
Search results for "Quitting process" in Home Design Ideas
 Nicole Arnold Interiors
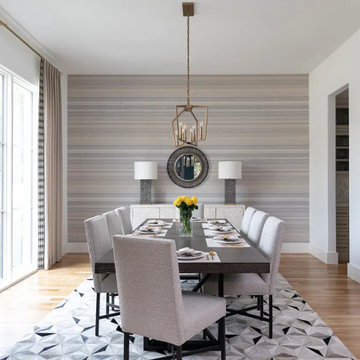
As this family was moving to Dallas, they needed the guidance of a designer to provide finishing touches to the building process as well as someone to fully furnish their new home. Their desire was to have a new start in an updated transitional and slightly modern style, quite different from their previous home’s modern farmhouse décor. We brought in clean lines, warm textures and an abundance of neutrals to keep a light and airy feel throughout most of the home, reserving some moody tones for the study and a little drama in the guest bath. This home’s new, elevated aesthetic is a perfect balance of beauty, function, light and elegance. It just flows with feelings of comfort and ease!
 Nicole Arnold Interiors
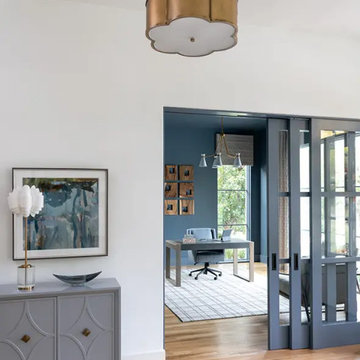
As this family was moving to Dallas, they needed the guidance of a designer to provide finishing touches to the building process as well as someone to fully furnish their new home. Their desire was to have a new start in an updated transitional and slightly modern style, quite different from their previous home’s modern farmhouse décor. We brought in clean lines, warm textures and an abundance of neutrals to keep a light and airy feel throughout most of the home, reserving some moody tones for the study and a little drama in the guest bath. This home’s new, elevated aesthetic is a perfect balance of beauty, function, light and elegance. It just flows with feelings of comfort and ease!

 Mittendorf Quality Construction
Inspiration for a rustic brown one-story wood gable roof remodel in Seattle
Find the right local pro for your project
 Nicole Arnold Interiors
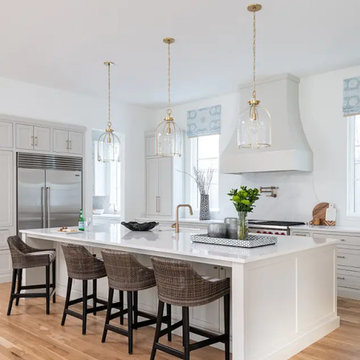
As this family was moving to Dallas, they needed the guidance of a designer to provide finishing touches to the building process as well as someone to fully furnish their new home. Their desire was to have a new start in an updated transitional and slightly modern style, quite different from their previous home’s modern farmhouse décor. We brought in clean lines, warm textures and an abundance of neutrals to keep a light and airy feel throughout most of the home, reserving some moody tones for the study and a little drama in the guest bath. This home’s new, elevated aesthetic is a perfect balance of beauty, function, light and elegance. It just flows with feelings of comfort and ease!
 Nicole Arnold Interiors
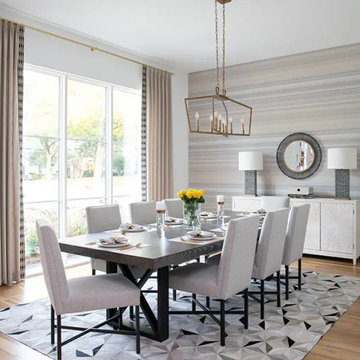
As this family was moving to Dallas, they needed the guidance of a designer to provide finishing touches to the building process as well as someone to fully furnish their new home. Their desire was to have a new start in an updated transitional and slightly modern style, quite different from their previous home’s modern farmhouse décor. We brought in clean lines, warm textures and an abundance of neutrals to keep a light and airy feel throughout most of the home, reserving some moody tones for the study and a little drama in the guest bath. This home’s new, elevated aesthetic is a perfect balance of beauty, function, light and elegance. It just flows with feelings of comfort and ease!

 E.L.I. land design, LLC
Rick Frank
Hot tub - mid-sized traditional backyard tile and rectangular lap hot tub idea in Houston
Hot tub - mid-sized traditional backyard tile and rectangular lap hot tub idea in Houston
 Nicole Arnold Interiors
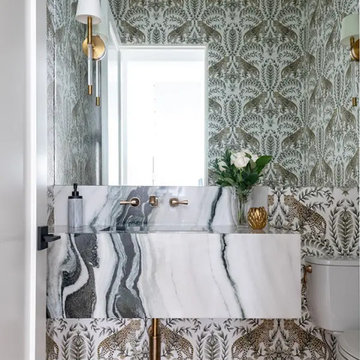
As this family was moving to Dallas, they needed the guidance of a designer to provide finishing touches to the building process as well as someone to fully furnish their new home. Their desire was to have a new start in an updated transitional and slightly modern style, quite different from their previous home’s modern farmhouse décor. We brought in clean lines, warm textures and an abundance of neutrals to keep a light and airy feel throughout most of the home, reserving some moody tones for the study and a little drama in the guest bath. This home’s new, elevated aesthetic is a perfect balance of beauty, function, light and elegance. It just flows with feelings of comfort and ease!
 Mark Design Co.
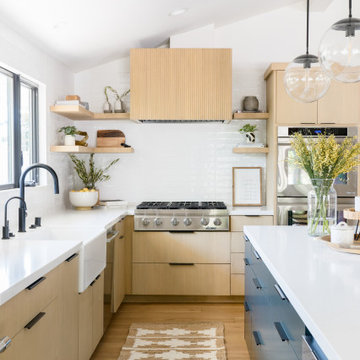
Mid-sized danish l-shaped light wood floor, brown floor and vaulted ceiling eat-in kitchen photo in Orange County with a farmhouse sink, flat-panel cabinets, brown cabinets, quartz countertops, white backsplash, ceramic backsplash, stainless steel appliances, an island and white countertops

 Painting in Partnership, Inc.
This week, as paint restoration specialists from the Chicago area, we undertook work on a historical, 1858, Greek Revival and Federalist brick house built for Gustavus Palmer, a successful farmer and early settler in McHenry county. The house sits on its original corner lot in Crystal Lake, Illinois and still looks quite impressive. In 1985, the house was added to the National Register of Historical Places and the Park District is now responsible for the preservation of this special piece of McHenry county history.
Because of its design, the house has no gutters. The water drains over the large crown and dental moldings, and causes the paint to fail in a major way, thereby compromising the integrity of the original wood components of the building. As shown in the first picture, on the West side of the house, once the scraping process started, one hundred fifty five years of paint came off a twenty foot section of the crown. To preserve the wood, we used a product designed to restore wooden boats. The product is a Clear Penetrating Epoxy Sealer (CPES) known as “ The Rot Doctor ”. It seals the wood fibers and creates an ideal surface for paint to adhere to.
 Tile Doctor Ltd
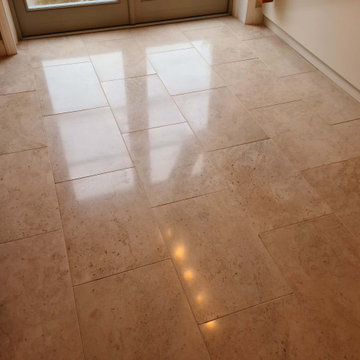
I recently went to survey a floor in Harrogate which I immediately recognised as beige Moleanos Limestone which comes from Portugal. If you have been reading my previous posts you will remember I am not a fan of this type of stone as it is very difficult to clean, polish or seal. This particular floor was laid around 5 years prior and was now looking quite dull and was in need of reviving.
The client didn’t want to spend much so l suggested l could spray burnish the floor to get her shine back again and remove the splash marks. We do this a lot for owners of polished stone floors as part of an annual maintenance package, it is a low cost option that uses a very fine 3,000 grit burnishing pad to renovate the stone and bring up the shine. However, I pointed out to her that this process wouldn’t clean her grout which was making her floor look scruffy.
I priced up the different options and after weighing up the quotes I’m pleased to say she decided to go for a full clean and seal. The full process involves the use of different grades of diamond encrusted burnishing pads from low to very fine grits to renovate the Limestone and also a chemical clean of the grout followed by a fresh seal.
I returned on the scheduled date and after preparing the floor I started cleaning the Limestone by running over the tiles with a 400-grit coarse burnishing pad lubricated with water. The soil was rinsed off with more water and extracted with a wet vacuum. This process was repeated with the 800 and 1500-grit pads which starts to build-up the polish on the stone.
I then turned my attention to the grout with a strong dilution of Tile Doctor Pro-Clean which was left to soak into the grout for ten minutes before scrubbing it by hand with a stiff brush. After a final rinse and extraction with the wet vacuum the tile and grout were looking much cleaner and was left to dry off overnight.
On Day 2 I stated with the application of the 3,000-grit pad which is the last step in the polishing processed and builds up a lovely satin finish on the stone floor. This is done using only a little water and is basically the spray burnish technique I referred to earlier. This process has the added advantage of leaving the floor dry.
With the stone tiles looking lovely and the grout clean the last step was to seal it all in and protect it from dirt and future staining with the application of a sealer. For this I used two coats of Tile Doctor Ultra Seal.
My client was very pleased she had spent the extra money to achieve the floor she had always wanted, apparently it had never looked this good even when new. We discussed the annual maintenance plan to ensure the floor remained looking this good.
Nigel Stoker
North West Yorkshire TIle Doctor

 Vetter Architects
The client’s request was quite common - a typical 2800 sf builder home with 3 bedrooms, 2 baths, living space, and den. However, their desire was for this to be “anything but common.” The result is an innovative update on the production home for the modern era, and serves as a direct counterpoint to the neighborhood and its more conventional suburban housing stock, which focus views to the backyard and seeks to nullify the unique qualities and challenges of topography and the natural environment.
The Terraced House cautiously steps down the site’s steep topography, resulting in a more nuanced approach to site development than cutting and filling that is so common in the builder homes of the area. The compact house opens up in very focused views that capture the natural wooded setting, while masking the sounds and views of the directly adjacent roadway. The main living spaces face this major roadway, effectively flipping the typical orientation of a suburban home, and the main entrance pulls visitors up to the second floor and halfway through the site, providing a sense of procession and privacy absent in the typical suburban home.
Clad in a custom rain screen that reflects the wood of the surrounding landscape - while providing a glimpse into the interior tones that are used. The stepping “wood boxes” rest on a series of concrete walls that organize the site, retain the earth, and - in conjunction with the wood veneer panels - provide a subtle organic texture to the composition.
The interior spaces wrap around an interior knuckle that houses public zones and vertical circulation - allowing more private spaces to exist at the edges of the building. The windows get larger and more frequent as they ascend the building, culminating in the upstairs bedrooms that occupy the site like a tree house - giving views in all directions.
The Terraced House imports urban qualities to the suburban neighborhood and seeks to elevate the typical approach to production home construction, while being more in tune with modern family living patterns.
Overview:
Elm Grove
Size:
2,800 sf,
3 bedrooms, 2 bathrooms
Completion Date:
September 2014
Services:
Architecture, Landscape Architecture
Interior Consultants: Amy Carman Design

 Holidays Reimagined
Holidays Reimagined used this existing entertainment center to feature 3 holiday vignettes, an oversized wreath, and a spray of candles at top to glow throughout the room. When using battery operated flicker candles, we always mix sizes AS WELL AS MANUFACTURERS when displayed here in the photo. Different manufacturers create the programmed flicker effect to their best knowledge of how they perceive flame. So when you purchase from at least 3 artificial flame candle manufacturers the effect can be quite striking. You have varied speeds and pulsations which give your room the movement of a realistic flame glow.
If the client had more space in the budget, we would have recommended the original flame candle called "Dream Candle"
Virtually indistinguishable from actual burning candles, they combine electromagnetics and LED lights to simulate the look of a flickering flame with robust depth and realistic movement.
These flame-replicating designer candles use electromagnetics, a process originally created by The Disney Imagineers for use at theme parks.

 WalkThru Garage Doors Inc.
Custom colour Fullview WalkThru Garage Door protecting a private automobile collection in Phoenix, Arizona WalkThru Garage Doors Inc.
Garage - mid-sized contemporary attached one-car garage idea in Toronto
Garage - mid-sized contemporary attached one-car garage idea in Toronto

 Sullivan Building & Design Group
As part of an overall renovation of an old farmhouse the bathrooms are always a little more di cult to plan. In this case our client wanted to create a real “masculine” overall feel but with enough class to make it comfortable for a woman. Bold forms and solid lines needed to be o set by subtle softness in the design.
THE RESULTS
The overall bathroom is both handsome and bold. We custom built the walnut vanity from wall to wall of the existing space. We used wall mounted faucets with just a bit of a rounded profile to soften the square edges of the soapstone tops and walnut mirror.
The shower is a combination of very bold blackened steel framed glass around a clean white subway tile background. The black and white theme is quite typical in this period home. Our client was an active participant in the overall design process and was thrilled with the result.
This bathroom is a total remake of a small bathroom that existed in an old stone farmhouse in which the whole house was totally renovated. As this was a bachelor pad of sorts there was a real desire to blend bold forms and dark colors with a touch of class and sophistication. Bold walnut vanity with soft baskets for storage blended perfectly with black metal shower frame and clean white subway tile. A very cozy modern bath with a charming old world feel.
 Reico Kitchen & Bath
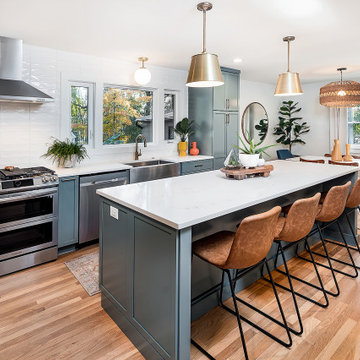
Designed by Lauren Hunt of Reico Kitchen & Bath in Charlotte, NC, in collaboration with The Atta Group, this mid-century/transitional kitchen & bar features Merillat Masterpiece cabinets in the Levan shaker door style with a Rainfall finish. Kitchen countertops are Hanstone Strato, complemented by a Bally Butcherblock bar countertop in teak.
“The clients were a dream to work with! We have similar design taste, so it made for a really effortless and smooth design process!” said Hunt.
“Their original kitchen was much smaller, so much of our discussion was centered on making the new space they had functional and efficient. We used quite a few pullouts and drawer accessories to help keep their storage space organized.”
“I was thrilled that they’ve broke away from the whites and gray painted cabinets we’ve been seeing by selecting Masterpiece’s Rainfall paint and incorporating some warmer finishes. I’m really happy with the finished product – we were able to create a design that is sleek and streamlined while still being warm and inviting!”
Photos courtesy of Six Cents Media.
 Tile Doctor Ltd
This customer from the historic city of Cardiff was keen to see what Tile Doctor could do to put some life back into their treasured Limestone kitchen floor that was laid in 2008. My first observations were mainly centred on the horrific condition of the surface which although adequately sealed initially the floor had not received any subsequent maintenance and its condition had deteriorated over time. The light shining in from the patio doors highlighted all the imperfections in the floor caused by surface wear and tear commonly seen in high traffic areas such as a kitchen.
Upon closer inspection, there were further problems: the floor was stained and scuffed, and in most places the sealer had worn off completely allowing the dirt to become ingrained into the pores of the Limestone. Additionally the grout was recessed but was now flush with the tile surface due to dirt build-up. There were also areas contaminated with grease and kitchen cooking oil.
The Limestone floor tiles were 20mm thick French Limestone, and had been laid very well so there was no requirement to do any tile or grout repairs however to get this floor back to its original condition the surface would need to be reconditioned using the Tile Doctor four stage burnishing system.
I started by giving the floor a wash with a medium dilution of Tile Doctor Pro-Clean, focusing mainly on the grout lines in order to remove the muck that had built-up there. I used a special stiff grout brush for this activity; it’s quite narrow and ideal for grout scrubbing.
This worked well, but the significant build-up of dirt along some of the grout lines meant more work was required. I tackled this problem with a hand scraper assisted with steam. At the end of this process, the whole floor was then rinsed down with water to remove any soil and the resulting slurry was then extracted using a wet vacuum.
The next step was to start the burnishing process, which basically involves applying four diamond encrusted floor pads in sequence over the floor. Each pad is a different grade, starting with the most abrasive coarse pad and moving through to the finer grades using a little water to lubricate and rinsing away any slurry between each pad.
I eventually finished with the extra fine pad which builds up shine and lustre on the tile; it had taken two days to clean the grout and burnish the Limestone but the floor was much improved and so after a final rinse down I left the floor to dry off overnight with the aid of the underfloor heating.
During this time, I also addressed the stained Limestone in the area of the kitchen where the dustbin was situated. This had been a major upset for the customer and I’m happy to report I managed to deal with it. However, it was quite an involved process, so I’ll write about this in a separate post.
On the third day I came back to seal the floor, checking first that it had dried sufficiently with a damp meter. Fortunately, the underfloor heating had done a great job of drying the stone and I was able to seal the floor using three coats of Tile Doctor Colour Grow sealant. This sealant not only provides a durable seal but also penetrates deep into the pores of the stone protecting it from within and enhancing the natural colours of the Limestone in the process.
After the final layer of sealant, I worked over the floor again with the extra fine burnishing pad both to add shine again following sealing, and to ensure that no smear marks were visible as the lighting conditions were unforgiving and highlighted any imperfections.
The customer was delighted with the results: so much so, in fact, that they booked me in to restore their Victorian hallway floor as well but that’s a story for another time!
Julian Iancono
SE Wales Tile Doctor
 Murillos Tile & Marble
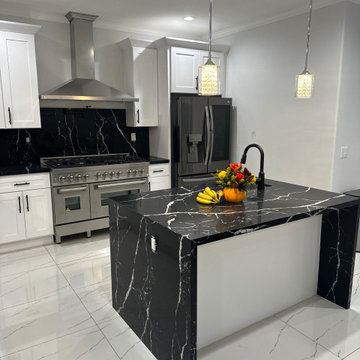
This is a very bold kitchen that we had the pleasure of fabricating and installing just before thanksgiving literally up until the morning of. We took it on 2 days before the festivities just because we knew how fun and beautiful this kitchen would turn out working with NERO MARQUINA marble look-a-like QUARTZ slab from GENUINE MATERIALS in ONTARIO, CA.
we love installing these waterfall island the process is always exciting book matching everything as perfect as we can and managing to have everything line up perfectly on installation with no adjustments needed its a great feeling especially under pressure of needing to finish quickly. Putting in that peninsula with 3 installers was also no joke quite fun and perfectly executed with a snug fit and no wall damage
One note we wish would have came out better was the backsplash under the hood it should have came all the way up to touch the hood. This was a miscommunication error between the homeowner and us on the specs of the hood we should have been more thorough on checking how low it would sit as it was not installed when we put in the backsplash.

 Edgewater Design Group
As written in Northern Home & Cottage by Elizabeth Edwards
In general, Bryan and Connie Rellinger loved the charm of the old cottage they purchased on a Crooked Lake peninsula, north of Petoskey. Specifically, however, the presence of a live-well in the kitchen (a huge cement basin with running water for keeping fish alive was right in the kitchen entryway, seriously), rickety staircase and green shag carpet, not so much. An extreme renovation was the only solution. The downside? The rebuild would have to fit into the smallish nonconforming footprint. The upside? That footprint was built when folks could place a building close enough to the water to feel like they could dive in from the house. Ahhh...
Stephanie Baldwin of Edgewater Design helped the Rellingers come up with a timeless cottage design that breathes efficiency into every nook and cranny. It also expresses the synergy of Bryan, Connie and Stephanie, who emailed each other links to products they liked throughout the building process. That teamwork resulted in an interior that sports a young take on classic cottage. Highlights include a brass sink and light fixtures, coffered ceilings with wide beadboard planks, leathered granite kitchen counters and a way-cool floor made of American chestnut planks from an old barn.
Thanks to an abundant use of windows that deliver a grand view of Crooked Lake, the home feels airy and much larger than it is. Bryan and Connie also love how well the layout functions for their family - especially when they are entertaining. The kids' bedrooms are off a large landing at the top of the stairs - roomy enough to double as an entertainment room. When the adults are enjoying cocktail hour or a dinner party downstairs, they can pull a sliding door across the kitchen/great room area to seal it off from the kids' ruckus upstairs (or vice versa!).
From its gray-shingled dormers to its sweet white window boxes, this charmer on Crooked Lake is packed with ideas!
- Jacqueline Southby Photography

 Susan Yeley Homes
Like most of our projects, we can't gush about this reno—a new kitchen and mudroom, ensuite closet and pantry—without gushing about the people who live there. The best projects, we always say, are the ones in which client, contractor and design team are all present throughout, conception to completion, each bringing their particular expertise to the table and forming a cohesive, trustworthy team that is mutually invested in a smooth and successful process. They listen to each other, give the benefit of the doubt to each other, do what they say they'll do. This project exemplified that kind of team, and it shows in the results.
Most obvious is the opening up of the kitchen to the dining room, decompartmentalizing somewhat a century-old bungalow that was originally quite purposefully compartmentalized. As a result, the kitchen had to become a place one wanted to see clear through from the front door. Inset cabinets and carefully selected details make the functional heart of the house equal in elegance to the more "public" gathering spaces, with their craftsman depth and detail. An old back porch was converted to interior space, creating a mudroom and a much-needed ensuite walk-in closet. A new, larger deck went on: Phase One of an extensive design for outdoor living, that we all hope will be realized over the next few years. Finally, a duplicative back stairwell was repurposed into a walk-in pantry.
Modernizing often means opening spaces up for more casual living and entertaining, and/or making better use of dead space. In this re-conceptualized old house, we did all of that, creating a back-of-the-house that is now bright and cheerful and new, while carefully incorporating meaningful vintage and personal elements.
The best result of all: the clients are thrilled. And everyone who went in to the project came out of it friends.
Contractor: Stumpner Building Services
Cabinetry: Stoll’s Woodworking
Photographer: Gina Rogers
 Kraft Custom Construction
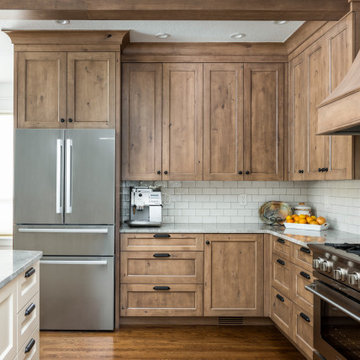
After a not-so-great experience with a previous contractor, this homeowner came to Kraft Custom Construction in search of a better outcome. Not only was she wanting a more functional kitchen to enjoy cooking in, she also sought out a team with a clear process and great communication.
Two elements of the original floorplan shaped the design of the new kitchen: a protruding pantry that blocked the flow from the front door into the main living space, and two large columns in the middle of the living room.
Using a refined French-Country design aesthetic, we completed structural modifications to reframe the pantry, and integrated a new custom buffet cabinet to tie in the old columns with new wood ceiling beams. Other design solutions include more usable countertop space, a recessed spice cabinet, numerous drawer organizers, and updated appliances and finishes all around.
This bright new kitchen is both comfortable yet elegant, and the perfect place to cook for the family or entertain a group of guests.
9