
Search results for "Reduce same origin" in Home Design Ideas
 Alair Homes Plano
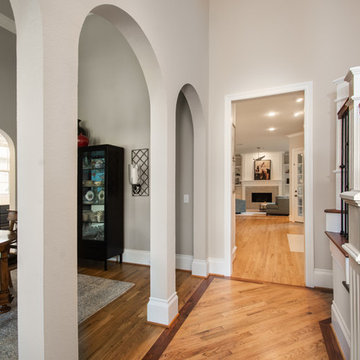
This house was built in 1994 and our clients have been there since day one. They wanted a complete refresh in their kitchen and living areas and a few other changes here and there; now that the kids were all off to college! They wanted to replace some things, redesign some things and just repaint others. They didn’t like the heavy textured walls, so those were sanded down, re-textured and painted throughout all of the remodeled areas.
The kitchen change was the most dramatic by painting the original cabinets a beautiful bluish-gray color; which is Benjamin Moore Gentleman’s Gray. The ends and cook side of the island are painted SW Reflection but on the front is a gorgeous Merola “Arte’ white accent tile. Two Island Pendant Lights ‘Aideen 8-light Geometric Pendant’ in a bronze gold finish hung above the island. White Carrara Quartz countertops were installed below the Viviano Marmo Dolomite Arabesque Honed Marble Mosaic tile backsplash. Our clients wanted to be able to watch TV from the kitchen as well as from the family room but since the door to the powder bath was on the wall of breakfast area (no to mention opening up into the room), it took up good wall space. Our designers rearranged the powder bath, moving the door into the laundry room and closing off the laundry room with a pocket door, so they can now hang their TV/artwork on the wall facing the kitchen, as well as another one in the family room!
We squared off the arch in the doorway between the kitchen and bar/pantry area, giving them a more updated look. The bar was also painted the same blue as the kitchen but a cool Moondrop Water Jet Cut Glass Mosaic tile was installed on the backsplash, which added a beautiful accent! All kitchen cabinet hardware is ‘Amerock’ in a champagne finish.
In the family room, we redesigned the cabinets to the right of the fireplace to match the other side. The homeowners had invested in two new TV’s that would hang on the wall and display artwork when not in use, so the TV cabinet wasn’t needed. The cabinets were painted a crisp white which made all of their decor really stand out. The fireplace in the family room was originally red brick with a hearth for seating. The brick was removed and the hearth was lowered to the floor and replaced with E-Stone White 12x24” tile and the fireplace surround is tiled with Heirloom Pewter 6x6” tile.
The formal living room used to be closed off on one side of the fireplace, which was a desk area in the kitchen. The homeowners felt that it was an eye sore and it was unnecessary, so we removed that wall, opening up both sides of the fireplace into the formal living room. Pietra Tiles Aria Crystals Beach Sand tiles were installed on the kitchen side of the fireplace and the hearth was leveled with the floor and tiled with E-Stone White 12x24” tile.
The laundry room was redesigned, adding the powder bath door but also creating more storage space. Waypoint flat front maple cabinets in painted linen were installed above the appliances, with Top Knobs “Hopewell” polished chrome pulls. Elements Carrara Quartz countertops were installed above the appliances, creating that added space. 3x6” white ceramic subway tile was used as the backsplash, creating a clean and crisp laundry room! The same tile on the hearths of both fireplaces (E-Stone White 12x24”) was installed on the floor.
The powder bath was painted and 12x36” Ash Fiber Ceramic tile was installed vertically on the wall behind the sink. All hardware was updated with the Signature Hardware “Ultra”Collection and Shades of Light “Sleekly Modern” new vanity lights were installed.
All new wood flooring was installed throughout all of the remodeled rooms making all of the rooms seamlessly flow into each other. The homeowners love their updated home!
Design/Remodel by Hatfield Builders & Remodelers | Photography by Versatile Imaging
 Klopf Architecture
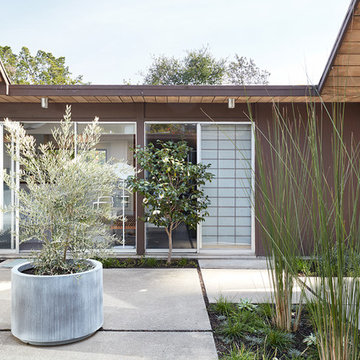
Klopf Architecture and Jesse Ososki Art remodeled an existing Eichler atrium home into a brighter, more open, and more functional version of its original self.
The goals were to preserve the Eichler look and feel without the need to strictly adhere to it. The scope of work included re-configuring the master bedroom/bath, the kitchen, and the hall bath/laundry area, as well as updating interior finishes throughout to be more sophisticated.
The owners are detail-oriented and were very involved in the design process, down to the selection of lighting controls and stainless steel faceplates.Their design aesthetic leans toward the Scandinavian — light and bright, with simple straight lines and pure geometric shapes.
The finish flooring is large porcelain tile (24” x 24”) in a neutral grey tone, providing a uniform backdrop against which other materials can stand out. The same tile continues into the shower floor (with a different finish texture for slip-resistance) and up the shower/tub walls (in a smaller size). Heath Classic Field ceramic tile in Modern Blue was used sparingly, to add color at the hall bath vanity backsplash and at the shampoo niches in both bathrooms. Back-painted soda glass in pale blue to match the Heath tile was used at the kitchen backsplash. This same accent color was also used at the front entry atrium door. Kitchen cabinetry, countertops, appliances, and light fixtures are all white, making the kitchen feel more airy and light. Countertops are Caesarstone Blizzard.
The owners chose to keep some of the original Eichler elements: the concrete masonry fireplace; the stained tongue-and-groove redwood ceiling decking; and the luan wall paneling. The luan paneling was lightly sanded, cleaned, and re-stained. The owners also kept an added element that was installed by a previous owner: sliding shoji panels at all bedroom windows and sliding glass doors, for both privacy and sun control. Grooves were cut into the new tile flooring for the shoji panels to slide in, creating a more integrated look. Walnut was used to add warmth and contrast at the kitchen bar top and niche, the bathroom vanities, and the window sill/ledge under the kitchen window.
This Burlingame Eichler Remodel is a 2,121 sf, 4 bedroom/2 bath home located in the heart of Silicon Valley.
Klopf Architecture Project Team: John Klopf, Klara Kevane and Yegvenia Torres Zavala
Contractor: Jesse Ososki Art
Structural Engineer: Emmanuel Pun
Photography ©2018 Mariko Reed
Location: Burlingame, CA
Year completed: 2017
 Mark Brand Architecture
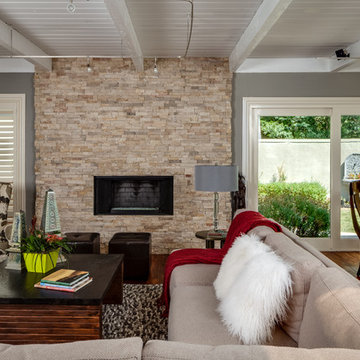
The original design of this late Mid-century Modern house featured a horrifically ugly entry which the owners needed our help to fix. In addition, they wanted to add a master suite, create a home theatre, and remodel the family room. Although they originally considered adding a second floor, our final design resulted in an extension of the house which accentuated its existing linear quality. Our solution to the entry problem included cutting back part of the vaulted roof to allow more light in and adding a cantilevered canopy instead. A new entry bridge crosses a koi pond, and new clerestory windows, stone planters and cedar trim complete the makeover of the previously bland plywood-clad box. The new master suite features 12 foot ceilings, clerestory windows, 8 foot high French doors and a fireplace. The exterior of the addition employs the same pallet of materials as the new façade but with a carefully composed composition of form and proportion. The new family room features the same stone cladding as we used on the exterior.
Photo by Christopher Stark Photography.
Find the right local pro for your project
 Remodeling by Classic Homes
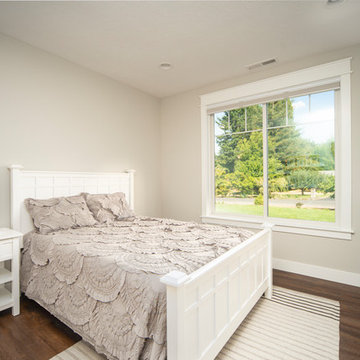
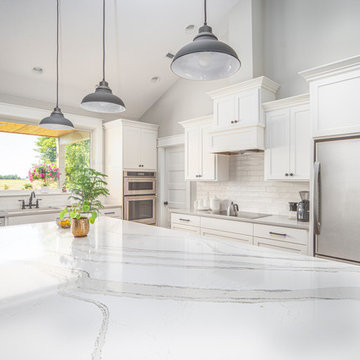
The original ranch style home was built in 1962 by the homeowner’s father. She grew up in this home; now her and her husband are only the second owners of the home. The existing foundation and a few exterior walls were retained with approximately 800 square feet added to the footprint along with a single garage to the existing two-car garage. The footprint of the home is almost the same with every room expanded. All the rooms are in their original locations; the kitchen window is in the same spot just bigger as well. The homeowners wanted a more open, updated craftsman feel to this ranch style childhood home. The once 8-foot ceilings were made into 9-foot ceilings with a vaulted common area. The kitchen was opened up and there is now a gorgeous 5 foot by 9 and a half foot Cambria Brittanicca slab quartz island.
 Remodeling by Classic Homes
The original ranch style home was built in 1962 by the homeowner’s father. She grew up in this home; now her and her husband are only the second owners of the home. The existing foundation and a few exterior walls were retained with approximately 800 square feet added to the footprint along with a single garage to the existing two-car garage. The footprint of the home is almost the same with every room expanded. All the rooms are in their original locations; the kitchen window is in the same spot just bigger as well. The homeowners wanted a more open, updated craftsman feel to this ranch style childhood home. The once 8-foot ceilings were made into 9-foot ceilings with a vaulted common area. The kitchen was opened up and there is now a gorgeous 5 foot by 9 and a half foot Cambria Brittanicca slab quartz island.
 Alair Homes Plano
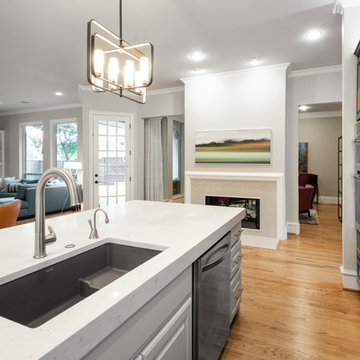
This house was built in 1994 and our clients have been there since day one. They wanted a complete refresh in their kitchen and living areas and a few other changes here and there; now that the kids were all off to college! They wanted to replace some things, redesign some things and just repaint others. They didn’t like the heavy textured walls, so those were sanded down, re-textured and painted throughout all of the remodeled areas.
The kitchen change was the most dramatic by painting the original cabinets a beautiful bluish-gray color; which is Benjamin Moore Gentleman’s Gray. The ends and cook side of the island are painted SW Reflection but on the front is a gorgeous Merola “Arte’ white accent tile. Two Island Pendant Lights ‘Aideen 8-light Geometric Pendant’ in a bronze gold finish hung above the island. White Carrara Quartz countertops were installed below the Viviano Marmo Dolomite Arabesque Honed Marble Mosaic tile backsplash. Our clients wanted to be able to watch TV from the kitchen as well as from the family room but since the door to the powder bath was on the wall of breakfast area (no to mention opening up into the room), it took up good wall space. Our designers rearranged the powder bath, moving the door into the laundry room and closing off the laundry room with a pocket door, so they can now hang their TV/artwork on the wall facing the kitchen, as well as another one in the family room!
We squared off the arch in the doorway between the kitchen and bar/pantry area, giving them a more updated look. The bar was also painted the same blue as the kitchen but a cool Moondrop Water Jet Cut Glass Mosaic tile was installed on the backsplash, which added a beautiful accent! All kitchen cabinet hardware is ‘Amerock’ in a champagne finish.
In the family room, we redesigned the cabinets to the right of the fireplace to match the other side. The homeowners had invested in two new TV’s that would hang on the wall and display artwork when not in use, so the TV cabinet wasn’t needed. The cabinets were painted a crisp white which made all of their decor really stand out. The fireplace in the family room was originally red brick with a hearth for seating. The brick was removed and the hearth was lowered to the floor and replaced with E-Stone White 12x24” tile and the fireplace surround is tiled with Heirloom Pewter 6x6” tile.
The formal living room used to be closed off on one side of the fireplace, which was a desk area in the kitchen. The homeowners felt that it was an eye sore and it was unnecessary, so we removed that wall, opening up both sides of the fireplace into the formal living room. Pietra Tiles Aria Crystals Beach Sand tiles were installed on the kitchen side of the fireplace and the hearth was leveled with the floor and tiled with E-Stone White 12x24” tile.
The laundry room was redesigned, adding the powder bath door but also creating more storage space. Waypoint flat front maple cabinets in painted linen were installed above the appliances, with Top Knobs “Hopewell” polished chrome pulls. Elements Carrara Quartz countertops were installed above the appliances, creating that added space. 3x6” white ceramic subway tile was used as the backsplash, creating a clean and crisp laundry room! The same tile on the hearths of both fireplaces (E-Stone White 12x24”) was installed on the floor.
The powder bath was painted and 12x36” Ash Fiber Ceramic tile was installed vertically on the wall behind the sink. All hardware was updated with the Signature Hardware “Ultra”Collection and Shades of Light “Sleekly Modern” new vanity lights were installed.
All new wood flooring was installed throughout all of the remodeled rooms making all of the rooms seamlessly flow into each other. The homeowners love their updated home!
Design/Remodel by Hatfield Builders & Remodelers | Photography by Versatile Imaging
 Thyme & Place Design LLC
When my client had to move from her company office to work at home, she set up in the dining room. Despite her best efforts, this was not the long-term solution she was looking for. My client realized she needed a dedicated space not on the main floor of the home. On one hand, having your office space right next to the kitchen is handy. On the other hand, it made separating work and home life was not that easy.
The house was a ranch. In essence, the basement would run entire length of the home. As we came down the steps, we entered a time capsule. The house was built in the 1950’s. The walls were covered with original knotty pine paneling. There was a wood burning fireplace and considering this was a basement, high ceilings. In addition, there was everything her family could not store at their own homes. As we wound though the space, I though “wow this has potential”, Eventually, after walking through the laundry room we came to a small nicely lit room. This would be the office.
My client looked at me and asked what I thought. Undoubtedly, I said, this can be a great workspace, but do you really want to walk through this basement and laundry to get here? Without reservation, my client said where do we start?
Once the design was in place, we started the renovation. The knotty pine paneling had to go. Specifically, to add some insulation and control the dampness and humidity. The laundry room wall was relocated to create a hallway to the office.
At the far end of the room, we designated a workout zone. Weights, mats, exercise bike and television are at the ready for morning or afternoon workouts. The space can be concealed by a folding screen for party time. Doors to an old closet under the stairs were relocated to the workout area for hidden storage. Now we had nice wall for a beautiful console and mirror for storage and serving during parties.
In order to add architectural details, we covered the old ugly support columns with simple recessed millwork panels. This detail created a visual division between the bar area and the seating area in front of the fireplace. The old red brick on the fireplace surround was replaced with stack stone. A mantle was made from reclaimed wood. Additional reclaimed wood floating shelves left and right of the fireplace provides decorative display while maintaining a rustic element balancing the copper end table and leather swivel rocker.
We found an amazing rug which tied all of the colors together further defining the gathering space. Russet and burnt orange became the accent color unifying each space. With a bit of whimsy, a rather unusual light fixture which looks like roots from a tree growing through the ceiling is a conversation piece.
The office space is quite and removed from the main part of the basement. There is a desk large enough for multiple screens, a small bookcase holding office supplies and a comfortable chair for conference calls. Because working from home requires many online meetings, we added a shiplap wall painted in Hale Navy to contrast with the orange fabric on the chair. We finished the décor with a painting from my client’s father. This is the background online visitors will see.
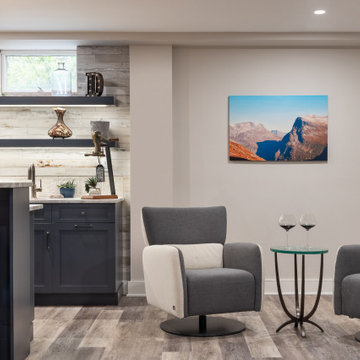
The last and best part of the renovation is the beautiful bar. My client is an avid collector of wine. She already had the EuroCave refrigerator, so I incorporated it into the design. The cabinets are painted Temptation Grey from Benjamin Moore. The counter tops are my favorite hard working quartzite Brown Fantasy. The backsplash is a combination of rustic wood and old tin ceiling like porcelain tiles. Together with the textures of the reclaimed wood and hide poofs balanced against the smooth finish of the cabinets, we created a comfortable luxury for relaxing.
There is ample storage for bottles, cans, glasses, and anything else you can think of for a great party. In addition to the wine storage, we incorporated a beverage refrigerator, an ice maker, and a sink. Floating shelves with integrated lighting illuminate the back bar. The raised height of the front bar provides the perfect wine tasting and paring spot. I especially love the pendant lights which look like wine glasses.
Finally, I selected carpet for the stairs and office. It is perfect for noise reduction. Meanwhile for the overall flooring, I specifically selected a high-performance vinyl plank floor. We often use this product as it is perfect to install on a concrete floor. It is soft to walk on, easy to clean and does not reduce the overall height of the space.
Sponsored
Columbus, OH

Wannemacher Interiors
Customized Award-Winning Interior Design Solutions in Franklin Cnty OH
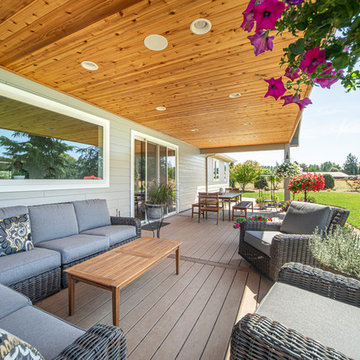 Remodeling by Classic Homes
The original ranch style home was built in 1962 by the homeowner’s father. She grew up in this home; now her and her husband are only the second owners of the home. The existing foundation and a few exterior walls were retained with approximately 800 square feet added to the footprint along with a single garage to the existing two-car garage. The footprint of the home is almost the same with every room expanded. All the rooms are in their original locations; the kitchen window is in the same spot just bigger as well. The homeowners wanted a more open, updated craftsman feel to this ranch style childhood home. The once 8-foot ceilings were made into 9-foot ceilings with a vaulted common area. The kitchen was opened up and there is now a gorgeous 5 foot by 9 and a half foot Cambria Brittanicca slab quartz island.
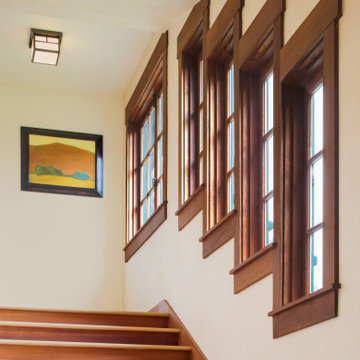
 Thayer Hopkins Architects
The original Edgemont Inn was built in 1904 for visiting San Franciscans who ventured north on the Mt. Tam cog railway. After a century of use the structure was in need of complete restoration. All materials were removed and salvaged before the structure was lifted and set on new foundations. New additions were woven into the original architecture to improve function and aesthetics. All the doors, paneling and mouldings were made from old growth redwood that was salvaged and repurposed by craftsman builder Jim Lino, in keeping with the spirit and history of the house.
Crow’s Nest, an historic cottage in old Inverness, located on the same property, was recreated and expanded in the spirit of the original Shingle Style Arts and Crafts structure. Proportion, attention to fine detail, and meticulous craftsmanship define the quality and timeless sense of the architecture. Original clinker bricks were salvaged and used in the exposed chimney and fireplace that anchor the structure and provide a texture of its history. The original wrought iron Edgemont Inn sign was salvaged and is mounted on the brick chimney as enter the house.
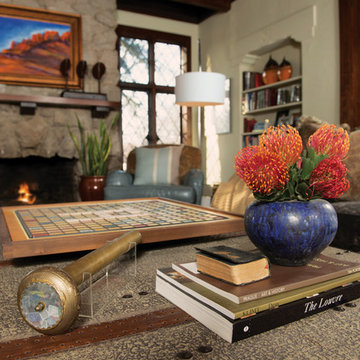
 Nathan Taylor for Obelisk Home
An over scaled family room with dark original shadow box paneling, large Carthage stone fireplace, and leaded windows, required a design esthetic that paid homage to the history of the home, yet created a space for entertaining large groups, while at the same time feeling warm and comfortable, and would also allow the homeowners to take Sunday naps in the often unused room. With the entry to the home also included in the overall dimensions, creating definition without walls was the challenge. Using an antique table that was purchased by the client many years ago as an entry table was the perfect answer. We took the Italian chandelier from the dining room, had it refinished to look old, and re-hung it as the entry fixture. An antique, nearly 18’ foot rug was found, and was the anchor to the room. Over scaled sofa’s, large cocktail truck, antique console tables, new “shiny” lamps, modern tables, and plush pillows all add to the warmth of this space. The room was also painted a warm gray/green to pull all the warm colors and textures together. Original artwork was also very important to the client, and represents their travels an individual taste.
Original Artwork by Karen Schneider
Photos by Randy Colwell
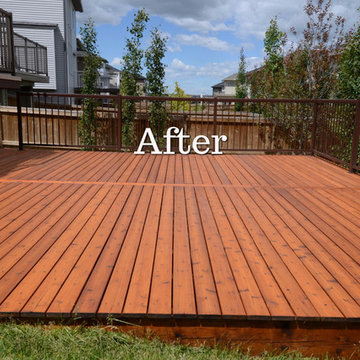
 Eco Star Painting
Step #1 Apply BM CLEAN
As you can see in the 'Before' picture above, this cedar deck was extremly dirty. This required an extra step in comparison to the typical deck stripping process. My paint rep at Benjamin Moore recommended a product called CLEAN. It comes in one gallon plastic containers and can be applied out of a plastic pail or with a garden sprayer. We used a Garden sprayer and chose a flat tip for application. The three gallon garden sprayer was filled with 2 gallons of water and one gallon of the CLEAN solution. This is a strong mixture and can be reduced to up to 6 parts water and one part of the Benjamin Moore CLEAN.
This approximately 22x20 deck had a board running perpindicular to the rest of the floor boards which divided it into 2 equal parts. Our method was to apply the solution to 3-4 of these 10' boards at a time. Allow it to set up for a few minutes and then scrub away with the deck brush. The agitation loosens up the dirt and grime and is then removed with a pressure washer a board a time. The flat tip on the pressure washer was almost the same width as the floor board. It is important to clean the sides of the board too because any remaining dirt or stain will be visible.
Benjamin Moore Deck Restoration products named Clean,Restore,brighten
Step #2 Apply BM RESTORE
The second step is exactly the same as the first step but with a different solution called Benjamin Moore RESTORE. The deck was dry before we started the 2nd step becuase it was baking hot outside. You use the same 2/1 mixture of water to chemical. This chemical will remove the stain still present in the deck floor. Make sure to rinse the garden sprayer clean before adding the restore solution. Unlike the BM CLEAN, the BM RESTORE has an orange-ish color in appearance. It did a fine job of removing most of the stain, but not 100% of it. There were a few areas that required a 3rd coat of restore but the process was quicker.
Step #3 Apply BM BRIGHTEN
The third step is exactly the same as the first two step but the chemical solution used was Benjamin Moore 'BRIGHTEN'. Again, the garden sprayer was cleaned and filled with 2 parts water and one part Brighten. The brightener not only lightens the wood but it also neutralizes the previous stripper solution. As stated before the Restore adds a bit of color and the Brighten will remove any traces of it. you still have to agitate the brightener with a scrub brush and either pressure wash it off or use a garden hose. We used the pressure washer for faster results. After it dries the wood look a lot brighter but we still found some spots of stain that had not come off.
Apply Sikkens Stain
As stated above the stain we used is called "Sikkens Proluxe" which is basically just a slight re-branding of the classic Sikkens Stain. The formula is exactly the same. In fact, the secondary name is still called 'Cetol' SRD RE. The color chosen was "CEDAR".
The weather was quite hot for a typical Calgary Spring day so we stained a 10' section of floor board at a time. The deck has a metal railing so the supporting feet had to be brushed in with a 2.5" natural bristle paint brush. for the rest of the job a 6" Wooster natural bristle deck brush was used. The handle was remove and a broom handle was inserted. The stain was stirred frequently and poured into a plastic Simms brand roller pan. Semi transparent Oil based stain has the consistency of water so you need to be careful not to spill any of it. When applying to a board you hit the sides first with the brush and then fillin the rest. Ten feet of floor board can be stain in a short period of time. it's important not to leave any streaks so it is adviseable to back-brush the entie length before moving on to the next board. The staining only took about 2.5 hours to complete. One coat is the manufacturers recommendation.
One last thing about Sikkens Stain. To maintain this beautiful look the deck should be re- coated once a year, preferably every spring. It's like applying sunscreen yearly to protect the wood against further damage. Two gallons was enough to cover this 450 sq foot deck.
 Barrel & Board Design
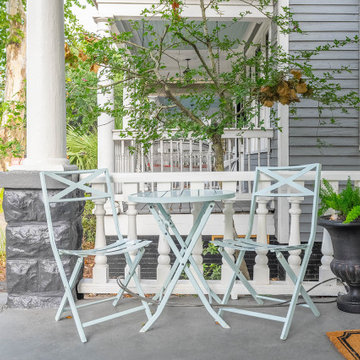
This 1900's Victorian home was a huge undertaking! We took a dilapidated, neglected duplex and gave it a full make over. The exterior windows, doors, trim and siding were rebuilt in the areas where the wood rot or dry rot was extensive using the same materials and style as the original structure. The interior had been morphed into a duplex over the years, but the bones showed the truth of the original structure in the header for a single front door.
 Barrel & Board Design
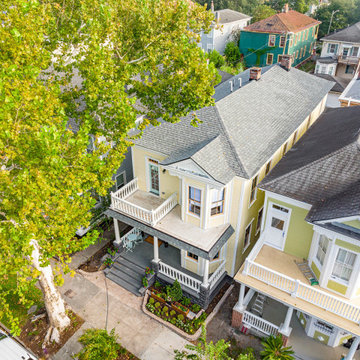
This 1900's Victorian home was a huge undertaking! We took a dilapidated, neglected duplex and gave it a full make over. The exterior windows, doors, trim and siding were rebuilt in the areas where the wood rot or dry rot was extensive using the same materials and style as the original structure. The interior had been morphed into a duplex over the years, but the bones showed the truth of the original structure in the header for a single front door.

Sponsored
Delaware, OH

Buckeye Basements, Inc.
Central Ohio's Basement Finishing ExpertsBest Of Houzz '13-'21
 Thayer Hopkins Architects
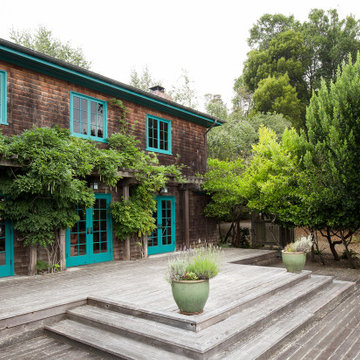
The original Edgemont Inn was built in 1904 for visiting San Franciscans who ventured north on the Mt. Tam cog railway. After a century of use the structure was in need of complete restoration. All materials were removed and salvaged before the structure was lifted and set on new foundations. New additions were woven into the original architecture to improve function and aesthetics. All the doors, paneling and mouldings were made from old growth redwood that was salvaged and repurposed by craftsman builder Jim Lino, in keeping with the spirit and history of the house.
Crow’s Nest, an historic cottage in old Inverness, located on the same property, was recreated and expanded in the spirit of the original Shingle Style Arts and Crafts structure. Proportion, attention to fine detail, and meticulous craftsmanship define the quality and timeless sense of the architecture. Original clinker bricks were salvaged and used in the exposed chimney and fireplace that anchor the structure and provide a texture of its history. The original wrought iron Edgemont Inn sign was salvaged and is mounted on the brick chimney as enter the house.
 Thayer Hopkins Architects
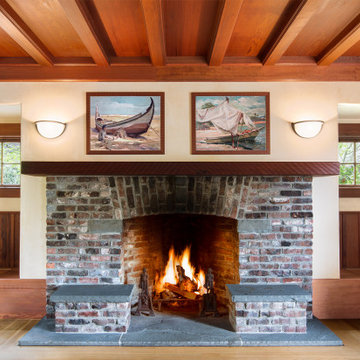
The original Edgemont Inn was built in 1904 for visiting San Franciscans who ventured north on the Mt. Tam cog railway. After a century of use the structure was in need of complete restoration. All materials were removed and salvaged before the structure was lifted and set on new foundations. New additions were woven into the original architecture to improve function and aesthetics. All the doors, paneling and mouldings were made from old growth redwood that was salvaged and repurposed by craftsman builder Jim Lino, in keeping with the spirit and history of the house.
Crow’s Nest, an historic cottage in old Inverness, located on the same property, was recreated and expanded in the spirit of the original Shingle Style Arts and Crafts structure. Proportion, attention to fine detail, and meticulous craftsmanship define the quality and timeless sense of the architecture. Original clinker bricks were salvaged and used in the exposed chimney and fireplace that anchor the structure and provide a texture of its history. The original wrought iron Edgemont Inn sign was salvaged and is mounted on the brick chimney as enter the house.
 Woodwright Custom Builders LLC
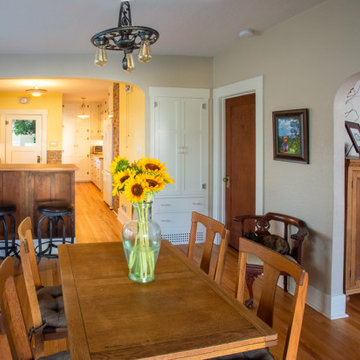
Looking south, post remodel, what had been a bank of cabinets is now the main path through the kitchen. The stove (not visible) has been relocated to the north with its back against the new bar. The face of bar is made from salvaged fir sliding door panels that had been stored in the home's basement from its original construction. The fir floor of the kitchen has been removed and replaced with oak to match the dining room and living room. The fir was salvaged for use as the countertop of the bar and pantry. The original exhaust fan was removed and replaced with a Zephyr island exhaust with built-in LED lights (not visible) above the stove. The faux wood countertop and backsplash have been replaced with "Absolute Black" granite with a honed finish and Daltile 3" x 6" bright white subway tile. Combination power/led light strips were installed under the cabinets. An antique enamel topped cabinet (not visible) serves as a moveable island/landing spot and work surface. The center panels of the upper row of cabinets have been replaced with "mistlite" obscure glass. All of the cabinet pulls have been replaced with Van Dyke Restorers brushed silver "bow" handles. The hinges on the under-counter cabinets are new House of Antique Hardware 2-1/2" half-surface hinges to match the original ornamental butt hinges. The shape of the arched wall between the kitchen and dining room matches the wall between the dining room and living room. Two vintage light fixtures have been installed. Closest to the camera is a 100-year-old wrought iron chandelier Annette found through Etsy. In the kitchen, a farmhouse style overhead fixture of roughly the same age was acquired from Northend Lampworks. Brick on the exterior wall of the pantry and chimney has been exposed. The new dining room closet is based on the design of the former hall closet that was sacrificed as a space for the fridge. The hardware (glass pulls) of the original closet were salvaged for use on the new closet. The original hinges were used to outfit new cabinets on the east wall of the kitchen. The hinges for the new closet are replicas of Half Surface hinges from House of Antique Hardware. The bottom grill was custom made by Gem State Metal from a pattern we created in Photoshop. The grill preserves the function of the cold air return that was consumed by the closet when the north wall of the kitchen shifted 17" into the dining room. The space beneath the closet is lined with black foamcore for visual contrast. The top drawer of the closet is outfitted with a powerstrip plugged into an outlet built into the wall behind the drawer. The power strip is used to charge mobile devices such as iphones and tablets, out of sight. Since the closet is only 14" deep, hooks were installed instead of a coatrod.
 Thayer Hopkins Architects
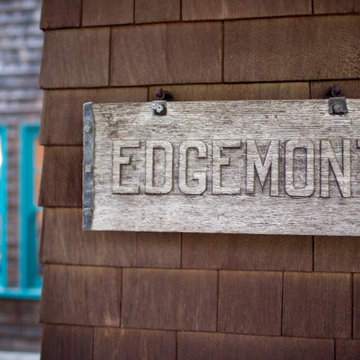
The original Edgemont Inn was built in 1904 for visiting San Franciscans who ventured north on the Mt. Tam cog railway. After a century of use the structure was in need of complete restoration. All materials were removed and salvaged before the structure was lifted and set on new foundations. New additions were woven into the original architecture to improve function and aesthetics. All the doors, paneling and mouldings were made from old growth redwood that was salvaged and repurposed by craftsman builder Jim Lino, in keeping with the spirit and history of the house.
Crow’s Nest, an historic cottage in old Inverness, located on the same property, was recreated and expanded in the spirit of the original Shingle Style Arts and Crafts structure. Proportion, attention to fine detail, and meticulous craftsmanship define the quality and timeless sense of the architecture. Original clinker bricks were salvaged and used in the exposed chimney and fireplace that anchor the structure and provide a texture of its history. The original wrought iron Edgemont Inn sign was salvaged and is mounted on the brick chimney as enter the house.
Sponsored
Columbus, OH
Wannemacher Interiors
Customized Award-Winning Interior Design Solutions in Franklin Cnty OH
 Barrel & Board Design
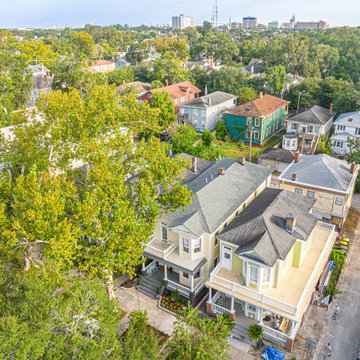
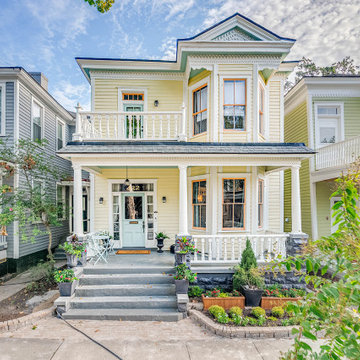
This 1900's Victorian home was a huge undertaking! We took a dilapidated, neglected duplex and gave it a full make over. The exterior windows, doors, trim and siding were rebuilt in the areas where the wood rot or dry rot was extensive using the same materials and style as the original structure. The interior had been morphed into a duplex over the years, but the bones showed the truth of the original structure in the header for a single front door.
 Barrel & Board Design
This 1900's Victorian home was a huge undertaking! We took a dilapidated, neglected duplex and gave it a full make over. The exterior windows, doors, trim and siding were rebuilt in the areas where the wood rot or dry rot was extensive using the same materials and style as the original structure. The interior had been morphed into a duplex over the years, but the bones showed the truth of the original structure in the header for a single front door.
 Thayer Hopkins Architects
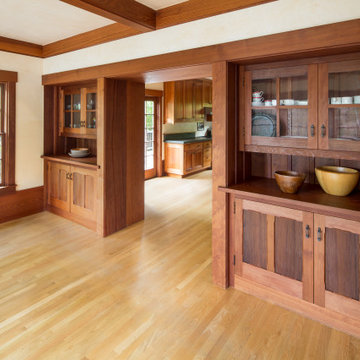
The original Edgemont Inn was built in 1904 for visiting San Franciscans who ventured north on the Mt. Tam cog railway. After a century of use the structure was in need of complete restoration. All materials were removed and salvaged before the structure was lifted and set on new foundations. New additions were woven into the original architecture to improve function and aesthetics. All the doors, paneling and mouldings were made from old growth redwood that was salvaged and repurposed by craftsman builder Jim Lino, in keeping with the spirit and history of the house.
Crow’s Nest, an historic cottage in old Inverness, located on the same property, was recreated and expanded in the spirit of the original Shingle Style Arts and Crafts structure. Proportion, attention to fine detail, and meticulous craftsmanship define the quality and timeless sense of the architecture. Original clinker bricks were salvaged and used in the exposed chimney and fireplace that anchor the structure and provide a texture of its history. The original wrought iron Edgemont Inn sign was salvaged and is mounted on the brick chimney as enter the house.
54