
Search results for "Reduce wears" in Home Design Ideas
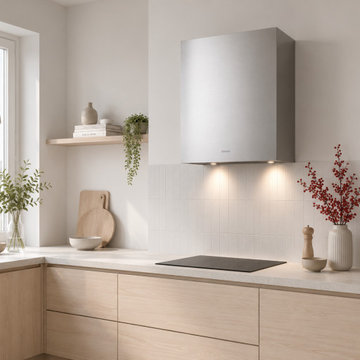
 Futuro Futuro Kitchen Range Hoods
Futuro Futuro 36-Inch Amalfi Wall Range Hood – Modern Italian Design with Powerful Ventilation
The Futuro Futuro 36-Inch Amalfi Wall Range Hood combines contemporary Italian design, premium materials, and advanced ventilation technology to create a statement piece for modern kitchens. Featuring a sleek cubist-inspired design, this luxury wall-mounted range hood delivers both exceptional performance and timeless style.
Premium Italian Craftsmanship and Durable Stainless Steel Construction
Designed and handcrafted in Italy, the Amalfi Series is built with high-quality AISI 304 stainless steel, a material known for its outstanding resistance to rust, corrosion, and everyday wear. This durable construction ensures long-lasting performance while maintaining its elegant appearance for years to come.
The Amalfi’s refined geometric design adds a sophisticated modern touch to any kitchen while providing the reliability expected from premium Italian craftsmanship.
Powerful and Quiet 940 CFM Ventilation System
The Futuro Futuro Amalfi Wall Range Hood features a high-performance 940 CFM internal Whisper tangential blower designed to efficiently remove smoke, grease, steam, and cooking odors from your kitchen.
Despite its powerful airflow, the hood operates quietly thanks to an advanced multi-layer sound-absorbing system. This innovative technology helps reduce operating noise, allowing you to enjoy a cleaner, fresher kitchen environment without unnecessary distractions.
Advanced Perimeter Suction Filtration Technology
The Amalfi Series uses a perimeter suction filtration system that creates an air curtain around your cooktop. This design improves capture efficiency by directing smoke, grease, and odors toward the edges of the hood for more effective filtration.
The hidden metal mesh grease filters maintain the hood’s clean, minimalist appearance while providing reliable grease collection. The filters are easy to remove and dishwasher safe for convenient maintenance.
Smart Controls and Energy-Efficient LED Lighting
The illuminated electronic control panel makes operating the Amalfi Wall Range Hood simple and intuitive. With the push of a button, you can adjust ventilation settings and access built-in features.
A convenient filter-cleaning reminder helps ensure your hood continues performing at its best. Two energy-efficient LED lights provide bright, focused illumination over your cooktop while enhancing visibility during food preparation.
Why Choose the Futuro Futuro Amalfi 36-Inch Wall Range Hood?
36-inch modern wall-mounted range hood design
Premium Italian craftsmanship
Durable AISI 304 stainless steel construction
Powerful 940 CFM internal blower
Quiet operation with advanced sound absorption technology
Perimeter suction filtration system for improved smoke and odor capture
Dishwasher-safe metal mesh grease filters
Energy-efficient LED cooktop lighting
Sleek cubist design for contemporary kitchens
What makes the Futuro Futuro Amalfi range hood different?
The Amalfi stands out with its combination of Italian craftsmanship, premium stainless steel construction, powerful ventilation, quiet operation, and modern architectural design.
How powerful is the Amalfi 36-Inch range hood?
This model features a 940 CFM internal blower designed to handle heavy cooking, smoke, grease, and odors effectively.
Is the Amalfi range hood easy to maintain?
Yes. The removable metal mesh grease filters are dishwasher safe, and the electronic controls include a cleaning reminder for easier upkeep.
What kitchen styles work best with the Amalfi Wall Range Hood?
Its sleek cubist design complements contemporary, modern, minimalist, and luxury kitchen designs.

 Industrial Projects
Creating a comfortable outdoor living space is a priority for many homeowners and DIY enthusiasts. With rising summer temperatures, installing a shade tarp in your backyard offers an affordable and effective solution for sun protection. We’ve developed this detailed, step-by-step guide to help you confidently install a shade tarp that not only shields you from the sun but also adds aesthetic appeal to your outdoor area.
Benefits of Installing a Backyard Shade Tarp
Before diving into the installation process, let’s explore the key benefits of having a backyard shade tarp:
Provides UV Protection: Keeps your family and guests safe from harmful sun exposure.
Reduces Outdoor Temperatures: Creates a cooler, more enjoyable outdoor space.
Protects Outdoor Furniture: Extends the life of patio furniture by reducing sun damage.
Enhances Outdoor Aesthetics: Adds a modern, stylish look to your yard.
Budget-Friendly: More affordable compared to permanent structures like pergolas.
Materials and Tools You’ll Need
To begin your DIY backyard shade project, gather the following materials and tools:
Materials:
Shade tarp (UV-resistant and breathable)
Sturdy posts or existing structures (trees, fences, walls)
Mounting hardware (eye bolts, D-rings, turnbuckles, snap hooks)
Nylon or polyester rope, or stainless-steel wire
Concrete (if installing new posts)
Tools:
Power drill
Measuring tape
Level
Ladder
Wrench or adjustable spanner
Post hole digger (if installing new posts)
Step 1: Plan Your Shade Tarp Layout
The first step in installing your backyard shade tarp is careful planning. Take time to assess your outdoor area and answer these key questions:
Where is the sun’s path throughout the day?
What size and shape of tarp best suits your space?
Will you anchor the tarp to existing structures or install new posts?
What height do you want the tarp to sit at for maximum shade and airflow?
Pro Tip: Use string or garden hoses to visualize the tarp layout on the ground before making permanent decisions.
Step 2: Measure and Mark Anchor Points
Once you’ve determined the tarp’s location and orientation:
Measure the tarp dimensions.
Mark the exact points where each corner of the tarp will be anchored.
Ensure that the anchor points are at least 5–10% longer than the tarp size to allow for tensioning and slight adjustments.
Consider slope angles for water runoff. Aim for at least a 20-degree angle to prevent water pooling on the tarp.
Step 3: Install Support Posts (If Necessary)
If your backyard lacks existing anchor points like trees or fences, you’ll need to install sturdy support posts:
Dig post holes at least 24 inches deep and 8-12 inches wide for stability.
Set posts in concrete, making sure they remain plumb and level.
Allow the concrete to cure for at least 24–48 hours before applying tension from the tarp.
We recommend using pressure-treated wood, galvanized steel poles, or aluminum posts for longevity and strength.
Step 4: Install Mounting Hardware
With your anchor points ready, it’s time to install the necessary hardware:
Attach eye bolts or pad eyes securely into walls, posts, or other fixed structures.
For added flexibility and adjustability, install turnbuckles or tensioners to fine-tune the tarp’s tightness.
Connect snap hooks, D-rings, or carabiners to make assembly and disassembly easier.
Make sure all hardware is rated for outdoor use to prevent rust and corrosion.
Step 5: Attach and Tension the Shade Tarp
Now it’s time for the most satisfying part—mounting the shade tarp:
Begin by attaching one corner of the tarp to an anchor point.
Gradually attach the remaining corners, moving diagonally for even tension.
Adjust each connection point using your turnbuckles, ropes, or cables.
Pull the tarp tight enough to avoid sagging, but not so tight that it risks tearing.
Check that the tarp maintains the desired slope for rainwater runoff and adjust tension as needed.
Step 6: Final Adjustments and Safety Check
Before enjoying your new shaded area:
Inspect all anchor points and hardware for stability.
Test the tarp’s tension and make adjustments for even distribution.
Ensure that no sharp edges or loose connections remain that could damage the tarp or pose a safety hazard.
Confirm that the tarp is secure in windy conditions by giving it a gentle tug.
If you live in an area with frequent high winds, consider removing the tarp during storms to prevent damage.
Step 7: Enjoy Your Shaded Backyard Oasis
Once installed, your backyard shade tarp provides a comfortable and protective space for outdoor gatherings, relaxation, or family activities. You can decorate underneath with outdoor furniture, string lights, or potted plants to create a personalized outdoor retreat.
Maintenance Tips for Long-Lasting Shade Tarp Performance
To extend the life of your shade tarp, follow these maintenance guidelines:
Regularly check for wear and tear, especially around anchor points and seams.
Clean the tarp periodically with mild soap and water to prevent mildew buildup.
Store the tarp indoors during harsh weather seasons if it's not designed for year-round use.
Tighten hardware as needed to maintain proper tension and avoid sagging.
By following these simple care steps, your shade tarp will continue to deliver years of sun protection and outdoor comfort.
Conclusion: Upgrade Your Outdoor Space with a DIY Shade Tarp
Installing a shade tarp in your backyard is a cost-effective and rewarding DIY project. With careful planning, quality materials, and proper installation techniques, you’ll enjoy cool, shaded outdoor living all season long. This step-by-step guide ensures your project goes smoothly from start to finish.
 Village Home Stores
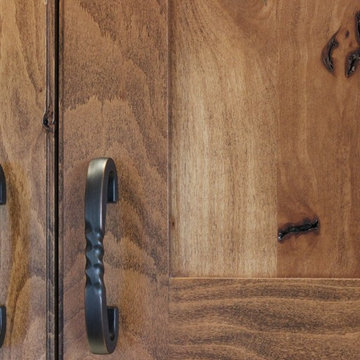
Full-overlay Rustic Beech cabinets in the "Charleston" door style and "Briarwood" finish.
Village Home Stores
Example of a large mountain style kitchen design in Chicago
Example of a large mountain style kitchen design in Chicago
Find the right local pro for your project
 Blake Civiello Architecture
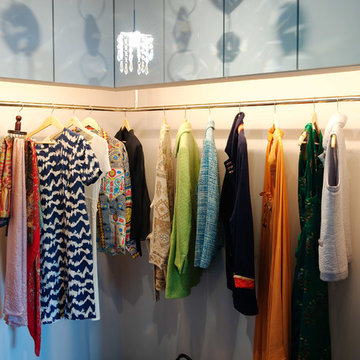
Designed by Blake Civiello. Photos by Philippe Le Berre
Example of a small trendy women's bamboo floor home design design in Los Angeles with flat-panel cabinets and white cabinets
Example of a small trendy women's bamboo floor home design design in Los Angeles with flat-panel cabinets and white cabinets

 IQnewswire
The End of the Ultra-Slim Wedding Suit
For several years, men’s formalwear was dominated by narrow lapels, short jackets and trousers cut close to the leg. The style created a sharp outline, but it often left little room for sitting, dancing or eating comfortably. Current tailoring is moving towards a more balanced shape, with cleaner shoulders, a defined waist and trousers that follow the leg without gripping it.This change does not mean that wedding suits have become oversized. The newer approach sits between skinny and loose. It keeps the structure expected of formal clothing while allowing the cloth to hang properly. For grooms, that balance is useful during a day that may involve a ceremony, photographs, dinner and several hours on the dance floor.
Look For Shape Rather Than Tightness
A well-fitted suit should create a clear outline without relying on tension. Collections of Marc Darcy suits include tailored three-piece designs, checks and textured fabrics that suit the current preference for visible structure and considered proportions.
The jacket should sit close enough to define the waist, but the front button should fasten without pulling the cloth into an X-shaped crease. At the shoulders, the seam should finish close to the natural shoulder point. Extra width can make the jacket look borrowed, while a shoulder that is too narrow may cause the upper sleeve to collapse.
Fit should be assessed while moving as well as standing. Reach forward, sit down and raise both arms. A tailored jacket will never feel like casual sportswear, but it should allow the groom to carry out ordinary movements without sharp restriction across the back or chest.
Give The Jacket Enough Length
Very short suit jackets became common alongside skinny trousers, but they can disrupt the proportions of a three-piece outfit. If the jacket finishes too high, the waistcoat may appear longer than the outer layer and the trousers may look as though they begin too low.
A more traditional jacket length usually covers most of the seat and divides the body more evenly. This can make the legs appear longer without shortening the jacket excessively. The correct length depends on height and body proportions, so two men wearing the same chest size may still need different jacket lengths.
View the suit from the back and side rather than relying on a front-facing mirror. The vents should lie flat, and the hem should not lift away from the body. A side photograph can reveal an unbalanced jacket more clearly than the changing-room mirror.
Choose Trousers That Fall Cleanly
The move away from very tight tailoring is most noticeable in suit trousers. A modern tailored leg can still be neat at the ankle, but it should provide enough room through the seat and thigh for the fabric to fall without horizontal lines.
Trouser pockets offer a useful fit check. If they pull open while standing, the waist or hips may be too tight. The fly should lie flat, and the waistband should remain in place without depending on an overtightened belt. Higher-rise trousers can work particularly well with a waistcoat because they reduce the chance of shirt fabric appearing between the two pieces.
The hem should make gentle contact with the shoe rather than gathering heavily around it. A short hem can work with narrow trousers but taking it too far may make the suit look dated once the current cropped style moves on. A slight break is easier to wear with different formal shoes and tends to look balanced in full-length wedding photographs.
Let The Waistcoat Support the Silhouette
A waistcoat adds structure through the centre of the outfit, but only when it fits correctly. It should lie flat against the shirt and cover the trouser waistband. Tightening the back strap cannot correct a waistcoat that is the wrong size or too short.
Current three-piece styling often places greater emphasis on the waistcoat. Double-breasted designs, contrasting fabrics and wider openings can distinguish the groom without requiring a brightly coloured jacket. When the groom removes the jacket later, the waistcoat keeps the outfit looking complete.
Allow room for a full meal and several hours of wear. A waistcoat that feels acceptably close during a brief fitting may become uncomfortable at dinner. Sit down with every button fastened and check whether the lower edge presses into the waist or causes the front to bow.
Use Stronger Lapels Carefully
Wider notch and peak lapels are returning after years of extremely narrow designs. A broader lapel can frame the shirt and tie, balance the shoulders and give the jacket a more formal character. Peak lapels create a particularly strong line on double-breasted jackets and evening suits.
The lapel width should still suit the wearer. A very broad lapel can overwhelm a smaller frame, while an extremely narrow one may look out of proportion on a broad chest. The shirt collar, tie width and lapel should relate to one another without matching exactly.
A wider lapel also leaves less need for decorative extras. A simple buttonhole flower or plain pocket square may be enough. Large lapel pins can crowd the upper part of the jacket, especially when the cloth already contains a check.
Avoid Buying According to the Size Label Alone
The same labelled size can fit differently across designs because cut, fabric and construction affect the garment. Begin with accurate chest, waist, inside-leg and approximate jacket-length measurements. Compare those figures with the retailer’s size information rather than ordering the size worn in another brand without checking.
If the jacket fits at the shoulders but needs slight shaping through the waist, a tailor can often make the adjustment. Sleeves and trouser hems are also commonly altered. Major changes to the shoulder line or jacket length are more difficult and may not be economical.
Do not choose the smallest size that can be fastened. A suit that looks tight in the fitting room is unlikely to become more comfortable during a long wedding day. Cloth should skim the body and return to a clean position after movement.
Balance a checked suit with simple styling
Texture and checks remain popular in wedding tailoring, particularly for country houses, converted barns and traditional venues. These fabrics already add depth to the outfit, so the cut should remain controlled and the accessories relatively quiet.
A plain white, pale blue or cream shirt gives a checked suit a clear foundation. Choose a tie from one of the secondary colours in the cloth rather than introducing another strong pattern. A white pocket square works when the suit contains several shades and does not need further decoration.
Shoes should support the proportions of the trousers. A very slim shoe may appear too small beneath a fuller hem, while a heavy casual sole can pull attention away from the tailoring. Oxfords, Derbies and refined brogues usually provide enough visual weight without looking bulky.
Coordinate the wedding party without forcing one fit
Matching groomsmen suits can become difficult when every member of the party has a different build. Insisting on an identical close fit may leave some men comfortable and others visibly restricted. A better approach is to keep the cloth, colour and main design consistent while adjusting jacket and trouser sizes for each person.
The groom can stand apart through a waistcoat, lapel shape or accessory rather than wearing a suit cut much tighter than everyone else. This creates a connection across the group without treating one silhouette as suitable for every body.
Arrange fittings early enough to identify size and alteration issues. Group orders should be checked well before the wedding, particularly when trousers need hemming or jackets require sleeve adjustments. Each person should try the complete outfit with the intended shirt and shoes.
Judge the suit by the whole day
A wedding fitting often lasts less than half an hour, while the suit may be worn for twelve hours or more. Comfort should therefore be tested under realistic conditions. Sit for several minutes, walk upstairs and check the waistband after moving around.
Pay attention to the parts that cannot be seen clearly in a mirror. The collar should remain close to the shirt at the back of the neck. Jacket vents should not pull apart, and the trouser seat should follow the body without sagging or strain.
The current move towards balanced tailoring gives grooms more room to choose clothes that look formal without feeling restrictive. Clean shoulders, a shaped jacket and trousers with a natural fall will outlast extreme proportions. A suit that allows the groom to stand, sit and celebrate comfortably is also more likely to look composed in photographs taken throughout the day.
 Alex Buckman Studio
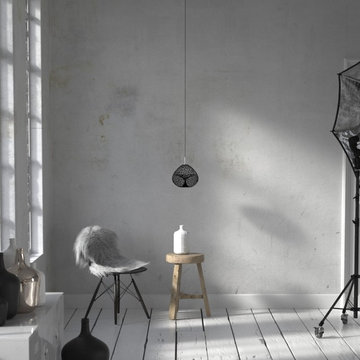
Single Colony Pendant fitting well into its Scandinavian setting.
Example of a mid-sized urban master painted wood floor bedroom design in Wellington with white walls
Example of a mid-sized urban master painted wood floor bedroom design in Wellington with white walls
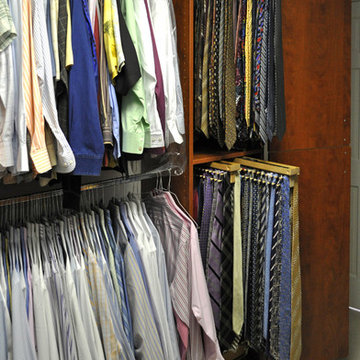
 Pawling Closet Company
Mid-sized elegant gender-neutral carpeted walk-in closet photo in New York with open cabinets and dark wood cabinets
Sponsored
Columbus, OH

Wannemacher Interiors
Customized Award-Winning Interior Design Solutions in Franklin Cnty OH
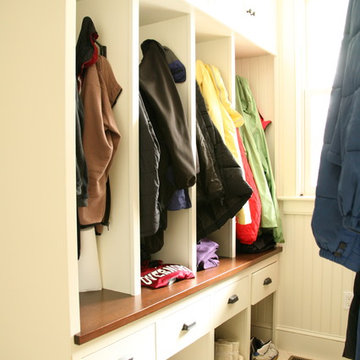
 OLSON LEWIS + Architects
Contractor: Anderson Contracting Services
Photographer: Eric Roth
Elegant mudroom photo in Boston with white walls
Elegant mudroom photo in Boston with white walls


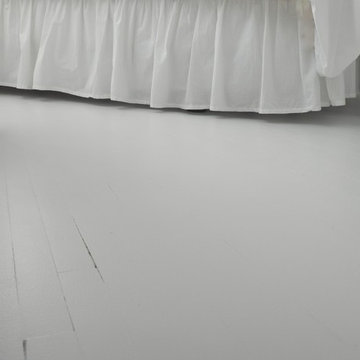
 User
UserBeing able to see the individual hardwood boards, including areas where the cracks are more pronounced, lends a nice character to the room.
Example of a mid-sized transitional master painted wood floor bedroom design with gray walls and no fireplace
Example of a mid-sized transitional master painted wood floor bedroom design with gray walls and no fireplace
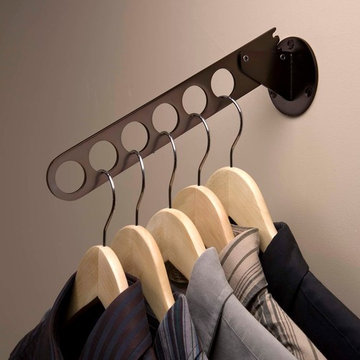
 Tailored Living featuring Premier Garage of OC
A perfect accessory for any laundry room. Ideal for spot treatments or allowing clothing to air dry.
Inspiration for a timeless walk-in closet remodel in Orange County
Inspiration for a timeless walk-in closet remodel in Orange County
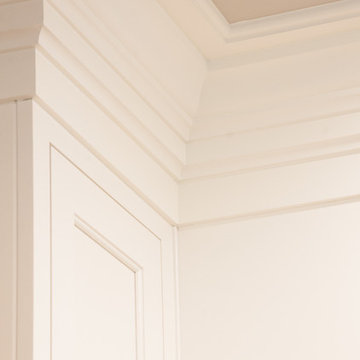
 Plaistow Cabinet
Shiloh Cabinetry. Polar White, Inset
Kitchen - transitional kitchen idea in Manchester with white cabinets, beaded inset cabinets, marble countertops, white backsplash, marble backsplash and stainless steel appliances
Kitchen - transitional kitchen idea in Manchester with white cabinets, beaded inset cabinets, marble countertops, white backsplash, marble backsplash and stainless steel appliances
 Betty Wasserman Art & Interiors
Modern luxury meets warm farmhouse in this Southampton home! Scandinavian inspired furnishings and light fixtures create a clean and tailored look, while the natural materials found in accent walls, casegoods, the staircase, and home decor hone in on a homey feel. An open-concept interior that proves less can be more is how we’d explain this interior. By accentuating the “negative space,” we’ve allowed the carefully chosen furnishings and artwork to steal the show, while the crisp whites and abundance of natural light create a rejuvenated and refreshed interior.
This sprawling 5,000 square foot home includes a salon, ballet room, two media rooms, a conference room, multifunctional study, and, lastly, a guest house (which is a mini version of the main house).
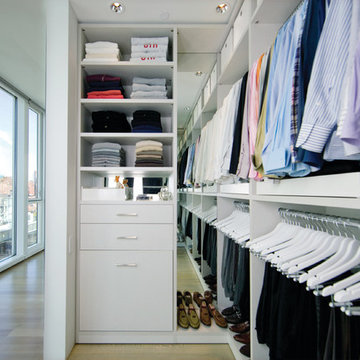
 California Closets of Tennessee
Minimalist design offers elegant yet straightforward storage and organization.
Mid-sized minimalist gender-neutral light wood floor walk-in closet photo in Nashville with flat-panel cabinets and white cabinets
Mid-sized minimalist gender-neutral light wood floor walk-in closet photo in Nashville with flat-panel cabinets and white cabinets
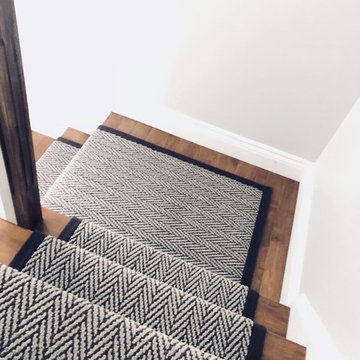
 Alexanian Carpet & Flooring
 Stylish & Timeless
Inspiration for a transitional wooden l-shaped wood railing staircase remodel in Toronto with painted risers
Inspiration for a transitional wooden l-shaped wood railing staircase remodel in Toronto with painted risers
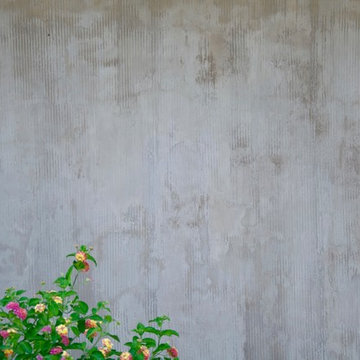
 Stonelace Designs
Originally, the exterior of the Napa ranch residence was a standard knocked down stucco finish. We covered over the entire exterior of the house with a natural plaster product that has been made in Italy for centuries, known as Rialto or Vero. This product is a combination of slaked lime mixed with 60% reconstituted crushed marble dust. Quarried from the legendary Carrara marble mines. The finish itself is a vertically combed striated texture embedded into the plaster. While it cures, a transparent group of patinas are applied to the stone-like plaster substance to create a look of an aged villa.
 User
UserDesigned by Katy Shannon of Closet Works
Double hang clothing rods provide storage for short to medium length skirts and blouses, extending into an alcove for maximum storage.
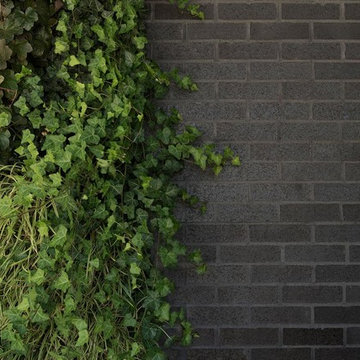
 THE UP STUDIO
Free Float is a pool house that continues UP's obsession with contextual contradiction. Located on a three acre estate in Sands Point NY, the modern pool house is juxtaposed against the existing traditional home. Using structural gymnastics, a column-free, simple shading area was created to protect occupants from the summer sun while still allowing the structure to feel light and open, maintaining views of the Long Island Sound and surrounding beaches.
Photography : Harriet Andronikides
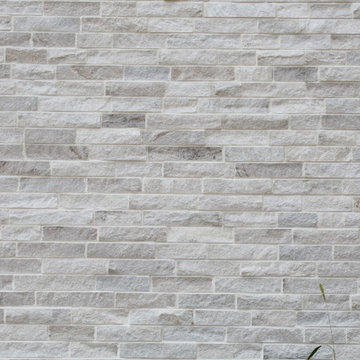
 Quarry Mill
Whittier natural thin stone veneer from the Quarry Mill creates a polish look on the exterior of this residential home. Whitter is a natural quartzite veneer in the dimensional ledgestone style. The pieces of stone are all 3” in height with lengths varying from 6”-18”. Whittier is predominantly white with some cream and light grey tones. The stone will also have some soft brown natural veining within the pieces and softly sparkle in the light. The pieces have been sawn on five sides including the top, bottom, ends, and back. The front shows the split face of the stone with a sandpaper like texture. Installation can be done with or without a mortar joint between the pieces. Whittier is a premium quality imported stone that we have in stock and ready to ship.
9