
Search results for "Remaining treated" in Home Design Ideas

 Kitchen Ideas Center
Kitchen - transitional u-shaped medium tone wood floor, brown floor, coffered ceiling and exposed beam kitchen idea with an undermount sink, shaker cabinets, white cabinets, stainless steel appliances, an island and white countertops


Find the right local pro for your project
 Tile Doctor Ltd
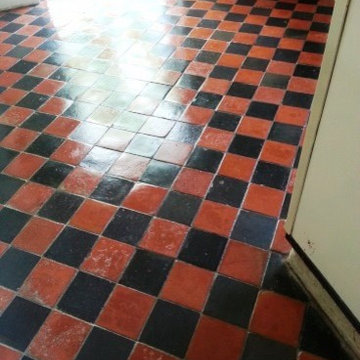
We were asked to restore a beautiful Victorian tiled floor at a house in the small village of Sharnbrook, Bedfordshire. The floor had been badly treated for many years until new occupiers decided to restore it.
The area comprised of a Pantry, Loo, Lobby, Dining room, Kitchen and Conservatory, we had several problems to deal with including some tiles that were loose, some had cement on them and the dining room floor had the remnants of a coir rug stuck to the surface.
Having moved all the furniture we started from the far end pre-treating the coir matted dining room tiles by soaking them in a strong dilution of Tile Doctor Pro-Clean; leaving them to soak in this way would soften up the matting and enabled us to remove the debris more easily with a scrapper by the time we got to the dining room.
We then started on the rest of the floor again using a strong dilution of Tile Doctor Pro-Clean which was left to dwell on the tile for ten minutes before being worked in using a scrubbing pad until any remaining old sealer was stripped off the tile the tiles were clean.
For the tiles which were covered in cement we treated them with an acid rinse using Tile Doctor Grout Clean-Up, being an acid you have to take care and wear appropriate personal protection and not to leave the acid on the tile for too long. It was satisfying however to watch the cement fizz away to reveal the beautiful tile below.
Once everything was stripped and the floor clean we gave the tiles a thorough rinse and extracted as much water from the floor as possible before installing a number of and air movers to speed up the drying process.
Whilst the floor was drying our attention moved onto the replacement of the lose tiles and re-adhering them to the floor. This was a straight forward job using tile adhesive and matching grout and we then left to allow the floor to dry out thoroughly.
We returned seven days later and took more damp readings, these all read ok so we proceeded to seal the floor. First we used a coat of Tile Doctor Colour Grow which is an impregnating sealer the gets into the pores of the tile protecting it from within and also enhancing the colours in the tile in the process; this was then followed with four coats of Tile Doctor Seal and Go to leave a high shine finish as requested by the client.
 Soak Barrel Co. – Cedar Hot Tubs & Outdoor Saunas
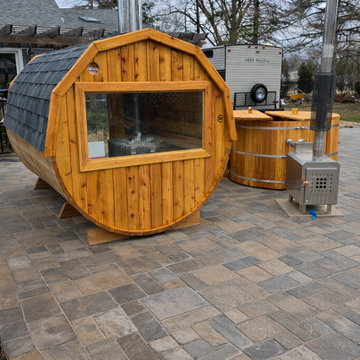
This project features a handcrafted cedar barrel sauna with a panoramic front window and integrated porch, installed as a complete outdoor wellness setup.
The sauna is built from solid Western Red Cedar and equipped with a wood-burning sauna stove capable of reaching temperatures of up to 194°F, providing a traditional and authentic sauna experience.
Western Red Cedar is naturally resistant to moisture, mold, and decay, making it one of the most durable wood species for long-term outdoor use. The solid cedar construction remains stable through seasonal temperature changes and requires only simple and occasional maintenance. The interior typically needs only basic cleaning and ventilation, while the exterior can be treated with standard wood oils if desired.
The front porch provides a convenient entry area and a comfortable space for cooling down between sauna sessions.
This project can also be expanded into a complete Fire & Ice setup by pairing the sauna with a cedar hot tub or cold plunge for contrast therapy.
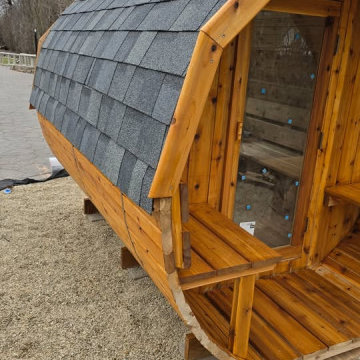 Soak Barrel Co. – Cedar Hot Tubs & Outdoor Saunas
This project features a handcrafted cedar barrel sauna with a panoramic front window and integrated porch, installed as a complete outdoor wellness setup.
The sauna is built from solid Western Red Cedar and equipped with a wood-burning sauna stove capable of reaching temperatures of up to 194°F, providing a traditional and authentic sauna experience.
Western Red Cedar is naturally resistant to moisture, mold, and decay, making it one of the most durable wood species for long-term outdoor use. The solid cedar construction remains stable through seasonal temperature changes and requires only simple and occasional maintenance. The interior typically needs only basic cleaning and ventilation, while the exterior can be treated with standard wood oils if desired.
The front porch provides a convenient entry area and a comfortable space for cooling down between sauna sessions.
This project can also be expanded into a complete Fire & Ice setup by pairing the sauna with a cedar hot tub or cold plunge for contrast therapy.
 Ky-Kan Coatings
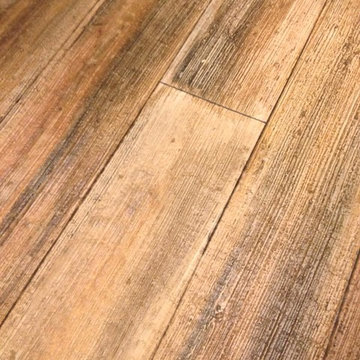
Concrete can be made to look like any substance. Tile, stone, wood, brick, etc. With unlimited color options, Ky-Kan Coatings can transform any room in your home or business using lightweight, beautiful concrete.

Sponsored
Delaware, OH

Buckeye Basements, Inc.
Central Ohio's Basement Finishing ExpertsBest Of Houzz '13-'21



 Zelaya Properties LLC
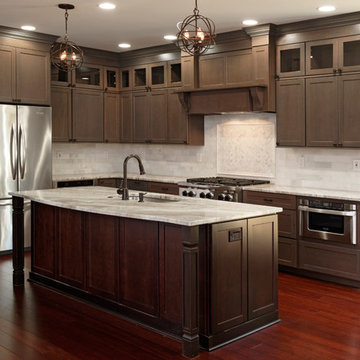
We used: Custom cherry cabinetry in Arts & Crafts Shaker style by Kabinart in Boulder and Espresso stains. Liberty Hardware Venetian bronze 1-1/2" cabinet knobs. KitchenAid Architect II Series 22 CF counter-depth French door refrigerator. KitchenAid Architect Series II 27" convection single wall oven. KitchenAid 36" 6-burner dual fuel freestanding commercial-style range. KitchenAid Architect II Series 24" dishwasher. Sharp Insight Pro Series 24" built-in microwave drawer (Model #KB6524PS). Crystorama Solaris 12" wide pendant lights in English bronze. Granite countertops in Brown Fantasy. 3"x6" polished marble backsplash.
Paint colors:
Walls: Glidden Silver Cloud 30YY 63/024
Ceilings/Trims/Doors: Glidden Swan White GLC23
Robert B. Narod Photography
 Natural Stone Institute
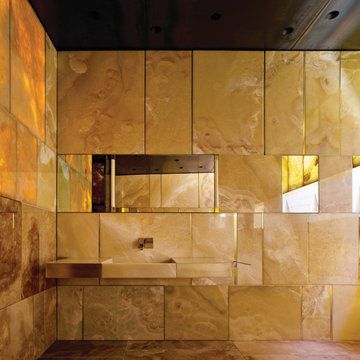
This private residence in Arizona has 22 exquisite slabs of onyx in the master bathroom. The overall goal of this project was to create a museum experience for the homeowners, yet have it remain comfortable and livable. The master bathroom contains an 18 ft. long x 10 ft. tall backlit shower wall that opens to a private outdoor space. Walls within the 440 sq. ft. master bath were floated square and plumb, water proofed and clad with the direct adhered method per the MIA installation standard for wet areas-stone slab residential showers.
The onyx slabs were sized, templated for random colors, cut and fabricated with a 1/6" chamfer to create a jeweled edge. Hidden in these walls were backlit medicine cabinets, trash bins, and accent panels. Each panel was highlighted with a stainless muntz bar on all sizes. The custom backlit trough sinks were fabricated to contain a slot drain and functioning drawers. The entire master bath floor was treated as a wet area with suspended shower floor. A secondary shower floor underneath, pitched water to drain system below.
 Natural Stone Institute
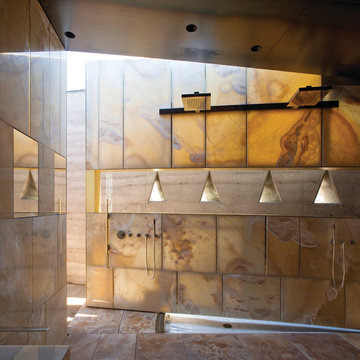
This private residence in Arizona has 22 exquisite slabs of onyx in the master bathroom. The overall goal of this project was to create a museum experience for the homeowners, yet have it remain comfortable and livable. The master bathroom contains an 18 ft. long x 10 ft. tall backlit shower wall that opens to a private outdoor space. Walls within the 440 sq. ft. master bath were floated square and plumb, water proofed and clad with the direct adhered method per the MIA installation standard for wet areas-stone slab residential showers.
The onyx slabs were sized, templated for random colors, cut and fabricated with a 1/6" chamfer to create a jeweled edge. Hidden in these walls were backlit medicine cabinets, trash bins, and accent panels. Each panel was highlighted with a stainless muntz bar on all sizes. The custom backlit trough sinks were fabricated to contain a slot drain and functioning drawers. The entire master bath floor was treated as a wet area with suspended shower floor. A secondary shower floor underneath, pitched water to drain system below.
 Natural Stone Institute
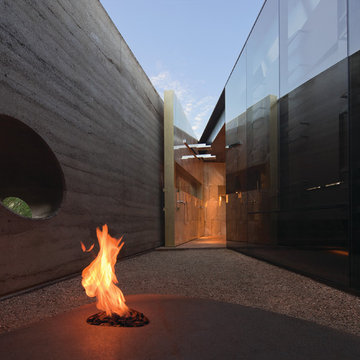
This private residence in Arizona has 22 exquisite slabs of onyx in the master bathroom. The overall goal of this project was to create a museum experience for the homeowners, yet have it remain comfortable and livable. The master bathroom contains an 18 ft. long x 10 ft. tall backlit shower wall that opens to a private outdoor space. Walls within the 440 sq. ft. master bath were floated square and plumb, water proofed and clad with the direct adhered method per the MIA installation standard for wet areas-stone slab residential showers.
The onyx slabs were sized, templated for random colors, cut and fabricated with a 1/6" chamfer to create a jeweled edge. Hidden in these walls were backlit medicine cabinets, trash bins, and accent panels. Each panel was highlighted with a stainless muntz bar on all sizes. The custom backlit trough sinks were fabricated to contain a slot drain and functioning drawers. The entire master bath floor was treated as a wet area with suspended shower floor. A secondary shower floor underneath, pitched water to drain system below.

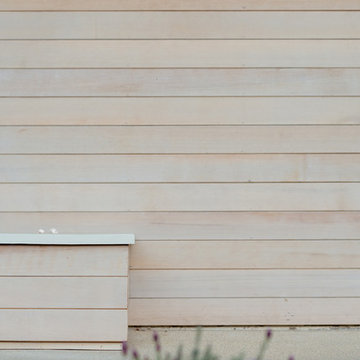
 Moss Yaw Design studio
Engineered cedar siding creates beautiful gray-blue tones at the exterior of the home, while adding a textural element to activate the simple exterior design.
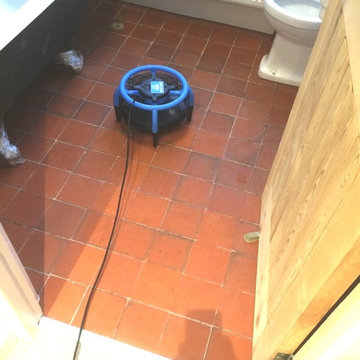 Tile Doctor Ltd
This is a job I recently completed in the small town of Braunstone, which lies just outside the city boundaries of Leicester, Leicestershire. My client wanted a restorative cleaning and sealing service for their very old Quarry tiled bathroom floor, which dates back to the Edwardian period. The floor was suffering from paint and adhesive staining, and was now in dire need of a thorough clean more generally along with a fresh seal to protect it from further damage.
I treated the floor in the first instance Tile Doctor Remove & Go which is a powerful stripper that breaks down old sealers remaining on the floor, as well as inherent paint and adhesive contamination. Remove & Go also contains cleaning properties which allows it to draw out ingrained dirt from the stone, lifting it to the surface. The product was applied to the floor and allowed to dwell for approximately thirty minutes prior to agitation with a hand-held rotary polisher fitted with a small black stripping pad.
The resulting slurry was promptly removed using a wet vacuum machine and our specialist Tile Doctor Acid Gel was then applied to the floor. Acid Gel is a blend of phosphoric and hydrochloric acids in gel form, and is specially formulated to treat grout haze and efflorescence on both wall and floor tiles.
Readers should be aware that this product is not suitable for use on acid-sensitive stone tiles such as Marble, Limestone and Travertine as it can potentially cause severe etching. In this case Acid Gel was left to dwell for ten minutes prior to agitation. This was effective in removing the white efflorescence salt staining that was present in several concentrated areas. Once again, the resulting slurry was vacuumed away, and the entire floor was rinsed with clean water.
The floor was left to dry for roughly twenty four hours before I returned to seal the floor. My choice of sealer in this case was Tile Doctor Colour Grow, a colour enhancing, impregnating sealer. The sealer will help to protect the tiles from soil ingress, and both water and oil based spills.
As you can see from the ‘Before’ and ‘After’ photographs, a marked difference was made to the appearance of this Quarry tiled floor. A professional and carefully thought out approach was taken to tackling the innate problems, particularly relating to efflorescence and paint and adhesive staining, and my client was extremely pleased with the results.
Kay Sylvester
Leicestershire Tile Doctor
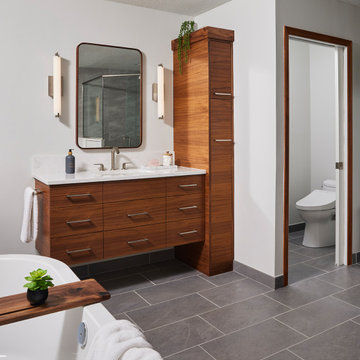
 Fox Interiors
The bathroom was redesigned to improve flow and add functional storage with a modern aesthetic.
Natural walnut cabinetry brings warmth balanced by the subtle movement in the warm gray floor and wall tiles and the white quartz counters and shower surround. We created half walls framing the shower topped with quartz and glass treated for easy maintenance. The angled wall and extra square footage in the water closet were eliminated for a larger vanity.
Floating vanities make the space feel larger and fit the modern aesthetic. The tall pullout storage at her vanity is one-sided to prevent items falling out the back and features shelves with acrylic sides for full product visibility.
We removed the tub deck and bump-out walls with inset shelves for improved flow and wall space for towels.
Now the freestanding tub anchors the middle of the room while allowing easy access to the windows that were blocked by the previous built-in.
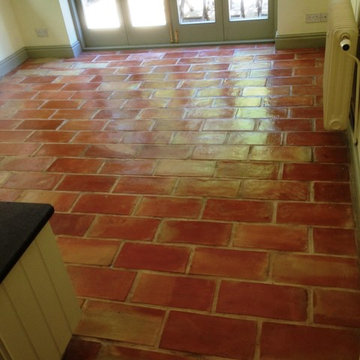 Tile Doctor Ltd
This is an interesting Terracotta brick tiled floor installed in a house in the village of Alderly Edge. The Terracotta tiles were made in a brick shape which was a popular design found in rural buildings in the 19th century. Although the floor was in good condition the sealer was starting to wear off and being clay Terracotta are porous and trap dirt if not sealed. You can see this in the before photograph below where you can see how the grout and Terracotta has darkened with ingrained dirt.
To get the Terracotta tiles clean and free of any remaining sealer I soaked tiles in a strong dilution of Tile Doctor Pro-Clean and left it to dwell for twenty minutes, Pro-Clean is an alkaline product and so safe to use on tiled floors. Then using a large 17inch black scrubbing pad fitted to a rotary machine and a stiff grout brush proceeded to work the cleaning solution into the tile and grout. The now dirty cleaning solution was removed using a wet vacuum and the floor rinsed down with hot water. Some stubborn areas were spot treated using the same process and once happy with the overall condition of the floor the tiles were thoroughly rinsed three times using hot water to remove any trace of cleaning product prior to sealing and then left to dry overnight.
I returned the next day to seal the floor testing it first with a damp meter to make sure it had dried. I then started to seal the tiles and with Terracotta being a very porous material it took eight coats of sealer to do the job. I used Tile Doctor Seal and Go which is a topical sealer that gives Terracotta a subtle gloss finish, it’s also water based so it doesn’t leave a smell as it dries.
 WOODlife Flooring
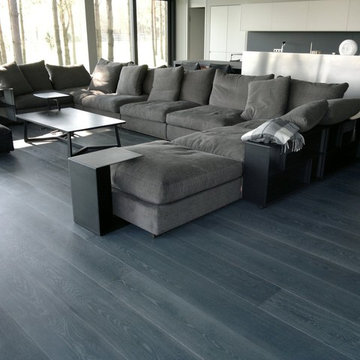
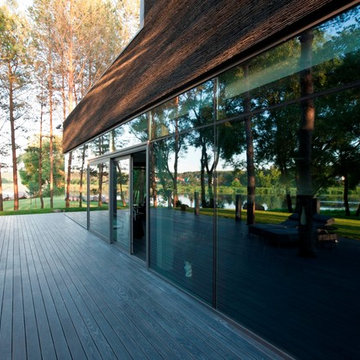
This product combination features a rare aesthetic match in the looks of interior and exterior wooden flooring. On top of that, application is nearly unlimited, even in circumstances with extreme changes in humidity and temperature. This is a result of a meticulous attitude and wise use of raw materials during manufacturing. This particular floor finish in anthracite shades is based on application of natural hardwax oils on engineered oak flooring inside, and on solid ash flooring outside. The oak and ash wood have both been pretreated with 100% natural processes resulting in a dark, warm appearance into the deepest grains. The thick top layer of the engineered oak floorboard (6+mm) provides that the floor and the dark colour will remain for a lifetime. The pretreatment of the solid ash flooring also highly improves its stability and durability, and is now even suitable along a pool! The outside terrace or patio will now be a TRUE extension of the living room, and designed for a smooth transition. No standard products, but personalized as desired. Last but not least exterior siding and paneling can even be matched. ‘WOODlife-Inside out’ is available in European oak, (thermo) ash and Douglas fir.
 WOODlife Flooring
This product combination features a rare aesthetic match in the looks of interior and exterior wooden flooring. On top of that, application is nearly unlimited, even in circumstances with extreme changes in humidity and temperature. This is a result of a meticulous attitude and wise use of raw materials during manufacturing. This particular floor finish in anthracite shades is based on application of natural hardwax oils on engineered oak flooring inside, and on solid ash flooring outside. The oak and ash wood have both been pretreated with 100% natural processes resulting in a dark, warm appearance into the deepest grains. The thick top layer of the engineered oak floorboard (6+mm) provides that the floor and the dark colour will remain for a lifetime. The pretreatment of the solid ash flooring also highly improves its stability and durability, and is now even suitable along a pool! The outside terrace or patio will now be a TRUE extension of the living room, and designed for a smooth transition. No standard products, but personalized as desired. Last but not least exterior siding and paneling can even be matched. ‘WOODlife-Inside out’ is available in European oak, (thermo) ash and Douglas fir.
 TKS Design Group
Free ebook, CREATING THE IDEAL KITCHEN
Download now → http://bit.ly/idealkitchen
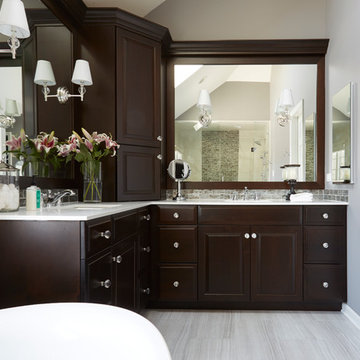
The homeowners came to us with the desire to update their master bathroom into a more spa-like retreat that was also more functional for their daily needs. The existing space was large with a vaulted ceiling, lots of natural light and an existing private water closet. So the bones of the space were great and the room just needed a few tweaks.
We started by relocating the cramped shower that shared the water closet room, to the existing tub location. The giant whirlpool tub took up more than its share of real estate in the room, and the beautiful new shower, which gets used daily, now sits in its spot. The new shower features beautiful lass tile accents as well as a bench seat and frameless shower door.
The new tub is freestanding and sits in front of an updated slightly smaller window, providing a sculptural focal point upon entry to the room. There was still plenty of room for two large vanities, and a corner storage cabinet and appliance garage that hides small bathroom necessities.
The water closet remains in its own private room and the area that once housed the shower, is now an additional closet for the master bedroom. The room is a pallet of soft grays and whites with the cherry vanities adding some warmth. Polished chrome and glass accents bring some sparkle to the space.
Designed by: Susan Klimala, CKD, CBD
Photography by: Mike Kaskel
For more information on kitchen and bath design ideas go to: www.kitchenstudio-ge.com
4