
Search results for "Remove soil" in Home Design Ideas

 Landmark Design Landscaping
Foundation drains: It's important to have fabric around your pipe. We then put gravel, another layer of fabric, then the soil.
This is an example of a mid-sized side yard landscaping in Raleigh.
This is an example of a mid-sized side yard landscaping in Raleigh.
 River Valley Landscapes
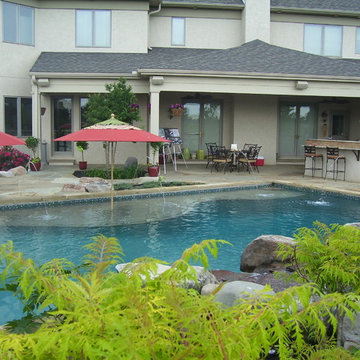
 This project was the result of the owner’s desire to install a swimming pool and outdoor living space inspired by tropical resorts they had visited on family vacations. The one element asked for specifically was a large waterfall spilling into the pool. The challenge for the designers was how to achieve the look the owner’s wished without the use of clichéd items such as thatched huts and tiki torches. The designers decided lush full plantings using plants found in the northeast region that met certain design criteria would be the primary way of giving the tropical feel. Boulder outcroppings, irregular stone paving and fire bowls along the back of the pool would complete the look.
The property is located in a newer subdivision with homes on both sides and a school to the rear. A walkway connects the neighborhood and the school along one side. The desired privacy would be addressed by the placement of plants and trees around the perimeter in mounded beds. Placing the waterfall to the rear of the pool helped block the view of the school beyond. The township had restrictions on the amount of impervious material allowable on site. The patio was designed to the maximum allowable size with square footage going to where it would be most usable. Planting beds were cut into the patio to decrease unnecessary square footage, divide spaces, and allow for more places to add plants and trees.
A rectangular swimming pool was chosen to make it easier to install an automatic pool cover. The pool was designed, with input from the landscape designers, and contracted separately by the owner. The landscape designers chose the location of pool and waterfall so that it was prominently placed to be the focal point of the backyard. The pool includes a curving sunbathing shelf running from end to end, finished in a lighter color to make it more visible, with removable umbrellas for shade and to add to the resort feel. To tie into the boulders used throughout the design, a large boulder was used as a substitute for a diving board. The yard sloped down towards the back of the property which required a large amount of soil to be added and large boulder retaining wall along the back.
For the planting design, the designers choose to focus on plants with larger leaves, various leaf colors and textures, and plants with large flowers in bold colors. These plants were then arranged into a loose lush planting scheme mixed with more traditional northeast plants such as pines, grasses, and roses. Unique plants such as hardy bananas were added for their tropical and exotic look. The full planting beds help to nestle in and enclose the living space.
Broken flagstone was chosen for the patio and intentionally left irregular at the edges. PA flagstone was avoided and a stone with gold and brown tones was chosen. Boulder outcroppings added to the natural and tropical theme. The fire pit was designed with a large built-in bench to increase the amount of seating. The designers chose a rounded smooth shape and incorporated the same stone as the pool coping for the caps and bench. For entertaining guests the outdoor kitchen was outfitted with a large gas grill, beverage taps, refrigerator, sink and a dedicated lobster cooker. The kitchen was finished with granite countertops and stainless steel cabinets. Two strategically placed fire bowls, along with the low voltage lighting, add additional interest to the space at night.
While the designers were faced with many challenges the resulting design incorporated enough elements to achieve the desired look and feel. Using plants appropriate to the northeast that fit the design criteria and carefully choosing hardscaping materials was essential. The owner’s feel they now have their own tropical theme resort right in their Pennsylvania backyard.
 Rain Garden Nursery LandscapeMakeoverDesignStaging
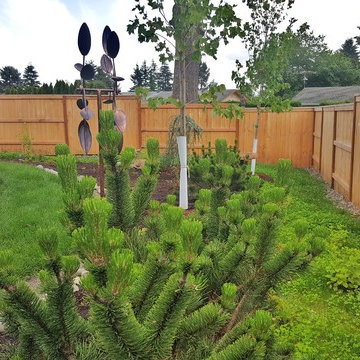
Scott & Catherine Buley, HTT&T, High Tech Turf & Trees, LandscapeMakeover.biz, Rain Garden Nursery. Again, the "mystery-area" to the left here lost 7&1/2 square feet of turf cover. We re-sodded as promised and all should be well. We may do a soil test on the removed sod to see what may have caused this. During mid and late Summer it looked fine as seen here, and then began slowly dying back in that one small discreet area. It may very likely be that a natural paving stone path might be in order here, for guests and Puppies? Note the new EcoLawn to the right here looks great too!
Find the right local pro for your project
 Watermark Design Studio LLC
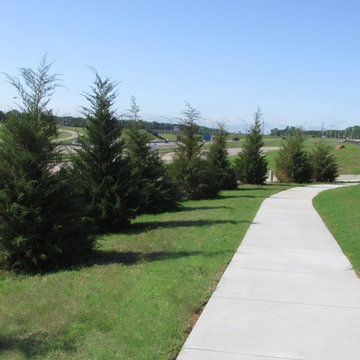
Featured here are pictures of our recently completed commercial project in Edmond. The project involved the removal of over 500 cubic yards of native soil, rock and clay; to make a cut for an enormous retaining wall that we built with Pavestone Company gravity block, and for site prep to accommodate the pad needed for the store. City code required us to install a rail at the top of the wall for safety because of its height. Nearly 50 native trees and 150 shrubs from the local Total Environment Wholesale Nursery set this project in a fairly natural setting as well as a state of the art irrigation system to have adequate water to maintain the health of the plants and Canadian Valley Sod Farm turf installed. The store has had a record breaking launch and will prove to be a welcomed asset to the I-35 corridor. It was a pleasure working with the team from Whataburger and the attentive engineers from the City of Edmond.

 Optic Verve LLC
When we first removed the lawn and piled up the soil, neighbors were wondering what the hell we were doing. Less than a year later, they are stopping by asking for plant identifications, and gardening advice. The best part of projects like this is that they often help softening HOA restrictions, a little bit at a time.
 River Valley Landscapes
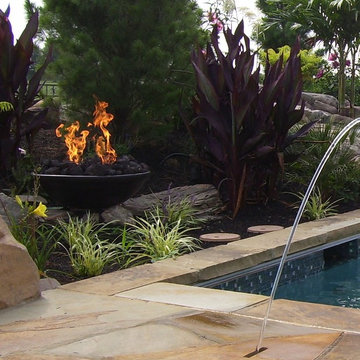
 This project was the result of the owner’s desire to install a swimming pool and outdoor living space inspired by tropical resorts they had visited on family vacations. The one element asked for specifically was a large waterfall spilling into the pool. The challenge for the designers was how to achieve the look the owner’s wished without the use of clichéd items such as thatched huts and tiki torches. The designers decided lush full plantings using plants found in the northeast region that met certain design criteria would be the primary way of giving the tropical feel. Boulder outcroppings, irregular stone paving and fire bowls along the back of the pool would complete the look.
The property is located in a newer subdivision with homes on both sides and a school to the rear. A walkway connects the neighborhood and the school along one side. The desired privacy would be addressed by the placement of plants and trees around the perimeter in mounded beds. Placing the waterfall to the rear of the pool helped block the view of the school beyond. The township had restrictions on the amount of impervious material allowable on site. The patio was designed to the maximum allowable size with square footage going to where it would be most usable. Planting beds were cut into the patio to decrease unnecessary square footage, divide spaces, and allow for more places to add plants and trees.
A rectangular swimming pool was chosen to make it easier to install an automatic pool cover. The pool was designed, with input from the landscape designers, and contracted separately by the owner. The landscape designers chose the location of pool and waterfall so that it was prominently placed to be the focal point of the backyard. The pool includes a curving sunbathing shelf running from end to end, finished in a lighter color to make it more visible, with removable umbrellas for shade and to add to the resort feel. To tie into the boulders used throughout the design, a large boulder was used as a substitute for a diving board. The yard sloped down towards the back of the property which required a large amount of soil to be added and large boulder retaining wall along the back.
For the planting design, the designers choose to focus on plants with larger leaves, various leaf colors and textures, and plants with large flowers in bold colors. These plants were then arranged into a loose lush planting scheme mixed with more traditional northeast plants such as pines, grasses, and roses. Unique plants such as hardy bananas were added for their tropical and exotic look. The full planting beds help to nestle in and enclose the living space.
Broken flagstone was chosen for the patio and intentionally left irregular at the edges. PA flagstone was avoided and a stone with gold and brown tones was chosen. Boulder outcroppings added to the natural and tropical theme. The fire pit was designed with a large built-in bench to increase the amount of seating. The designers chose a rounded smooth shape and incorporated the same stone as the pool coping for the caps and bench. For entertaining guests the outdoor kitchen was outfitted with a large gas grill, beverage taps, refrigerator, sink and a dedicated lobster cooker. The kitchen was finished with granite countertops and stainless steel cabinets. Two strategically placed fire bowls, along with the low voltage lighting, add additional interest to the space at night.
While the designers were faced with many challenges the resulting design incorporated enough elements to achieve the desired look and feel. Using plants appropriate to the northeast that fit the design criteria and carefully choosing hardscaping materials was essential. The owner’s feel they now have their own tropical theme resort right in their Pennsylvania backyard.
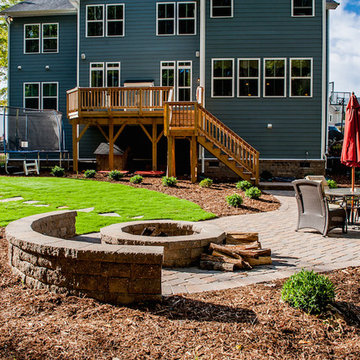



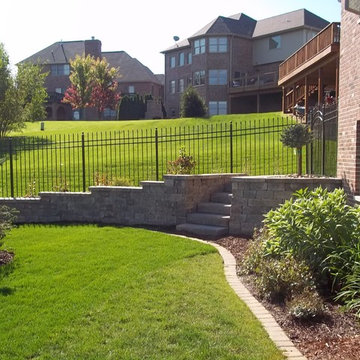
 Forest Landscaping
This client contacted us with a two fold purpose. The first was that his yard was constantly wet no matter how much or how little he irrigated, which kept him and his pets from enjoying the yard. The second was to give him and his wife a patio that fit the space well. We designed a retaining wall that diverted water away from his property that was draining off several neighbor's lots onto his. Along with excavating and removing some poor soils, this succeeded in drying out what had previously been a saturated and largely unusable backyard. We also designed a spacious, curved layout that compliments the rolling nearby terrain. We also sealed the hardscape elements to give it a lustrous, wet look without making it slippery!
 Tile Doctor Ltd
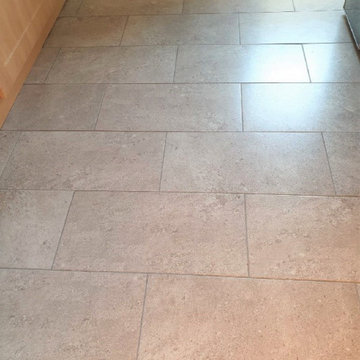
The owners of this house in Adwick Le Street, which is North of Doncaster, were fed up with the appearance of the Grout in their Ceramic tiled kitchen floor. They had not been able to keep the grout clean and it was now patchy, discoloured, darker and consequently always looked dirty.
I visited the property, to survey the floor and could see the Ceramic tiles and where in good condition, but the grout lines were really letting the kitchen down. I discussed with my client the option of re-colouring the grout, which they agreed was sensible, anything to keep the impossible grout clean. The alternative of scraping out the grout and replacing would be a messy and time-consuming option which we both agreed was not the choice they wanted to go for. I gave them a price to complete the work which they were happy to go ahead with.
Before any grout colouring could be done the grout first needed to be prepared, this was done using Tile Doctors Grout Colourant Pre-Treater which is an acid-based cleaner specially made for the job. This product cleans and prepares the grout for the colourant to ensure a better contact with the colourant later. It’s very simple to apply and is simply sprayed onto the grout lines, left to dwell for five minutes and then scrubbed into the grout by hand. Once done the soiled pre-treater is rinsed off with water and removed with a wet vacuum.
Once the grout lines are dry, they are ready to be coloured, unfortunately this is a manual process which take a lot of attention to detail and can be quite tedious. The best way of doing it I have found is go get down on your hands and knees with a toothbrush and gently scrub the colourant into each grout line, any colourant that seeps over onto the tiles needs to be quicky wiped away before it dries. The one upside however is observing the highly satisfying transformation of the grout as the result is instant and you can see the improvement as you go along.
There are ten grout colours of Tile Doctor Grout Colourant to choose from and in this case the owners had chosen Natural Grey. If you want to save a few points they also sell a Grout Colourant kit that contains both the colourant and the pre-treater. The grout colourant is epoxy based so it remains water and stain proof and will last for years.
I’m not sure the pictures I took do the transformation justice, but my client was over the moon with the difference it had made to the floor. The patchy grout was gone and then whole room seemed brighter.
For regular cleaning I recommended the use of Tile Doctor Neutral Tile Cleaner which will keep the floor looking good but is gentle enough to use every day and won’t compromise the colourant.
Matthew Lovett
South Yorkshire Tile Doctor
 RECO ROBERTS ELECTRIC
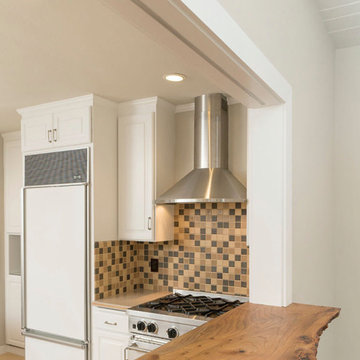
This Rockridge home received not just a remodel, but a transformation. The house was built on a hillside, so it required major excavation and soil removal, along with piers and a concrete retaining wall, to prevent a potential mudslide. The two-bedroom, one-bath home increased its square footage by 963 sq ft, adding a master suite, another bathroom and two walk-in closets. RECO worked closely with the contractor on this project. We installed overhead lighting throughout the living areas of the home that is controlled by a remote lighting control system.
The results of this transformation: A home that’s lighter, brighter, safer and more accessible. The owners are delighted with their more livable new space.
 Pennsylvania Landscape & Nursery Association
Terran Landscapes http://www.terranlandscapes.com
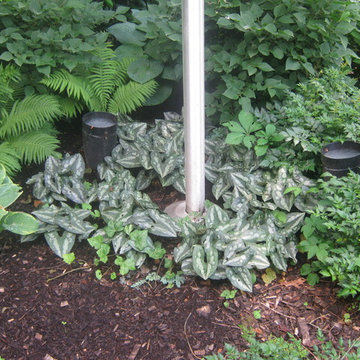
Project Entry: Fishers Woodland Garden
2014 PLNA Awards for Landscape Excellence Winner
Category: Theme Garden $15,000-$30,000
Award Level: Bronze
Photo Description:
We were contracted by the client to design a calming space for their staff to relax, take a walk, and enjoy a leisurely lunch as well as to provide their grandchildren a place to run and pick flowers. The space was originally dominated by large trees and had been overgrown with ivy, sumac and aggressive vines, providing an unwelcome, dark space with little color or visual appeal. The client requested a colorful blend of shrubs and perennials that would provide interest throughout the seasons, as well as provide privacy by screening the street traffic along Carisbrooke Road.
Our goal was to create the privacy screen along the road by layering plants from the ground to the tree canopy. The theme was to let nature inspire the landscape, allowing a space that was originally woodland to become an enhanced version of itself, creating a beautiful habitat for birds and butterflies to excite the senses and satisfy all who enjoy the beauty of nature.
We began by clearing the brush and removing all aggressive vines and ivy that jeopardized the health of the trees. We kept and transplanted all non- invasive or native plant material in the area to various locations throughout the property. Several yards of compost were then tilled into the soil and the existing trees fertilized to provide a rich growing environment.
A few challenges occurred during the design process. It was decided that a new generator was to be installed in the woodland and due to a future addition to the house, we were forced to eliminate planned additional impervious pathway surfaces. We provided screening to hide the generator and buffer the noise, and created a meandering path and sitting area out of natural woodchips instead of the proposed bluestone to solve the impervious space issue. The woodchips add a sense of informality and invite the viewer to walk slowly through the space. The reduced noise from the additional screening of the generator allows for quiet reflection as chipmunks scurry and hummingbirds dart about between the flowers.
Our plant palette consists of shady understory plants that thrive and flower vigorously from spring through fall. A tall, lush, evergreen backdrop of Ilex opaca and Prunus laurocerasus ‘Schipkaensis’ provides the screening and blends into a middle layer of ‘Ivory Halo’ dogwood, hydrangeas and winterberry hollies. Beautiful perennials and groundcovers bloom along the woodland path, providing a low visual layer of color and texture. Movement throughout the garden is provided by the graceful Calamagrostis brachytricha and Hakenchloa that soften the nearby hardscaping. The woodland floor is full of shade-loving Solomon’s seal, hosta, astilbe, ferns, bleeding heart, Tiarella and Aconitum.
The street side of this woodland required plants with a preference for a little more sun and drought tolerance. A palette of oakleaf hydrangea, Agastache, Liatris and Rudbeckia softens the fence line and provides the desired color.
As designed and installed, the woodland garden successfully provides the client’s family and office staff a quiet space where they can take a peaceful moment and enjoy nature.
Photo Credit: Lisa C. Falls
 Paradise Found Construction
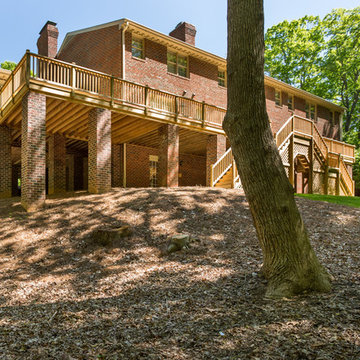
Over the years, the deck of this large executive home had been slowly pulling away from the house. Many of the 2 ft. x 2 ft. masonry support piers had begun to sink and lean in various directions. Unfortunately, the problem wasn’t isolated to just the deck support columns. An inspection of the columns supporting the adjacent Sunroom confirmed that the same structural failures were occurring to all of them.
An excavation of one of the piers and its concrete footer revealed that the Sunroom and half of the Deck columns had been built on soil fill, and were slowly sinking and tilting away from the house. The only permanent solution to keep the Deck and Sunroom from collapsing was to replace the piers and the underlying footers.
The Sunroom and a portion of the Deck were jacked up and supported by wooden cribs until new 2 ft. x 2ft. solid masonry columns could be built to replace the failed ones. In order to create enough bearing support under the footers, galvanized steel helical screws were driven under each column footer to an average depth of 26 feet. Concrete footers were poured on top of the screws, and each footer was tied into the adjacent footer and eventually back into the foundation of the home by a series of stabilizing rebar and concrete cross-tie footers.
Once all 14 of the failed columns were rebuilt, the Sunroom was lowered onto the new support piers. A new deck was built to replace the compromised section, and the rest of the original decking and railings were removed and replaced. After the new wood had been acclimated to weather for several months and allowed to dry out and stabilize, the deck and railings were stained and sealed.
 Tile Doctor Ltd
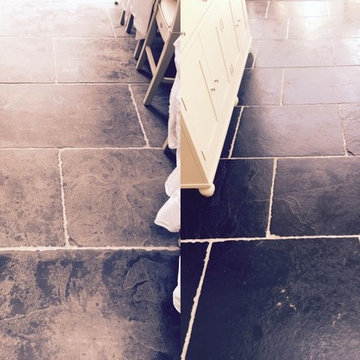
I was recently asked to this property in Wimbledon in to see if there was anything we could do to resolve the problem with a recently laid Black Limestone tiled floor. The builders that had laid the Limestone did not cover or clean the tiles prior to sealing with an impregnating seal thereby trapping in all the dirt from the building works. They then grouted the tiles but didn’t clean the grout off the surface before putting on another two coats of sealer all of which resulted in a very poor finish.
Naturally the customer was not happy so called them back to rectify the problem and so they came back and tried to strip the sealer off with cloths and a chemical stripper. Then without rinsing the stone to remove the chemicals they added another two coats of sealer; in desperation the lady gave up with them and called me in.
To resolve I tried all the sealant strippers available to me but couldn’t budge the mess effectively. The only other option available was to diamond grind the surface so I discussed this with the customer and she agreed to this and left me to carry on.
Initially I started with a coarse 400 grit diamond pad but even that wasn’t having much effect so in the end I had to cut back the surface using a 100 grit pad moving up to 200 grit, then 400 before finally stopping at 800. To lubricate the process you need to use a little water and then rinse away the resultant soil after each pad. If this was a polished stone surface I would have continued with finer and finer grits to restore the surface polish however these tiles were rough limestone and I needed to leave it as near to how it should be.
Once all the Limestone had been stripped back the stone turned an uninviting grey colour, so to bring it back to black I applied two coats of Tile Doctor Stone Oil which enhanced the colour.
I left the floor overnight to allow the Stone Oil to dry out and then returned to seal the Limestone using two coats of Tile Doctor Colour Grow which is an impregnating sealer that enhances the colour in the stone and will protect it from staining going forward.
When the customer saw the final result she was overwhelmed and said she felt like crying with relief, because the floor now looked how she had imagined it to be. It was a great feeling for me to know that I had solved the problems for her.

 Deck and Patio Company "Outdoor Living Experts"
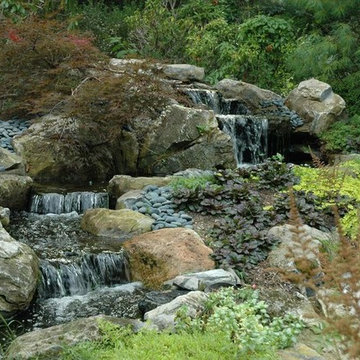
Indeed, Marc Wiener successfully incorporate water features into the existing landscape. When considering color and texture he applied his extensive expertise on how plant material will eventually grow. Here we see low-lying evergreens and ground cover perennials in and around the stream and rock outcroppings which soften the large boulders, which he says would “otherwise stand out and detract from the overall intent of looking ‘natural.’”
Larger flowering plantings were installed behind the water feature to provide accenting and screening. On lower portions of the slope, the water feature was planted with flowers for cutting and small beds for annuals so the client could interact with the stream garden throughout the season.
www.deckandpatio.com
 Colorworks Landscape Design
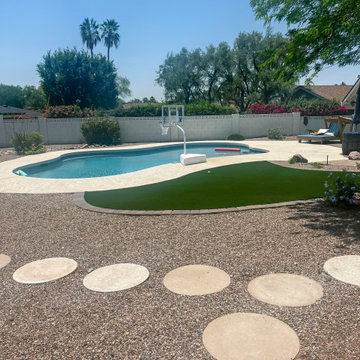
This full-yard transformation brought structure, beauty, and functionality to a property that needed a complete refresh — and the results speak for themselves!
Here’s a peek at what we delivered:
- Removed 35+ plants, mulch, boulders & Saltillo patio
- Installed a 74' retaining wall with steps
- Added drainage basins, drip irrigation & planter sleeves
- Laid over 250 SF of 3-piece pavers in Sierra blend
- Planted 50+ trees and shrubs, including column ficus
- Installed 2,200 SF of 80 oz premium artificial turf
- Integrated granite, soil, and boulders to reshape the landscape
- Low-voltage LED lighting throughout: steps, paths, and features
- Set a statement pottery piece with irrigation + drylock finish
 GARY DUFF DESIGNS,LTD
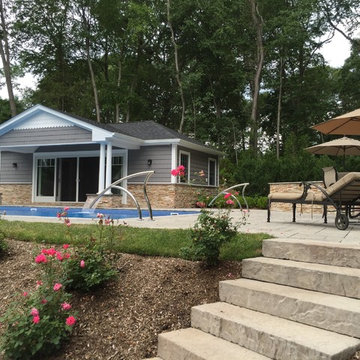
This beautiful landscape design was a unique project. When presented with a very steep incline, a large hill and only approximately 30' of level space, the Gary Duff Designs team got down to work, chopping down trees, and removing barrels of soil. After flattening out the space, this experienced team was able to implement each desired feature, from pool and play area to patio and privacy. This complete re-design and demolition resulted in an intimate, yet open, backyard living space.
 Sustainable Horticultural Environments
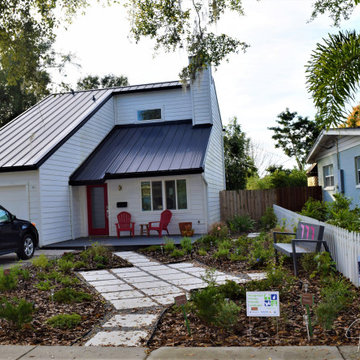
Certified Florida-friendly landscape renovated by removing all gravel, amending the soil, creating a butterfly and pollinator cottage garden with blueberries, flowers, herbs, natives, shrubs, and native Parsley hawthorn tree.
 Align Design LLC
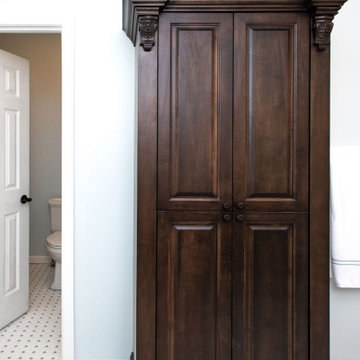
Beautiful detailing on the custom cabinets and vanities add to the luxury of this bathroom.
Inspiration for a large victorian master white tile and ceramic tile porcelain tile, multicolored floor and single-sink bathroom remodel in Other with recessed-panel cabinets, dark wood cabinets, a two-piece toilet, blue walls, an undermount sink, quartz countertops, a hinged shower door, white countertops and a freestanding vanity
Inspiration for a large victorian master white tile and ceramic tile porcelain tile, multicolored floor and single-sink bathroom remodel in Other with recessed-panel cabinets, dark wood cabinets, a two-piece toilet, blue walls, an undermount sink, quartz countertops, a hinged shower door, white countertops and a freestanding vanity
 Art Garden Design
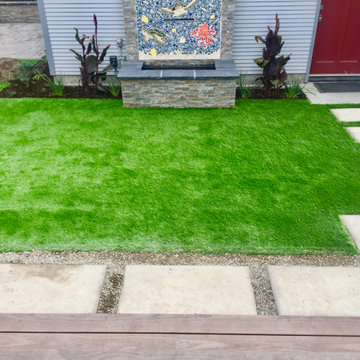
This Berkeley property had overgrown vines, concaving fences, rotted deck, dead lawn, broken concrete, and poor drainage. After removing about 30 yards of soil from this lot, we were able to begin leveling and sculpting the landscape. We installed new concrete pathways, synthetic lawn, custom swing and arbor, Thermory wood decking with metal railings, paver patio with masonry stone wall seating, and stone mosaic water feature with stainless steel wire to match. Many elements tied together nicely in this modern Berkeley backyard.
 Rain Garden Nursery LandscapeMakeoverDesignStaging
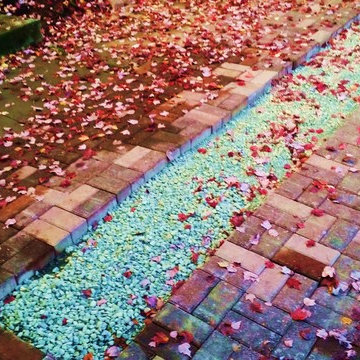
Scott & Catherine Buley, HTT&T, High Tech Turf & Trees, LandscapeMakeover.biz, Rain Garden Nursery. We're suggesting they consider adding pervious turf cells here in the center to stabilize anything from grass, to D.G., decomposed granite, or another porous media. There is a long strip of filled concrete in the middle of the driveway, just two feet wide. It would be equally attractive and "green" to remove it and enough soil to add turf cell paving stones, or a material matching this strip here. Far more attractive and practical then replacing an entire driveway.
33