
Search results for "Remove soil" in Home Design Ideas
 Susan's Edible Garden & Permaculture Design
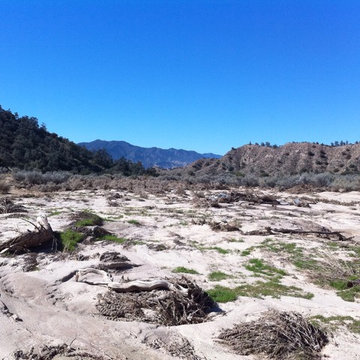
This is the aftermath of a 100 year flood event in the Los Padres National Forest near Goleta, California. While flood events will always happen, they are greatly mitigated with natural forests and native vegetation. But here, the forest was removed 200 years ago by smelting operations. Currently, this land is recovering with the help of Quail Springs Permaculture Demonstration Site. They are working with nature to restore this landscape by installing swales gabions to slow the water so it has time to rehydrate the soil. These low tech water harvesting are applicable on any scale.
 MASB Construction & Remodeling LLC
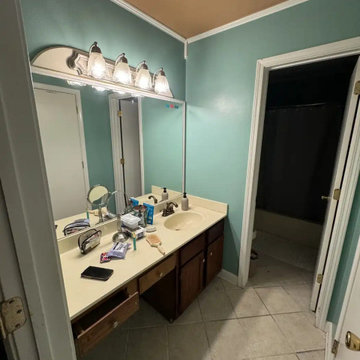
Oklahoma City Bathroom Remodel – Custom Walk-In Shower Renovation (In Progress)
This bathroom remodeling project in Oklahoma City involves a full structural update and layout improvement to modernize an outdated bathroom space.
Scope of work includes:
• Removal of existing tub and shower assembly
• Structural framing adjustments
• Custom walk-in shower installation
• Large-format marble tile installation
• Recessed niche construction
• Updated lighting and ventilation
• Custom storage integration
• Surface waterproofing and leveling
This bathroom renovation is currently in progress and showcases the transformation from original layout to modern custom shower system.
Proper waterproofing, structural alignment, and substrate preparation are critical in Oklahoma homes due to soil movement and foundation shifting. Every step is executed with long-term durability in mind.
MASB Construction & Remodeling provides professional bathroom remodeling services in Oklahoma City, Edmond, Moore, Norman, and surrounding areas.
 Colorworks Landscape Design
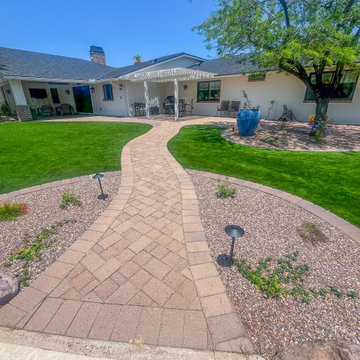
This full-yard transformation brought structure, beauty, and functionality to a property that needed a complete refresh — and the results speak for themselves!
Here’s a peek at what we delivered:
- Removed 35+ plants, mulch, boulders & Saltillo patio
- Installed a 74' retaining wall with steps
- Added drainage basins, drip irrigation & planter sleeves
- Laid over 250 SF of 3-piece pavers in Sierra blend
- Planted 50+ trees and shrubs, including column ficus
- Installed 2,200 SF of 80 oz premium artificial turf
- Integrated granite, soil, and boulders to reshape the landscape
- Low-voltage LED lighting throughout: steps, paths, and features
- Set a statement pottery piece with irrigation + drylock finish
Find the right local pro for your project
 Bianchi Design
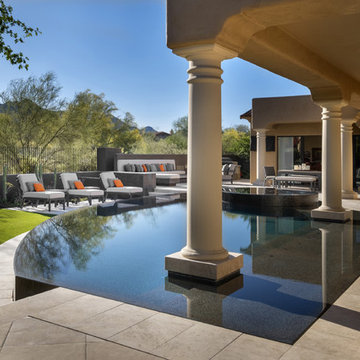
A complete metamorphosis was needed to bring out the buried treasure hidden beneath this yard, and a family of five rattlesnakes had to find a new home!
Here’s the short list of the awkward elements that had to be remedied:
First, the neighbors’ living room window peered perpetually (like, all the time) and directly into the yard with no privacy whatsoever. None.
Second, the vast deep end swallowed up the patio and provided no place for furniture, or walking. Only tripping and treading water was allowed.
Third, the sunken lawn must have been an arena of some sort! Intentionally excavated from natural grade a full -42″ from the patio, for no good reason.
Fourth, the not-worth-a-visit ramada was the focal point for the entire yard. See it up close! It’s gone.
Fifth, the spa was shoved against the farthest wall and provided no invitation. It was so bad, it never had a photo taken! See the statue peeing between the two short columns? It’s over there. Peeing in the corner as all little boys are want to do.
Sixth, the bbq and fire place were non-functional and equally uninviting, and here’s a better view of just how crowded the furniture is. Don’t fall in!
Last, we will not mention the boulder pile droppings distributed around the yard. Oops! Sorry.
The first order of business was to spend several weeks tearing out everything but the pool shell. Then another few weeks were spent wheelbarrowing in a few hundred yards of top soil (there was no access) to fill the matador pit flush to a more relatable -18″. The large gaping trough was then discretely hidden with large removable stones, so it was out of sight but still serviceable.
Second, the neighbor was screened instantly with a row of mature Texas Ebony trees in a raised planter, that also housed a sculptural ironwood tree as the focal point of the property, soon to be reflected in the pool’s richer Midnight Blue pebble tec finish.
A hundred or so yards of shotcrete filled not only the reclaimed deep end, but also created a sun shelf and spa ledge, now the focal jewel in the foreground as a 360 overflow vanishing edge spa clad in Pewter glass tile from Oceanside Glass, and viewed from all the interior living spaces.
The BBQ was tucked around the corner out of sight but still easy access. The fireplace for two gave way to a large inviting built in banco, with a splashes of colorful fabrics to draw one out. The fire pit serves about 10 people easily, for hours at a time.
Last but not least, the foreground of the pool became a sweeping entry shelf extending the full length of the pool, bedecked with fiberoptic starlights and six glowing bubblers set low, to just barely break the surface of the water, giving a lovely and tranquil sound while sleeping away with all retractable doors wide open.
Simple. Serene. Self-evident. That is the remedy.
If your project needs a similar touch, more or less, drop me a line and we’ll figure out a plan.

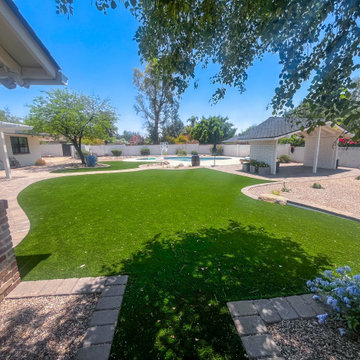 Colorworks Landscape Design
This full-yard transformation brought structure, beauty, and functionality to a property that needed a complete refresh — and the results speak for themselves!
Here’s a peek at what we delivered:
- Removed 35+ plants, mulch, boulders & Saltillo patio
- Installed a 74' retaining wall with steps
- Added drainage basins, drip irrigation & planter sleeves
- Laid over 250 SF of 3-piece pavers in Sierra blend
- Planted 50+ trees and shrubs, including column ficus
- Installed 2,200 SF of 80 oz premium artificial turf
- Integrated granite, soil, and boulders to reshape the landscape
- Low-voltage LED lighting throughout: steps, paths, and features
- Set a statement pottery piece with irrigation + drylock finish
 Deck and Patio Company "Outdoor Living Experts"
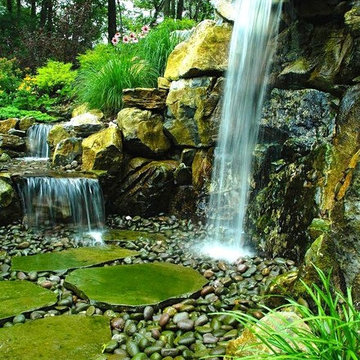
Here, Deck and Patio replaced an old double 4-foot wooden retaining wall and water slide with a 7-foot-high water feature.
“When we did this project, we actually removed an existing slide that went in to their old pool,” says Dave Stockwell. “Instead of adding a new slide, we used the space for a ‘pond-less’ waterfall system by Aquascape that filters and collects water flow underground and recirculates it. We even added a stepping stone path in front of the waterfall so they can stroll right past it — as if they were on vacation in the Caribbean or the like.”
www.deckandpatio.com


 Art Garden Design
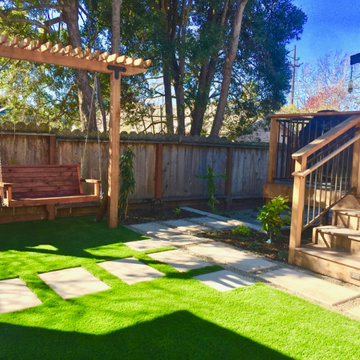
This Berkeley property had overgrown vines, concaving fences, rotted deck, dead lawn, broken concrete, and poor drainage. After removing about 30 yards of soil from this lot, we were able to begin leveling and sculpting the landscape. We installed new concrete pathways, synthetic lawn, custom swing and arbor, Thermory wood decking with metal railings, paver patio with masonry stone wall seating, and stone mosaic water feature with stainless steel wire to match. Many elements tied together nicely in this modern Berkeley backyard.
 Brian-Kyles Landscapes of Distinction
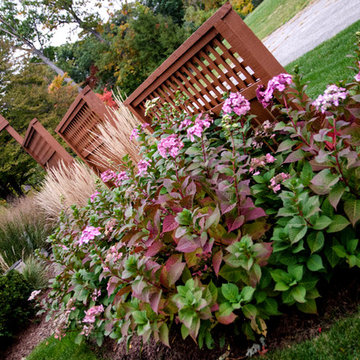
Trellises create an element of privacy.
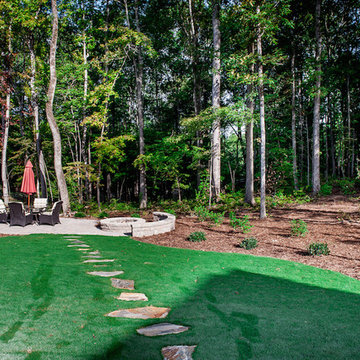
Once a heavily wooded area near a ravine, we transformed this lot into a functional and aesthetic landscape with old world charm. Trees were removed that overshadowed the beautiful house, trellises were installed for privacy in the growing development, and over 1,000 yards of soil were trucked in to create varying levels of backyard leading down to the Rocky River.

 User
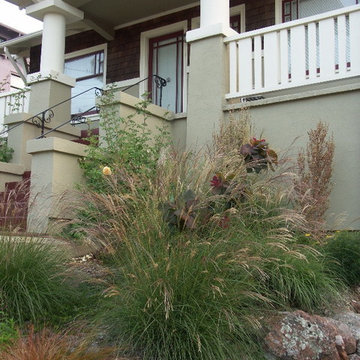
UserWe encountered two design challenges in this original 1916 Oakland bungalow. Existing concrete walls and all the topsoil had been removed, creating a very steep slope. Our job was to bring the space back to the architectural jewel it could be. We added terraced moss rock walls that enabled us to rebuild soil and create more visual depth in this small space. Paint color from the Sherwin-Williams historical pallet complements plant choices, including yellow climbing Roses, warm rusty red Smoke Bush, and trailing Manzanita. (Installed by Andrew Packer, Acorn Landscaping acorn-landscaping.com)
 Sweet Smiling Landscape Design
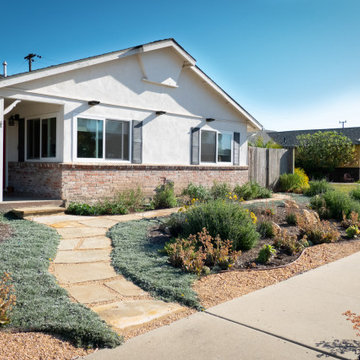
Tiered of the looking out at a shabby brown lawn in their front yard and unwilling to use the water to keep it green these homeowners decided to go for something different. The wife in this household worked from home and was motivated to have a better view from her home office. As an enthusiastic bird watcher, I wanted to give her a view that included happy birds fluttering about. The husband was annoyed by the fact that some of the neighbors allowed their dogs to use this corner lot a toilet without having the curtesy of cleaning up after them.
My job was to create a low water landscape (also known as xeriscape) that attracted birds, bees and butterflies but kept the dogs off. We started with directing down spouts in to catch basins called infiltration swales. These swales capture water storing it in the soil where it can be accessed by plants months after the rains have stopped. Then we integrated primarily California native plants and succulents into the design. Special attention was payed to the water needs of the plants and the ideal growing conditions for each species so that the combination of earthworks and plant choice and placement this landscape can get by with zero supplemental irrigation after the period of establishment this landscape. By incorporating flowering California native plants, native birds and insects flocked to the site in a neighborhood otherwise dominated by lifeless landscapes. By surrounding the garden with decomposed granite and succulents we created a space that was unpleasant and unappealing for dogs to relive themselves while remaining appealing to more human sensibilities.
Today this property sits on the corner in a suburban neighborhood of Goleta, California. Hopefully serving as inspiration to take out lawns and build beautiful gardens that work to integrate the man made landscape with the natural ecosystem in which it is built.
 DREAMscape Outdoors FENCE + PATIO
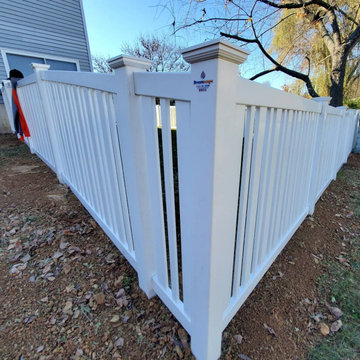
Outdoor Essentials Evanston White Vinyl Picket Fence Installation by DREAMscape Outdoors Hanover, PA.
We do fencing right, by taking our time to ensure it's installed properly, with level posts, proper amount of concrete footers, remove all access soil, & seed when complete. That other contractors in our area do not do this and they rush and half it to get it done, and on to the next because they aren't charging properly just so they can be the low price to get the job...
FOLLOW US on Instagram & Facebook for more inspirational Landscapes & Hardscapes, Decks & Fencing. Watch us & Subscribe on YouTube.
Watch the project here!
https://www.youtube.com/watch?v=5D6kDGongdE

 Brian-Kyles Landscapes of Distinction
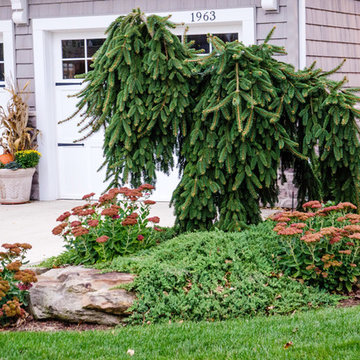
Once a heavily wooded area near a ravine, we transformed this lot into a functional and aesthetic landscape with old world charm. Trees were removed that overshadowed the beautiful house, trellises were installed for privacy in the growing development, and over 1,000 yards of soil were trucked in to create varying levels of backyard leading down to the Rocky River.
 Tile Doctor Ltd
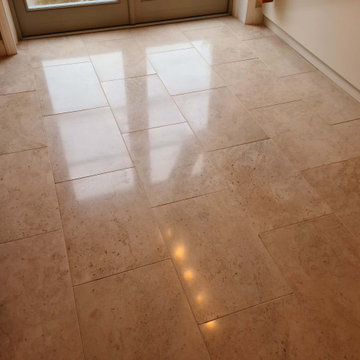
I recently went to survey a floor in Harrogate which I immediately recognised as beige Moleanos Limestone which comes from Portugal. If you have been reading my previous posts you will remember I am not a fan of this type of stone as it is very difficult to clean, polish or seal. This particular floor was laid around 5 years prior and was now looking quite dull and was in need of reviving.
The client didn’t want to spend much so l suggested l could spray burnish the floor to get her shine back again and remove the splash marks. We do this a lot for owners of polished stone floors as part of an annual maintenance package, it is a low cost option that uses a very fine 3,000 grit burnishing pad to renovate the stone and bring up the shine. However, I pointed out to her that this process wouldn’t clean her grout which was making her floor look scruffy.
I priced up the different options and after weighing up the quotes I’m pleased to say she decided to go for a full clean and seal. The full process involves the use of different grades of diamond encrusted burnishing pads from low to very fine grits to renovate the Limestone and also a chemical clean of the grout followed by a fresh seal.
I returned on the scheduled date and after preparing the floor I started cleaning the Limestone by running over the tiles with a 400-grit coarse burnishing pad lubricated with water. The soil was rinsed off with more water and extracted with a wet vacuum. This process was repeated with the 800 and 1500-grit pads which starts to build-up the polish on the stone.
I then turned my attention to the grout with a strong dilution of Tile Doctor Pro-Clean which was left to soak into the grout for ten minutes before scrubbing it by hand with a stiff brush. After a final rinse and extraction with the wet vacuum the tile and grout were looking much cleaner and was left to dry off overnight.
On Day 2 I stated with the application of the 3,000-grit pad which is the last step in the polishing processed and builds up a lovely satin finish on the stone floor. This is done using only a little water and is basically the spray burnish technique I referred to earlier. This process has the added advantage of leaving the floor dry.
With the stone tiles looking lovely and the grout clean the last step was to seal it all in and protect it from dirt and future staining with the application of a sealer. For this I used two coats of Tile Doctor Ultra Seal.
My client was very pleased she had spent the extra money to achieve the floor she had always wanted, apparently it had never looked this good even when new. We discussed the annual maintenance plan to ensure the floor remained looking this good.
Nigel Stoker
North West Yorkshire TIle Doctor
 Sweet Smiling Landscape Design
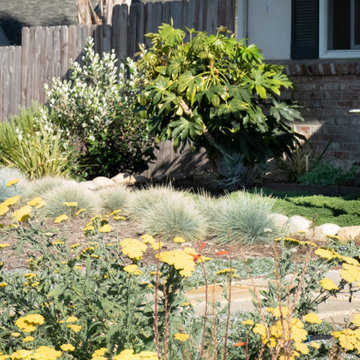
Tiered of the looking out at a shabby brown lawn in their front yard and unwilling to use the water to keep it green these homeowners decided to go for something different. The wife in this household worked from home and was motivated to have a better view from her home office. As an enthusiastic bird watcher, I wanted to give her a view that included happy birds fluttering about. The husband was annoyed by the fact that some of the neighbors allowed their dogs to use this corner lot a toilet without having the curtesy of cleaning up after them.
My job was to create a low water landscape (also known as xeriscape) that attracted birds, bees and butterflies but kept the dogs off. We started with directing down spouts in to catch basins called infiltration swales. These swales capture water storing it in the soil where it can be accessed by plants months after the rains have stopped. Then we integrated primarily California native plants and succulents into the design. Special attention was payed to the water needs of the plants and the ideal growing conditions for each species so that the combination of earthworks and plant choice and placement this landscape can get by with zero supplemental irrigation after the period of establishment this landscape. By incorporating flowering California native plants, native birds and insects flocked to the site in a neighborhood otherwise dominated by lifeless landscapes. By surrounding the garden with decomposed granite and succulents we created a space that was unpleasant and unappealing for dogs to relive themselves while remaining appealing to more human sensibilities.
Today this property sits on the corner in a suburban neighborhood of Goleta, California. Hopefully serving as inspiration to take out lawns and build beautiful gardens that work to integrate the man made landscape with the natural ecosystem in which it is built.
 Billdr Renovation
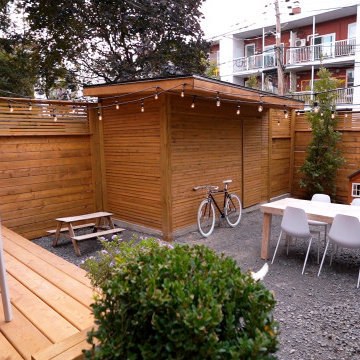
The aim of this project was to bring intimacy and versatility to a duplex backyard with the addition of a new patio, garden, shed, and fence, sourced from treated wood. This project involved removing the existing soil, landscaping, installing fences, building a patio and a shed. The client also took the opportunity to install a charging station for their electric vehicle.
 Black + Vernooy Architects
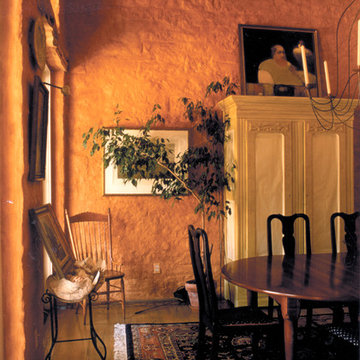
Inspired by the owners' travels in the Mediterranean region yet rooted firmly in Texas soil, this single family residence is designed to provide a secluded, comfortable environment for observing nature, relaxing, entertaining, living, and working. The oddly shaped site determined a house that is removed from the street, resulting in a long drive through a wooded area that leads to the gently sloping house site. The house is designed around a large, central public living area. The basic "H" shaped plan reaches out to define the entry court as well as the rear yard area. The building can only be seen in small vignettes as one moves around and through it, and is finally understood from inside the main room. The public space is central to the plan, where rooms overlay and flow through and into one another. Private rooms are tucked away in more remote parts of the site. The guest bedrooms are located at a slightly lower level, and a remote study, reached by a ship's ladder, overlooks the main living area and enjoys its own roof terrace. The central part of the house is designed as a solid, strong, "original" building to which other wings are added as if built over time. The client desired that the house appear to be of no discernible style or period, and seem older rather than newer.
Built By: Dalgleish Construction Co.
Photography By: Paul Bardagjy
 Tile Doctor Ltd
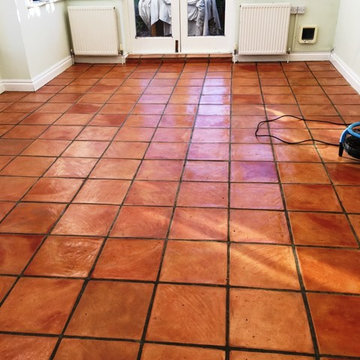
This couple, who live in the seaside resort of Brighton, had purchased their house four months before Christmas and wanted to have the fantastic Terracotta tiled floor in the kitchen and conservatory looking its best before the festive period, since they had family visiting. The floor was looking washed out and it was clear the sealer had failed in the high traffic areas and was now allowing dirt to penetrate into the pores of the tile making it difficult to clean.
We often get calls from new home owners keen to put their own stamp on a property shortly after moving in; stone floors rarely come with cleaning instructions so if you have a stone floor it makes sense to get in touch, so we can advise you on how best to maintain it.
We provided a quote which included stripping the floor of old sealers, cleaning, oiling and then sealing it again to restore cleanliness and character to the Terracotta. There was a lot to do and two areas to clean so I anticipated it would take four days to complete.
Having accepted the quote our first task upon returning to the property was to give the Terracotta tiles a deep clean and remove any remaining sealer present on the tile. This was achieved by applying a strong combination of Tile Doctor Pro-Clean and Tile Doctor NanoTech HBU to the tiles and then covering it in a plastic sheet, so it wouldn’t dry out. This method allows the products to really soak into the pores of the Terracotta and draw out the dirt. I should also mention that Pro-Clean is a very effective Tile and Grout cleaner whilst HBU enhances it by adding nano-sized cleaning particles.
The plastic blanket was left in place for a few hours before being peeled off and then the cleaning products scrubbed into the tile and grout using a black pad fitted to a rotary floor machine and hand brushes. The now soiled product was rinsed off with water which was then extracted using a wet vacuum. The floor was inspected, and stubborn marks spot treated until the floor was clean.
After thoroughly cleaning the Terracotta over two days, we left the floor to completely dry off over the weekend. The tiles would need to be sufficiently dry to receive fresh sealant, as excess moisture can cloud the sealant and prevent it from working correctly.
When we returned to the property, we proceeded to apply Tile Doctor Stone Oil to the tiles. Stone Oil is a sealer which restores the colour and texture of tiled floors, as well as mechanical strength once cured.
We applied a single coat of the Stone Oil before topping it up with multiple coats of Tile Doctor Seal and Go, a topical sealer which provides a high-quality sheen finish to help accentuate the appearance of the Terracotta tiles as well as adding protection.
You can see the results of the restoration below. The couple were so impressed that they have now agreed to have Tile Doctor visit once a year (at a fraction of the cost of the original restoration) to complete a maintenance clean. This will make sure this Terracotta is always looking at its best!
Mick Conlon
East Sussex Tile Doctor
 River Valley Landscapes
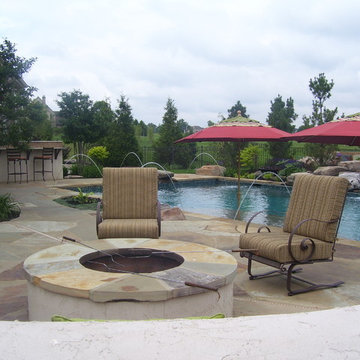
 This project was the result of the owner’s desire to install a swimming pool and outdoor living space inspired by tropical resorts they had visited on family vacations. The one element asked for specifically was a large waterfall spilling into the pool. The challenge for the designers was how to achieve the look the owner’s wished without the use of clichéd items such as thatched huts and tiki torches. The designers decided lush full plantings using plants found in the northeast region that met certain design criteria would be the primary way of giving the tropical feel. Boulder outcroppings, irregular stone paving and fire bowls along the back of the pool would complete the look.
The property is located in a newer subdivision with homes on both sides and a school to the rear. A walkway connects the neighborhood and the school along one side. The desired privacy would be addressed by the placement of plants and trees around the perimeter in mounded beds. Placing the waterfall to the rear of the pool helped block the view of the school beyond. The township had restrictions on the amount of impervious material allowable on site. The patio was designed to the maximum allowable size with square footage going to where it would be most usable. Planting beds were cut into the patio to decrease unnecessary square footage, divide spaces, and allow for more places to add plants and trees.
A rectangular swimming pool was chosen to make it easier to install an automatic pool cover. The pool was designed, with input from the landscape designers, and contracted separately by the owner. The landscape designers chose the location of pool and waterfall so that it was prominently placed to be the focal point of the backyard. The pool includes a curving sunbathing shelf running from end to end, finished in a lighter color to make it more visible, with removable umbrellas for shade and to add to the resort feel. To tie into the boulders used throughout the design, a large boulder was used as a substitute for a diving board. The yard sloped down towards the back of the property which required a large amount of soil to be added and large boulder retaining wall along the back.
For the planting design, the designers choose to focus on plants with larger leaves, various leaf colors and textures, and plants with large flowers in bold colors. These plants were then arranged into a loose lush planting scheme mixed with more traditional northeast plants such as pines, grasses, and roses. Unique plants such as hardy bananas were added for their tropical and exotic look. The full planting beds help to nestle in and enclose the living space.
Broken flagstone was chosen for the patio and intentionally left irregular at the edges. PA flagstone was avoided and a stone with gold and brown tones was chosen. Boulder outcroppings added to the natural and tropical theme. The fire pit was designed with a large built-in bench to increase the amount of seating. The designers chose a rounded smooth shape and incorporated the same stone as the pool coping for the caps and bench. For entertaining guests the outdoor kitchen was outfitted with a large gas grill, beverage taps, refrigerator, sink and a dedicated lobster cooker. The kitchen was finished with granite countertops and stainless steel cabinets. Two strategically placed fire bowls, along with the low voltage lighting, add additional interest to the space at night.
While the designers were faced with many challenges the resulting design incorporated enough elements to achieve the desired look and feel. Using plants appropriate to the northeast that fit the design criteria and carefully choosing hardscaping materials was essential. The owner’s feel they now have their own tropical theme resort right in their Pennsylvania backyard.
36