
Search results for "Safe replacement" in Home Design Ideas
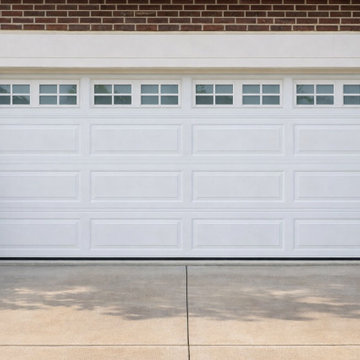
 Evanston Garage Door
This project involved replacing a worn and damaged garage door spring for a homeowner in Evanston, IL. The door had become heavy, noisy, and difficult to lift, creating a safety concern for the family. Our team inspected the system, identified the failing spring, and installed a new high‑cycle torsion spring designed for long‑term durability.
We also performed a full system balance, tightened all hardware, and lubricated the moving components to ensure smooth and quiet operation. The result was a safer, easier‑to‑use garage door with improved performance and reliability.
Projects like this highlight the importance of proper garage door maintenance and professional installation. Our goal is always to provide homeowners with safe, dependable, and long‑lasting solutions.
 Lori Clarke Interior Design Inc.
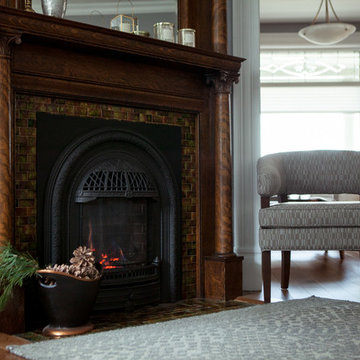
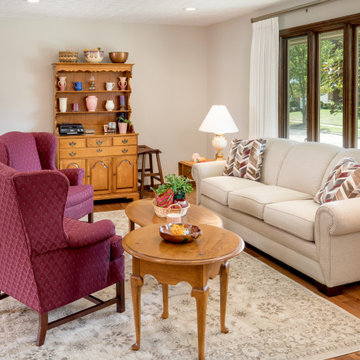
Get Cozy in this Renovated 1870’s Home with Modern Classic Charm
The Challenge: Replacing and rebuilding an entire floor to coincide with the style and charm of the historic home
For a lot of people, nothing can compare to the charm and warmth of a unique heritage property. As an interior designer, it is remarkable to walk into a home that was built in Fredericton during the 1870s. To be surrounded with such architectural details is a designer’s dream, so you stop and pause and realize the character, charm and warmth should never be comprised, it must be protected. I had every intention of doing so, I wanted to bring the space under renovation back to a luster and original beauty by providing a modern yet classic appeal.
The first thing I noticed was the wasted space that we could capitalize on. The bay window was the perfect backdrop for a custom window bench and the current heritage bookshelves required symmetry, so a decision to build an adjoining custom piece was designed. The floors required complete replacement and the entrance tile was outdated and did not align with the hardwood floor.
With a heritage home renovation comes special challenges that don’t normally present themselves in a newer home renovation. Unfortunately, the original floor had to be replaced, it could not be salvaged. We chose a warm hickory hardwood that aligned perfectly with the warmth and comfort of the home. The entrance tile…took some convincing. In the end the home owners agreed to my recommendation of Casa Roma tile.
The real challenge came when the floor had to be replaced, there were so many issues from rotten wood to uneven floor joists. The contractor and his team were meticulous, ensuring the new floor was safe, balanced and aligned to perfection with the adjoining floor. The entrance floor was removed and a seamless transition from tile to hardwood was perfected. The result – true perfection, like the hardwood and the tile had been married together for years.
The adjoining custom piece was designed to house the electronics in the room but with a great deal of detail to ensure it appeared to have always been there. The real challenge was matching the stain to the existing bookcases, there was no stain on the market that matched. A call to Fredericton’s Stain Doctor and the perfect stain was custom created.
I utilized the colour undertones in the home owners art collection to create the colour palate. I wanted to ensure the furniture and furnishings were worthy of this magnificent home. I developed a soft, warm palate of greys, blues and lavender using different textures yet providing a cozy, modern and classic appeal.
I can’t imagine anyone not wanting to curl up in either of these rooms with a good book, a glass of wine, get lost and let the world go by
Bang On Photography
 Lori Clarke Interior Design Inc.
Get Cozy in this Renovated 1870’s Home with Modern Classic Charm
The Challenge: Replacing and rebuilding an entire floor to coincide with the style and charm of the historic home
For a lot of people, nothing can compare to the charm and warmth of a unique heritage property. As an interior designer, it is remarkable to walk into a home that was built in Fredericton during the 1870s. To be surrounded with such architectural details is a designer’s dream, so you stop and pause and realize the character, charm and warmth should never be comprised, it must be protected. I had every intention of doing so, I wanted to bring the space under renovation back to a luster and original beauty by providing a modern yet classic appeal.
The first thing I noticed was the wasted space that we could capitalize on. The bay window was the perfect backdrop for a custom window bench and the current heritage bookshelves required symmetry, so a decision to build an adjoining custom piece was designed. The floors required complete replacement and the entrance tile was outdated and did not align with the hardwood floor.
With a heritage home renovation comes special challenges that don’t normally present themselves in a newer home renovation. Unfortunately, the original floor had to be replaced, it could not be salvaged. We chose a warm hickory hardwood that aligned perfectly with the warmth and comfort of the home. The entrance tile…took some convincing. In the end the home owners agreed to my recommendation of Casa Roma tile.
The real challenge came when the floor had to be replaced, there were so many issues from rotten wood to uneven floor joists. The contractor and his team were meticulous, ensuring the new floor was safe, balanced and aligned to perfection with the adjoining floor. The entrance floor was removed and a seamless transition from tile to hardwood was perfected. The result – true perfection, like the hardwood and the tile had been married together for years.
The adjoining custom piece was designed to house the electronics in the room but with a great deal of detail to ensure it appeared to have always been there. The real challenge was matching the stain to the existing bookcases, there was no stain on the market that matched. A call to Fredericton’s Stain Doctor and the perfect stain was custom created.
I utilized the colour undertones in the home owners art collection to create the colour palate. I wanted to ensure the furniture and furnishings were worthy of this magnificent home. I developed a soft, warm palate of greys, blues and lavender using different textures yet providing a cozy, modern and classic appeal.
I can’t imagine anyone not wanting to curl up in either of these rooms with a good book, a glass of wine, get lost and let the world go by
Bang On Photography
Find the right local pro for your project
 Accurate America
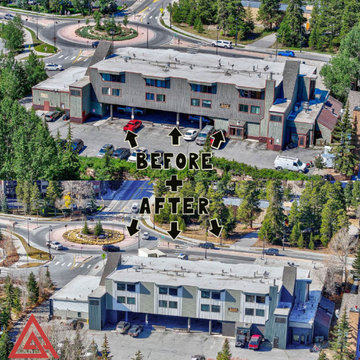
Complete exterior restoration of Blazing Saddles Sunset Condominiums, a multi-family property in Breckenridge, Colorado. Working closely with the HOA, we transformed this mountain community property with a comprehensive renovation while residents remained in place.
Scope of Work:
16,300 sq ft James Hardie lap siding replacement with natural cedar trim
72 Simonton window and door replacements (residential and commercial units)
Full building paint with Sherwin Williams SuperPaint
300 LF gutter and downspout system replacement
Project Highlights:
Coordinating a $394K+ exterior renovation at 9,600 feet elevation required meticulous planning and communication. Our team provided daily resident notifications, maintained safe access throughout construction, and worked efficiently to minimize disruption during Breckenridge's active season. The result: enhanced curb appeal, improved energy efficiency, and a weather-tight building envelope backed by our lifetime workmanship warranty and James Hardie's industry-leading material warranty.

 Joints And Spine Centre
Advanced knee joint replacement surgery performed in a modern medical setup in Ludhiana, Punjab. This project highlights precision implant planning, safe surgical techniques, and comprehensive post-operative rehabilitation to ensure faster recovery and long-term mobility improvement.
 Microworks Handyman
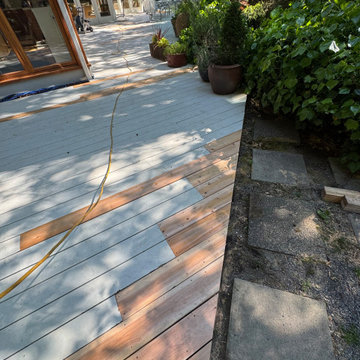
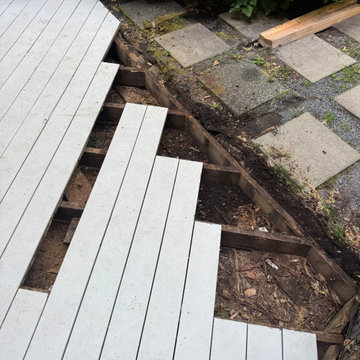
Deck Plank Replacement & Your Entire To-Do List Done! ??️
Start by fixing those rotting, splintered, or warped deck boards that make your outdoor space look tired and unsafe, and let us take care of the rest in one seamless visit. With our Ultimate Handyman Block, your professional will kick off the day with a quick property walkthrough to prioritize your exact needs. We will dive straight into carefully removing the damaged decking, inspecting the joists beneath, and seamlessly securing fresh, durable planks so your outdoor living space is safe, solid, and ready for entertaining. Once your deck surface is perfectly restored, we will use the rest of your reserved session to tackle whatever else is weighing on your mind—from mounting heavy TVs and patching drywall to upgrading door hardware and repairing fences. Professional-grade consumables are fully included in the service, and if your project requires specialty composite boards, hidden fastening systems, or specific pressure-treated lumber, we source them for you and pass the items on with zero markup. It is the ultimate, stress-free way to finally catch up on those nagging repairs and get your property back to 100% in a single day.
 Microworks Handyman
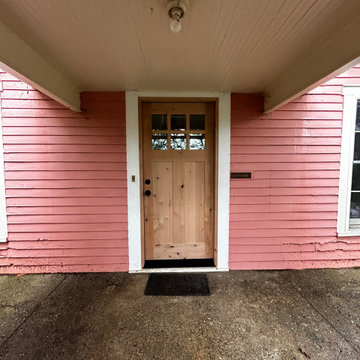
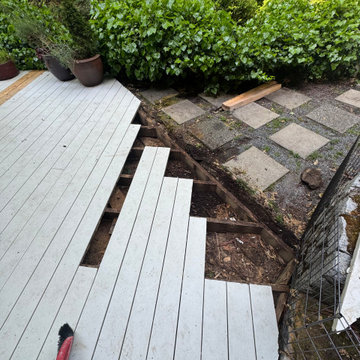
Deck Plank Replacement & Your Entire To-Do List Done! ??️
Start by fixing those rotting, splintered, or warped deck boards that make your outdoor space look tired and unsafe, and let us take care of the rest in one seamless visit. With our Ultimate Handyman Block, your professional will kick off the day with a quick property walkthrough to prioritize your exact needs. We will dive straight into carefully removing the damaged decking, inspecting the joists beneath, and seamlessly securing fresh, durable planks so your outdoor living space is safe, solid, and ready for entertaining. Once your deck surface is perfectly restored, we will use the rest of your reserved session to tackle whatever else is weighing on your mind—from mounting heavy TVs and patching drywall to upgrading door hardware and repairing fences. Professional-grade consumables are fully included in the service, and if your project requires specialty composite boards, hidden fastening systems, or specific pressure-treated lumber, we source them for you and pass the items on with zero markup. It is the ultimate, stress-free way to finally catch up on those nagging repairs and get your property back to 100% in a single day.

 Microworks Handyman
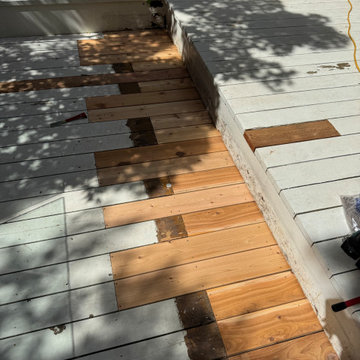
Deck Plank Replacement & Your Entire To-Do List Done! ??️
Start by fixing those rotting, splintered, or warped deck boards that make your outdoor space look tired and unsafe, and let us take care of the rest in one seamless visit. With our Ultimate Handyman Block, your professional will kick off the day with a quick property walkthrough to prioritize your exact needs. We will dive straight into carefully removing the damaged decking, inspecting the joists beneath, and seamlessly securing fresh, durable planks so your outdoor living space is safe, solid, and ready for entertaining. Once your deck surface is perfectly restored, we will use the rest of your reserved session to tackle whatever else is weighing on your mind—from mounting heavy TVs and patching drywall to upgrading door hardware and repairing fences. Professional-grade consumables are fully included in the service, and if your project requires specialty composite boards, hidden fastening systems, or specific pressure-treated lumber, we source them for you and pass the items on with zero markup. It is the ultimate, stress-free way to finally catch up on those nagging repairs and get your property back to 100% in a single day.
 Microworks Handyman
Deck Plank Replacement & Your Entire To-Do List Done! ??️
Start by fixing those rotting, splintered, or warped deck boards that make your outdoor space look tired and unsafe, and let us take care of the rest in one seamless visit. With our Ultimate Handyman Block, your professional will kick off the day with a quick property walkthrough to prioritize your exact needs. We will dive straight into carefully removing the damaged decking, inspecting the joists beneath, and seamlessly securing fresh, durable planks so your outdoor living space is safe, solid, and ready for entertaining. Once your deck surface is perfectly restored, we will use the rest of your reserved session to tackle whatever else is weighing on your mind—from mounting heavy TVs and patching drywall to upgrading door hardware and repairing fences. Professional-grade consumables are fully included in the service, and if your project requires specialty composite boards, hidden fastening systems, or specific pressure-treated lumber, we source them for you and pass the items on with zero markup. It is the ultimate, stress-free way to finally catch up on those nagging repairs and get your property back to 100% in a single day.
 Do Arch LLC
Our Process
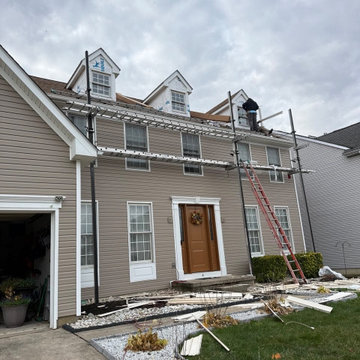
Every siding project we complete follows a structured, detail-focused approach to ensure long-term performance and a clean, high-end finish:
1. Preparation & Protection
We begin by protecting all surrounding areas, including landscaping, walkways, and entry points. This ensures a safe and clean job site from start to finish.
2. Removal of Existing Siding
The old siding is carefully removed and disposed of. During this stage, we inspect the underlying structure for any signs of damage or moisture issues.
3. Surface Inspection & Repairs
We address any compromised sheathing or framing as needed to create a solid, secure base for the new installation.
4. Weather Barrier Installation
A proper moisture barrier is installed to improve energy efficiency and protect the home from water intrusion.
5. Siding Installation
We install Double 4.5" Encore Dutch Lap siding in Natural Clay with precision, ensuring straight lines, tight seams, and consistent spacing throughout.
6. Trim, Shutters & Moldings
All shutters and exterior moldings are carefully reinstalled and aligned, maintaining the home’s original character while enhancing the updated look.
7. Final Detailing & Cleanup
We complete all finishing touches, conduct a full quality check, and leave the property clean and ready to enjoy.
 SUPERIOR CHIMNEY SERVICES CORPORATION
A friend noticed a damp, musty smell coming from her living room fireplace the week after a February thaw. When she called a masonry technician from Superior Chimney, to take a look, and found that water had been working its way behind the bricks for years. What started as a small crack now meant her chimney needed structural repairs before she could safely use it again.
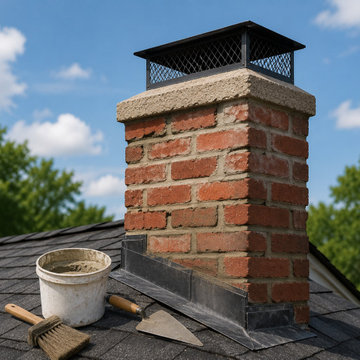
Chimney repairs are any work done to restore the structural and weatherproof condition of a chimney. This can include mortar joint repair, brick replacement, crown repair, flue repair, and cap or flashing replacement. Most Chicagoland homeowners discover the need for chimney repairs often times after winter, when the freeze and thaw cycles have already done its damage. Uncovering the symptoms early is the best way to keep chimney repairs down. Let’s discuss how that can be done.
Why Chicagoland Weather Is Especially Hard on Chimneys
Chicagoland has some of the most polarized weather. One day it’s a blizzard and the next week hot, humid and 100 degrees. That swing in weather conditions and temperatures are the real reasons why chimney repairs are needed.
When moisture from humid and rainy days’ soak into brick and mortar and then freezes, it expands. As it begins to thaw, the materials contract. Repeat that cycle dozens of times in a single Illinois winter and even solid masonry in the chimney starts to crack, spall, and separate from the joints holding it together. This is called the freeze thaw cycle. We’ve talked about it many times over the years, and it continues to be the single biggest reason homes need chimney repairs more often than homes in milder climates.
The Chimney Safety Institute of America (CSIA), the leading nonprofit certifying body for chimney professionals in the United States, notes that water intrusion is one of the most damaging and most preventable problems. If the problem is left to mature, it affects more than the appearance. It compromises the structure itself.
What Do Chimney Repairs Involve?
Not every chimney problem requires the same fix. Chimney repairs generally fall into a few categories. Understanding the difference, helps homeowners have a more informed conversation with the expert technician.
Mortar joint repair or tuckpointing. This involves removing deteriorated mortar between bricks and replacing it with fresh mortar, matched to the original color and texture as closely as possible.
Brick replacement. When individual bricks have spalled, meaning the face has cracked or popped off from trapped moisture, those bricks are removed and replaced.
Crown and cap repair. The crown is the concrete slab at the very top of the chimney. Cracks both big and small let water directly into the chimney flue. Chimney crown repair is often one of the most urgent forms of chimney repairs.
Flashing repair. Flashing is the barrier where the chimney meets the roofline. Loose, damaged or poorly installed flashing is a common source for water leaks. The roof gets the blame as it is the largest piece that covers the house. However, it certainly can be the overlooked chimney.
Flue and liner repair. Cracked flue tiles or damaged liners affect how safely a chimney vents smoke and combustion gases.
When to Know a Chimney Needs Repair
Most chimney damage shows up as small, easy to dismiss way. Let’s take a look at the following list. Be sure to print this out and keep it handy so if/when something happens, you know what to look for.
• Water stains near the fireplace or on the ceiling
• A brownish stain on the wall around your fireplace, or a stain on the ceiling near an exterior chimney. This means water is getting in somewhere it should not.
• Crumbling or missing mortar
• If you can see gaps between bricks, or mortar that flakes off when you touch it
• A leaning or visibly shifting chimney
• A chimney that appears to pull away from the house, even slightly, could indicate a structural issue
• White staining on the brick (efflorescence)
• Chalky white residue left behind as water evaporates out of the masonry. It is a visible sign that moisture is moving through brick
• Rusted damper or firebox components
• Metal parts inside a fireplace that are rusting are a strong indicator that moisture is present
• Debris in the fireplace
• Small chunks of brick, mortar, or tile landing in the firebox
What are the Various Types of Chimney Repair?
This is a compiled list of chimney repairs so you can be aware of what to look for. If you have any questions, contact us directly at 877-244-6349.
Homeowners who schedule chimney repairs at the first sign of trouble typically spend far less than those who wait until water damage reaches the interior of the home. This is a great reason to contact Superior Chimney at 877-244-6349.
Why an Annual Inspection Matters More Than People Think
The CSIA and the National Fire Protection Association both recommend that chimneys, fireplaces, and vents be inspected at least once a year, whether or not the fireplace gets used. This recommendation exists because damage does not take a break just because a chimney sits without any use.
According to data stated by the CSIA, chimney related fires still contribute to tens of thousands of residential fires across the United States each year, and a large share of those incidents can be traced back to deferred maintenance. An annual chimney inspection is what catches the small mortar crack or the hairline crown crack before it turns into a repair bill.
Hiring the Right Company for Chimney Repairs
Not every company who offers chimney repair work has the certified training to diagnose a problem correctly. CSIA certification is the most widely recognized credential in the industry, and it requires technicians to study chimney physics, venting systems, and fire codes. After the studies, the new technician needs to pass an exam and agree to a professional code of ethics.
When you call, be sure to ask:
Are your technicians CSIA certified, and can I verify that certification?
Will you show me photos or video of the damage before starting work?
Does the estimate distinguish between cosmetic repair and structural repair?
At Superior Chimney, we welcome these and other of your questions.
How Chimney Repairs Affect Insurance and Resale
A chimney in poor condition can complicate a home sale or an insurance claim. Home inspectors routinely report on visible mortar loss, leaning chimneys, or missing chimney caps. Some insurers will request proof of repair before renewing a policy on an older home. Addressing chimney repairs proactively protects more than curb appeal. It protects the sale timeline and the claims history associated to the property.
Frequently Asked Questions
How often should a Chicago area chimney be inspected? At least once a year, per CSIA and NFPA guidance, regardless of how often the fireplace is used.
Can chimney repairs be done in winter? Some interior repairs can happen in cold weather, but most masonry repair requires temperatures consistently above freezing. Spring and fall are the most common repair times in the Chicago area.
Is tuckpointing the same thing as chimney repair? Tuckpointing is one type of chimney repair, focused on replacing deteriorated mortar joints.
Does homeowners insurance cover chimney repairs? It depends. Sudden damage from a storm may be covered, while gradual deterioration from lack of maintenance typically is not.
So Finally…
Taking care of your home includes a chimney. Just because you don’t see it every day, doesn’t mean things aren’t happening. Be sure to get a chimney inspection done once per year by a certified and credible company such as Superior Chimney to take care of the issues. Contact us today by calling 877-244-6349.
 Green Gorge Construction
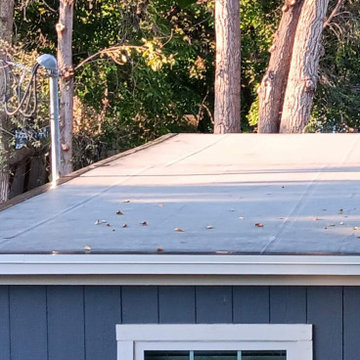
Due to its deteriorating condition, the asphalt roll roofing on this ADU required replacement before the Fall rains. Asphalt roll roofing generally lasts only 5-10 years, leading to ongoing maintenance challenges. The original 1×10 sheathing showed significant sagging in several spots, resulting in standing water not suitable for asphalt. Additionally, there was a complete absence of ventilation after improper installation of R-21 fiberglass insulation, leaving no air gap between the sheathing and insulation. A noticeable hump along the center of the roof indicated that the load-bearing wall had been supporting that section since construction, contributing to light sagging between the walls.
The old roof was completely removed down to the joists, revealing a solid base for the new installation. The central hump was eliminated by shaving the high point along that line. 2×6 beams were ripped in half then nailed on top of the existing joists, creating a 1.5″ gap for insulation and providing strong attachment points for the OSB sheathing, which was secured with screws to prevent any potential issues with nail heads popping through over the roof’s expected lifespan of over 50 years. The EPDM membrane was then adhered using glue and contact cement along the edges of each sheet, with the ends folded over the roof edges and secured with termination bars. Drip edge flashing was added and taped to ensure a water-tight seal, and EPDM-safe caulking was applied over the seams for additional protection. Finally, all exposed wood was primed and painted.
The new roof features a 60mil commercial-grade EPDM rubber membrane, offering a lifespan exceeding 50 years, in stark contrast to the 5-10 year lifespan of asphalt roll roofing.
Using two sheets of EPDM for installation streamlined the process, resulting in one single seam across the entire roof, compared to the asphalt roll’s dimensions of 3 feet wide by 33 feet long, which created 8 vertical seams and 9 horizontal seams—significantly increasing the risk of leakage and failure. Wrapping the rubber over the edge of the roof effectively addressed concerns about water infiltration at the edges, an issue prevalent with the asphalt and drip edge interface.
Another benefit to removing the splitting 1×10 decking and replacing it with OSB sheathing is the increase in structural integrity, moisture resistance, longevity and consistency.
The project successfully transformed the ADU’s roof from a maintenance-prone asphalt roll system to a highly durable 60mil EPDM rubber membrane. By addressing critical structural issues, including sagging sheathing and inadequate ventilation, the team ensured that the new roof not only offers superior water resistance and longevity but also meets higher performance standards for insulation and durability. The replacement process eliminated common weak points, such as numerous seams and poor edge sealing, which were vulnerabilities in the old roofing system. The result is a streamlined, secure installation that provides peace of mind and long-term value, with a lifespan extending well beyond the original roof.
 safe ZOnea
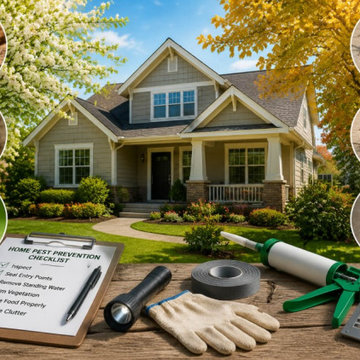
Maintaining a pest-free home requires attention throughout the year. Seasonal changes affect pest behavior, and understanding these patterns can save homeowners from costly damage and health hazards. In this guide, we will explore practical strategies for spring pest prevention tips, ensuring your property stays protected through every season. From spotting early signs to implementing proactive measures, these steps empower homeowners to take control before infestations occur.
Understanding Seasonal Pest Patterns
Pests adapt to changing weather, and knowing their patterns helps prevent infestations effectively.
Spring: Awakening Pests
Spring signals the end of winter dormancy for many pests. Rodents, ants, and termites start seeking food and warmth. Effective spring pest prevention tips include:
● Cleaning gutters and removing debris
● Sealing cracks and gaps in exterior walls
● Inspecting wood piles and compost areas
● Monitoring early signs of termite activity
Pro Tip: Conduct a termite inspection or a professional evaluation to catch infestations early before they spread.
Summer: Peak Pest Season
Warm temperatures accelerate pest breeding cycles. For a comprehensive summer pest prevention guide:
● Maintain lawns and trim vegetation away from homes
● Check window and door screens for tears
● Store food in sealed containers
● Inspect water sources that attract mosquitoes
Do You Know? Mosquitoes can lay eggs in a teaspoon of water. Eliminating stagnant water is crucial to reducing their population.
Fall: Preparing for Winter
As temperatures drop, pests search for warm indoor spaces. Key actions include:
● Inspecting for winter rodent entry points
● Sealing attic vents, crawl spaces, and foundation gaps
● Cleaning storage areas to minimize hiding spots
● Checking chimney and fireplace openings
Quick Fact: Rodents can enter homes through openings as small as ¼ inch.
Seasonal Pest Checklist for Homeowners
Creating a structured seasonal pest checklist simplifies preventive measures and ensures nothing is overlooked.
Season
Key Actions
Spring
Inspect for termites, seal exterior gaps, clean gutters, and check compost
Summer
Repair screens, trim vegetation, remove standing water, and secure food
Fall
Seal entry points, inspect attic/crawlspace, clear debris, and prepare storage
Winter
Monitor indoor activity, keep firewood away from walls, and maintain traps
Inspection & Maintenance Tips
● Schedule annual pest inspections by professional Virginia pest control consultation to detect hidden problems
● Keep a log of pest sightings and treatment dates
● Regularly replace weather stripping and caulk cracks
Note: Even small preventive steps, when consistently applied, drastically reduce infestations.
Common Pests and Their Seasonal Behaviors
Understanding how different pests behave each season helps homeowners take timely action to protect their property.
● Ants and Termites: Ants emerge in spring seeking food, while termites become active and can damage wood unnoticed. Early detection is critical.
● Rodents and Mice: Fall and winter increase rodent intrusions. Block all entry points and keep food sealed.
● Mosquitoes and Flies: Summer creates the ideal breeding environment for mosquitoes. Eliminate standing water and use physical barriers like nets.
● Spiders and Other Insects: Seasonal shifts cause spiders to move indoors. Regular vacuuming and decluttering reduce hiding spots.
Eco-Friendly Prevention Methods
● Use natural repellents like peppermint oil or diatomaceous earth
● Encourage beneficial insects, such as ladybugs, to reduce pest populations
● Plant pest-deterring plants near home boundaries, like marigolds or lavender
Integrated Pest Management (IPM)
Adopt an IPM approach by combining physical barriers, monitoring, and environmentally safe treatments. This minimizes chemical use while maintaining a pest-free home.
Quote: “Prevention is the most effective form of pest control.” – National Pest Management Association
Seasonal Pest Prevention Tools
● Snap traps and humane rodent traps
● Sticky traps for insects
● Outdoor perimeter sprays (eco-friendly)
● Moisture meters to detect early termite or mold problems
Pro Tip: Keep tools organized and accessible to act quickly when pest activity is noticed.
Planning: Annual Pest Calendar
Month
Recommended Action
March-April
Spring pest prevention tips: Inspect, seal, clean gutters
June-July
Summer pest prevention guide: Screens, standing water, food storage
September
Seasonal pest checklist: Seal entries, declutter, prep storage
November
Winter rodent entry points: Monitor indoors, maintain traps
Key Takeaways
● Seasonal awareness prevents infestations and property damage
● Consistent inspections and maintenance are essential
● Simple eco-friendly measures can significantly reduce pests
● Use a structured checklist and calendar for effective prevention
Conclusion
Homeowners who stay proactive and follow spring pest prevention tips, along with year-round monitoring, ensure their properties remain safe and comfortable. Using a summer pest prevention guide, checking winter rodent entry points, and maintaining a seasonal pest checklist ensure your home remains safe and comfortable. Remember to combine inspections, physical barriers, and environmentally friendly methods for the best results.
FAQs
Q1: How often should I perform a termite inspection?
A1: Conduct inspections annually, especially in spring, to detect early signs of termite activity and prevent extensive damage.
Q2: Can pests enter my home during winter?
A2: Yes, rodents and insects seek warmth and shelter indoors. Sealing entry points and monitoring for activity is crucial.
Q3: What is the most effective eco-friendly method for pest prevention?
A3: Using natural repellents, encouraging beneficial insects, and eliminating water sources effectively reduces pest populations without chemicals.
Ensure your home is ready for every season. Schedule a professional Virginia pest control consultation or a termite inspection in Suffolk, VA, today and stay ahead of potential infestations.
Sponsored
Plain City, OH

Kuhns Contracting, Inc.
Central Ohio's Trusted Home Remodeler Specializing in Kitchens & Baths
 NMC Exteriors & Remodeling
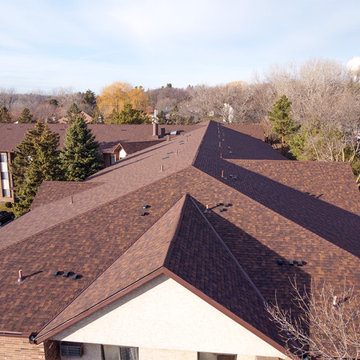
When you own a commercial property, you are responsible for keeping all aspects of the building safe and secure—protecting your tenants, employees, and customers from the hazards of the local climate. The roof of your building is a key factor in maintaining a comfortable and functional facility, and NMC Exteriors provides the commercial roofing services you need in Minneapolis for repairs, replacement, and more.
Get a Commercial Exterior Assessment Today from Our Skilled Team!
 BugleNW
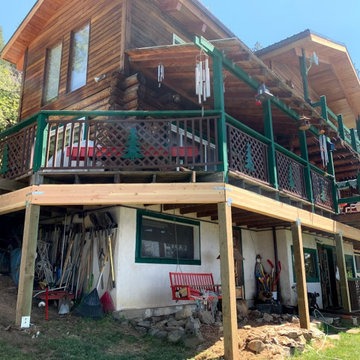
Replaced the old beams and posts to help keep the deck safe
Inspiration for a timeless home design remodel in Other
Inspiration for a timeless home design remodel in Other
 America Green Builders
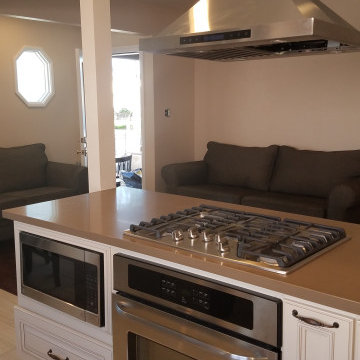
This house had a large water damage and black mold in the bathroom and kitchen area for years and no one took care of it. When we first came in we called a remediation company to remove the black mold and to keep the place safe for the owner and her children. After remediation process was done we start complete demolition process to the kitchen, bathroom, and floors around the house. we rewired the whole house and upgraded the panel box to 200amp. installed R38 insulation in the attic. replaced the AC and upgraded to 3.5 tons. Replaced the entire floors with laminate floors. open up the wall between the living room and the kitchen, creating open space. painting the interior house. installing new kitchen cabinets and counter top. installing appliances. Remodel the bathroom completely. Remodel the front yard and installing artificial grass and river stones. painting the front and side walls of the house. replacing the roof completely with cool roof asphalt shingles.
 America Green Builders
This house had a large water damage and black mold in the bathroom and kitchen area for years and no one took care of it. When we first came in we called a remediation company to remove the black mold and to keep the place safe for the owner and her children. After remediation process was done we start complete demolition process to the kitchen, bathroom, and floors around the house. we rewired the whole house and upgraded the panel box to 200amp. installed R38 insulation in the attic. replaced the AC and upgraded to 3.5 tons. Replaced the entire floors with laminate floors. open up the wall between the living room and the kitchen, creating open space. painting the interior house. installing new kitchen cabinets and counter top. installing appliances. Remodel the bathroom completely. Remodel the front yard and installing artificial grass and river stones. painting the front and side walls of the house. replacing the roof completely with cool roof asphalt shingles.
Sponsored
Plain City, OH
Kuhns Contracting, Inc.
Central Ohio's Trusted Home Remodeler Specializing in Kitchens & Baths
 Maximum Lock & Safe
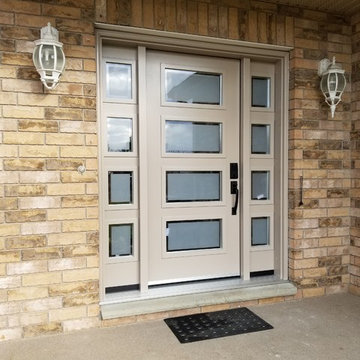
After, new custom paint outside custom fit to opening.
Entryway - mid-sized modern entryway idea in Toronto with a white front door
Entryway - mid-sized modern entryway idea in Toronto with a white front door
 Greystone Custom Homes
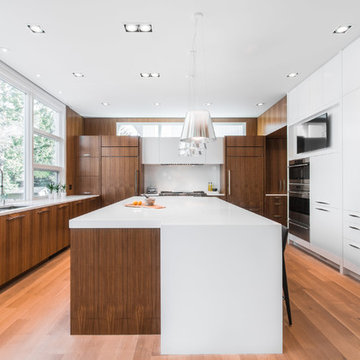
Trendy u-shaped medium tone wood floor and brown floor kitchen photo in Calgary with a double-bowl sink, flat-panel cabinets, medium tone wood cabinets, black appliances, an island and white countertops
 Woodburn & Company Landscape Architecture, LLC
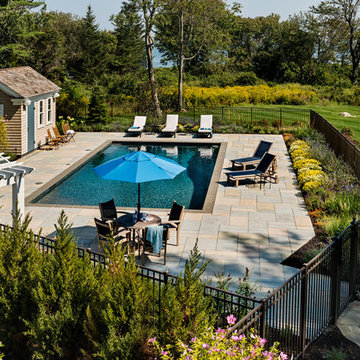
photos by Rob Karosis
Architecture by TMS Architects
General Contractor Castelli Construction, Inc..
Landascape Conteactor Site Structures Landscape
8