
Search results for "Sealing" in Home Design Ideas
 All Surface Restoration
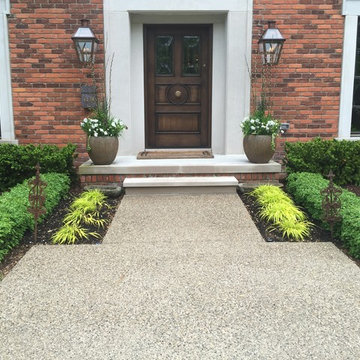
Exposed aggregate walkway after cleaning & sealing with Paver Gloss Sealer.
Design ideas for a mid-sized front yard landscaping in Detroit.
Design ideas for a mid-sized front yard landscaping in Detroit.
 All Surface Restoration
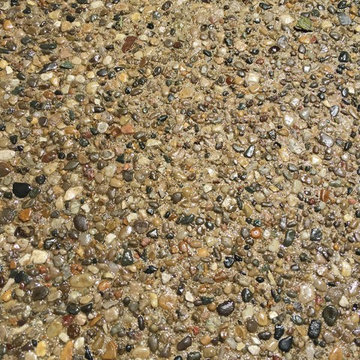
Exposed Aggregate Pool Patio After Sealing With Paver Gloss Sealer
Inspiration for a large backyard patio remodel in Detroit
Inspiration for a large backyard patio remodel in Detroit
Find the right local pro for your project
 All Surface Restoration
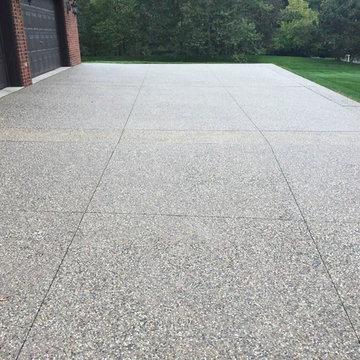
Exposed aggregate driveway after cleaning & sealing with Paver Gloss Sealer.
Inspiration for a mid-sized front yard driveway in Detroit.
Inspiration for a mid-sized front yard driveway in Detroit.

 Reeso Tiles, Inc.
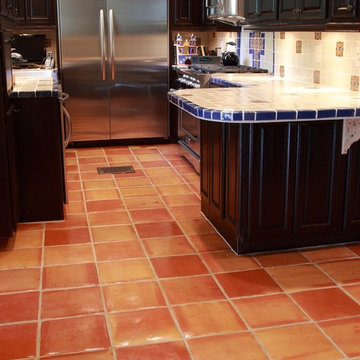
Modern meets classic. The flooring tile in this picture is our 12x12 Saltillo regular square tile in its natural color variations. They are sealed with our oil based sealer (semi gloss). You can also have the Saltillo tile stained and sealed in brick red, antique birch, soft brown, walnut, or white wash. Other sealed options are glossy, and matte.
The beautiful Talavera tile on the kitchen counter and backsplash are in the following patterns:
T31 blue large angle 2x4,
T31 off white 4x4,
SP1 decorative Talavera 4x4 (special design).
Theses tiles are sold per piece.
(Saltillo tidbits: The area of Saltillo Mexico where the tile is made has the proper mix of clay, climate, and dedicated workers to produce one of the world's most popular tiles.
Saltillo tiles are not merely "sundried", they are also kiln fired. The way in which these tiles are stacked and positioned in the kiln produces their natural shading and range of colors. The stripping is caused by the overlapping of tiles when they are stacked in the kiln).
We also carry Saltillo regular square in 4x4, 8x8, and 16x16, or in Super (round edges) in 12x12.
Questions? Message us or call us at 210-736-2634. Check out our website at www.reesotiles.com.
 Our Town Plans
Faith Allen
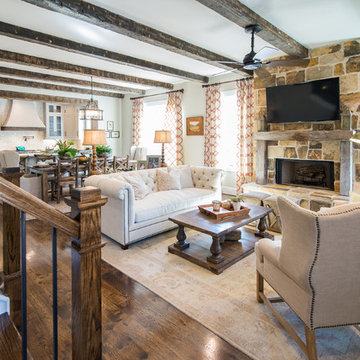
Family room - transitional open concept medium tone wood floor family room idea in Atlanta with white walls, a standard fireplace, a stone fireplace and a wall-mounted tv
Family room - transitional open concept medium tone wood floor family room idea in Atlanta with white walls, a standard fireplace, a stone fireplace and a wall-mounted tv

Sponsored
Delaware, OH

Buckeye Basements, Inc.
Central Ohio's Basement Finishing ExpertsBest Of Houzz '13-'21
 G & S Floor Service
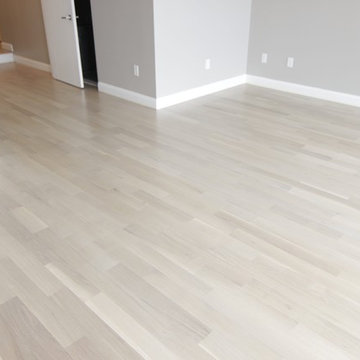
4" select and better, rift and quarter sawn solid white oak hardwood flooring. Scandinavian floor design with Bona NordicSeal and Bona Traffic HD
Sye Phommachanh
 Universal Appliance and Kitchen Center
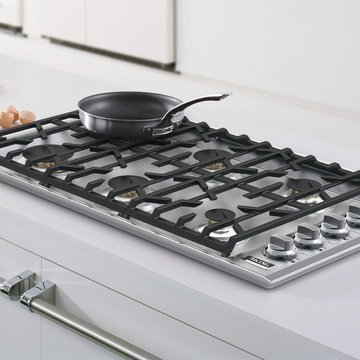
Viking 36" Gas Cooktop - VGC536-6B
Available at Universal Appliance and Kitchen Center.
Commercial-Type Cooking Power
- Gas 36" wide cooktop
-- Six sealed burners with brass flame ports and porcelain/cast-iron caps
-- Left front - 18,000 BTU high
-- Left rear - 10,000 BTU high
-- Center front - 12,000 BTU high
-- Center rear - 12,000 BTU high
-- Right front - 6,000 BTU high
-- Right rear - 8,000 BTU high
- Highest combined BTU rating in the industry, featuring sealed burners with brass burner rings in a wide variety of sizes
- Powerful 18,000 BTU burner delivers commercial power for high heat sautéing, rapid boiling and quick recovery
- Simmer settings on all burners allows low BTU output for heating delicate sauces
- EXCLUSIVE SureSpark™ Ignition System ensures automatic ignition/re-ignition should flame extinguish at any time while cooking
Safe, Easy Operation
- Child proof, push-to-turn metal knobs for safe use
- Automatic electric spark ignition means no standing pilot to re-light, waste energy or add extra heat to the kitchen
- EXCLUSIVE ScratchSafe™ Grate Design provides ultimate protection from scratches and ensures proper placement of the heavy-duty, porcelain-coated cast iron grates
Easy Maintenance and Cleanup
- Permanently sealed burners prevent spills from entering burner box
- Deep, seamless recessed burner pan retains liquid spills
- Updated beveled edge design provides sleek styling and easy cleaning
- Durable laser-etched graphics withstand the rigors of regular cleaning
- Removable knobs, grates, and burner ports/caps make cleanup easy
Replaces Most Ordinary Cooktops
- Overall/burner box dimensions designed to fit virtually all 36" wide cooktop cutouts
Optional Accessories
- Porcelain-coated cast iron wok ring fits securely over grates to accommodate a traditional wok
- Portable non-stick cast aluminum griddle fits securely onto grates for griddling or defrosting food
Exclusive Finishes
- Available in Stainless Steel (SS)
Warranty Highlights*
- Three-year full - complete unit
- Ninety-day full - cosmetic parts such as glass, painted items and decorative items
- Five-year limited - surface burners
*Warranty valid on Viking products shipped within the United States and products purchased and installed in Mexico and the Caribbean on or after April 1, 2013, excluding Cuba, Dominican Republic, and Haiti.
Model Numbers
VGC536-6B - 36" wide cooktops
 The Design Team
Diehl Construction
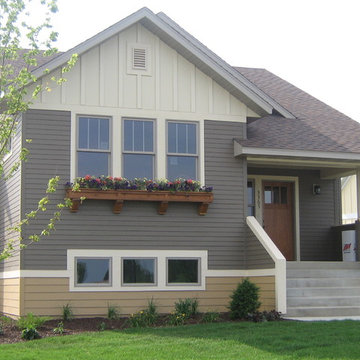
Mid-sized traditional gray two-story wood gable roof idea in Minneapolis
Mid-sized traditional gray two-story wood gable roof idea in Minneapolis
 MarbleSeal Technologies
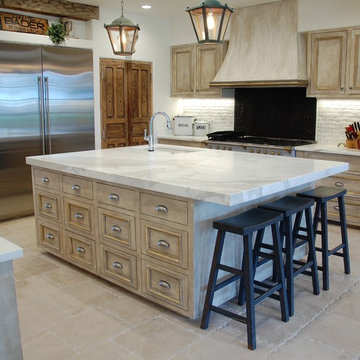
Clearstone™ is a specially formulated polyester resin based system, which is water clear and non-yellowing. It can be applied to many types of natural stone including marble, limestone, travertine, onyx and sandstone.
 Artistic Landscapes
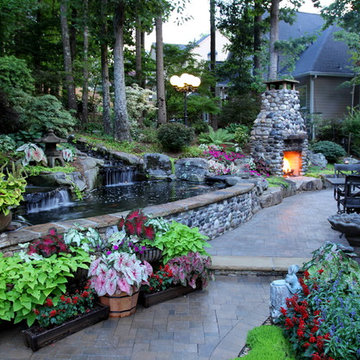
A Koi pond with two waterfalls and advanced filtration. The fireplace is made with river rocks from Montana. The paver patio are Pavestone pavers that have been sealed. the flowers are annuals.
 MD Flooring Solutions, LLC
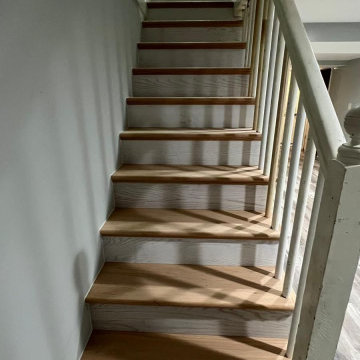
Basement steps project:
1x coat of Minwax or DuraSeal Stain: Stain to best match LVP in basement —1 color included
1x coat of ZINSSER®SealCoat™ Universal Sanding Sealer.
1x coat of Water-Based Oil-Modified polyurethane by default.
1x final coat of SamSeal or Masterline Oil-based polyurethane.
Finish: to best match LVP in basement
- To sand and refinish Unfinished hardwood 11x Treads only

 Ogne Remodeling & Roofing
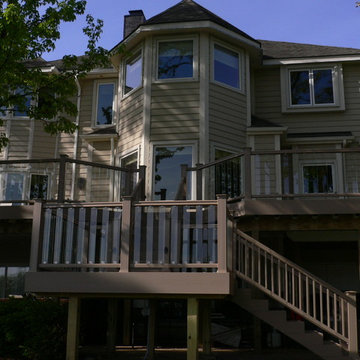
Seal It Green Xtreme Composite Sealer
Seal It Green Composite Deck Clean
Link for Composite Sealer: http://sealitgreen.com/cid-18-1/xtreme-composite-sealants.html
Link for Composite Deck Clean: http://sealitgreen.com/pid-21/composite-deck-clean.html
 Alex Stone and Tile Services
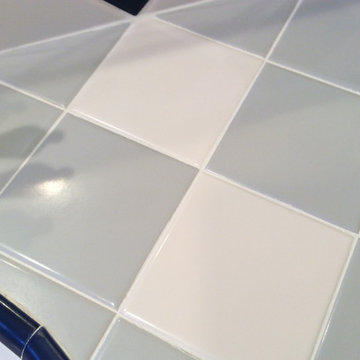
Vintage tile countertop cleaned and sealed by Alex Stone and Tile Services, Los Angeles, San Fernando Valley, West Los Angeles, Pasadena, Ca.
Home design - 1960s home design idea in Los Angeles
Home design - 1960s home design idea in Los Angeles
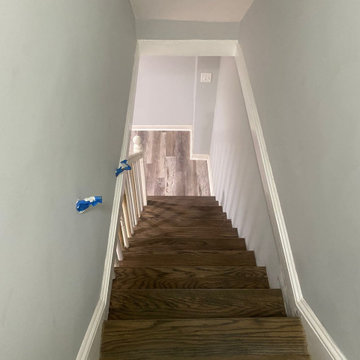 MD Flooring Solutions, LLC
Basement steps project:
1x coat of Minwax or DuraSeal Stain: Stain to best match LVP in basement —1 color included
1x coat of ZINSSER®SealCoat™ Universal Sanding Sealer.
1x coat of Water-Based Oil-Modified polyurethane by default.
1x final coat of SamSeal or Masterline Oil-based polyurethane.
Finish: to best match LVP in basement
- To sand and refinish Unfinished hardwood 11x Treads only
 Tile Doctor Ltd
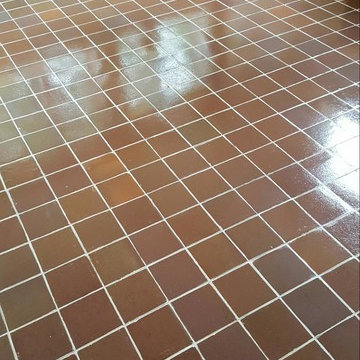
It’s always a good idea to double-check any tile cleaning advice you receive with a professional. Sometimes advice can be inaccurate and cause more problems than good. Such was the case with this customer, who lives in the small town of Appleton near Warrington. He had been advised by his builder to use brick acid to remove carpet glue from a newly discovered Quarry tiled floor. Taking the advice, he had washed the floor several times with a solution of brick acid diluted with water. But while this seemed to successfully remove the carpet glue, it also severely discoloured the grout lines, leaving the entire floor looking grubby and unappealing.
The customer was just about to go on holiday, and asked me to see what could be done to restore the floor’s appearance while he was gone. With the house to myself, I got to work.
My first job was to strip the floor property to remove old sealers present on the tile using a strong dilution of our high alkaline cleaner, Tile Doctor Pro Clean. We use this cleaner on all types of tile and natural stone due to its versatility and consistency.
I spread the solution onto the floor and left to dwell for twenty minutes before scrubbing with a black pad fitted to a floor rotary machine. This process also removed the years of dirt and dust that had penetrated through the recently removed carpet. I also paid attention to the grout lines giving them a good scrub with a stiff grout brush, but the acid staining proved to be impossible to remove completely.
While I’m not sure exactly how long the floor had been covered by carpet, it’s safe to say a deep clean had been long, long overdue. Once I had cleaned the floor to a high standard, I used a wet-vac to remove the now dirty cleaning solution from the floor, before leaving it to dry off completely overnight.
Upon my return to the property the next day, I tested to make sure the floor was dry enough to seal, which is important as excess moisture can cloud the sealer and damage its performance.
Once satisfied, I applied one coat of Tile Doctor Colour Grow, which is our impregnating sealer designed to really bring out the natural colours in the tile, followed by two coats of Tile Doctor Seal and Go to give the tiles a stain resistant, low-sheen finish.
After this was dry I coloured the grout lines with a matching Tile Doctor Grout Colourant to cover and hide the damage the acid had caused to the grout lines. Finally, I gave the floor three more coats of Seal and Go to add the finishing touches.
My customer returned from holiday to find a completely transformed floor. Looking at the before and after photos, it is easy to see why he was more than happy with the result! Another satisfied customer.
Alastair Robb
West Cheshire Tile Doctor
 Tile Doctor Ltd
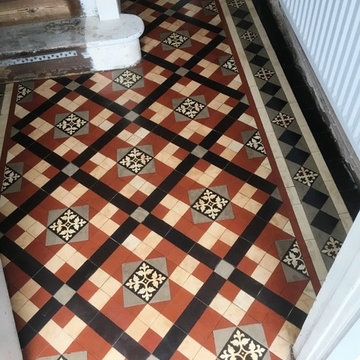
The owner of this house in Chaplefields near Coventry had bought this property as an investment and was keen to improve its appearance. As part of this work he had lifted the vinyl tiles in the hallway and discovered a lovely Edwardian tiled floor. Unfortunately, whoever had laid the Vinyl tiles had decided to use Tar as an adhesive and this had left a black mess all over the floor.
Realising the potential value an original feature such as this could add to the property he was keen to restore the tiles but not so keen to deal with the Tar, so we were asked to deal with the problem and restore the floor as close to its original condition as possible.
To get the tiles clean and remove the horrible tar I applied a strong dilution of Tile Doctor Remove and Go, which as its name suggest is great for removing coverings from tiles. I applied the Remove and Go with a mop, left it to soak in for a few minutes and then worked it in using a rotary machine fitted with a black scrubbing pad. The soil was extracted off the floor using a wet and dry vacuum and then the process repeated until I was happy all the tar was gone.
I then gave the tiles an acid wash using Tile Doctor Acid Gel; this serves to break down alkaline mineral deposits such as cement and grout smears, it also counters any efflorescence problems which can be an issue with these old floors where no damp proof membrane has been installed.
Finally, the floor was given a rinse with clean water and a steam clean to remove any trace of cleaning products and to neutralise the tiles in preparation for sealing.
I left the floor to dry off overnight and returned to the property to seal the tiles the next day. To seal the tiles, I used three coats of Tile Doctor Seal and Go which is a water based sealer that leaves a subtle sheen finish and being water based doesn’t leave a smell as it dries. The sealer will provide durable protection going forward preventing dirt from becoming ingrained into the pores of the tile and ensuring it remains easy to clean and keeping its appearance for some time to come.
The floor now looks fantastic and gives a great impression when you come into the property which is exactly what the owner wanted.
Mick Gayton
Warwickshire Tile Doctor
 Tile Doctor Ltd
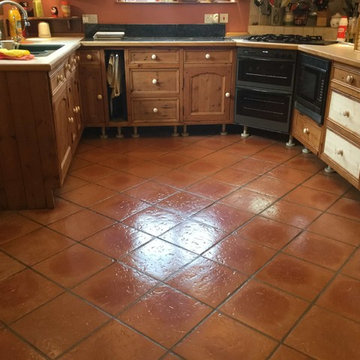
This Terracotta tiled floor was installed in the kitchen of a cottage in the small village of Maidford near Towcester. The tiles were not looking their best and the owner of the property realised it was time to do something about it and contacted Tile Doctor to have the floor stripped and resealed. Stripping and Sealing tile and stone floors is our bread and butter so I was more than happy to pop round and survey the floor which was approximately 9m2.
The grout had darkened with dirt and the previous tile sealer was failing so dirt was now getting ingrained in the Terracotta making it difficult to clean in places and leading to a patchy appearance. We discussed the work involved, my quote was accepted, and a date agreed for me to return and complete the work which would take two days, one to clean and one to seal.
After tidying up the Kitchen and removing the kickboards from underneath the kitchen units I set about working on cleaning and stripping the Terracotta floor of old sealers. To start I tested a small area with a strong dilution of Tile Doctor Wax Away. Wax was quite often used on Terracotta so I figured this product would be a good place to start. My suspicions were proved correct, and I found this to be the best product for removing the many layers of sealant on the floor. Wax Away is a new alkaline product by Tile Doctor and ideal for cleaning clay-based tiles such as Terracotta.
With my sights set on the rest of the floor Wax Away was scrubbed into the tile using a 17” rotary floor scrubbing machine and a black scrubbing pad running on a slow speed which helps to reduce splashing. This activity soon brought the dirt off the floor and the soiled cleaning solution was removed using a wet vacuum and the floor was rinsed down with clean water. The cleaning process was repeated a couple of times until I was happy with the floor, a stiff hand brush was then used along the grout lines with a dilution of Tile Doctor Pro-Clean to clean up the grout.
After rinsing and extracting the floor again the floor was inspected, and I noticed there were a few stubborn paint splashes on the tiles. I managed to remove these and these by spot treating the affected area with Tile Doctor Remove and Go and a steamer to lift the stain out of the clay tile. Once happy the floor was clean it was given a thorough rinse to neutralise it and remove any trace of cleaning products and then left it to dry.
I allowed the floor to dry for several days before returning to seal the Terracotta using numerous coats of Tile Doctor Seal and Go which is an ideal sealer for Terracotta and provides durable stain protection together with a low sheen finish. Terracotta is by its nature very porous and so it’s not unknown for it to take up to nine coats of sealer, which can take some time to apply as like paint you have to wait until it’s dry before it will take the next coat.
The customer was so impressed by the results I achieved in their kitchen they decided to go ahead and book me in to carry out this process throughout the whole of the ground floor which included lounge, study and hallway.
Phil Vissian
Northamptonshire Tile Doctor
34