
Search results for "Simply remove" in Home Design Ideas
 Drury Design
THE SETUP
Senior Designer Diana Burton’s client loved her sixties-era home – it just needed some work. The cozy galley kitchen was narrow and mostly closed off from the family room. A pass-through window served as a limited pipeline for treats and chatter. The appliances were failing, too. It was simply time for an overhaul.
Design Objectives:
Remove load bearing wall and open kitchen to the family room
Omit large unused fireplace in family room
Increase work surfaces and overall storage solutions
Dedicated small countertop appliance storage
Seating for 3 or 4 at island
Add pantry storage
Offer solution for lack of mudroom
Upgrade all appliances
THE REMODEL
Design Challenges:
Finding a location to hide structural support for new beam
Reworking awkward configuration of existing walls
Adding a walk-in pantry
Creating mudroom storage
Allowing room for large sectional in family room
Design Solutions:
Add a discreet column by the fridge to hide essential support
Flush out wall by bath to be even with the range wall, where the new walk in pantry exists
Use void space behind new wall for large appliance garage
Create combination walk in pantry/mudroom by adding bench with shoe storage and hooks
Maintain island depth for comfortable seating without infringing on space for the sectional
THE RENEWED SPACE
This cramped, dated kitchen has a new lease on life! Opening it to the family room dramatically transformed the space. Diana’s client now has plenty of storage, a big island for food prep, and an open-concept space that’s perfect for entertaining and hanging out with friends and family.

 Crystal Kitchen + Bath
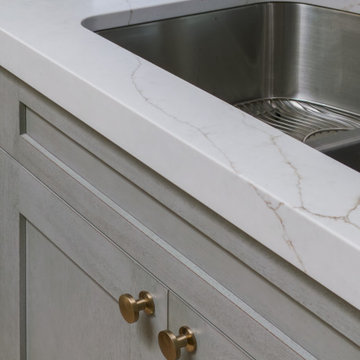
Infusing this once, drab 80’s kitchen with light and color was one goal in this extensive remodel. By removing the wall separating the dining room from the kitchen, the space doubled in size and allowed natural light to flood it.
Creating a design that filled the space yet remained very functional to the homeowner was extremely important. By implementing the two working triangles, one homeowner can be using the sink, cooktop and refrigerator while the other uses the secondary island for food prep as it has an additional sink.
A large soffit housing HVAC runs through the middle of the townhome and seemed intrusive to the space at first. After embracing it in the design, it’s as if it were meant to be. Three aluminum framed cabinets hang below, one directly underneath the soffit to create an asymmetrical design.
On a budget but still wanting a beautiful design, Crystal’s semi-custom line of cabinetry came into play. Simply White and Light Grey provide the perfect backdrop for natural maple, brushed gold hardware and accessories that infuse the space with color. Inside the cabinetry, the best storage solutions make for an extremely functional kitchen!
What a dream it is to have a kitchen that boasts quality, functionality and makes a person feel inspired within it.
Photography: Paige Kilgore
 O'Hanlon Kitchen & Bath
2016 Best Kitchen Renovation $25-$50,000
We are pleased to announce our project has been awarded the 2016 Best Kitchen Renovation under $25,000 by the Home Builders Association of Metro Harrisburg!
Kitchen designed by Tracy West, project installed by Robert Sykora, and photos by Elliot Quintin.
Merry In Middletown
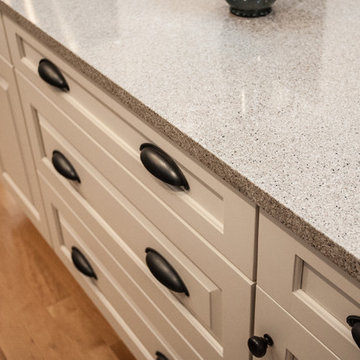
In this kitchen, we removed a soffit and wall that separated the kitchen from the dinning room. We installed St. Martin Cabinetry in the Newhaven door style. The color is Simply White. We used Cambria Quartz in the color New Castle. The backsplash is Mohawk Porcelain Vintage Cleft color Carlsbad Beige 2x4 Mosaic. Elliot Quintin
Find the right local pro for your project
 Houseplay Renovations LLC
What if your bathroom could be not just lackluster, but a place of real luxury … spacious, fresh, and beautiful? In this project, we gave new life to a bathroom that wasn’t meeting its full potential.
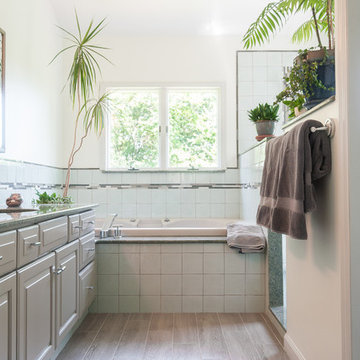
This spacious, sunny bathroom’s layout and design were pre-existing, so the space simply needed freshening up. Our team did just that, through the use of careful planning, new materials, and skilled labor.
With serenity in mind, we created an oasis, painting and tiling to bring the homeowner’s vision to life. While installing new tile required the removal and re-installation of all plumbing fixtures, the transformation was well worth it.
This project is a great example of how choosing materials gives life to a space. Here, the wood-look floor tile, ceramic crackle wall tile, and glass mosaic detail strips join together to create the lush, luxurious look.
Once we’d established a new look for the space, we turned our attention to the finishing touches, such as the deep soaker tub, square drain in the standing shower, and stone tops on the vanity and half-walls. These details complete the room, facilitating a sense of ease and tranquility.
Sometimes, all it takes is a few changes to yield a fantastic result … in this case, a place of peace in the midst of a wild world.
Want to brighten up your home? Contact us; we’re here to help.
Photo Credit: Tamara Templeman
 Sosna Inc
This young couple, busy raising two young boys (plus a playful cat), had always planned to renovate—it was just a matter of finding the right people for the job.
Their biggest concern? Hiring a contractor they could truly rely on to bring their vision to life without added stress.
The master ensuite simply wasn’t working. A large, unused deck-mount tub dominated the space, while the tiny, dim shower made daily routines uncomfortable. The layout didn’t make sense for how they actually used the room, which ended up being mostly for the toilet and vanity. On top of that, the master bedroom sat in an open loft without proper walls or a door, making privacy nearly impossible.
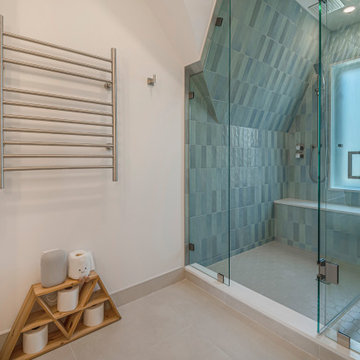
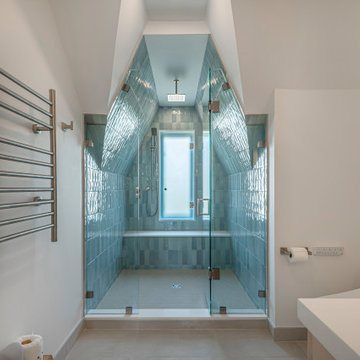
Our solution involved a thoughtful reconfiguration of the ensuite. We removed the oversized tub and replaced it with a spacious walk-in shower. The old, cramped shower space became the perfect spot for a relocated vanity, allowing for better flow and use of the room. Up in the loft, we built a new wall with a door to give the bedroom the privacy it was missing. The stairway was also refreshed with new oak treads and a stained handrail to match the existing flooring.
One challenge during construction was installing the custom shower glass and tile within the sloped ceilings and angled walls—but our team carefully managed every detail to ensure a precise and polished finish.
The new master ensuite now feels like a retreat.
Handmade-style blue subway tiles add a calming pop of colour in the shower, paired with crème porcelain floor tiles. A prefabricated solid wood vanity with quartz countertop, brushed nickel fixtures, and an electric towel warmer complete the space—bringing comfort and functionality together beautifully.
A fun moment during the design phase? We used stools, tables, and even a piano to mock up the future layout—helping the homeowners get a real feel for the spacing between the new vanity and toilet. It was a creative, hands-on way to ensure everyone felt confident moving forward.
Now, the ensuite functions exactly as it should: a fully usable and relaxing 3-piece bathroom, styled just the way they wanted. And with the new loft wall and door, the bedroom finally feels like a true primary suite—private, peaceful, and made for them.
 MainStreet Design Build
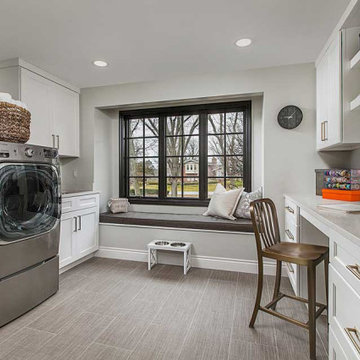
By simply widening arch ways and removing a door opening, we created a nice open flow from the mud room right through to the laundry area. The space opened to a welcoming area to keep up with the laundry for a family of 6 along with a planning space and a mini office/craft/wrapping desk.
 THE Remodel Group
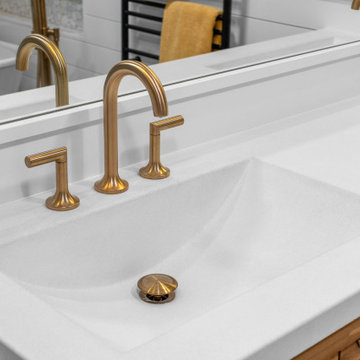
A luxurious en suite bath was created within this classic 1925 Portland bungalow by reconfiguring the second story’s original small bedrooms and tiny half bath. In this welcoming new urban boho space, eclectic finishes mingle harmoniously, integrated through subtle repetition of shapes and materials.
A furniture-style vanity sets the tone for this luxurious space, introducing materials, colors, shapes, and textures that repeat throughout. Individual walnut hexagons join to create distinctive vanity doors, offset beautifully by horizontal-grain drawers. Topping the cabinetry is a simple concrete countertop with integral sinks. An expansive framed mirror above enlarges and brightens the room. Within the mirror, sconces float, their globes a nod to the hexagons below. Champagne bronze fixtures reflect the warm walnut glow. Nestled into the back corner, a stunning shower features waterjet tiles in a double herringbone pattern, each precisely cut and laid to maintain design integrity at every surface transition. Teak floor tiles and a pebbled niche hint at the classic spa experience. Across from the shower, a large hexagonal window provides a treetop view from the free-standing tub below. The gentle oval of the tub and the beaded chandelier above provide a pleasing contrast to the strong lines surrounding it, as do the softly-shaded pebbles in the full-length niche. Shiplap wainscotting wraps the room, creating an illusion of height in the compact space. Subtle flooring and soft green walls create an understated backdrop for the bold mix of materials, unifying them into a serene oasis.
Asking a century-old home to accommodate a modern luxury bath is a tall order. Asbestos-laden plaster and flooring had to be abated. The subfloor had to be leveled and reinforced to increase strength and prevent deflection. Water lines and multiple electrical circuits had to be brought across and up without disturbing a beautifully-paneled ceiling, something we accomplished by firring out stair walls to hide the chases. Our client had visions of a leafy view from her tub, but the new layout eliminated existing windows. Placing a new window was complicated by deep eaves and flat soffits. By pushing the header into the roofline, however, we were able to accommodate a picture window. The flat soffit was replaced by an inverse hip lined with stained tongue and groove cedar, tying it to the bathroom finishes. Bringing materials up a narrow staircase became truly challenging when it was time to install the big items. However, strategic removal of drywall around the landing got the job done. Our attention to detail is showcased in the shower tile, where precise cuts were required at surface transitions to maintain the integrity of a complex double herringbone lay. The project was delivered on time.
Savvy layout choices minimized spending on structural changes. Because we were dealing with dormer space, head height was an issue. Raising the ceiling would have been complex and expensive so our design accommodated the constraints – tub on the low outside wall, shower on the full-height interior wall. The vanity spanned the spread, accommodating our petite client on the exterior side and her taller husband on the interior side. An under-eave closet was closed off to create room for both a freestanding tub and a separate shower. Rather than building replacement storage elsewhere, we simply added a new door into the closet from the primary bedroom. This was made possible by absorbing the short hallway separating the existing bed and bathroom into the primary bedroom. This new layout also created an en suite relationship between the primary bedroom and the new bath. We saved additional dollars by selecting a furniture-style vanity rather than using custom cabinetry, and the countertop with integral sinks provided a cost savings over a more traditional quartz countertop with undermount sinks. Affordable shower tiles allowed us to put more money into a dynamic tile layout. The project was delivered within budget.


 Sosna Inc
This young couple, busy raising two young boys (plus a playful cat), had always planned to renovate—it was just a matter of finding the right people for the job.
Their biggest concern? Hiring a contractor they could truly rely on to bring their vision to life without added stress.
The master ensuite simply wasn’t working. A large, unused deck-mount tub dominated the space, while the tiny, dim shower made daily routines uncomfortable. The layout didn’t make sense for how they actually used the room, which ended up being mostly for the toilet and vanity. On top of that, the master bedroom sat in an open loft without proper walls or a door, making privacy nearly impossible.
Our solution involved a thoughtful reconfiguration of the ensuite. We removed the oversized tub and replaced it with a spacious walk-in shower. The old, cramped shower space became the perfect spot for a relocated vanity, allowing for better flow and use of the room. Up in the loft, we built a new wall with a door to give the bedroom the privacy it was missing. The stairway was also refreshed with new oak treads and a stained handrail to match the existing flooring.
One challenge during construction was installing the custom shower glass and tile within the sloped ceilings and angled walls—but our team carefully managed every detail to ensure a precise and polished finish.
The new master ensuite now feels like a retreat.
Handmade-style blue subway tiles add a calming pop of colour in the shower, paired with crème porcelain floor tiles. A prefabricated solid wood vanity with quartz countertop, brushed nickel fixtures, and an electric towel warmer complete the space—bringing comfort and functionality together beautifully.
A fun moment during the design phase? We used stools, tables, and even a piano to mock up the future layout—helping the homeowners get a real feel for the spacing between the new vanity and toilet. It was a creative, hands-on way to ensure everyone felt confident moving forward.
Now, the ensuite functions exactly as it should: a fully usable and relaxing 3-piece bathroom, styled just the way they wanted. And with the new loft wall and door, the bedroom finally feels like a true primary suite—private, peaceful, and made for them.
 User
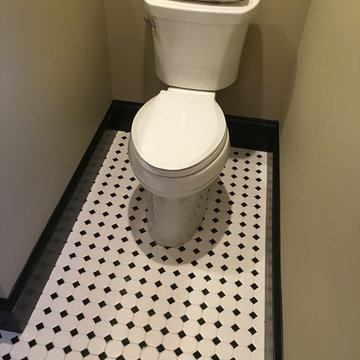
UserThis was an historic cottage with a small bathroom on the lower level. The existing tile was in good shape, but had a hunter green dot in the floor tile and a green rope tile in the shower. The design plan was to simply re-tile the floor, remove and change out only the deco portion in the shower, repaint the vanity, install a new countertop and replace the faucet and toilet. A black pebble was installed on the shower floor. We also added new black baseboards and crown moulding. Making the renovation cost effective while achieving a dramatic new look. The wall color is Universal Khaki by Sherwin-Williams.
 Home Interior Woodworks
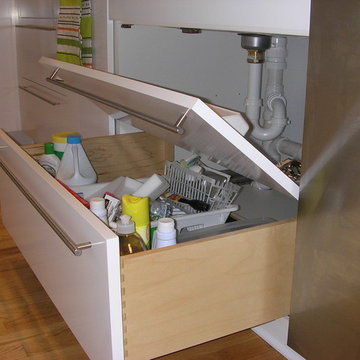
This design was created because we wanted to carry the same base drawer style throughout the entire kitchen. Out of this objective we provided a bottom drawer in a sink base cabinet! Not only that, the client can reach items in the bottom drawer by simply by pulling the middle drawer that is actually a drop down panel that exposes the items in the drawer with ease. Both drop down panel and drawer are easily removed for maintenance/
 Rooftopia, LLC
Sampson, our client's adorable pug, would agree that this stylish rooftop garden is the place to be after Rooftopia had the opportunity to give the deck a much needed makeover! Our teams removed an old worn out wooden deck and replaced the flooring with new porcelain tiles on a floating pedestal system for a durable and gorgeous deck surface that not only looks fabulous, it improves drainage, protects the roof membrane from UV exposure, evenly disperses the weight of the garden elements and is modular and very low maintenance.
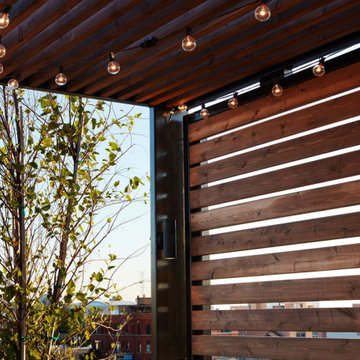
This private rooftop also features a custom made metal pergola and wooden screen to offer shade and artfully frames the view of the incredible city skyline. The pergola also creates a pleasing surround for the primary rooftop seating and lounge area.
The outdoor kitchen is made of durable marine grade aluminum cabinets and a custom concrete countertop with a built in bar ledge. The bar ledge features an original metal screen pattern and seating positioned to highlight the stunning view and keep the conversation flowing. The centrally located dining area makes it easy to entertain a crowd, host out of town guests before a concert or simply prepare a refreshing drink after work.
Working with the scale of the rooftop we added large planter boxes & greenery situated to soften the hard lines of the building, add a layer of privacy and frame the views of the skyline. A few containers are placed near the entrance and in the seating area to offer pops of colorful seasonal flowers. An irrigation system is a key part of the garden that operates automatically to water plants on a daily timer so our clients can spend their time relaxing and the plants stay healthy. Rooftopia also integrated LED lighting and patio string lights to accent and illuminate these beautiful garden elements.
 Drury Design
THE SETUP
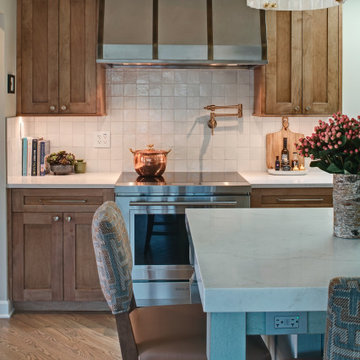
Senior Designer Diana Burton’s client loved her sixties-era home – it just needed some work. The cozy galley kitchen was narrow and mostly closed off from the family room. A pass-through window served as a limited pipeline for treats and chatter. The appliances were failing, too. It was simply time for an overhaul.
Design Objectives:
Remove load bearing wall and open kitchen to the family room
Omit large unused fireplace in family room
Increase work surfaces and overall storage solutions
Dedicated small countertop appliance storage
Seating for 3 or 4 at island
Add pantry storage
Offer solution for lack of mudroom
Upgrade all appliances
THE REMODEL
Design Challenges:
Finding a location to hide structural support for new beam
Reworking awkward configuration of existing walls
Adding a walk-in pantry
Creating mudroom storage
Allowing room for large sectional in family room
Design Solutions:
Add a discreet column by the fridge to hide essential support
Flush out wall by bath to be even with the range wall, where the new walk in pantry exists
Use void space behind new wall for large appliance garage
Create combination walk in pantry/mudroom by adding bench with shoe storage and hooks
Maintain island depth for comfortable seating without infringing on space for the sectional
THE RENEWED SPACE
This cramped, dated kitchen has a new lease on life! Opening it to the family room dramatically transformed the space. Diana’s client now has plenty of storage, a big island for food prep, and an open-concept space that’s perfect for entertaining and hanging out with friends and family.

 C.E. Pontz Sons
This Pond project consisted of removal and rebuilding of existing stream and pond. All new pond components were installed. The installation included pond liner, pump, rock, skimmer and filtration. This is a complete Aquascape ecosystem pond. The pond is roughly 15’x 20′ at its largest and has a 20′ meandering stream. We also installed a custom fire bowl spillway fountain. The self-contained fire fountain is a water feature with a fire feature in the center making it an ideal focal point or centerpiece to any outdoor setting. We customized this fountain to include a spillway as well. it is no longer self-contained. We incorporated it to work with the pond system. Simply add paraffin or “tiki torch fuel” and you’re ready to go. We also installed an automatic dosing system for ease of maintenance. This Pond was installed in Lancaster, PA. We also did some renovation work on the flagstone walkway along the pond.

 Keystone Fabrics
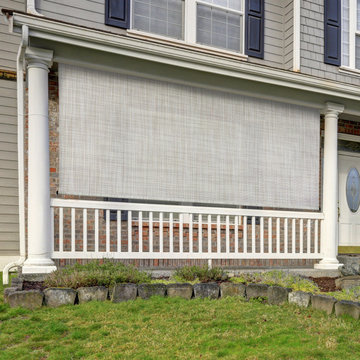
Are you hot and uncomfortable in your outdoor spaces? If so, Keystone Fabrics cordless outdoor sun shades are the perfect solution. Our shades are made from a high quality, durable PVC fabric. With up to 90% UV block, these shades keep your space cool, while lowering your energy costs, reducing blinding glare and fading of furniture. Simply roll your shades down, using the pole and hand crank system, before heat starts building up on your window, porch or patio and start enjoying your outdoor space again. An installation template and removable pole are included. These shades are available in a variety of colors and sizes.
 Classic Kitchens Designs & Renovations Ltd.
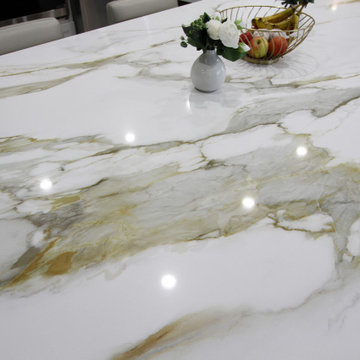
Our client had a dark kitchen that was very popular back in the day, however times change and it was time for something brighter and more airy, with better functionality. We started by removing bulkheads and changing out the flooring to a modern, 24x24 porcelain tile. Custom, Benjamin Moore painted cabinetry was then installed, following by stunning Porcelain countertops with matching backsplash. The result is simply stunning! Be sure to have a look at the before pics to see where we started.
 Total Home
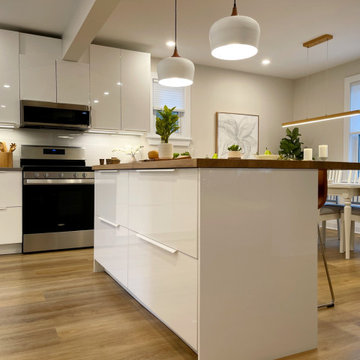
We are very proud of this kitchen renovation, for an older home in Kemptville. The house as you can see from the before photos, was quite dated, to the original kitchen, so it was time for an upgrade.
We removed a wall, separating the dining area to the kitchen, and had to install a beam above the island. We simply clad it in drywall for a clean aesthetic.
You would not know that these two spaces were one and the same.
The quality and care Gilbert executed in this renovation is top notch!
Another quality project by Total Home.
 Sherri Blum | Jack and Jill Interiors, Inc.
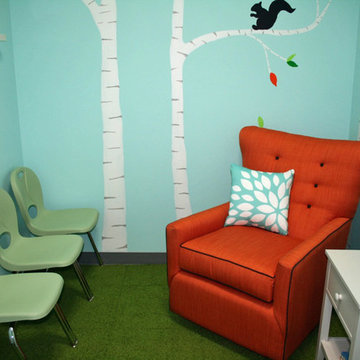
Children’s waiting room interior design project at Princeton University. I was beyond thrilled when contacted by a team of scientists ( psychologists and neurologists ) at Princeton University. This group of professors and graduate students from the Turk-Brown Laboratory are conducting research on the infant’s brain by using functional magnetic resonance imaging (or fMRI), to see how they learn, remember and think. My job was to turn a tiny 7’x10′ windowless study room into an inviting but not too “clinical” waiting room for the mothers or fathers and siblings of the babies being studied.
We needed to ensure a comfortable place for parents to rock and feed their babies while waiting their turn to go back to the laboratory, as well as a place to change the babies if needed. We wanted to stock some shelves with good books and while the room looks complete, we’re still sourcing something interactive to mount to the wall to help entertain toddlers who want something more active than reading or building blocks.
Since there are no windows, I wanted to bring the outdoors inside. Princeton University‘s colors are orange, gray and black and the history behind those colors is very interesting. It seems there are a lot of squirrels on campus and these colors were selected for the three colors of squirrels often seem scampering around the university grounds. The orange squirrels are now extinct, but the gray and black squirrels are abundant, as I found when touring the campus with my son on installation day. Therefore we wanted to reflect this history in the room and decided to paint silhouettes of squirrels in these three colors throughout the room.
While the ceilings are 10′ high in this tiny room, they’re very drab and boring. Given that it’s a drop ceiling, we can’t paint it a fun color as I typically do in my nurseries and kids’ rooms. To distract from the ugly ceiling, I contacted My Custom Creation through their Etsy shop and commissioned them to create a custom butterfly mobile to suspend from the ceiling to create a swath of butterflies moving across the room. Their customer service was impeccable and the end product was exactly what we wanted!
The flooring in the space was simply coated concrete so I decided to use Flor carpet tiles to give it warmth and a grass-like appeal. These tiles are super easy to install and can easily be removed without any residual on the floor. I’ll be using them more often for sure!
See more photos of our commercial interior design job below and contact us if you need a unique space designed for children. We don’t just design nurseries and bedrooms! We’re game for anything!
 Classic Kitchens Designs & Renovations Ltd.
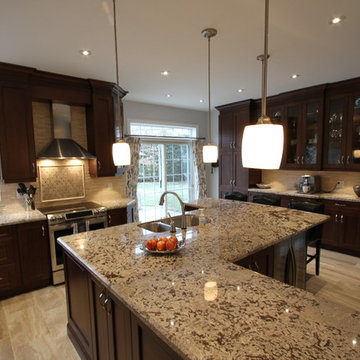
The old kitchen really needed a face lift, and the customer has a large family, so entertaining a crowd at special occasions was very important to them. We removed a support wall and installed a beam to join 3 rooms together to create a space that a large number of people could feel right at home in! Pictures really don't do this kitchen justice, as it is simply awe inspiring when you are standing at the island! We were told that a recent 30 person gathering ended with everyone around the island having a great old time! Mission accomplished!
 Resort Style New Zealand
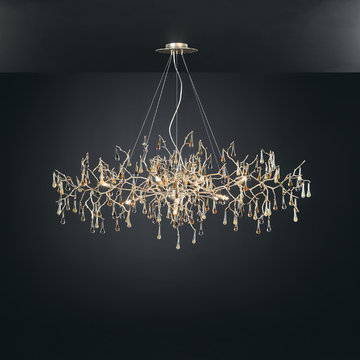
This project is based in Sydney, Australia and involved the bespoke design of a special chandelier that the customer could change the colour of from season to season. The drops are removable and the scale and presence is simply stunning. This is a cost effective and luxurious solution that our clients are thrilled with.
 Rooftopia, LLC
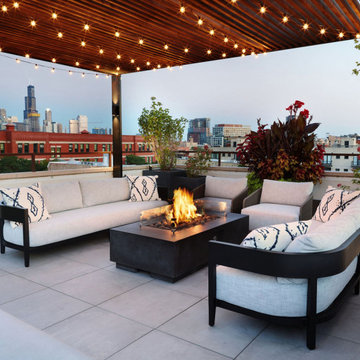
Sampson, our client's adorable pug, would agree that this stylish rooftop garden is the place to be after Rooftopia had the opportunity to give the deck a much needed makeover! Our teams removed an old worn out wooden deck and replaced the flooring with new porcelain tiles on a floating pedestal system for a durable and gorgeous deck surface that not only looks fabulous, it improves drainage, protects the roof membrane from UV exposure, evenly disperses the weight of the garden elements and is modular and very low maintenance.
This private rooftop also features a custom made metal pergola and wooden screen to offer shade and artfully frames the view of the incredible city skyline. The pergola also creates a pleasing surround for the primary rooftop seating and lounge area.
The outdoor kitchen is made of durable marine grade aluminum cabinets and a custom concrete countertop with a built in bar ledge. The bar ledge features an original metal screen pattern and seating positioned to highlight the stunning view and keep the conversation flowing. The centrally located dining area makes it easy to entertain a crowd, host out of town guests before a concert or simply prepare a refreshing drink after work.
Working with the scale of the rooftop we added large planter boxes & greenery situated to soften the hard lines of the building, add a layer of privacy and frame the views of the skyline. A few containers are placed near the entrance and in the seating area to offer pops of colorful seasonal flowers. An irrigation system is a key part of the garden that operates automatically to water plants on a daily timer so our clients can spend their time relaxing and the plants stay healthy. Rooftopia also integrated LED lighting and patio string lights to accent and illuminate these beautiful garden elements.
43