
Search results for "So called confidence" in Home Design Ideas
 Studio SHK
Gregory Manalo
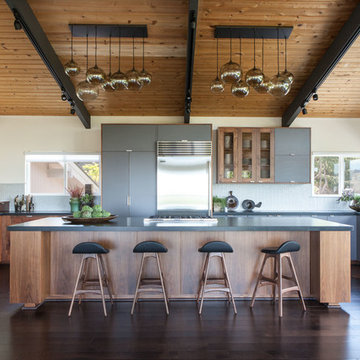
Trendy u-shaped dark wood floor kitchen photo in San Francisco with an undermount sink, flat-panel cabinets, gray cabinets, stainless steel appliances, an island and granite countertops
Trendy u-shaped dark wood floor kitchen photo in San Francisco with an undermount sink, flat-panel cabinets, gray cabinets, stainless steel appliances, an island and granite countertops
 BuilderElements
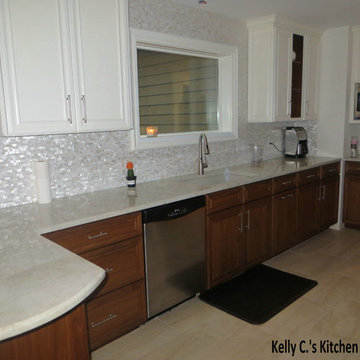
Collection: Light Weight Mother of Pearl Tile
Material: Seashell
Color: Natural White, majority chips are white, with small percentage of natural yellow and minimun natural grey; overall is white
Surface Finish: Glossy, easy for cleaning
Shape: Subway
Size: 12 x 12 In.305*305mm
Chip Size: 3/5 x 1-1/6 In.15*30mm
Thickness: 2mm
Detailed Description: Each sheet of this tile is approximately 1 sq ft per sheet and is mesh mounted on high quality fiber glass for easy installation of your mosaic tile projects.
Application: Mother of Pearl mosaic tiles are impervious to the elements, thus it is great for both interior and exterior use so moisture is not an issue. Mother of Pearl mosaic tiles are great on floors and walls and have been most popular in bathrooms, spas, kitchen backsplash, wall facades and pools as well as a variety of other applications.
Characteristics: The mother of pearl mosaic tile has a zero water absorption rate, and this tile exceeds ANSI standards for water absorption for mosaic tile. It is strong, durable, contamination free, and only the best quality tiles are selected as our tiles are inspected for blemishes before shipment.
Brand Name: Home Elements
Manufacturer: Home Elements,Inc. This manufacturer has the biggest selections of glass mosaic tiles.
Disclaimer: Mother of pearl tile, also called shell tile or shell mosaic tile, is 100% natural and green products made of natural shell, polished and processed by hands. The color variation and occasionally small size variation naturally exist from chip to chip, from sheet to sheet, from job to job. However, the overall sizes are consistent and will NOT have any negative impact on installation; on the contrary, some small variations on sizes reflect the nature of the products thus making your wall or floor tiling project a more natural one. Also, the color variation caused by different computer screen or browser exists from different pc screens. Therefore, the possible color/size variations between the mother of pearl tile sample and actual shipment or the product color shown on the screen and actual shipment should not be considered as quality issues.

 TOC design & construction inc.
DESIGNED BY TOC design
CONSTRUCTION BY TOC design & Construction inc.
PHOTOS BY : Tania Scardellato
I was fortunate to have a young family approach me in desperate need to renovate there only 3 piece bathroom. This space was In dire need of a remodel, with old brown wall to wall tiles and a dated bulky yellow brown single sink vanity.
Storage was a must, lighting a necessity, and proper accessibility to the shower bath area.
We had a tight budget to respect, but a full gut of this bathroom was required. And a good thing too, once we started doing the demolition we noticed that mildew and rotting floors and walls had accumulated throughout the years. Doing it right the first time is no joke when dealing with water and electrical issues.
We discarded all reminisce of old and built from scratch, new walls, new plumbing, new electrical ,new insulation and a new window, a new fan that actually exhausted outside ( I say this laughing as you would be amazed at how many fans are installed but don’t exhaust outside, and you the client would never know unless you go inside the attic space.
Once all the hard stuff was done, the rest is just a matter of smart design. If you have a small bathroom here are some tips to guide you.
10 tips for making a small bathroom feel larger
Is your tiny bathroom cramping your functionality and style, leaving you longing for the enormous bathrooms gracing the pages of design magazines? Even if your bathroom is a fraction of the size, all it takes is some design savvy to make the most of the space you have. Consider these 10 smart tips that will help your bathroom look, feel and function like those larger contenders.
1-Get creative with corners
Space is at a premium in small bathrooms, so it's important to maximize every inch. Corners, for example, provide extra space for shelving, storage units and even hooks. Get creative and install unique design solutions that are not only functional, but also eye-catching. If you love the airiness of floating cabinets, add baskets or decorative boxes under for extra storage. If you are installing floating cabinets insure that they are installed securely to studs or plywood at wall.
2- Let solid colors shine
Busy patterns have a shrinking effect and make small bathrooms seem even smaller. Conversely, light natural hues make a space feel more open. If you're itching to get creative with design, experiment with textures but keep overpowering patterns to a minimum. Tone on tone is the best to achieve this.
3 - Maximize your bathtub
A bathtub takes up a significant portion of the room, but modern, compact options with curved basins, can make the tub feel larger when in use, all while conserving space.
4 - Select a smaller faucet
A faucet is jewelry for the bathroom. And just as accessories can overpower an outfit, a big bulky faucet isn't flattering in a small bath. Single-handle designs conserve counter space, while a wall-mount installation frees it up all together and can create quite the wow-factor, if the budget can accommodate the required changes to plumbing behind the wall.
5 - Make vanity storage simple
If you're in a storage war with your small bathroom, you're not alone in the battle. Toiletries and personal supplies without a place to call home only add clutter and chaos. Store smart with a space-saving vanity, the dual sink vanity shown here, looks quite simple, but in reality it has 4 sets of full extension drawers, and the vanity tower adds extra storage without overpowering the use of space.
6 - Show off the shower
Shower curtains may be pretty, but they interrupt the visual flow of a bathing space and make it feel significantly smaller. In bathrooms with small footprints, opt for a clear glass sliding shower door that doesn't require the clearance of one with a hinged design. Or as shown in this design and for fraction less expensive a half hinged panel installed on a fixed tempered glass panel. If you're embarking on a big remodel, create the illusion of more space by using same tile in the shower that's used throughout; instead of seeing them as two separate zones, the eye will read them as one.
7 - Discover the treasure of hidden storage
Work with a contractor, and you just might find some serious storage potential hidden behind your walls. Whether it's utilizing space between the studs for shallow shelving or a creating a small linen closet by annexing space from an adjacent room, even small additions can make a big difference.
8 - Focal Point
Tile is a beautiful, durable addition to any bathroom. For dainty spaces, consider installing tile at a diagonal to accentuate the focal point or as in this bathroom I used an oversized textured pattern to bring depth to the space at the window wall.
9 - Choose the right lights
Strategically install light to reflect and brighten a small bathroom to make it appear larger. Recessed lighting is an affordable solution for tiny rooms, offering ample light while taking up little space. Wall sconces alongside a mirror also reflect off the walls and make a room feel bright and airy. I always recommend going with LED lighting at 2800 to 3000K.
10 – Accessorize
This is your time to shine in your decorating skills, have fun with your towels, you can change the color scheme daily just by adding pops of color in your accessories, make sure to get items that serve a dual purpose, like baskets, boxes they can always be used as hampers, storing of towels and even a nice display for your guest.
Find the right local pro for your project
 Kimberlee Marie Interiors
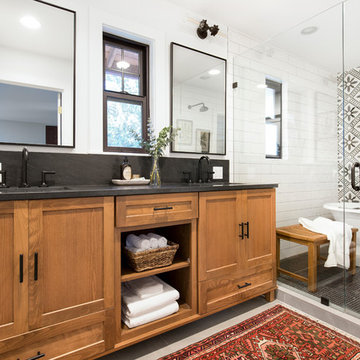
It’s always a blessing when your clients become friends - and that’s exactly what blossomed out of this two-phase remodel (along with three transformed spaces!). These clients were such a joy to work with and made what, at times, was a challenging job feel seamless. This project consisted of two phases, the first being a reconfiguration and update of their master bathroom, guest bathroom, and hallway closets, and the second a kitchen remodel.
In keeping with the style of the home, we decided to run with what we called “traditional with farmhouse charm” – warm wood tones, cement tile, traditional patterns, and you can’t forget the pops of color! The master bathroom airs on the masculine side with a mostly black, white, and wood color palette, while the powder room is very feminine with pastel colors.
When the bathroom projects were wrapped, it didn’t take long before we moved on to the kitchen. The kitchen already had a nice flow, so we didn’t need to move any plumbing or appliances. Instead, we just gave it the facelift it deserved! We wanted to continue the farmhouse charm and landed on a gorgeous terracotta and ceramic hand-painted tile for the backsplash, concrete look-alike quartz countertops, and two-toned cabinets while keeping the existing hardwood floors. We also removed some upper cabinets that blocked the view from the kitchen into the dining and living room area, resulting in a coveted open concept floor plan.
Our clients have always loved to entertain, but now with the remodel complete, they are hosting more than ever, enjoying every second they have in their home.
 Edgewater Design Group
As written in Northern Home & Cottage by Elizabeth Edwards
Sara and Paul Matthews call their head-turning home, located in a sweet neighborhood just up the hill from downtown Petoskey, “a very human story.” Indeed it is. Sara and her husband, Paul, have a special-needs son as well as an energetic middle-school daughter. This home has an answer for everyone. Located down the street from the school, it is ideally situated for their daughter and a self-contained apartment off the great room accommodates all their son’s needs while giving his caretakers privacy—and the family theirs. The Matthews began the building process by taking their thoughts and
needs to Stephanie Baldwin and her team at Edgewater Design Group. Beyond the above considerations, they wanted their new home to be low maintenance and to stand out architecturally, “But not so much that anyone would complain that it didn’t work in our neighborhood,” says Sara. “We
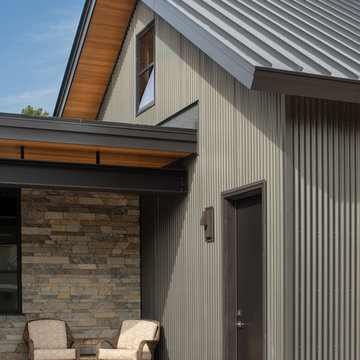
were thrilled that Edgewater listened to us and were able to give us a unique-looking house that is meeting all our needs.” Lombardy LLC built this handsome home with Paul working alongside the construction crew throughout the project. The low maintenance exterior is a cutting-edge blend of stacked stone, black corrugated steel, black framed windows and Douglas fir soffits—elements that add up to an organic contemporary look. The use of black steel, including interior beams and the staircase system, lend an industrial vibe that is courtesy of the Matthews’ friend Dan Mello of Trimet Industries in Traverse City. The couple first met Dan, a metal fabricator, a number of years ago, right around the time they found out that their then two-year-old son would never be able to walk. After the couple explained to Dan that they couldn’t find a solution for a child who wasn’t big enough for a wheelchair, he designed a comfortable, rolling chair that was just perfect. They still use it. The couple’s gratitude for the chair resulted in a trusting relationship with Dan, so it was natural for them to welcome his talents into their home-building process. A maple floor finished to bring out all of its color-tones envelops the room in warmth. Alder doors and trim and a Doug fir ceiling reflect that warmth. Clearstory windows and floor-to-ceiling window banks fill the space with light—and with views of the spacious grounds that will
become a canvas for Paul, a retired landscaper. The couple’s vibrant art pieces play off against modernist furniture and lighting that is due to an inspired collaboration between Sara and interior designer Kelly Paulsen. “She was absolutely instrumental to the project,” Sara says. “I went through
two designers before I finally found Kelly.” The open clean-lined kitchen, butler’s pantry outfitted with a beverage center and Miele coffee machine (that allows guests to wait on themselves when Sara is cooking), and an outdoor room that centers around a wood-burning fireplace, all make for easy,
fabulous entertaining. A den just off the great room houses the big-screen television and Sara’s loom—
making for relaxing evenings of weaving, game watching and togetherness. Tourgoers will leave understanding that this house is everything great design should be. Form following function—and solving very human issues with soul-soothing style.
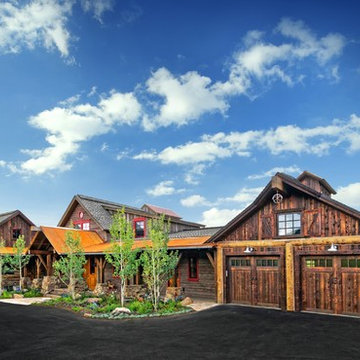
 Trilogy Partners
Concept and Backstory for this Trilogy Partners and bhh Partners Design:
This home, though built recently, has a long history. It’s an old story about a family with a hardworking father and a loving mother and three kids who lived in Denver, but loved the mountains more than anything. About 1908 they decided to buy an old sheep station outside of Breckenridge. At first they lived in the simple shepherd’s cabin they referred to as the “Station House.” As the children grew, so did the family’s passion for horses, ranching, hunting, and fishing and the great outdoors, and it wasn’t long before everyone in the family began to refer to the Station House as home. Denver just became Denver, and it was certainly not where their hearts longed to be. A heavy bell large enough to be heard for several miles, which became known as the “Dinner Bell,” was installed by the front door to call the kids home for supper. After a few years, the family built a pole barn for the horses and a carriage, and then it became the place where they parked theModel T.
About 1923 the eldest son returned from college. His first duty was to supervise the construction of “The Manor House.” Now that mother and father had the time to spend not just summer, but most of the year in the valley, it made sense that they build a real house. The Station House could be used by guests. The son had a lot to do and not much time because the house had to be finished in time for a very important event. A wedding, his wedding, was to happen in the spring, barely a year away.So the Manor House, built with local timbers and many local hands, rose up between the old Station House and the Pole Barn. And there was a first marriage at the house. As the family continued to grow,it seemed the Manor House had to grow with them and over the years, it reached out to either side until finally, it was connected by a long front porch to the Station House, just to the south, and the Pole Barn just to the north. The dinner Bell was installed beneath the gable in the front porch because children still needed to be called home from the hills.
Fifty years passed and the fact that dozens of mothers, fathers, children, and grand children and even great grandchildren spread all over the country still called it Home didn’t seem strange to any of them. For this was where they came to share the most important things with the rest of their family. They came in the summers and winters, stayed sometimes a week, often longer, but at least once a year, if not a couple times more. They came for the most memorable days of their lives, anniversaries, birthdays, weddings, and sometimes for no reason other than they needed to be with their kin. On those saddest days, when one had passed away, they gathered to remember at the Manor House. They would bury their own in the family plot where the sheep once graced in a meadow that the elk favored in winter. There would be hugs, and tears. But for all, it was far better being sad ere than anywhere else.
And now, a hundred years have passed since a family of five first set for in the valley. And the Manor House, the Station House, and Pole Barn all deserve a little sprucing up in time for another important event. For in the spring comes wedding number 32.
Photo Credit: Michael Yearout
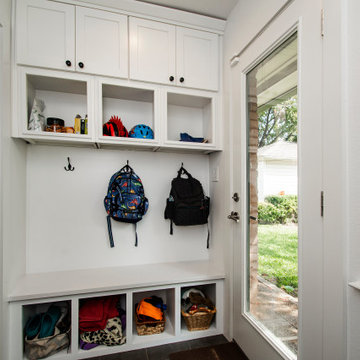
 Alair Homes Plano
Our clients purchased this 1950 ranch style cottage knowing it needed to be updated. They fell in love with the location, being within walking distance to White Rock Lake. They wanted to redesign the layout of the house to improve the flow and function of the spaces while maintaining a cozy feel. They wanted to explore the idea of opening up the kitchen and possibly even relocating it. A laundry room and mudroom space needed to be added to that space, as well. Both bathrooms needed a complete update and they wanted to enlarge the master bath if possible, to have a double vanity and more efficient storage. With two small boys and one on the way, they ideally wanted to add a 3rd bedroom to the house within the existing footprint but were open to possibly designing an addition, if that wasn’t possible.
In the end, we gave them everything they wanted, without having to put an addition on to the home. They absolutely love the openness of their new kitchen and living spaces and we even added a small bar! They have their much-needed laundry room and mudroom off the back patio, so their “drop zone” is out of the way. We were able to add storage and double vanity to the master bathroom by enclosing what used to be a coat closet near the entryway and using that sq. ft. in the bathroom. The functionality of this house has completely changed and has definitely changed the lives of our clients for the better!
Sponsored
Columbus, OH

Hope Restoration & General Contracting
Columbus Design-Build, Kitchen & Bath Remodeling, Historic Renovations
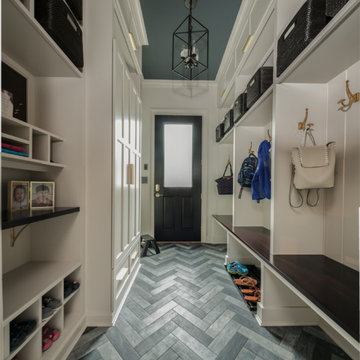
 Melissa Hill Home Design
This beautiful home located near a central Connecticut wine vineyard was purchased by a growing family as their dream home. They decided to make their informal entry into their home a priority. We truly are believers in combining function with elegance. This mudroom opens up to their kitchen so why not create some amazing storage that looks great too! This space speaks to their transitional style with a touch of tradition. From mixing the metal finishes to the herringbone floor pattern we were able to create a timeless, functional first impression to a beautiful home. Every family can benefit from having a space called “Home Central” from pre-school on…come in and take your shoes off.
Custom designed by Hartley and Hill Design. All materials and furnishings in this space are available through Hartley and Hill Design. www.hartleyandhilldesign.com 888-639-0639
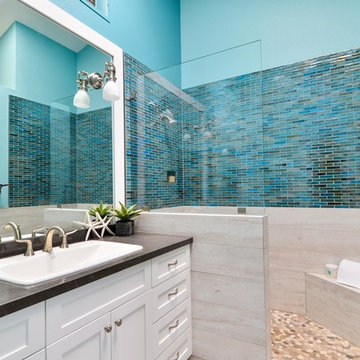
 TaylorPro Design and Remodeling, Inc.
"TaylorPro completely remodeled our master bathroom. We had our outdated shower transformed into a modern walk-in shower, new custom cabinets installed with a beautiful quartz counter top, a giant framed vanity mirror which makes the bathroom look so much bigger and brighter, and a wood ceramic tile floor including under floor heating. Kerry Taylor also solved a hot water problem we had by installing a recirculating hot water system which allows us to have instant hot water in the shower rather than waiting forever for the water to heat up.
From start to finish TaylorPro did a professional, quality job. Kerry Taylor was always quick to respond to any question or problem and made sure all work was done properly. Bonnie, the resident designer, did a great job of creating a beautiful, functional bathroom design combining our ideas with her own. Every member of the TaylorPro team was professional, hard-working, considerate, and competent. Any remodeling project is going to be somewhat disruptive, but the TaylorPro crew made the process as painless as possible by being respectful of our home environment and always cleaning up their mess at the end of the day. I would recommend TaylorPro Design to anyone who wants a quality project done by a great team of professionals. You won't be disappointed!"
~ Judy and Stuart C, Clients
Carlsbad home with Caribbean Blue mosaic glass tile, NuHeat radiant floor heating, grey weathered plank floor tile, pebble shower pan and custom "Whale Tail" towel hooks. Classic white painted vanity with quartz counter tops.
Bathroom Design - Bonnie Bagley Catlin, Signature Designs Kitchen Bath.
Contractor - TaylorPro Design and Remodeling
Photos by: Kerry W. Taylor
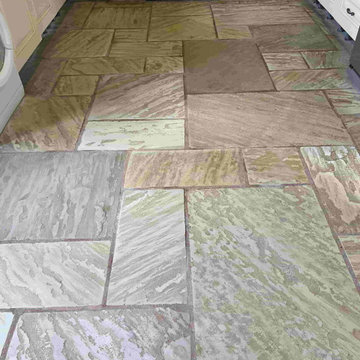
 Tile Doctor Ltd
This client at a property in Bamber Bridge was really fed up with his Indian sandstone kitchen floor. The sandstone suited the age of the property but due to its course rough texture he was having issues keeping the stone clean and maintaining it to a decent standard. Ideally, he wanted something long lasting that was easier to keep clean.
Sealers can only help so much on a rough stone like this, in my opinion really rough stone is best sold for use outside in patio’s etc. My client didn’t want to rip it up as it ran underneath the kitchen units and it cost them a lot of money to have it laid, so having been on our website and checked out our previous work they realised we could mill the stone and smooth down the rough texture to a much smoother finish and yet still leave enough texture in the stone for it to look very natural.
We have developed a system at Tile Doctor called “Milling” which is very similar to sanding rough wood to reveal the inner patina. Once done we then we give it one more clean before adding a fresh sealer to add protection. Milling does change the look of the stone as you will see on the before and after pictures on this page, so it is not for everyone. It is however a one-off process so once done it will never need to be milled again. Like all stone floors it will still benefit from a deep clean and re-seal every five years (depending on use) just to keep it looking its best but after milling you will be able to walk on the stone in bare feet or socks and slippers as it really does make a big difference to the finish.
By milling we mainly use coarse-grit burnishing pads that contain segments made from hard industrial diamonds. Working our way up the different grits the pads are applied using a weighted floor buffer which is run over each tile several times to cut the stone back. The process is so effective we often find that the pads are all you need to clean the stone so hardly ever use any chemicals with this process, apart from the sealer which is applied once fully dry.
I should mention that Milling is not something a customer should consider doing themselves as you need invest in a heavy-duty weighted buffing machine which are rarely available for hire.
To seal internal Sandstone floors, I usually use Tile Doctor Colour Grow which brings out the natural colours in the stone. On this occasion however two coats of Tile Doctor Ultra Seal were applied to the stone and grout which results in an invisible natural finish and better matched the clients’ requirements.
My client was really pleased with the new floor and left the following feedback:
“Only finished today but looks so good now. Russell did a great job milling the flags to a much smoother finish. Two coats of sealant applied by Heidi on last day which hopefully will keep it looking that way. Mark F. Bamber Bridge”
For aftercare cleaning I left them with a bottle of Tile Doctor Neutral Cleaner which is specially designed for cleaning sealed floors. You need to be very careful when using supermarket cleaners as many are tool strong and will slowly strip the sealer off the floor, always read the label.
Russell Taylor
Lancashire Tile Doctor
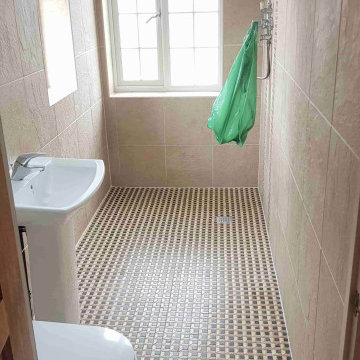 Tile Doctor Ltd
This wet room in Doncaster had become so mouldy and dirty the owners didn’t know what to do with it. The Limestone and Marble Mosaics on the floor and the Ceramic wall tile and Grout throughout the bathroom had become so badly affected with mould, nothing they could buy from could resolve it.
Following my site visit I was confident the room could be cleaned up (in-fact I have seen worse), I explained what we could do to restore and revamp the wet room and they were happy to go ahead with my quote.
First, I opened windows to maximise ventilation and then working top down I set about tackling the Ceramic wall tile and grout by spraying on a strong dilution of Tile Doctor Pro-Clean. Spraying on the solution mixes it with air making it lighter and easier to stick to the wall where it can soak in and get to work breaking down the mould.
After about fifteen minutes it was scrubbed into the tile and specifically the grout joints where it was needed most. This action releases grime and other contamination from the grout. The room needed a series of different treatments due to the different tiles and areas of mould, so I followed that up with Tile Doctor Duo Clean. This is a bleach-based cleaner which is brilliant at tackling mould and getting the grout back to its original colour.
The Ceramic tile in this bathroom has a textured surface which traps dirt so to get them clean I also used Tile Doctor Oxy-Gel. Being a Gel is easily sticks to the vertical surface allowing for longer dwell times which allows the product to dissolve the dirt and make it easier to remove.
With the walls looking much clear for my efforts I turned my attention to the Mosaic floor tiles. For these I went straight in with a cocktail combination of Tile Doctor Pro-Clean and Duo Clean cleaners which I knew from cleaning the wall tiles would have the right impact.
I was also able to use a buffing machine fitted with a poly brush attachment and running at medium speed to do most of the scrubbing. The grout lines were green with mould, and I was able to get this process to return the Mosaics and grout lines back to their original state.
The slurry was removed with a wet vacuum and rinsed thoroughly with water. It took many hours and repeated scrubbing to get the room looking like it should. I was then able to finally leave for the day and allow the wet room to dry out overnight.
I returned the following morning and started by removing all the old silicone from the corners of the room, much of it had become stained and difficult to get clean so replacement was the best option. The waste was removed and replaced with a new bead of mould resistant silicone colour matched to suit the tiles.
The Mosaics has fully dried by this point, so I was then able to apply a sealer to floor to seal in the Marble and Limestone floor Mosaics and grout. I used a couple of coats of Tile Doctor Colour Grow for this, it’s a breathable impregnating sealer that’s suitable for wet rooms. For the wall tile and grout, I used an aerosol sealer which will help protect the walls from getting mouldy and dirty again.
Once I had finished, I educated the owners on how to keep up the cleaning of the room supplying them with a complimentary bottle of Tile Doctor Aqua-Pro shower tile Cleaner. This is much better than any supermarket cleaner as it is pH neutral and will ensure that the newly applied sealant will not be prematurely affected. Hopefully, this will ensure it never gets quite so bad in the future however improved ventilation is the real key to solving that problem. They were very satisfied with the work we carried out and as you can see from the photographs on this page, the wet room has been transformed.
Matthew Lovett
South Yorkshire Tile Doctor
 Tile Doctor Ltd
We received a request to renovate Victorian tiled hallway floor at a house in the London borough of Harlesden NW10. My client had modernised the heating system and this unfortunately required a section of the tiled flooring to be dug up so new pipework could be laid.
After speaking on the phone, I arranged an initial visit to the property so I could properly assess the work required and provide a price for restoring the floor. During my visit I could see there was another section of missing tiles at one of the door thresholds which would need attention. Except for the missing sections of floor I could see that the tiles themselves were in good condition for their age and would respond well to a deep clean and fresh seal.
I was confident on being able to source matching replacements for the missing tiles and reassured my client that we would be able not only repair the floor but also renovate it to a good standard. I gave them a price to do the restoration which they were happy to accept, and the work was booked.
After some research I managed to source replacement tiles from the Vintage Floor Tile Company in Kent; Victorian tiles are still popular so there a few companies that keep stock so we can usually find a match.
With the replacements in hand, work started by removing the cement and loose material from the missing sections of flooring and backfilling with self-levelling compound to bring the exposed base up to the right level for tiling.
The tiles were then cut to shape as required to match the existing patten and fixed into place with a quick setting adhesive and then grouted.
The floor was left to overnight to allow the adhesive to harden fully, and I returned the next day to deep clean the whole floor. To give the tiles are deep clean a strong dilution of Tile Doctor Remove and Go was sprayed onto the floor and left to soak in for ten minutes. It was then scrubbed into the floor using a rotary machine fitted with a with a black pad. This action lifted the dirt out of the tiles and the resulting slurry was removed with the wet vacuum.
It turned out that the pores of the tiles were holding a lot of dirt, so the process was repeated until I was satisfied. Due to the age of the property, there was no damp-proof membrane installed so I do try to minimise the amount of water I use in this process as there is always a chance of exacerbating any latent efflorescence issues.
Efflorescence occurs where moisture rises through the tile bringing with it salts from underneath the floor as it evaporates on the surface. This can lead to unsightly white marks appearing on the tile. To counteract this potential problem the cleaning was followed by an acid wash using Tile Doctor Acid Gel applied with a 100 then 200-grit pad, before finishing on a 400-grit burnishing pad. The floor was again rinsed with water after the application of each pad to remove the slurry and extracted with a wet vacuum.
Once I was satisfied the floor was as clean as possible, we left site and the area was left to dry over the weekend ready for application of a new sealer.
I returned on the Monday and started by taking a few moisture readings to check the floor was dry. The floor was in an acceptable range, so I applied the first of 4 coats of sealer. For this floor I chose Tile Doctor Seal and Go Extra which is specially formulated product that provides stain resistance with a hard wearing low-sheen finish.
This product is also breathable which is an important feature for old floors, anything that blocks moisture from rising through the tile will cause it to become trapped underneath where it will pool and eventually reach out to the walls and result in rising damp.
Once complete the floor looked brand new and I’m pleased to say with the deep clean and a fresh sealer applied it was impossible to tell the difference between the original and repaired sections of flooring.
For the aftercare of sealed Victorian tiled floors, I recommend Tile Doctor Neutral Cleaner, it’s a mild day to day cleaner with a neutral pH that won’t damage the sealer. Many of the tile cleaning products you find in supermarkets are simply too strong.
Andrew Newstead
North London Tile Doctor
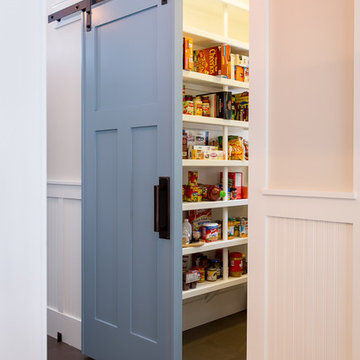
 Marty Rhein, CKD, CBD - BAC Design Group
Williamson Photography
Kitchen pantry - coastal dark wood floor kitchen pantry idea in Other
Kitchen pantry - coastal dark wood floor kitchen pantry idea in Other
Sponsored
Columbus, OH

Structural Remodeling
Franklin County's Heavy Timber Specialists | Best of Houzz 2020!
 Advance Design Studio, Ltd.
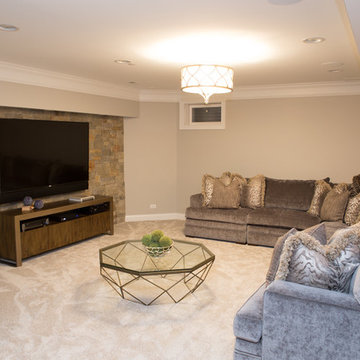
Mike and Michelle of Lake Barrington knew they needed extra space. Their home was becoming too crowded for their family with blossoming teenagers, so a basement renovation offered the perfect solution for more space for the kids and more room to entertain for the adults.
“Our project consisted of expanding our laundry room, putting in a first floor wet bar so we had adult space upstairs, while also renovating our basement for a family-friendly and teen-functional area as well,” Michelle says.
They found Advance Design Studio through a neighbor who gave a glowing recommendation, giving Michelle and Mike the confidence they needed to move forward with a major home renovation. They felt like they knew Advance Design before they even worked together. When they met with the owner Todd Jurs and designer Nicole Ryan, Mike and Michelle knew they were getting a trustworthy, dependable team that could create the project they had been dreaming about for 7 years.
Having virtually no natural light to work with, one of the biggest design challenges was creating a basement that did not feel dark and depressing. The Advance team got to work creating architectural archways and custom detailed dry-stack stone columns artfully designed into the space, adding a dramatic element that made the space feel less like a basement or more like a relaxing family room. Color 3D renderings were created to portray what the space would look like so Mike and Michelle could visualize the space in advance.
Detailed trim and crown moldings grace the built in buffet and wet bar making for an amazingly functional space that lacks nothing in style and visual interest. Cherry wood cabinetry by Dura Supreme is featured in the space with a “Cocoa Brown” finish and includes beautiful mirrored glass doors embellished with unique elliptical mullion details. A built-in microwave, dishwasher and mini fridge add practicality to the ample entertainment mecca. An under mounted sink finishes the space joined with a intricate mosaic tile backsplash and “Ventisca Polished” quartz countertops.
The basement is absolutely perfect for hosting friends and family with expertly designed key areas such as a game space for the kids, a movie area for the family, an ample workout room with luxurious full bath, and even built in wine storage. The family absolutely loves the new basement living space, and has already enjoyed numerous family movie nights and sleep-overs with friends.
While custom cabinets made by Dura Supreme were used to create unique spaces that lived up to Mike and Michelle’s expectations., heated flooring under the 16”x16” “Mongolian Spring” tile was installed giving all tiled areas of the basement a much cozier feel, eliminating that cold hard surface most of us hate in our basements!
The new basement must-have requirement list included a new bath space, which was incorporated adjacent to the work out room. The sleek shower door and cabinets in the new bathroom make guests and family feel like they are in an elegant hotel. The new guest bath features 4”x36” “Silver Screen” honed marble tile in a brick pattern on the shower walls and 2”x2” “Chenille” limestone tile in a hexagon mosaic pattern on the shower floor.
“I came in with very specific requirements for our three project areas,” Michelle says. “There was not one time that I felt like I was asking for something that was not going to turn out how I anticipated.”
Tying in multiple rooms during a renovation if you have can do it makes a lot of sense and saves money in the long run. A fully functional laundry room as well was a must on this family’s wish list. Michelle wanted to add space to the existing cramped and awkward laundry room, and Mike wanted to make sure they could still park a car in the garage. Reconfiguring interior walls required borrowing unused space cleverly from the garage in order to enlarge the laundry room space.
Drawers under the stairs added beautiful hidden storage created almost magically out of dead space. White painted Dura Supreme cabinets bring additional light into the small space; while the 16”x16” cleft slate tile flooring provides excellent contrast and the naturally earthy feel Michelle wanted. Quartz countertops with a 3”x12” “Debut Dew” subway tile backsplash add elegance to the now upliftingly bright laundry room.
The extra space makes doing laundry much more pleasurable and the added storage is a great for all those little things like winter hats and gloves, umbrellas and the like. “The Advance Design project team was phenomenal to work with,” Michelle says. “They came in, shared the plans with us and walked us through the expectations. We always knew what was coming next.”
Converting an existing closet space, the wet bar upstairs was challenging because they wanted a functional area that didn’t look or feel like cabinets just sticking out of a closet. So the Advance team transformed this ordinary closet space into a stunning wet bar that architecturally appears as if it’s always been there. Traditional, elegant hand carved custom molding matching the adjacent fireplace ties the new entertainment bar area in nicely with the existing family room and kitchen area.
Featuring a built in wine refrigerator, Dura Supreme cabinetry in deep cherry wood elegantly displays wine bottles and etched glass mullion doors that fill with soft light in the evening hours. Cambria “Windermere” quartz countertops with a sophisticated hammered copper sink and a glimmering backsplash round out the stunning wet bar. Hosting parties and family functions has become much more enjoyable now that they have a dedicated beverage serving area large enough to include hors devours.
All three projects were designed and constructed together at the same time, making for a cohesive project that was administered smoothly and easily both for the design team and for the family. Disruption to the home was minimal as each phase was completed in each project conclusively, and design and meeting time for the homeowner was efficient and organized making for an enjoyable process.
“Advance Design was great to work with,” Michelle says. “I would highly recommend them to anyone considering a home improvement project. They took the time at the beginning to understand our needs, our budget, and our vision for our home. The field team was great, attentive, on time, cleaned up each day and made the overall experience very positive. We couldn't be happier with the finished product.”
With the help of our talented, award winning design team you can create the basement, laundry room, or any other home renovation that you have been dreaming of. With our “Common Sense Remodeling” approach, the process of renovating you home has never been easier. Contact us today at 847-836-2600 or schedule an appointment to talk with us about that kitchen remodeling project.
Joe Nowak
 Interiors Joan and Associates
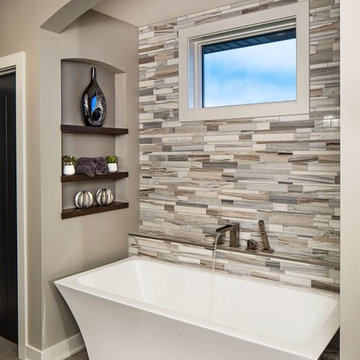
Freestanding bathtub - contemporary master beige tile and gray tile freestanding bathtub idea in Omaha with gray walls
 Wayne Windham Architect, P.A.
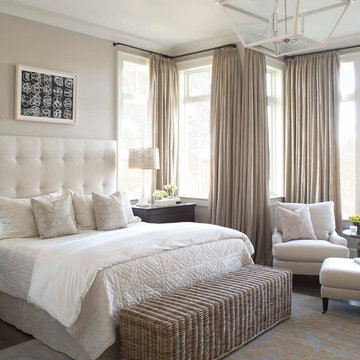
Inspiration for a coastal master dark wood floor and brown floor bedroom remodel in Charleston with beige walls
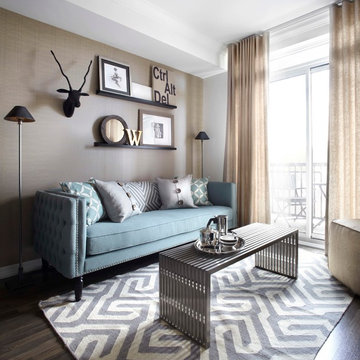
 LUX Design | Interior Design Build
A pale blue tufted sofa sits on a patterned area carpet, with a chrome coffee table bench, gold drapery and photo gallery wall above.
Example of a small trendy open concept dark wood floor and brown floor living room design in Toronto with beige walls
Example of a small trendy open concept dark wood floor and brown floor living room design in Toronto with beige walls
Sponsored
Columbus, OH
Hope Restoration & General Contracting
Columbus Design-Build, Kitchen & Bath Remodeling, Historic Renovations
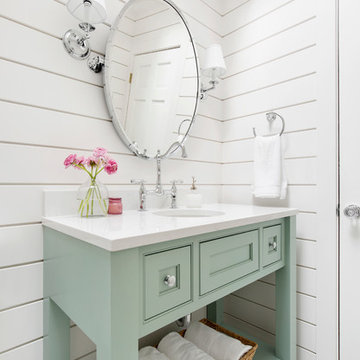 Kimberlee Marie Interiors
It’s always a blessing when your clients become friends - and that’s exactly what blossomed out of this two-phase remodel (along with three transformed spaces!). These clients were such a joy to work with and made what, at times, was a challenging job feel seamless. This project consisted of two phases, the first being a reconfiguration and update of their master bathroom, guest bathroom, and hallway closets, and the second a kitchen remodel.
In keeping with the style of the home, we decided to run with what we called “traditional with farmhouse charm” – warm wood tones, cement tile, traditional patterns, and you can’t forget the pops of color! The master bathroom airs on the masculine side with a mostly black, white, and wood color palette, while the powder room is very feminine with pastel colors.
When the bathroom projects were wrapped, it didn’t take long before we moved on to the kitchen. The kitchen already had a nice flow, so we didn’t need to move any plumbing or appliances. Instead, we just gave it the facelift it deserved! We wanted to continue the farmhouse charm and landed on a gorgeous terracotta and ceramic hand-painted tile for the backsplash, concrete look-alike quartz countertops, and two-toned cabinets while keeping the existing hardwood floors. We also removed some upper cabinets that blocked the view from the kitchen into the dining and living room area, resulting in a coveted open concept floor plan.
Our clients have always loved to entertain, but now with the remodel complete, they are hosting more than ever, enjoying every second they have in their home.
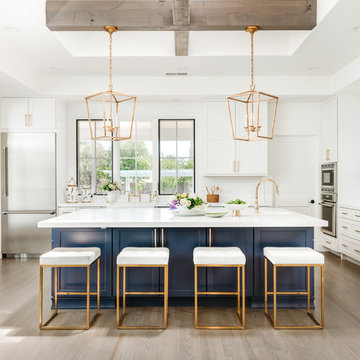
 GOLDEN GATE KITCHENS
Christopher Stark Photography
Dura Supreme custom painted cabinetry, white , custom SW blue island, Indigo Batik< Calcatta Marble Counters
Furniture and accessories: Susan Love, Interior Stylist
Photographer www.christopherstark.com
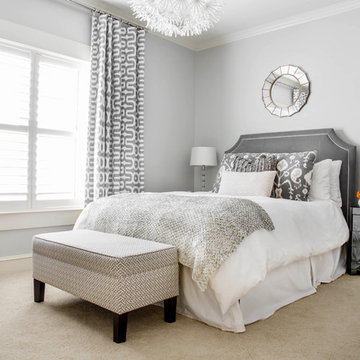
 Lindsey Binz Home Company
Inspiration for a transitional carpeted bedroom remodel in Little Rock with gray walls
52