
Search results for "Starting watering" in Home Design Ideas


 Mottram Architecture
This custom piece of cabinetry was specially designed and built by the homeowner's father!
Timber frame homes offer unique challenges during a remodel. What often makes them beautiful and attractive to most homeowners, also makes them challenging for space requirements.
Context: The lovely couple that owned this home were struggling with some interesting floor plan challenges that just didn't work for their family. The loved the beautiful timbers and woodwork of their home, but the dramatically sloping ceilings on the second floor, particularly in the bathroom, just didn't work for this 1 1/2 bath home. Needing to use the skylight to approach the toilet was a less then ideal scenario. Although the bathroom footprint was more then adequate, the sloped ceiling only made half of the space useable. Check out the Before/After post on our blog to see the photos of the house pre-renovation. As much as they loved all the wood features in their home, another challenge they had was light. The wood ceiling made everything inside the house darker, even with a fantastic array of south facing windows, there were spaces in the home that felt dark and small. When they contacted us they wanted to know how could they make their brighter and more inviting, were there solutions to the 2nd floor sloped ceiling issues, and if they were going to do all of this work, how could they make their home more comfortable and efficient. A nagging water leak in the upstairs bathroom spurred them into action and here is how we solved their dilemma.
Conclusion: First, we added a little dormer to the rear of the house so we could get full headroom in nearly all of the upstairs bathroom! Then we decided to extend that dormer one more timber bay over to create a walk in closet with natural light and plenty of space. Since we were contemplating energy efficiency, we resolved a nagging issue that is present in a lot of timber frame construction, air tightness. Commonly found in timber frame construction, fiberglass insulation is installed in the rafter bays and board ceilings are installed over top. Unfortunately, board ceilings are anything but air tight, and fiberglass insulation needs to be in an airtight cavity for maximum effectiveness. So we were able to solve two issues at the same time for this homeowner. We removed the board ceiling and fiberglass insulation, we dense packed the rafter bays with cellulose insulation, and installed sheetrock in place of the boards. The boards were salvaged for re-use by the homeowner, and the space and light quality was dramatically improved. Some may think that losing the board ceiling took something away from the space, but what you'll see in the pictures is that it highly accentuates the heavy timbers and really makes them stand out in a beautiful way. Now with this added airtightness, better insulation, and brighter space, the homeowner hardly runs their wood stove, and it's so quiet in the space, an added bonus from changing the insulation. It became necessary to also add a sheetrock ceiling to the living room to hide the plumbing from the new bathroom layout above. Changing this ceiling gave the homeowner some real quality lighting that was lacking in the living room before. The brighter ceiling and new lighting layout completely transforms the living room into a space you want to hang out, even though the layout didn't change at all. When the homeowner saw the finished spaces she said "I can't believe this is my house, I want to live in this house"
Energy Efficiency: I touched a little on the efficiency above, but like all projects done with Mottram Architecture, we always want to leave you with a little extra. Timber frame construction with board ceilings and fiberglass insulation are notoriously leaky! If you want to know what we think about fiberglass insulation, check our our blog post on Why Fiberglass Insulation Sucks. By installing cellulose insulation and covering it with sheetrock we were able to greatly reduce the heat flowing out of this home. It not only improves cashflow it improves the comfort level in the space. Who wants to sit in their living room and feel a draft? Let us remind you, we are not saying cellulose insulation is an air barrier, we use the sheetrock to help with that, but it does significantly reduce the air flow over fiberglass insulation. And when we reduce the airflow, we reduce the heat flow. And when we reduce the heat flow, we reduce the need to re-heat that drafty air from outside. When it comes to energy efficiency the first and best place to start is air infiltration. We greatly reduced the air infiltration with the new insulation, but we also added a hat and warm boots. What I mean by that is, we improved the insulation in the roof, and we installed insulation in the basement. Maybe it's a silly analogy, but when you think about keeping warm, we always start with the hat and boots! With sustainability in mind, the next project will be to add a deck to the front of this house with rain catchment barrels from the metal roof. They are planning to plant a garden in the spring and the rain catchment system will help to irrigate the new garden.
Builder: East Shore Builders
Photographer: Michael Eric Berube
Michael Eric Berube, Maine Virtual Home Tours

 TVL Creative Ltd.
This project is an incredible transformation and the perfect example of successful style mixing! This client, and now a good friend of TVL (as they all become), is a wonderfully eclectic and adventurous one with immense interest in texture play, pops of color, and unique applications. Our scope in this home included a full kitchen renovation, main level powder room renovation, and a master bathroom overhaul. Taking just over a year to complete from the first design phases to final photos, this project was so insanely fun and packs an amazing amount of fun details and lively surprises. The original kitchen was large and fairly functional. However, the cabinetry was dated, the lighting was inefficient and frankly ugly, and the space was lacking personality in general. Our client desired maximized storage and a more personalized aesthetic. The existing cabinets were short and left the nice height of the space under-utilized. We integrated new gray shaker cabinets from Waypoint Living Spaces and ran them to the ceiling to really exaggerate the height of the space and to maximize usable storage as much as possible. The upper cabinets are glass and lit from within, offering display space or functional storage as the client needs. The central feature of this space is the large cobalt blue range from Viking as well as the custom made reclaimed wood range hood floating above. The backsplash along this entire wall is vertical slab of marble look quartz from Pental Surfaces. This matches the expanse of the same countertop that wraps the room. Flanking the range, we installed cobalt blue lantern penny tile from Merola Tile for a playful texture that adds visual interest and class to the entire room. We upgraded the lighting in the ceiling, under the cabinets, and within cabinets--we also installed accent sconces over each window on the sink wall to create cozy and functional illumination. The deep, textured front Whitehaven apron sink is a dramatic nod to the farmhouse aesthetic from KOHLER, and it's paired with the bold and industrial inspired Tournant faucet, also from Kohler. We finalized this space with other gorgeous appliances, a super sexy dining table and chair set from Room & Board, the Paxton dining light from Pottery Barn and a small bar area and pantry on the far end of the space. In the small powder room on the main level, we converted a drab builder-grade space into a super cute, rustic-inspired washroom. We utilized the Bonner vanity from Signature Hardware and paired this with the cute Ashfield faucet from Pfister. The most unique statements in this room include the water-drop light over the vanity from Shades Of Light, the copper-look porcelain floor tile from Pental Surfaces and the gorgeous Cashmere colored Tresham toilet from Kohler. Up in the master bathroom, elegance abounds. Using the same footprint, we upgraded everything in this space to reflect the client's desire for a more bright, patterned and pretty space. Starting at the entry, we installed a custom reclaimed plank barn door with bold large format hardware from Rustica Hardware. In the bathroom, the custom slate blue vanity from Tharp Cabinet Company is an eye catching statement piece. This is paired with gorgeous hardware from Amerock, vessel sinks from Kohler, and Purist faucets also from Kohler. We replaced the old built-in bathtub with a new freestanding soaker from Signature Hardware. The floor tile is a bold, graphic porcelain tile with a classic color scheme. The shower was upgraded with new tile and fixtures throughout: new clear glass, gorgeous distressed subway tile from the Castle line from TileBar, and a sophisticated shower panel from Vigo. We finalized the space with a small crystal chandelier and soft gray paint. This project is a stunning conversion and we are so thrilled that our client can enjoy these personalized spaces for years to come. Special thanks to the amazing Ian Burks of Burks Wurks Construction for bringing this to life!
Find the right local pro for your project
 Mottram Architecture
Timber frame homes offer unique challenges during a remodel. What often makes them beautiful and attractive to most homeowners, also makes them challenging for space requirements.
Context: The lovely couple that owned this home were struggling with some interesting floor plan challenges that just didn't work for their family. The loved the beautiful timbers and woodwork of their home, but the dramatically sloping ceilings on the second floor, particularly in the bathroom, just didn't work for this 1 1/2 bath home. Needing to use the skylight to approach the toilet was a less then ideal scenario. Although the bathroom footprint was more then adequate, the sloped ceiling only made half of the space useable. Check out the Before/After post on our blog to see the photos of the house pre-renovation. As much as they loved all the wood features in their home, another challenge they had was light. The wood ceiling made everything inside the house darker, even with a fantastic array of south facing windows, there were spaces in the home that felt dark and small. When they contacted us they wanted to know how could they make their brighter and more inviting, were there solutions to the 2nd floor sloped ceiling issues, and if they were going to do all of this work, how could they make their home more comfortable and efficient. A nagging water leak in the upstairs bathroom spurred them into action and here is how we solved their dilemma.
Conclusion: First, we added a little dormer to the rear of the house so we could get full headroom in nearly all of the upstairs bathroom! Then we decided to extend that dormer one more timber bay over to create a walk in closet with natural light and plenty of space. Since we were contemplating energy efficiency, we resolved a nagging issue that is present in a lot of timber frame construction, air tightness. Commonly found in timber frame construction, fiberglass insulation is installed in the rafter bays and board ceilings are installed over top. Unfortunately, board ceilings are anything but air tight, and fiberglass insulation needs to be in an airtight cavity for maximum effectiveness. So we were able to solve two issues at the same time for this homeowner. We removed the board ceiling and fiberglass insulation, we dense packed the rafter bays with cellulose insulation, and installed sheetrock in place of the boards. The boards were salvaged for re-use by the homeowner, and the space and light quality was dramatically improved. Some may think that losing the board ceiling took something away from the space, but what you'll see in the pictures is that it highly accentuates the heavy timbers and really makes them stand out in a beautiful way. Now with this added airtightness, better insulation, and brighter space, the homeowner hardly runs their wood stove, and it's so quiet in the space, an added bonus from changing the insulation. It became necessary to also add a sheetrock ceiling to the living room to hide the plumbing from the new bathroom layout above. Changing this ceiling gave the homeowner some real quality lighting that was lacking in the living room before. The brighter ceiling and new lighting layout completely transforms the living room into a space you want to hang out, even though the layout didn't change at all. When the homeowner saw the finished spaces she said "I can't believe this is my house, I want to live in this house"
Energy Efficiency: I touched a little on the efficiency above, but like all projects done with Mottram Architecture, we always want to leave you with a little extra. Timber frame construction with board ceilings and fiberglass insulation are notoriously leaky! If you want to know what we think about fiberglass insulation, check our our blog post on Why Fiberglass Insulation Sucks. By installing cellulose insulation and covering it with sheetrock we were able to greatly reduce the heat flowing out of this home. It not only improves cashflow it improves the comfort level in the space. Who wants to sit in their living room and feel a draft? Let us remind you, we are not saying cellulose insulation is an air barrier, we use the sheetrock to help with that, but it does significantly reduce the air flow over fiberglass insulation. And when we reduce the airflow, we reduce the heat flow. And when we reduce the heat flow, we reduce the need to re-heat that drafty air from outside. When it comes to energy efficiency the first and best place to start is air infiltration. We greatly reduced the air infiltration with the new insulation, but we also added a hat and warm boots. What I mean by that is, we improved the insulation in the roof, and we installed insulation in the basement. Maybe it's a silly analogy, but when you think about keeping warm, we always start with the hat and boots! With sustainability in mind, the next project will be to add a deck to the front of this house with rain catchment barrels from the metal roof. They are planning to plant a garden in the spring and the rain catchment system will help to irrigate the new garden.
Builder: East Shore Builders
Photographer: Michael Eric Berube
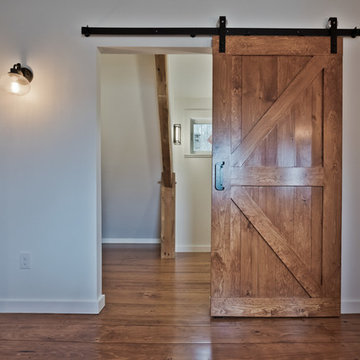 Mottram Architecture
Timber frame homes offer unique challenges during a remodel. What often makes them beautiful and attractive to most homeowners, also makes them challenging for space requirements.
Context: The lovely couple that owned this home were struggling with some interesting floor plan challenges that just didn't work for their family. The loved the beautiful timbers and woodwork of their home, but the dramatically sloping ceilings on the second floor, particularly in the bathroom, just didn't work for this 1 1/2 bath home. Needing to use the skylight to approach the toilet was a less then ideal scenario. Although the bathroom footprint was more then adequate, the sloped ceiling only made half of the space useable. Check out the Before/After post on our blog to see the photos of the house pre-renovation. As much as they loved all the wood features in their home, another challenge they had was light. The wood ceiling made everything inside the house darker, even with a fantastic array of south facing windows, there were spaces in the home that felt dark and small. When they contacted us they wanted to know how could they make their brighter and more inviting, were there solutions to the 2nd floor sloped ceiling issues, and if they were going to do all of this work, how could they make their home more comfortable and efficient. A nagging water leak in the upstairs bathroom spurred them into action and here is how we solved their dilemma.
Conclusion: First, we added a little dormer to the rear of the house so we could get full headroom in nearly all of the upstairs bathroom! Then we decided to extend that dormer one more timber bay over to create a walk in closet with natural light and plenty of space. Since we were contemplating energy efficiency, we resolved a nagging issue that is present in a lot of timber frame construction, air tightness. Commonly found in timber frame construction, fiberglass insulation is installed in the rafter bays and board ceilings are installed over top. Unfortunately, board ceilings are anything but air tight, and fiberglass insulation needs to be in an airtight cavity for maximum effectiveness. So we were able to solve two issues at the same time for this homeowner. We removed the board ceiling and fiberglass insulation, we dense packed the rafter bays with cellulose insulation, and installed sheetrock in place of the boards. The boards were salvaged for re-use by the homeowner, and the space and light quality was dramatically improved. Some may think that losing the board ceiling took something away from the space, but what you'll see in the pictures is that it highly accentuates the heavy timbers and really makes them stand out in a beautiful way. Now with this added airtightness, better insulation, and brighter space, the homeowner hardly runs their wood stove, and it's so quiet in the space, an added bonus from changing the insulation. It became necessary to also add a sheetrock ceiling to the living room to hide the plumbing from the new bathroom layout above. Changing this ceiling gave the homeowner some real quality lighting that was lacking in the living room before. The brighter ceiling and new lighting layout completely transforms the living room into a space you want to hang out, even though the layout didn't change at all. When the homeowner saw the finished spaces she said "I can't believe this is my house, I want to live in this house"
Energy Efficiency: I touched a little on the efficiency above, but like all projects done with Mottram Architecture, we always want to leave you with a little extra. Timber frame construction with board ceilings and fiberglass insulation are notoriously leaky! If you want to know what we think about fiberglass insulation, check our our blog post on Why Fiberglass Insulation Sucks. By installing cellulose insulation and covering it with sheetrock we were able to greatly reduce the heat flowing out of this home. It not only improves cashflow it improves the comfort level in the space. Who wants to sit in their living room and feel a draft? Let us remind you, we are not saying cellulose insulation is an air barrier, we use the sheetrock to help with that, but it does significantly reduce the air flow over fiberglass insulation. And when we reduce the airflow, we reduce the heat flow. And when we reduce the heat flow, we reduce the need to re-heat that drafty air from outside. When it comes to energy efficiency the first and best place to start is air infiltration. We greatly reduced the air infiltration with the new insulation, but we also added a hat and warm boots. What I mean by that is, we improved the insulation in the roof, and we installed insulation in the basement. Maybe it's a silly analogy, but when you think about keeping warm, we always start with the hat and boots! With sustainability in mind, the next project will be to add a deck to the front of this house with rain catchment barrels from the metal roof. They are planning to plant a garden in the spring and the rain catchment system will help to irrigate the new garden.
Builder: East Shore Builders
Photographer: Michael Eric Berube

 Envision Web
Stuart Wade, Envision Virtual Tours
Envision Virtual Tours and High Resolution Photography is your best choice to find just what you are looking for in the Ellijay, Ga. area .Ellijay, Georgia, known as the “Apple Capital” of Georgia, is located between the Ellijay and Cartecay Rivers where they join to make the Coosawattee River and is the county seat of Gilmer County, Georgia. The origin of the city’s name is not certain but thought to be the English derivative of an Indian word(s) meaning “many waters”, “place of green things” or “new ground”. Some histories say it may have been named for an Indian chief.
Inhabited for countless years by the Cherokee people indigenous to the North Georgia, the area was first mentioned as a village and trade center before the onslaught of white settlers inhabited the region. During the 1830’s both white settlers and Indians occupied Ellijay. During the original land lottery in 1832, Martin Scalf acquired the 160 acre lot where the town now stands. In 1833, Clemonds Quinland bought 10 acres from Scalf, retained one acre for himself and donated the rest of the purchase to the County. A plan for twenty town lots, streets and a public square was created and the streets were oriented to allow maximum sunlight exposure to the buildings.
Proceeds from lot sales were used to build a jail and courthouse and pay other city expenses. During this same year, Gilmer County was appropriated $800.00 from the State to build a school, and a three-acre lot was donated for the city cemetery. On December 29, l834, Ellijay was incorporated and designated as the County seat of Gilmer County. By 1837, the town had twenty dwellings, three stores and one attorney. Most of these early buildings were of log construction.
Many roads led to Ellijay by 1849. The population had grown to 150 by 1850 and the town at five stores. Some wood-frame buildings were being constructed at this time and in 1854, a new courthouse was built in the center of the square, replacing the earlier building. The County’s first newspaper was the Ellijay Courier, started in 1875, and during this time period, Ellijay was a stop on the stagecoach line. The railroad bridge over the Cartecay River was completed in 1884 and the town now had rail service.
With the arrival of the railroad and subsequent tracks to White Path, Ellijay began to grow much faster. Many hotels were constructed and land was donated for a depot east of town. More industries, such as a cheese factory and the Shippen Brothers Lumber Mill, located in Ellijay. By 1898, the city had expanded its limits in every direction and now included the depot.
By 1900, all the buildings on the town square were brick. This included the recently completed Hyatt Hotel. Most of the other buildings in town were still of log construction, but new wood-frame buildings were being built. The Shippen Brothers Lumber Company production was expanding and exporting their lumber to Europe. Within the next few decades, this company grew to be one of the largest employers in Ellijay, often with five to six million feet of lumber in the yard at one time.
The population of Ellijay grew to 659 by 1910, and began to acquire many new modern conveniences such as electric lights and power, a telephone company and many new businesses.
Then in 1912, a fire ravaged the city, destroying 23 buildings. As a result, many new buildings were constructed under new and stricter fire and safety guidelines. The population, however, decreased slightly at this time to 632 in 1920.
During the 1920’s the town’s population began to grow again and, by this time, apples were being shipped out of the county and new storage facilities were built. Chickens were also shipped to markets outside of Ellijay and Gilmer County.
From the mid 1930’s to 1950, Ellijay received much assistance from the Federal WPA Programs. The old courthouse was removed from the center of town square and the Hyatt Hotel was remodeled to be the new courthouse. A park was created on the site of the old courthouse and the streets around the square were paved. A new street was built at this time entering town from the northeast. Other new roads, bridges, sidewalks and gutters were constructed to improve the city. A school and gymnasium were also built and other structures improved.
This growth began to impact the city’s infrastructure and in the l950’s and l960’s, a period of upgrading water systems, roads, and power supplies began. New low-rent housing appeared in l960 and a new hospital was built in l957. Georgia Highway 5 was widened in l962, new buildings around the square replaced old ones and some were remodeled. In 1974, the hospital was enlarged.
Currently, Ellijay attracts tourists who love the small-town feel and friendly atmosphere. Hotels and restaurants, unique shops, antiques and art galleries lend their charms to those who visit. A new courthouse constructed to resemble the old one, new streetscaping, family-oriented downtown events and the beautification of the square have stepped up the social and economic activity and have made Ellijay a popular destination.
 Envision Web
Stuart Wade, Envision Virtual Tours
Envision Virtual Tours and High Resolution Photography is your best choice to find just what you are looking for in the Ellijay, Ga. area .Ellijay, Georgia, known as the “Apple Capital” of Georgia, is located between the Ellijay and Cartecay Rivers where they join to make the Coosawattee River and is the county seat of Gilmer County, Georgia. The origin of the city’s name is not certain but thought to be the English derivative of an Indian word(s) meaning “many waters”, “place of green things” or “new ground”. Some histories say it may have been named for an Indian chief.
Inhabited for countless years by the Cherokee people indigenous to the North Georgia, the area was first mentioned as a village and trade center before the onslaught of white settlers inhabited the region. During the 1830’s both white settlers and Indians occupied Ellijay. During the original land lottery in 1832, Martin Scalf acquired the 160 acre lot where the town now stands. In 1833, Clemonds Quinland bought 10 acres from Scalf, retained one acre for himself and donated the rest of the purchase to the County. A plan for twenty town lots, streets and a public square was created and the streets were oriented to allow maximum sunlight exposure to the buildings.
Proceeds from lot sales were used to build a jail and courthouse and pay other city expenses. During this same year, Gilmer County was appropriated $800.00 from the State to build a school, and a three-acre lot was donated for the city cemetery. On December 29, l834, Ellijay was incorporated and designated as the County seat of Gilmer County. By 1837, the town had twenty dwellings, three stores and one attorney. Most of these early buildings were of log construction.
Many roads led to Ellijay by 1849. The population had grown to 150 by 1850 and the town at five stores. Some wood-frame buildings were being constructed at this time and in 1854, a new courthouse was built in the center of the square, replacing the earlier building. The County’s first newspaper was the Ellijay Courier, started in 1875, and during this time period, Ellijay was a stop on the stagecoach line. The railroad bridge over the Cartecay River was completed in 1884 and the town now had rail service.
With the arrival of the railroad and subsequent tracks to White Path, Ellijay began to grow much faster. Many hotels were constructed and land was donated for a depot east of town. More industries, such as a cheese factory and the Shippen Brothers Lumber Mill, located in Ellijay. By 1898, the city had expanded its limits in every direction and now included the depot.
By 1900, all the buildings on the town square were brick. This included the recently completed Hyatt Hotel. Most of the other buildings in town were still of log construction, but new wood-frame buildings were being built. The Shippen Brothers Lumber Company production was expanding and exporting their lumber to Europe. Within the next few decades, this company grew to be one of the largest employers in Ellijay, often with five to six million feet of lumber in the yard at one time.
The population of Ellijay grew to 659 by 1910, and began to acquire many new modern conveniences such as electric lights and power, a telephone company and many new businesses.
Then in 1912, a fire ravaged the city, destroying 23 buildings. As a result, many new buildings were constructed under new and stricter fire and safety guidelines. The population, however, decreased slightly at this time to 632 in 1920.
During the 1920’s the town’s population began to grow again and, by this time, apples were being shipped out of the county and new storage facilities were built. Chickens were also shipped to markets outside of Ellijay and Gilmer County.
From the mid 1930’s to 1950, Ellijay received much assistance from the Federal WPA Programs. The old courthouse was removed from the center of town square and the Hyatt Hotel was remodeled to be the new courthouse. A park was created on the site of the old courthouse and the streets around the square were paved. A new street was built at this time entering town from the northeast. Other new roads, bridges, sidewalks and gutters were constructed to improve the city. A school and gymnasium were also built and other structures improved.
This growth began to impact the city’s infrastructure and in the l950’s and l960’s, a period of upgrading water systems, roads, and power supplies began. New low-rent housing appeared in l960 and a new hospital was built in l957. Georgia Highway 5 was widened in l962, new buildings around the square replaced old ones and some were remodeled. In 1974, the hospital was enlarged.
Currently, Ellijay attracts tourists who love the small-town feel and friendly atmosphere. Hotels and restaurants, unique shops, antiques and art galleries lend their charms to those who visit. A new courthouse constructed to resemble the old one, new streetscaping, family-oriented downtown events and the beautification of the square have stepped up the social and economic activity and have made Ellijay a popular destination.
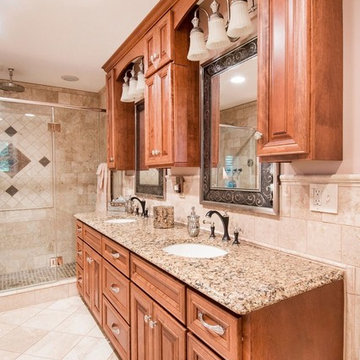


 Envision Web
Stuart Wade, Envision Virtual Tours
Envision Virtual Tours and High Resolution Photography is your best choice to find just what you are looking for in the Ellijay, Ga. area .Ellijay, Georgia, known as the “Apple Capital” of Georgia, is located between the Ellijay and Cartecay Rivers where they join to make the Coosawattee River and is the county seat of Gilmer County, Georgia. The origin of the city’s name is not certain but thought to be the English derivative of an Indian word(s) meaning “many waters”, “place of green things” or “new ground”. Some histories say it may have been named for an Indian chief.
Inhabited for countless years by the Cherokee people indigenous to the North Georgia, the area was first mentioned as a village and trade center before the onslaught of white settlers inhabited the region. During the 1830’s both white settlers and Indians occupied Ellijay. During the original land lottery in 1832, Martin Scalf acquired the 160 acre lot where the town now stands. In 1833, Clemonds Quinland bought 10 acres from Scalf, retained one acre for himself and donated the rest of the purchase to the County. A plan for twenty town lots, streets and a public square was created and the streets were oriented to allow maximum sunlight exposure to the buildings.
Proceeds from lot sales were used to build a jail and courthouse and pay other city expenses. During this same year, Gilmer County was appropriated $800.00 from the State to build a school, and a three-acre lot was donated for the city cemetery. On December 29, l834, Ellijay was incorporated and designated as the County seat of Gilmer County. By 1837, the town had twenty dwellings, three stores and one attorney. Most of these early buildings were of log construction.
Many roads led to Ellijay by 1849. The population had grown to 150 by 1850 and the town at five stores. Some wood-frame buildings were being constructed at this time and in 1854, a new courthouse was built in the center of the square, replacing the earlier building. The County’s first newspaper was the Ellijay Courier, started in 1875, and during this time period, Ellijay was a stop on the stagecoach line. The railroad bridge over the Cartecay River was completed in 1884 and the town now had rail service.
With the arrival of the railroad and subsequent tracks to White Path, Ellijay began to grow much faster. Many hotels were constructed and land was donated for a depot east of town. More industries, such as a cheese factory and the Shippen Brothers Lumber Mill, located in Ellijay. By 1898, the city had expanded its limits in every direction and now included the depot.
By 1900, all the buildings on the town square were brick. This included the recently completed Hyatt Hotel. Most of the other buildings in town were still of log construction, but new wood-frame buildings were being built. The Shippen Brothers Lumber Company production was expanding and exporting their lumber to Europe. Within the next few decades, this company grew to be one of the largest employers in Ellijay, often with five to six million feet of lumber in the yard at one time.
The population of Ellijay grew to 659 by 1910, and began to acquire many new modern conveniences such as electric lights and power, a telephone company and many new businesses.
Then in 1912, a fire ravaged the city, destroying 23 buildings. As a result, many new buildings were constructed under new and stricter fire and safety guidelines. The population, however, decreased slightly at this time to 632 in 1920.
During the 1920’s the town’s population began to grow again and, by this time, apples were being shipped out of the county and new storage facilities were built. Chickens were also shipped to markets outside of Ellijay and Gilmer County.
From the mid 1930’s to 1950, Ellijay received much assistance from the Federal WPA Programs. The old courthouse was removed from the center of town square and the Hyatt Hotel was remodeled to be the new courthouse. A park was created on the site of the old courthouse and the streets around the square were paved. A new street was built at this time entering town from the northeast. Other new roads, bridges, sidewalks and gutters were constructed to improve the city. A school and gymnasium were also built and other structures improved.
This growth began to impact the city’s infrastructure and in the l950’s and l960’s, a period of upgrading water systems, roads, and power supplies began. New low-rent housing appeared in l960 and a new hospital was built in l957. Georgia Highway 5 was widened in l962, new buildings around the square replaced old ones and some were remodeled. In 1974, the hospital was enlarged.
Currently, Ellijay attracts tourists who love the small-town feel and friendly atmosphere. Hotels and restaurants, unique shops, antiques and art galleries lend their charms to those who visit. A new courthouse constructed to resemble the old one, new streetscaping, family-oriented downtown events and the beautification of the square have stepped up the social and economic activity and have made Ellijay a popular destination.

 Progressive Design Build
Challenge
As part-time residents of this Bonita Springs home, our clients were looking to update their outdoor entertainment area. They also planned to be away for the summer during the remodel and needed their renovation project to be finished prior to their return for the winter.
Their needs included:
Changing the color pallet to a monochromatic scheme, removing the yellow brick pavers, adding an outdoor kitchen area, adding an outdoor fireplace, resurfacing the pool and updating the tile, installing a new screen enclosure, and creating privacy from the neighbors, particularly the main sitting areas, pool and outdoor kitchen.
Although there was already a 1,221 sq. ft. lanai under the roof, it lacked functionality needed by the homeowners. Most of its amenities were located at one end of the lanai, and lacked privacy that the homeowners valued.
Solution
The final project design required two additions to the lanai area adding an accumulative 265 sq. ft. to the existing space expanding their sitting area and accommodating a much-needed outdoor kitchen. The new additions also needed to blend with the home’s existing style.
Addition #1—Sitting Area:
The first addition added approximately 145 sq. ft. to the end of the lanai. This allowed Progressive Design Build to tie into the existing gable room for the new space and create privacy from the neighbors.
Addition #2—Outdoor Kitchen:
The second addition was a bump out that added approximately 120 sq. ft. to the end of the house close to the interior kitchen. This allowed the client to add an outdoor over and 52” Viking grill (with a side burner) to their outdoor living space. Other amenities included a new sink and under counter fridge, granite countertops, tumbled stone stile and Cypress cabinetry, custom-fabricated with marine grade plywood boxes and marine grade finishes to withstand moisture, common in the Bonita Bay community.
Special attention was given to the preparation area on either side of the stove, the landing area next to the oven and the serving counter behind the bar. Bar seating was added to the outdoor kitchen, allowing guests to visit with the cook comfortably and easily.
Brick Pavers
During the design phase, we discovered that the original brick pavers were set in sand, with no concrete pad below. Consequently, the retaining wall and several pavers were starting to fail, caused by the shifting sands. To remedy the problem, we installed a new concrete deck and laid new nonslip pavers on top of the deck—ideal for wet area applications.
Pool Renovations
To dramatically improve the enjoyment and ambiance of their pool, Progressive Design Build completely re-plumbed it, putting in additional lighting and new water features. New decorative pool tile, coping, and a paver deck were also installed around the pool. The pool finish chosen by our clients was a nice tropical blue color.
Screen Enclosure
A new screen enclosure was installed in compliance with new local building codes, making it more stable and solid than the existing one. The color change from white to bronze coordinated well with the homeowners’ new color scheme; and the location of the service door and stairs provided convenient access to the new pool equipment.
Results
This project was completed on time and within budget before these homeowners returned for their winter holiday. They were thrilled with the weekly communication, which included two-way phone calls and email photo sharing. They always knew where their project was in the construction process and what was happening at all times—providing security and peace of mind.
 Mottram Architecture
Timber frame homes offer unique challenges during a remodel. What often makes them beautiful and attractive to most homeowners, also makes them challenging for space requirements.
Context: The lovely couple that owned this home were struggling with some interesting floor plan challenges that just didn't work for their family. The loved the beautiful timbers and woodwork of their home, but the dramatically sloping ceilings on the second floor, particularly in the bathroom, just didn't work for this 1 1/2 bath home. Needing to use the skylight to approach the toilet was a less then ideal scenario. Although the bathroom footprint was more then adequate, the sloped ceiling only made half of the space useable. Check out the Before/After post on our blog to see the photos of the house pre-renovation. As much as they loved all the wood features in their home, another challenge they had was light. The wood ceiling made everything inside the house darker, even with a fantastic array of south facing windows, there were spaces in the home that felt dark and small. When they contacted us they wanted to know how could they make their brighter and more inviting, were there solutions to the 2nd floor sloped ceiling issues, and if they were going to do all of this work, how could they make their home more comfortable and efficient. A nagging water leak in the upstairs bathroom spurred them into action and here is how we solved their dilemma.
Conclusion: First, we added a little dormer to the rear of the house so we could get full headroom in nearly all of the upstairs bathroom! Then we decided to extend that dormer one more timber bay over to create a walk in closet with natural light and plenty of space. Since we were contemplating energy efficiency, we resolved a nagging issue that is present in a lot of timber frame construction, air tightness. Commonly found in timber frame construction, fiberglass insulation is installed in the rafter bays and board ceilings are installed over top. Unfortunately, board ceilings are anything but air tight, and fiberglass insulation needs to be in an airtight cavity for maximum effectiveness. So we were able to solve two issues at the same time for this homeowner. We removed the board ceiling and fiberglass insulation, we dense packed the rafter bays with cellulose insulation, and installed sheetrock in place of the boards. The boards were salvaged for re-use by the homeowner, and the space and light quality was dramatically improved. Some may think that losing the board ceiling took something away from the space, but what you'll see in the pictures is that it highly accentuates the heavy timbers and really makes them stand out in a beautiful way. Now with this added airtightness, better insulation, and brighter space, the homeowner hardly runs their wood stove, and it's so quiet in the space, an added bonus from changing the insulation. It became necessary to also add a sheetrock ceiling to the living room to hide the plumbing from the new bathroom layout above. Changing this ceiling gave the homeowner some real quality lighting that was lacking in the living room before. The brighter ceiling and new lighting layout completely transforms the living room into a space you want to hang out, even though the layout didn't change at all. When the homeowner saw the finished spaces she said "I can't believe this is my house, I want to live in this house"
Energy Efficiency: I touched a little on the efficiency above, but like all projects done with Mottram Architecture, we always want to leave you with a little extra. Timber frame construction with board ceilings and fiberglass insulation are notoriously leaky! If you want to know what we think about fiberglass insulation, check our our blog post on Why Fiberglass Insulation Sucks. By installing cellulose insulation and covering it with sheetrock we were able to greatly reduce the heat flowing out of this home. It not only improves cashflow it improves the comfort level in the space. Who wants to sit in their living room and feel a draft? Let us remind you, we are not saying cellulose insulation is an air barrier, we use the sheetrock to help with that, but it does significantly reduce the air flow over fiberglass insulation. And when we reduce the airflow, we reduce the heat flow. And when we reduce the heat flow, we reduce the need to re-heat that drafty air from outside. When it comes to energy efficiency the first and best place to start is air infiltration. We greatly reduced the air infiltration with the new insulation, but we also added a hat and warm boots. What I mean by that is, we improved the insulation in the roof, and we installed insulation in the basement. Maybe it's a silly analogy, but when you think about keeping warm, we always start with the hat and boots! With sustainability in mind, the next project will be to add a deck to the front of this house with rain catchment barrels from the metal roof. They are planning to plant a garden in the spring and the rain catchment system will help to irrigate the new garden.
Builder: East Shore Builders
Photographer: Michael Eric Berube

 Sandra Hambley
This Reston master bath features a “Shower Foyer” with shower knobs at entrance so you don’t need to get wet while waiting for water to warm up. The multiple shower jets and rain head give a truly luxurious shower experience. Heated towels await you when complete. All the new bathrooms feature linear drain systems, allowing for the same flooring to be used in the shower and the rest of the bathroom – so there’s no shower lip! Refined details include a custom made vanity from Spain and a chandelier!
Signature Design Interiors bathroom remodels start at $20,000. Project prices depend on the size, construction requirements, floor plan, and selections that you make.
We are a Class A contractor and our services include both the design and construction of your bathroom. Our remodeling projects receive the same care and creativity that our decorating projects do, with a special focus on marrying beauty with function, tailored to meet your individual lifestyle.
Interior Designer, Interior Decorator, Interior Design, Interior Decorators, Interior Designer near me, Interior Decorator Near me, Interior Designers near me, Fairfax, Falls Church, McLean, Annandale, Vienna, Reston, Alexandria, Great Falls, Arlington, Oakton, Herndon, Leesburg, Ashburn, Sterling, Lorton, Chantilly, Washington DC, Bowie, Upper Marlboro Decor and You DC, Sandra Hambley, Janet Aurora, Crystal Cline, Bonnie Peet, Katie McGovern, Annamaria Kennedy, Interior Designer Fairfax VA, Interior Designers Fairfax VA, Interior Decorator Fairfax VA, Interior Decorators Fairfax VA, Interior Designer McLean VA, Interior Designers Mclean VA, Interior Decorator Mclean VA, Interior Decorators Mclean VA, Interior Designer Annandale VA, Interior Designers Annandale VA, Interior Decorator Annandale VA, Interior Decorators Annandale VA, Interior Designer Vienna VA, Interior Designers Vienna VA, Interior Decorator Vienna VA, Interior Decorators Vienna VA, Interior Designer Reston VA, Interior Designers Reston VA, Interior Decorator Reston VA, Interior Decorators Reston VA, Interior Designer Alexandria VA, Interior Designers Alexandria VA, Interior Decorator Alexandria VA, Interior Decorators Alexandria VA, Interior Designer Oakton VA, Interior Designers Oakton VA, Interior Decorator Oakton VA, Interior Decorators Oakton VA, Interior Designer Arlington VA, Interior Designers Arlington VA, Interior Decorator Arlington VA, Interior Decorators Arlington VA, Interior Designer Washington DC, Interior Designers Washington DC, Interior Decorator Washington DC, Interior Decorators Washington DC, Interior Designer Leesburg VA, Interior Designers Leesburg VA, Interior Decorator Leesburg VA, Interior Decorators Leesburg VA, Interior Designer Lorton VA, Interior Designers Lorton VA, Interior Decorator Lorton VA, Interior Decorators Lorton VA, Interior Designer Sterling VA, Interior Designers Sterling VA, Interior Decorator Sterling VA, Interior Decorators Sterling VA, Interior Designer
Chantilly VA, Interior Designers Chantilly VA, Interior Decorator Chantilly VA, Interior Decorators Chantilly VA, Interior Designer Bowie MD, Interior Designers Bowie MD,
Interior Decorator Bowie MD Interior Decorators Bowie MD, Interior Designer Upper Marlboro MD, Interior Designers Upper Marlboro MD, Interior Decorator Upper Marlboro MD, Interior Decorators Upper Marlboro MD, historic home decor, decorating historic homes, Washington DC homes, Washington DC designer, Washington DC decorator
 Envision Web
Stuart Wade, Envision Virtual Tours
Envision Virtual Tours and High Resolution Photography is your best choice to find just what you are looking for in the Ellijay, Ga. area .Ellijay, Georgia, known as the “Apple Capital” of Georgia, is located between the Ellijay and Cartecay Rivers where they join to make the Coosawattee River and is the county seat of Gilmer County, Georgia. The origin of the city’s name is not certain but thought to be the English derivative of an Indian word(s) meaning “many waters”, “place of green things” or “new ground”. Some histories say it may have been named for an Indian chief.
Inhabited for countless years by the Cherokee people indigenous to the North Georgia, the area was first mentioned as a village and trade center before the onslaught of white settlers inhabited the region. During the 1830’s both white settlers and Indians occupied Ellijay. During the original land lottery in 1832, Martin Scalf acquired the 160 acre lot where the town now stands. In 1833, Clemonds Quinland bought 10 acres from Scalf, retained one acre for himself and donated the rest of the purchase to the County. A plan for twenty town lots, streets and a public square was created and the streets were oriented to allow maximum sunlight exposure to the buildings.
Proceeds from lot sales were used to build a jail and courthouse and pay other city expenses. During this same year, Gilmer County was appropriated $800.00 from the State to build a school, and a three-acre lot was donated for the city cemetery. On December 29, l834, Ellijay was incorporated and designated as the County seat of Gilmer County. By 1837, the town had twenty dwellings, three stores and one attorney. Most of these early buildings were of log construction.
Many roads led to Ellijay by 1849. The population had grown to 150 by 1850 and the town at five stores. Some wood-frame buildings were being constructed at this time and in 1854, a new courthouse was built in the center of the square, replacing the earlier building. The County’s first newspaper was the Ellijay Courier, started in 1875, and during this time period, Ellijay was a stop on the stagecoach line. The railroad bridge over the Cartecay River was completed in 1884 and the town now had rail service.
With the arrival of the railroad and subsequent tracks to White Path, Ellijay began to grow much faster. Many hotels were constructed and land was donated for a depot east of town. More industries, such as a cheese factory and the Shippen Brothers Lumber Mill, located in Ellijay. By 1898, the city had expanded its limits in every direction and now included the depot.
By 1900, all the buildings on the town square were brick. This included the recently completed Hyatt Hotel. Most of the other buildings in town were still of log construction, but new wood-frame buildings were being built. The Shippen Brothers Lumber Company production was expanding and exporting their lumber to Europe. Within the next few decades, this company grew to be one of the largest employers in Ellijay, often with five to six million feet of lumber in the yard at one time.
The population of Ellijay grew to 659 by 1910, and began to acquire many new modern conveniences such as electric lights and power, a telephone company and many new businesses.
Then in 1912, a fire ravaged the city, destroying 23 buildings. As a result, many new buildings were constructed under new and stricter fire and safety guidelines. The population, however, decreased slightly at this time to 632 in 1920.
During the 1920’s the town’s population began to grow again and, by this time, apples were being shipped out of the county and new storage facilities were built. Chickens were also shipped to markets outside of Ellijay and Gilmer County.
From the mid 1930’s to 1950, Ellijay received much assistance from the Federal WPA Programs. The old courthouse was removed from the center of town square and the Hyatt Hotel was remodeled to be the new courthouse. A park was created on the site of the old courthouse and the streets around the square were paved. A new street was built at this time entering town from the northeast. Other new roads, bridges, sidewalks and gutters were constructed to improve the city. A school and gymnasium were also built and other structures improved.
This growth began to impact the city’s infrastructure and in the l950’s and l960’s, a period of upgrading water systems, roads, and power supplies began. New low-rent housing appeared in l960 and a new hospital was built in l957. Georgia Highway 5 was widened in l962, new buildings around the square replaced old ones and some were remodeled. In 1974, the hospital was enlarged.
Currently, Ellijay attracts tourists who love the small-town feel and friendly atmosphere. Hotels and restaurants, unique shops, antiques and art galleries lend their charms to those who visit. A new courthouse constructed to resemble the old one, new streetscaping, family-oriented downtown events and the beautification of the square have stepped up the social and economic activity and have made Ellijay a popular destination.
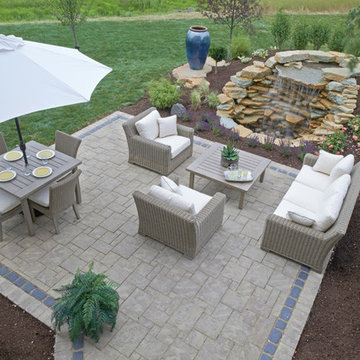

 TVL Creative Ltd.
This project is an incredible transformation and the perfect example of successful style mixing! This client, and now a good friend of TVL (as they all become), is a wonderfully eclectic and adventurous one with immense interest in texture play, pops of color, and unique applications. Our scope in this home included a full kitchen renovation, main level powder room renovation, and a master bathroom overhaul. Taking just over a year to complete from the first design phases to final photos, this project was so insanely fun and packs an amazing amount of fun details and lively surprises. The original kitchen was large and fairly functional. However, the cabinetry was dated, the lighting was inefficient and frankly ugly, and the space was lacking personality in general. Our client desired maximized storage and a more personalized aesthetic. The existing cabinets were short and left the nice height of the space under-utilized. We integrated new gray shaker cabinets from Waypoint Living Spaces and ran them to the ceiling to really exaggerate the height of the space and to maximize usable storage as much as possible. The upper cabinets are glass and lit from within, offering display space or functional storage as the client needs. The central feature of this space is the large cobalt blue range from Viking as well as the custom made reclaimed wood range hood floating above. The backsplash along this entire wall is vertical slab of marble look quartz from Pental Surfaces. This matches the expanse of the same countertop that wraps the room. Flanking the range, we installed cobalt blue lantern penny tile from Merola Tile for a playful texture that adds visual interest and class to the entire room. We upgraded the lighting in the ceiling, under the cabinets, and within cabinets--we also installed accent sconces over each window on the sink wall to create cozy and functional illumination. The deep, textured front Whitehaven apron sink is a dramatic nod to the farmhouse aesthetic from KOHLER, and it's paired with the bold and industrial inspired Tournant faucet, also from Kohler. We finalized this space with other gorgeous appliances, a super sexy dining table and chair set from Room & Board, the Paxton dining light from Pottery Barn and a small bar area and pantry on the far end of the space. In the small powder room on the main level, we converted a drab builder-grade space into a super cute, rustic-inspired washroom. We utilized the Bonner vanity from Signature Hardware and paired this with the cute Ashfield faucet from Pfister. The most unique statements in this room include the water-drop light over the vanity from Shades Of Light, the copper-look porcelain floor tile from Pental Surfaces and the gorgeous Cashmere colored Tresham toilet from Kohler. Up in the master bathroom, elegance abounds. Using the same footprint, we upgraded everything in this space to reflect the client's desire for a more bright, patterned and pretty space. Starting at the entry, we installed a custom reclaimed plank barn door with bold large format hardware from Rustica Hardware. In the bathroom, the custom slate blue vanity from Tharp Cabinet Company is an eye catching statement piece. This is paired with gorgeous hardware from Amerock, vessel sinks from Kohler, and Purist faucets also from Kohler. We replaced the old built-in bathtub with a new freestanding soaker from Signature Hardware. The floor tile is a bold, graphic porcelain tile with a classic color scheme. The shower was upgraded with new tile and fixtures throughout: new clear glass, gorgeous distressed subway tile from the Castle line from TileBar, and a sophisticated shower panel from Vigo. We finalized the space with a small crystal chandelier and soft gray paint. This project is a stunning conversion and we are so thrilled that our client can enjoy these personalized spaces for years to come. Special thanks to the amazing Ian Burks of Burks Wurks Construction for bringing this to life!

 Pradel Garden Designs
Backyard had 3 levels and a deck so many planters frame the different areas. Here Sansevieria, foxtail fern, spider plant, trailing purple wandering jew and white vinca for a classic look!
 Mottram Architecture
Timber frame homes offer unique challenges during a remodel. What often makes them beautiful and attractive to most homeowners, also makes them challenging for space requirements.
Context: The lovely couple that owned this home were struggling with some interesting floor plan challenges that just didn't work for their family. The loved the beautiful timbers and woodwork of their home, but the dramatically sloping ceilings on the second floor, particularly in the bathroom, just didn't work for this 1 1/2 bath home. Needing to use the skylight to approach the toilet was a less then ideal scenario. Although the bathroom footprint was more then adequate, the sloped ceiling only made half of the space useable. Check out the Before/After post on our blog to see the photos of the house pre-renovation. As much as they loved all the wood features in their home, another challenge they had was light. The wood ceiling made everything inside the house darker, even with a fantastic array of south facing windows, there were spaces in the home that felt dark and small. When they contacted us they wanted to know how could they make their brighter and more inviting, were there solutions to the 2nd floor sloped ceiling issues, and if they were going to do all of this work, how could they make their home more comfortable and efficient. A nagging water leak in the upstairs bathroom spurred them into action and here is how we solved their dilemma.
Conclusion: First, we added a little dormer to the rear of the house so we could get full headroom in nearly all of the upstairs bathroom! Then we decided to extend that dormer one more timber bay over to create a walk in closet with natural light and plenty of space. Since we were contemplating energy efficiency, we resolved a nagging issue that is present in a lot of timber frame construction, air tightness. Commonly found in timber frame construction, fiberglass insulation is installed in the rafter bays and board ceilings are installed over top. Unfortunately, board ceilings are anything but air tight, and fiberglass insulation needs to be in an airtight cavity for maximum effectiveness. So we were able to solve two issues at the same time for this homeowner. We removed the board ceiling and fiberglass insulation, we dense packed the rafter bays with cellulose insulation, and installed sheetrock in place of the boards. The boards were salvaged for re-use by the homeowner, and the space and light quality was dramatically improved. Some may think that losing the board ceiling took something away from the space, but what you'll see in the pictures is that it highly accentuates the heavy timbers and really makes them stand out in a beautiful way. Now with this added airtightness, better insulation, and brighter space, the homeowner hardly runs their wood stove, and it's so quiet in the space, an added bonus from changing the insulation. It became necessary to also add a sheetrock ceiling to the living room to hide the plumbing from the new bathroom layout above. Changing this ceiling gave the homeowner some real quality lighting that was lacking in the living room before. The brighter ceiling and new lighting layout completely transforms the living room into a space you want to hang out, even though the layout didn't change at all. When the homeowner saw the finished spaces she said "I can't believe this is my house, I want to live in this house"
Energy Efficiency: I touched a little on the efficiency above, but like all projects done with Mottram Architecture, we always want to leave you with a little extra. Timber frame construction with board ceilings and fiberglass insulation are notoriously leaky! If you want to know what we think about fiberglass insulation, check our our blog post on Why Fiberglass Insulation Sucks. By installing cellulose insulation and covering it with sheetrock we were able to greatly reduce the heat flowing out of this home. It not only improves cashflow it improves the comfort level in the space. Who wants to sit in their living room and feel a draft? Let us remind you, we are not saying cellulose insulation is an air barrier, we use the sheetrock to help with that, but it does significantly reduce the air flow over fiberglass insulation. And when we reduce the airflow, we reduce the heat flow. And when we reduce the heat flow, we reduce the need to re-heat that drafty air from outside. When it comes to energy efficiency the first and best place to start is air infiltration. We greatly reduced the air infiltration with the new insulation, but we also added a hat and warm boots. What I mean by that is, we improved the insulation in the roof, and we installed insulation in the basement. Maybe it's a silly analogy, but when you think about keeping warm, we always start with the hat and boots! With sustainability in mind, the next project will be to add a deck to the front of this house with rain catchment barrels from the metal roof. They are planning to plant a garden in the spring and the rain catchment system will help to irrigate the new garden.
Builder: East Shore Builders
Photographer: Michael Eric Berube

 Alair Homes Plano
Our clients house was built in 2012, so it was not that outdated, it was just dark. The clients wanted to lighten the kitchen and create something that was their own, using more unique products. The master bath needed to be updated and they wanted the upstairs game room to be more functional for their family.
The original kitchen was very dark and all brown. The cabinets were stained dark brown, the countertops were a dark brown and black granite, with a beige backsplash. We kept the dark cabinets but lightened everything else. A new translucent frosted glass pantry door was installed to soften the feel of the kitchen. The main architecture in the kitchen stayed the same but the clients wanted to change the coffee bar into a wine bar, so we removed the upper cabinet door above a small cabinet and installed two X-style wine storage shelves instead. An undermount farm sink was installed with a 23” tall main faucet for more functionality. We replaced the chandelier over the island with a beautiful Arhaus Poppy large antique brass chandelier. Two new pendants were installed over the sink from West Elm with a much more modern feel than before, not to mention much brighter. The once dark backsplash was now a bright ocean honed marble mosaic 2”x4” a top the QM Calacatta Miel quartz countertops. We installed undercabinet lighting and added over-cabinet LED tape strip lighting to add even more light into the kitchen.
We basically gutted the Master bathroom and started from scratch. We demoed the shower walls, ceiling over tub/shower, demoed the countertops, plumbing fixtures, shutters over the tub and the wall tile and flooring. We reframed the vaulted ceiling over the shower and added an access panel in the water closet for a digital shower valve. A raised platform was added under the tub/shower for a shower slope to existing drain. The shower floor was Carrara Herringbone tile, accented with Bianco Venatino Honed marble and Metro White glossy ceramic 4”x16” tile on the walls. We then added a bench and a Kohler 8” rain showerhead to finish off the shower. The walk-in shower was sectioned off with a frameless clear anti-spot treated glass. The tub was not important to the clients, although they wanted to keep one for resale value. A Japanese soaker tub was installed, which the kids love! To finish off the master bath, the walls were painted with SW Agreeable Gray and the existing cabinets were painted SW Mega Greige for an updated look. Four Pottery Barn Mercer wall sconces were added between the new beautiful Distressed Silver leaf mirrors instead of the three existing over-mirror vanity bars that were originally there. QM Calacatta Miel countertops were installed which definitely brightened up the room!
Originally, the upstairs game room had nothing but a built-in bar in one corner. The clients wanted this to be more of a media room but still wanted to have a kitchenette upstairs. We had to remove the original plumbing and electrical and move it to where the new cabinets were. We installed 16’ of cabinets between the windows on one wall. Plank and Mill reclaimed barn wood plank veneers were used on the accent wall in between the cabinets as a backing for the wall mounted TV above the QM Calacatta Miel countertops. A kitchenette was installed to one end, housing a sink and a beverage fridge, so the clients can still have the best of both worlds. LED tape lighting was added above the cabinets for additional lighting. The clients love their updated rooms and feel that house really works for their family now.
Design/Remodel by Hatfield Builders & Remodelers | Photography by Versatile Imaging

Sponsored
Sunbury, OH

J.Holderby - Renovations
Franklin County's Leading General Contractors - 2X Best of Houzz!

 Industrial Projects
Creating a comfortable outdoor living space is a priority for many homeowners and DIY enthusiasts. With rising summer temperatures, installing a shade tarp in your backyard offers an affordable and effective solution for sun protection. We’ve developed this detailed, step-by-step guide to help you confidently install a shade tarp that not only shields you from the sun but also adds aesthetic appeal to your outdoor area.
Benefits of Installing a Backyard Shade Tarp
Before diving into the installation process, let’s explore the key benefits of having a backyard shade tarp:
Provides UV Protection: Keeps your family and guests safe from harmful sun exposure.
Reduces Outdoor Temperatures: Creates a cooler, more enjoyable outdoor space.
Protects Outdoor Furniture: Extends the life of patio furniture by reducing sun damage.
Enhances Outdoor Aesthetics: Adds a modern, stylish look to your yard.
Budget-Friendly: More affordable compared to permanent structures like pergolas.
Materials and Tools You’ll Need
To begin your DIY backyard shade project, gather the following materials and tools:
Materials:
Shade tarp (UV-resistant and breathable)
Sturdy posts or existing structures (trees, fences, walls)
Mounting hardware (eye bolts, D-rings, turnbuckles, snap hooks)
Nylon or polyester rope, or stainless-steel wire
Concrete (if installing new posts)
Tools:
Power drill
Measuring tape
Level
Ladder
Wrench or adjustable spanner
Post hole digger (if installing new posts)
Step 1: Plan Your Shade Tarp Layout
The first step in installing your backyard shade tarp is careful planning. Take time to assess your outdoor area and answer these key questions:
Where is the sun’s path throughout the day?
What size and shape of tarp best suits your space?
Will you anchor the tarp to existing structures or install new posts?
What height do you want the tarp to sit at for maximum shade and airflow?
Pro Tip: Use string or garden hoses to visualize the tarp layout on the ground before making permanent decisions.
Step 2: Measure and Mark Anchor Points
Once you’ve determined the tarp’s location and orientation:
Measure the tarp dimensions.
Mark the exact points where each corner of the tarp will be anchored.
Ensure that the anchor points are at least 5–10% longer than the tarp size to allow for tensioning and slight adjustments.
Consider slope angles for water runoff. Aim for at least a 20-degree angle to prevent water pooling on the tarp.
Step 3: Install Support Posts (If Necessary)
If your backyard lacks existing anchor points like trees or fences, you’ll need to install sturdy support posts:
Dig post holes at least 24 inches deep and 8-12 inches wide for stability.
Set posts in concrete, making sure they remain plumb and level.
Allow the concrete to cure for at least 24–48 hours before applying tension from the tarp.
We recommend using pressure-treated wood, galvanized steel poles, or aluminum posts for longevity and strength.
Step 4: Install Mounting Hardware
With your anchor points ready, it’s time to install the necessary hardware:
Attach eye bolts or pad eyes securely into walls, posts, or other fixed structures.
For added flexibility and adjustability, install turnbuckles or tensioners to fine-tune the tarp’s tightness.
Connect snap hooks, D-rings, or carabiners to make assembly and disassembly easier.
Make sure all hardware is rated for outdoor use to prevent rust and corrosion.
Step 5: Attach and Tension the Shade Tarp
Now it’s time for the most satisfying part—mounting the shade tarp:
Begin by attaching one corner of the tarp to an anchor point.
Gradually attach the remaining corners, moving diagonally for even tension.
Adjust each connection point using your turnbuckles, ropes, or cables.
Pull the tarp tight enough to avoid sagging, but not so tight that it risks tearing.
Check that the tarp maintains the desired slope for rainwater runoff and adjust tension as needed.
Step 6: Final Adjustments and Safety Check
Before enjoying your new shaded area:
Inspect all anchor points and hardware for stability.
Test the tarp’s tension and make adjustments for even distribution.
Ensure that no sharp edges or loose connections remain that could damage the tarp or pose a safety hazard.
Confirm that the tarp is secure in windy conditions by giving it a gentle tug.
If you live in an area with frequent high winds, consider removing the tarp during storms to prevent damage.
Step 7: Enjoy Your Shaded Backyard Oasis
Once installed, your backyard shade tarp provides a comfortable and protective space for outdoor gatherings, relaxation, or family activities. You can decorate underneath with outdoor furniture, string lights, or potted plants to create a personalized outdoor retreat.
Maintenance Tips for Long-Lasting Shade Tarp Performance
To extend the life of your shade tarp, follow these maintenance guidelines:
Regularly check for wear and tear, especially around anchor points and seams.
Clean the tarp periodically with mild soap and water to prevent mildew buildup.
Store the tarp indoors during harsh weather seasons if it's not designed for year-round use.
Tighten hardware as needed to maintain proper tension and avoid sagging.
By following these simple care steps, your shade tarp will continue to deliver years of sun protection and outdoor comfort.
Conclusion: Upgrade Your Outdoor Space with a DIY Shade Tarp
Installing a shade tarp in your backyard is a cost-effective and rewarding DIY project. With careful planning, quality materials, and proper installation techniques, you’ll enjoy cool, shaded outdoor living all season long. This step-by-step guide ensures your project goes smoothly from start to finish.
 TVL Creative Ltd.
This project is an incredible transformation and the perfect example of successful style mixing! This client, and now a good friend of TVL (as they all become), is a wonderfully eclectic and adventurous one with immense interest in texture play, pops of color, and unique applications. Our scope in this home included a full kitchen renovation, main level powder room renovation, and a master bathroom overhaul. Taking just over a year to complete from the first design phases to final photos, this project was so insanely fun and packs an amazing amount of fun details and lively surprises. The original kitchen was large and fairly functional. However, the cabinetry was dated, the lighting was inefficient and frankly ugly, and the space was lacking personality in general. Our client desired maximized storage and a more personalized aesthetic. The existing cabinets were short and left the nice height of the space under-utilized. We integrated new gray shaker cabinets from Waypoint Living Spaces and ran them to the ceiling to really exaggerate the height of the space and to maximize usable storage as much as possible. The upper cabinets are glass and lit from within, offering display space or functional storage as the client needs. The central feature of this space is the large cobalt blue range from Viking as well as the custom made reclaimed wood range hood floating above. The backsplash along this entire wall is vertical slab of marble look quartz from Pental Surfaces. This matches the expanse of the same countertop that wraps the room. Flanking the range, we installed cobalt blue lantern penny tile from Merola Tile for a playful texture that adds visual interest and class to the entire room. We upgraded the lighting in the ceiling, under the cabinets, and within cabinets--we also installed accent sconces over each window on the sink wall to create cozy and functional illumination. The deep, textured front Whitehaven apron sink is a dramatic nod to the farmhouse aesthetic from KOHLER, and it's paired with the bold and industrial inspired Tournant faucet, also from Kohler. We finalized this space with other gorgeous appliances, a super sexy dining table and chair set from Room & Board, the Paxton dining light from Pottery Barn and a small bar area and pantry on the far end of the space. In the small powder room on the main level, we converted a drab builder-grade space into a super cute, rustic-inspired washroom. We utilized the Bonner vanity from Signature Hardware and paired this with the cute Ashfield faucet from Pfister. The most unique statements in this room include the water-drop light over the vanity from Shades Of Light, the copper-look porcelain floor tile from Pental Surfaces and the gorgeous Cashmere colored Tresham toilet from Kohler. Up in the master bathroom, elegance abounds. Using the same footprint, we upgraded everything in this space to reflect the client's desire for a more bright, patterned and pretty space. Starting at the entry, we installed a custom reclaimed plank barn door with bold large format hardware from Rustica Hardware. In the bathroom, the custom slate blue vanity from Tharp Cabinet Company is an eye catching statement piece. This is paired with gorgeous hardware from Amerock, vessel sinks from Kohler, and Purist faucets also from Kohler. We replaced the old built-in bathtub with a new freestanding soaker from Signature Hardware. The floor tile is a bold, graphic porcelain tile with a classic color scheme. The shower was upgraded with new tile and fixtures throughout: new clear glass, gorgeous distressed subway tile from the Castle line from TileBar, and a sophisticated shower panel from Vigo. We finalized the space with a small crystal chandelier and soft gray paint. This project is a stunning conversion and we are so thrilled that our client can enjoy these personalized spaces for years to come. Special thanks to the amazing Ian Burks of Burks Wurks Construction for bringing this to life!

 Gappsi
Here we see Gappsi Signature Natural Stone Travertine being used in varying mediums, including patio, coping, wall veneer and a fireplace. Designed in tandem with the homeowners wish list of Built-In BBQ with bar seating, Pool, Spa and a custom fireplace our Designers created a cohesive 1,900 sqft patio that enhanced and reclaimed this once wild and brush ridden yard. Located in Centerport North Shore Long Island this property challenged our design and build team from the start with its contouring slopes and heavly dense underbrush we spent a full seven days removing and regrading the property to work with our design. A seating walls along the back side serves the function of retaining the higher elevation sloping towards the back of the property, somewhere to rest upon and as well a contrasting vertical eye catching visual anchor. The lighter Fiorito Stone veneer plays as a subtle complimentary change to the exotic and brilliant colored Natural Travertine in French pattern. The Fiorito step treads also create a visual warning that there are steps, which benefits all especially at night. The design team incorporated the BBQ/Bar area along the retaining wall to flow unbroken to the fireplace and continue into the natural living waterfall. The addition of the waterfall near the fireplace was done as a theme of fire and water giving the natural elements their respect and admiration the customer wanted. Each of these areas have been given their individual space so the user can feel immersed in each setting without feeling crowded or within another area. The warm tranquil space in front of the fireplace is far enough away from the vivid and fun dining and BBQ/bar area that individuals can almost get away while still being in the backyard. Gappsi ability to design create and accommodate all that you see here helps set us apart from the competition. From conception of the homeowners ideas and wishes paired with the lay of the land helped form such an intricate and fuctional design. All accessories were also taken into consideration to perfectly fit such items as the spa dining table to the components of the BBQ/Bar. Gappsi provides Gunite, Vinyl, Fiberglass Swimming pools and Hot Tubs for Residential
and commercial application in Suffolk and Nassau County Long Island NY, http://gappsi.com/long-island-swimming-pool-companies-designs-builders-construction-ny.html
Gappsi also provideDesign and installation of Landscape and Masonry for all Suffolk and Nassau County Long Island NY. http://gappsi.com/landscape-design-long-island-ny-landscaping-companies.html
Gappsi also provides Home Remodeling Kitchens and Baths Roofing and siding for residence of Suffolk and Nassau County Long Island NY. http://gappsi.com/long-island-home-improvement-remodeling-general-contractor-ny.html
If in need of Lawn and garden irrigation, in Suffolk and Nassau Gappsi can provide these services http://gappsi.com/irrigation/ along with PVC, wood aluminum and lop-loc fences installation. http://gappsi.com/fences/
To preserve and beautify yournatural Paving stones in Suffolk and Nassau County Long Island NY Gappsi offers cleaning and sealing of patios Driveways and retaining walls. For commercial and residential Applications in Suffolk and Nassau County Long Island NY. http://gappsi.com/patio-cleaning-and-sealing/
Our Showroom displays the most unique Travertine, Porphyry, Granite, Marble, Limestone and Sandstone pavers along with pool copings and veneers. Ready to be picked up at our Yard at 1015 West Jericho Turnpike Smithtown NY or delivered to your Location in Suffolk and Nassau County Long Island NY http://pavingstoneselect.com/
To complete your landscapes outdoor Sports and recreations Gappsi offers Bocce Courts, Putting greens, Sports and Tennis Courts also supply and installation of Synthetic Turf. http://deckandpationaturalstones.com/artificial-grass-synthetic-turf-installation-long-island-ny.html+
213