
Search results for "Subjected" in Home Design Ideas
 Bruns Architecture
Tricia Shay Photography
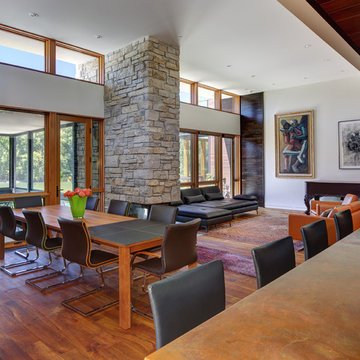
Example of a mid-sized minimalist formal and open concept medium tone wood floor and brown floor living room design in Milwaukee with white walls, a two-sided fireplace, a stone fireplace and no tv
Example of a mid-sized minimalist formal and open concept medium tone wood floor and brown floor living room design in Milwaukee with white walls, a two-sided fireplace, a stone fireplace and no tv


 Archadeck of Austin
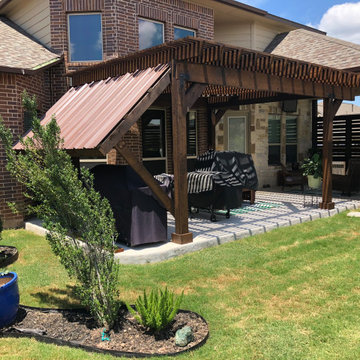
These Liberty Hill homeowners had one very distinct issue with outdoor food prep. Facing due west, their grill space on the patio was subject to the hottest sunlight of the entire day. To resolve the issue, we added on a custom shade roof, built specifically for evening grilling! This angled metal roof will keep the elements at bay, so the grill master can attend to his or her duties in complete comfort.
Find the right local pro for your project
 YS-Art Gallery
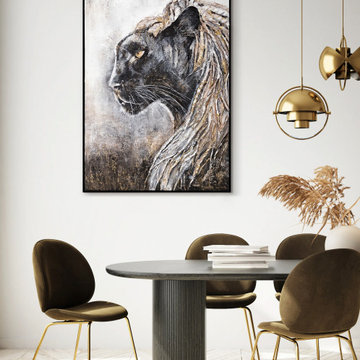
✅ 100% handmade. The subjects of the painting - our author's development.
✅ It is possible to adapt the hand-painted painting to the size you need. The frame color is specified basic, you can choose any other from our catalog. We will replace the frame color free of charge.
Link to site: https://www.ysart-gallery.com/collections/framed-painting-for-home-decor/products/acrylic-painting-animals-bagheera
 Bosfori
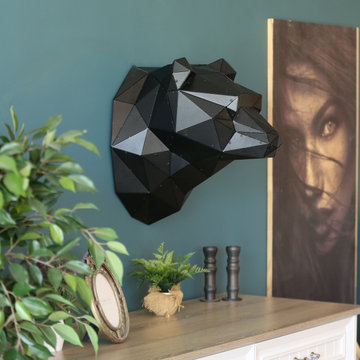
Bring the beauty of the outdoors to your little one's room or any room with this nature-inspired Bear Wall Art. This 3D Metal Bear is a hand assembled geometric metal hanging wall decoration is inspirational wall art for living room, bedroom, dining room, kitchen, and for your entire home.
This item was hand assembled in 2.5 hours per unit.
There may be ± 5 - 10 mm fluctuations in the dimensions of handmade products.
All products are subjected to special paint application resistant to moisture, heat and rust.
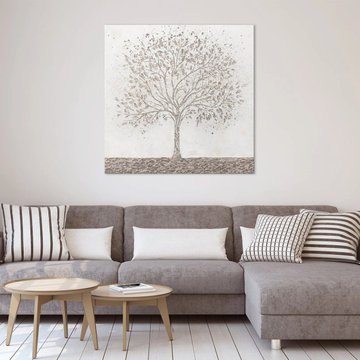 YS-Art Gallery
✅ 100% handmade. The subjects of the painting - our author's development.
✅ It is possible to adapt the hand-painted painting to the size you need. The frame color is specified basic, you can choose any other from our catalog. We will replace the frame color free of charge.
Link to site: https://www.ysart-gallery.com/collections/abstract-landscape-painting/products/wood-wall-art-the-tree-of-wealth-acrylic-painting
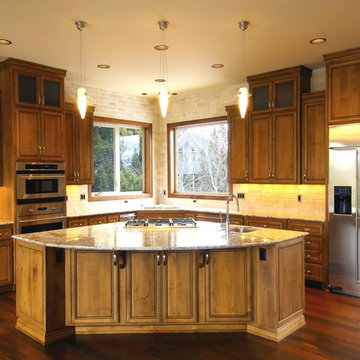
 Jerome DeMarco ART.chitecture
Jerome DeMarco Art.chitecture
May be subject to copyright
Elegant kitchen photo in Portland
Elegant kitchen photo in Portland
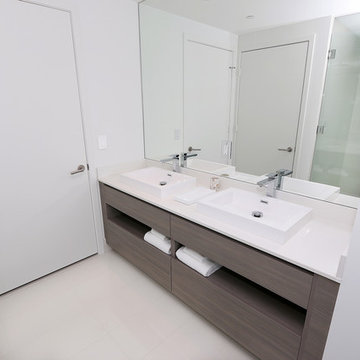
 Aerial Videos and Photographers in Miami
Interior photography refers to architectural photography of interiors, not to be confused with general photography indoors. Interior photography is a great photography niche to have skills in, as many companies, real estate agents and publications are always in need of good interior shots.
The skill of photographing a room, whether it is in a house or a commercial environment, is one that is practiced principally by professionals who specialize in architectural photography or interior design work.
Most people never give much thought to making a room the subject of a photograph. That is a mistake.
If your are listing a house for sale or rent, a good photograph of a luxurious living room or dining room might be a great promotion item.
Good detailed photographs of a room and its furnishings might come in handy for insurance documentation. And, particularly as we grow older, who would not value a photograph of a childhood bedroom from years gone by?
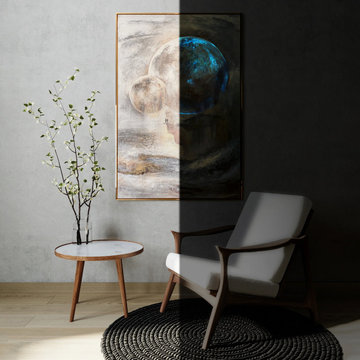 YS-Art Gallery
✅ 100% handmade. The subjects of the painting - our author's development.
✅ It is possible to adapt the hand-painted painting to the size you need. The frame color is specified basic, you can choose any other from our catalog. We will replace the frame color free of charge.
Link to site: https://www.ysart-gallery.com/collections/abstract-wall-decor-for-personalized-home-decor/products/glow-in-the-dark-wall-decor-star-connection
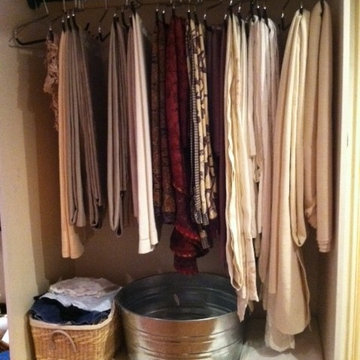
 STR8N UP Professional Organizing Services
this room houses all cleaning supplies and overflow entertaining silver and bar needs for a large estate.
We implemented separate areas for each subject and created a wrapping station for preparing hostess gifts
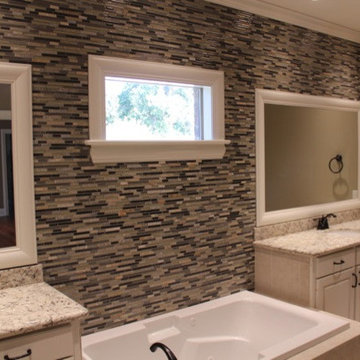
 Shoemaker Homes
THE JASMINE: A 3BR/2.5BA open split plan that flows from the entry foyer through the open living area into the kitchen & dining area. The breakfast bar overlooks the living room creating the feel of more space. The private master suite has a luxurious bath with an oversized zero entry shower, jetted tub, separate vanities & a large walk-in closet. One wall within the master bath is covered in mosaic tile. The home also features wood floors, granite counters, and a large screened in patio with fireplace, office/computer room & much more. NOTE: Photos may not be of the actual home being offered for sale. Floor plans & features are subject to change w/o notice.
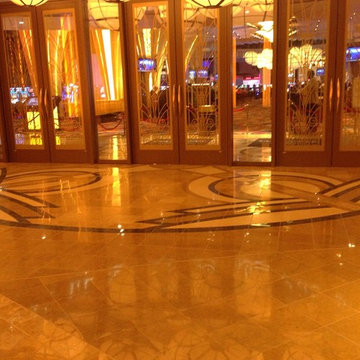
 Floor Safety Enterprises, Inc.
Casino Lobby Polished Inka Gold, Black Absolute, Creme' Marfil Marbles in Lazer Cut Design. Make ANSI Compliant with Slip Grip Pro Stone Friction Sealer from ADA Construction Services, Santa Ana, CA.
Rod Eden, Senior Tech, Project Manager.
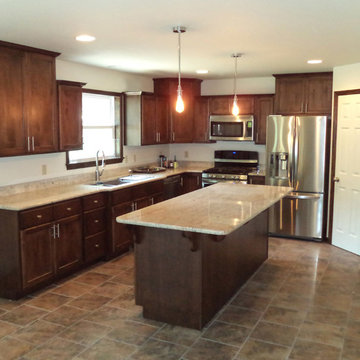
 User
UserAnother option for a Kitchen in the Casale II
Unique Features of the Casale II: The Casale II: Approximately 2,906 square foot two-story home, 4 bedrooms (optional 5th bedroom on first floor), 2 1/2 baths, whirlpool tub in master bath, great room with cathedral ceiling (over full basement), two-car over-sized garage, open foyer, 1st floor mud room/laundry room, 25'-6" front porch, includes vinyl spindle railing, vinyl turn posts (with structural core) and concrete floor.
All representations of home ideas, plans, features are for illustrative purposes only and are subject to change as we deem necessary to serve our Customers. Many images may contain custom features we have incorporated at the request of our Customers. Brookside Homes assumes no responsibility for inaccurate information displayed on this website. For any specific information, please contact a Sales Counselor directly.
14-29M
 YS-Art Gallery
✅ 100% handmade. The subjects of the painting - our author's development.
✅ It is possible to adapt the hand-painted painting to the size you need. The frame color is specified basic, you can choose any other from our catalog. We will replace the frame color free of charge.
Link to site: https://www.ysart-gallery.com/collections/abstract-wall-decor-for-personalized-home-decor/products/hand-painted-acrylic-paintings-on-canvas-geometry-game
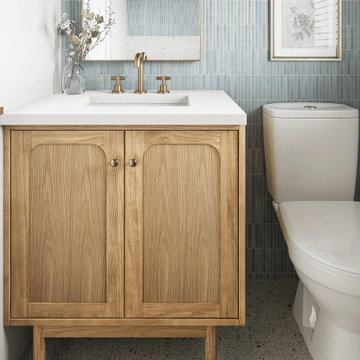
 highland
Renovating a bathroom is one of the most rewarding home improvement projects you can undertake. It adds immediate value to your property and elevates your daily routine. However, designing the perfect space requires balancing aesthetics with practical utility. At the heart of this balance is the vanity — it is the functional hub where you get ready each morning, a vital storage unit, and the visual centerpiece of the room.
To ensure you make the right investment, here is an in-depth look at choosing a bathroom vanity that blends style, longevity, and everyday functionality.
1. Assessing the Layout and Space Constraints
Before you fall in love with a specific design or finish, you must determine what your bathroom can physically handle. Scale is everything. A vanity that is too large disrupts traffic flow, while one that is too small gets lost visually and lacks adequate storage.
The next major step is determining the scale of your plumbing fixtures. Understanding how to choose a bathroom sink and vanity setup comes down to a simple choice: single or double sinks. Your choice will depend on who uses the bathroom and the overall footprint of the space.
Single Sink Vanities
Typically ranging from 20 to 48 inches (50–120 cm) in width, single vanities are the ideal choice for powder rooms, guest bathrooms, or small master suites. For very compact spaces, you can find narrower options starting around 16 inches (40 cm). The major advantage of a single-sink layout is that it provides more usable countertop space for cosmetics, toiletries, and decorative items. If you want to skip the guesswork and invest in a premium, beautifully handcrafted fixture, explore the luxury collections at Willow Bath and Vanity. From elegant single vanities to spacious double setups, their masterfully built furniture combines solid wood construction with elite styling to transform any bathroom into a spa-like retreat.
Double Sink Vanities
Usually starting at 48 inches (120 cm) and extending up to 72 inches (180 cm) or more, double vanities are a lifesaver for shared master bathrooms. They allow two people to get ready simultaneously without fighting for sink space. Keep in mind that a double vanity naturally reduces both cabinet storage space and countertop real estate since a second sink basin and plumbing lines take up substantial interior room.
Sink Types to Consider
The countertop is the workhorse of the bathroom. It regularly comes into contact with running water, toothpaste, soapy residue, and high-heat styling tools. Knowing how to choose a bathroom vanity top requires evaluating how much maintenance you are willing to perform against the look you want to achieve. Material Pros Cons Maintenance Level Quartz Highly durable, non-porous, stain and scratch-resistant. Offers the look of stone without the hassle. Premium pricing; can show seams on very large custom layouts. Low (No sealing required) Marble Timeless, elegant, and luxurious. Every slab features a completely unique veining pattern. Porous; prone to scratching, etching from acids, and water stains. Requires careful daily use. High (Requires regular sealing) Granite Naturally strong, heat-resistant, and chemically stable. Unique earthy patterns. Porous; can chip if subjected to heavy impacts. Medium (Requires occasional sealing) When coordinating your countertop, ensure it complements your bathroom’s floor tiles, shower surround, and plumbing hardware to maintain visual harmony.
4. Selecting the Core Vanity Style and Finish
Once the functional components are locked in, you can focus on the architectural style of the vanity base. The base dictates the design theme of the entire room.
Conclusion
Choosing the perfect vanity is a step-by-step process that combines precise measurements with your personal design taste. By taking careful measurements, choosing between a single- or double-sink setup, and picking a durable counter material like quartz or granite, you can transform your bathroom into a beautiful, organized retreat. Prioritize high-quality materials and smart craftsmanship, and your new vanity will look spectacular and serve your household reliably for years to come.
1. Assessing the Layout and Space Constraints
Before you fall in love with a specific design or finish, you must determine what your bathroom can physically handle. Scale is everything. A vanity that is too large disrupts traffic flow, while one that is too small gets lost visually and lacks adequate storage.
- Take Precise Measurements: measure the available width, depth, and height. Remember to account for surrounding fixtures.
- Check Clearance Zones: ensure there is enough clearance for the bathroom door to swing open, for shower glass doors to clear the vanity, and for drawers and cabinet doors to extend fully without hitting the toilet or walls.
-
Locate Existing Plumbing: moving pipes can significantly increase renovation costs. If you want a seamless installation, look for a vanity configuration that aligns easily with your current plumbing setup.
The next major step is determining the scale of your plumbing fixtures. Understanding how to choose a bathroom sink and vanity setup comes down to a simple choice: single or double sinks. Your choice will depend on who uses the bathroom and the overall footprint of the space.
Single Sink Vanities
Typically ranging from 20 to 48 inches (50–120 cm) in width, single vanities are the ideal choice for powder rooms, guest bathrooms, or small master suites. For very compact spaces, you can find narrower options starting around 16 inches (40 cm). The major advantage of a single-sink layout is that it provides more usable countertop space for cosmetics, toiletries, and decorative items. If you want to skip the guesswork and invest in a premium, beautifully handcrafted fixture, explore the luxury collections at Willow Bath and Vanity. From elegant single vanities to spacious double setups, their masterfully built furniture combines solid wood construction with elite styling to transform any bathroom into a spa-like retreat.
Double Sink Vanities
Usually starting at 48 inches (120 cm) and extending up to 72 inches (180 cm) or more, double vanities are a lifesaver for shared master bathrooms. They allow two people to get ready simultaneously without fighting for sink space. Keep in mind that a double vanity naturally reduces both cabinet storage space and countertop real estate since a second sink basin and plumbing lines take up substantial interior room.
Sink Types to Consider
- Undermount: installed beneath the counter for a smooth, seamless surface that is incredibly easy to wipe down.
- Vessel: sits atop the counter like a decorative bowl. It makes a bold style statement but raises the overall height of the counter surface.
- Drop-In: features a lip that rests on the counter cutout. It is easier to install, but its edges can catch dirt.
-
The countertop is the workhorse of the bathroom. It regularly comes into contact with running water, toothpaste, soapy residue, and high-heat styling tools. Knowing how to choose a bathroom vanity top requires evaluating how much maintenance you are willing to perform against the look you want to achieve. Material Pros Cons Maintenance Level Quartz Highly durable, non-porous, stain and scratch-resistant. Offers the look of stone without the hassle. Premium pricing; can show seams on very large custom layouts. Low (No sealing required) Marble Timeless, elegant, and luxurious. Every slab features a completely unique veining pattern. Porous; prone to scratching, etching from acids, and water stains. Requires careful daily use. High (Requires regular sealing) Granite Naturally strong, heat-resistant, and chemically stable. Unique earthy patterns. Porous; can chip if subjected to heavy impacts. Medium (Requires occasional sealing) When coordinating your countertop, ensure it complements your bathroom’s floor tiles, shower surround, and plumbing hardware to maintain visual harmony.
4. Selecting the Core Vanity Style and Finish
Once the functional components are locked in, you can focus on the architectural style of the vanity base. The base dictates the design theme of the entire room.
- Freestanding vanities: sit directly on the floor, supported by legs or a solid kickboard base. This is a traditional, stable configuration that offers the maximum hidden cabinet and drawer storage space.
- Wall-Mounted (Floating) vanities: anchored directly onto the wall studs, leaving the floor underneath completely clear. Floating vanities are staples of modern, minimalist design. They create an illusion of space, making small rooms look larger, and make cleaning the bathroom floor incredibly easy.
- Console vanities: feature an open shelving design supported by a metal or wood frame. It offers a light, airy look reminiscent of a boutique hotel, though it sacrifices hidden storage.
Conclusion
Choosing the perfect vanity is a step-by-step process that combines precise measurements with your personal design taste. By taking careful measurements, choosing between a single- or double-sink setup, and picking a durable counter material like quartz or granite, you can transform your bathroom into a beautiful, organized retreat. Prioritize high-quality materials and smart craftsmanship, and your new vanity will look spectacular and serve your household reliably for years to come.

 Curtain Call
Designer Lindsay Fuller and I worked with our client to find just the right fabric for a large traversing thermal drapery to cover this extra wide sliding door that faces a lake i this family room. Lindsay and our client had redecorated with a new gray sofa an d love seat, a new rug and a newly upholstered chair with a mult stripe fabric. Our client chose a fabulous Robert Allen fabric, white with a red pattern, just enough color to pull the various elements in the room together.

 1st Choice Heating & Air Conditioning, Inc.
New 2-Ton Lennox Merit Series 14 SEER Single Stage Air Conditioner
Patio - small backyard patio idea in Orange County
Patio - small backyard patio idea in Orange County
 User
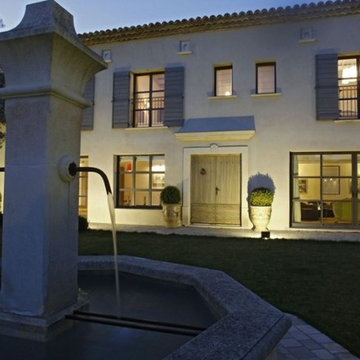
UserComprising three buildings located on a plot of 2100 m² completely enclosed in a natural environment ... The main house has 5 bedrooms, 3 master suites, reception rooms, a kitchen with living room ... On both sides there are two fully equipped houses, a "Préau" serving as summer kitchen. A special care was taken in the development of the exterior with beautiful seating, fountain in the center of the relaxation area, heated pool. $ 1,780,000 EUR. In collaboration with Uzès Sotheby's.
* This property is subject to change of value and confirmation of availability without previous notice. The informative data should be confirmed by documents provided by the owner or official authorities.

 Landscape Plus Ltd
Sometimes 'restraint' is the most important design element used in pulling a property together. There is a fine (admittedly subjective) line between running out of nerve... falling short... and goin over the top, produsing an almost comical theme park result.
These clients had ambitious plans for building their new Edwardian home. Realizing their property had the lines of a once great garden, they cleverly slipped the new home onto th site without betraying the existing setting. Our team's objective was to enliven the tired grounds, adding features and linking areas in a logical, tasteful manner.
The front entrance walkway and driveway pad are adorned with stone inlays. The former garage (now a garden shed) and adjoining brick wing all are alive with climbing trees.
What was once a sunken vegetable patch is now a Celtic cross parterre. Rubble pathways weave through boxwood, lavender and rose standards. A sad, sagging dry stone wall is completely rebuilt (once again dry). It now enjoys the addition of a small recessed water feature.
A wonderful and spacious lower garden is fully revitalized and connected to the upper area with a grand staircase.
Sitting areas share a view of an exquisite cascading water feature. The bronze ladies stand in a raised pool, set into a larger perennial border.

 Tile Doctor Ltd
These pictures of a Victorian Tiled Hallway are from a property in Canterbury that was once a nursing home and was now being renovated to become a children’s home. The building was being gutted and extended at the same time and when the carpet was pulled up in the hallway, they were surprised to find a relatively intact Victorian tiled floor underneath.
Whilst they thought it bizarre that anyone would want to cover up such an attractive floor the carpet had protected it over the years. They realized it would make a marvellous feature at the entrance to the property, but professional restoration would be needed to do it justice. After a bit of research, they came across Tile Doctor and got in touch.
Canterbury comes under my North Kent designation, so I went to visit the property and survey the floor and quote for doing the restoration. There were a few missing and loose tiles that would need replacing and refixing also there was a lot of ingrained dirt so a deep clean and application of a new sealer would be required. I gave them a price for the work which they readily accepted, and we arranged a suitable time to carry out the work. Subject to the building schedule I had calculated the floor would take three days to restore.
On the first day I set about replacing and re-fixing the missing, broken, and loose tiles. This is delicate work as you need to extract the old tile without disturbing its neighbours and then clean up the area ready for its replacement. Being a Tile Doctor I keep a selection of stock tiles for repairs, some are reclaimed, and some are replica. Also, there are several companies still making Victorian style tiles so I can usually source what I need.
After the individual missing and broken tiles had been replaced and the adhesive had set, it was then a matter of renovating the floor as a whole. The tiles were covered in a thick layer of carpet adhesive which needed a combination of specialist tools and products to remove. First, a liberal layer of Tile Doctor Remove and Go was applied and left to dwell for thirty minutes. Next, Tile Doctor Pro-Clean was added and scrubbed in with a black pad.
This process softened the adhesive sufficiently in readiness for the next stage which involves using a set of diamond burnishing pads on a weighted buffing machine. Several applications were needed, each time with a successively finer grade of diamond pad and rinsing off the slurry in between. The tiles were first milled using a very coarse 50-grit pad, followed by 100, 200 and finally burnished with a 400-grit burnishing pads. This removed all the adhesive and dirt in the tiles, which was cleaned up using the wet vacuum.
Old Victorian floors like this do not have a damp proof membrane installed under the floor, and with a lot of water being used in the cleaning process I was concerned White efflorescence salts could appear later as the floor dried. To counter this, I gave the floor an acid wash using Tile Doctor Acid Gel to counter and dissolve the salts, it also gives the tiles another clean and will remove any old grout smears further improving the appearance of the tiles. Once done the floor was left to dry overnight.
On my return I tested the floor was dry by taking several moisture readings around the floor with a damp meter. Applying sealer to a damp floor is never advised and can lead to clouding and an unwanted finish.
Happy that the tiles were dry, a single coat of Tile Doctor Colour Grow sealer was applied. This is an impregnating sealer with a colour enhancing component to ‘lift’ the stronger colours of the floor. Colour Grow however does leave a matt appearance and as the client had asked for a shiny finish it was topped up with five coats of Tile Doctor Seal and Go. This is a compatible topical sealer which added a mid to high sheen.
By the end of the third day the Victorian floor looked brand new, and I received the following feedback from the client. Its rare to receive feedback from commercial customers so they were clearly overwhelmed with the transformation.
Did not think this glued covered bad old floor could look sooooo good Fabulous Fantastic job Looks Amazing Thank you
For aftercare I recommend the use of Tile Doctor Neutral Cleaner which isn’t as harsh as many of the products you find in supermarket. Stronger products can actually strip off the sealer over time leaving it vulnerable to dirt and detracting from its appearance.
Graham Davis
North Kent Tile Doctor
31