
Search results for "Time consuming task" in Home Design Ideas
 Advanced Grounds Maintenance, LLC
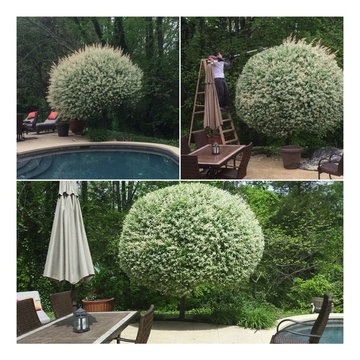
Hakuro-nishiki Dappled Willow
("High Maintenance Pom Pom"-is what we like to call it!)
Known by many names this colorful dappled willow "tree" requires a lot of up keep! Hakuro Nishiki’ is a little slow to establish, but will grow quickly at a rate of 12-18’ per year!...We maintain this Pom's form several times within a season! If you are thinking of getting one please do your homework on its up keep as you can see its no easy task!
 Barten Bros. Junk & Clean Up
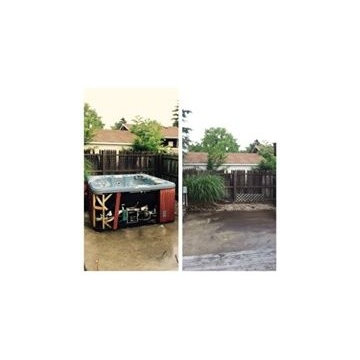
Removal of hot tubs and spas can be cumbersome. Hot tubs are big, heavy, awkward and combine water and electricity. It is important to keep in mind the potential consequences of improper removal, personal injury, property damage, creating a mess, etc. Our staff is trained, experienced and know how to properly deal with these circumstances to ensure the job is done properly, safely and in a timely fashion. We offer the man power, the trucks, the tools, the knowledge, licensing, insurance and know-how to accomplish these tasks.
 Picus Woodwrights
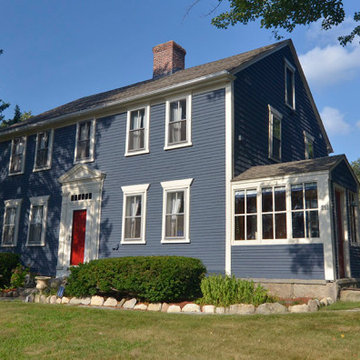
While we are not home inspectors, we are sometimes asked by clients who are considering buying an antique home to offer our thoughts and opinions on individual properties before they purchase them. Such was the case with Bryan and Erin in Smithfield, Rhode Island. When they called, they had already looked at the early nineteenth-century center chimney colonial on the hilltop and they were interested in looking again. Much of the house was original and, as is often the case in two-hundred-year-old buildings, long of tooth and ready for a new family to move in.
Erin and Bryan decided to be that family and we were thrilled to work with them to make the house their own. That started with performing a full structural evaluation of the existing house and determining what repairs they needed to consider. We also designed a single-storey shed style addition that would house a new kitchen and bathroom.
As with many projects undertaken on old buildings, it is wise to approach the work with a master plan in mind. We understand and share the hard truth that owning an antique property is often a financial burden and the decision to do so an expression of passion for… something different. Working with Bryan and Erin, we developed a master plan that established outlines for the work to happen over time.
They started with extensive structural repairs in the basement and portions of the exterior walls. We also added a new foundation for the addition and decided to reframe the flooring system through the original house out through the addition. This spared us the task of rebuilding the original collapsing foundation along that wall. We created a kitchen with an open floorplan but used reclaimed hard pine flooring through the addition to match the original floors elsewhere. We also reproduced any original millwork from elsewhere in the house for the added space.
Erin and Bryan aren’t farmers but they could be. Even before they moved in, they planted gardens and as our work wound down, they sent us home with vegetables daily.
Find the right local pro for your project
 Lori Delisle Interior Design & Decorating
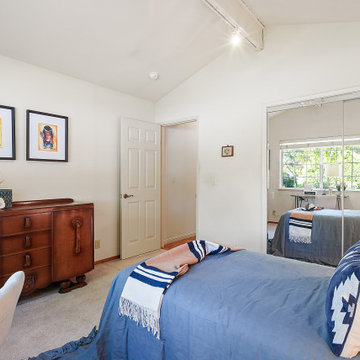
My client's mother had a love for all things 60's, 70's & 80's. Her home was overflowing with original pieces in every corner, on every wall and in every nook and cranny. It was a crazy mish mosh of pieces and styles. When my clients decided to sell their parent's beloved home the task of making the craziness look welcoming seemed overwhelming but I knew that it was not only do-able but also had the potential to look absolutely amazing.
We did a massive, and when I say massive, I mean MASSIVE, decluttering including an estate sale, many donation runs and haulers. Then it was time to use the special pieces I had reserved, along with modern new ones, some repairs and fresh paint here and there to revive this special gem in Willow Glen, CA for a new home owner to love.
 Thompson Remodeling
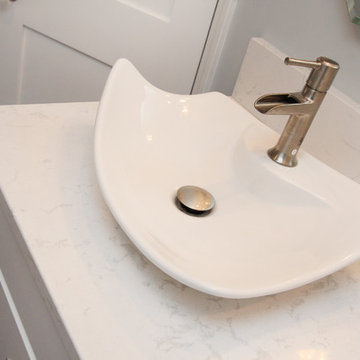
For 39 years, the owners of this four bedroom home lived with a cramped bathroom that hardly deserved to be called a master bath. Its limited space allowed only one user at a time, lacked counterspace, and was severely outdated.
The homeowners had specific needs and a very clear vision for their remodeled bath, which included:
- Enlarging the existing space to make it suitable for two to use
- A claw foot tub for daily baths
- A spa shower
- Plenty of counterspace and storage
- A modern European aesthetic
- “Bling factor”
The new design is the ultimate marriage of function and style. To start, the space from a seldom used spare bedroom was captured. A custom floating vanity provides much needed counterspace and storage. Multiple light sources provide task, ambient light and natural light.
A claw foot tub serves as the focal point and inspiration for the rest of the finishes. A crystal chandelier and wall sconces add an elegant “bling factor”. The curves of the vessel sinks balance nicely with the straight lines of the vanity. A spa shower provides a soothing option for days when the owner opts for a faster bathing option.
 Tile Doctor Ltd
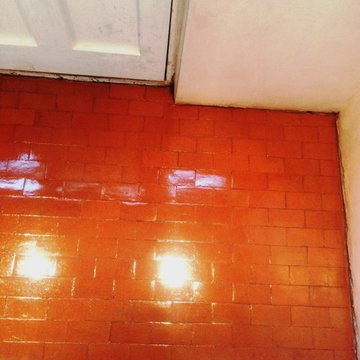
Here’s a quick job I completed in the coastal town of Eastbourne in East Sussex. While more commonly I am asked to work on entire floors, this customer was specifically interested in restoring a small doorway-like area with Quarry tiled flooring, the reason being that it had been covered for a long time by an old wardrobe and dog basket. As a result, the area had not been properly cared for, becoming very dusty and dirty. Also revealed were some unsightly splashes of white paint from previous decoration work.
The customer was keen to finally give this area of the floor the attention it needed, and so asked me to come in to provide a thorough clean and lay down some fresh sealer.
My first task was actually to relocate the old wardrobe and dog basket to the garage to get the area ready for cleaning. Then, to begin the cleaning process, I stripped away any old existing sealer and the white paint splashes by using Tile Doctor Remove & Go stripper in combination with a wire brush. Remove & Go is a versatile product that can also be used to break down glues and other adhesives.
I then washed the area down with water and promptly vacuumed up any moisture, before sitting down with a heat gun for an hour to dry the tiles. Usually a floor should be left for up to 48 hours to dry completely before sealing, but in this case the area was so small that I was able to dry it in the space of an hour.
Nonetheless, I opted to install a fan and leave the floor for an extra hour over lunch to ensure any excess moisture was removed. This is really important to do before sealing, as any remaining moisture can cloud the sealer and damage its performance.
To complete the restoration, I sealed the tiles using nine coats of the topical, water-based sealer Seal & Go, which is suitable for building up surface protection against dirt and stains on internal unsealed porous surfaces such as Victorian, Quarry and Sandstone tiles. The Quarry tiles were quite porous, which is not uncommon for Quarry Tiles and really soaked up the sealer.
As the photographs show, the results of the restoration were very good, with smiles all round – including from the slightly bemused family dog!
Rupert Mcleod
East Sussex Tile Doctor
 Michael Nash Design, Build & Homes
2013 NARI Capital CotY, Merit Award Winner, Creative Solutions under $15,000
Objective:
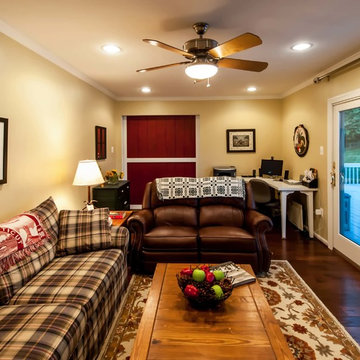
This couple was tired of the old brick look of their family room and its embedded fireplace.
They wanted to uplift the entire room, with better lighting, updated built ins and new gas log fireplace.
Challenges:
It was not an easy task to get rid of all masonry and brick wall.
Gas lines and powder line were quite distance away and the family room floor was a concrete slab.
Design solutions:
It was important for the couple to create an optional separation between the family room and the kitchen for times that she is having her book club gang over and husband wanted to watch his sporting events.
Part of the wall between kitchen and family room was taken by a closet.
We have removed that entire wall and implemented a 6” wide Barn door for a partial solution to their problem.
New wiring for light and cable wires were running into the old masonry wall.
Gas line gave the old wood burning fireplace and new life.
Custom built in cabinetry was placed in place old masonry wall.
A new stone hearth and surround wrapped around the new fireplace.
New hardwood wide plank flooring gave this family room warmth.
New recess lighting has offered a much brighter room.
Outcome:
He gets to enjoy his favorite football team beat up the rebels while she gets to have her tea party around the kitchen table.
And in all other occasions they get to cuddle by the flames of a new fireplace.
 NY Plantings Irrigation and Landscape Lighting
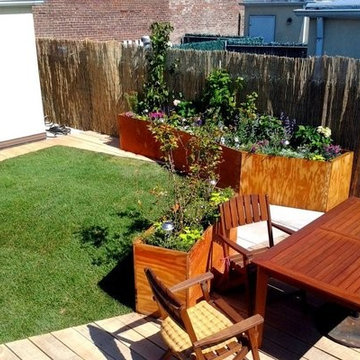
New york plantings townhouse patio design with green rooftop garden, custom built planters and landscape lights features.
Greenroof is still in its infancy even though the concept has been around for a long time, even a hundred years or more.
NY plantings has the concept and business model to service the trade by providing expert contracting services, experienced professional staff and project management that effectively and efficiently gets the job done.
Landscape architects, designers, garden designers, landscape design professionals, general contractors, property owners, property management companies, project managers and anyone who requires a company that first is a master garden and NY landscaping company. Tree planting, garden installation and complete plantings installations including personalized design touches such as specimen shrubs, flowering trees, dwarf conifers and trees, landscape boulders and moss rock, flowers and climbers.
NY Plantings can work from a design concept only without requiring a detailed landscape drawing or garden plan. True enthusiasm and years of hands on experience mean that you don’t even need a detailed planting plan; in most cases lead designer, Todd Nappi makes suggestions or improvements to the typical NYC landscape Designer provided garden design plan that both achieve highly desirable results and can possibly even save money vs. the cost of the original rooftop garden design or traditional landscape.
A high technical aptitude with experience in building rooftop and terrace gardens from scratch, solving challenging issues onsite and the ability to make the right decisions prove that NY Plantings is a resource as a landscape or rooftop garden contractor to the Landscape Design trade.
Besides Gardening, Drip irrigation and landscape lighting NY Plantings has been also specializing in hard capes, outdoor construction such as decks, pergolas, custom built planter boxes, custom fence, lattice, trellis and living walls (vertical gardening)
Nyc terrace garden and custom built planter design by newyorkplantings. Greenroof design and construction is the new frontier for any urban epicenter and NY Plantings green roofing installers are up to the task.
As the green roof industry becomes more mature so will NY Plantings remain a resource as a contractor for providing and installing greenroof systems in Manhattan and the NY Metro areas.
#newyorkplantings
New York Plantings Garden Designers and Landscape contracting
432 E 14st
New York, NY 10009
Call: 347-558-7051
site url: http://www.newyorkplantings.com/
info@newyorkplantings.com
 Robin's Nest Interiors
Updated Spec Home: Basement Living Area
I promised you there would be a Season 2 of our series Updated Spec Home and here it is – Basement Family Room. My mom and sister found themselves spending more and more time in this room because it was a great open space to watch television and hang out with my sister’s two border collies.
Color Scheme
We pulled our color scheme from a floral fabric that they saw on a chair at my store, and we used it to reupholster their existing wood accent chairs. We used pops of turquoise and green throughout the space including the long back wall which was perfect to make a feature with this vibrant wallpaper in a geometric design.
Defining the Space
The room was so large that we needed to define different areas. The large rug in the oversized pattern was perfect for the seating area.
Lighting
Since there is only one small window bringing natural light into the space, we painted the remaining walls a light warm gray (Sherwin Williams’ City Loft SW7631) and added several table lamps and a floor lamp for task lighting.
Reusing Existing Furniture
Fortunately the space was large enough so my sister could keep her fabulous worn leather chair and ottoman and my mom could have an upholstered chair and ottoman in a subtle blue and green tweed.
The large hallway leading to the storage area was the perfect place for these small bookcases which house family photos in various silver frames. The bookcases have a special place in our hearts – they belonged to my grandparents. We accessorized with a long painted box which was the perfect scale for the bookcases and a grouping of vibrant botanical prints.
In lieu of a conventional media cabinet, my mom and sister found this one with a built-in fireplace. It brings a lot of warmth into the space – literally!
Painted Furniture
We had Kelly Sisler of Kelly Faux Creations paint their existing glass front cabinet this awesome apple green. Accessories include turquoise floral vases, a metallic circular vase, and a beautiful floral print.
Reading Nook
We positioned this original oil painting in the landing so it would be visible from the seating area. The landing was the perfect spot to display my sister’s collection of art glass. I love the small reading nook created with this rattan wooden accent chair and lantern floor lamp. We were able to make good use of the ledge in the stairwell by leaning these vibrant watercolors.
The dogs even have their own space. Meet my two “nephews” – Dill and Atticus (the one with his back to us pouting). We used this colorful oversized canvas to define their space and break up the long wall.
As you know, one good thing leads to another. Be sure to tune in next week for a surprise addition to this Updated Spec Home. In the meantime, check out this Basement Family Room designed by Robin’s Nest Interiors. Enjoy!
 Benson Homes LLC
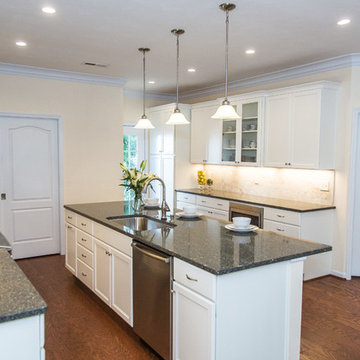
This remodeling story is a wonderful example of how removing and shifting walls can have an amazing impact on the functionality and visual appeal of an entire level of a home. When our clients reached out to us, they were looking to create an open concept Kitchen that would allow for easy entertaining. The couple had recently purchased this townhome so his mother could be closer to the family.
The existing floorplan offered first floor living, but the Kitchen was tucked in the back and was separated from the rest of the living space by a full wall with a small pass through into the Dining Room. Our design involved removing the dividing wall between the Dining Room and Kitchen as well as the fake columns and beam that separated the Dining Room and Living Room. The entire space was opened up to allow for easy flow and view throughout the first floor living space. The wall shared by the Kitchen and large Master Bedroom was shifted back just enough to provide a full wall of additional cabinetry including a much-needed large double Pantry cabinet. Now that we had opened up the Kitchen area we could focus on the cabinetry layout and selections.
The existing wood toned cabinets were replaced with white cabinets and crown molding to match the rest of the home. The larger, open space allowed for more cabinetry and the addition of an island with new undermount sink, dishwasher and convenient trash pullout along with seating for the grandchildren. A new range hood was installed and vented to the exterior of the house to replace the old recirculating hood. We were able to repurpose the some of the existing cabinets for use above the washer and dryer in the adjoining Laundry Room and swapped out the existing swinging door for a pocket door to free up traffic flow when doing Laundry and working in the Kitchen. The slate-look ceramic tile was replaced with a pre-engineered hardwood floor that creates a sense of warmth while easy to clean. The new Cambria countertop compliments the slate-look tile found in the Dining Room and Living Room and a natural field tile backsplash offsets the cabinets beautifully.
The single fluorescent ceiling light was outdated and did not provide adequate lighting for the new Kitchen. The new lighting plan was carefully thought out to provide general illumination through well placed recessed lighting; task lighting through pendant lighting over the island and under cabinet lighting; and aesthetic fluidity with an eye-catching chandelier for the Dining Room table. Special details include a touch faucet, under counter microwave and glass front cabinetry for displaying dishes.
By removing and shifting walls, we improved the entire flow of the first floor visually as well as functionally and created a beautiful, light-filled space for cooking and entertaining. Grandma can easily prepare meals in her new Kitchen and still chat with her guests and grandchildren who love to sit at the island as well as in the adjoining Dining Room and Living Room.
The Benson Homes team really enjoyed creating this space for this family and we hope they will enjoy spending time with friends and family for years to come.
 Tile Doctor Ltd
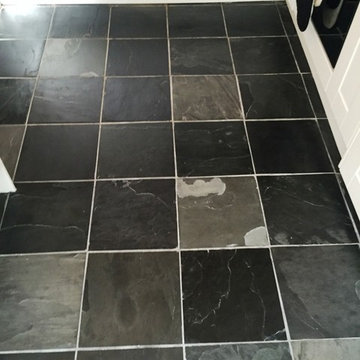
These Slate kitchen floor tiles at a property in Oxford were in good physical condition, but had become dull over time due to heavy usage, and upon close inspection the grout was stained. The customer contacted me as she was keen to get the tiles back to looking their best. This would require a thorough clean and the application of a fresh sealer.
While Slate floor tiles are reputed to be hard wearing and damage resistant – and are therefore a popular choice for high traffic areas like kitchens – this does not exclude them from needing regular maintenance.
To begin, I mixed a strong solution of Tile Doctor Pro Clean and water. Pro-Clean is a versatile cleaner that when used in a weak dilution can be used as a regular cleaner for most types of natural stone floor, including more sensitive stones such as Limestone and Marble.
The cleaning was then spread across the surface area of the floor, and left it to dwell for ten minutes to allow the solution to seep into the pores of the stone and lift the ingrained dirt to the surface. Pro-Clean in a strong dilution also functions as a stripping product, meaning it works to strip away any old and ineffectual sealer.
I then scrubbed the solution into the floor using a stiff scrubbing brush, paying particular attention to the grout in order to break down the visible staining. The tiles and grout lines came up really well during the cleaning process – this became clear once I had rinsed the floor and removed the residue using a wet vacuum.
With the customer eager to have the job completed quickly, I installed portable room dryers and utilised a heat gun to dry the floor, allowing me to seal it on the same day.
Once I had ensured the floor was completely dry, I commenced the sealing process by firstly applying a coat of Tile Doctor Stone Oil, a product which is designed to bring out all of the natural dark shades in the Slate.
When this was dry, I applied a single coat of Tile Doctor Colour Grow. This is an impregnating sealer, meaning that it soaks into pores of the stone to provide durable protection from within against ingrained dirt and stains. Colour Grow also enhances the natural colours in the stone even further.
The customer was amazed by just how big a difference could be made to the tiles in the space of just a day. Although the tiles were generally in very good nick, my main task was to be liven them up – judging by the before and after photos, I think this was achieved. And, now that they have been treated to a fresh seal, the tiles will be prevented from quickly becoming dull again.
Barry Woodward
Oxfordshire Tile Doctor
 Lara Hontzias Interior Design
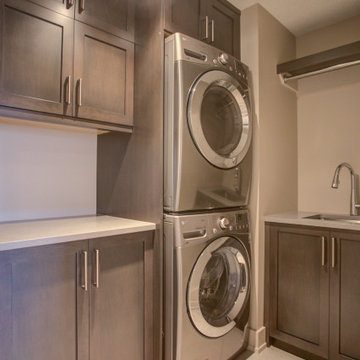
This home was a total renovation overhaul! I started working with this wonderful family a couple of years ago on the exterior and it grew from there! Exterior, full main floor, full upper floor and bonus room all renovated by the time we were done. The addition of wood beams, hardwood flooring and brick bring depth and warmth to the house. We added a lot of different lighting throughout the house. Lighting for art, accent and task lighting - there is no shortage now. Herringbone and diagonal tile bring character along with varied finishes throughout the house. We played with different light fixtures, metals and textures and we believe the result is truly amazing! Basement next?
 HUNTER DOUGLAS-LNG BLINDS
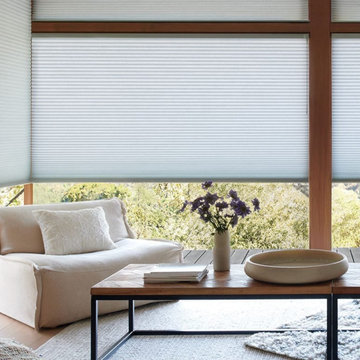
DUETTE® Honeycomb Shades
The Original Energy-Efficient Honeycomb Shade
An innovative window treatment that looks beautiful and insulates your home all year round, Duette® Honeycomb Shades were the first cellular shades, specially engineered to provide energy efficiency at the window in both cold and warm climates. Their specially engineered honeycomb construction traps air in distinct pockets, which creates insulation that can help lower your energy consumption and energy bills.
Decorate every kind of window you have—even tricky skylights and unusually shaped panes—with Duette. Our signature honeycomb shades are one of our most versatile options and beautify every kind of interior.
Key Features
Premium Design & Style—Explore the richness of texture and warmth offered by The Alustra® Collection of Duette, a thoughtfully curated suite of exclusive design-inspired fabrics, textures, colors and hardware created to meet the expectations of leading designers and discerning consumers who seek the best in design.
Largest Selection in the Industry—Explore the widest selection of cellular pleat sizes, opacities, colors, textures and operating systems. Duette shades can also accommodate many specialty shaped windows, even tricky skylights.
Energy-Efficiency—Studies show that windows are responsible for up to 30% of your home’s energy losses. Duette shades trap air in distinct pockets, creating exceptional insulation. Our latest innovation, Duette Architella®, features a honeycomb-within-a-honeycomb design for even greater energy efficiency.
Room Darkening—The LightLock™ system, the newest iteration from Duette, is the first operating system of its kind to offer unparalleled darkness. The secret lies within the patent-pending side channel design, optimized to absorb or deflect nearly all incoming light.
Durability—All of our high-performing fabrics are resistant to fading and will maintain their crisp, neat pleats over time.
Vertical Application—For doors that need extra insulation, the Duette Vertiglide™ operating system is the ideal option. It’s designed for vertical applications and uses the same fabrics as your horizontal Duette shades. Use one shade to cover the entire expanse of a sliding door, or, cover the door with a split stack Vertiglide shade, with each side operating independently.
Sound Absorption—Improve your room’s acoustics while reducing the intensity of outside sound. Duette Honeycomb Shades absorb up to 70% of sound energy, creating a more quiet, tranquil room.
LNG Blinds
19 Addison Pl
Valley Stream, NY 11580
Call Us (516) 593-0044
#homesweethome #homedecor #lovemyhome #barenecessities #windows #instastyle #instadesign #interiordesign
#blinds #privacy #embellishment #instahomes #propertyowner #renovation #customblindsbydesign #hunterdouglas #showcase #displays #windowtreatments #windowcoverings #shades #shutters #drapery #interiors #decor
 Advance Design Studio, Ltd.
Bud Kane has remodeled nearly every room in his own home over many years. Now reaching his 70’s, he contemplated heading up a major kitchen and laundry room renovation himself, planning on doing the carpentry work with his own hands. “I was not convinced I would ever meet anyone who could do it as well as I could do it myself”, said Bud. Ruth and Bud spent 5 years visiting kitchen firms and interviewing designers. They couldn’t however bring themselves to pull the trigger on the project, until they met Advance Design Studio in 2015.
“No one understood what I wanted”, said Ruth. She was continually frustrated by experiences with designers who weren’t hearing what was important to her. “Everyone kept designing my kitchen with what they thought it should look like; I couldn’t find anyone who would listen to me”!
When they met designer Scott Christensen from Advance Design Studio, they liked him right away. He listened to Ruth and designed a kitchen that she loved, all the while interjecting years of wisdom and design expertise that Ruth appreciated. “The finished product is better than I expected”, says Ruth. “I respected Scott’s opinions and together we created the perfect place for me to bake with my grandkids and truly enjoy the kitchen and laundry room I’ve been dreaming of for many years!”
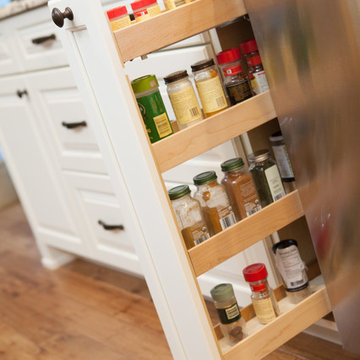
The kitchen transformation began with removing the home’s soffits, and extending new painted maple cabinetry to the ceiling with the addition of an elegant crown molding. Ruth’s new Vita Mix holds a coveted place on her counter, and adjustments were planned to size the cabinets in conjunction with the under cabinet decorative light molding to fit this appliance just right. “This one small detail was really important to me”, says Ruth smiling. An elegant new island replaced the original island, complete with room for 3 stools where her grandchildren will sit to make home-made pasta every Thanksgiving, and cookies at Christmas time. “Traditions are very important in my family, and making my kitchen work to suit cherished activities with my family was the number one reason this renovation was so desired”, replied Ruth when asked about the island.
A picture perfect new tea station replaced a cluttered unused desk area, creating a wonderful place to prepare hot drinks for sipping any season of the year while overlooking the couple’s wonderfully manicured gardens from the lovely 3 season’s room just off the kitchen. The soft sage island bead panel detail was repeated on the backsplash, replicating the feel of a fine old piece of furniture.
The biggest problem with the laundry room was 3 doors, one from the garage, one from the closet, and one to the hallway. “Scott designed a pocket door, and oh what a dream it is now to bring groceries in from the garage!” exclaims Bud who grew to disdain this task! Doing laundry is now a breeze in this attractive new space that doubles as a wonderful pantry for the kitchen with room to store food items that didn’t have a home in the poorly designed original space.
New Hickory distressed wood flooring was laid both in the kitchen and leading to the hall foyer. Soft gray wood-replicating porcelain was placed in the laundry area, making for an easily cleanable surface for what doubles as a mud room from the garage. Creamy tumbled marble graces an unobtrusive backsplash spilling onto shiny granite counter tops in a rich earthy pattern of fall colors that mimic colors throughout the home. Advance is known details that included custom crafted furniture toe kicks, luxurious crown moldings, and beaded under cabinet moldings. The kitchen is complete with a glass display cabinet showing Ruth’s treasured china tea collection.
Early on, it was initially only their intention of purchasing cabinets for the new design. They were so impressed however with Advance Design’s complete program for budgeting, design, installation and management that it became clear to them both that they wanted Advance to handle the entire project from start to finish. “After seeing the quality work they did, coupled with the in-house team completely dedicated to our satisfaction, it became apparent there was no other choice but to hire them to handle everything. And we’re so glad we did, we have not one regret”, says Bud.
“The attention to detail by the carpentry crew more than satisfied my perfectionist expectations of the finished carpentry,” exclaimed Bud. “Every one of Advance Design’s people we encountered from design through construction was wonderful. We’ve never met a group of people so dedicated to making sure we were happy with every single detail, and every single part of this experience”, said Ruth and Bud.
Designer: Scott Christensen
Photographer: Joe Nowak
 Drury Design
THE SETUP
When we first encountered this basement for a family with three boys, we saw a space with untapped potential. Though previously remodeled, it lacked a cohesive design strategy. The expansive area housed various entertainment pieces (a shuffleboard table, air hockey, foosball, etc.) scattered haphazardly throughout the space.
While the basement included a workout room and a rudimentary kitchen area, it lacked a dedicated game room or proper bar. Excessive storage closets along the back wall consumed valuable real estate that could be repurposed for more engaging uses.
In essence, the basement was spacious but disjointed—functional for family use but falling short as an entertainment hub. It didn’t align with the sophistication of the rest of the home. Our clients envisioned a transformation: a fresh, organized space that would not only serve their family’s needs but also shine as an inviting arena for entertaining friends and hosting gatherings – especially sports-focused gatherings!
Design Objectives:
Reimagine the basement layout, creating distinct zones for varied activities.
Expand the workout area to accommodate new equipment, including a Smith machine.
Implement a multi-screen setup inspired by high-end sports bars, allowing guests to follow multiple games while socializing.
Enhance existing features while developing new areas:
Optimize a workout space for all equipment needs
Establish a dedicated children’s space with guest room capabilities
Create an integrated bar and entertainment area
Retain and incorporate the existing projector setup
Design Challenges:
Navigate layout constraints in the new workout room due to fixed utility areas.
Carve out a distinct space for kids within the open plan.
Revitalize an underutilized section of the basement.
Elevate the existing big screen area with purposeful design elements.
Develop a full-fledged bar area while maintaining kitchen functions applicable for hangout snacking.
Work around immovable structural elements (soffits, load-bearing support columns)
THE RENEWED SPACE
Design Solutions:
Install a stylish barn door for the utility area of the new workout space, improving aesthetics and accessibility.
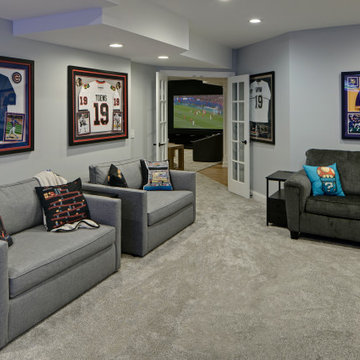
Repurpose the former workout room into a dedicated game room for kids, utilizing couches with pull-out beds so the area can double as overflow guest accommodations.
Transform the unused area into a vibrant pub-style area for card and table games.
Enhance the big screen area with elegant wainscoting and ambient theatre-style lighting.
Design a multi-functional wet bar area featuring varied seating, prep areas, and a microwave.
Base the bar sink area width off the soffit above it.
In the big screen area, use the soffit to inform the width of a wainscoting section.
For the immovable support columns, dress one up to match the wainscoting of the nearby big screen wall. Hide the other one in a new wall.
Final Thoughts:
The reimagined basement has exceeded our clients’ expectations, evolving into the ultimate entertainment hub. With seven strategically placed screens, it’s perfect for gatherings focused on major sporting events and casual gatherings, as well. The space strikes a balance between adult sophistication and family-friendly functionality, featuring distinct zones for various activities.
The new design not only maximizes functionality for modern, multi-screen entertainment but also elevates the aesthetic appeal. It integrates flawlessly with the rest of the home’s transitional style while allowing each basement section to maintain its unique character. The result is a versatile space that caters to both intimate family time and large-scale entertaining.
 Lara Hontzias Interior Design
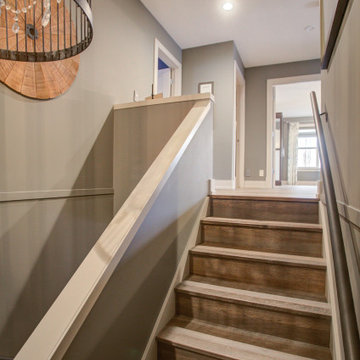
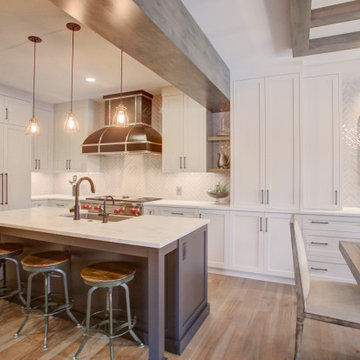
This home was a total renovation overhaul! I started working with this wonderful family a couple of years ago on the exterior and it grew from there! Exterior, full main floor, full upper floor and bonus room all renovated by the time we were done. The addition of wood beams, hardwood flooring and brick bring depth and warmth to the house. We added a lot of different lighting throughout the house. Lighting for art, accent and task lighting - there is no shortage now. Herringbone and diagonal tile bring character along with varied finishes throughout the house. We played with different light fixtures, metals and textures and we believe the result is truly amazing! Basement next?
 Lara Hontzias Interior Design
This home was a total renovation overhaul! I started working with this wonderful family a couple of years ago on the exterior and it grew from there! Exterior, full main floor, full upper floor and bonus room all renovated by the time we were done. The addition of wood beams, hardwood flooring and brick bring depth and warmth to the house. We added a lot of different lighting throughout the house. Lighting for art, accent and task lighting - there is no shortage now. Herringbone and diagonal tile bring character along with varied finishes throughout the house. We played with different light fixtures, metals and textures and we believe the result is truly amazing! Basement next?
 Advance Design Studio, Ltd.
See "5-Year Kitchen in Elgin" for the kitchen featured in this description.
Bud Kane has remodeled nearly every room in his own home over many years. Now reaching his 70’s, he contemplated heading up a major kitchen and laundry room renovation himself, planning on doing the carpentry work with his own hands. “I was not convinced I would ever meet anyone who could do it as well as I could do it myself”, said Bud. Ruth and Bud spent 5 years visiting kitchen firms and interviewing designers. They couldn’t however bring themselves to pull the trigger on the project, until they met Advance Design Studio in 2015.
“No one understood what I wanted”, said Ruth. She was continually frustrated by experiences with designers who weren’t hearing what was important to her. “Everyone kept designing my kitchen with what they thought it should look like; I couldn’t find anyone who would listen to me”!
When they met designer Scott Christensen from Advance Design Studio, they liked him right away. He listened to Ruth and designed a kitchen that she loved, all the while interjecting years of wisdom and design expertise that Ruth appreciated. “The finished product is better than I expected”, says Ruth. “I respected Scott’s opinions and together we created the perfect place for me to bake with my grandkids and truly enjoy the kitchen and laundry room I’ve been dreaming of for many years!”
The kitchen transformation began with removing the home’s soffits, and extending new painted maple cabinetry to the ceiling with the addition of an elegant crown molding. Ruth’s new Vita Mix holds a coveted place on her counter, and adjustments were planned to size the cabinets in conjunction with the under cabinet decorative light molding to fit this appliance just right. “This one small detail was really important to me”, says Ruth smiling. An elegant new island replaced the original island, complete with room for 3 stools where her grandchildren will sit to make home-made pasta every Thanksgiving, and cookies at Christmas time. “Traditions are very important in my family, and making my kitchen work to suit cherished activities with my family was the number one reason this renovation was so desired”, replied Ruth when asked about the island.
A picture perfect new tea station replaced a cluttered unused desk area, creating a wonderful place to prepare hot drinks for sipping any season of the year while overlooking the couple’s wonderfully manicured gardens from the lovely 3 season’s room just off the kitchen. The soft sage island bead panel detail was repeated on the backsplash, replicating the feel of a fine old piece of furniture.
The biggest problem with the laundry room was 3 doors, one from the garage, one from the closet, and one to the hallway. “Scott designed a pocket door, and oh what a dream it is now to bring groceries in from the garage!” exclaims Bud who grew to disdain this task! Doing laundry is now a breeze in this attractive new space that doubles as a wonderful pantry for the kitchen with room to store food items that didn’t have a home in the poorly designed original space.
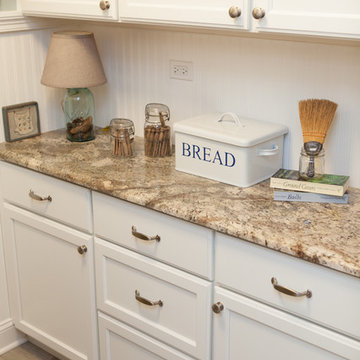
New Hickory distressed wood flooring was laid both in the kitchen and leading to the hall foyer. Soft gray wood-replicating porcelain was placed in the laundry area, making for an easily cleanable surface for what doubles as a mud room from the garage. Creamy tumbled marble graces an unobtrusive backsplash spilling onto shiny granite counter tops in a rich earthy pattern of fall colors that mimic colors throughout the home. Advance is known details that included custom crafted furniture toe kicks, luxurious crown moldings, and beaded under cabinet moldings. The kitchen is complete with a glass display cabinet showing Ruth’s treasured china tea collection.
Early on, it was initially only their intention of purchasing cabinets for the new design. They were so impressed however with Advance Design’s complete program for budgeting, design, installation and management that it became clear to them both that they wanted Advance to handle the entire project from start to finish. “After seeing the quality work they did, coupled with the in-house team completely dedicated to our satisfaction, it became apparent there was no other choice but to hire them to handle everything. And we’re so glad we did, we have not one regret”, says Bud.
“The attention to detail by the carpentry crew more than satisfied my perfectionist expectations of the finished carpentry,” exclaimed Bud. “Every one of Advance Design’s people we encountered from design through construction was wonderful. We’ve never met a group of people so dedicated to making sure we were happy with every single detail, and every single part of this experience”, said Ruth and Bud.
Designer: Scott Christensen
Photographer: Joe Nowak
 DigitsDesign.eu
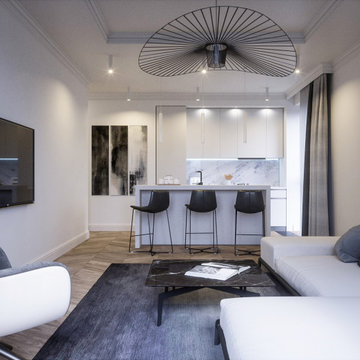
Jasmine Garden is a modern business class residential estate complex situated in a quiet part of Jurmala city, 700 meters away from the sea. Four buildings of this project are named after garden jasmine sorts – Luisa, Patricia, Stephanie and Aurelia, and have 48 fully finished apartments with spacious terraces. Ground level parking and access to the underground parking are located in the jasmine-covered territory of the complex, which is surrounded by fence. Children playground and well-arranged green park with recreation area are located near the building. Designbox Studio responsible task in this project was to provide these 48 apartments with the comfort of interior design.
Jasmine Garden residential complex offers a wide range of services and amenities for comfortable living. The apartments are designed in a modern style with high-quality materials. Each apartment has everything necessary for comfortable living, including a terrace with a view of the picturesque landscape.
The complex is surrounded by a fence and equipped with video surveillance to ensure the safety of residents. Residents also have access to underground parking and guest parking spaces.
For leisure and entertainment, the complex features well-maintained greenery, a children’s playground, and a park with comfortable areas for relaxation and picnics. Thanks to its close proximity to the sea, residents can enjoy beautiful beaches and landscapes and spend their free time in nature.
 Robin's Nest Interiors
Updated Spec Home: Basement Living Area
I promised you there would be a Season 2 of our series Updated Spec Home and here it is – Basement Family Room. My mom and sister found themselves spending more and more time in this room because it was a great open space to watch television and hang out with my sister’s two border collies.
Color Scheme
We pulled our color scheme from a floral fabric that they saw on a chair at my store, and we used it to reupholster their existing wood accent chairs. We used pops of turquoise and green throughout the space including the long back wall which was perfect to make a feature with this vibrant wallpaper in a geometric design.
Defining the Space
The room was so large that we needed to define different areas. The large rug in the oversized pattern was perfect for the seating area.
Lighting
Since there is only one small window bringing natural light into the space, we painted the remaining walls a light warm gray (Sherwin Williams’ City Loft SW7631) and added several table lamps and a floor lamp for task lighting.
Reusing Existing Furniture
Fortunately the space was large enough so my sister could keep her fabulous worn leather chair and ottoman and my mom could have an upholstered chair and ottoman in a subtle blue and green tweed.
The large hallway leading to the storage area was the perfect place for these small bookcases which house family photos in various silver frames. The bookcases have a special place in our hearts – they belonged to my grandparents. We accessorized with a long painted box which was the perfect scale for the bookcases and a grouping of vibrant botanical prints.
In lieu of a conventional media cabinet, my mom and sister found this one with a built-in fireplace. It brings a lot of warmth into the space – literally!
Painted Furniture
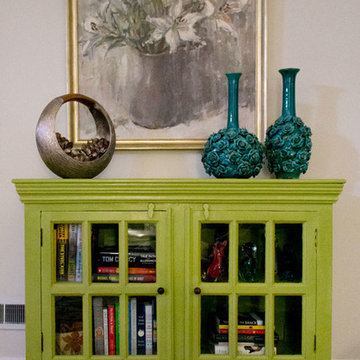
We had Kelly Sisler of Kelly Faux Creations paint their existing glass front cabinet this awesome apple green. Accessories include turquoise floral vases, a metallic circular vase, and a beautiful floral print.
Reading Nook
We positioned this original oil painting in the landing so it would be visible from the seating area. The landing was the perfect spot to display my sister’s collection of art glass. I love the small reading nook created with this rattan wooden accent chair and lantern floor lamp. We were able to make good use of the ledge in the stairwell by leaning these vibrant watercolors.
The dogs even have their own space. Meet my two “nephews” – Dill and Atticus (the one with his back to us pouting). We used this colorful oversized canvas to define their space and break up the long wall.
As you know, one good thing leads to another. Be sure to tune in next week for a surprise addition to this Updated Spec Home. In the meantime, check out this Basement Family Room designed by Robin’s Nest Interiors. Enjoy!
74