
Search results for "Topic" in Home Design Ideas
 Tile Doctor Ltd
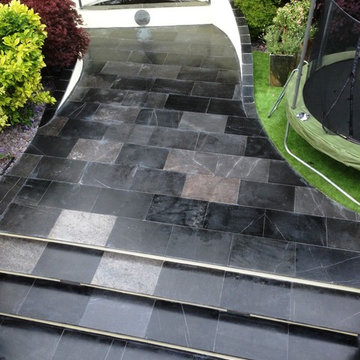
Details of a Limestone patio I was asked to clean at a property in the affluent neighbourhood of Alderly Edge, Cheshire, famous for being the home of choice for several Premier League footballers. In fact Alderly Edge, which lies not too far south of Manchester and is one of the most sought after places to live in the UK. My client was unhappy with the look of the patio had previously been sealed using a topical sealer, and this had left the tiles looking dull and lifeless.
Limestone is a fantastic natural stone, popularly used for internal floors as well as patios, it comes in a variety of fantastic colours and shades. What my client really wanted for the patio was a wet look to bring out the character of the Limestone. So, my job was to strip the old sealer off and replace it will one that would achieve the desired finish.
To strip the old sealer from the patio, I used a series of fine diamond encrusted burnishing pads which are applied in order from Coarse, Medium, Fine and then Super Fine. The coarse pad is effective at stripping off sealer without damaging the tile, and without the need to use a liquid product. The finer burnishing pads then rebuild the appearance of the Limestone to provide a nice deep shine.
The new sealer of choice was Tile Doctor Colour Grow, which can be used on both internal and external natural stone surfaces. Colour Grow is an impregnating sealer which penetrates deep into the pores of the stone, providing both long-lasting resistance and durable protection against ingrained dirt and stains. As you can see from the photos, Colour Grow is also specially formulated to intensify the natural colours in the stone, and it really helped to bring the Limestone back to life again.
The finished job left this patio with the wet, polished look my client had requested. She was very pleased with the result and amazed by just how quickly such a marked difference could be made. Another happy client!
Steve Keary
North Cheshire Tile Doctor
 Tile Doctor Ltd
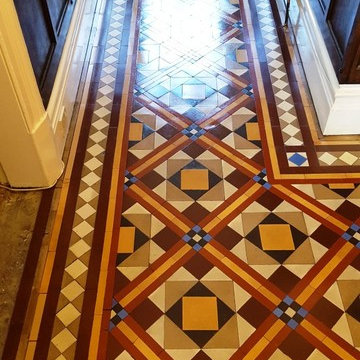
The colourful and diverse geometric patterns of a Victorian tiled floor can give a property a regal, elegant and timeless feel, making it a popular choice even in the 21st century. However, as time passes without regular care and maintenance, Victorian tiles can quickly lose their colour and appear deadened by the buildup of dirt and dust over several months (and sometimes years).
This property owner in Hebden a very small village in North Yorkshire of less than 300 people, had this common problem. Her Victorian tiled hallway had not been adequately maintained and was now more difficult to keep clean than ever. To add to the problem, most of the tiles along the edges were either broken, cracked, or filled with holes, probably I suspect from the installation of carpet grippers at some point in the past.
At this point, the property owner turned to Tile Doctor to see what could be done.
Before beginning a deep clean of the entire length of the hallway, it was first necessary to source and install replacement tiles for those that had been broken and damaged. I also relaid any that were loose.
When finished, I left the tiles to set and returned the next day to start the clean. My choice of cleaner in this situation was Tile Doctor Pro Clean, which was scrubbed into the floor with a special pad fitted to a rotary machine to break down ingrained dirt and stains. Pro Clean does this very effectively on all types of tile, including natural stone and of course Victorian tiles.
The floor was then rinsed with water and the soiled cleaning solution extracted from the floor using a vet vacuum. Stubborn areas were re-treated with more Pro Clean, and when I was satisfied with the condition of the tiles the floor was given a final but thorough rinse to remove any trace of cleaning product.
The floor was then left to dry completely overnight to ensure all excess moisture had disappeared, leaving it fresh to be sealed. I returned in the morning for a third day of work to seal the Victorian tiles with four coats of Tile Doctor Seal and Go, a topical sealer which provides a rich satin finish to really add depth to the colours in the tile while protecting it against dirt and stains.
The customer was delighted with the restoration and couldn’t quite believe the huge improvement in the appearance of the tiles, especially in regards to the enhancement in the different colours. Another satisfied customer!
Nigel Stoker
North West Yorkshire Tile Doctor

 Advance Design Studio, Ltd.
After six years of living in their Huntley IL home, Chris and Meghan were tired of their dark, dingy, outdated kitchen and it was finally time for a long-anticipated change. “The kitchen is the place where we live, it’s where we do everything,” Meghan said. “It was important that it be a space where we wanted to be.” Meghan loves cooking and enjoys including their girls in healthy meal prepping, this led them to want a brighter, more enjoyable kitchen with increased functionality and improved storage.
For Chris especially, the laundry room was an entirely dysfunctional eyesore. “We had a washer and a dryer, but it was all kind-of cobbled together!” Chris said. “There were always laundry piles everywhere, we weren’t really sure what we wanted to do in there, but it was time for us to make a change.” The mess of the space was stressful every time they walked in the door from the garage each day. Kids’ backpacks and shoes piled up haphazardly in the makeshift boot-bench closet left the family feeling disorganized and stressed. They needed space for folding clothes and locker cubbies to help keep the family organized.
Having known Christine and Todd in the Huntley community for years, Chris and Meghan were familiar with their work. “We already trusted them personally and having seen their projects for years we knew they did top notch work. After we reviewed the initial round of designs, we knew that hiring them was definitely the right choice,” Meghan and Chris said. Although Chris had done a lot of work in their home himself, the kitchen and laundry room renovation was such a large undertaking that he didn’t want to steal time away from his family to spend what would surely be many long weekends doing the job himself. “That would not have been a wise choice for us,” Chris laughed.
“Our designer, Michelle was very, very, easy to work with; anything we wanted to see or weren’t sure about, she went above and beyond to make this easy for us. She was easy to get hold of and always quick to respond,” the couple said. Michelle pulled ideas that mirrored the couple’s taste and style and was adept at directing the couple to limited choices that didn’t overwhelm them and kept the process moving. “I have a hard time making decisions. Michelle made the decision-making process so easy. I loved how she listened to what I liked and then presented three great options for me to choose from,” Meghan said.
The main objectives for the kitchen were better storage solutions, they wanted the space to reflect their lifestyle and taste, and they wanted it to last for years with low maintenance. One of the first steps in creating a more functional kitchen was relocating the refrigerator, creating an improved workflow for the busy family.
“We didn’t know that we could even move the refrigerator to a new location where it is now, that was something that we never would have thought of,” Chris said. “The new refrigerator location makes the kitchen feel so much bigger. We didn’t add any space, but our whole kitchen with the new design just seems like it’s so much larger than before!” Meghan said.
The perimeter mist colored cabinets helped warm and brighten the entire room, while the graphite colored cabinets on the island added contrast. Using this fresh, clean color palette satisfied the couple’s desire for a bright space that was the exact opposite of what they had before. Organization accessories were also added to the cabinets such as a spice drawer tray and roll outs to create hidden convenience.
“I absolutely love the hidden spices – it makes cooking so much more enjoyable!” Chris said. “And all the pull outs, and the double trash bin, who would think you could get so excited about organization!” the couple said in unison.
One thing they hated in their original kitchen was how dark the space felt. Added lighting on the ceiling with the new light fixtures combined with the lighter cabinetry colors throughout solved this problem. “Our new kitchen has this warm, almost cozy feeling that our old kitchen never had, it’s just a space that I love spending my time in now,” Meghan said. The light airy feeling was accentuated with the use of floating white shelves on either side of the decorative range hood. “We have so much cabinetry space, the new design is amazing we actually have more storage space than we will ever need,” Meghan said.
The island was extended to create more work surface and added space for stool seating. “The new island changes how we live. Now the kids can be in the kitchen with us, doing homework, eating breakfast, and the three of us have special dinners there when Chris is working late,” Meghan said.
The Carrara Marmi Quartz countertops were chosen because they are, not only beautiful, but are made from hard-working material that doesn’t require maintenance. The white subway tile backsplash that wraps to the ceiling behind the focal point cooktop range/hood compliments the crisp white countertops perfectly, while brushed brass hardware and light fixtures keep the design fresh and new.
The couple had a few fears at the beginning of the project, as most homeowners do. Their biggest fear was being out of their kitchen and laundry room for an extended time. The crew made it very easy for the family to work in a limited space keeping the washer and dryer hooked up the majority of the time, and also getting appliances working with minimal downtime.
“They above and beyond accommodated us to get us through the process,” Meghan said. “They did a great job making sure we were as comfortable as possible throughout the process,” Chris added.
“Our project manager DJ did a great job. He was very good at updating us on schedule changes, getting guys in as quickly as possible. Everyone that stepped in the house was nice and did great work,” said Chris. They thought Advance’s carpenter was phenomenal and were impressed when he took a conceptual idea from a photograph and worked with designer Michelle to create a one of a kind range/hood that has become the topic of conversation with friends and family who visit the new kitchen. “He was in our house literally every day for several weeks. He was easy to work with and good at what he did,” Meghan and Chris said.
The focal point of the kitchen; a hand-crafted, custom-built ventilation hood was clad with handpicked reclaimed barnwood. Advance Design’s carpenter built the framework and the cladding to create a one-of-a-kind design element that the couple loves.
“I think it was especially fun for him to create something unique from scratch, showcasing his talent in this area,” Meghan said. “I love that my kitchen is not like everyone else’s. I got to pick out the wood on my hood and watch it being built and was able to choose what pieces of wood went where on it. It’s totally unique.”
Red Oak flooring was toothed-in throughout the kitchen and the rest of the first floor anywhere changes were made. Then the whole floor was refinished to tone down the orange undertones in the existing floor stain, ultimately changing the color complexion of the entire first floor. The result is a completely new feeling to the entire home.
Renovating the laundry room was extremely important to Meghan and Chris, but they had trouble visualizing what the possibilities were for the seemingly small space. Michelle produced beautiful 3D illustrations that helped them envision the space in a whole new way.
“I must have told Michelle 100 times that I am a visual person, seeing the designs in 3D made it so easy to make decisions and see what we could really do with our space,” Meghan said.
A dividing wall and doorway were removed between the existing laundry room and hallway formerly containing a coat closet, providing space to design specialized graphite colored cabinetry matching the kitchen island to house custom storage cubbies for each family member. Adding the tall utility cabinetry in the new laundry area helped solve the storage issue, tucking away cleaning supplies, household items, and even the cat got its own cubby.
“I love how everything is now hidden in its own space. I can’t tell you how much I hated coming home and seeing everything sitting around on counters,” Chris said.
Electrical outlets were planned for the inside of utility cabinets, so devices could charge in hidden locations. Stacking the washer and dryer allowed for wider countertop space to provide a folding area and a special space for clothes to hang. “The way I do laundry has been completely transformed! I can actually fold clothes and hang them now right out of the washer and dryer,” Meghan said.
“The end result in the kitchen and the laundry/mud room was an updated light and bright space, with a smarter work flow that better meets the needs of this family,” Michelle said.
“I would totally recommend Advance Design,” Meghan said. “Sometimes I sit and just look at my kitchen and laundry room and think ‘Wow, I can’t believe I get to live here!’ It’s an understatement to say we love our new space.”
Find the right local pro for your project
 Advance Design Studio, Ltd.
After six years of living in their Huntley IL home, Chris and Meghan were tired of their dark, dingy, outdated kitchen and it was finally time for a long-anticipated change. “The kitchen is the place where we live, it’s where we do everything,” Meghan said. “It was important that it be a space where we wanted to be.” Meghan loves cooking and enjoys including their girls in healthy meal prepping, this led them to want a brighter, more enjoyable kitchen with increased functionality and improved storage.
For Chris especially, the laundry room was an entirely dysfunctional eyesore. “We had a washer and a dryer, but it was all kind-of cobbled together!” Chris said. “There were always laundry piles everywhere, we weren’t really sure what we wanted to do in there, but it was time for us to make a change.” The mess of the space was stressful every time they walked in the door from the garage each day. Kids’ backpacks and shoes piled up haphazardly in the makeshift boot-bench closet left the family feeling disorganized and stressed. They needed space for folding clothes and locker cubbies to help keep the family organized.
Having known Christine and Todd in the Huntley community for years, Chris and Meghan were familiar with their work. “We already trusted them personally and having seen their projects for years we knew they did top notch work. After we reviewed the initial round of designs, we knew that hiring them was definitely the right choice,” Meghan and Chris said. Although Chris had done a lot of work in their home himself, the kitchen and laundry room renovation was such a large undertaking that he didn’t want to steal time away from his family to spend what would surely be many long weekends doing the job himself. “That would not have been a wise choice for us,” Chris laughed.
“Our designer, Michelle was very, very, easy to work with; anything we wanted to see or weren’t sure about, she went above and beyond to make this easy for us. She was easy to get hold of and always quick to respond,” the couple said. Michelle pulled ideas that mirrored the couple’s taste and style and was adept at directing the couple to limited choices that didn’t overwhelm them and kept the process moving. “I have a hard time making decisions. Michelle made the decision-making process so easy. I loved how she listened to what I liked and then presented three great options for me to choose from,” Meghan said.
The main objectives for the kitchen were better storage solutions, they wanted the space to reflect their lifestyle and taste, and they wanted it to last for years with low maintenance. One of the first steps in creating a more functional kitchen was relocating the refrigerator, creating an improved workflow for the busy family.
“We didn’t know that we could even move the refrigerator to a new location where it is now, that was something that we never would have thought of,” Chris said. “The new refrigerator location makes the kitchen feel so much bigger. We didn’t add any space, but our whole kitchen with the new design just seems like it’s so much larger than before!” Meghan said.
The perimeter mist colored cabinets helped warm and brighten the entire room, while the graphite colored cabinets on the island added contrast. Using this fresh, clean color palette satisfied the couple’s desire for a bright space that was the exact opposite of what they had before. Organization accessories were also added to the cabinets such as a spice drawer tray and roll outs to create hidden convenience.
“I absolutely love the hidden spices – it makes cooking so much more enjoyable!” Chris said. “And all the pull outs, and the double trash bin, who would think you could get so excited about organization!” the couple said in unison.
One thing they hated in their original kitchen was how dark the space felt. Added lighting on the ceiling with the new light fixtures combined with the lighter cabinetry colors throughout solved this problem. “Our new kitchen has this warm, almost cozy feeling that our old kitchen never had, it’s just a space that I love spending my time in now,” Meghan said. The light airy feeling was accentuated with the use of floating white shelves on either side of the decorative range hood. “We have so much cabinetry space, the new design is amazing we actually have more storage space than we will ever need,” Meghan said.
The island was extended to create more work surface and added space for stool seating. “The new island changes how we live. Now the kids can be in the kitchen with us, doing homework, eating breakfast, and the three of us have special dinners there when Chris is working late,” Meghan said.
The Carrara Marmi Quartz countertops were chosen because they are, not only beautiful, but are made from hard-working material that doesn’t require maintenance. The white subway tile backsplash that wraps to the ceiling behind the focal point cooktop range/hood compliments the crisp white countertops perfectly, while brushed brass hardware and light fixtures keep the design fresh and new.
The couple had a few fears at the beginning of the project, as most homeowners do. Their biggest fear was being out of their kitchen and laundry room for an extended time. The crew made it very easy for the family to work in a limited space keeping the washer and dryer hooked up the majority of the time, and also getting appliances working with minimal downtime.
“They above and beyond accommodated us to get us through the process,” Meghan said. “They did a great job making sure we were as comfortable as possible throughout the process,” Chris added.
“Our project manager DJ did a great job. He was very good at updating us on schedule changes, getting guys in as quickly as possible. Everyone that stepped in the house was nice and did great work,” said Chris. They thought Advance’s carpenter was phenomenal and were impressed when he took a conceptual idea from a photograph and worked with designer Michelle to create a one of a kind range/hood that has become the topic of conversation with friends and family who visit the new kitchen. “He was in our house literally every day for several weeks. He was easy to work with and good at what he did,” Meghan and Chris said.
The focal point of the kitchen; a hand-crafted, custom-built ventilation hood was clad with handpicked reclaimed barnwood. Advance Design’s carpenter built the framework and the cladding to create a one-of-a-kind design element that the couple loves.
“I think it was especially fun for him to create something unique from scratch, showcasing his talent in this area,” Meghan said. “I love that my kitchen is not like everyone else’s. I got to pick out the wood on my hood and watch it being built and was able to choose what pieces of wood went where on it. It’s totally unique.”
Red Oak flooring was toothed-in throughout the kitchen and the rest of the first floor anywhere changes were made. Then the whole floor was refinished to tone down the orange undertones in the existing floor stain, ultimately changing the color complexion of the entire first floor. The result is a completely new feeling to the entire home.
Renovating the laundry room was extremely important to Meghan and Chris, but they had trouble visualizing what the possibilities were for the seemingly small space. Michelle produced beautiful 3D illustrations that helped them envision the space in a whole new way.
“I must have told Michelle 100 times that I am a visual person, seeing the designs in 3D made it so easy to make decisions and see what we could really do with our space,” Meghan said.
A dividing wall and doorway were removed between the existing laundry room and hallway formerly containing a coat closet, providing space to design specialized graphite colored cabinetry matching the kitchen island to house custom storage cubbies for each family member. Adding the tall utility cabinetry in the new laundry area helped solve the storage issue, tucking away cleaning supplies, household items, and even the cat got its own cubby.
“I love how everything is now hidden in its own space. I can’t tell you how much I hated coming home and seeing everything sitting around on counters,” Chris said.
Electrical outlets were planned for the inside of utility cabinets, so devices could charge in hidden locations. Stacking the washer and dryer allowed for wider countertop space to provide a folding area and a special space for clothes to hang. “The way I do laundry has been completely transformed! I can actually fold clothes and hang them now right out of the washer and dryer,” Meghan said.
“The end result in the kitchen and the laundry/mud room was an updated light and bright space, with a smarter work flow that better meets the needs of this family,” Michelle said.
“I would totally recommend Advance Design,” Meghan said. “Sometimes I sit and just look at my kitchen and laundry room and think ‘Wow, I can’t believe I get to live here!’ It’s an understatement to say we love our new space.”
 Tile Doctor Ltd
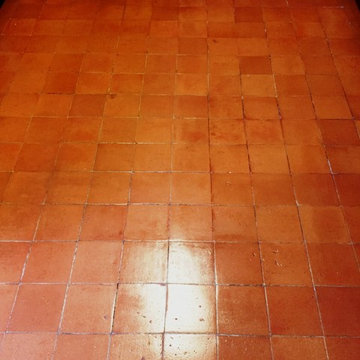
Not too long ago I visited a client who had just moved into a lovely old cottage in Milton, Oxfordshire. She wanted to restore many of the antique features of the building, including a fantastic Quarry tiled floor in the kitchen.
Quarry is typically a robust, hard wearing stone, but in a high traffic area like a kitchen, the tiles will need regular maintenance. These tiles clearly hadn’t seen a thorough clean and fresh seal in a long time, and so I was called in to provide just that.
On the first day of work, I gave the Quarry tiles a deep clean using a strong solution of Tile Doctor Pro-Clean and water. Pro-Clean is a versatile alkaline cleaner that also helps to break down any old and no longer effectual sealer remaining on the tiles.
The solution was applied evenly to the floor and left to dwell for half an hour, allowing time for it to seep into the stone to get underneath and lift out the ingrained dirt. I then removed the dirt by agitating the solution with a scrubbing pad fitted to a rotary floor scrubber. I worked in small sections at first, and gradually finished the entire floor.
After completing the initial clean, I rinsed away the soiled solution and vacuumed up the excess moisture using a wet-vac machine. I then scrubbed the floor an acid wash using a dilution of Tile Doctor Grout Clean-Up to remove grout smears and other mineral type deposits. The resulting solution was then removed in a similar fashion using a wet-vac.
The final step in the cleaning process was to rinse the floor with Tile Doctor pH Neutral Cleaner to remove any trace of product helps to tackle any remaining dirt and reset the pH balance of the tiles before sealing.
After leaving the floor to dry overnight, I returned the next day to the house to seal the floor with Tile Doctor Seal & Go, a water-based topical sealer which gives the floor an aesthetically pleasing sheen and a robust surface seal.
The photos demonstrate the results better than this short account can, needless to say the floor is now transformed.
Barry Woodward
Oxfordshire Tile Doctor
 Tile Doctor Ltd
At first sight, this Victorian tiled pathway in Palmers Green, N13 did not appear to need too many repairs, with just a few obvious broken and loose tiles to be fixed. On closer inspection however it became clear it was in need of a deep clean and fresh seal.
To start, we applied Tile Doctor Remove & Go across the entire length of the pathway to break down and strip off the old sealer and provide an initial clean. In the more stubborn and difficult to reach areas where we saw the buildup of efflorescence, we applied Tile Doctor Acid Gel to neutralise the alkaline salts.
Acid Gel, as the name indicates, is a pH1 blend of Phosphoric and Hydrochloric acid in gel form, making it easier to apply to tricky areas, including sloped or vertical surfaces. Users should be aware not to use this type of product on acid-sensitive stone such as Limestone, as this can cause etching if left on too long.
Once the dirt and efflorescence buildups had been dealt with, I focused my attention towards the tile repairs, quickly realising that the extent of damage was greater than initially thought. Firstly, the numerous loose and broken tiles were removed and individually cleaned in a similar way to the rest of the floor. We then repaired the sub base ready for the existing and newly sourced tiles to be re-laid, before leaving the floor to set and dry overnight.
The next day, the pathway was grouted, before being sealed with Tile Doctor’s colour enhancing, impregnating sealer, Colour Grow to bring back the life and character to the Victorian tiles.
I was also asked to renovate the Edwardian hallway tiles in the house so once finished with the pathway they were deep cleaned using a strong dilution of Tile Doctor Pro Clean. This also helped to break down the old sealers and waxes – followed by a careful cleaning of the grout lines using Tile Doctor Grout Clean Up in combination with 3m black pads and detail brushes.
To ensure any pre existing sealer was completely removed, I followed up with a steam clean and left the tiles to dry overnight.
Upon my return to the property the next day, I completed re-grouting in the necessary areas, before sealing the tiles with five coats of Tile Doctor Seal & Go, providing an aesthetically pleasing satin finish. Seal & Go is a topical, solvent-based sealer which forms a layer of durable protection on the surface of the tiles, protecting against dirt and stains.
The hard work invested in restoring these two floors certainly paid off, as the client was exceptionally pleased with the results, going as far as to leave the following feedback:
“I wanted to restore my tired Edwardian tiled hallway and was given Rob Voyce’s
contact details. I was very impressed with Rob and his team; they were very
professional and friendly. Rob explained the stages of the work to be carried out and
we agreed a date and the job was completed much to my satisfaction. Very pleased.”
Nigel Voyce
North London Tile Doctor
 Tile Doctor Ltd
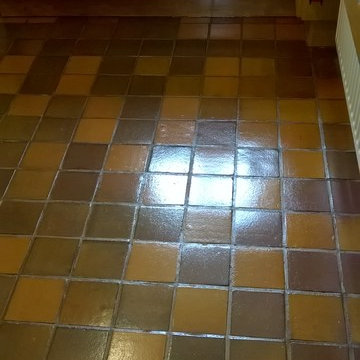
This Quarry tiled kitchen floor was in very good condition, with no cracked or broken tiles. However, my customer, who lives in the town of Tutbury, near Burton-on-Trent, was keen to boost the condition of the tiles further through professional maintenance, including a deep clean and a fresh seal to restore the sheen to the Quarry. NB, did you know it’s estimated that Tutbury has actually been inhabited for 3000 years, having once been the site of an Iron Age hill fort, this house of course was a lot more recent.
To clean the tiles, I chose to use our tried and trusted alkaline cleaner, Tile Doctor Pro Clean. We use Pro Clean on most types of natural stone floor, including Quarry, Slate, and Victorian. I applied Pro Clean liberally across the floor and left it to dwell for a short period, giving it time to seep into the tile to get underneath and lift out any ingrained dirt. The cleaner was then agitated using a scrubbing pad fitted to a rotary machine to remove the dirt and other general muck.
I then rinsed the floor with cold water and soaked up the resulting slurry with a wet-vac machine. Some areas of the floor proved to be quite stubborn to clean, so in these areas the cleaning process was repeated until satisfactory results were achieved. Finally, the floor was given another rinse and left to dry off overnight.
The next day I returned to the property and checked that the floor was ready to seal by running several damp tests, with the results indicating that was no excess moisture remaining on the tiles. We carry out these tests before sealing because moisture can cloud the sealer and prevent it from properly protecting the tiles.
My choice of sealer was Tile Doctor Seal & Go, a cost effective topical sealer that builds up a robust layer of protection on the surface of the floor and provides a durable sheen finish that, as you can see from the photographs, really lifts the appearance of the tiles.
It’s a fact that any sealed tiled floor will need to be regularly maintained as sealers do wear off over time, especially in the high traffic areas, and this is when the floor starts to lose its appearance as dirt becomes trapped in the pores of the stone. The life of the sealer can be extended however by ensuring you only clean the floor with a PH Neutral cleaner.
Trevor Preeece
 Tile Doctor Ltd
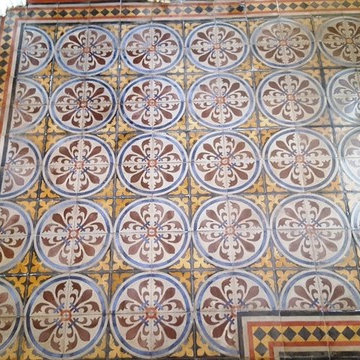
This very old Encaustic tiled flooring was uncovered at a property in Chester when the present owners started to undertake renovation. They removed the carpets and vinyl tiles from the hallway, revealing the Encaustic tiles to find that they were in truly horrific condition. This included being covered by heavy dirt, dust and, in some parts, by a sticky black bitumen.
Encaustic tiles are made out of compressed cement, and were commonly used in properties built during the Edwardian and Victorian period. This gives us a good idea of just how old these tiles are – but the owners were keen to see what Tile Doctor could do to restore their condition.
The black bitumen was my main concern when it came to cleaning the tiles. To remove this, along with all the other dirt and dust, our powerful cleaner for heavy soil buildup, known as Tile Doctor Remove and Go, was applied.
The product, which is also effective for removing adhesive and paint stains, was worked into the tiles then left to dwell for thirty minutes, before being scrubbed with a black pad fitted to a rotary machine. The resulting cleaning residue was soaked up with a wet vac machine. This cleaning process was repeated once more over to get the tiles as clean as possible, before leaving them to dry overnight.
The next day, damp readings were taken to make sure the floor was dry enough to seal. It’s essential to take damp readings before sealing – especially with old tiled floors that may not have a damp proof membrane installed – as even the slightest amount of excess moisture can damage the performance of the sealer.
Two types of sealer were used in this situation. First to be applied was a single coat of Tile Doctor Colour Grow, an impregnating, colour intensifying sealer which enhances the best shades in the tiles. Following this, four coats of Tile Doctor Seal and Go were applied. This is a topical sealer, which means it builds a layer of protection on the surface of the floor, while also providing an aesthetically pleasing low-sheen finish.
The customer was over the moon at the end result. At first the floor looked to be with a lost cause, but with the right cleaning methods and products it has been a restored to a standard where it almost appears new. Another satisfied customer!
Alastair Robb
West Cheshire Tile Doctor
 Tile Doctor Ltd
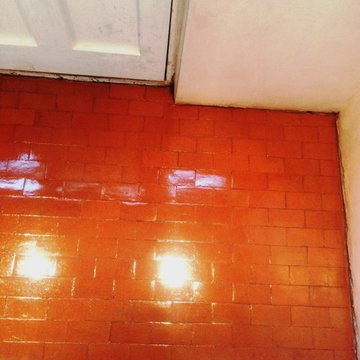
Here’s a quick job I completed in the coastal town of Eastbourne in East Sussex. While more commonly I am asked to work on entire floors, this customer was specifically interested in restoring a small doorway-like area with Quarry tiled flooring, the reason being that it had been covered for a long time by an old wardrobe and dog basket. As a result, the area had not been properly cared for, becoming very dusty and dirty. Also revealed were some unsightly splashes of white paint from previous decoration work.
The customer was keen to finally give this area of the floor the attention it needed, and so asked me to come in to provide a thorough clean and lay down some fresh sealer.
My first task was actually to relocate the old wardrobe and dog basket to the garage to get the area ready for cleaning. Then, to begin the cleaning process, I stripped away any old existing sealer and the white paint splashes by using Tile Doctor Remove & Go stripper in combination with a wire brush. Remove & Go is a versatile product that can also be used to break down glues and other adhesives.
I then washed the area down with water and promptly vacuumed up any moisture, before sitting down with a heat gun for an hour to dry the tiles. Usually a floor should be left for up to 48 hours to dry completely before sealing, but in this case the area was so small that I was able to dry it in the space of an hour.
Nonetheless, I opted to install a fan and leave the floor for an extra hour over lunch to ensure any excess moisture was removed. This is really important to do before sealing, as any remaining moisture can cloud the sealer and damage its performance.
To complete the restoration, I sealed the tiles using nine coats of the topical, water-based sealer Seal & Go, which is suitable for building up surface protection against dirt and stains on internal unsealed porous surfaces such as Victorian, Quarry and Sandstone tiles. The Quarry tiles were quite porous, which is not uncommon for Quarry Tiles and really soaked up the sealer.
As the photographs show, the results of the restoration were very good, with smiles all round – including from the slightly bemused family dog!
Rupert Mcleod
East Sussex Tile Doctor
 Tile Doctor Ltd
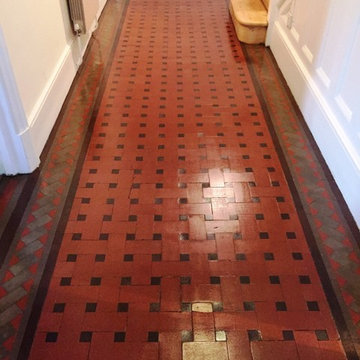
This fantastic Victorian tiled hallway floor in Oxford was in good physical condition for its age; however like any sealed floor the sealer had worn down with use and with dirt becoming trapped in the pores of the tile it was now becoming difficult to clean effectively and had become dull and un-inviting. It was now due a really good deep clean and re-seal. Oxford as I’m sure your aware has a rich history and is home to one of the world’s best universities, so not surprisingly many houses here have interesting floors such as this one.
Upon my arrival at the house, my first task was to protect the skirting boards, as well as the wooden floors leading into the other rooms. I then mixed a solution of Tile Doctor Pro-Clean, a versatile, high alkaline cleaner combined 50:50 with Tile Doctor NanoTech HBU, a particularly strong cleaner that utilises nano-sized particles to penetrate into areas of the stone that standard products simply cannot reach.
I applied the solution to the surface and allowed it to soak for thirty minutes, allowing it to get to work on the ingrained dirt so it could be easily removed. Following this, I agitated the solution with a soft brush attached to a rotary scrubbing machine. I then applied more solution and left it for a further thirty minutes, before scrubbing this into the tiles using a black pad fitted to the rotary machine.
After the clean had been completed, I rinsed the entire floor multiple times and vacuumed up the resulting slurry using a wet-vac machine.
I left the floor overnight, allowing the surface enough time to dry and returned then next day to seal the floor, checking first to ensure the tiles had dried. To seal the floor I used several coatings of Tile Doctor Seal & Go. Seal & Go which is a water-based, topical sealer that is suitable for use on unsealed, porous surfaces such as Victorian tile, textured Quarry, Slate, and Sandstone; being water based you don’t get the smell so it’s much more pleasant to work with.
As you can see from the before and after photos, the result was an aesthetically pleasing and – most importantly – clean, Victorian tiled floor. Needless to say, my client was extremely pleased with my work.
Barry Woodward
Oxfordshire Tile Doctor

 Jack Calderone
This bedroom and full bathroom are part of an adventuresome project my wife and I embarked upon to create a complete apartment in the basement of our townhouse. We designed a floor plan that creatively and efficiently used all of the 385-square-foot-space, without sacrificing beauty, comfort or function – and all without breaking the bank! To maximize our budget, we did the work ourselves and added everything from thrift store finds to DIY wall art to bring it all together.
A partial double closet bar adds a little extra space while still leaving room for longer hanging clothes.
 Tile Doctor Ltd
Sealers really do bring out the best in Terracotta tiles, however the catch is they will wear off over time and if you want to maintain that appearance you have to work out a regular maintenance plan. If you don’t maintain the sealer you will find that the sealer near the most heavily used areas such as doors etc. will wear away first and once that happens dirt will become ingrained in the tile and becomes difficult to clean resulting in a patchy appearance.
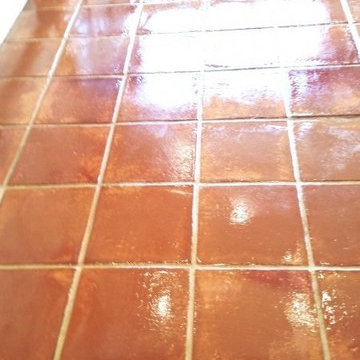
The remaining sealer on this Terracotta tiled kitchen floor at a house in the town of Wickford, Essex was no longer effective and had worn completely off in places. The solution was to strip off the old sealer, clean the Terracotta tile and gout and then re-seal with a fresh seal.
I started by giving the floor a deep clean with Tile Doctor Pro Clean diluted 2 parts water to 1 part cleaner. This is quite a strong dilution designed to allow the removal of the sealer and was left to dwell on the floor for ten minutes before working it into the floor using a scrubbing machine fitted with a black pad. Surprisingly the sealer was proving difficult to shift in certain areas and I had to repeat the process a few times and made sure to give the grout a good scrubbing as well.
I managed to get rid of most of the sealer using this process and for the remaining stubborn areas I used a stronger product called Tile Doctor Remove and Go which is a very effective coatings remover that is safe to use on tiles. This did the trick and the floor was now free of sealers and the grout was looking much better too, the resultant slurry was removed using a wet vacuum and I then rinsed the floor several times with water before leaving it to dry for weekend.
Tile Doctor Colour Grow which is an impregnating sealer that seeps into the pores of the tile to block them and prevent contaminates becoming ingrained in there and it also enhances the natural colours. Once this was dry I followed up with a number of coats of Tile Doctor Seal and Go which is topical sealer that will protect the surface and adds a nice sheen to the floor and is a popular choice for Terracotta and Quarry tiles.
I’m not sure my photographs do this post any justice however hopefully you can see that floor was quite transformed, the grout is much cleaner and the colours in the Terracotta have really come to life.
Nick Murphy
South Essex Tile Doctor
 Tile Doctor Ltd
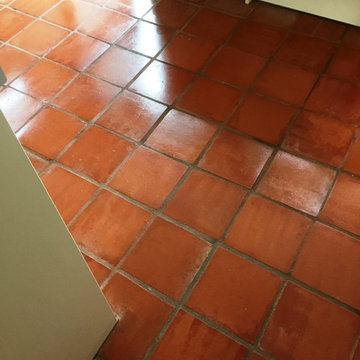
Newly built properties are not without their problems and often take a while to resolve all the snagging which occasionally extends to resolving problems with newly laid tiled floors. At this new property in the village of Malvern, and overlooked by the Malvern hills, the builders had left the Terracotta tiled kitchen floor covered in grout smears (also known as Grout Haze) following installation. They had also neglected to seal the tiles, which was actually quite fortunate in this case as they would have sealed in the grout haze, making it more difficult to remove.
Naturally, the property owner wanted the problem to be resolved as soon as possible, and for me to make the tiles easy to keep clean in future, which can be achieved by sealing the tile.
Before starting work, I made sure to fully protect any exposed woodwork with a plastic sheet covering to protect them from potential damage. I then proceeded to give the floor a thorough clean, using Tile Doctor Remove and Go to clean the floor and eradicate some stains that had been left behind as a result of the building work.
Next, I paid special attention to the grout, where the very visible problem of grout haze had arisen. To neutralise these smears I used Tile Doctor Grout Clean Up, a concentrated phosphoric acid cleaner that can also remove alkaline mineral deposits and efflorescence. Grout Clean Up is only to be used on acid resistant stone, as sensitive stone can suffer from irreparable etching if it comes into contact with the product.
Once completely clean and free of grout smears the floor was thoroughly rinsed with water to remove any trace of product and then dried as much as possible with a wet vacuum, afterwards an air mover was installed to speed up the drying process.
Later that afternoon the floor was dry and I was able to apply a sealer. To do this I opted to use several coats of Tile Doctor Seal and Go Extra, a topical, fully breathable sealer that works really well on Terracotta.
The sealer builds up a layer of protection on the surface of the tiles, protecting against ingrained dirt and stains. Seal and Go Extra also provides a high quality sheen finish which really did well to enhance the look of the Terracotta.
The property owner was exceptionally pleased with the results, and to have this problem dealt with quickly and efficiently, additionally the sealer will ensure the Kitchen floor is easy to keep clean in the future.

 avandearth
Startup industry is growing increasingly from year to year, and the trend to create their own projects has gripped the world. We have compiled a list of the most fun projects that are developed in Europe. We present you the most interesting start-up projects of Italy and France.
Italy: music, food and business processes
Italy has the status of a new high-tech center. This is not surprising, because in recent years, start-ups of Italian specialists are increasingly succeeding and attract the attention of the public.
1. Musixmatch is an application that displays lyrics on the smartphone screen. Founder is Max Chochola. The audience of the project is 30 million. The base has 7 million songs. Text is in 40 languages. The startup has already received investments from two venture capital funds.
2. Thefork is a start-up from Tripadvisor that contains information about food and the best restaurants in Italy.
3. Decisyon is a symbiosis of social networks and systems. It allows companies to coordinate the work of the team. The goal is an optimization of business processes. According to media reports, last year the company received an investment of $ 22 million from the American investment company.
France: transportation and the Internet of things
Earlier this year, France launched an initiative by which start-ups can apply for the selection and to get a visa to travel to the country. It helps in developing their business. This step is indicated in the country's interest in new companies and highly qualified specialists. Among the most interesting of the French start-up are projects that have been successful:
1. BlaBlaCar is a famous company that has almost become synonymous with the search for travel companions for the trip. A few weeks ago, the startup closed a new round of investment and attracted $ 200 million that will be spent on expansion in new markets. In general, for the 9 years of its existence BlaBlaCar bought eight companies and received funding of $ 335 million.
2. Actility is a company specializing in the Internet of things. Its main product is a platform ThingPark, designed to connect all kinds of organizations. The project was founded in Paris in 2010, and in June 2015 received an investment of $ 25 million from the fund Ginko Ventures.
About the Author: Avan Dearthis a writer, whose articles are published in his own blog. He likes to make student’s life easier with the help of his academic articles atCourseworkServiceUK. He can write on completely various topics, especially on the newest technologies.
 Tile Doctor Ltd
For this job, I had the pleasure of visiting the historic Salts Mill, a former textile mill turned art gallery, shopping centre, and restaurant complex near Bingley, West Yorkshire. It was built in 1853 by the famous manufacturer and philanthropist, Sir Titus Salt, and was at one point the largest industrial building in the world by total floor area.
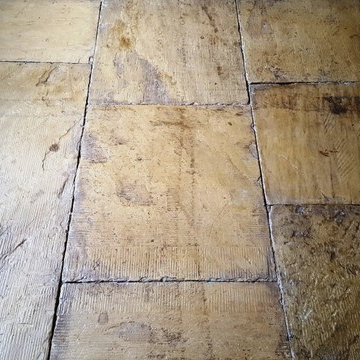
As you can imagine, a lot of the rooms at Salts Mill are over a century and a half old. Most of them also contained stone flooring made from Yorkstone – a type of Sandstone unique to Yorkshire, and easily distinguishable due to its rich, natural yellow colouring. Unfortunately, one such floor in the Salts Mill was in quite a bad state. It has completely lost its vibrance – appearing more grey than yellow – and was evidentially in need of a very deep clean and fresh seal.
I started the Yorkstone tile restoration by soaking the floor in a strong dilution of our reliable alkaline-based tile cleaner, Tile Doctor Pro Clean, and scrubbing it in using a rotary machine fitted with a scrubbing pad. This quickly removed the initial layers of muck and, in the process, revealed oil-based paint and glue stains all over the floor.
To break down the oil and paint I applied Tile Doctor Remove & Go, which is our heavy duty stripper, remover and degreaser. This quickly ate through the paint and glue, and I followed by giving the floor another thorough clean with Pro Clean. Finally, I rinsed the floor with clean water before leaving it to dry for a full two days due to the amount of chemical cleaning product and water applied.
Upon my return to the Salts Mill two days later, I ran some quick damp tests to check for any excess moisture which could’ve prevented me from sealing the floor. Thankfully, the floor was dry and ready to be sealed, but it is always recommended, especially with older floors, to be aware of damp issues as these can be very troublesome.
My choice of sealer was Tile Doctor Seal and Go, a topical sealer which provides a robust, stain resistant seal and a durable low sheen finish all in one product. Multiple coats of Seal and Go were applied, bringing the life and character back to these classic tiles.
Nigel Stoker
North West Yorkshire Tile Doctor
 Tile Doctor Ltd
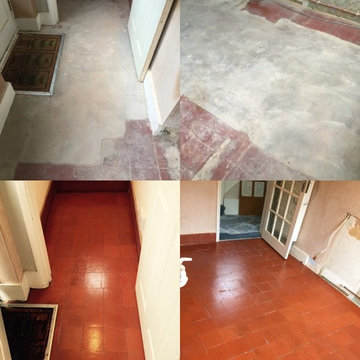
This customer from Woking had a Quarry tiled kitchen floor that she simply didn’t think could be restored. The floor had been unearthed after many years of being covered by a layer of levelling compound cement and then linoleum. Indeed, the situation certainly looked dire, but I carried out a successful test clean on a patch of the floor where the cement was at its thickest to show that it would be possible to conduct a full restoration. Having seen the results, the customer was more than happy for me to get the work underway.
To begin the restoration, I soaked small sections with water and Tile Doctor Remove and Go our heavy duty coatings remover. The solution was left to dwell for a short period to soften the cement, before I used the heat from a steamer in combination with a hand scraper to begin lifting away the muck. As you can probably imagine, this was an arduous and intensive process which took a full four days to fully complete.
Next, I cleaned the cement-free tiles using our high alkaline tile cleaning product Tile Doctor Pro Clean diluted 1 part cleaner with 3 parts water. This helped to eradicate the leftover muck once I had removed the bulk of the cement. I then sprayed Tile Doctor Grout Clean Up onto the grout lines and tiles to fully neutralise them and also remove any cement residue. Finally, I steamed the floor and left it for a week to dry out completely.
Upon my return to the property I sealed the floor with two coats of Tile Doctor Colour Grow, an impregnating sealer which really enhances the natural colours stone, and four coats of Tile Doctor Seal and Go, a topical sealer which provides a high quality sheen finish and durable protection against stains.
The customer was over the moon with the results and left some great feedback:
“Wayne did a really superb job. It was a very tough task, hot and exhausting, but he was fantastically good-humoured throughout, and kept me really well-informed. He was 100% reliable and very good at communicating between visits. I’m absolutely thrilled with the results! Thank you Wayne and thank you Tile Doctor! Would definitely recommend, and use your services again.”


 Advance Design Studio, Ltd.
After six years of living in their Huntley IL home, Chris and Meghan were tired of their dark, dingy, outdated kitchen and it was finally time for a long-anticipated change. “The kitchen is the place where we live, it’s where we do everything,” Meghan said. “It was important that it be a space where we wanted to be.” Meghan loves cooking and enjoys including their girls in healthy meal prepping, this led them to want a brighter, more enjoyable kitchen with increased functionality and improved storage.
For Chris especially, the laundry room was an entirely dysfunctional eyesore. “We had a washer and a dryer, but it was all kind-of cobbled together!” Chris said. “There were always laundry piles everywhere, we weren’t really sure what we wanted to do in there, but it was time for us to make a change.” The mess of the space was stressful every time they walked in the door from the garage each day. Kids’ backpacks and shoes piled up haphazardly in the makeshift boot-bench closet left the family feeling disorganized and stressed. They needed space for folding clothes and locker cubbies to help keep the family organized.
Having known Christine and Todd in the Huntley community for years, Chris and Meghan were familiar with their work. “We already trusted them personally and having seen their projects for years we knew they did top notch work. After we reviewed the initial round of designs, we knew that hiring them was definitely the right choice,” Meghan and Chris said. Although Chris had done a lot of work in their home himself, the kitchen and laundry room renovation was such a large undertaking that he didn’t want to steal time away from his family to spend what would surely be many long weekends doing the job himself. “That would not have been a wise choice for us,” Chris laughed.
“Our designer, Michelle was very, very, easy to work with; anything we wanted to see or weren’t sure about, she went above and beyond to make this easy for us. She was easy to get hold of and always quick to respond,” the couple said. Michelle pulled ideas that mirrored the couple’s taste and style and was adept at directing the couple to limited choices that didn’t overwhelm them and kept the process moving. “I have a hard time making decisions. Michelle made the decision-making process so easy. I loved how she listened to what I liked and then presented three great options for me to choose from,” Meghan said.
The main objectives for the kitchen were better storage solutions, they wanted the space to reflect their lifestyle and taste, and they wanted it to last for years with low maintenance. One of the first steps in creating a more functional kitchen was relocating the refrigerator, creating an improved workflow for the busy family.
“We didn’t know that we could even move the refrigerator to a new location where it is now, that was something that we never would have thought of,” Chris said. “The new refrigerator location makes the kitchen feel so much bigger. We didn’t add any space, but our whole kitchen with the new design just seems like it’s so much larger than before!” Meghan said.
The perimeter mist colored cabinets helped warm and brighten the entire room, while the graphite colored cabinets on the island added contrast. Using this fresh, clean color palette satisfied the couple’s desire for a bright space that was the exact opposite of what they had before. Organization accessories were also added to the cabinets such as a spice drawer tray and roll outs to create hidden convenience.
“I absolutely love the hidden spices – it makes cooking so much more enjoyable!” Chris said. “And all the pull outs, and the double trash bin, who would think you could get so excited about organization!” the couple said in unison.
One thing they hated in their original kitchen was how dark the space felt. Added lighting on the ceiling with the new light fixtures combined with the lighter cabinetry colors throughout solved this problem. “Our new kitchen has this warm, almost cozy feeling that our old kitchen never had, it’s just a space that I love spending my time in now,” Meghan said. The light airy feeling was accentuated with the use of floating white shelves on either side of the decorative range hood. “We have so much cabinetry space, the new design is amazing we actually have more storage space than we will ever need,” Meghan said.
The island was extended to create more work surface and added space for stool seating. “The new island changes how we live. Now the kids can be in the kitchen with us, doing homework, eating breakfast, and the three of us have special dinners there when Chris is working late,” Meghan said.
The Carrara Marmi Quartz countertops were chosen because they are, not only beautiful, but are made from hard-working material that doesn’t require maintenance. The white subway tile backsplash that wraps to the ceiling behind the focal point cooktop range/hood compliments the crisp white countertops perfectly, while brushed brass hardware and light fixtures keep the design fresh and new.
The couple had a few fears at the beginning of the project, as most homeowners do. Their biggest fear was being out of their kitchen and laundry room for an extended time. The crew made it very easy for the family to work in a limited space keeping the washer and dryer hooked up the majority of the time, and also getting appliances working with minimal downtime.
“They above and beyond accommodated us to get us through the process,” Meghan said. “They did a great job making sure we were as comfortable as possible throughout the process,” Chris added.
“Our project manager DJ did a great job. He was very good at updating us on schedule changes, getting guys in as quickly as possible. Everyone that stepped in the house was nice and did great work,” said Chris. They thought Advance’s carpenter was phenomenal and were impressed when he took a conceptual idea from a photograph and worked with designer Michelle to create a one of a kind range/hood that has become the topic of conversation with friends and family who visit the new kitchen. “He was in our house literally every day for several weeks. He was easy to work with and good at what he did,” Meghan and Chris said.
The focal point of the kitchen; a hand-crafted, custom-built ventilation hood was clad with handpicked reclaimed barnwood. Advance Design’s carpenter built the framework and the cladding to create a one-of-a-kind design element that the couple loves.
“I think it was especially fun for him to create something unique from scratch, showcasing his talent in this area,” Meghan said. “I love that my kitchen is not like everyone else’s. I got to pick out the wood on my hood and watch it being built and was able to choose what pieces of wood went where on it. It’s totally unique.”
Red Oak flooring was toothed-in throughout the kitchen and the rest of the first floor anywhere changes were made. Then the whole floor was refinished to tone down the orange undertones in the existing floor stain, ultimately changing the color complexion of the entire first floor. The result is a completely new feeling to the entire home.
Renovating the laundry room was extremely important to Meghan and Chris, but they had trouble visualizing what the possibilities were for the seemingly small space. Michelle produced beautiful 3D illustrations that helped them envision the space in a whole new way.
“I must have told Michelle 100 times that I am a visual person, seeing the designs in 3D made it so easy to make decisions and see what we could really do with our space,” Meghan said.
A dividing wall and doorway were removed between the existing laundry room and hallway formerly containing a coat closet, providing space to design specialized graphite colored cabinetry matching the kitchen island to house custom storage cubbies for each family member. Adding the tall utility cabinetry in the new laundry area helped solve the storage issue, tucking away cleaning supplies, household items, and even the cat got its own cubby.
“I love how everything is now hidden in its own space. I can’t tell you how much I hated coming home and seeing everything sitting around on counters,” Chris said.
Electrical outlets were planned for the inside of utility cabinets, so devices could charge in hidden locations. Stacking the washer and dryer allowed for wider countertop space to provide a folding area and a special space for clothes to hang. “The way I do laundry has been completely transformed! I can actually fold clothes and hang them now right out of the washer and dryer,” Meghan said.
“The end result in the kitchen and the laundry/mud room was an updated light and bright space, with a smarter work flow that better meets the needs of this family,” Michelle said.
“I would totally recommend Advance Design,” Meghan said. “Sometimes I sit and just look at my kitchen and laundry room and think ‘Wow, I can’t believe I get to live here!’ It’s an understatement to say we love our new space.”
 Tile Doctor Ltd
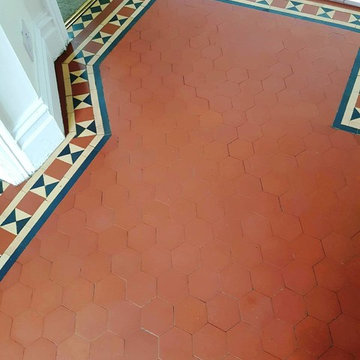
From The 1860s Victorian tiled floors started to appear in public buildings and by the 1890s they had become an essential feature in the most ordinary Victorian terraced houses. Although these floors fell out of fashion during the 1960s and ’70s, when many of them were covered over, they are now being rediscovered by their present owners and this is exactly what happened to my customer in the village of Littleover.
The customer had attempted to clean the floor by themselves but they couldn’t archive the result wanted, fortunately they discovered the Derbyshire Tile Doctor and after their call I went over and did a test for cleaning to make sure I can archive the needed results. They were happy with what they saw, so they booked me in to complete the work.
For cleaning the hallway I used a strong dilution of Tile Doctors Pro Clean which is strong multi-purpose high-alkaline cleaner. I left the Pro Clean to dwell for 10 minutes and then worked it in the tiles by using a strong black scrubbing pad fitted to my rotary machine. After scrubbing I rinsed the floor several times with clean water to remove any trace of cleaning product from the floor.
After successfully cleaning the hall I moved on to the porch which still had some old topical sealer on less walked areas. On these areas I had to use Tile Doctors own very effective stripper Remove and Go. Remove and Go has a long dwell time to remove any given sealer or wax so I left it to soak in for fifteen minutes followed by scrubbing it in with black pad fitted to rotary machine. The next step was to wash off the residue with water which was then removed using a wet vacuum.
Following this the tiles were given a rinse with Tile Doctor Grout Clean-up which is an acid based product that can remove grout smears and mineral deposits. Last step before sealing was to give the floor a thorough wash down with clean water to remove any cleaning product left on the tiles and then I left the floor to dry overnight.
Next day when I returned I used my damp tester to make sure that the floor is completely dry. Luckily for me floor was all dry and I started sealing. For sealing I used Tile Doctors Colour Grow Sealer which is colour enhancing breathable sealer. I applied 2 coats of the sealer and after every coat I polished off the excess with clean cotton cloths.
The result was really good and my customer was very happy with the work and said that now the floor looks transformed.
Tony Olmet
Derbyshire Tile Doctor
 Advance Design Studio, Ltd.
After six years of living in their Huntley IL home, Chris and Meghan were tired of their dark, dingy, outdated kitchen and it was finally time for a long-anticipated change. “The kitchen is the place where we live, it’s where we do everything,” Meghan said. “It was important that it be a space where we wanted to be.” Meghan loves cooking and enjoys including their girls in healthy meal prepping, this led them to want a brighter, more enjoyable kitchen with increased functionality and improved storage.
For Chris especially, the laundry room was an entirely dysfunctional eyesore. “We had a washer and a dryer, but it was all kind-of cobbled together!” Chris said. “There were always laundry piles everywhere, we weren’t really sure what we wanted to do in there, but it was time for us to make a change.” The mess of the space was stressful every time they walked in the door from the garage each day. Kids’ backpacks and shoes piled up haphazardly in the makeshift boot-bench closet left the family feeling disorganized and stressed. They needed space for folding clothes and locker cubbies to help keep the family organized.
Having known Christine and Todd in the Huntley community for years, Chris and Meghan were familiar with their work. “We already trusted them personally and having seen their projects for years we knew they did top notch work. After we reviewed the initial round of designs, we knew that hiring them was definitely the right choice,” Meghan and Chris said. Although Chris had done a lot of work in their home himself, the kitchen and laundry room renovation was such a large undertaking that he didn’t want to steal time away from his family to spend what would surely be many long weekends doing the job himself. “That would not have been a wise choice for us,” Chris laughed.
“Our designer, Michelle was very, very, easy to work with; anything we wanted to see or weren’t sure about, she went above and beyond to make this easy for us. She was easy to get hold of and always quick to respond,” the couple said. Michelle pulled ideas that mirrored the couple’s taste and style and was adept at directing the couple to limited choices that didn’t overwhelm them and kept the process moving. “I have a hard time making decisions. Michelle made the decision-making process so easy. I loved how she listened to what I liked and then presented three great options for me to choose from,” Meghan said.
The main objectives for the kitchen were better storage solutions, they wanted the space to reflect their lifestyle and taste, and they wanted it to last for years with low maintenance. One of the first steps in creating a more functional kitchen was relocating the refrigerator, creating an improved workflow for the busy family.
“We didn’t know that we could even move the refrigerator to a new location where it is now, that was something that we never would have thought of,” Chris said. “The new refrigerator location makes the kitchen feel so much bigger. We didn’t add any space, but our whole kitchen with the new design just seems like it’s so much larger than before!” Meghan said.
The perimeter mist colored cabinets helped warm and brighten the entire room, while the graphite colored cabinets on the island added contrast. Using this fresh, clean color palette satisfied the couple’s desire for a bright space that was the exact opposite of what they had before. Organization accessories were also added to the cabinets such as a spice drawer tray and roll outs to create hidden convenience.
“I absolutely love the hidden spices – it makes cooking so much more enjoyable!” Chris said. “And all the pull outs, and the double trash bin, who would think you could get so excited about organization!” the couple said in unison.
One thing they hated in their original kitchen was how dark the space felt. Added lighting on the ceiling with the new light fixtures combined with the lighter cabinetry colors throughout solved this problem. “Our new kitchen has this warm, almost cozy feeling that our old kitchen never had, it’s just a space that I love spending my time in now,” Meghan said. The light airy feeling was accentuated with the use of floating white shelves on either side of the decorative range hood. “We have so much cabinetry space, the new design is amazing we actually have more storage space than we will ever need,” Meghan said.
The island was extended to create more work surface and added space for stool seating. “The new island changes how we live. Now the kids can be in the kitchen with us, doing homework, eating breakfast, and the three of us have special dinners there when Chris is working late,” Meghan said.
The Carrara Marmi Quartz countertops were chosen because they are, not only beautiful, but are made from hard-working material that doesn’t require maintenance. The white subway tile backsplash that wraps to the ceiling behind the focal point cooktop range/hood compliments the crisp white countertops perfectly, while brushed brass hardware and light fixtures keep the design fresh and new.
The couple had a few fears at the beginning of the project, as most homeowners do. Their biggest fear was being out of their kitchen and laundry room for an extended time. The crew made it very easy for the family to work in a limited space keeping the washer and dryer hooked up the majority of the time, and also getting appliances working with minimal downtime.
“They above and beyond accommodated us to get us through the process,” Meghan said. “They did a great job making sure we were as comfortable as possible throughout the process,” Chris added.
“Our project manager DJ did a great job. He was very good at updating us on schedule changes, getting guys in as quickly as possible. Everyone that stepped in the house was nice and did great work,” said Chris. They thought Advance’s carpenter was phenomenal and were impressed when he took a conceptual idea from a photograph and worked with designer Michelle to create a one of a kind range/hood that has become the topic of conversation with friends and family who visit the new kitchen. “He was in our house literally every day for several weeks. He was easy to work with and good at what he did,” Meghan and Chris said.
The focal point of the kitchen; a hand-crafted, custom-built ventilation hood was clad with handpicked reclaimed barnwood. Advance Design’s carpenter built the framework and the cladding to create a one-of-a-kind design element that the couple loves.
“I think it was especially fun for him to create something unique from scratch, showcasing his talent in this area,” Meghan said. “I love that my kitchen is not like everyone else’s. I got to pick out the wood on my hood and watch it being built and was able to choose what pieces of wood went where on it. It’s totally unique.”
Red Oak flooring was toothed-in throughout the kitchen and the rest of the first floor anywhere changes were made. Then the whole floor was refinished to tone down the orange undertones in the existing floor stain, ultimately changing the color complexion of the entire first floor. The result is a completely new feeling to the entire home.
Renovating the laundry room was extremely important to Meghan and Chris, but they had trouble visualizing what the possibilities were for the seemingly small space. Michelle produced beautiful 3D illustrations that helped them envision the space in a whole new way.
“I must have told Michelle 100 times that I am a visual person, seeing the designs in 3D made it so easy to make decisions and see what we could really do with our space,” Meghan said.
A dividing wall and doorway were removed between the existing laundry room and hallway formerly containing a coat closet, providing space to design specialized graphite colored cabinetry matching the kitchen island to house custom storage cubbies for each family member. Adding the tall utility cabinetry in the new laundry area helped solve the storage issue, tucking away cleaning supplies, household items, and even the cat got its own cubby.
“I love how everything is now hidden in its own space. I can’t tell you how much I hated coming home and seeing everything sitting around on counters,” Chris said.
Electrical outlets were planned for the inside of utility cabinets, so devices could charge in hidden locations. Stacking the washer and dryer allowed for wider countertop space to provide a folding area and a special space for clothes to hang. “The way I do laundry has been completely transformed! I can actually fold clothes and hang them now right out of the washer and dryer,” Meghan said.
“The end result in the kitchen and the laundry/mud room was an updated light and bright space, with a smarter work flow that better meets the needs of this family,” Michelle said.
“I would totally recommend Advance Design,” Meghan said. “Sometimes I sit and just look at my kitchen and laundry room and think ‘Wow, I can’t believe I get to live here!’ It’s an understatement to say we love our new space.”
27