
Search results for "Two factor" in Home Design Ideas
 K Squared Builders - Dale Kramer
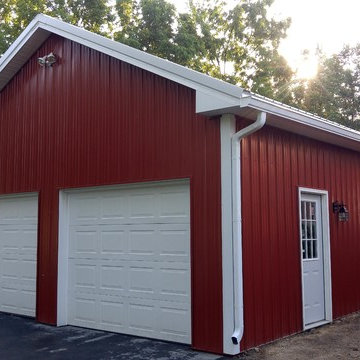
This 2 car garage is a pole barn structure with open attic access above. The siding and roof are pre-painted steel.
Mid-sized elegant detached two-car garage photo in DC Metro
Mid-sized elegant detached two-car garage photo in DC Metro
 Drury Design
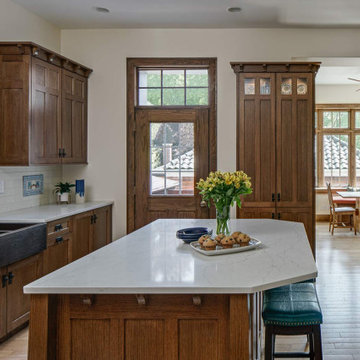
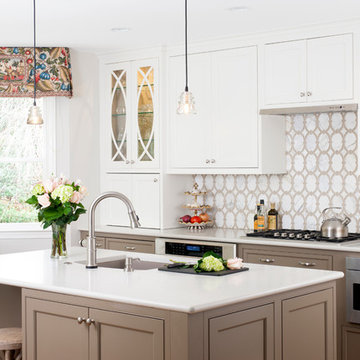
The 100-year old home’s kitchen was old and just didn’t function well. A peninsula in the middle of the main part of the kitchen blocked the path from the back door. This forced the homeowners to mostly use an odd, U-shaped corner of the kitchen.
Design objectives:
-Add an island
-Wow-factor design
-Incorporate arts and crafts with a touch of Mid-century modern style
-Allow for a better work triangle when cooking
-Create a seamless path coming into the home from the backdoor
-Make all the countertops in the space 36” high (the old kitchen had different base cabinet heights)
Design challenges to be solved:
-Island design
-Where to place the sink and dishwasher
-The family’s main entrance into the home is a back door located within the kitchen space. Samantha needed to find a way to make an unobstructed path through the kitchen to the outside
-A large eating area connected to the kitchen felt slightly misplaced – Samantha wanted to bring the kitchen and materials more into this area
-The client does not like appliance garages/cabinets to the counter. The more countertop space, the better!
Design solutions:
-Adding the right island made all the difference! Now the family has a couple of seats within the kitchen space. -Multiple walkways facilitate traffic flow.
-Multiple pantry cabinets (both shallow and deep) are placed throughout the space. A couple of pantry cabinets were even added to the back door wall and wrap around into the breakfast nook to give the kitchen a feel of extending into the adjoining eating area.
-Upper wall cabinets with clear glass offer extra lighting and the opportunity for the client to display her beautiful vases and plates. They add and an airy feel to the space.
-The kitchen had two large existing windows that were ideal for a sink placement. The window closest to the back door made the most sense due to the fact that the other window was in the corner. Now that the sink had a place, we needed to worry about the dishwasher. Samantha didn’t want the dishwasher to be in the way of people coming in the back door – it’s now in the island right across from the sink.
-The homeowners love Motawi Tile. Some fantastic pieces are placed within the backsplash throughout the kitchen. -Larger tiles with borders make for nice accent pieces over the rangetop and by the bar/beverage area.
-The adjacent area for eating is a gorgeous nook with massive windows. We added a built-in furniture-style banquette with additional lower storage cabinets in the same finish. It’s a great way to connect and blend the two areas into what now feels like one big space!
 Gallery KBNY
Our clients occupied the first two floors of this Manhattan townhouse, converted to condos with coveted access to the outdoors via a patio. The overall space had been well-maintained, but was dated and didn't necessarily reflect the aesthetic of our clients. Our goal was to brighten the home with character alongside modern elements.
In addition to a full kitchen renovation, this Manhattan townhouse renovation included installing new flooring; retiling and installing new fixtures in the bathroom and powder room; painting the walls; updating the staircase; renovating all the doors, including closets and to the back patio; and installing new lighting fixtures.
EYE-CATCHING KITCHEN
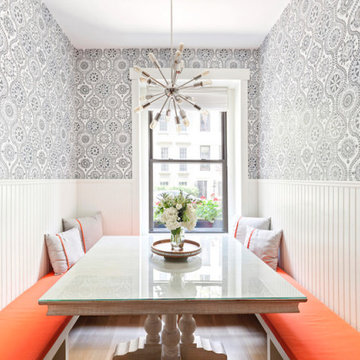
The kitchen in this Manhattan townhouse renovation is a galley-style space attached to the dining room. We wanted to connect the two in a more cohesive manner, so we built custom banquette seating benches in the dining room, with the table in the center acting as both a connector and divider.
Light wainscoting on the base of the walls and wallpaper above contrast against the bright orange benches and ultra-modern light fixture. Gray Shaker-style cabinets and a true herringbone backsplash are paired with a farmhouse sink set in white quartz countertops for a contemporary take on farmhouse style.
TOWNHOUSE CHARACTER
For the aesthetic in this Manhattan townhouse, we combined elements of a variety of design styles: farmhouse in the kitchen, transitional in the bathroom, touches of modern throughout. But the one factor shared by all is the charm of character. Retaining and refining that classic character was important to our clients.
Our extensive experience in renovating townhouses and brownstones in New York, including our gut renovation of this landmarked townhome in Hudson Square and this brownstone in Bed-Stuy, we were able to provide our clients with the confidence and clarity needed when entering these types of highly specific renovation projects.
SOME HIGHLIGHTS
- New select white oak flooring throughout
- White gloss penny tiles and black grout in the powder room
- Wraparound built-in banquette seating in the dining room
- Newly exposed brick wall in hallway leading out to patio, painted white for fresh contrast
Thinking about renovating your townhouse? We are a design-and-build firm with a full-scale approach that handles every single aspect of your townhouse renovation, from filing permits to sourcing materials and everything in between. Contact us today to find out how you can benefit from our expertise in remodeling New York City townhomes and brownstones.
Find the right local pro for your project
 Advance Design Studio, Ltd.
Karen and Chad of Tower Lakes, IL were tired of their unfinished basement functioning as nothing more than a storage area and depressing gym. They wanted to increase the livable square footage of their home with a cohesive finished basement design, while incorporating space for the kids and adults to hang out.
“We wanted to make sure that upon renovating the basement, that we can have a place where we can spend time and watch movies, but also entertain and showcase the wine collection that we have,” Karen said.
After a long search comparing many different remodeling companies, Karen and Chad found Advance Design Studio. They were drawn towards the unique “Common Sense Remodeling” process that simplifies the renovation experience into predictable steps focused on customer satisfaction.
“There are so many other design/build companies, who may not have transparency, or a focused process in mind and I think that is what separated Advance Design Studio from the rest,” Karen said.
Karen loved how designer Claudia Pop was able to take very high-level concepts, “non-negotiable items” and implement them in the initial 3D drawings. Claudia and Project Manager DJ Yurik kept the couple in constant communication through the project. “Claudia was very receptive to the ideas we had, but she was also very good at infusing her own points and thoughts, she was very responsive, and we had an open line of communication,” Karen said.
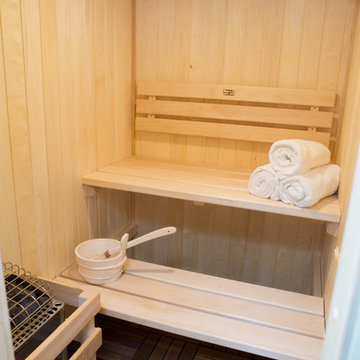
A very important part of the basement renovation for the couple was the home gym and sauna. The “high-end hotel” look and feel of the openly blended work out area is both highly functional and beautiful to look at. The home sauna gives them a place to relax after a long day of work or a tough workout. “The gym was a very important feature for us,” Karen said. “And I think (Advance Design) did a very great job in not only making the gym a functional area, but also an aesthetic point in our basement”.
An extremely unique wow-factor in this basement is the walk in glass wine cellar that elegantly displays Karen and Chad’s extensive wine collection. Immediate access to the stunning wet bar accompanies the wine cellar to make this basement a popular spot for friends and family.
The custom-built wine bar brings together two natural elements; Calacatta Vicenza Quartz and thick distressed Black Walnut. Sophisticated yet warm Graphite Dura Supreme cabinetry provides contrast to the soft beige walls and the Calacatta Gold backsplash. An undermount sink across from the bar in a matching Calacatta Vicenza Quartz countertop adds functionality and convenience to the bar, while identical distressed walnut floating shelves add an interesting design element and increased storage. Rich true brown Rustic Oak hardwood floors soften and warm the space drawing all the areas together.
Across from the bar is a comfortable living area perfect for the family to sit down at a watch a movie. A full bath completes this finished basement with a spacious walk-in shower, Cocoa Brown Dura Supreme vanity with Calacatta Vicenza Quartz countertop, a crisp white sink and a stainless-steel Voss faucet.
Advance Design’s Common Sense process gives clients the opportunity to walk through the basement renovation process one step at a time, in a completely predictable and controlled environment. “Everything was designed and built exactly how we envisioned it, and we are really enjoying it to it’s full potential,” Karen said.
Constantly striving for customer satisfaction, Advance Design’s success is heavily reliant upon happy clients referring their friends and family. “We definitely will and have recommended Advance Design Studio to friends who are looking to embark on a remodeling project small or large,” Karen exclaimed at the completion of her project.
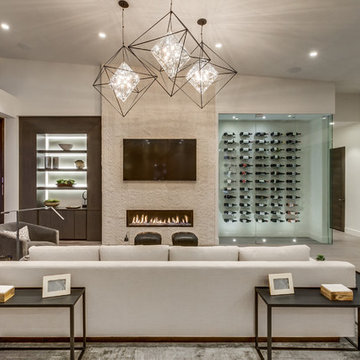
 VintageView
Using Vino Pins, the label-forward wine racking peg system, this smart wine cellar design showcases wines in a contemporary fashion that matches the home's decor.

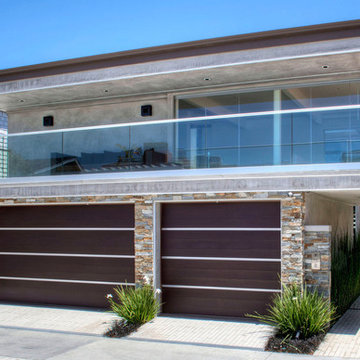
 Cantoni Irvine
Designed By: Sarah Buehlman
Marc and Mandy Maister were clients and fans of Cantoni before they purchased this harbor home on Balboa Island. The South African natives originally met designer Sarah Buehlman and Cantoni’s Founder and CEO Michael Wilkov at a storewide sale, and quickly established a relationship as they bought furnishings for their primary residence in Newport Beach.
So, when the couple decided to invest in this gorgeous second home, in one of the ritziest enclaves in North America, they sought Sarah’s help in transforming the outdated 1960’s residence into a modern marvel. “It’s now the ultimate beach house,” says Sarah, “and finished in Cantoni from top to bottom—including new custom cabinetry installed throughout.”
But let’s back up. This project began when Mandy contacted Sarah in the midst of the remodel process (in December 2010), asking if she could come take a look and help with the overall design.
“The plans were being drawn up with an architect, and they opted not to move anything major. Instead, they updated everything—as in the small carpeted staircase that became a gorgeous glass and metal sculpture,” Sarah explains. She took photographs and measurements, and then set to work creating the scaled renderings. “Marc and Mandy were drawn to the One and Only Collection. It features a high-gloss brown and white color scheme which served as inspiration for the project,” says Sarah.
Primary pieces in the expansive living area include the Mondrian leather sectional, the Involution sculpture, and a pair of Vladimir Kagan Corkscrew swivel chairs. The Maisters needed a place to house all their electronics but didn’t want a typical entertainment center. The One and Only buffet was actually modified by our skilled shop technicians, in our distribution center, so it could accommodate all the couple’s media equipment. “These artisans are another one of our hidden strengths—in addition to the design tools, inventory and extensive resources we have to get a job done,” adds Sarah. Marc and Mandy also fell in love with the exotic Makassar ebony wood in the Ritz Collection, which Sarah combined in the master bedroom with the Ravenna double chaise to provide an extra place to sit and enjoy the beautiful harbor views.
Beyond new furnishings, the Maisters also decided to completely redo their kitchen. And though Marc and Mandy did not have a chance to actually see our kitchen displays, having worked with Sarah over the years, they had immense trust in our commitment to craftsmanship and quality. In fact, they opted for new cabinetry in four bathrooms as well as the laundry room based on our 3D renderings and lacquer samples alone—without ever opening a drawer. “Their trust in my expertise and Cantoni’s reputation were a major deciding factor,” says Sarah.
This plush second home, complete with a private boat dock right out back, counts as one of Sarah’s proudest accomplishments. “These long-time clients are great. They love Cantoni and appreciate high quality Italian furnishings in particular. The home is so gorgeous that once you are inside and open the Nano doors, you simply don’t want to leave.” The job took almost two years to complete, but everyone seems quite happy with the results, proving that large or small—and in cases necessitating a quick turnaround or execution of a long-term vision—Cantoni has the resources to come through for all clients.

 Platinum Poolcare
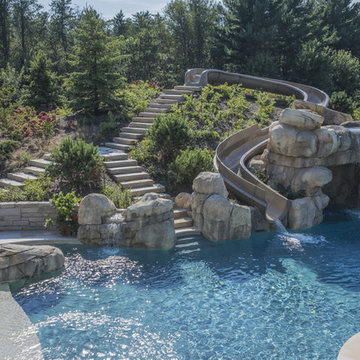
This amazing home features a backyard patio and pool area with a spectacular custom pool with many features including island which feature sitting areas and fire pit a spa as well as incredible slide which goes into the swimming pool. The pool measures roughly 2300 square feet, and has a deep end of 10'0". The spa is raised and has 12 therapy heads. There is LED colored lighting throughout the project. There is a 300 square foot zero depth beach entry into the pool with agitator jets to keep the water moving. There is also a sunshelf within the pool. The lazy river wraps around the sunken island, and the current in the lazy river is propelled by a commercial waterpark quality pumping system. The sunken island has lighting, a fire pit, and a bridge connecting it to the decking area. There is an infinity edge on one edge of the pool. The pool also has an in-floor cleaning system to keep it clean and sanitary. The swimming pool also has the ability to change colors at night utilizing the amazing LED lighting system. The pool and spa exposed aggregate finish is French Gray color. The slide that cascades down the grotto is custom built. The waterfall grotto also provide a thrilling jump off point into the deepest part of the pool. This amazing backyard was designed and built for a home in Bull Valley Illinois.
 Simply Home Decorating
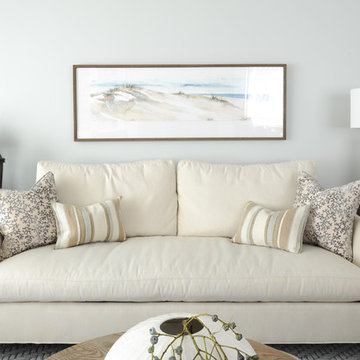
This tiny home is located on a treelined street in the Kitsilano neighborhood of Vancouver. We helped our client create a living and dining space with a beach vibe in this small front room that comfortably accommodates their growing family of four. The starting point for the decor was the client's treasured antique chaise (positioned under the large window) and the scheme grew from there. We employed a few important space saving techniques in this room... One is building seating into a corner that doubles as storage, the other is tucking a footstool, which can double as an extra seat, under the custom wood coffee table. The TV is carefully concealed in the custom millwork above the fireplace. Finally, we personalized this space by designing a family gallery wall that combines family photos and shadow boxes of treasured keepsakes. Interior Decorating by Lori Steeves of Simply Home Decorating. Photos by Tracey Ayton Photography
 Chango
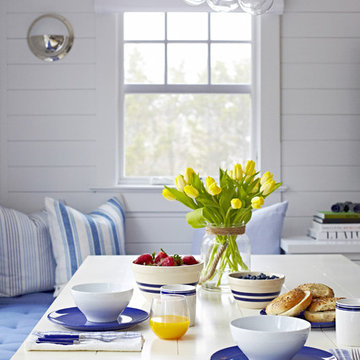
Interior Architecture, Interior Design, Art Curation, and Custom Millwork & Furniture Design by Chango & Co.
Construction by Siano Brothers Contracting
Photography by Jacob Snavely
See the full feature inside Good Housekeeping
 Zola European Windows
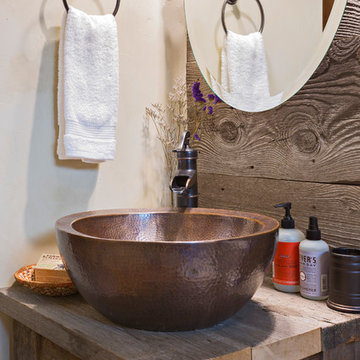
This Boulder, Colorado remodel by fuentesdesign demonstrates the possibility of renewal in American suburbs, and Passive House design principles. Once an inefficient single story 1,000 square-foot ranch house with a forced air furnace, has been transformed into a two-story, solar powered 2500 square-foot three bedroom home ready for the next generation.
The new design for the home is modern with a sustainable theme, incorporating a palette of natural materials including; reclaimed wood finishes, FSC-certified pine Zola windows and doors, and natural earth and lime plasters that soften the interior and crisp contemporary exterior with a flavor of the west. A Ninety-percent efficient energy recovery fresh air ventilation system provides constant filtered fresh air to every room. The existing interior brick was removed and replaced with insulation. The remaining heating and cooling loads are easily met with the highest degree of comfort via a mini-split heat pump, the peak heat load has been cut by a factor of 4, despite the house doubling in size. During the coldest part of the Colorado winter, a wood stove for ambiance and low carbon back up heat creates a special place in both the living and kitchen area, and upstairs loft.
This ultra energy efficient home relies on extremely high levels of insulation, air-tight detailing and construction, and the implementation of high performance, custom made European windows and doors by Zola Windows. Zola’s ThermoPlus Clad line, which boasts R-11 triple glazing and is thermally broken with a layer of patented German Purenit®, was selected for the project. These windows also provide a seamless indoor/outdoor connection, with 9′ wide folding doors from the dining area and a matching 9′ wide custom countertop folding window that opens the kitchen up to a grassy court where mature trees provide shade and extend the living space during the summer months.
With air-tight construction, this home meets the Passive House Retrofit (EnerPHit) air-tightness standard of
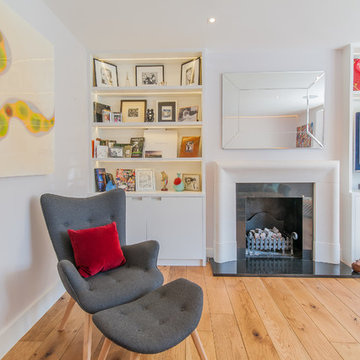
 50 Degrees North Architects
Overview
Whole house refurbishment, double storey wrap around extension and large loft conversion.
The Brief
Create a WOW factor space, add glamour and fun and give the house a street side and garden side, both different.
Our Solution
This project was exciting from the start, the client wanted to entertain in a WOW factor space, have a panoramic view of the garden (which was to be landscaped), add bedrooms and a great master suite.
We had some key elements to introduce such as an aquarium separating two rooms; double height spaces and a gloss kitchen, all of which manifest themselves in the completed scheme.
Architecture is a process taking a schedule of areas, some key desires and needs, mixing the functionality and creating space.
New spaces transform a house making it more valuable, giving it kerb appeal and making it feel like a different building. All of which happened at Ailsa Road.
 Encircle Design and Build
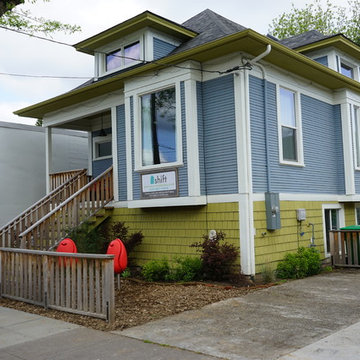
The house was lifted to add a second apartment in the basement. The old vinyl siding was removed and underneath the original siding looked great after some repairs and a fresh coat of paint.
Michelle Ruber

 Drury Design
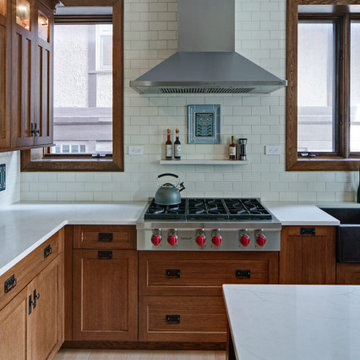
The 100-year old home’s kitchen was old and just didn’t function well. A peninsula in the middle of the main part of the kitchen blocked the path from the back door. This forced the homeowners to mostly use an odd, U-shaped corner of the kitchen.
Design objectives:
-Add an island
-Wow-factor design
-Incorporate arts and crafts with a touch of Mid-century modern style
-Allow for a better work triangle when cooking
-Create a seamless path coming into the home from the backdoor
-Make all the countertops in the space 36” high (the old kitchen had different base cabinet heights)
Design challenges to be solved:
-Island design
-Where to place the sink and dishwasher
-The family’s main entrance into the home is a back door located within the kitchen space. Samantha needed to find a way to make an unobstructed path through the kitchen to the outside
-A large eating area connected to the kitchen felt slightly misplaced – Samantha wanted to bring the kitchen and materials more into this area
-The client does not like appliance garages/cabinets to the counter. The more countertop space, the better!
Design solutions:
-Adding the right island made all the difference! Now the family has a couple of seats within the kitchen space. -Multiple walkways facilitate traffic flow.
-Multiple pantry cabinets (both shallow and deep) are placed throughout the space. A couple of pantry cabinets were even added to the back door wall and wrap around into the breakfast nook to give the kitchen a feel of extending into the adjoining eating area.
-Upper wall cabinets with clear glass offer extra lighting and the opportunity for the client to display her beautiful vases and plates. They add and an airy feel to the space.
-The kitchen had two large existing windows that were ideal for a sink placement. The window closest to the back door made the most sense due to the fact that the other window was in the corner. Now that the sink had a place, we needed to worry about the dishwasher. Samantha didn’t want the dishwasher to be in the way of people coming in the back door – it’s now in the island right across from the sink.
-The homeowners love Motawi Tile. Some fantastic pieces are placed within the backsplash throughout the kitchen. -Larger tiles with borders make for nice accent pieces over the rangetop and by the bar/beverage area.
-The adjacent area for eating is a gorgeous nook with massive windows. We added a built-in furniture-style banquette with additional lower storage cabinets in the same finish. It’s a great way to connect and blend the two areas into what now feels like one big space!

 TOC design & construction inc.
DESIGNED BY TOC design
CONSTRUCTION BY TOC design & Construction inc.
PHOTOS BY : Tania Scardellato
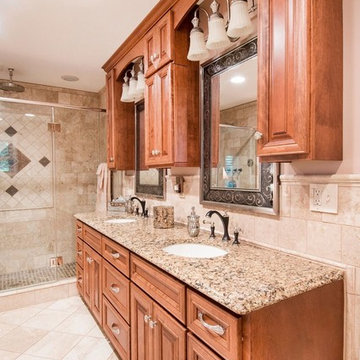
I was fortunate to have a young family approach me in desperate need to renovate there only 3 piece bathroom. This space was In dire need of a remodel, with old brown wall to wall tiles and a dated bulky yellow brown single sink vanity.
Storage was a must, lighting a necessity, and proper accessibility to the shower bath area.
We had a tight budget to respect, but a full gut of this bathroom was required. And a good thing too, once we started doing the demolition we noticed that mildew and rotting floors and walls had accumulated throughout the years. Doing it right the first time is no joke when dealing with water and electrical issues.
We discarded all reminisce of old and built from scratch, new walls, new plumbing, new electrical ,new insulation and a new window, a new fan that actually exhausted outside ( I say this laughing as you would be amazed at how many fans are installed but don’t exhaust outside, and you the client would never know unless you go inside the attic space.
Once all the hard stuff was done, the rest is just a matter of smart design. If you have a small bathroom here are some tips to guide you.
10 tips for making a small bathroom feel larger
Is your tiny bathroom cramping your functionality and style, leaving you longing for the enormous bathrooms gracing the pages of design magazines? Even if your bathroom is a fraction of the size, all it takes is some design savvy to make the most of the space you have. Consider these 10 smart tips that will help your bathroom look, feel and function like those larger contenders.
1-Get creative with corners
Space is at a premium in small bathrooms, so it's important to maximize every inch. Corners, for example, provide extra space for shelving, storage units and even hooks. Get creative and install unique design solutions that are not only functional, but also eye-catching. If you love the airiness of floating cabinets, add baskets or decorative boxes under for extra storage. If you are installing floating cabinets insure that they are installed securely to studs or plywood at wall.
2- Let solid colors shine
Busy patterns have a shrinking effect and make small bathrooms seem even smaller. Conversely, light natural hues make a space feel more open. If you're itching to get creative with design, experiment with textures but keep overpowering patterns to a minimum. Tone on tone is the best to achieve this.
3 - Maximize your bathtub
A bathtub takes up a significant portion of the room, but modern, compact options with curved basins, can make the tub feel larger when in use, all while conserving space.
4 - Select a smaller faucet
A faucet is jewelry for the bathroom. And just as accessories can overpower an outfit, a big bulky faucet isn't flattering in a small bath. Single-handle designs conserve counter space, while a wall-mount installation frees it up all together and can create quite the wow-factor, if the budget can accommodate the required changes to plumbing behind the wall.
5 - Make vanity storage simple
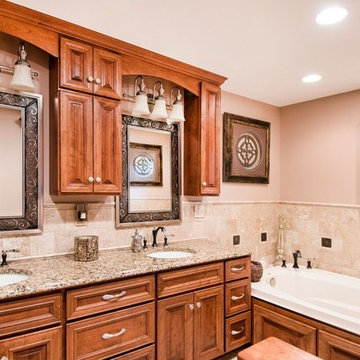
If you're in a storage war with your small bathroom, you're not alone in the battle. Toiletries and personal supplies without a place to call home only add clutter and chaos. Store smart with a space-saving vanity, the dual sink vanity shown here, looks quite simple, but in reality it has 4 sets of full extension drawers, and the vanity tower adds extra storage without overpowering the use of space.
6 - Show off the shower
Shower curtains may be pretty, but they interrupt the visual flow of a bathing space and make it feel significantly smaller. In bathrooms with small footprints, opt for a clear glass sliding shower door that doesn't require the clearance of one with a hinged design. Or as shown in this design and for fraction less expensive a half hinged panel installed on a fixed tempered glass panel. If you're embarking on a big remodel, create the illusion of more space by using same tile in the shower that's used throughout; instead of seeing them as two separate zones, the eye will read them as one.
7 - Discover the treasure of hidden storage
Work with a contractor, and you just might find some serious storage potential hidden behind your walls. Whether it's utilizing space between the studs for shallow shelving or a creating a small linen closet by annexing space from an adjacent room, even small additions can make a big difference.
8 - Focal Point
Tile is a beautiful, durable addition to any bathroom. For dainty spaces, consider installing tile at a diagonal to accentuate the focal point or as in this bathroom I used an oversized textured pattern to bring depth to the space at the window wall.
9 - Choose the right lights
Strategically install light to reflect and brighten a small bathroom to make it appear larger. Recessed lighting is an affordable solution for tiny rooms, offering ample light while taking up little space. Wall sconces alongside a mirror also reflect off the walls and make a room feel bright and airy. I always recommend going with LED lighting at 2800 to 3000K.
10 – Accessorize
This is your time to shine in your decorating skills, have fun with your towels, you can change the color scheme daily just by adding pops of color in your accessories, make sure to get items that serve a dual purpose, like baskets, boxes they can always be used as hampers, storing of towels and even a nice display for your guest.
 Trendy Peas
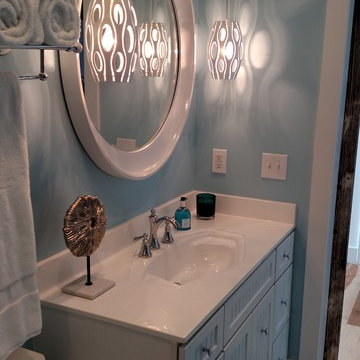
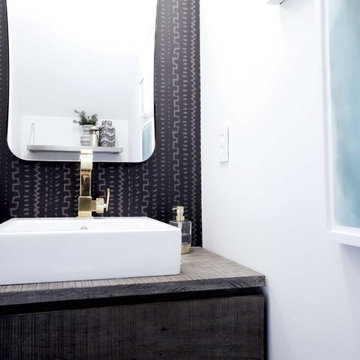
The vanity we chose has two large drawers. Since my kids use this bathroom to brush their teeth and hair in the morning before school, I needed something more functional to keep these items than two little boxes propped on the shelf. These drawers are so big that they also hold extra toilet paper rolls and extra hand towels. And that gorgeous brass faucet is definitely a wow factor in this space.
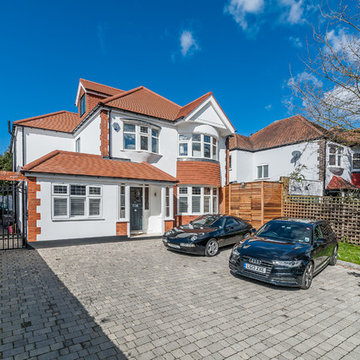 50 Degrees North Architects
Overview
Whole house refurbishment, double storey wrap around extension and large loft conversion.
The Brief
Create a WOW factor space, add glamour and fun and give the house a street side and garden side, both different.
Our Solution
This project was exciting from the start, the client wanted to entertain in a WOW factor space, have a panoramic view of the garden (which was to be landscaped), add bedrooms and a great master suite.
We had some key elements to introduce such as an aquarium separating two rooms; double height spaces and a gloss kitchen, all of which manifest themselves in the completed scheme.
Architecture is a process taking a schedule of areas, some key desires and needs, mixing the functionality and creating space.
New spaces transform a house making it more valuable, giving it kerb appeal and making it feel like a different building. All of which happened at Ailsa Road.
 Gallery KBNY
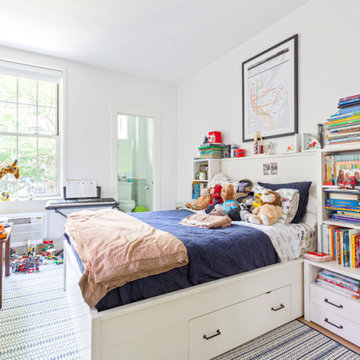
Our clients occupied the first two floors of this Manhattan townhouse, converted to condos with coveted access to the outdoors via a patio. The overall space had been well-maintained, but was dated and didn't necessarily reflect the aesthetic of our clients. Our goal was to brighten the home with character alongside modern elements.
In addition to a full kitchen renovation, this Manhattan townhouse renovation included installing new flooring; retiling and installing new fixtures in the bathroom and powder room; painting the walls; updating the staircase; renovating all the doors, including closets and to the back patio; and installing new lighting fixtures.
EYE-CATCHING KITCHEN
The kitchen in this Manhattan townhouse renovation is a galley-style space attached to the dining room. We wanted to connect the two in a more cohesive manner, so we built custom banquette seating benches in the dining room, with the table in the center acting as both a connector and divider.
Light wainscoting on the base of the walls and wallpaper above contrast against the bright orange benches and ultra-modern light fixture. Gray Shaker-style cabinets and a true herringbone backsplash are paired with a farmhouse sink set in white quartz countertops for a contemporary take on farmhouse style.
TOWNHOUSE CHARACTER
For the aesthetic in this Manhattan townhouse, we combined elements of a variety of design styles: farmhouse in the kitchen, transitional in the bathroom, touches of modern throughout. But the one factor shared by all is the charm of character. Retaining and refining that classic character was important to our clients.
Our extensive experience in renovating townhouses and brownstones in New York, including our gut renovation of this landmarked townhome in Hudson Square and this brownstone in Bed-Stuy, we were able to provide our clients with the confidence and clarity needed when entering these types of highly specific renovation projects.
SOME HIGHLIGHTS
- New select white oak flooring throughout
- White gloss penny tiles and black grout in the powder room
- Wraparound built-in banquette seating in the dining room
- Newly exposed brick wall in hallway leading out to patio, painted white for fresh contrast
Thinking about renovating your townhouse? We are a design-and-build firm with a full-scale approach that handles every single aspect of your townhouse renovation, from filing permits to sourcing materials and everything in between. Contact us today to find out how you can benefit from our expertise in remodeling New York City townhomes and brownstones.
 Wood Anchor
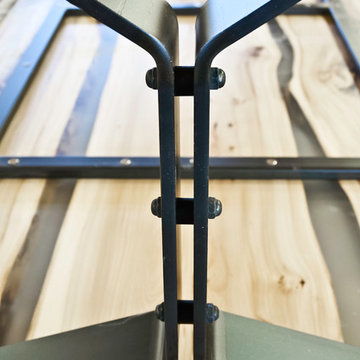
We were contacted by a business owner from Calgary to build a unique conference room table. One that had some wow factor.
What we came up with was adding two flowing “rivers” of clear resin to showcase 3 Elm slab live edges.
To ensure maximum leg room while having a modern industrial feel free came up with a new leg design called the “Dagny”.
A new take on using flat-bar steel. Elegant yet bold!
Details: 10′ long x 4′ wide x 1 1/2″ thick x 30″ tall reclaimed Elm conference table, featuring two clear resin “rivers”. Natural Elm wood colour, finished with OSMO Hardwax Polyx Oil. Bllack powder coated Dagny leg.
2016 © Ray Chan Photo, All Rights Reserved
 House of Meraki
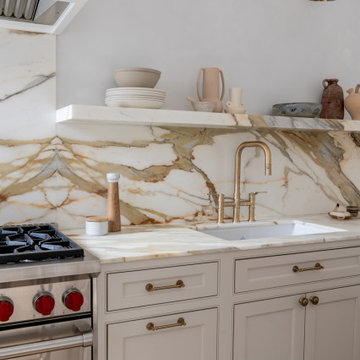
aking on this pre-war building renovation was the ultimate design challenge. We combined two units into one massive home. By moving the dining table into the great room, we were able to double the size of the kitchen, allowing for a large island in the center of the space. The wolf range topped with a custom hood was on the utilitary side of the kitchen, next the the shaws sink and House of Rohl faucet. The Calacatta Paonazzo marble from Artistic tile in a honed finished continued from the counters to the backsplash and floating shelf, serving the wow factor this light kitchen deserved. On the opposite wall, floor to ceiling custom cabinetry housed a coffee station and ample storage. There’s even a reading nook window seat, perfect for morning coffee. The two glass blown pendants from Gabriel Scott float on top of the island while the Hudson Valley sconces illuminate the marble shelf.
43