

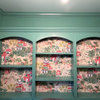
Kitchen Backsplash Finally Done! (photos)
15 years ago


Sort by:Oldest
Comments (15)
Related Stories
KITCHEN DESIGNKitchen Islands: Pendant Lights Done Right
How many, how big, and how high? Tips for choosing kitchen pendant lights
Full Story
ORGANIZINGGet It Done: Organize Your Kitchen Cabinets
You deserve better than precarious piles of pots and toppling towers of lids. Give cabinet chaos the boot with these organizing strategies
Full Story
KITCHEN DESIGNGet It Done: Organize Your Kitchen Drawers
Clear 'em out and give the contents a neat-as-a-pin new home with these organizing and storage tips
Full Story
KITCHEN STORAGEGet It Done: How to Clean Out the Pantry
Crumbs, dust bunnies and old cocoa, beware — your pantry time is up
Full Story
HOUSEKEEPINGGet It Done: Whip That Junk Drawer Into Shape
If the jumbled mess in your catch-all drawer inspires only dread, this quick organizing project is just the sort you need
Full Story
VINTAGE STYLEHouzz Tour: Flea Market Decor Done Right in Finland
Forget fusty and dusty. Secondhand finds in this home are as bright and cheery as if they just stepped off the showroom floor
Full Story
WORKING WITH PROSHow to Find Your Renovation Team
Take the first steps toward making your remodeling dreams a reality with this guide
Full Story
HOUSEKEEPINGThree More Magic Words to Help the Housekeeping Get Done
As a follow-up to "How about now?" these three words can help you check more chores off your list
Full Story
BATHROOM DESIGNGet It Done: Organize the Bathroom for Well-Earned Bliss
You deserve the dreamy serenity of cleared countertops, neatly arranged drawers and streamlined bathroom storage
Full Story
MOST POPULARHow to Refine Your Renovation Vision to Fit Your Budget
From dream to done: When planning a remodel that you can afford, expect to review, revise and repeat
Full Story
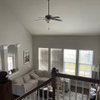
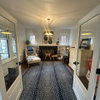
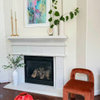
jakabedy
UserOriginal Author
Related Professionals
Texarkana Interior Designers & Decorators · Fergus Falls Interior Designers & Decorators · Murrieta Interior Designers & Decorators · Montrose Interior Designers & Decorators · Missoula Interior Designers & Decorators · Salina Kitchen & Bathroom Designers · New Orleans Kitchen & Bathroom Designers · Brainerd Kitchen & Bathroom Designers · Westerly Kitchen & Bathroom Designers · Cornwall Kitchen & Bathroom Designers · Jonesboro Furniture & Accessories · Petersburg Furniture & Accessories · Plattsburgh Furniture & Accessories · Platteville Furniture & Accessories · Olympia Furniture & Accessorieselle3
WannBeHome
ellendi
palimpsest
myhomewareshop
UserOriginal Author
UserOriginal Author
cliff_and_joann
busybee3
UserOriginal Author
teacats
UserOriginal Author
powermuffin