Software
Houzz Logo Print
dfosrunnalls

Painting cabinets

13 years ago
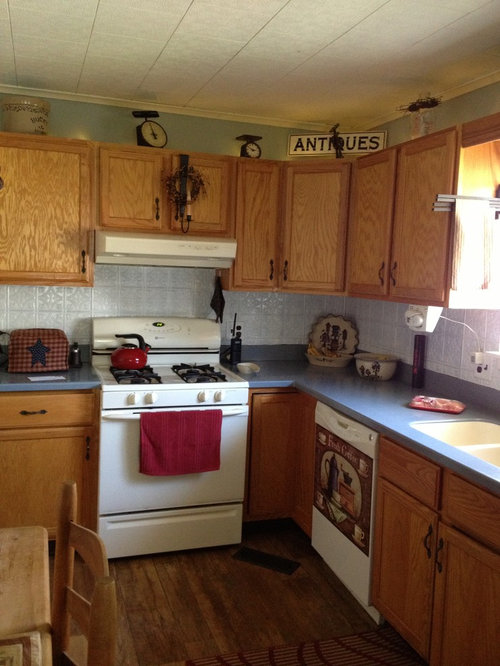
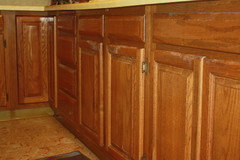
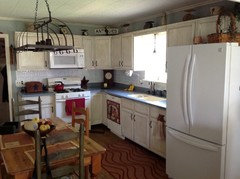
I want to paint my cabinets, what do I have to do to prepare them? What type paint ? And yes I'm keeping the white appliances .

Comments (42)

  • 13 years ago
    I'm bumping up your discussion. Rustoleum has a product that people seem to be happy with, and there is also one from Benjamin Moore specifically for painting cabinetry. I'm not an expert, however, so I'm hoping others can give you more specific information.
  • 13 years ago
    There are SO many ways to accomplish painting wood grain cabinets. You can look on the internet. What I think is very important, though, is to make sure the strong wood grain yours have does not show through. It looks really cheesy. They have products that you appy first that makes it a completely smooth surface, and it is worth it, because painting cabinets is a lot of work, and if you are going to spend the time and money on it, you want them to look like they were made for the space, not an obvious DIY job.
  • 13 years ago
    Hi! Just putting the finishing touches on mine. They looked like yours and I too wanted a redo. I am far from a pro, so I researched all I could and here is what I did. 1. Lightly sanded everything. 2. Washed all woodwork with warm soap and water. Rinsed well. 3. Applied a deglosser to everything. Buy a bag of rags for this step and ventilated the area. Just rub on. Let dry for 30 min. 4. Brushed on one coat of oil based primer. Let dry. 5. Brushed on the latex satin paint - 2 coats with drying between coats. When painting watch for drips to smooth out with brush and finish with a long brush stroke. I found it better to not lay on the paint too thick thinking I'd get better coverage. Some of our wood grain is slightly visible, and they still look great! We didn't paint the inside of the cabinets. If you are buying new hardware you may want to fill in old holes with wood filler before painting. Be patient and let them really dry before reassembling.......even then it will take a few days for them to cure. Sound like a lot, huh. Once I started, it got easier. The end look is so worth it! You will be amazed. Good luck and buy some good brushes, let the "Iron Renovator" loose in your kitchen!!!
  • 13 years ago
    dfos, please post photos of your finished cabinets.
  • 13 years ago
    Will do. I just need to get my son, who is tech smart, to help me. Will do soon as grandkids off to school.
  • 13 years ago
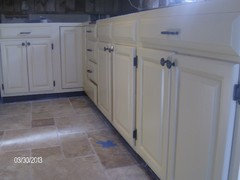
    I painted our cabinets as well (pictures below) and Go2Mass has it right. We went with oil rubbed bronze hardware so instead of discarding the old hinges and having to drill all new holes, I just cleaned the old brass ones and spray painted them ORB with Rustoleum. They look like new. You could use a shellack based primer like BIB, I'm sure that would work. One work of caution the cabinets do chip very easy. I don't know if there is any way around that unless you sand down to bare wood which woughd be tough. I didn't use a deglosser, I lightly sanded with a palm sander then washed with TCP(?) and let dry. I also used the satin finish. The finish coat was Valspar Signature 'Corktop'. Good luck!
  • 13 years ago
    last modified: 13 years ago
    Benjamin Moore makes a product specifically for painting cabinets ... it's called "Advantage" or "Advanced" -- something like that. I've used it and it is GREAT. No bubbles, and it dries to the touch very quickly, so you don't get dust settling on it & sticking to it. Now that I've discovered this paint, I will never use anything else for DIY painting of wood cabinets or furniture.

    Your kitchen will be beautiful painted -- can't wait to see the "after" photos.
  • 13 years ago
    Hey, how do you post pictures on this site. I have a new HTC1x cell. This tech is just beyond me.
  • 13 years ago
    Wow thank you for all the comments on this project. I'll be honest it founds like a lot of work,but I am definitely up for the challenge and will post pictures when I'm done. Thanks again!!
  • 13 years ago
    You would go to the comments and discussions ... There is a camera button to take pics or your can get them from your library. If you like the picture then you agree to it .
  • 13 years ago
    Just reading the comments. Victor, how did you get those pics up? Like your idea of giving old hardware a new look! We just ordered New. From what I learned about painting cabinets is that ......the prep work is important!!! Any food splatters left on the wood will chip. So Ed, spend the time on prep. That's what helps to make the paint adhear. Victor, loved your finished look, very nice!
  • 13 years ago
    Will give it a try, dfosrunnalls. Thanks
  • 13 years ago
    Ok...I'm going to start the prep work tonight after work..can't wait!!
  • 13 years ago
    Good luck go mass
  • 13 years ago
    Sorry didn't get it figured out. And I thought the process for painting cabinets was involved!! Good luck to you! Our hardware finally arrived and will soon be finished, I hope. Enjoy the new look!
  • 13 years ago
    Sharyn, your kitchen is beautiful! Really like your color choices. Awesome!
  • 13 years ago
    last modified: 13 years ago
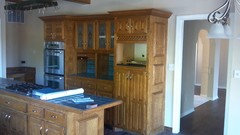
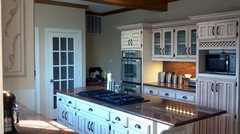
    Hi Sharyn, wow, that's a lot of work to remodel your kitchen! Congrats. DId you get a new floor, or is it just a difference in the lighting between the Before and After photos ? You also changed the texture of the wood of the cabinet in front of the photo ? What kind of under-cabinet lighting did you use -- LED ? So much work! :)
  • 13 years ago
    Sharyn...I love your new kitchen!!! It's lay out is so similar to mine and I can't wait until mine is finished!! I usually see transformations with stainless appliances and I live the white! I'm definitely going to try the same product !!! Thank you again !!!
  • 13 years ago
    Go2mass.. Can't wait to see your transformations!!!
  • 13 years ago
    I sanded mine as much as possible, then I used one coat of SW adhesive primer tinted the same color as my paint. Then I sprayed on two light coats of SW proclassic. It has been about six months and so far, no chipping. I also used SW glaze mixed about 3 to 1 with paint to glaze a bit. I mostly tried to keep it in the recesses and deeper woodgrain.
  • 13 years ago
    Cindy .... I love your kitchen and your handles!!! They are nice ... I work all week and am looking forward to doings cabinets on a 3 day weekend!! All of your comments inspire me to do it soon !!!
  • 13 years ago
    Cindy I love your kitchen and the new handles .. They are awesome!!! All if these comments are inspiring me to get mine done ...I work 5 days a week so I need a 3 day weekend to start.
  • 13 years ago
    Sorry 2 comments didn't think the one came through
  • 13 years ago
    Thank you, I got a great deal on the hardware at this place we have in the Tulsa area called Day's Lumber. The handles were only $2.25, the pulls were $3.25, and new hinges were $1.25 a pair. I thought they were a steal since the hinges were about three bucks at the big box stores. They have a really limited selection, but always have steals if they happen to have what you need.
    I hear you on the time to do DIY's, we were exhausted, hateful, wretches by the time we got this all done, lol. Hubby rewired the island, added the under cabinet lighting (worth every penny!) changed out virtually every light fixture in the house and outside, including every can light, and re-did most all the outlets and switches, plus some rewiring in other areas. It amazes me how much the lighting updates changed the house. I was certainly lucky to be able to have him do the electrical (he's an elevator mechanic) because my $1,500 for lighting went through the whole house instead of one room!
    I will say it is incredibly satisfying every time I walk in that kitchen, it just makes me happy.
  • 13 years ago
    Make sure you use a spray painter. We did it with a brush and the finish is not as clean looking.
  • 13 years ago
    Sharyn... How many kits did you have to get...and if you don't mind..what was the price?
  • 13 years ago
    Thanks for the compliments. Same floor. New counter tops. I added beadboard planks to the back of the exposed cabinets as well as the back splash. I used 1 kit of Rustoleum in Pure White. The kit was $55 at Home Depot, on sale. I bought 2 kits, and left one untinted, so that if I didn't need it I could return it, and I did end up returning it. Under cabinet lights are GE Florescents. They are not hard wired in, I just hid the cords very well in between the cabinets and plugged them in above the stove in the cabinet. Painting the cabinets and stiles took me 5 days from start to finish, but I worked alone. Had I rolled on the base coat instead of hand brushed it, it would have went much faster to. (Only roll if you plan on not using the glaze) I also did 3 coats, not 2 as recommended. I did this entire room all by myself (Yes, I'm patting myself on the back..lol) 2 people would have sped the project along, this room took me about a month to do from stripping the paper, painting to decorating, and everything in between.
  • 13 years ago
    Well you did a fantastic job!! I love it!!! Thanks for the info also! I too will be doing it alone . That's what I prefer. I also had to remove 4 layers of wall paper but am so glad I did! That was a process in itself !! I will post pics as soon as I finish!!!
  • 13 years ago
    Ps..I have the same stove as you and the microwave looks the same lol
  • 13 years ago
    https://www.houzz.com/magazine/white-appliances-find-the-limelight-stsetivw-vs~1494317?vm=article


    Since we are both white appliance fans - I thought you might appreciate this Houzz article on white appliances. Inasmuch as the SS looks nice, it just isn't for me and my household. My kids would ruin it, the fingerprints, the dings, I cannot even fathom the upkeep on a stove..no thanks! I have a full plate as it is and wiping fingerprints 10x a day isn't part of my day. I also heard that if you replace a SS appliance down the line, getting the SS to match the remaining things is very hard, since the finishes vary. I've replaced all my white items with Samsung brand, years apart, except the stove which is GE...they match fine.
  • 13 years ago
    Sharyn, got the kitchen done...whew...it was a process but am very happy with the outcome. Thank you for the tips. I love hoe they came out!
  • 13 years ago
    **how**
  • 13 years ago
    Boy! Congratulations! It REALLY brightens the kitchen up! I didn't recognize it!
  • 13 years ago
    Congrats!! Your efforts paid off....it looks great! Painting isn't a hard job, just tedious, right? (I'm thinking of re-painting my bottom cabinets brown..our secret, my husband will kill me..lol)
  • 13 years ago
    I know!!! It looks like a new kitchen. Not hard to do, just a process but well worth it. The kit was fantastic!! Everything was included except the brushes. So happy!! It took me 3 days but did it by myself.(my choice). And I won't tell your husband....I know what you mean :)
  • 13 years ago
    Great job, big change!
  • 13 years ago
    Hmmmmm what do you think of painting the legs of the table and chairs to match cabinets??
  • 13 years ago
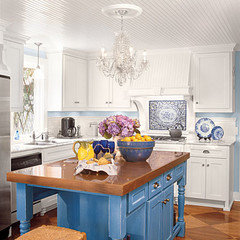
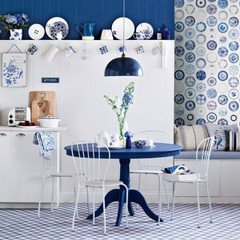
    I think white might be too much white in there. But - what about painting all of it blue to match your countertops..That pop of color would look really nice. Rustoleum has a Blue color kit too.
  • 13 years ago
    Hmmm I never thought about that ... What about the top if the table?? Should I do the whole thing blue?
  • 13 years ago
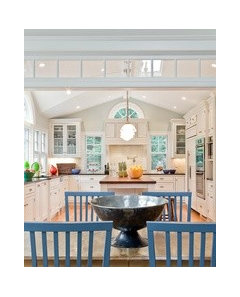
    I'd start off all blue. Not a dark blue, but a soft country blue. Later, If you think it's too much blue, then paint the top white. (don't poly it until you are 100% sure) I think the blue will just scream "country chic" like you have already in the kitchen. I'm dying to see the results!!! Here are some pics I found, I didnt have a lot of time to find exactly what I was looking for, but you get the idea. See how the blue just pops!
  • 13 years ago
    I love the color of the first picture. Gonna give it some thought while me and my husband are painting the outside of our house. Thank you Sharyn!!! Will definitely post the pics :)