

Need help with awkward laundry room/bathroom floor plan
I have a very awkward space at the back of my house. I don't know why the people did this design bc it makes no sense.
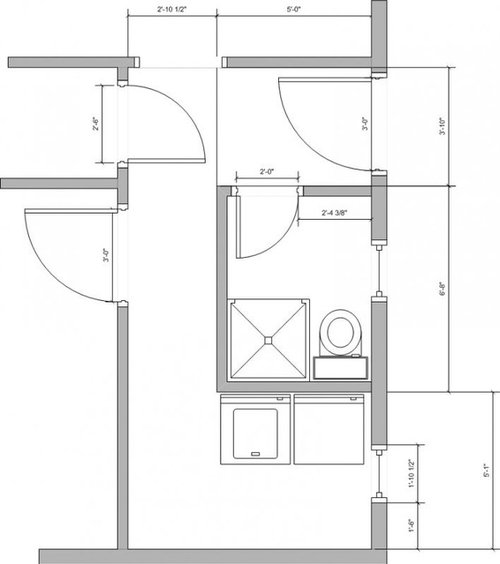
The entry to the area is from the kitchen (currently an archway with a curtain). Immediately to the right is a closet door. Just beyond that on the right is the door to a bedroom.
On the left is a tiny foyer leading to the back door. The bathroom is up against the exterior wall.
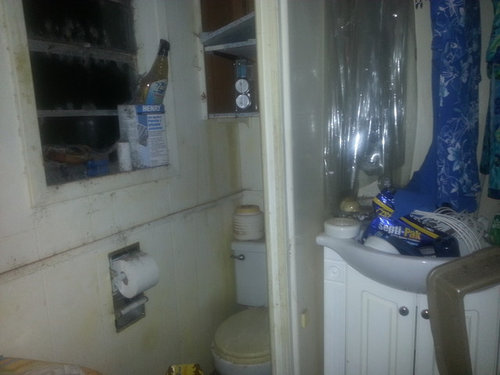
The space in the bathroom is such that it does not meet building codes. The toilet is crammed in to a 23" space. The wall shared by the laundry room and bathroom has the vent pipe for the plumbing that goes out through the roof.
The back right corner of the laundry area has the roughed in plumbing for a sink but nothing is hooked up to it.
I have a vanity that I would like to put in the area.
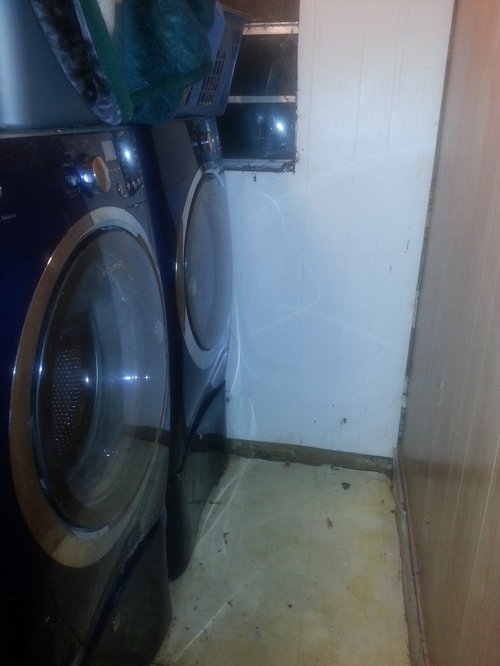
I have an Electrolux IQ touch washer and dryer with pedestal drawers so they are rather tall. Right now they are up against the south wall of the bathroom. They would not fit on the east wall because of some stuff jutting out of the wall. It is very cramped.
I need to figure out how to reconfigure the area so the bathroom will be usable as a guest one as well as for the occupant of the adjacent bedroom. I also want to have more space for the laundry area. Maybe some place to store stuff that is going to be washed and a place to fold the laundry. I'm thinking a table that folds out from a wall might be a good folding spot? Not sure.
I was thinking of just having a stall for a toilet and the sink would be outside of that. I'm not sure if there will be room for a shower. I was thinking a corner shower might work, but the person who will use it is 380lbs and quite large.
I don't want to spend too much money on it, but I know I will have to get the plumbing redone.
Any suggestions for the best use of space?
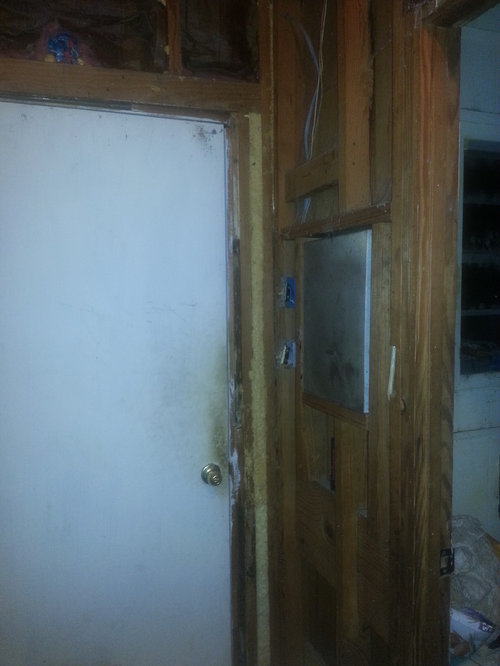
Photos of the area currently (it is a total mess right now)
The vanity is sitting inside of the shower bc it isn't hooked up.
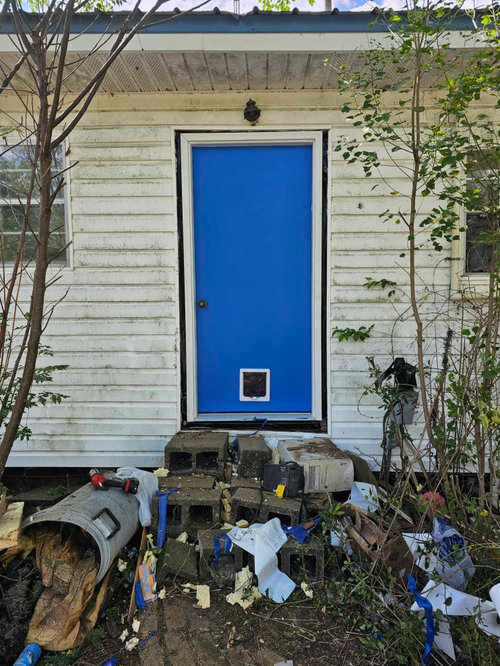
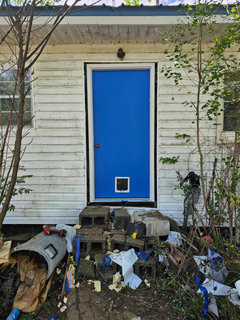
In case people don't scroll down to the comments I'm adding some updated photos of some changes. I finally got around to installing the new back door (and subsequently realized I put the pet door in backwards but I'm not changing it, it still works as I need it to). And yes I realize the outside looks absolutely terrible. I still need to add better trim, add an awning, build a landing, and install the new outdoor light. And I need to get rid of the stupid trees that keep springing back up from the roots.
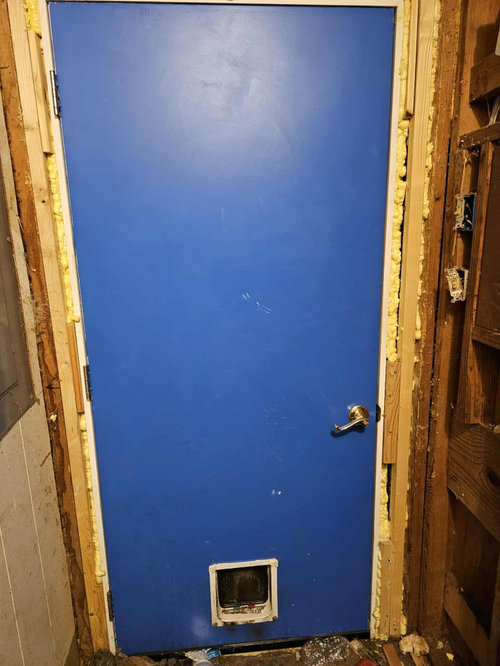
Turns out the exterior walls are 2x4 framing. There was no proper header on this load-bearing wall so we added one with foam core for insulation. Door needs some touch-up and more insulation around it and the framing needs to be planed down. Wall to the right will be removed entirely and electrical re-routed. Leveling the floor is going to suck. LOL. I used the expanding foam specifically for doors and windows this time.
I got a countertop for a good price and put it on top of the machines and got some stuff to organize things better: detergent holders that tip the containers so the stuff flows out better, scent bead dispenser, laundry pod holder, magnetic dryer sheet holder, magnetic dryer ball holder, magnetic lint bin, etc.
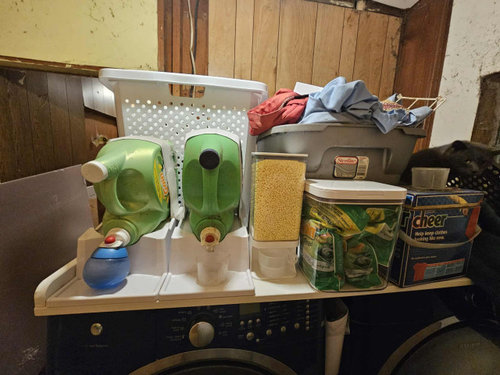
When everything is moved the machines will be closer together and the magnetic things will all be on the dryer to the right. Please ignore the powdered Cheer. I didn't buy it. Mom must've bought it and I don't know why we have it as it doesn't work with our machines. LOL.
Comments (140)
 12 years agoPersonally, I would go with a door that swing inward to the west wall with a door stopper so the knob does not make a hole in the wall. However, you will still have the problem of the light switch. If you were to spend money on a pocket door, I would spend it on moving the light switch from the west wall to the north wall. But I don't have idea if the cost is comparable :/
zannej
Original Author12 years agoThanks. I don't think it would really cost anything to move the switch to the north wall. I could probably actually do it myself because the wire is already there-- or I could have a friend do it. The walls will be opened up and the north wall is actually closer to the circuit box. So I could just turn off all the power, disconnected the outlet, and move it over. Or I could have my friend who is a certified electrician do it. It wouldn't be running new wires-- just moving something closer. Its closer to the light socket anyway. Actually, now that I think about it, I need to put in a new vent light for that room so I can take the cover plate from the old one and move it to the north wall and get a new one installed. Moving ductwork in the attic might be a pain though. It needs to be done.Related Professionals
Jamestown Interior Designers & Decorators · Tupelo Architects & Building Designers · Philadelphia Architects & Building Designers · Portland Kitchen & Bathroom Designers · Gary Kitchen & Bathroom Designers · Wenatchee Kitchen & Bathroom Designers · Nashville Bathroom Remodelers · Portland Cabinets & Cabinetry · Grand Rapids Cabinets & Cabinetry · Harrisburg Cabinets & Cabinetry · Honolulu Cabinets & Cabinetry · West Plains Home Remodeling · Longview Home Remodeling · Hagerstown Bathroom Remodelers · Bloomington Bathroom Remodelerszannej
Original Author12 years agoI've been thinking about this and since the arc of the door doesn't seem to impact the distances required by code, I'm contemplating actually putting a shower/tub combo near the window. The logistics and price of tanking the entire room to be a wetroom would be very complicated and expensive. If I can get enough wiggle room to have a 30 to 32 inch wide tub against the wall, we wouldn't have to worry about an expensive floor drain (which can cost more than a tub), sloping the floor outside of the shower (which would be required to keep in water), or having a glass shower door. We could use a regular shower curtain and put up some sort of shower/tub surround. We might even be able to find an inexpensive tub from habitat for humanity Restore or get a new tub from Surplus Warehouse or something. I think in the long run it would cost less and is something that is done often here so there would hopefully be less chance of error. The space is 61 inches long and I don't know if they make tubs that size, but if we put up cementboard on either side and trim it out it could bring it down to 60". That would give us a bit more room for moisture barriers and such. And then we could just use linoleum / vinyl sheet for the floor.
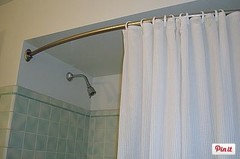
Another bonus would be that having a full bath would bring us up to 3 full baths and raise the value of the home.- 12 years agoI think this is a great idea. You could have a curves rod for the shower curtain. It gives a bit more elbow space.
zannej
Original Author12 years agoI was hoping to find one of the double rods that can hold towels as well. The thing is, I'm a bit worried about building code because I think the toilet would need to be 21 inches from the tub but there isn't space for that distance. None of the toilets in my house or in any house I've been in recently are 21 inches away from the shower. I know there is supposed to be at least 21" of clear space in front of the shower/tub for entry, but if someone is getting in on the other side (the side with the vanity) I don't know if that will be an issue. I plan to have it be more than 15" from center of the toilet to the edge of the tub at least. I'm trying to figure it all out.
Doofusaurus would prefer a shower, but with the way our fixtures drain, a shower pan would fill up so I think a tub would be safer.
I do like those curved shower rods though.zannej
Original Author12 years agolast modified: 12 years agoI got bored and made a Sims 3 approximation of the existing space. It is actually larger than the real space.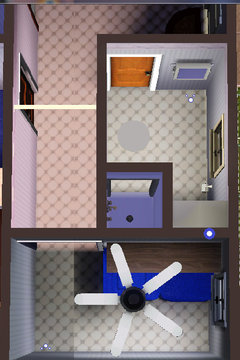 My Bathroom & Laundry Room · More Info
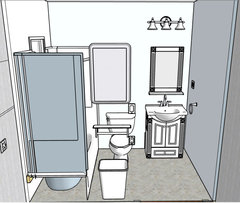
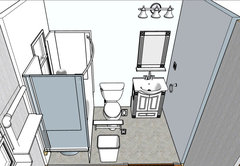
Here's the current plan 1: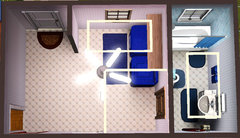 My Bathroom & Laundry Room · More Info
And plan 2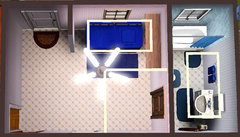 My Bathroom & Laundry Room · More Info
Please ignore the white rectangles- they are hidden lights for Sims 3 that are visible in buy/build mode and I used them to illuminate the area.
I also just found an image of a tub/shower setup that is pretty much what I am looking to create (except I'd want corner shelves) My Bathroom & Laundry Room · More Info
My sister (who wants us to just sell this house and move) actually liked the design ideas thus far. I explained that fixing this will help us to keep the laundry under control and help keep the house cleaner, which will make it easier when it is time to pack up and move.- 12 years agoIt is fun to draw plans ... too bad it is not easy to execute them :( Which floor plan do you prefer between 2 and 3?
I don't know much about plumbing. I wonder if moving the toilet anywhere on the same wall is the same amount of work as moving it on an other wall. If it is the same amount of work, maybe you should consider moving the toilet on the same wall as the vanity. The walking path would easier. zannej
Original Author12 years agoHmm.. I'm not certain which one I prefer. The Sims thing makes it look more spacious than it actually is. Plan 3 would put the washing machine closer to the water supply lines and drain for the old lavatory and put the dryer so that it would be easier to run a vent straight back behind it. I'm just not sure how cramped it would be and whether or not it would be difficult to get the machines over at that angle. They would block the window behind them and we would not be able to have a long shelf directly above. I suppose we could keep the shelf on another wall though.. We could probably install smaller shelves up to the window above.
I think I'm starting to lean more toward plan 3. I'd have to actually stand in a room with mockups to get a better idea.
The reason I left the toilet on the north wall is because it is closer to the existing primary vent stack and drain. In order to be vented properly, the trap must be within 5 feet of the vertical part of the vent. Moving it over to the south wall would require running the vent horizontally for almost 5 feet then putting it up into the wall-- unless I wanted to create a new vent stack for it that either went horizontal under the house and then vertical on the exterior or put it inside an exterior wall and having to deal with moving over any insulation that is put in. I put the vanity on the south wall because there was a utility sink there before so the water supply lines and drain are already there.
The main issue is that the order in which the fixtures hook in to the DWV system matters because some fixtures can siphon water out of the traps of others and there is some worry about contamination of something backwashes so there are rules on that. I just haven't quite figured out for sure what the rules are, what the correct order is, and what fittings would be needed to hook it all up properly. Using the north wall allows pipes to be run inside of it without interfering with insulation. Again, its also closer to the primary original vent stack.
The good thing is that, if I plan things well, the plumbing under the house will all be easy to access when the floor is removed to be replaced. I'm thinking of actually installing the door to the room, or temporarily putting up a makeshift door, to keep the cats out of that area while work is being done.
I'll have to get some price estimates from the plumber and coordinate days and times to see about having the work done.zannej
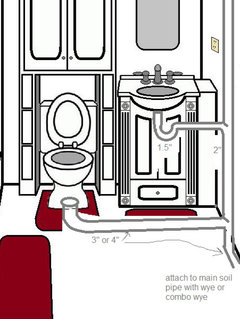
Original Author12 years agolast modified: 12 years agoAfter looking at more diagrams trying to figure out the DWV system, I realized that my washing machine standpipe is supposed to have a P-trap above the floor.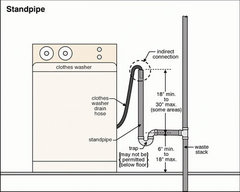 My Bathroom & Laundry Room · More Info
I also drew another crappy picture of the setup (sans washing machine) with a tub-- I totally failed at drawing the tub spout: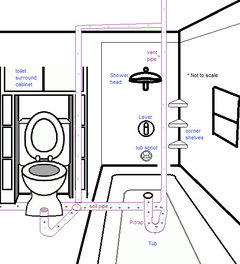 My Bathroom & Laundry Room · More Info
Compare to this sketch of the current setup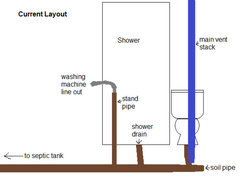 My Bathroom & Laundry Room · More Info
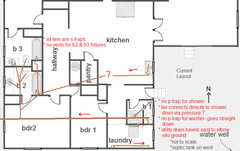
On the plus side, I figured out how to draw some simple sketches of the plumbing layout (I looked at examples plumbers drew up) and I think I might be on to something. Here is the sketch of the current setup-- I don't really know what it looks like under the house. I might have to dig a hole just to be able to climb under there because the dirt on the edge of the house has built up.
Here is the current setup as far as I can tell: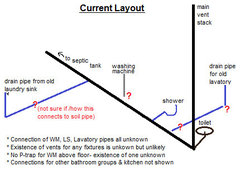 My Bathroom & Laundry Room · More Info
Plan A which has the washing machine downstream of the toilet and bathtub. In this version the washing machine would be on the south wall and would be near the existing standpipe.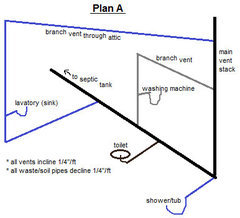 My Bathroom & Laundry Room · More Info
Plan A2 which puts the washing machine upstream of the toilet but downstream of the bathtub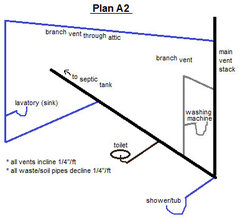 My Bathroom & Laundry Room · More Info
Plan B which has the washing machine on the east wall and thus upstream of the toilet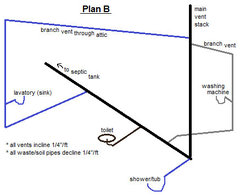 My Bathroom & Laundry Room · More Info
An iteration I did not draw yet would be having the bathtub waste pipe staggered so that it is downstream of the washing machine. I'm still not sure which order is correct to meet plumbing code. I believe that the toilet needs to be downstream of other fixtures. But is that only in wet venting? I think I'm leaning more toward Plan B, but I will have to see what space constraints are like. I need to create a mockup of the space and walk through it to see if it would be too awkward to squeeze between the toilet and vanity and whether or not I should consider cramming the toilet next to the vanity. That would limit the amount of space for a space saver around the toilet though. I think I can get away with not having a full 21" between the edge of the tub and the toilet because I've seen many bathrooms with the toilet closer-- so long as at least one end of the tub is still has that much clearance and the toilet is still at least 15" from center to the tub.
Any other thoughts?zannej
Original Author12 years agolast modified: 12 years agoI just realized that I forgot to share the latest images of the isometric sketches.
Plan A: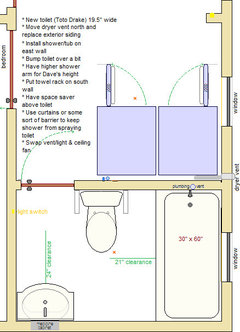 My Bathroom & Laundry Room · More Info
Plan B: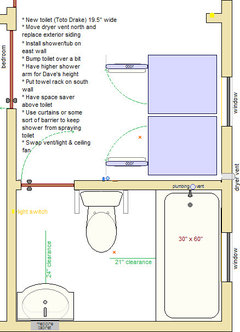 My Bathroom & Laundry Room · More Info
An alternative would be to try to put the toilet on the south wall, but that would involve possibly running more stuff through the exterior wall and it would be more cramped side to side. It might not allow for much room for a space saver around the toilet.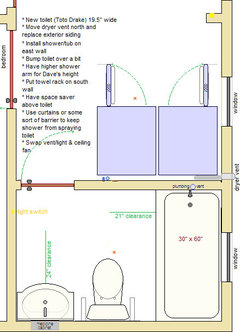 My Bathroom & Laundry Room · More Info
I will probably end up having to move the toilet a bit closer to the shower (leaving enough clearance for someone to stand between it and the tub to operate controls comfortably) and possibly add a small bulkhead or shelf behind the vanity and bump it forward a bit so that the drawer won't have to be cut in order to give clearance to the water lines and drain. I think I would like to route the vent through the west wall instead of the southern exterior wall.
Also, I replaced the old toilet in the drawings with my sketch of a Toto Drake.zannej
Original Author12 years agoOk. I was totally wrong about my current layout when I actually looked under the house. It's not pretty at all. There are numerous code violations. PVC pipe used for water supply (it should be CPVC, copper, or PEX), waterlines too close to waste lines, waste lines that have no venting at all, and waste pipes that go to I-don't-know-where. Add in some electrical lines inside pvc pipe zigzagging around the plumbing. Oh, yeah, and PVC hooked to ABS fittings.
First I'll show the exterior of the east side of the house. This is near the south corner. My cat, Imhotep decided to photobomb in the first pic.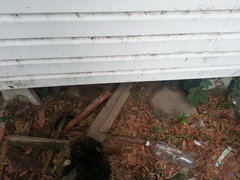 My Bathroom & Laundry Room · More Info
A bit more to the north (to the right of previous photo). Dryer vent cover would not stay on.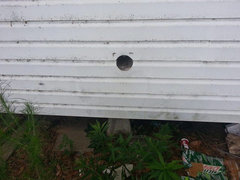 My Bathroom & Laundry Room · More Info
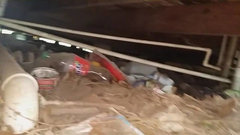
Taken from a spot about where the flattened mountain dew box was in the previous photo, you can see the larger pipe is PVC and comes straight down from the toilet in a Tee, then branches to the left (south) in to an ABS fitting that reduces the size of the pipe and then goes back up in to the floor (through a wall). I believe that is the main vent pipe.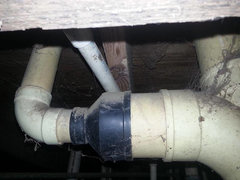 My Bathroom & Laundry Room · More Info
A bit more to the right to see the toilet drain betterand then the lower view-- there is no cleanout.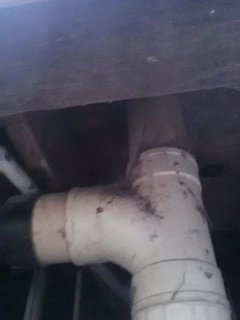 My Bathroom & Laundry Room · More Info(sorry its so fuzzy-- mosquitoes were biting me and I couldn't seem to hold the camera still).
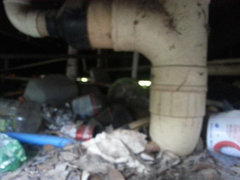 My Bathroom & Laundry Room · More Info
Panning northward (right) you can see what I believe is the shower drain in the background. It has a "pressure fitting" instead of a sanitary tee. It appears to drop straight down to the soil pipe but I can't see because of the trash in the way.Btw, the white zigzagging pipe appears to be the electrical line for the power outlet for the washer and dryer. Although it is entirely possible that it could be the cold water for the washing machine.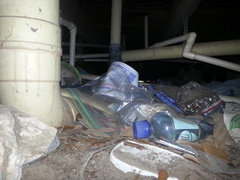 My Bathroom & Laundry Room · More Info
Panning northward again, you can barely see that the pipe inclining from the pressure fitting enters a black elbow and then goes upward. I believe this is the drain for the the old lavatory. So I think that the shower (which has no P-trap) was venting through the lavatory.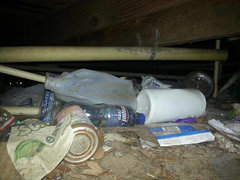 My Bathroom & Laundry Room · More Info
Moving to the south side of the house, this is the exterior view of the southeast corner. My friend stuck his cellphone in to the small gap next to the cement support (pylon?) and took a video. The following pictures are screen captures from that video.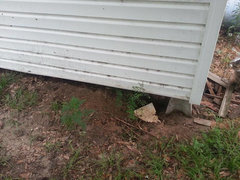 My Bathroom & Laundry Room · More Info
Here you can see the toilet drain and its vent from another angleNote the pipe that travels from the left (west) with three 90 degree elbows, crosses next to the vent pipe and then goes up in to the floor to the east (right) of the main vent.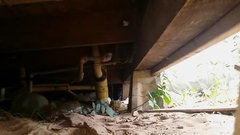 My Bathroom & Laundry Room · More InfoAt first I didn't know where it went because it is very hard to see that it merges in to an ABS fitting of some sort. Now, I do not know if maybe this is the main vent stack and the toilet one merges with it or if it merges with the vent from the toilet. I would have to get some measurements to get a better idea. (Later on I need to coat myself in mosquito spray and venture out to try to get a picture of it from the east side).My Bathroom & Laundry Room · More Info
Panning west (left)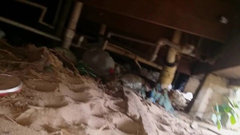 My Bathroom & Laundry Room · More Info
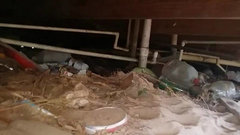 My Bathroom & Laundry Room · More Info
 My Bathroom & Laundry Room · More Info
I think those are cold water supply lines for the old laundry sink. But here is where it gets weird. The drain for the old laundry sink appears to go down and travel east and terminate under the ground rather than going north or northwest to link up with the main soil pipe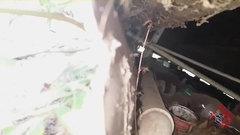 My Bathroom & Laundry Room · More Info
That drain pipe runs parallel to the south wall of the house.
In short, this is one effed up plumbing job.zannej
Original Author11 years agolast modified: 11 years agoI know this is an old discussion, but I'm still kicking around ideas. After a lot of thought, I think the layout would just be better if the toilet and sink were on the same wall (the exterior one) but the shower would still be a left-hand drain. That means the shower would be close to the existing vent stack. The toilet and sink will need to have the plumbing adjusted to have a vent stack in the wall that either goes up into the attic to attach to the current vent stack, or that goes out the exterior wall, around the soffit, and up above the roof.
Currently the dryer is not working. Its electric, but the vent hose behind the dryer was pulled off by a possum (it was trying to hide from the dog after it came in through the cat door). Anyway, even though I have some extra siding, I didn't like the idea of having to move the hole in the wall for the dryer vent (especially since the walls underneath the siding have asbestos). So I found two solutions.
1. A window vent: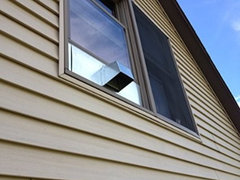 Amazon.com: Window Dryer Vent (Adjusts 18" Inch Through 24" Inch): Appliances · More Info
Pros: No need to cut a new hole in the wall, pipe would be easily accessible, would make up for issues with the window being partly obscured by the washer/dryer.
Cons: Would have to fill in existing hole for old dryer vent and cover with siding, its ugly, its not insulated so it wouldn't keep heat or cold in or out, if dryer vent tube becomes detached it has farther to fall, too high up to be able to use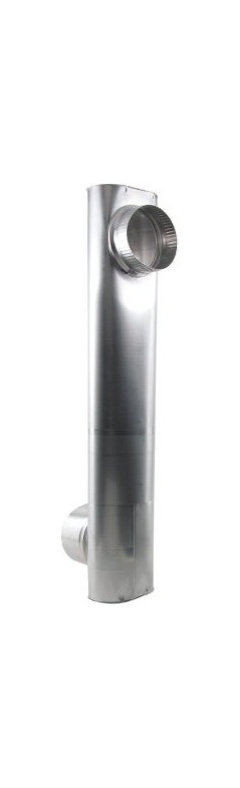 Amazon.com: DAF1 Skinny Duct" Telescoping Aluminum Dryer Vent (18" to 31"): Home · More Info
Also might not work well if window isn't square enough-- there could be gaps.
2. A slim 90 degree telescoping metal duct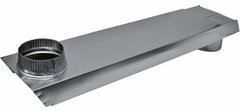 Amazon.com: Dryer Vent Tite Fit, 90 Degree 18" to 30": Everything Else · More Info
Its similar to the aforementioned skinny duct, but it has a squarish shape. I don't know how well it works and do wonder if it would trap lint.
Pros: would be able to keep existing vent hole by using this to go behind the bathtub. If its long enough to reach where the dryer's vent opening, it will negate the need for flexible vent tube and allow dryer to be closer to the wall
Cons: might be tricky to get dryer in place with this on and would be harder to move dryer if needed later (optional solution would be to have short run of flex vent). Concerned it might be too narrow and could trap lint.
There are other versions of the second type of vent, so I have more range in options and would be able to look for something that has good ratings and is sturdy if the slim 90 options listed turn out to not be as good.
Anyone have any thoughts? I'm leaning toward option 2, but need to figure out which extender to get. I know that the hole for the vent on my drier is about 13.5" from the side (from center of opening to side) and that the hole for the dryer is very close to the wall that will be in between. It may end up being 18" or less. With a longer run, I'll have a bit more wiggle room to bump the dryer over though.zannej
Original Author11 years agolast modified: 11 years agoI have yet another diagram. zannej's bathroom & laundry room ideas · More Info
This may be close to the final one. The lavatory is 4" from the wall because I read somewhere that building codes dictate the 4" distance rule. I do know of the 15" from center to wall rule and that would require this lavatory to be 2" away from the wall (it is 26" wide so it would need 2 more inches to meet the 15"). If I find that the 4" is not necessary, then I will put it at only 2" away.
I will probably have to change the location of the power outlets. I want to make sure the one for the washer is accessible but that it will not have any chance of getting wet. The dryer outlet is a different type of outlet that puts out more power so it will be separate. Both outlets are currently directly behind the fixtures they service. Moving them more to the north and east would actually move them closer to the circuit box, so I should have some more slack in the line to move them. (I'm hoping for 2" instead of 4" so it will give more space next to the toilet). I need to see where the most comfortable spot for the toilet paper is. I don't want to have it next to the shower in case there are any mishaps with the shower spray and the curtain not being pulled properly. So I'm thinking of having it on the side of the lavatory (which will also help determine distance since I want it to be comfortable reaching distance).
The washer and dryer are bumped over so far north so that I can have a narrow storage piece next to the dryer and a fold-down table of sorts for folding. It probably won't be able to be more than 12" wide though. I might be able to get about 14" or 15", but it would be tight. Maybe there can be enough room for a tilt-out storage bin to hold a trashcan for lint that sits underneath where the fold out shelf when it is down-- it would rest on top of the bin.
Something like this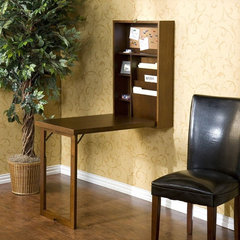 zannej's bathroom & laundry room ideas · More Info
or
Something like thiswould have concealed storage that would only be accessible when the shelf was folded down.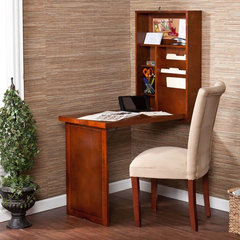 zannej's bathroom & laundry room ideas · More Info
I'm trying to find a decent double shower rod where the outer bar is slightly lower and can hold towels to save space. That way there might not be a need for a towel bar on the wall. I've read that the Zenith products get rusty but I don't want to spend to much on it.
Granted, I could probably get two inexpensive tension shower rods and put one a couple inches lower and away from the curtain and then have some sort of decorative looking blocks on the walls to make sure the rods stay up. They would just be little squares with the top curving downward a bit to make sure the rods don't roll if they come loose.
I'm also still trying to decide on the best door swing. If I have it swing in to the west I have to move the light switch. If the door is locked when someone is in there, then it is unlikely that a person standing at the sink would get hit in the back with the door from another person opening it. If I have it swing in to the east, the light switch could stay where it is, but the door would have to be closed before someone could walk through and there is a chance it could swing in too far and damage the door. If it swings out to the west then it is a bit awkward but it probably won't interfere with anything.
Any thoughts?- 11 years agoCould you move the dryer and washer towards the south wall? You would have a better access to the storage. You could still have that folding table that would be up when not in use. About the bathroom's door, I lean towards of having it swinging inward toward the west wall. That would require to move the light switch. If you are afraid of getting someone hit in the back when opening the door, you go install a door with a frosted glass, This gives privacy but you could still see if someone is standing at the sink.
I just had an idea about the folding table. See below. I wonder if the cabinet could be 12 in. wide or so then the table fold in front of the cabinet then fold it again on the side. This would double the depth of your table. It would need to be all fold up when not in use to unblock the entrance. The access to the plug for the washer could be inside the cabinet.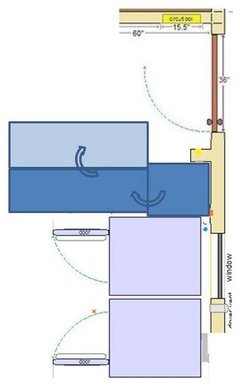
zannej
Original Author11 years agoThanks, suzanne_m. I'm worried that having the folding station and storage on the north would have us back in to the problem of making it feel more cramped in that space again. Also, I already have the electrical closer to the north as well as the water supply and drain from the old lav are on the north. If I move the washer and dryer to the north, it is easier to just re-use the existing rough-in and electrical. Since the circuit box is to the north, it would just be a matter of having more slack on the wires instead of having to run new ones to extend to reach. Plus I'll have the existing wall as the support for any storage.
Doofusaurus doesn't like to put things away so I'm positive that he would leave the fold-down table down and it would interfere with the door. So if it is off to the south, it wouldn't be in the way. Since he will be using the bathroom more, I'll have to see what he prefers in terms of the door swing. The good thing is that the switch for the light shouldn't be too difficult to move since it will have more slack and will be closer to the circuit box if we do move it to the other side.zannej
Original Author11 years agoHere is a rough sketch of what I imagine it will look like when finished. Not proportionate at all though. And I suck at perspective.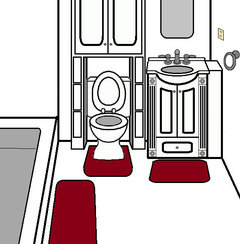 My Bathroom & Laundry Room · More Info
And here is the Sims 3 version. Too bad there really isn't this much space in the actual house.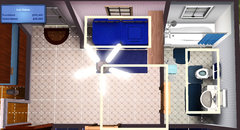 My Bathroom & Laundry Room · More Info
zannej
Original Author11 years agolast modified: 11 years agoThanks, suzanne_m. I'm working with some plumbers online to come up with the best plumbing layout and I also need to make sure I check the location of the studs and joists to be sure they won't interfere with any of the plumbing.zannej
Original Author11 years agoI'm just seeing this message now. I got very sick for awhile and haven't gotten much done. Had some set backs with tree branches falling in the yard. I've had to fix some outside waterlines and take care of injured pets. So, this has been put on the back burner. The arborist's fee is really going to cut in to the budget.
I'm still trying to learn more about the plumbing code so that I can figure out the proper way to hook up the fixtures to the drain-waste-vent system. I might talk to a local plumber once I make some progress on other projects first.
Thank you for asking!
zannej
Original Author11 years agoWell, I was google searching today and found out that the 4" distance rule mentioned in some of the room-planning guides I found online was actually no longer in effect. It was present in the 2006 IRC but was proposed to be removed in the 2007-2008 revisions and was absent from the 2009 code and onward. So, I can have my vanity 2" minimum from the wall. Might go with 3" but am not sure. This gives me at least a little more space to work with in the room.
zannej
Original Author11 years agoI've learned the difference between wyes, combos, and sanitary tees and how they can be used. That much is a plus. This is still on back burner pending other house repairs. Had some electrical issues caused by a storm and had to re-wire some phone jacks to get things working again.
zannej
Original Author11 years agoFound an interesting image of how to plumb the washing machine standpipe.
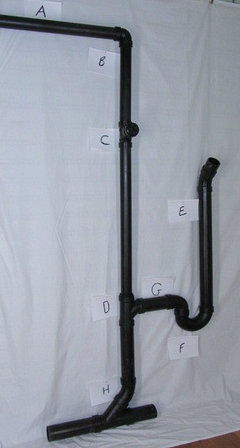 Washing Machine Pipes, pipe configuration images, helpful tips · More Info
Under IPC the trap arm can be 2" but the drain when it goes down will need to be 3". So I would probably need a 3"x2"x2" sanitary tee. Or maybe 3"x1.5"x2".
(I was recently told by a plumber friend that the measurement goes from
largest to opposite end, then middle). The middle part should never be
larger than the ends. This one is a 3x3x2.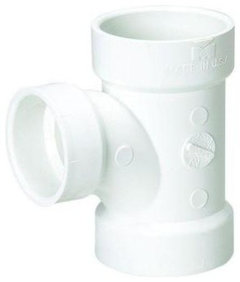 Mueller Streamline 3 in. x 3 in. x 2 in. PVC DWV All-Hub Sanitary Reducing Tee-0 · More Info
zannej
Original Author9 years agoSo, since the last post the 300 year old oak tree in the center of my circular drive fell over and died (taking out the car port and vehicles), I was in a car accident (other driver ran a red light and nailed me when I was driving through an intersection), my best friend's house burned down, my oldest dog got cancer and died, one of my cats got Leukemia (despite having been vaccinated) and died, my best friend's truck broke down, and life has basically been throwing a lot of lemons. We sold the tractor a few days before the tree fell-- which worked out well because it would have been crushed by the tree. The guy who bought it cleared the tree for us (which was a huge undertaking because that was a massive tree). We gave him a very good deal on the tractor so he has been coming around to mow the lawn and help clean stuff up from time to time. The tree dinged the roof over the porch a bit so we need to get that repaired. The lucky part was that if the tree had fallen at a slightly different angle it would have come down on my head, so, fortunately it fell more to the side.
Been talking to the online plumber friends and I think I might have a drywell (for laundry machine draining) and that I could tie the washing machine plumbing in to that so it won't saturate the septic tank. Mapped out the layout of the plumbing for the other bathrooms to figure out how they all tied together-- plumbers recommended gutting them and replacing it all. AAVs are no longer banned so I could probably use those instead of having to punch holes in the wall and run stuff in the attic. One of the plumbers pointed out that the exterior wall would have extra joists underneath for support so I should run the lavatory plumbing to the side wall instead-- and I could wet vent the toilet through it.
 My Bathroom & Laundry Room · More Info
 My Bathroom & Laundry Room · More Info
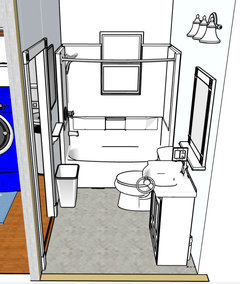
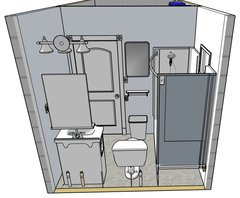
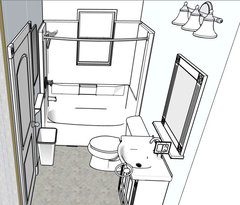
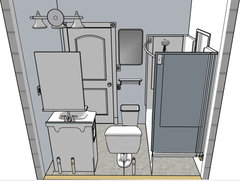
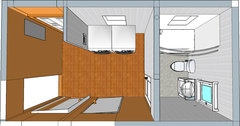 My Bathroom & Laundry Room · More InfoI made some sketches in Google Sketchup.
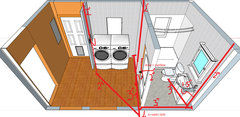 My Bathroom & Laundry Room · More Info
zannej
Original Author9 years agoI've had some health problems that are way too TMI so this project is still on standstill, but I am always tweaking the ideas. I believe that I *might* have a greywater system to tie in to, but am not certain. I will have to dig around some pipes to find out. I'm hoping that I do because that will let me do the washing machine drainage more easily and I won't have to worry about the detergent affecting the bacteria in the septic tank. I'm also considering finding out how much it would cost to get a greywater system set up. I wish it were as simple as digging a big trench and putting in some dust-less gravel (which is what my father did to create some french drains on the property).
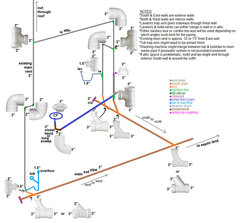
I decided against wet-venting the toilet and figured it might be better to just give the toilet a separate vent in the wall by running the drain straight west instead of angling it southwest to meet with the lavatory drain. The lavatory trap arm will go southwest to the interior wall and vent inside the wall. I will then do an elbow to merge it with the toilet vent and in the attic I will run them both to meet the main vent. I considered putting them out the wall and around the soffit, but I really don't want to go putting holes in exterior walls unless I have to.
So, my general plumbing layout (sans washing machine) sketch:
 My Bathroom & Laundry Room · More Info
I also made a larger rough sketch of the look for the bathroom, although I didn't add the curved double towel rod because I suck at proportions and perspective. I messed up the tub and the towel ring drawings.
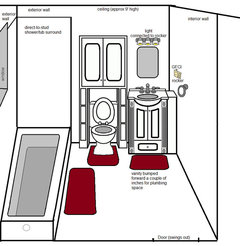 My Bathroom & Laundry Room · More Info
And here is a marked up version showing the general plumbing path.
I wish I was better at using sketchup and that I didn't have so much trouble trying to rotate objects to specific angles. I can never get them to rotate the way I want. Maybe someone can give me some tips on that.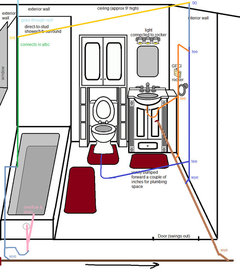 My Bathroom & Laundry Room · More Info
I will probably do another sketch showing the measurements for this layout. I probably won't have room for the fancy space saver.
Also, since polished/satin/brushed nickel fixtures are far more expensive than chrome, I will probably just get chrome stuff.
Some of the fixtures I was planning to get have been discontinued. Instead of a Delta showerhead, I'm now leaning toward a Moen magnetix one.
Also, in a bit of good news, Lowes now carries the Toto Drake with Sanagloss. Woot! MOEN Attract 6-Spray Hand Shower and Shower Head Combo Kit with Magnetix in Chro · More Info
zannej
Original Author8 years agoI'm still having health issues related to the car accident and I need to gather up some more $ for the project. I've got a lot going on and people who were going to help have had bad luck-- deaths in the family, illness, injuries, etc. Some of the products I wanted to get are no longer available. I might have to scrap the extra bathroom idea (or just put in a toilet and sink without a shower), but getting the laundry room done is more of a priority.
I've at least narrowed down more ideas on the plumbing.
I need to replace the back door and subfloor near it before it gets worse-- as it is, I have to prop an old computer chassis against the door to keep it shut.
zannej
Original Author8 years agoHad a new friend help with a little bit of demo to knock out the wall panels on the guest bathroom in the hallway. Right now it is acting as storage for old couch cushions, a bunch of my brother's laundry, etc. He plans to come back another day and help remove the studs. I'm hoping the wood can be salvaged and used for something.
I need to install a new header, replace the door, replace subfloor/substrate, and find a good flooring option. While I like vinyl plank, I've been thinking it might not be the most $ efficient so I'm thinking of getting sturdy vinyl sheet, but I'm trying to figure out if I want modified loose lay, grip strip, or regular loose lay. I need something that can hold up to appliances being moved. Trying to decide on a good brand/type. There's something called "LifeProof" brand from Home Depot that claims to be free of expansion/contraction, but I need to make sure it won't dent in from heavy stuff. I need about an 8' run of the 12'wide stuff (I need about 10' and will cut off the extra 2' because that is the most efficient use of the material). Subtracting where the tub will sit, I need about 6'x6' for the bathroom. I'm debating whether I should get same flooring for laundry room and bathroom or if I should get something cheaper for the bathroom.
I was thinking a wood pattern would be nice for the laundry room but then realized the planks usually run toward the length, not the width (if that makes any sense) and I want the visual of them running perpendicular to that but don't want to waste material. So, maybe a tile pattern might be good. I haven't completely ruled out vinyl plank, but it will be a bit more complex (and expensive) to install. I'll have to update later with some of my options for flooring. The dog is whining at me for something. LOL.
zannej
Original Author8 years agoI found a potential flooring option for the laundry room. It's cheaper in the local store than it is online. With the 10.5% sales tax it comes in at around $119 and some change for 4 boxes. I need about 8 I think.
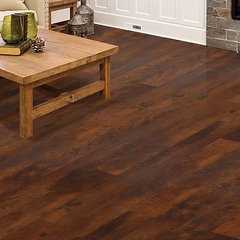 Select Surfaces Whiskey Barrel Oak Engineered Vinyl Plank - 4 Boxes - Sam's Club · More Info
I'm debating whether or not to snatch it up while it's in stock and cheap or to wait and see if it goes down in price or if something better comes along. Or at least wait until I get the subfloor redone. I will need to tear the floor down to the joists and use about 4 sheets of thick plywood rated for subfloor use. I think something like CAT PS1-09, treat it so it is waterproof, stagger it so seams aren't lined up, and then put a top layer (another 4 sheets) of plywood, also staggered.
zannej
Original Author8 years agoI keep procrastinating. I had a bad fall awhile back-- sprained my left ankle (which I'd previously broken) and tore a tendon in my right ankle. So I was off my feet for awhile.
Right now the laundry area is a total mess. Doofusaurus got his room so messy that he moved in to the guest room and junked it up. I had to pay some friends to come help me clean it up and a lot of stuff just got relocated to the guest bathroom/laundry area. Then Doof decided to clean his room some so he could do yoga & just shoved all of his trash and junk out into that hallway. When a friend took off some of the wall panels for the bathroom we discovered that there were no above floor shutoffs for the shower water supply lines. Right now it's just a total mess with old couch cushions and other stuff piled up in the bathroom. I did at least trace some of the wiring though.
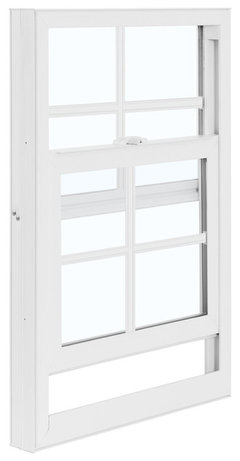
Some of the products I added to my wishlist are no longer available. The shower/tub I wanted has been discontinued so I will have to get a different one-- it will be 29" wide instead of 30" wide. The curved shower rod should help with adding more elbow room. The Ply Gem windows are not available in my area so I will need to find something else. Lowes has some Reliabilt brand ones that should do the trick. I'm debating between a window that raises up or one that tips in. I have it narrowed down to 3 windows (that can be custom ordered with tempered glass).
This one (the cheapest) with no grids
Or this one with grids and a better solar radiation blocking rate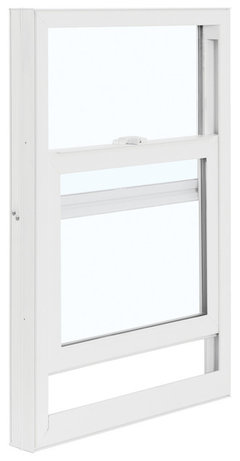 Shop ReliaBilt 3050 Vinyl Double Pane Single Strength Replacement Mobile Home Si · More InfoOr this one that tilts in and has better solar blocking.
 Shop ReliaBilt 3050 Vinyl Double Pane Single Strength Replacement Mobile Home Si · More InfoI'm leaning toward option 2 even though it is the most expensive. They say they are for mobile homes but the Lowes associate said they can be used on houses.
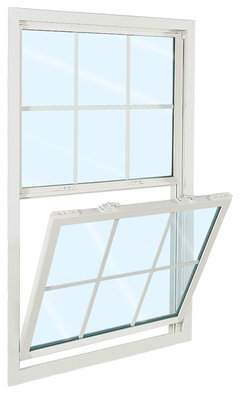 Shop ReliaBilt 3100 Vinyl Double Pane Single Strength Replacement Mobile Home Si · More Info
While I don't have any current photos, I do have some new sketches for the layout. Since I made the sketches I have made a couple of modifications that are not reflected in the pictures. I want to put upper cabinets or shelves above the washer and dryer but I couldn't find ones in sketchup's download page that I liked. So instead of blank wall above, there will be cabinets.
In my sketch I have a table that folds down from the wall but I couldn't seem to find the right hardware to make it work but while searching came across the hardware to make a table that folds up. I could mount the brackets to some 2x8s on the edges and have an arm that swings out when the table folds up. The arm would support the middle of the table.
These are the brackets (alleged weight capacity of 500lbs)
It would look something like this (photos courtesy of a customer on Amazon)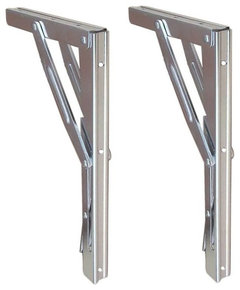 Amazon.com: Folding Shelf Brackets - Heavy Duty Bench Table Folding Shelf or Bra · More Info
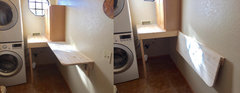 My Bathroom & Laundry Room · More Info
That would leave the upper area open for cabinets, shelves, or fold out/pull down drying racks. For the ceiling, I believe I have shiplap underneath the ceiling tiles. If that's the case, I will just give them a fresh coat of waterproof paint. Since I will be removing a vent/light/heater & moving the ceiling fan there, I will use a ceiling medallion to cover any holes. For the vent/light/heater I will use a triplex rocker switch (basically 3 small rocker switches that fit in the size of one rocker switch). Not this particular one, but I'll find a good one that doesn't have push-connect wires and instead of wire nuts I'll use some wago lever nuts.
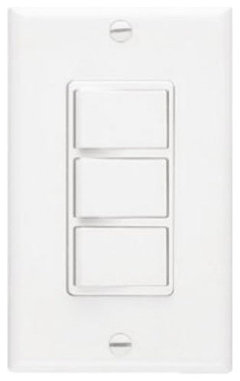 NuTone 66W Three-Function Wall Control for Ventilation Fans, White · More Info
I believe my dryer currently uses a 3-prong outlet (which is a shock hazard) and I plan to upgrade to a 4-prong outlet-- which will require getting some 10/3 (with ground) romex, a new outlet, & a new plug. It will be worth it for the added safety. Initially I planned to just flip the existing outlets to face the opposite direction & plug in there, but it would require an extra long cord for the washing machine to reach. I don't want to move them too close to the bathtub in case of any water leaks, so I'm thinking I could use boxes designed to be outside of a wall and put them under the shelf just to the right of the dryer so that the plugs can be accessed easily. I also want to add a removable access panel behind the bathtub (where the main plumbing vent will be) so I can turn the water for the tub/shower on/off.
I'm going to have to get an IPS (threaded) valve because the only plumber who will come out to my house will not sweat copper and I'm not comfortable attempting to sweat copper. So, I'm thinking the Moentrol M-pact 3510 valve.
I've been doing all this babbling and haven't posted the sketches!
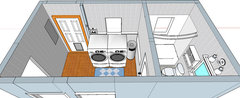 My Bathroom & Laundry Room · More Info
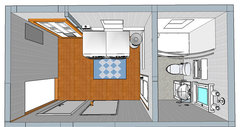 My Bathroom & Laundry Room · More Info
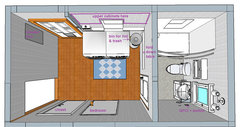 My Bathroom & Laundry Room · More Info
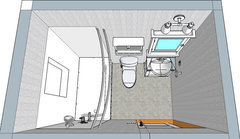 My Bathroom & Laundry Room · More Info
- 8 years ago
Hi! I advice you to use this website: https://home.by.me/en/.
You can create your own plan to find the good place for your furniture.
In addition,it is perfect to get inspired thanks users' projects: https://home.by.me/en/project/carlota/looser/medias. I think you will find good ideas! Have a nice dayzannej thanked bruno baudry zannej
Original Author8 years agoSomeone on a house repair forum mentioned to me that load bearing walls tend to have a solid run of supporting material underneath (I can't remember what it was called) and it might be impossible to cut through it for plumbing. Since the plumbing code here was repealed and reverted back to IPC 2012, I might be able to use AAVs (at least temporarily). Since an AAV only has to be 4" above the P-trap instead of 6" above the flood level, I could hide one under the lavatory instead of cutting in to that load-bearing wall. Rather than have the toilet run to that same wall as the lavatory, I could have it run independently to the main soil pipe but have the vent go up inside of the non load-bearing wall and tie in with the main vent stack.
I could run the trap arm for the standpipe to either just behind the dryer or just to the side of the dryer and have the vent go up and then have a 90 elbow to merge with the main vent stack. That would have the tub, toilet, and washing machine all tied to the actual main vent with only the lav on an AAV. The cleanout for the washing machine line could be hidden inside of a cabinet above the dryer and the entire horizontal run (on the way to the main stack) would be hidden inside. It would go to the wall that has the main vent. That means the toilet flange would have a drain that connects to a wye with a cleanout on the end and the pipe would run from south to north. The lavatory could then have a 2" pipe with cleanout for the drain. I'll have to draw up some sketches later.
zannej
Original Author7 years agolast modified: 7 years agoSo, I found a better waterproof flooring option with a 20mil wear layer (Sam'sclub had only 12mil), built-in underlayment, limited lifetime warranty, and free shipping. It's MSI Prescott Braly (aka MSI Herritage Mahogany on HomeDepot). It comes out cheaper than the stuff at samsclub because shipping & tax at Sams was higher than expected.
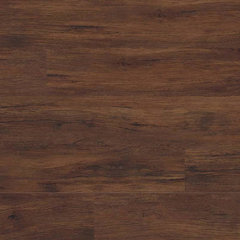 MSI Herritage Antique Mahogany 7 in. x 48 in. Luxury Vinyl Plank Flooring (19.04 · More Info
I would put a waterproof moisture barrier underneath and use anti-vibration pads/blocks under the washing machine & dryer.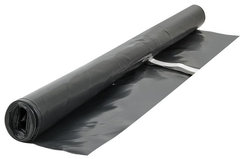 Roberts 120 sq. ft. 10 ft. x 12 ft. x .006 in. Roll of 6 mil MoistureBarricade P · More Info
For the plumbing, I would tie the kitchen sink's plumbing in to the line going to the laundry room and merge with the main soil pipe (currently it ties in to the bathroom groups on the opposite end of the house).
For the windows (because I want to replace the old metal ones) I am looking at some Reliabilt replacement windows. This one is inexpensive and comes with a screen. I believe it can be ordered with tempered glass.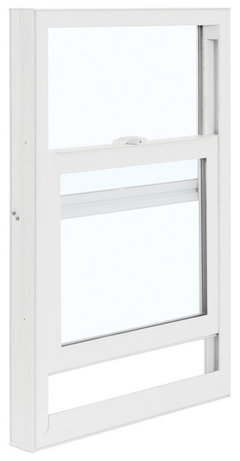 ReliaBilt 3050 Vinyl Replacement White Exterior Single Hung Window (Rough Openin · More Info
This one is a few $ more but the kitchen window has grids so it would match.
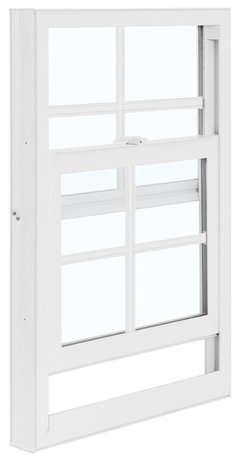 ReliaBilt 3050 Vinyl Replacement White Exterior Single Hung Window (Rough Openin · More Info
I've also been looking at doorknobs for the bathroom part. The back door lever and the knobs on the closet and bedroom are polished brass. The mothership wanted polished brass for the bathroom entry but the fixtures inside the bathroom will be polished chrome- so Schlage has a lever with polished brass on the outside and polished chrome on the inside.
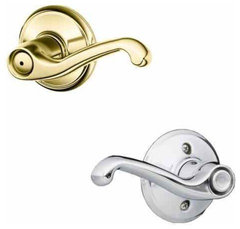 Schlage F40FLA605625RH Flair Right Handed Door Lever Set with Split Finish 43156 · More Info
zannej
Original Author7 years agoHealth issues have continued & I have only been able to work on planning for this, but I think I've decided to use a different trim kit & valve for the shower. I was already planning to get a Delta shower arm escutcheon/flange bc it's metal and looks nicer than standard ones. I found a thermostatic trim kit that uses only one hole through the wall but has two levers- one for adjusting temperature & the other for adjusting water pressure. It's the Delta Lahara. I'm still leaning toward getting a Moen tub spout bc I can't seem to find a Delta one that is as nice as the Monticello. The trim kit & MultiChoice valve are *much* cheaper than the Moen ones. Not as pretty, but still nice.
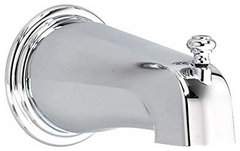 American Standard 8888.055.002 Deluxe 4-Inch Diverter Tub Spout, Polished Chrome · More Info
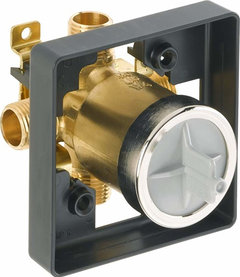 Delta Faucet R10000-UNBX MultiChoice Universal Tub and Shower Valve Body - - Ama · More Info
 Delta Faucet Lahara 17 Series Dual-Function Shower Trim Kit with 5-Spray Touch-C · More Info
I can't adjust the order of the pictures without removing them and doing them in a different order. For some reason if I hit Enter anywhere near one of the images it wipes the post & gives me a blank page. Not sure why.
I have actually been working on another bathroom. One of these days I'll do a post about it.zannej
Original Author7 years agolast modified: 7 years agoStill in planning stages but am gathering some supplies. The current layout idea has two upper cabinets (24"x30") on the exterior wall with a 12"x24" shelf with brackets that can hold a closet rod. I'm leaning toward laminated rods in case they get wet. The smallest laminated rod I could find was 72" long but I can cut it to 24" and use sealant/paint on the end to waterproof.
The cabinets I want are unfinished oak from Surplus Warehouse. I will paint them white. Not sure if I will even need door hardware if the cabinets can be pulled open with finger pressure. The shelf will also be laminated and comes in 12"x24" already.
I'm reminding myself that it doesn't all have to be done at once. I can start with the laundry room-- get the door & window replaced & get trim up, replace the subfloor, install the plumbing, install/modify electrical, put up wall panels, install cabinets & shelf, install the vinyl plank, move the appliances in & set them up, & then move on to the bathroom. Window should probably be done around the same time as laundry window (which means I'll have to make sure everything is cleaned up). Subfloor, plumbing rough-in, shower/tub install, electrical install, wall panels, sheet vinyl floor install, vanity install, then finishing touches like baseboard, toilet install, shelving, etc. Structure is the priority-- will need to sister some joists & get the subfloor up. Insulation will need to be put in walls. I may end up needing fernco fittings if there are alignment issues with PVC. For water supply I'll convert over to PEX using a cinch crimp tool & rings. I'll do the plumbing under the house while the subfloor is at least partially removed so it will be easier to access.
It's a lot of work, but if I pace myself its doable. The exterior door frame & header need restructuring before I work on the floor. The back door is literally falling apart & I need to put in reinforcements so I can have an awning above the door to deflect away some of the water. Right now it's totally overrun with weeds & thorn bushes. Eventually I'll need to get some back steps-- although I would like a small landing outside the door, but exterior stuff comes afterward.
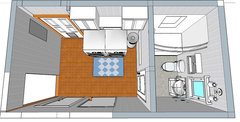 zannej's bathroom & laundry room ideas · More Info
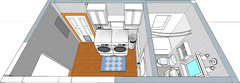 zannej's bathroom & laundry room ideas · More Info
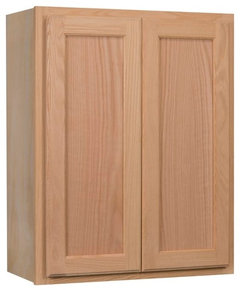 Unfinished Oak 24" x 30" Wall Cabinet | SKU: 5008530 | Barton's Home · More Info
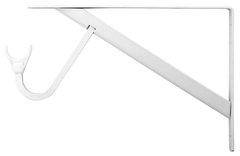 Closet Pro 11-1/4 in. Heavy Duty White Shelf and Rod Bracket-RP-0495-WT - The Ho · More Info
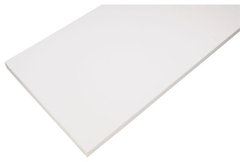 Rubbermaid 12 in. x 24 in. White Laminated Wood Shelf-FG4B7900WHT - The Home Dep · More Info
 72-in H x 1.3125-in W Vinyl Wrapped Wood Closet Rod at Lowes.com · More Info
zannej
Original Author6 years agoSo, things are still going slow. I've been working on the new exterior door that will be installed. The old one is literally falling apart. I got a steel clad "solid core"* door by Masonite. The "solid" part is actually foam which I don't consider to be very solid. It made putting the pet door in rather challenging since the pet door was intended to anchor in to solid wood & the screws wouldn't stay in the foam so I had to run bolts all the way through-- took a few days (had to get longer bolts & some washers)- charging batteries for the Dremel tool & the jigsaw. I finally got the pet door attached but the door got scratched up a bit so I need to use filler primer & then follow with white primer so it's all a uniform color before I apply the paint. I'm going with Behr Marquee Deep River satin exterior for the door and Ultra White semi-gloss for the trim & jamb.
I'll need to do a lot of work to be able to put the door in though-- need to patch the floor under the threshold, install flashing under the sill, replace the existing door sill & raise it up to the proper level, put in new king studs next to the existing king studs, trim the cripples (short studs between header & ceiling), and make & install a new header bc the current one is just a 2x4 that slopes downward. The new header will be up higher because there is electrical in the way. The existing 2x4 is going to have to come up a few inches and get leveled. There is also a lot of cleanup to do & the demo on the interior walls.
One of the people who was supposed to be helping me has been avoiding me for months (bc he owes us money). He just contacted me the other day about wanting to come do some work to pay down his debt but the very next day his house burned down so he's busy taking care of that. Another friend who owes bigtime injured his back & can't do any heavy lifting for another few weeks.
I did pick up a closet rod (scrap of one from my sister's house) that is close to the right length (just needs a little trim). I'll still have to get the shelf and brackets.
I'll upload photos later. Been taking care of my sick dog who I think doesn't have much longer to live. She's a very old dog & has lived years past her life expectancy for her breed.
zannej
Original Author6 years agoThis is my fifth attempt to post it because it has just closed the editor without posting when I tried to insert an image multiple times.
My dog passed away a few hours after my last post. The vet thought she was a goner two years ago but she pulled through. She was just in too much pain & her quality of life was only going to get worse. I really hated to have to make that decision, but I couldn't let her suffer anymore.
This is the door I got (it was listed in the "solid core" doors when I searched and employees said it had a solid core). It was solid spray foam. Now it says "insulated core in the description.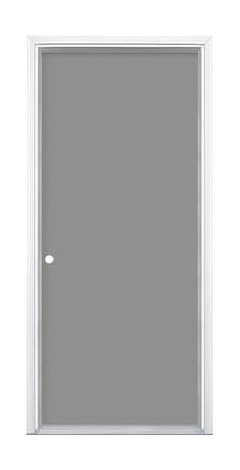 Masonite Decorative Glass Right-Hand Inswing Primed Steel Prehung Entry Door wit · More Info
Because it's foam inside the steel dents very easily and doesn't stay tight to the foam (like it would if it were adhered to wood) which posed problems when cutting for the pet door. Before I even purchased the door, I made an inquiry the manufacturer to make sure it was OK to cut for a pet door & they said it would be fine. My pet door did not come with a template so I had to make one, trace around it on the door once I measured to get it where I wanted, and drilled holes in each corner to make it easier to cut. Since I thought the core was wood, I was shocked at how the drill bit just dropped through the center before hitting the steel on the other side.
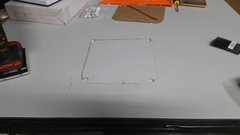 zannej's bathroom & laundry room ideas · More Info
Then I cut with a jigsaw blade, which is when I encountered my first problem: The steel moved away from the foam in the center & the longest metal cutting blades I found were just barely long enough to cut through, but because the steel could move, instead of cutting, it just moved up, leaving a dent from the underside. I had to flip the door and cut from the other side, but then it didn't want to cut quite evenly & the steel started to bend and tear. I had to rectify it with a Dremel tool & metal cutting blades, although it didn't entirely get rid of tears or jagged edges. I've never cut metal before so I don't know if that is "normal".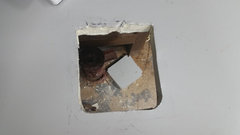 zannej's bathroom & laundry room ideas · More Info
I had to do a few fittings of the door pieces to see if they would go together and do some trimming on the metal as needed. You can see that it's not exactly straight in the above picture. No photo, but I used duct tape to cover the jagged edges, hold the steel tighter together over the center, and cover the foam-- particularly in one of the corners where the foam started to disintegrate from where I drilled for the pet door's screws. That brought me to another problem: the pet door was supposed to anchor to a solid core with #6 screws and bond to the door with doublesided sticky tape. But, the foam was too flimsy so I had to get 3" #6 bolts (I tried 2" but they were too short & I couldn't find 2-1/2" ones locally). I didn't use the sticky tape because I needed to get things to line up properly & it would have gotten in the way. I had to redrill some of the holes in the door, wallow out the holes in the plastic a bit to allow the bolts to slide through better, and make numerous adjustments. After a bit of trial and error, I finally got three of the bolts through with the help of a clamp, tape, and patience. The first two bolts went through just fine ( put them diagonally from each other in opposite corners). The third bolt gave me a little trouble-- since the foam was not conducive to making the bolts go through straight- so I had to play around with the angle a bit but got it through. I bent a couple of bolts but I bought extra just in case. The last bolt decided to be a royal pain in the keester. The foam disintegrated in that corner (which is why I wanted to use tape over it) so the bolt moved too much inside once it passed through the first layer of steel. That one proved frustrating enough that I had to take a breather for a couple days so I didn't get mad and break something. I brainstormed on the best way to get the bolt through and when I felt confident enough I went back down to try again. I used a flashlight to make sure the hole was clear, tipped the door up on it's side at an angle so I could reach through, and got the bolt to line up with the hole on the other side, but every time I went to use the screwdriver to turn it to go through it would slip out of alignment. Eventually I had to line it up with the hole and then smack it with a mallet, but that mofo finally went in. I secured all of the bolts with nuts but I didn't like how the nuts could slip into the holes slightly, which would allow the pet door to come loose. So I bought some washers for it, clamped the pet door, removed the nuts, slipped the washers on, then put the nut back on and repeated with each bolt.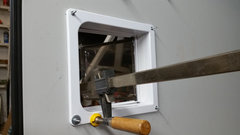 zannej's bathroom & laundry room ideas · More Info
I later trimmed the bolts with the Dremel's metal cutting blade (I went through 2 blades on this project).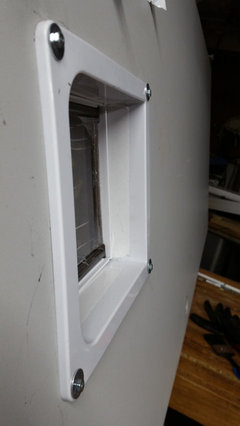 zannej's bathroom & laundry room ideas · More Info
While moving the door around, I noticed some medium depth scratches that I could feel were dented in so I decided to try some filler primer to hide them.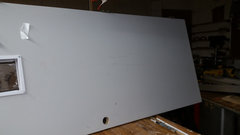 zannej's bathroom & laundry room ideas · More Info
 zannej's bathroom & laundry room ideas · More Info
I still need to paint the door frame and trim-- it will be white (also Behr Marquee) but I need to get some more supplies first- need another painting pan. The door frame is just sitting to the side waiting for paint.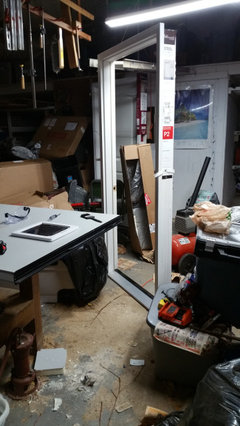 zannej's bathroom & laundry room ideas · More Info
It took about 3 coats that had to dry 24 hours in between for sanding. It wasn't perfect but it reduced the deepest ones and completely covered some of the shallower ones. I forgot to take a picture before using a white colored metal primer over it to hide the gray color so it wouldn't show through the paint. Unfortunately, either the mix is just crappy or the nozzle is defective. I shook the can vigorously for two minutes straight but it came out splotchy, dripped, and just didn't spray consistently (but the filler primer had gone on just fine).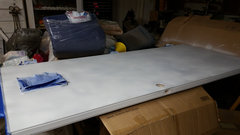 zannej's bathroom & laundry room ideas · More Info
Rewinding a bit, prior to the primer, I put white duct tape over the bolts and washers to make them less obvious and to make sure there was nothing sharp sticking out. They will have to be redone because the painter's tape started pulling the white tape off when I taped around the pet door to protect it from primer spray & paint.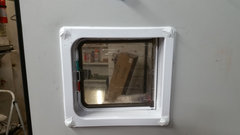 zannej's bathroom & laundry room ideas · More Info
I also put on the caps included with the pet door that were supposed to cover all 8 holes but could only cover the 4 outside holes. First 3 went on fine, but the 4th one required the mallet (it was the same hole that gave me the most trouble with the bolt). I caulked around both halves just in case.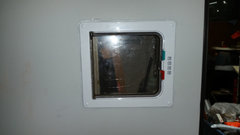 zannej's bathroom & laundry room ideas · More Info
After the primer, I painted the door with Behr Marquee Deep River satin exterior. It was my first time using a foam roller so I wasn't sure of the technique or how much pressure to use. Had a little trouble with the roller started to suck the paint back up, a bug landed on the surface at one point so I had to remove it, which messed up the finish, and I messed up the edging a bit & missed some spots (but I touched that up later). I took the pictures while it was still wet so it looked good but after it dried I could see the roller marks. It will need a 2nd coat. Good thing I have that moving blanket and cardboard now in place to protect the door better. Hopefully it won't get any more scratches. I'm going to keep it protected during transport up to the house when it is time to install it.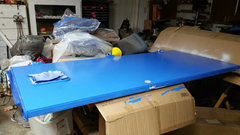 zannej's bathroom & laundry room ideas · More Info
Before and after comparison of the primer vs paint.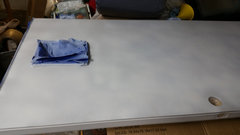 zannej's bathroom & laundry room ideas · More Info
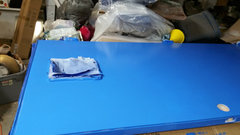 zannej's bathroom & laundry room ideas · More Info
zannej
Original Author6 years agoGot some touch-up painting done on the door (waiting for it to dry to get photos) & hit the door frame with Killz primers (same deal on photos).
Door frame with mold:
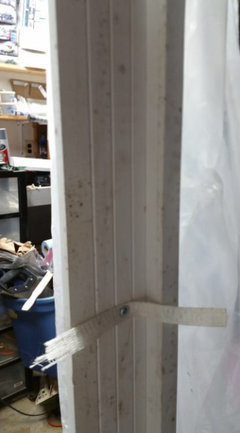 zannej's bathroom & laundry room ideas · More Info
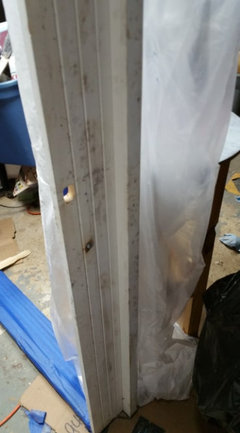 zannej's bathroom & laundry room ideas · More Info
1st coat of paint after it dried-- you can see it needed a 2nd coat. I touched up the scratches and one chip where something stuck to it and I pulled it off.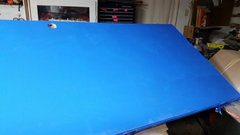 zannej's bathroom & laundry room ideas · More Info
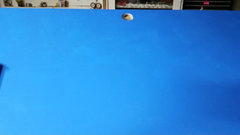 zannej's bathroom & laundry room ideas · More Info
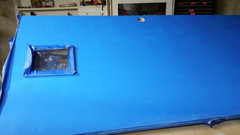 zannej's bathroom & laundry room ideas · More Info
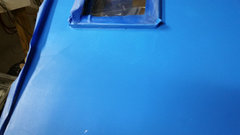 zannej's bathroom & laundry room ideas · More Info
Other side's 2nd coat after it dried (I need to get better pictures).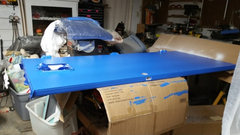 zannej's bathroom & laundry room ideas · More Info
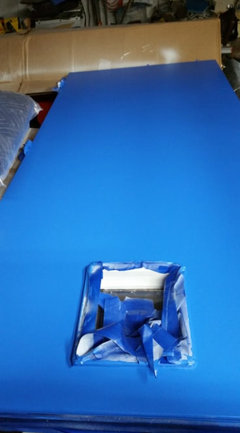 zannej's bathroom & laundry room ideas · More Info
zannej
Original Author5 years agoThe tub and wall surround have been purchased. Been busy helping my best friend who is the father to a new baby. Just went through a hurricane which messed things up more. Power was out for over 3 weeks, raccoons got in through the broken door & ransacked the place. They still keep coming back in & dragging stuff into the laundry hallway. A bunch of the electrical no longer works (possibly bad wires or outlets).
What remains to be done:
- Clean up garbage/laundry/stuff in hallway
- Finish removing wall
- Create new doorway for bathroom door
- Paint bathroom door
- Paint door frame for exterior door
- Repair & level floor (may use asphalt shingles as shims)
- Raise/install proper header (trim cripples, install new jack studs, put in two 2x6s as header)
- Install proper sill pan and flashing around door
- Install door
- Put in blocks for awning & install awning
- Install exterior light
- Install new windows (and install flashing)
- Install vinyl plank flooring
- Install cabinets and upper shelves
- Rough in plumbing
- Cut hole for new dryer vent
- Move electrical for washer & dryer
- Move washer & dryer in to place
- Install vanity & tub/shower
- Install vinyl sheet or vinyl plank flooring (thinking sheet so water can't get under)
I already have the tub spout & copper pipe/stub for it. I need to figure out what my friend did with my pex crimp tool and case.Still need to get the windows. I do have the window trim at least.
I think I will take a piece of cardboard and tape it to the wall once the new window is in. I can then make a template for cutting the back wall of the shower for the window. I may add osb or plywood backing for reinforcement in areas of the surround that will have holes cut to add extra reinforcement.
Still deciding on a showerhead bc we are not wanting to spend too much more $.
This has bumped up in priority in at least getting the back door in bc of the raccoons.
I need to stop procrastinating.
Thank you for everyone who's stood by and offered moral support.zannej
Original Author5 years agoDecided on and purchased a showerhead. Moen Engage 2.5gpm 5.5" handheld showerhead.
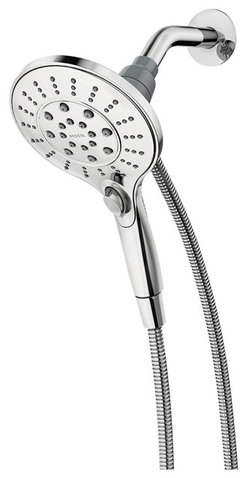 Moen 26112 Engage Magnetix Six-Function 5.5-Inch Handheld Showerhead with Magnet · More Info
It will have a Keeney S-shaped shower arm to give it enough clearance.
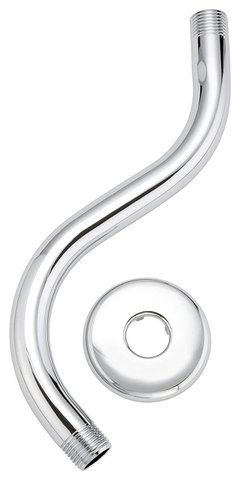 Plumb Pak PP825-191 S-Shaped Shower Arm and Flange Extension Head, Polished Chro · More Info
Best friend had a stroke & is now a single parent so he's needed help & my projects have been put off. I'm currently ill (not Covid thankfully) and waiting to recover.zannej
Original Author5 years agolast modified: 5 years agoTore my rotator cuff and deltoid so haven't been able to do as much. Winter storm broke all the hot water lines. Been trying to get it fixed but had to wait for supplies to come back in stock. Only plumber willing to come out to my neck of the woods is booked up. Tried to run it ourselves but encountered a rattlesnake that told us to go away. Hoping it left so we can get all the waterlines replaced with PEX.
I did get a little shelf to use for the shaving station. I will need to add some more pics and such of those plans. Shelf needs to be reinforced, sanded, and painted. I have the hardware and should have primer somewhere. I also got a dowel that can be used as a towel bar once I sand and paint it and attach it to the shelf.
Crappy unfinished sketch of side view. I was having trouble drawing the vanity. I have another sketch with the toilet. I drew all of this in MS Paint.
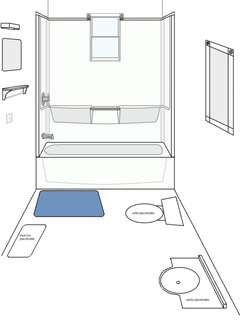
Ignore the weird floating vanity drawing where the big mirror should be. I was trying to get the angles right and this is a WIP (work in progress) sketch. Again, I drew this in MSPaint.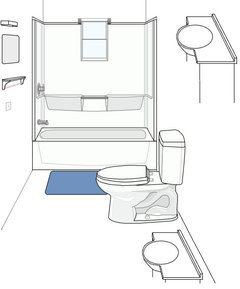
Updated original sketch view.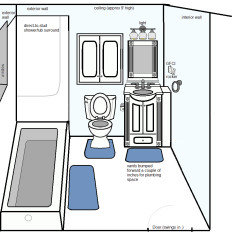
Opposite end view. Still needs more details.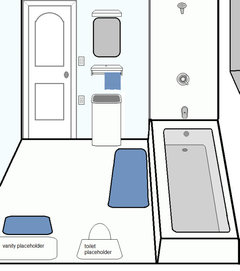
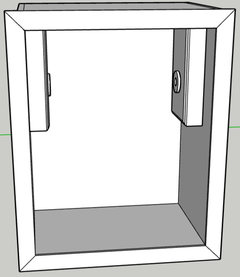
As you can see, I decided not to go with the lever handle as my brother hates them. Those style catch his pockets. So instead I want to go with Schlage Siena dual-finish. Bright Brass on the outside and bright chrome on the inside. It's an oval shaped knob so it is easier to turn but harder to snag clothes on.I'm going to make a custom recessed tp holder & shelf. I'm making it wide to fit a frame I already bought (and also to fight wet wipes and phones). It will be cut in to the side of the vanity.
More recent sketch of laundry room. I hid some of the walls to make it easier to see.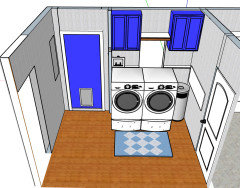
These are the shelves I got. I will use the middle medium) one that is about 18" for the shaving shelf.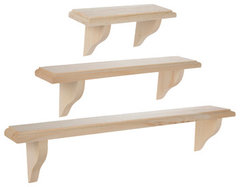 Wood Wall Shelves Set | Hobby Lobby | 657916 · More Info
They are put together with cheap staples so they aren't sturdy. I will reinforce them, sand them, and paint them. Not sure what I will do with the larger and smaller shelves. Might use the small one near the vanity. Perhaps the larger one can be above the toilet somewhere.
zannej
Original Author5 years agoThe pandemic has interfered with our plans. We just narrowly missed getting hit by another hurricane. Contractors are booked up and busy. The price of plywood has skyrocketed. It's a lot harder to find materials now. The first image shows all of the stuff we already have for the bathroom.
The other images are of the plans for the bathroom and laundry room.
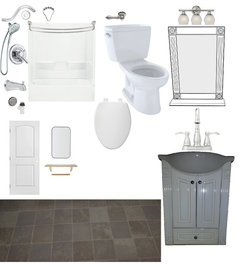 My Bathroom & Laundry Room · More Info
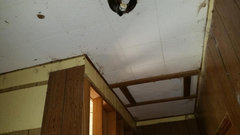 My Bathroom & Laundry Room · More Info
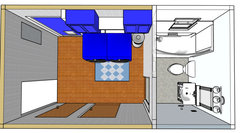 My Bathroom & Laundry Room · More Info
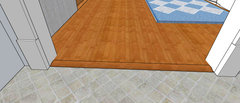 My Bathroom & Laundry Room · More Info
 My Bathroom & Laundry Room · More Info
 My Bathroom & Laundry Room · More Info
 My Bathroom & Laundry Room · More Info
 My Bathroom & Laundry Room · More Info
 My Bathroom & Laundry Room · More Info
 My Bathroom & Laundry Room · More Info
zannej
Original Author4 years agoI've decided to go with Shclage siena oval shaped knobs for the door. I'm still trying to plan out the plumbing layout for the toilet, sink, and tub. I know the main vent is right near the tub and I'm going with a direct drain. Hopefully there aren't any joists in between the overflow and drain. I will have to check at some point but I can't fit under to look.
Even though it would look ugly, I'm thinking of venting both the sink and the toilet separately but merging the drains under the house.zannej
Original Author4 years agoI received the schlage knobs, I need to paint the door (it is already primed), and the windows arrived. I will have to see if I can hire someone to install the windows as I don't think my friend or I are coordinated/skilled enough for something that important. But I haven't had any luck finding any tradespeople who will come to my house.
I'm debating whether to install the flooring before I install the new doors.
zannej
Original Author3 years agoI've been thinking and I didn't want to have the plumbing for the washing machine blocking access behind the dryer. My state allows for a 6' run on a 2' pipe and the distance from the trap to the wall is less than 6'. I could move it either just next to the wall and have a cleanout facing west, or I could move it inside the interior wall shared with the bathroom and have the cleanout facing north and poking out of the wall. I plan to have an access panel on that wall to allow access to the shower valve for any maintenance. Additionally, I decided that instead of having shelves built directly behind the washing machine, I could have an acrylic/plexiglass sheet placed over the top of the machines. It would let the color from under the machines show through, would keep stuff from falling between the machines if there is any gap, and could extend to the wall with ledgers to support it. It could be removable in case I needed to access something behind it. It could be notched to go around things and butt into the window just a bit (not enough to block operation but to stop items from falling. I might even add a little lip to keep things from sliding off the back. I believe I have an acrylic sheet down in the workshop that would fit. I'd just have to cut it to size. I could also move the plumbing box down a little. The sketches show the plexi with sharp corners, but I would chamfer them a bit so they wouldn't hang off.
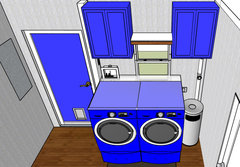 My Bathroom & Laundry Room · More Info
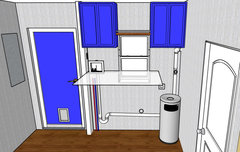 My Bathroom & Laundry Room · More Info
I need to draw a version where the vent and drain go into the wall. The main vent stack is in this wall so it should be able to go through the floor.
zannej
Original Author3 years agoThis is still on the waiting list for projects. I'm working on my ensuite bathroom right now. I've had a few injuries that have taken months of recovery so things are going slow.
zannej
Original Author3 years agoI'm still in recovery-- I suffered an electrocution injury to my left deltoid and bicep that rendered my arm mostly immobile and useless for a few months. I've regained 80% mobility but am still working on strength. I've almost completed my ensuite bathroom. It now has a toilet and functioning shower. Needs some plumbing & electrical fixes and some paint & cosmetic stuff.
This laundry room/bathroom is the next priority. We really need to get the new back door installed.
zannej
Original Authorlast yearlast modified: last yearAside from the injury, which is about 99% healed now, I had other setbacks. Had to do more caregiving for my mother because she almost died a few times. High blood sugar and then low blood sugar. She now has a continuous glucose monitor and insulin pump. Also have had sick pets to care for. Been super busy and my friend who helps me with stuff has also been busy. Won't get into the drama on that mess. The good news is he finally had time to come over and help install the back door. Unfortunately, I put the pet door in backwards but it was such a nightmare to put in the door to begin with that it is staying that way. Dumb cats and dogs haven't figured out how to use it yet though. LOL.
I also decided to go with a glass block window for the bathroom so Doofusaurus won't put an elbow through the glass.
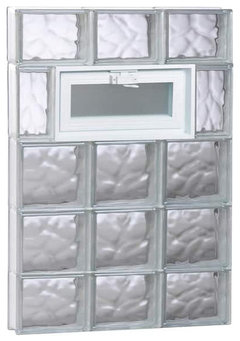 23.25 in. x 34.75 in. x 3.125 in. Frameless Wave Pattern Vented Glass Block Wind · More Info
The other vinyl window may go into one of the other bathrooms.I couldn't find any glass block window models with hopper windows online so I made one in Sketchup block by block. It's not perfect and isn't accurately to scale, but I think it turned out OK.
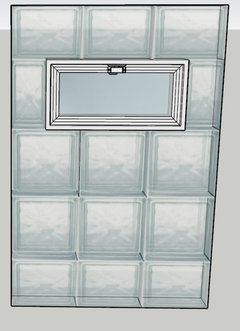 zannej's bathroom & laundry room ideas · More Info
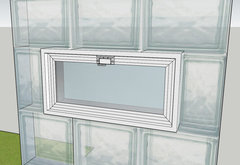 zannej's bathroom & laundry room ideas · More Info
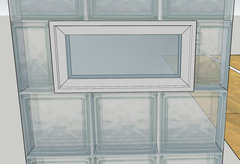 zannej's bathroom & laundry room ideas · More Info
The size/scale inside the shower is probably wrong and the wall depth isn't right, but its a close approximation. I discovered that the walls are 2x4s with some kind of tongue & groove boards as sheathing covered with some sort of fibrous siding that resembles asphalt shingles.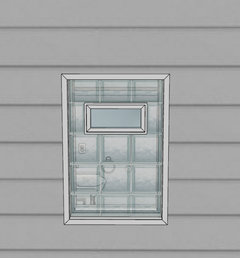 zannej's bathroom & laundry room ideas · More Info
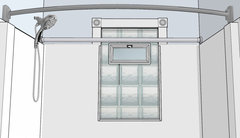 zannej's bathroom & laundry room ideas · More Info
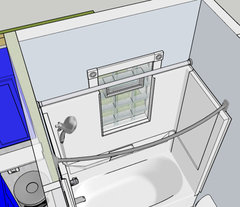 zannej's bathroom & laundry room ideas · More Info
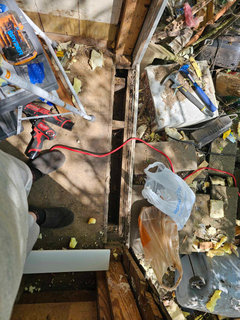
It's going to be so much "fun" drilling through that to put a hole for vent. I'll have to doublecheck to make sure there isn't a stud where I want to put the vent.It was a hot mess under the old door's threshold. I think the original house siding may have been asbestos, there was a little bit of asbestos insulation that I wet and removed. My best friend came over to help (he's the one sporting the goggles).
It looked worse in person and the door on the outside was even worse, it had strips of laminated wood peeled up and had vines growing all over. I forgot to get a "before" picture after we cut away the weeds to clear a path. No one has gone through this door in ages bc Doofusaurus piled trash against it and it hasn't been able to be opened. I got up at 5:30am and busted hump to clear enough of his stuff away to get the door to open.
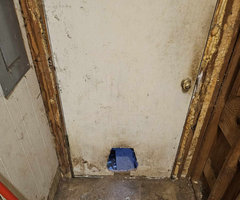 My Bathroom & Laundry Room · More Info
old header & some remnants of vines growing up. it was two 2x4s with spray foam in between and the front board was cracked. One of the cripples was also split.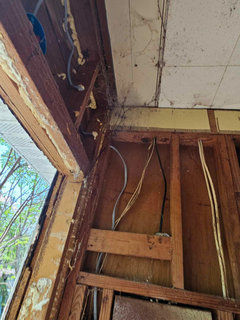 My Bathroom & Laundry Room · More Info
Old tongue and groove boards as sheathing and some sort of asphalt-shingle looking siding was under the house wrap and vinyl. Yes, I know the switches hanging out are dangerous, but the breaker is off to them.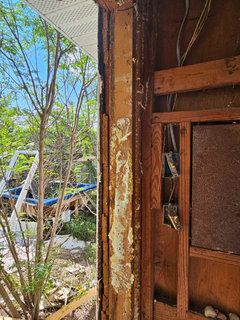 My Bathroom & Laundry Room · More Info
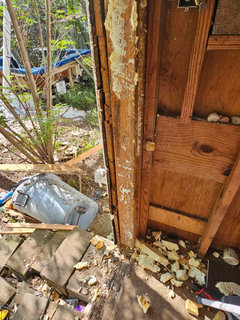 My Bathroom & Laundry Room · More Info
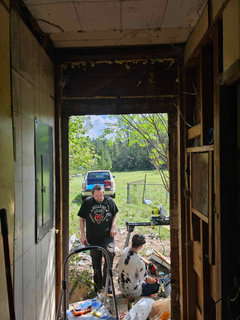 My Bathroom & Laundry Room · More Info
Friend removed the jack studs and the old 2x4 header temporarily. He's the one sitting down. Doofusaurus was out there helping. I poke fun bc he's my baby brother but I love him.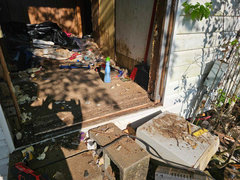 My Bathroom & Laundry Room · More Info
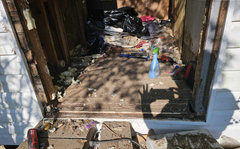 My Bathroom & Laundry Room · More Info
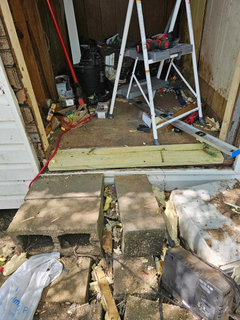
Nasty hole under where threshold was on old crappy door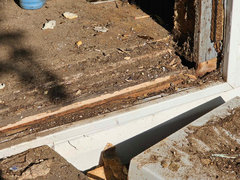 My Bathroom & Laundry Room · More Info
What served as a sill or what was left after the monkey deadbeat tenants cut it away and left this mess.
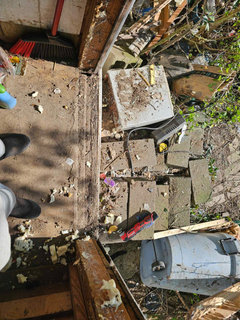 My Bathroom & Laundry Room · More Info
Not much was under the sill-- flashing tape would not stick to it.
 My Bathroom & Laundry Room · More Info
Next post will have the pictures of the new door.zannej
Original Authorlast yearFirst the installation process. The old jack studs were too short and had to be removed. Door frame was measured numerous times to make sure header was the correct height. Shims had to be used to get the new threshold level. Flashing tape was wrapped around new jack studs and over the new sill (since there was nothing for the tape to grab under the sill). The new threshold pretty much covers the sill up, but I will have to paint whatever parts are still exposed.
 My Bathroom & Laundry Room · More Info
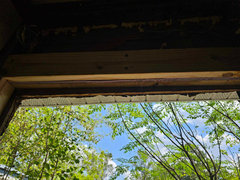
New header is 2x6s with foam board in the middle-- which is to code in this region as it provide some level of insulation-- also, the board was way cheaper than plywood and I hate OSB. The old siding and tongue & groove boards hung down a little too much and since the new door already had brickmould, the old stuff had to be cut away. Just in case it was asbestos I wet it before I wacked the crap out of it with a Stanley Fatmax Fubar demo tool.
 My Bathroom & Laundry Room · More Info
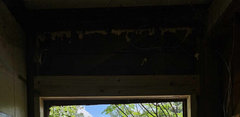
Sorry for the contrast issues.
 My Bathroom & Laundry Room · More Info
New jack studs were in and friend carried the frame to install (this was before we realized the old siding crud was in the way.
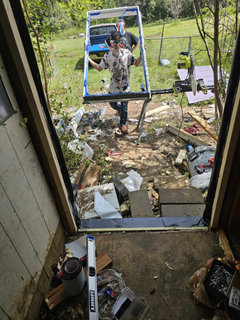 My Bathroom & Laundry Room · More Info
Frame installed. I'm going to have to use some sort of leveling mix to address the issue with the corner left corner being so much lower, but the threshold was level this way.
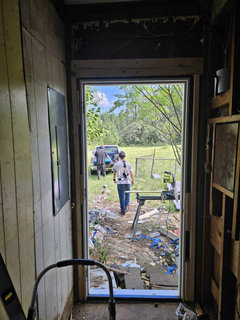 My Bathroom & Laundry Room · More Info
New cripples and a peek at the door. Doofusaurus dropped it and scraped the corner a bit so I will ahve to touch that up.
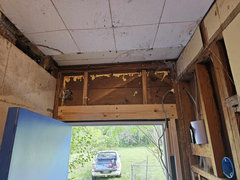 My Bathroom & Laundry Room · More Info
Inside with new door, header, jack studs, and shims. One of the jack studs is a little proud of the header but that's because the walls are wonky and the jack studs are both plumb/level. Door needs some touch-up paint obviously.
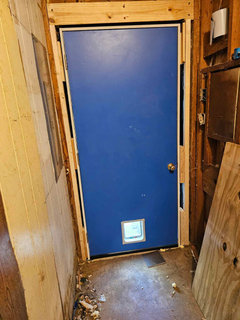 My Bathroom & Laundry Room · More Info
Outside view of new door. That light above it was destroyed by a hurricane. You can see there is a gap all the way around the brickmould. I need to either pull the brickmould and replace it or find trim to fill the gap. Not much is needed at the top, but the sides have 1.75" to 2" gap (it gets wider toward the bottom) and the bottom edge is clearly very ugly. I think some white flex seal might work in that spot. If I pull the brickmould I need boards at least 4" wide. I suppose I could go wider on the sides and have less of a reveal on the door frame and use the brickmould elsewhere if I can get it off without breaking it. I'd like to use PVC or Vinyl trim instead of wood.
 My Bathroom & Laundry Room · More Info
I do realize the pet door is in backwards. Too late to fix it. It's not coming off. But it still works fine. Derpy pets still haven't figured out how to use it though. I tried to teach my smartest cat as well as the dumbest cat but the former wasn't really interested and the latter didn't understand. If the smart one ever figures it out the others will usually follow suit.
And yes, I realize that the cinderblock mess is a hazard. I intend to build a landing outside the door.
So, any suggestions on the trim? Or cheap landing construction? Ground is really unlevel and has been eroding to the north (right side from the outer view).zannej
Original Author8 months agolast modified: 8 months agoLife is still crazy. Been having trouble with my left arm and my back so I haven't gotten as much done. My best friend who has been helping me had some health issues and was busy and unable to come out much. I've managed to make a very small amount of progress. I was thinking about how to keep stuff from falling between and behind the machines and came across a laundry countertop for a reasonable price. You cant tell from the photos but has 3 boards in the middle running from left ot right and then has rails/ledges. It's waterproof and heat resistant. It is allegedly stain resistant. We shall see about that. It's not terribly heavy but it was bulky enough that I exhausted myself just getting it out of the box. Ended up having to flip the box upsidedown and dumped it out because lifting it out wasn't working. I also had to clear off the machines and scrub them clean before putting this up. One of the tubs on top of the dryer has books and heavy stuff in it so it was incredibly difficult to lift and I couldn't get any help from Doofusaurus. In his defense, he hurt his back trying to lift Mom when she fell. We both hurt ourselves but he's not accustomed to back pain so its new to him. He hasn't mocked me about complaining of my back pain since at least and I've had a bad back for over 20yrs. Anyway, just getting the heavy stuff off the machines was a bear. I had to lean against the wall and use my left knee to push the countertop up to get it high enough to get on top of the machines once they were cleared out. There's a shelf bracket to the right that makes it so it can't slide all the way back, but it still fits pretty well and it looks nice. Getting the bins back on top really sucked- had to actually step on something with my left leg to brace it to get it high enough to pop the heaviest tub up and struggled hard to get it on the counter. I worked up a sweat and my blood pressure was through the roof, but I got it done.
 A photo clipped from Houzz Bookmarklet · More Info
I got some nice accessories like some detergent holders that tip the containers so I can dispense the liquid easily. I like Gain original scent stuff. Put the detergent in a cup and dump it in. I use a Downey dispenser ball for the fabric softener but put the Gain fabric softener in. I also toss in some Gain Fireworks scent beads. For when I'm feeling extra lazy I also got some Gain laundry pods. I have 3 total stands but only have 2 set up because I need to figure out a 3rd liquid to use-- maybe some oxyclean or something for whites. Unfortunately, the iron sediment in our well water makes it impossible to keep white clothes white so that is something we nee dto figure out down the line. A photo clipped from Houzz Bookmarklet · More Info
Also got magnetic dryer sheet holder, dryer ball holder, and lint bin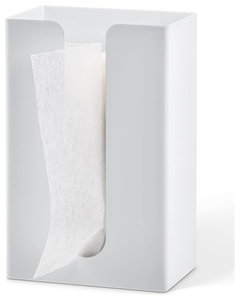 A photo clipped from Houzz Bookmarklet · More Info
 A photo clipped from Houzz Bookmarklet · More Info
 A photo clipped from Houzz Bookmarklet · More Info
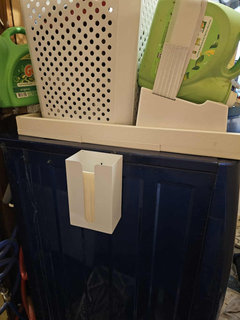 My Bathroom & Laundry Room · More Info
The dryer sheet holder wouldn't fit between the dryer and the wall so I stuck it on the washing machine for now-- you can see the edge of the countertop. I put the lint bin and dryer ball holder between the machines.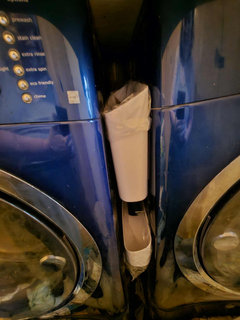 My Bathroom & Laundry Room · More Info
I also got a scent bead dispenser A photo clipped from Houzz Bookmarklet · More Info
and a laundry pod holder A photo clipped from Houzz Bookmarklet · More Info
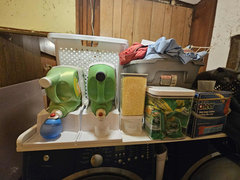 My Bathroom & Laundry Room · More Info
This is the temporary setup until we can renovate. That gray tub to the right was the bane of my existence. LOL. I don't know why we have the Cheer powder. It doesn't work with our machines. My only thought is Mom must've found it on a sale and since she doesn't do laundry anymore she has no clue what the machines do. She's now 75-yrs old and her balance sucks due to some inner ear damage so she can't carry laundry.I added a new door lever to the back door-- Schlage brand and used a gator repair hinge to make sure the door shut properly. Added more door & window expanding foam in the cracks.
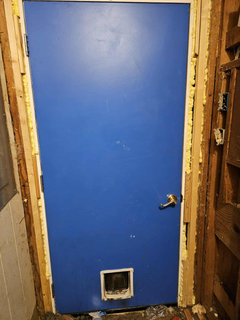 My Bathroom & Laundry Room · More Info
In terms of framing and plumbing I've changed the plans a bit. I realized that the partial wall wouldn't work as the framing doens't go all the way to the floor and its best to just eliminate that and have the wall flat with a possible bumpout up high to higher but that would probably be too much of a pain. I'm going to have to plane down the framing around the door to get the drywall to fit. I might be able to bump stuff over more to the left to have more space in the right corner. Because of the height I would need the standpipe to be to have the water supply lines reach I've decided to have the standpipe drain in a different smaller box that will be below the shelf behind the machines. The shelf will be moved up to be level with the back rail of the countertop. I will try to move the plumbing inside the wall. I checked the diagrams for the machines and found that the power cord for the washing machine is on the right as you face it so I will probably move the outlet for it over to the left and have a desk grommet for it to go through to plug in (since I want to be able to unplug it easily if need be). I'm not sure if I can drill all the way through the sill plate to run the pipes-- don't know if there is any other framing in the way so if I can't I will route stuff around the sill plate at the bottom and it will all be hidden behind the machines.Here is one of my sketchup layout diagrams.
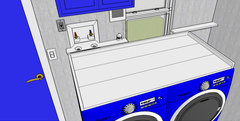 My Bathroom & Laundry Room · More Info
The water supply line box is from Oatey and I need to clean it up. I drew it from the measurements I took of the actual box since I couldn't find an existing model of it. In the sketchup image I hadn't yet moved the AAV up. I have a wallbox for the AAV with slits on the cover to allow airflow. I will put the AAV box as high as it can go without getting in the way of any cabinets. I will probably build custom cabinets rather than buying some bc prices are absolutely insane on stuff now and sales tax is 10.5% where they sell the cabinets (it's 11% where I live). The drawing doesn't show plans to move the outlet over. I will need to figure out where the studs are to get a good placement for that. You can't see from the image but I've added in the Sioux Chief Oxbox that goes below the shelf so the standpipe can be a reasonable height.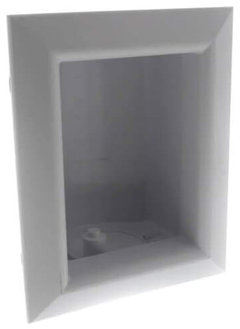 A photo clipped from Houzz Bookmarklet · More Info
I got some sioux chief water hammer arrestors that will connect to the back of the washing machine.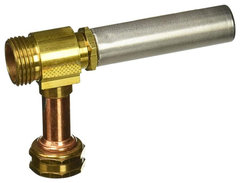 A photo clipped from Houzz Bookmarklet · More Info
For the dryer vent I got a pestblocking vent cover to go on the outside.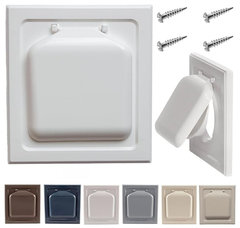 A photo clipped from Houzz Bookmarklet · More Info
While I can't fit a laundry tub in the laundry room, I plan to put one outside the back door (although it may temporarily sit against the fence near the water trough for the cows until I can get a landing built and get a hose big setup connected out there. I got a bbq cover for it. I got a 37gallon laundry tub on sale from Wayfair. It came with a drain kit as well as the faucet with pull-out sprayer. It will have to be anchored to the ground as it only weighs 30lbs and can blow away.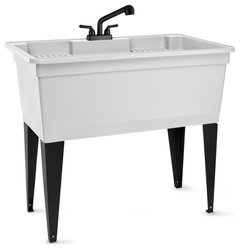 A photo clipped from Houzz Bookmarklet · More Info
I also got a ceiling mount rack thing and will need to figure out the placement. as I don't want it to conflict with the attic access nor with the ceiling fan or any of the lights. My initial plan was to run it parallel to the back door but I might have to run it perpendicular. A photo clipped from Houzz Bookmarklet · More Info
I got a pole with a hook to be able to grab hangers. I didn't add that to my ideabooks yet. I'm considering changing ceiling fans as well but we shall see. I might need to go with something smaller profile.I've also decided to have a table that folds down against the wall when not in use and I will have it on the wall sort of near the electrical panel as there just wasn't room for it on the opposite wall. I saw some nice lumber for sale at one of the big box stores but didn't want to mess with tying it down in the back of my truck when I'm not yet ready to start working on building the table. It was nice oak. My kitchen has custom red oak cabinets that my dad built back in the 80s. Anyway, I have most of the hardware for the table and just need to figure out final measurements so it won't scrape the floor. I will make a slip cover to turn it in to an ironing board. I won't leave the cover on bc when folded down the cats would claw it. So I'll have a spot to store it when its not on. I have a friend who is good at sewing who I might commission to help me make it.
I will have to upload my ideas for the folding table later.
This is my ideas collage for stuff for the laundry room:
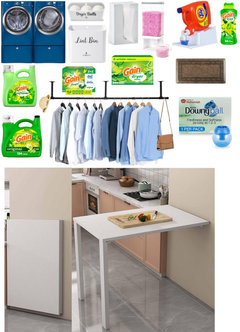 My Bathroom & Laundry Room · More Info
That was from before I found the laundry pod container.
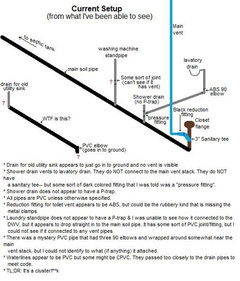


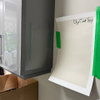
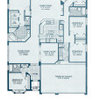
mveasey