
Search results for "Absorbed" in Home Design Ideas
 Drury Design
THE SETUP
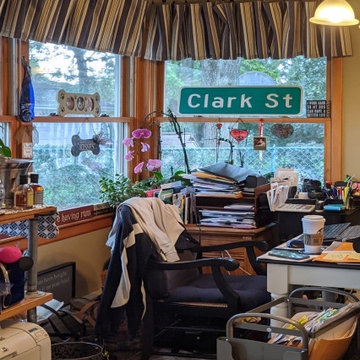
“You have to figure out how to rebuild a life worth living,” Basia Kozub’s client says. Her husband passed away suddenly three years ago. Holidays with family became more important, and she found herself struggling with a 37-year old kitchen that was falling apart. “I made a decision to move forward,” she says. “I went, ‘You know what? I’m redoing the kitchen.'”
The big task of getting started was as easy as having a conversation – literally. Basia was on the job, helping the client sort through priorities, wishes and ideas. Basia’s client is 5′ 4″, likes keeping an eye on the kiddoes in the backyard and wanted certain things to have their own place.
THE REMODEL
The objectives were:
Enlarge and open the space
Find a classic look that incorporates blues
Upgrade to easy-to-use appliances
Hide an office space within the space
Ample storage for dishes
Design challenges:
Uneven window alignment on the back wall
Original kitchen smaller than desired, stuctural concerns if walls to be moved
Keep folks close – figure out seating for entertaining
Main sink in corner is ideal, but windows are hard to reach
Lots of storage needed for dishes, glass collection, pantry items, bar bottles and office supplies
Specific storage needs for oft-used spices and utensils
THE RENEWED SPACE
Design solutions:
Replace back wall windows, establish window size continuity
Take out two walls to open up the space, tall shallow cabinet and a tall filler added to conceal a new header
Large island that seats six easily
Custom corner sink cabinet with recessed edge allows vertically challenged homeowner to reach the windows
Mindful storage planning features: plenty of cabinets, pull-out bar bottle storage, file drawers & cubbies with pocket doors for office appliances, magic corner pullouts, and appliance garages with pocket doors
Shelf behind range for easy access to daily-use spices and oils. Also: spice and utensil pullouts on either side of range
The clients says every priority and wish box got checked. The highly functional design absorbed everything that used to be in that area of the house, but now those things are out of the way.
“In the past, we were all spread out when we gathered for the holidays, because we had to spread out. Now, we’re all in here together, including my 92-year old mother. We’re visiting, cooking, laughing… everyone is here. And I’m really learning how to use these appliances. This kitchen has given me a whole new life.”
 Phoenix Home Remodeling
Their Kitchen Remodel
Siene & Kentay’s tired kitchen needed some attention. The large and heavy stone covered hood vent paired with the dark stained cabinets sucked the life and light out of the room.
One thing that struggled was lighting. Even with the walls of windows the dark features just absorbed the light.
We started by using a soft white shaker cabinet called Dove White as the main cabinet color in the kitchen. We removed the stone from the hood and the dark slate from the backsplash.
We also removed the dated shape of the peninsula by squaring it off. By doing this, the new walking area improved and allows for transitioning between rooms.
The oddly shaped island in the center struggled to give them the storage they needed. They were large cabinets, but items usually got stuck or lost.
After determining that Siene wanted to prepare food here, we opted to do deep drawer cabinets to store a lot of her prep items at arm’s reach.
The Island and bar cabinets are in a natural stain called Fawn. This color complimented the existing slate flooring. We also lined the hood in trim that matches the island.
The island is also waterfalled on both sides with quartz from Arizona Tile called Ivory White Honed.
Kitchen getting remodeled before & after photo
Kitchen being remodeled before and after photo
Just off the kitchen there was a bar, however it was hidden from all rooms. We decided that we would move the bar to a more prominent place in the home, and the existing would be turned into an appliance pantry.
A place for the coffee maker, microwave, and other smaller appliance storage.
We finished the kitchen with a simple backsplash in a lantern white mosaic with a natural tan grout. The door hardware, faucet from Delta and the new pendant lighting are all in the stainless family allowing for depth and consistency.
The new bar features a Sub-Zero wine column with refrigerated storage below. The upper lit glass cabinets offer a chance to showcase stemware and spirits.
This custom cabinet install allows the wood to shine and offers storage.
Lastly, the additional lighting installed in all areas now is controllable. Siene and Kentay have full control and can direct the light and how much is used.
When they want a night in, they can turn down the lights and relax. In their new updated family room in front of a newly integrated modern fireplace.
Kitchen getting renovated before and after photo
Laundry Room Remodeling
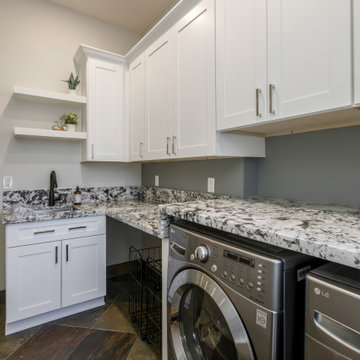
Jokingly, Siene called her Laundry Room the Christmas Box. We traded the red and green wallpaper for paint called Drift of Mist from Sherwin Williams.
The new white cabinetry offers a lot of storage they are , and a dedicated folding station was integrated for easy transitioning between loads of laundry.
 Abda Custom Window Fashions
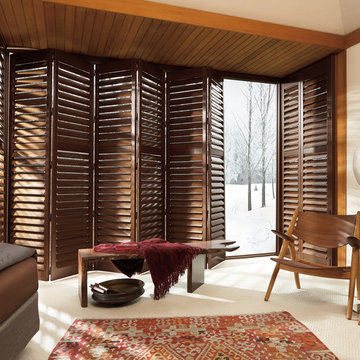
The stained shutters come in a variety stains and are a perfect solution for specialty shaped windows. Our shutters are flexible in design and let you decide how you want your shutters to operate and allows you to enjoy more view than ever before with louvers as large as 4.5” (plantation shutters). Our wood shutters have a satin coating, protecting them from common spills and making cleanup as simple as dusting with a soft, dry cloth. We have several types of shutters to match your needs and budget.
We have FREE in-home consultation and FREE showroom appointments. You can also stop in our showroom anytime during our normal business hours. Our professional Design Specialists are never pushy and believe in putting the client’s needs first. Give us a call today to get started on your shutter project today.
317-273-8343
Showroom:
1159 Country Club Road
Indianapolis, In 46234
M-F 9am-5pm
*Evenings & Saturdays by Appointments
Find the right local pro for your project
 Caela McKeever
Photo: Caela McKeever © 2017 Houzz
Inspiration for an eclectic home design remodel in Seattle
Inspiration for an eclectic home design remodel in Seattle

 Stone Action
California Brown granite is shown in this project!
Search "California Brown" granite, see more granite or other stone options: http://www.stoneaction.com
Learn more about granite to see if it’s right for you:
Granite countertops can last a lifetime. It contains no harmful chemicals and do not emit harmful radiation or gasses. Granite is heat resistant and is one of the most heat-resistant countertops on the market. You can place a hot pan out of the oven directly onto the countertop surface. Experts do recommend the use of a trivet when using appliances that emit heat for long periods of time, such as crockpots. Since the material is so dense, there is a small possibility heating one area of the top and not the entire thing, could cause the countertop to crack.
Granite is scratch resistant. You can cut on it, but it will dull your knives! Granite scores a seven on Moh’s hardness scale.
Granite countertops are considered to be a low maintenance countertop surface. The likelihood of needing to be repaired or resurfaced is low. Granite is a porous material. Most fabricators will apply a sealer to granite countertops before they are installed which will protect them from absorbing liquids too quickly. Many sealers last more than 10 years before needing to be reapplied. When they do need to be reapplied, it is something that most homeowners can do on their own as the process is similar to cleaning. Darker granites are very dense and sometimes don’t even require a sealer.
When it comes to pricing, there are a lot of variables such as edge profile, total square footage, backsplash, etc. Don’t be fooled by the stereotype that all granite is expensive. Lower-range granites will cost less than high-range laminate. Though granite countertops are not considered “low range” in pricing, there are a lot of affordable options.
If you are looking for something truly unique, consider an exotic granite. Some quarries are not easily accessible and/or only able to be quarried for short periods of time throughout the year. If these circumstances exist in a quarry with gorgeous stone, the price will be driven upward.
You won’t find a lot of solid patterns or bright colors, but both do exist. Also, watch for a large range of color and pattern within the same color of stone. It’s always a good idea to view the exact slab(s) that will be fabricated for your kitchen to make sure they are what you expected to see from the sample. Another factor is that many exotic types of granite have huge flowing waves, and a small sample will not be an accurate representation of the whole slab.
Granite countertops are very resistant to chemicals. Acids and bases will not harm the material.

 Daniel Scerri Periti
We were approached with a request to design the furnishings for an existing ‘finished’ apartment. The intention was to move in relatively fast, and the property already had an existing marble floor, kitchen and bathrooms which had to be kept. The property also boasted a fantastic 270 degree view, seen from most of the apartment. The clients had a very important role in the completion of the project. They were very involved during the design process and through various decoration choices. The final design was kept as a rigid guideline when faced with picking out all the different elements.
Once clear of all previous furniture, the space felt cold and bare; so we immediately felt the need for warmth, and raw, natural elements and textures to complement the cold marble floor while visually tying in the design of the whole apartment together.
Since the existing kitchen had a touch of dark walnut stain, we felt this material was one we should add to the palette of materials to contest the stark materials. A raw cement finish was another material we felt would add an interesting contrast and could be used in a variety of ways, from cabinets to walls and ceilings, to tie up the design of various areas of the apartment.
To warm up the living/dining area, keeping the existing marble floor but visually creating zones within the large living/dining area without hindering the flow, a dark timber custom-made soffit, continuous with a floor-to-ceiling drinks cabinet zones the dining area, giving it a degree of much-needed warmth.
The various windows with a stupendous 270 degree view needed to be visually tied together. This was done by introducing a continuous sheer [drape] which also doubled up as a sound-absorbing material along 2 of the 4 walls of the space.
A very large sofa was required to fill up the space correctly, also required for the size of the young family.
Services were integrated within the units and soffits, while a customized design in the corner between the kitchen and the living room took into consideration the viewpoints from the main areas to create a pantry without hindering the flow or views. A strategically placed floor-to-ceiling mirror doubles up the space and extends the view to the inner parts of the apartment.
The daughter’s bedroom was a small challenge in itself, and a fun task, where we wanted to achieve the perception of a cozy niche with its own enclosed reading nook [for reading fairy tales], behind see-through curtains and a custom-ordered wall print sporting the girl’s favorite colors.
The sons’ bedroom had double the requirements in terms of space needed: more wardrobe, more homework desk space, a tv/play station area… “We combined a raised platform area between the boys’ beds to become an area with cushions where the kids can lay down and play, and face a hidden screen behind the homework desk’s sliding back panel for their play station”. The color of the homework desk was chosen in relation to the boys’ ages. A more masculine material palette was chosen for this room, in contrast to the light pastel palette of the girl’s bedroom. Again, this colour can easily be changed over time for a more mature look.
PROJECT DATA:
St. Paul’s Bay, Malta
DESIGN TEAM:
Perit Rebecca Zammit, Perit Daniel Scerri, Elyse Tonna
OTHER CREDITS:
Photography: Tonio Lombardi
Styling : TKS

 John
Coco coir is a versatile and sustainable growing medium that is gaining popularity among gardeners. Made from the fibrous husk of coconuts, it’s an eco-friendly alternative to peat moss and can greatly enhance the quality of your soil. In gardening, it is often utilized in systems like Coco Coir Hydroponic, where it helps create an efficient water and nutrient delivery system.
What is Coco Coir?
Coco coir is a natural fiber extracted from coconut husks. It has a neutral pH, excellent water retention, and is reusable, making it a favorite among gardeners who prefer organic and sustainable practices. It is available in different forms such as blocks, bricks, or loose coir, each requiring some preparation before use in gardening.
Benefits of Using Coco Coir in Gardening
Coco coir offers several advantages for gardening. Here are the benefits of using coco coir in gardening:
Holds up to 10 times its weight in water, ensuring plants have consistent moisture.
Promotes oxygen flow to plant roots, leading to healthier root systems.
Coco coir is a renewable and eco-friendly alternative to peat moss.
It can be washed, rehydrated, and reused, reducing waste.
Naturally pH neutral, making it suitable for various plants without major adjustments.
Enhances the texture and moisture retention of garden soil.
How to Prepare Coco Coir for Planting
Preparing coco coir for planting involves a few essential steps. First, you need to hydrate the coir block, as it typically comes in a compressed form. Place the block in a large container and add warm water, allowing the block to expand and absorb the water. Once fully expanded, the coir should be fluffed up by breaking it apart with your hands or a tool to ensure it becomes loose and airy. After the coir has been fluffed, it is important to drain any excess water, as overly wet coir can lead to root suffocation. Finally, since coco coir is inert and does not contain nutrients, it’s a good idea to add organic compost or liquid fertilizer to enrich the coir before planting.
Do You Need to Soak Coco Coir Before Planting?
Yes, soaking coco coir before planting is necessary. Since it comes in a compressed form, it needs to be broken down and hydrated for proper use. The soaking process allows the coir to expand and release the fibers, making it usable as a growing medium. After soaking, the coir should be fluffed to ensure the water is evenly distributed. Draining any excess water is crucial because overly wet coir may impede plant root health.
How to Prepare Coco Peat for Planting
Coco peat, a fine, powdery form of coco coir, is highly beneficial for seed starting and improving water retention in soil. To prepare coco peat, it first needs to be hydrated, similar to how you prepare coir blocks. Slowly add water to the peat in a container and allow it to absorb and fluff up. Once hydrated, coco peat can be used on its own or mixed with other growing media such as perlite or vermiculite for added aeration and drainage. It is advisable to check the pH level of your final mix, as coco peat generally has a neutral pH, but adjustments may be necessary depending on the plants being grown.
Can You Use Just Coco Coir for Plants?
Yes, coco coir can be used by itself to grow plants, especially in hydroponic systems or as a seed-starting medium. However, because coco coir does not naturally contain nutrients, you will need to provide regular fertilizer to support plant growth. This makes it particularly suitable for plants grown in controlled environments, such as hydroponics, where nutrient solutions can be carefully managed. In traditional soil-based gardening, mixing coco coir with other organic materials like compost is recommended to provide essential nutrients and improve the overall soil structure.
How to Use Coco Coir in Hydroponics
Coco coir is widely used in hydroponic systems due to its water retention and aeration properties. To use coco coir in hydroponics, it first needs to be soaked and hydrated, as discussed earlier. Once the coir is fully prepared, it can be placed in the hydroponic system. Since coco coir does not contain natural nutrients, you will need to supply a balanced nutrient solution tailored for hydroponic plants. Regular monitoring of water and nutrient levels is essential to prevent nutrient imbalances or root rot. One of the benefits of coco coir in hydroponics is its reusability. After completing a growing cycle, the coir can be washed, rehydrated, and used again in future plantings.
Using Coco Coir as a Soil Amendment
Coco coir is also an excellent soil amendment, as it improves the texture and moisture retention of garden soil. To use coco coir in this way, mix loose coir with your existing garden soil at a ratio of one part coco coir to two parts soil. This will help retain moisture without compacting the soil, improving both water drainage and root growth. For optimal results, you can also add organic compost to the mix, ensuring that the nutrient levels are sufficient for plant growth. Coco coir works particularly well in raised beds, where it helps maintain proper soil structure over time.
Advantages of Using Coco Coir Over Peat Moss
While peat moss has been traditionally used as a growing medium, coco coir offers several advantages over it. Coco coir is a renewable resource, as it is a byproduct of coconut processing, while peat moss is harvested from peat bogs that take centuries to regenerate. Coco coir is also more durable, as it can be reused multiple times without breaking down, while peat moss disintegrates after a single use. Another key benefit is its neutral pH, whereas peat moss is more acidic and may require balancing to meet the needs of specific plants.
Conclusion
Coco coir is a highly versatile and sustainable growing medium that benefits both novice and experienced gardeners alike. Whether you are using it for hydroponics, as a soil amendment, or as a standalone medium for growing plants, knowing how to properly prepare and use it is key to maximizing its benefits. By following the steps detailed above, you can improve water retention, aeration, and overall plant health in your garden, all while contributing to eco-friendly gardening practices.
 Daniel Scerri Periti
We were approached with a request to design the furnishings for an existing ‘finished’ apartment. The intention was to move in relatively fast, and the property already had an existing marble floor, kitchen and bathrooms which had to be kept. The property also boasted a fantastic 270 degree view, seen from most of the apartment. The clients had a very important role in the completion of the project. They were very involved during the design process and through various decoration choices. The final design was kept as a rigid guideline when faced with picking out all the different elements.
Once clear of all previous furniture, the space felt cold and bare; so we immediately felt the need for warmth, and raw, natural elements and textures to complement the cold marble floor while visually tying in the design of the whole apartment together.
Since the existing kitchen had a touch of dark walnut stain, we felt this material was one we should add to the palette of materials to contest the stark materials. A raw cement finish was another material we felt would add an interesting contrast and could be used in a variety of ways, from cabinets to walls and ceilings, to tie up the design of various areas of the apartment.
To warm up the living/dining area, keeping the existing marble floor but visually creating zones within the large living/dining area without hindering the flow, a dark timber custom-made soffit, continuous with a floor-to-ceiling drinks cabinet zones the dining area, giving it a degree of much-needed warmth.
The various windows with a stupendous 270 degree view needed to be visually tied together. This was done by introducing a continuous sheer [drape] which also doubled up as a sound-absorbing material along 2 of the 4 walls of the space.
A very large sofa was required to fill up the space correctly, also required for the size of the young family.
Services were integrated within the units and soffits, while a customized design in the corner between the kitchen and the living room took into consideration the viewpoints from the main areas to create a pantry without hindering the flow or views. A strategically placed floor-to-ceiling mirror doubles up the space and extends the view to the inner parts of the apartment.
The daughter’s bedroom was a small challenge in itself, and a fun task, where we wanted to achieve the perception of a cozy niche with its own enclosed reading nook [for reading fairy tales], behind see-through curtains and a custom-ordered wall print sporting the girl’s favorite colors.
The sons’ bedroom had double the requirements in terms of space needed: more wardrobe, more homework desk space, a tv/play station area… “We combined a raised platform area between the boys’ beds to become an area with cushions where the kids can lay down and play, and face a hidden screen behind the homework desk’s sliding back panel for their play station”. The color of the homework desk was chosen in relation to the boys’ ages. A more masculine material palette was chosen for this room, in contrast to the light pastel palette of the girl’s bedroom. Again, this colour can easily be changed over time for a more mature look.
PROJECT DATA:
St. Paul’s Bay, Malta
DESIGN TEAM:
Perit Rebecca Zammit, Perit Daniel Scerri, Elyse Tonna
OTHER CREDITS:
Photography: Tonio Lombardi
Styling : TKS
 Bedding N Bath
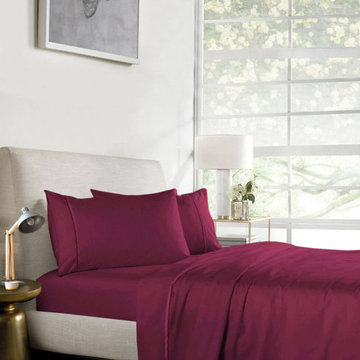
1000 TC Best Bed Sheets
Enjoy a restful and comfortable sleep with our 1000 TC best bed sheets that are made from pure and premium Egyptian cotton sheets set. Our exceptional and sustainable products provide you the phenomenal smoothness and calmness. Mix and match these products with other products of bedding n bath to set your temperament and versatile theme of your bedroom. Its softness, sustainability, breathability, and aesthetic style in modern living make it all year round. Available in different gorgeous colors to make your bed setting truly unique. It conjures a classy look to the bedroom while maintaining the coziness in your bedroom. The smooth cotton-rich fabric absorbs all the moisture for a cool and comfortable sleep on your hot summer night.
Thread Count :
Our products are made from higher thread count to give you a long-lasting and durable effect. The more thread count makes it more contented and easy-going.
wash-resistant:
To avoid diminution and destruction, we made our products with high-quality thread that does not become fade and boring over time. Instead, you enjoy our product with long-lasting fabric and unique stylings.
Enjoy the blissful and classic sleepy night as in five-star hotels with our sheet sets. Your findings of better sheet sets now end, because we provide you with the sheets that have soft and prosperous touch, we can help you out for an unspoiled match. Just indulge and cuddle up yourself with our premium quality best bed sheets.
Crafted from sustainable and durable 100% pure Egyptian cotton with the highest thread count of 500 and 1000 TC promises you to have the ideal and next-level comfort sleep sheets set. As comfort comes first in the bedroom, our sheet sets are welcoming, durable, breathable, long-lasting and have high resilience against daily wear and tear.
We at bedding n bath offered sheet sets in different stylings like we offered plain sheet sets, printed sheet sets, flannelette printed sheet sets, and flannelette plain sheet sets in different thread count. We deliver the sheet sets in varied colors and printed designs to make your bedroom look elegant and unique. Do visit our website to make an order online and you can also visit our shops for your comfort. Mix and match them with other bedroom essentials for a complete look. We also offered them in different bed size ranges. For your convenience, we include fitted sheets, flat sheets, and two matching pillowcases as well.
“For your aesthetic bedroom, pick one of them. Have a happy shopping.”
 Bedding N Bath
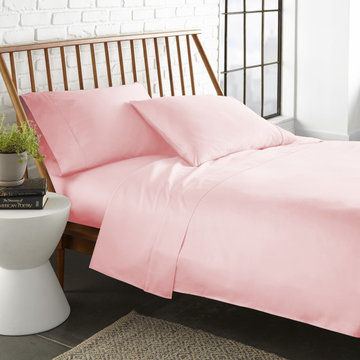
1000 TC sheet set
Enjoy a restful and comfortable sleep with our 1000 TC king bed sheet set that is made from pure and premium Egyptian cotton. Our exceptional and sustainable products provide you the phenomenal smoothness and calmness. Mix and match these products with other products of bedding n bath to set your temperament and versatile theme of your bedroom. Its softness, sustainability, breathability, and aesthetic style in modern living make it all year round. Available in different gorgeous colors to make your bed setting truly unique. It conjures a classy look to the bedroom while maintaining the coziness in your bedroom. The smooth cotton-rich fabric absorbs all the moisture for a cool and comfortable sleep on your hot summer night.
Thread Count:
Our products are made from higher thread count to give you a long-lasting and durable effect. The more thread count makes it more contented and easy-going.
Wash resistant:
To avoid diminution and destruction, we made our products with high-quality thread that does not become fade and boring over time. Instead, you enjoy our product with long-lasting fabric and unique stylings.
Enjoy the blissful and classic sleepy night as in five-star hotels with our queen bed sheet. Your findings of better sheet sets now end, because we provide you with the sheets that have soft and prosperous touch, we can help you out for an unspoiled match. Just indulge and cuddle up yourself with our premium quality sheets.
Crafted from sustainable and durable 100% pure Egyptian cotton with the highest thread count of 500 and 1000 TC promises you to have the ideal and next-level comfort sleep. As comfort comes first in the bedroom, our sheet sets are welcoming, durable, breathable, long-lasting and have high resilience against daily wear and tear.
We at bedding n bath offered sheet sets in different stylings like we offered plain sheet sets, printed sheet sets, flannelette printed sheet sets, and flannelette plain sheet sets in different thread count. We deliver the sheet sets in varied colors and printed designs to make your bedroom look elegant and unique. Do visit our website to make an order online and you can also visit our shops for your comfort. Mix and match them with other bedroom essentials for a complete look. We also offered them in different bed size ranges. For your convenience, we include fitted sheets, flat sheets, and two matching pillowcases as well.
“For your aesthetic bedroom, pick one of them. Have a happy shopping.”
 Hallmark Floors
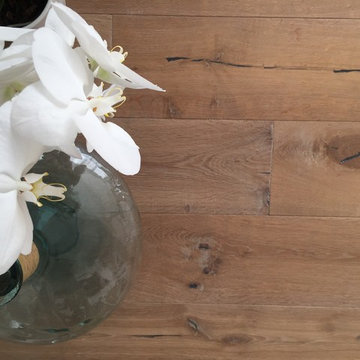
This contemporary modern design is showcased by Hallmark Floors Alta Vista, Malibu flooring. Sharp metal contrasts with soft upholstered seating invites you into this attractive Dining Room.
A return to vintage European Design, the Alta Vista Collection is crafted out of genuine French White Oak, a premier hardwood. For centuries this wood has been used for everything from flooring to shipbuilding because of its stability. Alta Vista boasts generous widths and lengths that can be used in a herringbone pattern.
Visit Hallmark Floors to view our entire flooring collection library. https://hallmarkfloors.com/hallmark-hardwoods/alta-vista-hardwood-collection/
 Daniel Scerri Periti
We were approached with a request to design the furnishings for an existing ‘finished’ apartment. The intention was to move in relatively fast, and the property already had an existing marble floor, kitchen and bathrooms which had to be kept. The property also boasted a fantastic 270 degree view, seen from most of the apartment. The clients had a very important role in the completion of the project. They were very involved during the design process and through various decoration choices. The final design was kept as a rigid guideline when faced with picking out all the different elements.
Once clear of all previous furniture, the space felt cold and bare; so we immediately felt the need for warmth, and raw, natural elements and textures to complement the cold marble floor while visually tying in the design of the whole apartment together.
Since the existing kitchen had a touch of dark walnut stain, we felt this material was one we should add to the palette of materials to contest the stark materials. A raw cement finish was another material we felt would add an interesting contrast and could be used in a variety of ways, from cabinets to walls and ceilings, to tie up the design of various areas of the apartment.
To warm up the living/dining area, keeping the existing marble floor but visually creating zones within the large living/dining area without hindering the flow, a dark timber custom-made soffit, continuous with a floor-to-ceiling drinks cabinet zones the dining area, giving it a degree of much-needed warmth.
The various windows with a stupendous 270 degree view needed to be visually tied together. This was done by introducing a continuous sheer [drape] which also doubled up as a sound-absorbing material along 2 of the 4 walls of the space.
A very large sofa was required to fill up the space correctly, also required for the size of the young family.
Services were integrated within the units and soffits, while a customized design in the corner between the kitchen and the living room took into consideration the viewpoints from the main areas to create a pantry without hindering the flow or views. A strategically placed floor-to-ceiling mirror doubles up the space and extends the view to the inner parts of the apartment.
The daughter’s bedroom was a small challenge in itself, and a fun task, where we wanted to achieve the perception of a cozy niche with its own enclosed reading nook [for reading fairy tales], behind see-through curtains and a custom-ordered wall print sporting the girl’s favorite colors.
The sons’ bedroom had double the requirements in terms of space needed: more wardrobe, more homework desk space, a tv/play station area… “We combined a raised platform area between the boys’ beds to become an area with cushions where the kids can lay down and play, and face a hidden screen behind the homework desk’s sliding back panel for their play station”. The color of the homework desk was chosen in relation to the boys’ ages. A more masculine material palette was chosen for this room, in contrast to the light pastel palette of the girl’s bedroom. Again, this colour can easily be changed over time for a more mature look.
PROJECT DATA:
St. Paul’s Bay, Malta
DESIGN TEAM:
Perit Rebecca Zammit, Perit Daniel Scerri, Elyse Tonna
OTHER CREDITS:
Photography: Tonio Lombardi
Styling : TKS

 Victor Mulbauer
New Installation of Red Oak Wood, 3 1/4 in width. White-washed Bona Stain was used, Bona Finish, as well as Bona Traffic HD.
**This photo is of the Red Oak Wood (3 1/4 inch) prior to the application of the white-washed Bona Stain.

 Bridgewater
The new owners were looking forward to living in their new home with an open floor plan, tall vaulted ceilings, and great views. It featured a large Great Room with two big French Doors separating the Dining Room from the Master Bedroom.
But after only a few months they identified a major design flaw: Each of the French Doors had ten glass windows with two large windows above each door. (Check out our before and after designs, traffic flow diagrams and photos of this project.) Glass windows and doors allowed sound and light from guests or the TV in the great room to easily sneak into the bedroom. With unique work and sleep schedules (he’s a pilot, she’s a registered nurse) this design wasn’t working.
Then there was a traffic flow design flaw: The Master Bedroom had a second entrance from a hallway. To get into the bedroom from the hallway you needed to walk down another claustrophobic hallway.
To get from the Master Bedroom to the Master Bath begin at the most remote corner of the bedroom and down a hallway between two closets. Once inside the bath, a huge triangular Jacuzzi dominating the space.
So, from a privacy and traffic flow perspective, this home had some major design issues.
When Craig Weber first met with the owners, he listened to their ideas and concerns. The owners trusted Craig to come up with the most efficient and most effective solution to this design dilemma. He offered a solution that resolved the bed-bath traffic flow problem, offered some bedroom room privacy, and updated the bath.
First, the two French Doors and windows were removed. A new wall was built with sound-absorbing materials, making the Great Room and Dining Room more comfortable spaces for entertaining while creating the bedroom privacy the owners craved.
Solving the Bedroom/Bath traffic flow problem began with removing the two existing closets. The bath door was relocated next to the hall entrance, and then a new walk-in closet was added adjacent to the hallway entrance. The solution offered easy access to and from the bath, closet and hallway without a hint of claustrophobia.
The Master Bath underwent a major transformation designed for convenience and comfort – especially during long, cold Minnesota winters.
Most everything from the former bath was torn out, beginning with the giant Jacuzzi.
A new bathtub that is wider and deeper than the standard size was installed with brushed Nickel fixtures. It’s the perfect place to relax with a glass of wine and candles.
Warm floors are a Minnesota “must have.” The bath’s new ceramic floor features in-floor electric heat. Getting in and out of the tub is easy and comfortable.
The new walk-in shower again features in-floor heating and a place to sit. The most interesting feature of this shower may the custom ceramic tile installed with unique patterns.
A new vanity Cambria Bradshaw countertops features two under-hung ceramic sinks with matching brushed Nickel fixtures.
Tall ceilings and three glass windows near the ceiling flood the room with natural light. A new energy-efficient window frames an ornamental stained glass window created by the owner’s father – a great personal touch.
A quiet place to sleep. A private dining room for entertaining. A Master Bath to die for. And easy traffic flow. The owners couldn’t have been more delighted with the outcome. And Lilly, their cat, loves it too.

 T.A. French - Custom Builder
Example of a mid-sized transitional dark wood floor and brown floor double front door design in Austin with gray walls and a black front door

 All Marble Tiles
Achieve a Royalty Look with Calacatta Gold Tiles
We all have that dream home we want to have. Better yet, some of us dream of a fantastic renovation of our homes; transforms them into glossy nests we can always be glad to perch in. For those of us who are already on the way to the dream house, you probably are shopping for material to use. So how about we introduce you to the good old Calacatta Gold marble?
If you are asking what that is, we can say it’s a unique way of inspiring royalty to your home using tiles. Calacatta Gold is a special stone tile mined in the hearts of Italy, on the Appian Mountains. Ever since it was discovered, it has been heavily used as a floor tile as well as wall tile, creating remarkable artistic visuals with a touch of natural gold in it. Calacatta gold tile also has one unique trait you won’t notice in most tiles; you can easily mix it with other slab colors, specifically gold extra, Calacatta Borghini, Crema and Super Extra.
Calacatta gold is also one of the few tiles with a unique pencil vein detail centering the white hue background and grey veins on the tile as well. This is the perfect choice for artistic walls and floors but be sure to use the right slab colors if you want to bring in more colors; if the slab and tile don’t match in color tones then it may affect the overall look of your walls/floors.
There are plenty of places in the house you can experiment with the pristine Calacatta gold tile. How about the living room wall that is a background for your TV and home theater system? Calacatta wall tile will create a covetable golden hue that will always shine before you. Moreover, you will definitely fall in love with your walls in the morning, when a streak of sunlight illuminates the golden yellows.
Installing the beautiful Calacatta gold tile is a pretty easy job as well. However you just need to be careful to use white thinset instead of grey. White thinsets will absorb the trowel lines whereas grey may leave behind ugly marks which may taint the exquisite nature of the tiles. If you also want your Calacatta floor tile or wall tile to last longer make sure it is properly sealed with grout.
You still have that dream home in mind? We already have you covered on the best tiles to you use. Just think Calacatta gold tile all the way, all your friends will definitely take selfies beside your shiny golden walls.
http://AllMarbleTiles.com
 All Marble Tiles
Achieve a Royalty Look with Calacatta Gold Tiles
We all have that dream home we want to have. Better yet, some of us dream of a fantastic renovation of our homes; transforms them into glossy nests we can always be glad to perch in. For those of us who are already on the way to the dream house, you probably are shopping for material to use. So how about we introduce you to the good old Calacatta Gold marble?
If you are asking what that is, we can say it’s a unique way of inspiring royalty to your home using tiles. Calacatta Gold is a special stone tile mined in the hearts of Italy, on the Appian Mountains. Ever since it was discovered, it has been heavily used as a floor tile as well as wall tile, creating remarkable artistic visuals with a touch of natural gold in it. Calacatta gold tile also has one unique trait you won’t notice in most tiles; you can easily mix it with other slab colors, specifically gold extra, Calacatta Borghini, Crema and Super Extra.
Calacatta gold is also one of the few tiles with a unique pencil vein detail centering the white hue background and grey veins on the tile as well. This is the perfect choice for artistic walls and floors but be sure to use the right slab colors if you want to bring in more colors; if the slab and tile don’t match in color tones then it may affect the overall look of your walls/floors.
There are plenty of places in the house you can experiment with the pristine Calacatta gold tile. How about the living room wall that is a background for your TV and home theater system? Calacatta wall tile will create a covetable golden hue that will always shine before you. Moreover, you will definitely fall in love with your walls in the morning, when a streak of sunlight illuminates the golden yellows.
Installing the beautiful Calacatta gold tile is a pretty easy job as well. However you just need to be careful to use white thinset instead of grey. White thinsets will absorb the trowel lines whereas grey may leave behind ugly marks which may taint the exquisite nature of the tiles. If you also want your Calacatta floor tile or wall tile to last longer make sure it is properly sealed with grout.
You still have that dream home in mind? We already have you covered on the best tiles to you use. Just think Calacatta gold tile all the way, all your friends will definitely take selfies beside your shiny golden walls.
http://AllMarbleTiles.com
 Bridgewater
The new owners were looking forward to living in their new home with an open floor plan, tall vaulted ceilings, and great views. It featured a large Great Room with two big French Doors separating the Dining Room from the Master Bedroom.
But after only a few months they identified a major design flaw: Each of the French Doors had ten glass windows with two large windows above each door. (Check out our before and after designs, traffic flow diagrams and photos of this project.) Glass windows and doors allowed sound and light from guests or the TV in the great room to easily sneak into the bedroom. With unique work and sleep schedules (he’s a pilot, she’s a registered nurse) this design wasn’t working.
Then there was a traffic flow design flaw: The Master Bedroom had a second entrance from a hallway. To get into the bedroom from the hallway you needed to walk down another claustrophobic hallway.
To get from the Master Bedroom to the Master Bath begin at the most remote corner of the bedroom and down a hallway between two closets. Once inside the bath, a huge triangular Jacuzzi dominating the space.
So, from a privacy and traffic flow perspective, this home had some major design issues.
When Craig Weber first met with the owners, he listened to their ideas and concerns. The owners trusted Craig to come up with the most efficient and most effective solution to this design dilemma. He offered a solution that resolved the bed-bath traffic flow problem, offered some bedroom room privacy, and updated the bath.
First, the two French Doors and windows were removed. A new wall was built with sound-absorbing materials, making the Great Room and Dining Room more comfortable spaces for entertaining while creating the bedroom privacy the owners craved.
Solving the Bedroom/Bath traffic flow problem began with removing the two existing closets. The bath door was relocated next to the hall entrance, and then a new walk-in closet was added adjacent to the hallway entrance. The solution offered easy access to and from the bath, closet and hallway without a hint of claustrophobia.
The Master Bath underwent a major transformation designed for convenience and comfort – especially during long, cold Minnesota winters.
Most everything from the former bath was torn out, beginning with the giant Jacuzzi.
A new bathtub that is wider and deeper than the standard size was installed with brushed Nickel fixtures. It’s the perfect place to relax with a glass of wine and candles.
Warm floors are a Minnesota “must have.” The bath’s new ceramic floor features in-floor electric heat. Getting in and out of the tub is easy and comfortable.
The new walk-in shower again features in-floor heating and a place to sit. The most interesting feature of this shower may the custom ceramic tile installed with unique patterns.
A new vanity Cambria Bradshaw countertops features two under-hung ceramic sinks with matching brushed Nickel fixtures.
Tall ceilings and three glass windows near the ceiling flood the room with natural light. A new energy-efficient window frames an ornamental stained glass window created by the owner’s father – a great personal touch.
A quiet place to sleep. A private dining room for entertaining. A Master Bath to die for. And easy traffic flow. The owners couldn’t have been more delighted with the outcome. And Lilly, their cat, loves it too.
 Bridgewater
The new owners were looking forward to living in their new home with an open floor plan, tall vaulted ceilings, and great views. It featured a large Great Room with two big French Doors separating the Dining Room from the Master Bedroom.
But after only a few months they identified a major design flaw: Each of the French Doors had ten glass windows with two large windows above each door. (Check out our before and after designs, traffic flow diagrams and photos of this project.) Glass windows and doors allowed sound and light from guests or the TV in the great room to easily sneak into the bedroom. With unique work and sleep schedules (he’s a pilot, she’s a registered nurse) this design wasn’t working.
Then there was a traffic flow design flaw: The Master Bedroom had a second entrance from a hallway. To get into the bedroom from the hallway you needed to walk down another claustrophobic hallway.
To get from the Master Bedroom to the Master Bath begin at the most remote corner of the bedroom and down a hallway between two closets. Once inside the bath, a huge triangular Jacuzzi dominating the space.
So, from a privacy and traffic flow perspective, this home had some major design issues.
When Craig Weber first met with the owners, he listened to their ideas and concerns. The owners trusted Craig to come up with the most efficient and most effective solution to this design dilemma. He offered a solution that resolved the bed-bath traffic flow problem, offered some bedroom room privacy, and updated the bath.
First, the two French Doors and windows were removed. A new wall was built with sound-absorbing materials, making the Great Room and Dining Room more comfortable spaces for entertaining while creating the bedroom privacy the owners craved.
Solving the Bedroom/Bath traffic flow problem began with removing the two existing closets. The bath door was relocated next to the hall entrance, and then a new walk-in closet was added adjacent to the hallway entrance. The solution offered easy access to and from the bath, closet and hallway without a hint of claustrophobia.
The Master Bath underwent a major transformation designed for convenience and comfort – especially during long, cold Minnesota winters.
Most everything from the former bath was torn out, beginning with the giant Jacuzzi.
A new bathtub that is wider and deeper than the standard size was installed with brushed Nickel fixtures. It’s the perfect place to relax with a glass of wine and candles.
Warm floors are a Minnesota “must have.” The bath’s new ceramic floor features in-floor electric heat. Getting in and out of the tub is easy and comfortable.
The new walk-in shower again features in-floor heating and a place to sit. The most interesting feature of this shower may the custom ceramic tile installed with unique patterns.
A new vanity Cambria Bradshaw countertops features two under-hung ceramic sinks with matching brushed Nickel fixtures.
Tall ceilings and three glass windows near the ceiling flood the room with natural light. A new energy-efficient window frames an ornamental stained glass window created by the owner’s father – a great personal touch.
A quiet place to sleep. A private dining room for entertaining. A Master Bath to die for. And easy traffic flow. The owners couldn’t have been more delighted with the outcome. And Lilly, their cat, loves it too.


123