
Search results for "Accepting" in Home Design Ideas

 Urban Oasis Design & Construction LLC
This new construction home was in need of a complete landscape design and installation. All details were considered to create intimate spaces as well as a sweeping backyard landscape to compliment the views from the home.
The home sits on two lots which allowed it to be built at the desired size.
The front yard includes a modern entry courtyard featuring bluestone, decorative gravel and granite sculpture - as well as decorative concrete planters.
The backyard has several levels. The upper level is an expanse of lawn with hedging. The middle tier planting softens the poured concrete wall. A steep slope descends to the street below. The homeowners wanted to create access from parking below to the home above, so a series of pavers and granite risers was designed to create a comfortable pathway that also forms the focal point of the backyard. Ecoturf lawn was installed on the slope to minimize the need for water and mowing. Concrete edging deliniates the lawn from the beds where a mixture of evergreen and deciduous plants create year-round interest.
The overall result includes modern details and some sweeping curves that draw the eye up to the home from the street below
William Wright Photography
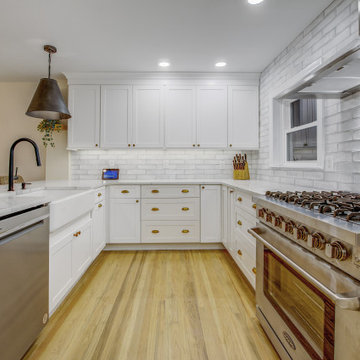
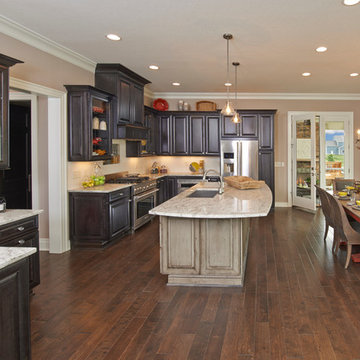
 Main Line Kitchen Design
 has a different business model than other kitchen showrooms, designers, and cabinetry dealers. The difference helps us to do five important things better than our competitors.
The kitchens we sell are better designed and our designers are more experienced. This is because we insist on showing customers designs we recommend, BEFORE, we do a design they request. This way, final designs tend to be more collaborative and professional. Our designers are more experienced because they are better paid and design with more cabinet brands than at other dealers.
Our pricing for cabinets is less than other cabinet dealers. This is because we do not have a showroom open to the public, and we require a small deposit and a screening before we accept customers. This helps our designers spend their time more effectively. And, it eliminates 80% of the overhead kitchen showrooms spend on staffing, larger displays, and on a curbside location.
We carry more brands of cabinetry than other dealers. This is possible because we display one cabinet for each brand we sell. Through glass countertops clients can examine a brands construction quality, and we display the door styles and finishes of our brands. Instead of the larger displays customers see in traditional showrooms, our customers can view 5 million kitchens on Houzz.com, or the hundreds of our kitchen renovations we show on Houzz, our web site, and in framed photos on the walls of our office building.
Kitchen construction is often better organized and generally costs less. This is because we recommend general contractors free of charge. They supervise construction from scheduling to completion. This eliminates a middleman, reduces delays, and eliminates the fees that almost all showrooms and home centers charge their customers. We are also happy to work with any contractor a customer finds on their own. If we haven’t worked with that contractor before they may need more of our direction, but both companies can benefit from working together and possibly referring each other in the future.
Less problems arise, and if they do, they are handled more quickly. This is because every kitchen we sell is reviewed by at least 3 kitchen designers during the ordering process. Our Operations Manager Ed Sossich checks orders and schedules all warehouse and home deliveries. Our delivery manager Mark Mitten supervises every delivery and checks in each cabinet and part. And our CRM system, Monday, prompts each person responsible for each phase of a customer’s kitchen with automated alerts. This keeps things moving, even during supply chain disruptions, and ensures no step is overlooked.
Main Line Kitchen Design’s company slogan is “The world of kitchen design is changing . . . “. We pride ourselves on being innovative in everything we do. From our web site and how we advertise, to the gift we send each customer upon the completion of their kitchen.
Our business model helps us receive 100’s of 5-star reviews, and makes our kitchen projects more enjoyable for everyone.
We look forward to working with you.

 Susan Tully Interiors
We love when our clients trust us enough to do a second project for them. In the case of this couple looking for a NYC Pied-a-Terre – this was our 4th! After designing their homes in Bernardsville, NJ and San Diego, CA and a home for their daughter in Orange County, CA, we were called up for duty on the search for a NYC apartment which would accommodate this couple with room enough for their four children as well!
What we cherish most about working with clients is the trust that develops over time. In this case, not only were we asked to come on board for design and project coordination, but we also helped with the actual apartment selection decision between locations in TriBeCa, Upper West Side and the West Village. The TriBeCa building didn’t have enough services in the building; the Upper West Side neighborhood was too busy and impersonal; and, the West Village apartment was just right.
Our work on this apartment was to oversee the design and build-out of the combination of a 3,000 square foot 3-bedroom unit with a 1,000 square foot 1-bedroom unit. We reorganized the space to accommodate this family of 6. The living room in the 1 bedroom became the media room; the kitchen became a bar; and the bedroom became a guest suite.
The most amazing feature of this apartment are its views – uptown to the Empire State Building, downtown to the Statue of Liberty and west for the most vibrant sunsets. We opened up the space to create view lines through the apartment all the way back into the home office.
Customizing New York City apartments takes creativity and patience. In order to install recessed lighting, Ray devised a floating ceiling situated below the existing concrete ceiling to accept the wiring and housing.
In the design of the space, we wanted to create a flow and continuity between the public spaces. To do this, we designed walnut panels which run from the center hall through the media room into the office and on to the sitting room. The richness of the wood helps ground the space and draws your eye to the lightness of the gorgeous views. For additional light capture, we designed a 9 foot by 10 foot metal and mirror wall treatment in the living room. The purpose is to catch the light and reflect it back into the living space creating expansiveness and brightness.
Adding unique and meaningful art pieces is the critical final stage of design. For the master bedroom, we commissioned Ira Lohan, a Santa Fe, NM artist we know, to create a totem with glass feathers. This piece was inspired by folklore from his Native American roots which says home is defined by where an eagle’s feathers land. Ira drove this piece across the country and delivered and installed it himself!!
Find the right local pro for your project
 Tile Doctor Ltd
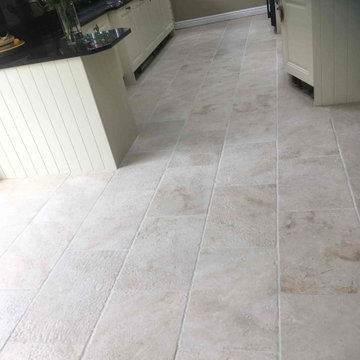
This client from Nantwich had a beautiful Travertine tiled floor installed in their very large kitchen and utility area. Realising that their tiles didn’t look as good as when they were installed, they got in touch to ask if I could clean and re-seal the tiles and grouting.
I went over to survey the floor and could see the grout had darkened (it was originally white) and the travertine was trapping dirt in the natural pits of the stone. I conducted a test clean on the grout and Travertine which responded well, the client was impressed, and I was asked to do the whole floor. Happy with my quote for restoring the tile and grout we scheduled a date to do the work.
Nantwich is a medieval market town in Cheshire, well known for its Tudor and Georgian architecture. It has one of the highest concentrations of listed buildings in England and many of these properties have very old floors.
We scheduled in a date for the work, and I began by cleaning the floor with a strong solution of Tile Doctor Remove and Go worked into the grout and pitting with hand brushes. I then used a wire brush on the grout to get it really clean. The soiled solution was rinsed off with water and extracted with a wet vacuum.
Once done the Travertine was burnished using a series of Tile Doctor burnishing pads from 400 through to 1500-grit attached to the rotary machine, rinsing with water in between to remove the soiling. The pads are encrusted with diamond and after being worked over each pad three times do an amazing job of removing ingrained dirt and bringing up the polish on the stone.
The floor needs to be dry before I can apply the sealer so once the burnishing was done, I gave it a final finish and extracted as much moisture as possible with the wet vacuum.
The Travertine was left to dry off overnight and I returned the next day to apply a sealer, first checking the floor was dry with a damp meter. The readings were acceptable, so I was able to get on with the sealing. My client had requested a natural finish, so I had recommended Tile Doctor Ultra-Seal which is almost invisible sealer that provides protection but doesn’t change the look of the stone. Only a couple of coats are required and being an impregnating sealer, it works by soaking into stone and occupying the pores so dirt can’t become ingrained there.
Once the sealer had dried the floor looked so much cleaner and I had a very happy customer who left the following feedback:
“Kamilla has totally transformed our tumbled travertine kitchen floor. It looks like new again, we are so pleased. Kamilla explained the whole process and was a pleasure to deal with. We are delighted with the end result, Kamilla worked so hard, would highly recommend.”
For aftercare cleaning and maintenance, I recommended they use Tile Doctor Stone Soap which is pH neutral and mild enough to use every day. You must be careful when choosing a cleaner for sealed floors as many products are too strong and will reduce the lifespan of the sealer.
Kamila Logonzy
East Cheshire Tile Doctor
 Tile Doctor Ltd
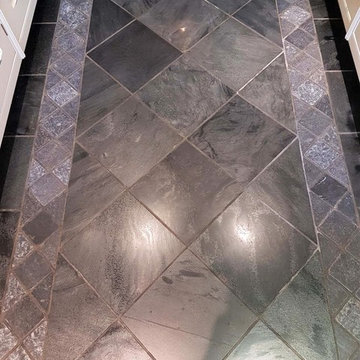
I was recently asked to survey an unusual stone floor at a house in in Harrogate comprising of Slate inlaid with Granite. The client advised that it had not been cleaned properly for 20 years and wanted it renovating! It was now definitely overdue a deep clean and professional attention. Fortunately, having worked on these floors for many years I knew I could make a substantial impact and transform its appearance. Fossilized slate is a beautiful stone when cleaned and sealed correctly.
The owner confessed they had actually been sealing the floor every two years but without a deep clean first, so they were effectively sealing in the dirt each time. I discussed with them the process I would use to clean and re-seal the floor and we agreed a price to carry to out the work.
To remove the layers of old sealer and dirt used a set of Tile Doctor Diamond Burnishing pads. The pads are attached to a rotary floor machine starting with the coarse 400-grit pad which was lubricated with a dilution of Tile Doctor Remove and Go to help strip the floor of dirt and layers of sealer. After rinsing and extracting the soil I worked through the different grades of pads in sequence finishing with the 1500-grit and this time using just water for lubrication.
A set of diamond handheld burnishing blocks were then used to clean up the edges and corners where the large 17” pads struggle to reach. This ensures all areas are treated and free of dirt and old sealer.
The floor was then rinsed and extracted again to remove the remaining soil. I find a wet vacuum is an invaluable tool for this. The floor was then left to dry out overnight ready for sealing the next day.
I returned the next day to seal the floor, first checking with a damp meter that the floor was dry, and the moisture reading was below the acceptable level. These results were fine, so I had a green light to continue and seal the stone.
The customer wanted a shine on the floor so rather than apply a satin sealer which I felt wouldn’t adhere to the stone properly I decided to polish the floor further with a the last of the four burnishing pads which is a very fine 3000-grit pad. You don’t need to use a lot of water with this last pad just a small amount sprayed onto the floor using a technique we refer to as a ‘Spray Burnish’.
To seal the floor, two coats of Tile Doctor Colour Grow were applied. This is an impregnating matt sealer which intensifies the natural colours of this beautiful stone and provides long lasting durable protection.
Even I was impressed with the finished result but more importantly the client was over the moon. To keep the floor looking its best I recommended they use Tile Doctor Stone Soap which is pH neutral. You should always read the label in detail when choosing a floor cleaning product as many are too strong and not recommended for sealed stone surfaces as they will prematurely erode the sealer.
Nigel Stoker
North West Yorkshire Tile Doctor

 Progressive Design Build
The Challenge
This beautiful waterfront home was begging for an update. Our clients wanted a contemporary design with modern finishes. They craved improved functionality in the kitchen, hardwood flooring in the living areas, and a spacious walk-in closet in the master bathroom. With two children in school, our clients also needed the project completed during their summer vacation – leaving a slim 90 days for the entire remodel. Could we do it? …Challenge accepted!
Our Solution
With their active summer travel schedule, our clients elected to vacate their home for the duration of the project. This was ideal for the intrusive nature of the scope of work.
In preparation, our design team created a project plan to suit our client’s needs. With such a clear timeline, we were able to select and order long-lead items in plenty of time for the project start date.
In the kitchen, we rearranged the layout to provide superior ventilation for the cooktop on the exterior wall. We added two large storage cabinets with glass doors, accented by a sleek mosaic backsplash of glass tile. We also incorporated a large contemporary waterfall island into the room. With seating at one end, the island provides both increased functionality and an eye-catching focal point for the center of the room. On the interior wall of the kitchen, we maximized storage with a wall of built-in cabinetry – complete with pullout pantry cabinets, a double oven, and a large stainless refrigerator.
Our clients wisely chose rich, dark-colored wood flooring to add warmth to the contemporary design. After installing the flooring in the kitchen, we brought it into the main living areas as well. In the great room, we wrapped the existing gas fireplace in a neutral stack stone. The effect of the stone on the media and window wall is breathtaking.
In the master bathroom, we expanded the closet by pushing the wall back into the adjacent pass-through hallway. The new walk-in closet now includes an impressive closet organization system.
Returning to the master bathroom, we removed the single vanity and repositioned the toilet, allowing for a new, curb-less glass shower and a his-and-hers vanity. The entire vanity and shower wall is finished in white 12×24 porcelain tile. The vertical glass mosaic accent band and backlit floating mirrors add to the clean, modern style. To the left of the master bathroom entry, we even added a matching make-up area.
Finally, we installed a number of elegant enhancements in the remaining rooms. The clients chose a bronze metal relief accent wall as well as some colorful finishes and artwork for the entry and hallway.
Exceptional Results
Our clients were simply thrilled with the final product! Not only did they return from their summer vacation to a gorgeous home remodel, but we concluded the project a full week ahead of schedule. As a result, the family was able to move in sooner than planned, giving them plenty of time to acclimate to the renovated space before their kids returned to school. Ultimately, we provided the outstanding results and customer experience that our clients had been searching for.
“We met with many other contractors leading up to signing with Progressive Design Build. When we met Mike, we finally felt safe. We had heard so many horror stories about contractors! Progressive was the best move we could have made. They made our dream house become a reality. Vernon was in charge of our project and everything went better than we expected. Our project was completed earlier than expected, too. Our questions and concerns were dealt with quickly and professionally, the job site was always clean, and all subs were friendly and professional. We had a wonderful experience with Progressive Design Build. We’re so grateful we found them.” – The Mader Family
 Tile Doctor Ltd
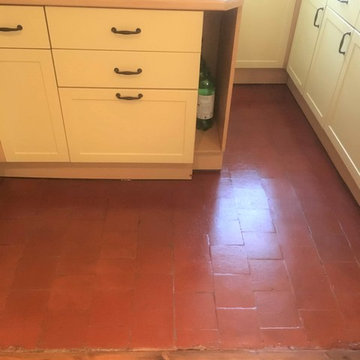
I received a call from this client in Old Marston around two miles north east of the centre of Oxford. They had lifted a lino floor in their kitchen and found an old Quarry Tiled floor underneath and decided to see if they could have it restored.
I went over to survey the floor and could see that the tiles had been covered with a thin layer of levelling screed to ensure the lino didn’t sink into the recesses. I ran some tests to demonstrate how the screed could be removed which worked well and it was apparent that the tiles underneath were intact and could be renovated. I submitted a quotation for removing all the screed, deep cleaning the Quarry tiles and then sealing the tiles to protect them. The client was really pleased that we could restore the floor and the quote was accepted, with a date booked to do the work.
To start the work, I applied undiluted Tile Doctor Grout Clean-up worked in with a small carbide brush attached to a hand-held rotary buffer. The combination of the acid in the Tile Doctor Grout Clean-up combined with the scrubbing action of the brush were effective at removing most of the screed. The small bits of remaining screed were carefully removed by hand, using a floor scraper. The floor was then rinsed with water and the soil removed with a wet vacuum.
For the second phase of the cleaning process I applied Tile Doctor Oxy-Gel which was scrubbed into the floor with a stiff brush rinsing after with water and the soil extracted again using the wet vacuum. After cleaning the floor to remove the dirt I could still see some evidence of the screed on the tiles, so I decided to give the floor an Acid Wash using Tile Doctor Acid Gel which was scrubbed into the floor and rinsed off as before. Tile Doctor Acid Gel is of course an acidic product so once it was removed, I decided to rinse the floor with Tile Doctor Neutral Cleaner to neutralise the pH levels in the floor. The wet vacuum was used again to remove as much moisture from the Quarry tiles as possible before leaving the now clean floor to dry off fully overnight.
I returned to seal this floor the next day. First, I checked the floor was fully dry with the damp meter, it was within the recommended range, so I was ready to complete the sealing process.
The client was not too sure if they wanted a matt or sheen finish, so I first put a coat of Tile Doctor Colour Grow on the floor to show them the matt finish. Colour Grow is an impregnating sealer that enhances natural colour and protects from within by occupying the pores in the tile. After reviewing the floor, they decided it was not for them, so I followed up by applying several coats of Tile Doctor Seal & Go which adds a nice sheen finish and is compatible with Colour Grow.
The combination of sealers worked very well together, and they were very satisfied with the final result and of course that we had been able to restore the Quarry tiles.
Barry Woodward
Oxfordshire Tile Doctor

 Tile Doctor Ltd
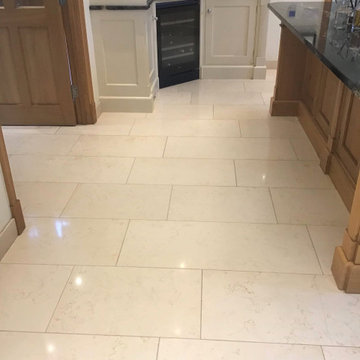
These photos are of a four-year-old Limestone kitchen floor at a property in Boughton that the customer was finding hard to keep clean and maintain a shine. Part of the problem was he owned two dogs and we often warn about the problems of dog urine on sealed tile and stone due to it being high in nitrogen.
On my initial visit I was able to ascertain that the sealer had almost completely worn off, leaving the stone vulnerable to dirt becoming ingrained into the pores of the stone. I come across this problem a lot, in my experience when stone floors are installed by tilers, they generally apply a single coat of sealant which wears off over time, and as discussed earlier can be prematurely degraded by strong chemicals.
My quote to renovate the Limestone floor was accepted and included a deep clean to the stone and grout, stone polish and then re-seal.
I arrived on site on the arranged date and began by scrubbing all the grout lines with Tile Doctor grout brushes and a 3:1 dilution of Tile Doctor Pro-Clean. I then moved on to a small handheld polishing machine to clean around the tile edges using 800 and 1500 grit diamond encrusted burnishing pad to achieve a deep clean.
The process was then repeated throughout the rest of the area using larger 17” burnishing pads fitted to a floor polishing machine. The burnishing pads I used come in a set of four starting with 400-grit and moving up to 800, 1500 and 3000 grit, after each pad is applied the floor is rinsed with water and the soil extracted with a wet vacuum.
It took me much of the day to complete this stage of the renovation and the floor was still damp so once done I left for the day, allowing the floor to dry off overnight.
I returned the following day to complete the final polish using the 3000-grit burnishing pad, this gave a high polished finish which the customer had requested. This last pad is applied dry with only a little water splashed onto the tile, a process we call a spray burnish.
The floor was then sealed with three applications of Tile Doctor Ultra Seal Sealant to protect the newly restored and polished tiles. Ultra-Seal is a penetrating sealer that soaks into those recently cleaned pores in the stone, occupying the space and preventing any dirt from becoming ingrained there. It’s also a natural look sealer so it doesn’t change the colour of the stone in anyway and is almost indetectable once applied.
“Hard work from Philip has left us with a kitchen floor brought back to life – cleaned and sealed in little over 24 hours – brilliant job – Thanks”
Before leaving I gave the customer some tips on maintenance and a complimentary bottle of Tile Doctor Stone Soap to enable him to keep the floor looking its best, this product works well with the sealant we applied and is PH neutral so won’t degrade the new sealer.
Phil Vissian
Northamptonshire Tile Doctor
 Get My Rugs LLC
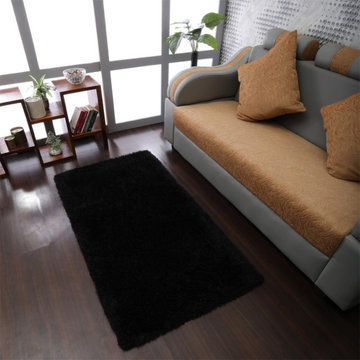
"This polyester shags rug in the shade of black color not just looks ravishing but also offers the toughness to this polyester rug to face the high foot traffic efficiently. This shags rug is handmade which reminds you the bygone era when handicrafts were very much popular.
Product Features:-
Construction: Handmade
Technique: Hand Tufted shag
Shape: Rectangle
Color: Black
Pile: 1.5 inches
Pattern: Solid
Material: Polyester
Weight: 18.16 lbs
Origin of Manufacturing: India
Recommended Use: Indoor
Eco-Friendly: Yes
Shipping: Free Shipping
Handmade by skilled artisans enhancing in-depth color and product durabilitySolid designed and weaved by hand tufted technique.Soft polyester yarn with ultra-plush pile height of 1.5 inches for underfoot comfortSolid area rugs perfect for Living Room, Bedroom, Study Room, Dinning Room, Foyer.Free shipping and quick order dispatch. With quality product we deliver quality services to customers
Weave:- Weaving of a hand tufted shag rug is relatively easier than compared to other weaving techniques. The design is first sketched on a canvas and then material is made into it as per the design. The pile is kept very high to give it a furry look. Hand tufted rugs are very soft on face and are great for underfoot comfort. The rugs are very eye pleasing and the cost is very economical.
Material:- Polyester, an artificial fabric, have gained much popularity as rug weaving material. The polyester material rugs are highly sturdy and have gain acceptance due to its qualities like shine, wear & fade resistance, comfort, non-allergenic, moisture resistance, ease of cleaning, moth-proof, etc.
Pile:- Enjoy the high pile of this rug and place it at high footfall areas in your home, providing great underfoot comfort. This high pile rug is ideal one for the buyers who wants to place it on the flooring for the soft and cozy feel.
Proper Set Up & Care:- Hand Tufted rugs are heavy rugs and fits well with any kind of flooring. Unlike rugs of other weave the hand tufted rugs have a cotton backing which makes it anti-skid. These rugs are very durable if maintained properly.
Floor Protection:- Though hand tufted rugs have cotton backing which makes it anti-skid and harmless to the floor but you can always use a high quality rug pad to provide an extra level for floor protection.
Cleaning Methods:- For hand tufted shag rugs we recommend to go for gentle vacuum cleaning. For any stain, the users can opt for professional dry cleaning method."
 Main Line Kitchen Design
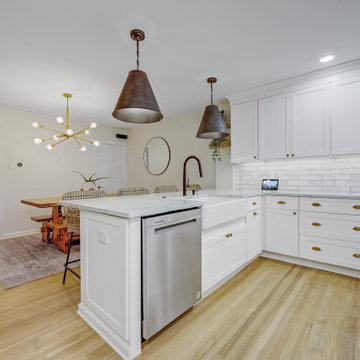
 has a different business model than other kitchen showrooms, designers, and cabinetry dealers. The difference helps us to do five important things better than our competitors.
The kitchens we sell are better designed and our designers are more experienced. This is because we insist on showing customers designs we recommend, BEFORE, we do a design they request. This way, final designs tend to be more collaborative and professional. Our designers are more experienced because they are better paid and design with more cabinet brands than at other dealers.
Our pricing for cabinets is less than other cabinet dealers. This is because we do not have a showroom open to the public, and we require a small deposit and a screening before we accept customers. This helps our designers spend their time more effectively. And, it eliminates 80% of the overhead kitchen showrooms spend on staffing, larger displays, and on a curbside location.
We carry more brands of cabinetry than other dealers. This is possible because we display one cabinet for each brand we sell. Through glass countertops clients can examine a brands construction quality, and we display the door styles and finishes of our brands. Instead of the larger displays customers see in traditional showrooms, our customers can view 5 million kitchens on Houzz.com, or the hundreds of our kitchen renovations we show on Houzz, our web site, and in framed photos on the walls of our office building.
Kitchen construction is often better organized and generally costs less. This is because we recommend general contractors free of charge. They supervise construction from scheduling to completion. This eliminates a middleman, reduces delays, and eliminates the fees that almost all showrooms and home centers charge their customers. We are also happy to work with any contractor a customer finds on their own. If we haven’t worked with that contractor before they may need more of our direction, but both companies can benefit from working together and possibly referring each other in the future.
Less problems arise, and if they do, they are handled more quickly. This is because every kitchen we sell is reviewed by at least 3 kitchen designers during the ordering process. Our Operations Manager Ed Sossich checks orders and schedules all warehouse and home deliveries. Our delivery manager Mark Mitten supervises every delivery and checks in each cabinet and part. And our CRM system, Monday, prompts each person responsible for each phase of a customer’s kitchen with automated alerts. This keeps things moving, even during supply chain disruptions, and ensures no step is overlooked.
Main Line Kitchen Design’s company slogan is “The world of kitchen design is changing . . . “. We pride ourselves on being innovative in everything we do. From our web site and how we advertise, to the gift we send each customer upon the completion of their kitchen.
Our business model helps us receive 100’s of 5-star reviews, and makes our kitchen projects more enjoyable for everyone.
We look forward to working with you.
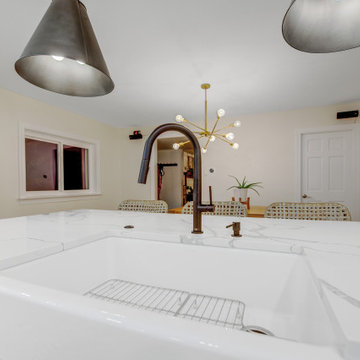 Main Line Kitchen Design
 has a different business model than other kitchen showrooms, designers, and cabinetry dealers. The difference helps us to do five important things better than our competitors.
The kitchens we sell are better designed and our designers are more experienced. This is because we insist on showing customers designs we recommend, BEFORE, we do a design they request. This way, final designs tend to be more collaborative and professional. Our designers are more experienced because they are better paid and design with more cabinet brands than at other dealers.
Our pricing for cabinets is less than other cabinet dealers. This is because we do not have a showroom open to the public, and we require a small deposit and a screening before we accept customers. This helps our designers spend their time more effectively. And, it eliminates 80% of the overhead kitchen showrooms spend on staffing, larger displays, and on a curbside location.
We carry more brands of cabinetry than other dealers. This is possible because we display one cabinet for each brand we sell. Through glass countertops clients can examine a brands construction quality, and we display the door styles and finishes of our brands. Instead of the larger displays customers see in traditional showrooms, our customers can view 5 million kitchens on Houzz.com, or the hundreds of our kitchen renovations we show on Houzz, our web site, and in framed photos on the walls of our office building.
Kitchen construction is often better organized and generally costs less. This is because we recommend general contractors free of charge. They supervise construction from scheduling to completion. This eliminates a middleman, reduces delays, and eliminates the fees that almost all showrooms and home centers charge their customers. We are also happy to work with any contractor a customer finds on their own. If we haven’t worked with that contractor before they may need more of our direction, but both companies can benefit from working together and possibly referring each other in the future.
Less problems arise, and if they do, they are handled more quickly. This is because every kitchen we sell is reviewed by at least 3 kitchen designers during the ordering process. Our Operations Manager Ed Sossich checks orders and schedules all warehouse and home deliveries. Our delivery manager Mark Mitten supervises every delivery and checks in each cabinet and part. And our CRM system, Monday, prompts each person responsible for each phase of a customer’s kitchen with automated alerts. This keeps things moving, even during supply chain disruptions, and ensures no step is overlooked.
Main Line Kitchen Design’s company slogan is “The world of kitchen design is changing . . . “. We pride ourselves on being innovative in everything we do. From our web site and how we advertise, to the gift we send each customer upon the completion of their kitchen.
Our business model helps us receive 100’s of 5-star reviews, and makes our kitchen projects more enjoyable for everyone.
We look forward to working with you.
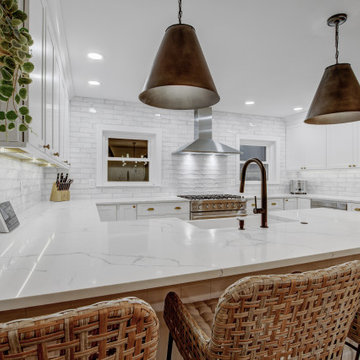 Main Line Kitchen Design
 has a different business model than other kitchen showrooms, designers, and cabinetry dealers. The difference helps us to do five important things better than our competitors.
The kitchens we sell are better designed and our designers are more experienced. This is because we insist on showing customers designs we recommend, BEFORE, we do a design they request. This way, final designs tend to be more collaborative and professional. Our designers are more experienced because they are better paid and design with more cabinet brands than at other dealers.
Our pricing for cabinets is less than other cabinet dealers. This is because we do not have a showroom open to the public, and we require a small deposit and a screening before we accept customers. This helps our designers spend their time more effectively. And, it eliminates 80% of the overhead kitchen showrooms spend on staffing, larger displays, and on a curbside location.
We carry more brands of cabinetry than other dealers. This is possible because we display one cabinet for each brand we sell. Through glass countertops clients can examine a brands construction quality, and we display the door styles and finishes of our brands. Instead of the larger displays customers see in traditional showrooms, our customers can view 5 million kitchens on Houzz.com, or the hundreds of our kitchen renovations we show on Houzz, our web site, and in framed photos on the walls of our office building.
Kitchen construction is often better organized and generally costs less. This is because we recommend general contractors free of charge. They supervise construction from scheduling to completion. This eliminates a middleman, reduces delays, and eliminates the fees that almost all showrooms and home centers charge their customers. We are also happy to work with any contractor a customer finds on their own. If we haven’t worked with that contractor before they may need more of our direction, but both companies can benefit from working together and possibly referring each other in the future.
Less problems arise, and if they do, they are handled more quickly. This is because every kitchen we sell is reviewed by at least 3 kitchen designers during the ordering process. Our Operations Manager Ed Sossich checks orders and schedules all warehouse and home deliveries. Our delivery manager Mark Mitten supervises every delivery and checks in each cabinet and part. And our CRM system, Monday, prompts each person responsible for each phase of a customer’s kitchen with automated alerts. This keeps things moving, even during supply chain disruptions, and ensures no step is overlooked.
Main Line Kitchen Design’s company slogan is “The world of kitchen design is changing . . . “. We pride ourselves on being innovative in everything we do. From our web site and how we advertise, to the gift we send each customer upon the completion of their kitchen.
Our business model helps us receive 100’s of 5-star reviews, and makes our kitchen projects more enjoyable for everyone.
We look forward to working with you.
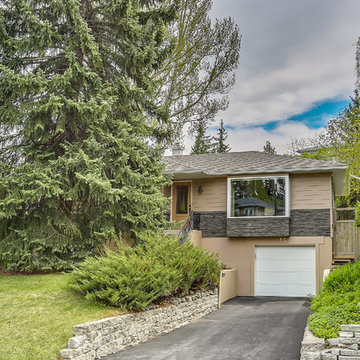
 Steven Hill - Calgary Real Estate
Head To Head Negotiations Gets Results For Happy Sellers:
When I was introduced to Steven Hill, I knew from the minute we met “this was the guy” to represent me. Steven has a very calm, soft approach to his dealing with people, unlike the ego driven who spout their credentials to impress. He listens to understand what the client wants rather than telling them what he wants. He assured me he was confident in his ability to sell my property without over promising and I was skeptical, but boy did he deliver on that promise, and some.
Let’s start with the brochures. Sotheby’s brochures blow everyone else out of the water. A piece of paper, with black and white photos, gets lost in the bottom of a purse, or garbage bin, but a Sotheby’s brochure is a piece of art. Steven’s photographer created fabulous photos that took my breath away when the brochure arrived. My house looked beyond amazing yet true to the property. This alone sets Sotheby’s far above the rest by doing more than photocopying a sheet of paper to leave an impression. Very impressed.
Steven and I corresponded everyday and, after 5 days on the market, we accepted a conditional offer. I was thrilled Steven got the sale price I wanted, so quickly. Unfortunately, we found ourselves in a tense situation when the home inspector found a breach in our sewer line. Immediately I got a quote for the repairs, and was fully prepared to cover the expense, but the buyer’s realtor was insisting on a sizeable holdback. This is where we witnessed Steven’s negotiation skills under pressure. He went head to head with the buyer’s realtor, as the buyers and ourselves stood by and watched. Steven insisted he would not allow his clients to have an open wallet, while the buyer’s realtor pushed harder and harder. Steven never once showed how irritated or upset he was by this realtor’s aggressive nature and, in a calm voice, kept insisting an open wallet was not going to work. This was a little unsettling with three days left to lift the conditions and I wasn’t holding out much hope the deal would close. Things looked grim, but once again Steven’s abilities and strong connections shone through…. he found a back up buyer who presented an offer we could not ignore. Of course, Steven had to bring this to the first buyer’s attention and, to everyone’s surprise, all conditions were lifted and we had a firm sale. Not only did I get my asking price but I no longer had to cover the repair expense. Steven was nothing but brilliant.
I believe somewhere along the way Steven and I became friends. I look forward to a “Hi Jane” text from him that always makes me smile. I thoroughly enjoy his kind, caring, easy going nature and his wicked sense of humor. I like his Porsche too
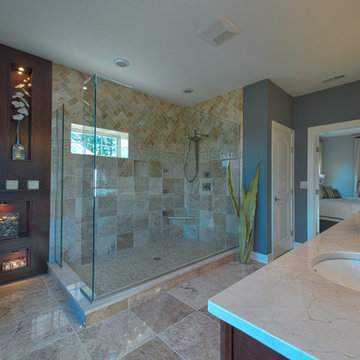
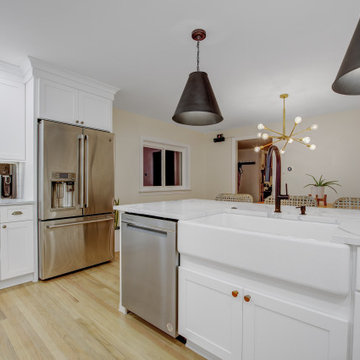 Main Line Kitchen Design
 has a different business model than other kitchen showrooms, designers, and cabinetry dealers. The difference helps us to do five important things better than our competitors.
The kitchens we sell are better designed and our designers are more experienced. This is because we insist on showing customers designs we recommend, BEFORE, we do a design they request. This way, final designs tend to be more collaborative and professional. Our designers are more experienced because they are better paid and design with more cabinet brands than at other dealers.
Our pricing for cabinets is less than other cabinet dealers. This is because we do not have a showroom open to the public, and we require a small deposit and a screening before we accept customers. This helps our designers spend their time more effectively. And, it eliminates 80% of the overhead kitchen showrooms spend on staffing, larger displays, and on a curbside location.
We carry more brands of cabinetry than other dealers. This is possible because we display one cabinet for each brand we sell. Through glass countertops clients can examine a brands construction quality, and we display the door styles and finishes of our brands. Instead of the larger displays customers see in traditional showrooms, our customers can view 5 million kitchens on Houzz.com, or the hundreds of our kitchen renovations we show on Houzz, our web site, and in framed photos on the walls of our office building.
Kitchen construction is often better organized and generally costs less. This is because we recommend general contractors free of charge. They supervise construction from scheduling to completion. This eliminates a middleman, reduces delays, and eliminates the fees that almost all showrooms and home centers charge their customers. We are also happy to work with any contractor a customer finds on their own. If we haven’t worked with that contractor before they may need more of our direction, but both companies can benefit from working together and possibly referring each other in the future.
Less problems arise, and if they do, they are handled more quickly. This is because every kitchen we sell is reviewed by at least 3 kitchen designers during the ordering process. Our Operations Manager Ed Sossich checks orders and schedules all warehouse and home deliveries. Our delivery manager Mark Mitten supervises every delivery and checks in each cabinet and part. And our CRM system, Monday, prompts each person responsible for each phase of a customer’s kitchen with automated alerts. This keeps things moving, even during supply chain disruptions, and ensures no step is overlooked.
Main Line Kitchen Design’s company slogan is “The world of kitchen design is changing . . . “. We pride ourselves on being innovative in everything we do. From our web site and how we advertise, to the gift we send each customer upon the completion of their kitchen.
Our business model helps us receive 100’s of 5-star reviews, and makes our kitchen projects more enjoyable for everyone.
We look forward to working with you.

 Pennsylvania Landscape & Nursery Association
Terren Landscapes http://www.terrenlandscapes.com
Project Entry: Pembrooke Estate Rain Garden
2014 PLNA Awards for Landscape Excellence Winner
Category: Sustainable Landscape &60,000-$120,000
Award Level: Silver
Project Description:
The client contracted our company to solve multiple existing drainage problems. In a heavy rain event the existing French drain system would overflow, causing water to pool in the driveway. After investigating the system we found that the capacity of the French drain was undersized for the amount of storm water from the large rain events received in recent years. As a result of our findings and at the request of the homeowner, we designed a storm water management system to capture all storm water from the structures on the property and regenerate the underground aquifers for the volume of a 5.8” rainstorm. In addition to the new drain system, the homeowners wanted a rain garden to provide a backdrop for an existing formal garden, provide a habitat for wildlife, and provide screening from an adjacent neighbor.
Throughout the design process many challenges were presented, including an existing gas line, which ran directly through the area that best suited the bioswale. The existence of the gas line caused us to alter the shape and depth of the bioswale in some areas. We also inspected the existing downspouts to make sure there were no obstructions that would impede the system’s efficiency, and then conducted a test pit dig to make sure we had sufficient percolation rates for disposal of storm water.
To effectively capture the storm water runoff, the existing downspouts were piped from the main house and the large detached garage to a large catch basin located at the low point in the driveway. The driveway catch basin contains two outlet pipes at different elevations within the basin allowing water from smaller rain events to enter the bioswale and rain garden area to percolate into the soil before excess water overflows into a sediment trap which filters out any debris and is then piped to an underground StormTech® pit to slowly percolate into the ground. The other outlet pipe in the driveway catch basin is used for larger storm water events, taking the water directly to the StormTech® pit.
Accepting and slowing the velocity of the storm water, mitigation of erosion, and filtering out pollutants contained in the “first flush” of rainfall are the primary functions of the bioswale and rain garden. Planting these areas with mostly native plant species helps carry out these functions while attracting and providing shelter for wildlife.
The ‘Niobe’ weeping willow is the centerpiece of the rain garden, connecting with the axis of the existing formal garden. To screen the neighboring property we chose Chamaecyparis nootkatensis ‘Pendula’ for its graceful evergreen habit and tolerance of wet sites. ‘Ivory Halo’ dogwood and Panicum ‘Cloud Nine’ were used for screening as well as winter interest. To provide deciduous structure to the garden Taxodium distichum and Magnolia virginiana were used in conjunction with witch hazel. Mostly native wetland perennials were used due to their tolerance of wet conditions and occasional drought.
The area above the StormTech® pit provides space for the client’s family to relax. The rain garden and bioswale provide screening, storm water management, a habitat for wildlife, and plants that enhance the adjacent formal garden.
Photo Credit: Terren Landscapes
 Tile Doctor Ltd
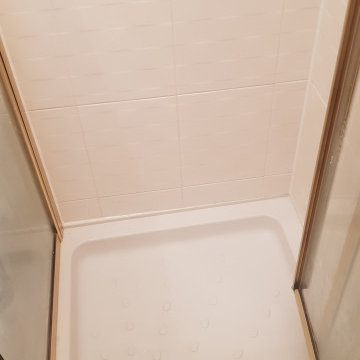
The pictures below detail the renovation of Ceramic Tiled Shower Cubicleat a property in Bolton Upon Dearne South Yorkshire. I was called in as the homeowners dreaded using the shower due to the state of the tiles, grout and cubicle in general.
As you can see from the photograph the grout was filthy, the silicone was mouldy, and the shower frame was caked in mouldy dirt. Over the years there had been a build-up of hard water and staining from products which leave a residue. They had used everyday cleaning products, but these had not been able to touch the problem as it had been left for too long.
I discussed with the clients how Tile Doctor could help, and how we would be able to deep clean the shower area and replace the mouldy silicone. I was confident we could get the renovate the cubicle and get it looking like new again. They were happy to accept my price and we arranged a time to complete the job. It would certainly be far cheaper than ripping out the shower cubicle and replacing with new.
Bolton Upon Dearne is a small village in the very middle of South Yorkshire, it is almost the same distance away from the centres of Barnsley, Rotherham and Doncaster. It has a rich history of coal mining but like many pit villages it has suffered since the pit closures of the 80’s and 90’s.
To start the shower was treated with Tile Doctor Oxy Gel, being a gel this product sticks well to the vertical surfaces giving it time to break down grease and grime, you’ll see from the picture just how much dirt was released.
This was followed with a strong dilution of Tile Doctor Duo Clean which is great for restoring lighter coloured grout back to its original state as well as removing mould. After scrubbing the soiled water was easily drained away using the shower hose. The transformation was amazing, the area already looked so much more inviting!
Next the old silicone that had gone mouldy was removed with a sharp knife, this is a slow work as you have avoid damaging the tile or the shower tray. Additionally, a clean and dry surface is required for the new silicone to adhere well.
The tiles were Ceramic which are given a glazed surface during manufacture, so they don’t need a specialist sealant like natural stone. However, the surface of grout is cementous and attracts dirt easily so the whole shower wall was sealed using a can of Tile Doctor Wall and Grout Sealer. This gives a layer which will protect the tiles and grout and will ensure the tiles are easier to keep clean.
For everyday cleaning I recommended they use Tile Doctor Aqua-Pro which is an effective, yet pH neutral tile and grout cleaner designed for everyday use in Bathrooms and Kitchens. The formula eliminates soap scum build-up and hard water deposits and its neutral formula won’t prematurely degrade the sealer. Used regularly this will prevent the build-up they had previously experienced and will keep the tiles looking good for some time to come.
As you can imagine my client was very happy with the completed work.
Matthew Lovett
South Yorkshire Tile Doctor

 Visbeen Architects
Good things come in small packages, as Tricklebrook proves. This compact yet charming design packs a lot of personality into an efficient plan that is perfect for a tight city or waterfront lot. Inspired by the Craftsman aesthetic and classic All-American bungalow design, the exterior features interesting roof lines with overhangs, stone and shingle accents and abundant windows designed both to let in maximum natural sunlight as well as take full advantage of the lakefront views.
The covered front porch leads into a welcoming foyer and the first level’s 1,150-square foot floor plan, which is divided into both family and private areas for maximum convenience. Private spaces include a flexible first-floor bedroom or office on the left; family spaces include a living room with fireplace, an open plan kitchen with an unusual oval island and dining area on the right as well as a nearby handy mud room. At night, relax on the 150-square-foot screened porch or patio. Head upstairs and you’ll find an additional 1,025 square feet of living space, with two bedrooms, both with unusual sloped ceilings, walk-in closets and private baths. The second floor also includes a convenient laundry room and an office/reading area.
Photographer: Dave Leale

 VAULT®
In the Tuscany region of central Italy, a region made famous around the world for its history, landscapes, traditions, artistic legacy and fine wine, perhaps nothing is more universally recognized than the old world villa’s that are nestled into the rolling countryside. Standing at approximately 10,500 square feet, this custom residence has all of the elegance, style and craftsmanship of those old world homes, but with all of the modern amenities of a new modern luxury home. This stunning residence was recognized by the National Association of Home Builders (NAHB) as the best custom built home in the country in 2010, a testament to the skillful designers and craftsmen who brought the homeowners vision into reality.
When Chad Haas, Founder of VAULT (www.vaultgarage.com), a company that prides itself in furnishing some of the most beautiful garages in the world, was brought into the project, the home and garage had already been built. The accolades of the gorgeous villa already awarded. But the homeowner felt that the exterior and interior of the garage lacked architectural harmony with the rest of the home and so he flew Mr. Haas out to visit the space directly so that he could assist hands-on with re-designing a new look and to add furnishings to accessories the space.
“When I first approached the villa from the street, I knew that I’d have my work cut out for me. Everything looked so perfect exactly the way it was designed and built. I questioned myself ‘how was I going to improve upon perfection?’, since remarkable attention was paid to even the smallest of details in the home” asked Haas.
The client’s goal was to engage Haas to design and furnish a garage where he could relax, separate from the home, enjoy his growing car collection and entertain family and friends.
After spending a short weekend together with the home owner to gather his ideas, Haas returned back to his Beaverton, Oregon-based company with a clearer vision: create the ultimate gentlemen’s retreat through the look of a turn-of-a-century Tuscan ‘car barn’.
Absolutely nothing in the garage was overlooked – and it shows. Every design element in the garage for color, texture and material was meticulously thought out to elicit just the right feeling and emotion in everyone that enters what may be one of the most beautifully elegant garages in America, a space commonly overlooked in the construction of homes today.
A main focal point of the exterior of garage is the beautiful view from the courtyard, where all three carriage doors can be seen. While the existing wood doors looked acceptable, it was agreed that something more befitting of the quality and beauty of the home were appropriate. Haas designed luxurious castle-style doors handcrafted from solid Mahogany and bathed in a rich dark brown stain that was complemented by hand-wrought iron grills, clavos and door pull hardware. The double-wide door, in particular, is truly remarkable in both its elegance, as well as its one-of-a-kind operation. “The client was concerned in this area of having mounting hardware and a motor on the ceiling. Because the cars in this area do not get brought out on a regular (daily) basis, the doors open manually by hand and operate accordion style on a track”. The homes main overhead garage doors feature jack-shaft operation which removes the clutter of a motor on the garage ceiling, but offers the convenience of powered operation. These extraordinary, custom-made castle doors look just as beautiful on the inside as the out and their unparalleled design and craftsmanship take the exterior of the home to even greater heights than before.
On to the interior, a black and white epoxy coating was stripped and replaced with porcelain tiles that resembled Italian travertine stone. To give the car barn a rustic feeling and a presence that it was older, not modern, Haas worked on the development and concept directly with the home owner to collaborate with a local millwork company that designed and hand-finished substantial wood beams from distressed Doug Fir. All of the walls were hand-plastered by a local artist using straw that was harvested from the immediate area surrounding the home and incorporated into the plaster to give it a rustic antique quality.
Haas conceived and designed a bar area and cabinetry for a work area that pulled inspiration from old ice boxes of the 1920’s that utilized heavy nickel-plated hardware, again to give storage spaces a rustic appearance.
The warm glow from several custom porcelain neon signs, each one meticulously built entirely by hand by VAULT, are dispersed throughout the space and transform the entire room and bring it to life. The client had never previously owned a neon sign before and along with the carriage doors felt that these items have transformed the space more than any other feature. Several antique gas pumps, restored in the client’s favorite petro bran, and a few additional porcelain signs will eventually furnish the rest of the space to complement the clients amazing car collection.
In addition to the countless details that set this showcase garage apart, its ability to seamlessly blend with the rest of the home and the natural, rustic setting of the Colorado Rockies, yet house modern automobiles in a manner in which they feel well placed and belong, is also noteworthy.
GARAGE DESIGN & FURNISHINGS
To learn more about VAULT visit them at: http://www.vaultgarage.com/
And on Facebook: http://www.facebook.com/VaultGarage
PHOTOGRAPHY
All photographs were used with the permission of photographer John Vanderpool (john.vanderpool5@gmail.com)
You can visit John Vanderpool on Facebook at: https://www.facebook.com/JVanderpoolPhotography
ARCHITECTURE
Jerry Gloss, Principal, KGA Architects: http://www.kgarch.com/
HOMEBUILDER
Thomas Sattler Home: http://thomassattlerhomes.com/
VEHICLES
Here is an overview of the cars that were photographed in this article:
1. 2014 Ferrari 458 Italia
2. 2013 Maserati GranTurismo Sport
3. 2007 Porsche 911 GT3 RS (997)
4. 2008 Porsche Cayenne GTS
5. 2008 Porsche GT3 RS
6. 2013 Porsche 911 Turbo S (997)
7. 2014 Porsche Panamera GTS
8. 2013 Ford SVT Raptor (6.2L CrewCab)’
Overview of project reprinted with permission of DuPont Registry.
 Progressive Design Build
The Challenge
This beautiful waterfront home was begging for an update. Our clients wanted a contemporary design with modern finishes. They craved improved functionality in the kitchen, hardwood flooring in the living areas, and a spacious walk-in closet in the master bathroom. With two children in school, our clients also needed the project completed during their summer vacation – leaving a slim 90 days for the entire remodel. Could we do it? …Challenge accepted!
Our Solution
With their active summer travel schedule, our clients elected to vacate their home for the duration of the project. This was ideal for the intrusive nature of the scope of work.
In preparation, our design team created a project plan to suit our client’s needs. With such a clear timeline, we were able to select and order long-lead items in plenty of time for the project start date.
In the kitchen, we rearranged the layout to provide superior ventilation for the cooktop on the exterior wall. We added two large storage cabinets with glass doors, accented by a sleek mosaic backsplash of glass tile. We also incorporated a large contemporary waterfall island into the room. With seating at one end, the island provides both increased functionality and an eye-catching focal point for the center of the room. On the interior wall of the kitchen, we maximized storage with a wall of built-in cabinetry – complete with pullout pantry cabinets, a double oven, and a large stainless refrigerator.
Our clients wisely chose rich, dark-colored wood flooring to add warmth to the contemporary design. After installing the flooring in the kitchen, we brought it into the main living areas as well. In the great room, we wrapped the existing gas fireplace in a neutral stack stone. The effect of the stone on the media and window wall is breathtaking.
In the master bathroom, we expanded the closet by pushing the wall back into the adjacent pass-through hallway. The new walk-in closet now includes an impressive closet organization system.
Returning to the master bathroom, we removed the single vanity and repositioned the toilet, allowing for a new, curb-less glass shower and a his-and-hers vanity. The entire vanity and shower wall is finished in white 12×24 porcelain tile. The vertical glass mosaic accent band and backlit floating mirrors add to the clean, modern style. To the left of the master bathroom entry, we even added a matching make-up area.
Finally, we installed a number of elegant enhancements in the remaining rooms. The clients chose a bronze metal relief accent wall as well as some colorful finishes and artwork for the entry and hallway.
Exceptional Results
Our clients were simply thrilled with the final product! Not only did they return from their summer vacation to a gorgeous home remodel, but we concluded the project a full week ahead of schedule. As a result, the family was able to move in sooner than planned, giving them plenty of time to acclimate to the renovated space before their kids returned to school. Ultimately, we provided the outstanding results and customer experience that our clients had been searching for.
“We met with many other contractors leading up to signing with Progressive Design Build. When we met Mike, we finally felt safe. We had heard so many horror stories about contractors! Progressive was the best move we could have made. They made our dream house become a reality. Vernon was in charge of our project and everything went better than we expected. Our project was completed earlier than expected, too. Our questions and concerns were dealt with quickly and professionally, the job site was always clean, and all subs were friendly and professional. We had a wonderful experience with Progressive Design Build. We’re so grateful we found them.” – The Mader Family
 Tile Doctor Ltd
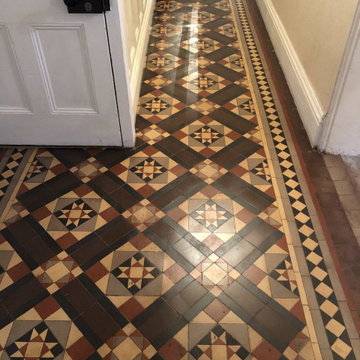
I received this Tile Doctor enquiry from a customer in the historic market town of Kidderminster who had a Victorian Minton Tiled hallway floor that had been covered in carpet for a long time. The carpet had since been removed and now the floor was fully exposed you could see it was covered in carpet glue and dirty with ingrained grime.
I arranged an appointment to inspect the floor thoroughly and provide a quote; you can never be sure what issues you might find, so surveying the floor first ensures I can give an accurate price. As anticipated the entire floor was covered in thick glue, fortunately apart from a few loose tiles the floor was in good order. I explained to the client the process I would use on the floor and that I was confident the floor could be restored for them. My quote was accepted, and we arranged a date to carry out the work.
I often get customers claiming to have an original Minton Tiled floor however there were many manufacturers creating similar patterns at the end of the 19th century, the only way to be certain is to lift a tile and look to see what’s stamped on the back. In this case we had a few loose ones that needed relaying, so I was able to confirm that quite easily.
I arrived on the booked day and the first step was to tape up the surrounding area to prevent any damage from splashing. I was then ready to tackle the glue. I applied a strong solution of Tile Doctor Remove and Go and covered the floor with industrial cling film to allow the solution to get to work without drying out. The film was removed after an hour and then the Remove and Go was worked into the tiles using a coarse 200-grit milling pad to cut through the glue and resurface the tiles.
Afterwards the floor was rinsed with water and the soil removed with a wet vacuum. Some of the glue proved very stubborn to remove and had to be dealt with carefully by hand using an industrial scraper, sometimes a bit of elbow grease is the only way to get the job done.
The floor was then given an Acid Rinse with Tile Doctor Acid Gel, this is designed to further clean the tiles and counter any efflorescent salts that might be present in the tiles due to the lack of damp proof membrane.
After another rinse and soil removal I turned my attention to the loose tiles which were secured by removing the tile, scraping out the adhesive and re-fixing. The appearance of the floor was much improved after day and the floor was then left overnight to dry out in preparation or the sealing process.
Returning the next day, I first checked the floor was dry using a damp meter. Once I was satisfied it was dry, I started to seal the floor. I had selected to use Tile Doctor Seal and Go Extra for sealing. It adds a richness to the colour of the tiles and a subtle sheen finish. I applied three coats, waiting for each one to dry before applying the next.
The pattern on the floor was really nice and the colours were now very vibrant. The client was very pleased and left a great review copied below:
“Our floor wasn’t easy as it had some form of coating on it which was difficult to remove but Mark took a lot of time to ensure the surface was thoroughly clean before the sealant was put down. Very pleased with how it looks. K. B, Kidderminster”
Mark Conway
Worcestershire Tile Doctor
146