
Search results for "Additional requirements" in Home Design Ideas
 Windy City Painters
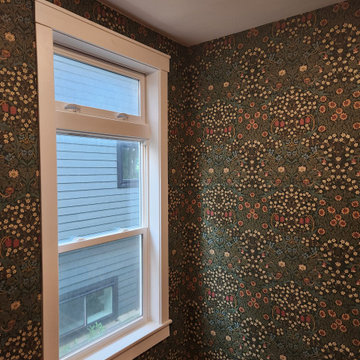
## Professional Wallpaper Installation Lincoln Park Project
Wallpaper installation Lincoln Park requires expert techniques for this stunning greystone renovation. Lincoln Park's architectural heritage includes beautiful greystones, vintage condos, and historic buildings that demand specialized installation approaches respecting original craftsmanship.
## Materials and Products Used
We utilized premium vinyl wallpaper with fabric backing for durability. Additionally, commercial-grade adhesives from Benjamin Moore ensure long-lasting application. Furthermore, we applied specialized primers designed for vintage plaster surfaces common in Lincoln Park homes.
## Four-Step Installation Process
First, complete removal of existing wallpaper and surface preparation. Second, repair any wall imperfections and apply appropriate primer. Third, precise measurement and cutting with careful pattern matching. Finally, professional installation with seamless application and detailed finishing.
## Chicago Home Challenges
Chicago's harsh winters create expansion and contraction issues requiring flexible adhesives. Moreover, older Lincoln Park buildings often have uneven plaster walls needing extensive preparation. Additionally, potential lead paint concerns in vintage homes require certified safe work practices.
## Results and Quality Standards
Perfect pattern alignment across all seams creates seamless appearance throughout the space. Furthermore, moisture-resistant materials ensure longevity against Chicago's humidity fluctuations. The finished installation enhances the home's architectural character while providing modern durability.
## Professional Tips
Always test adhesive compatibility on small areas first. Moreover, control room temperature and humidity during installation for optimal results. Additionally, choose wallpaper appropriate for Chicago's climate conditions.
See more work and request free estimate at windypainters.com.
## Frequently Asked Questions
Q: How long does wallpaper installation Lincoln Park typically take for one room?
A: Most single rooms completed within one to two days including preparation, removal, and professional wallpaper installation Lincoln Park application.
Q: What wallpaper types work best in Chicago's climate conditions?
A: Vinyl and fabric-backed wallpapers offer superior durability against humidity and temperature changes affecting wallpaper installation Lincoln Park projects.
Q: Can you install wallpaper over existing painted walls in older homes?
A: Yes, with proper surface preparation and primer application, wallpaper installation Lincoln Park works excellently over previously painted surfaces.
Q: Do you handle complete wallpaper removal before new installation?
A: Absolutely, comprehensive wallpaper removal and surface preparation included in all wallpaper installation Lincoln Park project estimates and services.
Q: What preparation is required for vintage Lincoln Park home wallpaper installation?
A: Surface cleaning, repairs, lead paint testing if applicable, and proper primer application essential for successful wallpaper installation Lincoln Park.
Q: How do you ensure perfect pattern matching across large walls?
A: Expert measuring, cutting, and installation techniques guarantee seamless pattern alignment throughout every wallpaper installation Lincoln Park project we complete.
Q: What warranty coverage do you provide for wallpaper installation work?
A: All wallpaper installation Lincoln Park projects include comprehensive warranty coverage protecting your investment and ensuring long-lasting beautiful results.
Q: Can wallpaper installation work in Lincoln Park condos and smaller spaces?
A: Yes, we specialize in all housing types including condos, requiring precise wallpaper installation Lincoln Park techniques for optimal results.
Q: How do Chicago weather conditions affect wallpaper installation timing and materials?
A: We schedule wallpaper installation Lincoln Park during optimal conditions and recommend climate-appropriate materials for Chicago's challenging weather patterns.
Q: What makes Windy City Painters different for wallpaper installation Lincoln Park projects?
A: Local Chicago expertise, understanding of neighborhood architecture, and proven wallpaper installation Lincoln Park experience delivering exceptional quality results.


 Le jardinet
An easy container design for the shade based on great foliage - yew, bugle weed and trailing periwinkle
Le jardinet
Inspiration for a landscaping in Seattle.
Inspiration for a landscaping in Seattle.
Find the right local pro for your project
 User
UserThis Greek Revival row house in Boerum Hill was previously owned by a local architect who renovated it several times, including the addition of a two-story steel and glass extension at the rear. The new owners came to us seeking to restore the house and its original formality, while adapting it to the modern needs of a family of five. The detailing of the 25 x 36 foot structure had been lost and required some sleuthing into the history of Greek Revival style in historic Brooklyn neighborhoods.
In addition to completely re-framing the interior, the house also required a new south-facing brick façade due to significant deterioration. The modern extension was replaced with a more traditionally detailed wood and copper- clad bay, still open to natural light and the garden view without sacrificing comfort. The kitchen was relocated from the first floor to the garden level with an adjacent formal dining room. Both rooms were enlarged from their previous iterations to accommodate weekly dinners with extended family. The kitchen includes a home office and breakfast nook that doubles as a homework station. The cellar level was further excavated to accommodate finished storage space and a playroom where activity can be monitored from the kitchen workspaces.
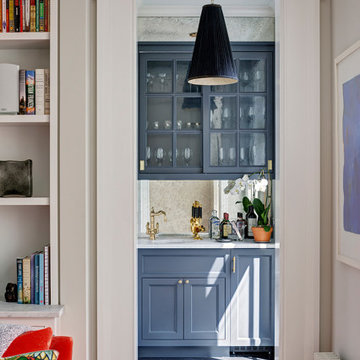
The parlor floor is now reserved for entertaining. New pocket doors can be closed to separate the formal front parlor from the more relaxed back portion, where the family plays games or watches TV together. At the end of the hall, a powder room with brass details, and a luxe bar with antique mirrored backsplash and stone tile flooring, leads to the deck and direct garden access. Because of the property width, the house is able to provide ample space for the interior program within a shorter footprint. This allows the garden to remain expansive, with a small lawn for play, an outdoor food preparation area with a cast-in-place concrete bench, and a place for entertaining towards the rear. The newly designed landscaping will continue to develop, further enhancing the yard’s feeling of escape, and filling-in the views from the kitchen and back parlor above. A less visible, but equally as conscious, addition is a rooftop PV solar array that provides nearly 100% of the daily electrical usage, with the exception of the AC system on hot summer days.
The well-appointed interiors connect the traditional backdrop of the home to a youthful take on classic design and functionality. The materials are elegant without being precious, accommodating a young, growing family. Unique colors and patterns provide a feeling of luxury while inviting inhabitants and guests to relax and enjoy this classic Brooklyn brownstone.
This project won runner-up in the architecture category for the 2017 NYC&G Innovation in Design Awards and was featured in The American House: 100 Contemporary Homes.
Photography by Francis Dzikowski / OTTO
 ING Construction
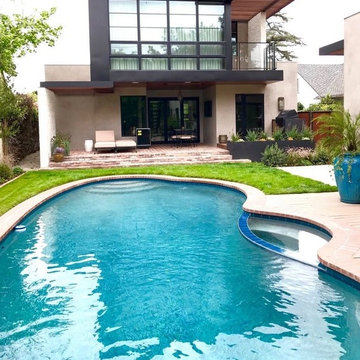
Los Angeles, CA - Complete Second Floor Addition to an Existing House
All architectural needs; blueprints, etc. All framing per the addition. All required electrical and plumbing needs. All exterior hardscape and architectural needs.
 Outdoor Dreams
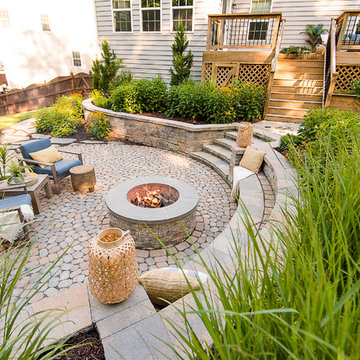
Example of a mid-sized transitional backyard concrete paver patio design in Richmond with a fire pit and no cover
 Designs for Living by Wendy, LLC
Eric Roth
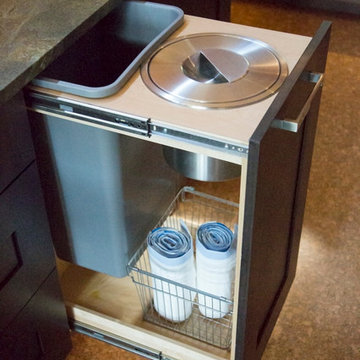
Eat-in kitchen - mid-sized transitional u-shaped cork floor eat-in kitchen idea in Jacksonville with recessed-panel cabinets, dark wood cabinets, an island, marble countertops and green countertops
Eat-in kitchen - mid-sized transitional u-shaped cork floor eat-in kitchen idea in Jacksonville with recessed-panel cabinets, dark wood cabinets, an island, marble countertops and green countertops
Sponsored
Columbus, OH

Structural Remodeling
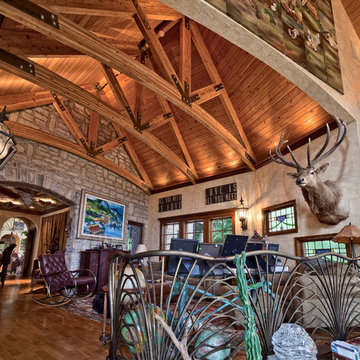
Franklin County's Heavy Timber Specialists | Best of Houzz 2020!

 Advance Design Studio, Ltd.
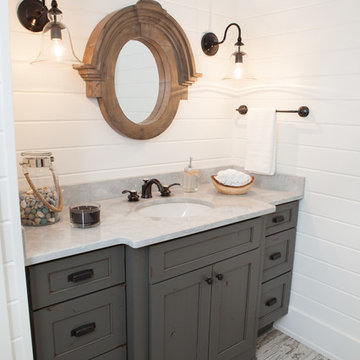
This 1930's Barrington Hills farmhouse was in need of some TLC when it was purchased by this southern family of five who planned to make it their new home. The renovation taken on by Advance Design Studio's designer Scott Christensen and master carpenter Justin Davis included a custom porch, custom built in cabinetry in the living room and children's bedrooms, 2 children's on-suite baths, a guest powder room, a fabulous new master bath with custom closet and makeup area, a new upstairs laundry room, a workout basement, a mud room, new flooring and custom wainscot stairs with planked walls and ceilings throughout the home.
The home's original mechanicals were in dire need of updating, so HVAC, plumbing and electrical were all replaced with newer materials and equipment. A dramatic change to the exterior took place with the addition of a quaint standing seam metal roofed farmhouse porch perfect for sipping lemonade on a lazy hot summer day.
In addition to the changes to the home, a guest house on the property underwent a major transformation as well. Newly outfitted with updated gas and electric, a new stacking washer/dryer space was created along with an updated bath complete with a glass enclosed shower, something the bath did not previously have. A beautiful kitchenette with ample cabinetry space, refrigeration and a sink was transformed as well to provide all the comforts of home for guests visiting at the classic cottage retreat.
The biggest design challenge was to keep in line with the charm the old home possessed, all the while giving the family all the convenience and efficiency of modern functioning amenities. One of the most interesting uses of material was the porcelain "wood-looking" tile used in all the baths and most of the home's common areas. All the efficiency of porcelain tile, with the nostalgic look and feel of worn and weathered hardwood floors. The home’s casual entry has an 8" rustic antique barn wood look porcelain tile in a rich brown to create a warm and welcoming first impression.
Painted distressed cabinetry in muted shades of gray/green was used in the powder room to bring out the rustic feel of the space which was accentuated with wood planked walls and ceilings. Fresh white painted shaker cabinetry was used throughout the rest of the rooms, accentuated by bright chrome fixtures and muted pastel tones to create a calm and relaxing feeling throughout the home.
Custom cabinetry was designed and built by Advance Design specifically for a large 70” TV in the living room, for each of the children’s bedroom’s built in storage, custom closets, and book shelves, and for a mudroom fit with custom niches for each family member by name.
The ample master bath was fitted with double vanity areas in white. A generous shower with a bench features classic white subway tiles and light blue/green glass accents, as well as a large free standing soaking tub nestled under a window with double sconces to dim while relaxing in a luxurious bath. A custom classic white bookcase for plush towels greets you as you enter the sanctuary bath.
 Chris Corbett Design
Neil Michael - Axiom Photography
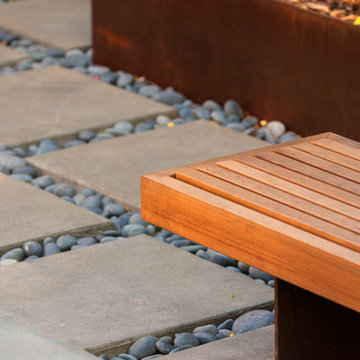
Inspiration for a small modern shade courtyard retaining wall landscape in Sacramento.
Inspiration for a small modern shade courtyard retaining wall landscape in Sacramento.
 Thompson Remodeling
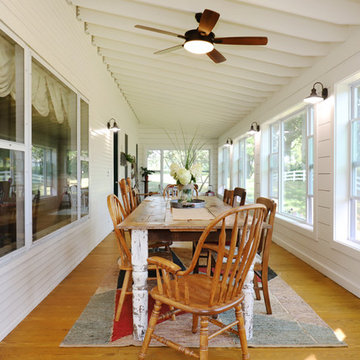
The owners of this beautiful historic farmhouse had been painstakingly restoring it bit by bit. One of the last items on their list was to create a wrap-around front porch to create a more distinct and obvious entrance to the front of their home.
Aside from the functional reasons for the new porch, our client also had very specific ideas for its design. She wanted to recreate her grandmother’s porch so that she could carry on the same wonderful traditions with her own grandchildren someday.
Key requirements for this front porch remodel included:
- Creating a seamless connection to the main house.
- A floorplan with areas for dining, reading, having coffee and playing games.
- Respecting and maintaining the historic details of the home and making sure the addition felt authentic.
Upon entering, you will notice the authentic real pine porch decking.
Real windows were used instead of three season porch windows which also have molding around them to match the existing home’s windows.
The left wing of the porch includes a dining area and a game and craft space.
Ceiling fans provide light and additional comfort in the summer months. Iron wall sconces supply additional lighting throughout.
Exposed rafters with hidden fasteners were used in the ceiling.
Handmade shiplap graces the walls.
On the left side of the front porch, a reading area enjoys plenty of natural light from the windows.
The new porch blends perfectly with the existing home much nicer front facade. There is a clear front entrance to the home, where previously guests weren’t sure where to enter.
We successfully created a place for the client to enjoy with her future grandchildren that’s filled with nostalgic nods to the memories she made with her own grandmother.
"We have had many people who asked us what changed on the house but did not know what we did. When we told them we put the porch on, all of them made the statement that they did not notice it was a new addition and fit into the house perfectly.”
– Homeowner
 Dan Nelson, Designs Northwest Architects
Photography by Lucas Henning.
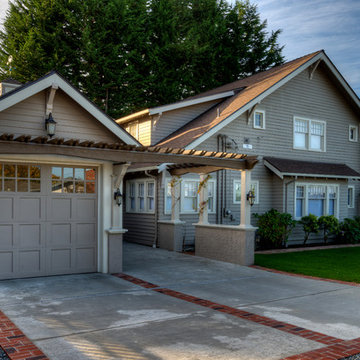
Garage - craftsman garage idea in Seattle
Garage - craftsman garage idea in Seattle

Sponsored
Columbus, OH
Structural Remodeling
Franklin County's Heavy Timber Specialists | Best of Houzz 2020!
 Progressive Design Build
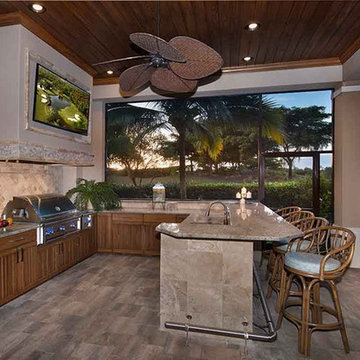
Here in Florida, we’re blessed with great weather year-round. So it’s no surprise that outdoor entertaining areas are an extremely popular way to enhance outdoor living. When our clients requested an update to their existing outdoor kitchen while they were away on vacation, we were ready to hit the ground running. While their beautiful 2-story home on a golf course had a pool and covered lanai area, the existing outdoor kitchen just didn’t function well for their needs. Mainly, they craved additional counter space and more seating. And, as avid football fans, with a son playing on a renown Division 1 college team, they also wanted a large screen TV to watch games. After all, what better way to share game day excitement than at a barbecue with family and friends?
A Bigger, Better Kitchen Layout
Our brilliant design team came up with a much larger, u-shaped outdoor kitchen layout for increased functionality. The extra base cabinets provided plenty of storage as well as a foundation for additional countertop space. Adjacent to the sink, we added a 24” outdoor refrigerator to keep food and beverages chilled, and the high top bar allowed for more seating around the perimeter.
For cooking, our clients selected a much larger Lynx grill and side burner to replace the original grill. While the kitchen was already set up for a grilling area, it required a hood, so we built and installed a custom hood for proper ventilation. Then, we added a large screen TV above the hood for easy viewing.
Finishing Touches
To softly illuminate the entire space at night, we installed additional recessed light fixtures into the ceiling and under the grill hood. We also tied the Cypress wood ceiling and the crown molding together into the design with a luxurious cabinet stain. Along with these finishing touches, we added a decorative travertine stone backsplash behind the grill and homogenized the front face of the bar for a polished, matching look.
Ventilation Challenges
With the outdoor kitchen lanai located directly under a second-floor living area, we had expected to tuck away ventilation ductwork between the second-level floor joists and the exterior wall running parallel to the grill hood. However, upon further investigation, we discovered the second floor joist system, in fact, ran perpendicular to the grill hood. In short, we needed a new way to hide the venting without compromising the original design.
Our team came up with an inspired solution: Construction of a false wall behind the outdoor kitchen allowed us to run ductwork without creating a visible chase for the vent, thus maintaining a symmetrical look on both sides of the grill and decorative hood.
Exceeding Expectations
In the end, we didn’t just meet our clients’ needs for a beautiful outdoor kitchen update – we exceeded them. As planned, we completed the new outdoor kitchen while they were out of town. But when our clients returned from vacation, they were so impressed with the results (and the stress-free design/build experience) that they promptly hired us for another extensive remodel – a stunning home addition!
 Woodland Builders
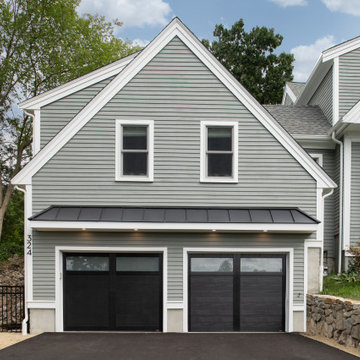
This home addition project required precision earthwork to make way for the new garage with bonus room.
Garage workshop - large contemporary attached two-car garage workshop idea in Boston
Garage workshop - large contemporary attached two-car garage workshop idea in Boston
 Jacobson Construction
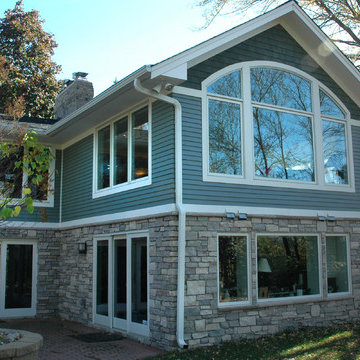
This project began as a home remodeling idea to use barrel vaulted ceilings for a new entry and living/family room or four-season porch and home office addition. Custom round steel ceiling frames were required to make it happen, with recessed down lights added to the curved ceiling. Curved specialty windows accented the curved ceiling. A similar style was added to the home’s entryway, which enhanced the home’s curb appeal.
The four-season porch included energy-saving Low-E windows, with a large home office below. Guests can enjoy the view of the Edina Valley, a Minneapolis landmark.
Interior and exterior photos in this project help define the scope of the project. Two garages were added during remodeling, and are featured on another Bridgewater project page.
Custom round steel ceiling frames were required to create the barrel vaulted ceiling in the entry.
Curved specialty windows accented the curved ceiling. A similar style was added to the home’s entryway, which enhanced the home’s curb appeal.
Interior and exterior photos in this project help define the scope of the project. Two garages were added during remodeling, and are featured on another Bridgewater project page.
The entry was added to the existing home, with custom windows that highlight the entry's barrel vaulted ceiling.
 Thompson Remodeling
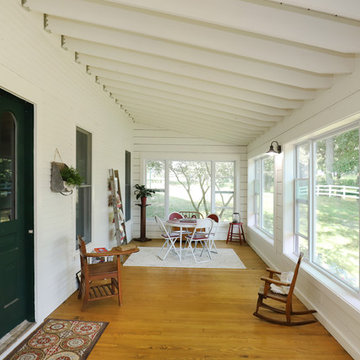
The owners of this beautiful historic farmhouse had been painstakingly restoring it bit by bit. One of the last items on their list was to create a wrap-around front porch to create a more distinct and obvious entrance to the front of their home.
Aside from the functional reasons for the new porch, our client also had very specific ideas for its design. She wanted to recreate her grandmother’s porch so that she could carry on the same wonderful traditions with her own grandchildren someday.
Key requirements for this front porch remodel included:
- Creating a seamless connection to the main house.
- A floorplan with areas for dining, reading, having coffee and playing games.
- Respecting and maintaining the historic details of the home and making sure the addition felt authentic.
Upon entering, you will notice the authentic real pine porch decking.
Real windows were used instead of three season porch windows which also have molding around them to match the existing home’s windows.
The left wing of the porch includes a dining area and a game and craft space.
Ceiling fans provide light and additional comfort in the summer months. Iron wall sconces supply additional lighting throughout.
Exposed rafters with hidden fasteners were used in the ceiling.
Handmade shiplap graces the walls.
On the left side of the front porch, a reading area enjoys plenty of natural light from the windows.
The new porch blends perfectly with the existing home much nicer front facade. There is a clear front entrance to the home, where previously guests weren’t sure where to enter.
We successfully created a place for the client to enjoy with her future grandchildren that’s filled with nostalgic nods to the memories she made with her own grandmother.
"We have had many people who asked us what changed on the house but did not know what we did. When we told them we put the porch on, all of them made the statement that they did not notice it was a new addition and fit into the house perfectly.”
– Homeowner

Sponsored
Columbus, OH

Hope Restoration & General Contracting
Columbus Design-Build, Kitchen & Bath Remodeling, Historic Renovations
 LA Home Contractor
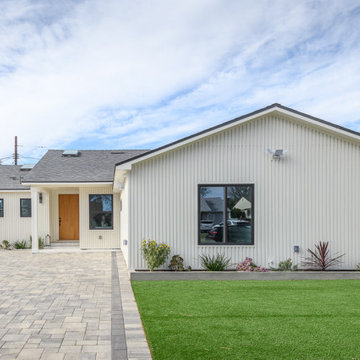
FULL HOUSE REMODEL – COMPLETE SCOPE OF WORK
1. Pre-Construction Phase
• Initial site inspection and measurements
• Architectural design and layout planning (if required)
• Structural engineering (if load-bearing walls are modified)
• Preparation of plans for city approval
• Permit application and plan check
• Obtain required building permits
• Scheduling of inspections
• Homeowner responsible for permit fees unless otherwise stated.
2. Site Preparation & Protection
• Protect flooring and non-work areas
• Install plastic dust barriers with zipper access
• Cover windows and furniture as needed
• Temporary utility setup if required
• Daily job site cleanup
• Final professional cleaning upon completion
3. Demolition
• Remove existing flooring (tile, wood, carpet, etc.)
• Remove cabinets, countertops, vanities
• Remove interior walls per plans
• Remove drywall where required
• Remove plumbing fixtures
• Remove electrical fixtures
• Haul away all debris
4. Structural & Framing
• Install structural beams if required
• Reframe modified walls
• Install new partitions per approved plans
• Repair or replace damaged framing
• Subfloor repair or replacement as needed
• Install blocking for cabinets and accessories
5. Plumbing (Up to Code)
• Replace old water supply lines (Copper Type L or PEX)
• Replace or modify drain lines (ABS)
• Relocate plumbing fixtures as needed
• Install new shut-off valves and cleanouts
• Water heater replacement if included
• Call for rough and final plumbing inspections
6. Electrical (Up to Code)
• Upgrade electrical panel if required
• Rewire entire house as needed
• Install new outlets and switches
• Install GFCI/AFCI protection per code
• Install recessed lighting and fixtures
• Install smoke and carbon monoxide detectors
• Dedicated circuits for appliances
• Call for rough and final electrical inspections
7. HVAC
• Replace or upgrade HVAC system if included
• Install new ducting and registers
• Install thermostat or mini-split system if applicable
8. Insulation
• Install wall insulation per code requirements
• Install ceiling insulation per code requirements
9. Drywall & Plaster
• Install new drywall
• Tape and mud (Level 4 or 5 finish)
• Texture to match existing or smooth finish
• Patch all affected areas
10. Flooring
• Install tile flooring
• Install engineered wood / hardwood / laminate / vinyl
• Install baseboards
• Floor leveling if required
11. Kitchen Remodel
• Install new cabinets
• Install countertops
• Install backsplash
• Install sink and faucet
• Install appliances (owner supplied unless specified)
12. Bathroom Remodel(s)
• Install new tub or shower system
• Waterproofing system installation
• Install tile on floors and walls
• Install vanity and toilet
• Install shower valve and fixtures
• Install shower glass if included
13. Doors & Windows
• Replace interior and entry doors
• Replace windows if included
• Install hardware
14. Interior & Exterior Paint
• Surface preparation
• Prime and paint walls, ceilings, and trim
• Exterior painting if included
15. Exterior Work (If Included)
• Stucco repair
• Roofing repair or replacement
• Concrete work or pavers
• Drainage improvements
16. Final Phase
• Final inspections
• Punch list completion
• Final cleaning
• Final walk-through with homeowner
Standard California Contract Terms (Summary)
• All work performed in compliance with California Building Code.
• Change orders must be approved in writing.
• Unforeseen conditions may require additional cost.
• One-year labor warranty unless otherwise stated.
• Progress payments per agreed payment schedule.
• Contractor is licensed and insured.
 LA Home Contractor
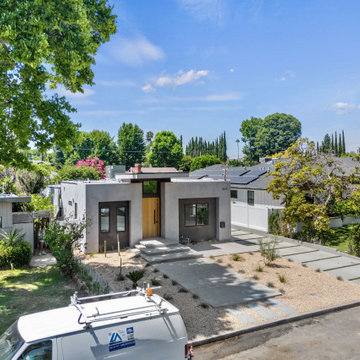
FULL HOUSE REMODEL – COMPLETE SCOPE OF WORK
1. Pre-Construction Phase
• Initial site inspection and measurements
• Architectural design and layout planning (if required)
• Structural engineering (if load-bearing walls are modified)
• Preparation of plans for city approval
• Permit application and plan check
• Obtain required building permits
• Scheduling of inspections
• Homeowner responsible for permit fees unless otherwise stated.
2. Site Preparation & Protection
• Protect flooring and non-work areas
• Install plastic dust barriers with zipper access
• Cover windows and furniture as needed
• Temporary utility setup if required
• Daily job site cleanup
• Final professional cleaning upon completion
3. Demolition
• Remove existing flooring (tile, wood, carpet, etc.)
• Remove cabinets, countertops, vanities
• Remove interior walls per plans
• Remove drywall where required
• Remove plumbing fixtures
• Remove electrical fixtures
• Haul away all debris
4. Structural & Framing
• Install structural beams if required
• Reframe modified walls
• Install new partitions per approved plans
• Repair or replace damaged framing
• Subfloor repair or replacement as needed
• Install blocking for cabinets and accessories
5. Plumbing (Up to Code)
• Replace old water supply lines (Copper Type L or PEX)
• Replace or modify drain lines (ABS)
• Relocate plumbing fixtures as needed
• Install new shut-off valves and cleanouts
• Water heater replacement if included
• Call for rough and final plumbing inspections
6. Electrical (Up to Code)
• Upgrade electrical panel if required
• Rewire entire house as needed
• Install new outlets and switches
• Install GFCI/AFCI protection per code
• Install recessed lighting and fixtures
• Install smoke and carbon monoxide detectors
• Dedicated circuits for appliances
• Call for rough and final electrical inspections
7. HVAC
• Replace or upgrade HVAC system if included
• Install new ducting and registers
• Install thermostat or mini-split system if applicable
8. Insulation
• Install wall insulation per code requirements
• Install ceiling insulation per code requirements
9. Drywall & Plaster
• Install new drywall
• Tape and mud (Level 4 or 5 finish)
• Texture to match existing or smooth finish
• Patch all affected areas
10. Flooring
• Install tile flooring
• Install engineered wood / hardwood / laminate / vinyl
• Install baseboards
• Floor leveling if required
11. Kitchen Remodel
• Install new cabinets
• Install countertops
• Install backsplash
• Install sink and faucet
• Install appliances (owner supplied unless specified)
12. Bathroom Remodel(s)
• Install new tub or shower system
• Waterproofing system installation
• Install tile on floors and walls
• Install vanity and toilet
• Install shower valve and fixtures
• Install shower glass if included
13. Doors & Windows
• Replace interior and entry doors
• Replace windows if included
• Install hardware
14. Interior & Exterior Paint
• Surface preparation
• Prime and paint walls, ceilings, and trim
• Exterior painting if included
15. Exterior Work (If Included)
• Stucco repair
• Roofing repair or replacement
• Concrete work or pavers
• Drainage improvements
16. Final Phase
• Final inspections
• Punch list completion
• Final cleaning
• Final walk-through with homeowner
Standard California Contract Terms (Summary)
• All work performed in compliance with California Building Code.
• Change orders must be approved in writing.
• Unforeseen conditions may require additional cost.
• One-year labor warranty unless otherwise stated.
• Progress payments per agreed payment schedule.
• Contractor is licensed and insured.
 Progressive Design Build
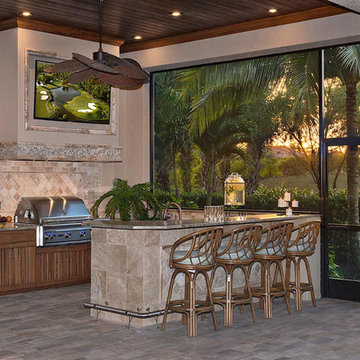
Here in Florida, we’re blessed with great weather year-round. So it’s no surprise that outdoor entertaining areas are an extremely popular way to enhance outdoor living. When our clients requested an update to their existing outdoor kitchen while they were away on vacation, we were ready to hit the ground running. While their beautiful 2-story home on a golf course had a pool and covered lanai area, the existing outdoor kitchen just didn’t function well for their needs. Mainly, they craved additional counter space and more seating. And, as avid football fans, with a son playing on a renown Division 1 college team, they also wanted a large screen TV to watch games. After all, what better way to share game day excitement than at a barbecue with family and friends?
A Bigger, Better Kitchen Layout
Our brilliant design team came up with a much larger, u-shaped outdoor kitchen layout for increased functionality. The extra base cabinets provided plenty of storage as well as a foundation for additional countertop space. Adjacent to the sink, we added a 24” outdoor refrigerator to keep food and beverages chilled, and the high top bar allowed for more seating around the perimeter.
For cooking, our clients selected a much larger Lynx grill and side burner to replace the original grill. While the kitchen was already set up for a grilling area, it required a hood, so we built and installed a custom hood for proper ventilation. Then, we added a large screen TV above the hood for easy viewing.
Finishing Touches
To softly illuminate the entire space at night, we installed additional recessed light fixtures into the ceiling and under the grill hood. We also tied the Cypress wood ceiling and the crown molding together into the design with a luxurious cabinet stain. Along with these finishing touches, we added a decorative travertine stone backsplash behind the grill and homogenized the front face of the bar for a polished, matching look.
Ventilation Challenges
With the outdoor kitchen lanai located directly under a second-floor living area, we had expected to tuck away ventilation ductwork between the second-level floor joists and the exterior wall running parallel to the grill hood. However, upon further investigation, we discovered the second floor joist system, in fact, ran perpendicular to the grill hood. In short, we needed a new way to hide the venting without compromising the original design.
Our team came up with an inspired solution: Construction of a false wall behind the outdoor kitchen allowed us to run ductwork without creating a visible chase for the vent, thus maintaining a symmetrical look on both sides of the grill and decorative hood.
Exceeding Expectations
In the end, we didn’t just meet our clients’ needs for a beautiful outdoor kitchen update – we exceeded them. As planned, we completed the new outdoor kitchen while they were out of town. But when our clients returned from vacation, they were so impressed with the results (and the stress-free design/build experience) that they promptly hired us for another extensive remodel – a stunning home addition!
19