
Search results for "Assessed" in Home Design Ideas
 Custom Design & Construction
Our client approached us while he was in the process of purchasing his ½ lot detached unit in Hermosa Beach. He was drawn to a design / build approach because although he has great design taste, as a busy professional he didn’t have the time or energy to manage every detail involved in a home remodel. The property had been used as a rental unit and was in need of TLC. By bringing us onto the project during the purchase we were able to help assess the true condition of the home. Built in 1976, the 894 sq. ft. home had extensive termite and dry rot damage from years of neglect. The project required us to reframe the home from the inside out.
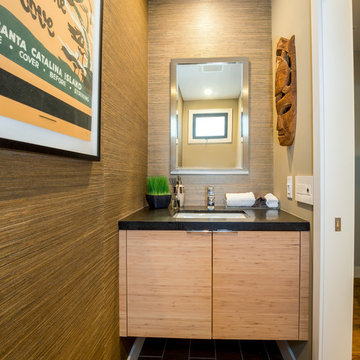
To design a space that your client will love you really need to spend time getting to know them. Our client enjoys entertaining small groups. He has a custom turntable and considers himself a mixologist. We opened up the space, space-planning for his custom turntable, to make it ideal for entertaining. The wood floor is reclaimed wood from manufacturing facilities. The reframing work also allowed us to make the roof a deck with an ocean view. The home is now a blend of the latest design trends and vintage elements and our client couldn’t be happier!
View the 'before' and 'after' images of this project at:
http://www.houzz.com/discussions/4189186/bachelors-whole-house-remodel-in-hermosa-beach-ca-part-1
http://www.houzz.com/discussions/4203075/m=23/bachelors-whole-house-remodel-in-hermosa-beach-ca-part-2
http://www.houzz.com/discussions/4216693/m=23/bachelors-whole-house-remodel-in-hermosa-beach-ca-part-3
Features: subway tile, reclaimed wood floors, quartz countertops, bamboo wood cabinetry, Ebony finish cabinets in kitchen

 Kathleen Jennison
An Arts & Crafts Bungalow is one of my favorite styles of homes. We have quite a few of them in our Stockton Mid-Town area. And when C&L called us to help them remodel their 1923 American Bungalow, I was beyond thrilled.
As per usual, when we get a new inquiry, we quickly Google the project location while we are talking to you on the phone. My excitement escalated when I saw the Google Earth Image of the sweet Sage Green bungalow in Mid-Town Stockton. "Yes, we would be interested in working with you," I said trying to keep my cool.
But what made it even better was meeting C&L and touring their home, because they are the nicest young couple, eager to make their home period perfect. Unfortunately, it had been slightly molested by some bad house-flippers, and we needed to bring the bathroom back to it "roots."
We knew we had to banish the hideous brown tile and cheap vanity quickly. But C&L complained about the condensation problems and the constant fight with mold. This immediately told me that improper remodeling had occurred and we needed to remedy that right away.
The Before: Frustrations with a Botched Remodel
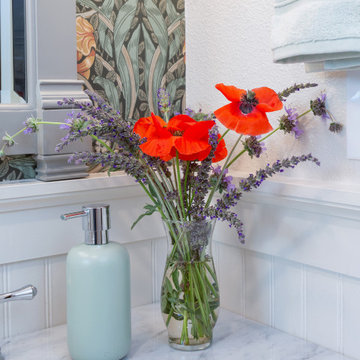
The bathroom needed to be brought back to period appropriate design with all the functionality of a modern bathroom. We thought of things like marble countertop, white mosaic floor tiles, white subway tile, board and batten molding, and of course a fabulous wallpaper.
This small (and only) bathroom on a tight budget required a little bit of design sleuthing to figure out how we could get the proper look and feel. Our goal was to determine where to splurge and where to economize and how to complete the remodel as quickly as possible because C&L would have to move out while construction was going on.
The Process: Hard Work to Remedy Design and Function
During our initial design study, (which included 2 hours in the owners’ home), we noticed framed images of William Morris Arts and Crafts textile patterns and knew this would be our design inspiration. We presented C&L with three options and they quickly selected the Pimpernel Design Concept.
We had originally selected the Black and Olive colors with a black vanity, mirror, and black and white floor tile. C&L liked it but weren’t quite sure about the black, We went back to the drawing board and decided the William & Co Pimpernel Wallpaper in Bayleaf and Manilla color with a softer gray painted vanity and mirror and white floor tile was more to their liking.
After the Design Concept was approved, we went to work securing the building permit, procuring all the elements, and scheduling our trusted tradesmen to perform the work.
We did uncover some shoddy work by the flippers such as live electrical wires hidden behind the wall, plumbing venting cut-off and buried in the walls (hence the constant dampness), the tub barely balancing on two fence boards across the floor joist, and no insulation on the exterior wall.
All of the previous blunders were fixed and the bathroom put back to its previous glory. We could feel the house thanking us for making it pretty again.
The After Reveal: Cohesive Design Decisions
We selected a simple white subway tile for the tub/shower. This is always classic and in keeping with the style of the house.
We selected a pre-fab vanity and mirror, but they look rich with the quartz countertop. There is much more storage in this small vanity than you would think.
The Transformation: A Period Perfect Refresh
We began the remodel just as the pandemic reared and stay-in-place orders went into effect. As C&L were already moved out and living with relatives, we got the go-ahead from city officials to get the work done (after all, how can you shelter in place without a bathroom?).
All our tradesmen were scheduled to work so that only one crew was on the job site at a time. We stayed on the original schedule with only a one week delay.
The end result is the sweetest little bathroom I've ever seen (and I can't wait to start work on C&L's kitchen next).
Thank you for joining me in this project transformation. I hope this inspired you to think about being creative with your design projects, determining what works best in keeping with the architecture of your space, and carefully assessing how you can have the best life in your home.
Find the right local pro for your project
 Mary Elliott
Copyright: MAE Interiors Inc. by Accent Photography
Bathroom - traditional master bathroom idea in Charlotte
Bathroom - traditional master bathroom idea in Charlotte
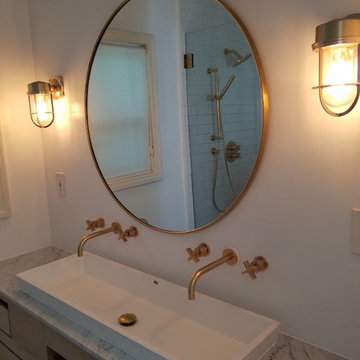
 52 Star Construction, Inc.
 Mike 52 star construction inc
Bathroom - modern bathroom idea in Los Angeles
Bathroom - modern bathroom idea in Los Angeles

 Industrial Projects
Creating a comfortable outdoor living space is a priority for many homeowners and DIY enthusiasts. With rising summer temperatures, installing a shade tarp in your backyard offers an affordable and effective solution for sun protection. We’ve developed this detailed, step-by-step guide to help you confidently install a shade tarp that not only shields you from the sun but also adds aesthetic appeal to your outdoor area.
Benefits of Installing a Backyard Shade Tarp
Before diving into the installation process, let’s explore the key benefits of having a backyard shade tarp:
Provides UV Protection: Keeps your family and guests safe from harmful sun exposure.
Reduces Outdoor Temperatures: Creates a cooler, more enjoyable outdoor space.
Protects Outdoor Furniture: Extends the life of patio furniture by reducing sun damage.
Enhances Outdoor Aesthetics: Adds a modern, stylish look to your yard.
Budget-Friendly: More affordable compared to permanent structures like pergolas.
Materials and Tools You’ll Need
To begin your DIY backyard shade project, gather the following materials and tools:
Materials:
Shade tarp (UV-resistant and breathable)
Sturdy posts or existing structures (trees, fences, walls)
Mounting hardware (eye bolts, D-rings, turnbuckles, snap hooks)
Nylon or polyester rope, or stainless-steel wire
Concrete (if installing new posts)
Tools:
Power drill
Measuring tape
Level
Ladder
Wrench or adjustable spanner
Post hole digger (if installing new posts)
Step 1: Plan Your Shade Tarp Layout
The first step in installing your backyard shade tarp is careful planning. Take time to assess your outdoor area and answer these key questions:
Where is the sun’s path throughout the day?
What size and shape of tarp best suits your space?
Will you anchor the tarp to existing structures or install new posts?
What height do you want the tarp to sit at for maximum shade and airflow?
Pro Tip: Use string or garden hoses to visualize the tarp layout on the ground before making permanent decisions.
Step 2: Measure and Mark Anchor Points
Once you’ve determined the tarp’s location and orientation:
Measure the tarp dimensions.
Mark the exact points where each corner of the tarp will be anchored.
Ensure that the anchor points are at least 5–10% longer than the tarp size to allow for tensioning and slight adjustments.
Consider slope angles for water runoff. Aim for at least a 20-degree angle to prevent water pooling on the tarp.
Step 3: Install Support Posts (If Necessary)
If your backyard lacks existing anchor points like trees or fences, you’ll need to install sturdy support posts:
Dig post holes at least 24 inches deep and 8-12 inches wide for stability.
Set posts in concrete, making sure they remain plumb and level.
Allow the concrete to cure for at least 24–48 hours before applying tension from the tarp.
We recommend using pressure-treated wood, galvanized steel poles, or aluminum posts for longevity and strength.
Step 4: Install Mounting Hardware
With your anchor points ready, it’s time to install the necessary hardware:
Attach eye bolts or pad eyes securely into walls, posts, or other fixed structures.
For added flexibility and adjustability, install turnbuckles or tensioners to fine-tune the tarp’s tightness.
Connect snap hooks, D-rings, or carabiners to make assembly and disassembly easier.
Make sure all hardware is rated for outdoor use to prevent rust and corrosion.
Step 5: Attach and Tension the Shade Tarp
Now it’s time for the most satisfying part—mounting the shade tarp:
Begin by attaching one corner of the tarp to an anchor point.
Gradually attach the remaining corners, moving diagonally for even tension.
Adjust each connection point using your turnbuckles, ropes, or cables.
Pull the tarp tight enough to avoid sagging, but not so tight that it risks tearing.
Check that the tarp maintains the desired slope for rainwater runoff and adjust tension as needed.
Step 6: Final Adjustments and Safety Check
Before enjoying your new shaded area:
Inspect all anchor points and hardware for stability.
Test the tarp’s tension and make adjustments for even distribution.
Ensure that no sharp edges or loose connections remain that could damage the tarp or pose a safety hazard.
Confirm that the tarp is secure in windy conditions by giving it a gentle tug.
If you live in an area with frequent high winds, consider removing the tarp during storms to prevent damage.
Step 7: Enjoy Your Shaded Backyard Oasis
Once installed, your backyard shade tarp provides a comfortable and protective space for outdoor gatherings, relaxation, or family activities. You can decorate underneath with outdoor furniture, string lights, or potted plants to create a personalized outdoor retreat.
Maintenance Tips for Long-Lasting Shade Tarp Performance
To extend the life of your shade tarp, follow these maintenance guidelines:
Regularly check for wear and tear, especially around anchor points and seams.
Clean the tarp periodically with mild soap and water to prevent mildew buildup.
Store the tarp indoors during harsh weather seasons if it's not designed for year-round use.
Tighten hardware as needed to maintain proper tension and avoid sagging.
By following these simple care steps, your shade tarp will continue to deliver years of sun protection and outdoor comfort.
Conclusion: Upgrade Your Outdoor Space with a DIY Shade Tarp
Installing a shade tarp in your backyard is a cost-effective and rewarding DIY project. With careful planning, quality materials, and proper installation techniques, you’ll enjoy cool, shaded outdoor living all season long. This step-by-step guide ensures your project goes smoothly from start to finish.

 Bellwether Windows, Siding & Doors
This Denver home in Stapleton needed a partial siding replacement despite having been built about 9 years ago. The home was built with low-grade composite siding that was swelling and cracking severely.
We only installed new siding on the left and rear elevations of the home leaving the rest of the siding intact. We installed James Hardie Hardie siding and trim. Then we painted a contemporary color scheme with Sherwin-Williams Duration exterior paint on the entire house to match. We will assess the damage and work with our homeowners to maximize on the siding repair and replacement. The transformation is stunning. Even for a newer community, this home’s exterior stands out among the neighborhood.
 Carekter Design & Remodeling
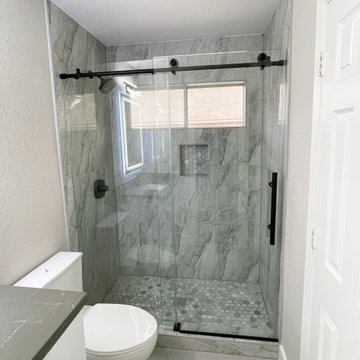
Converting a bathtub into a walk-in shower transformed the existing space that is easily assessable. Gray marble-looking tile creates a sophisticated and timeless look. The shower features a gray marble shower floor mosaic, shower niche, and frameless shower door. The white high gloss floating vanity creates the illusion of space and a clean, minimalistic aesthetic. The gray engineered quartz countertop complements the overall bathroom design.
 Eva Home Staging and Design
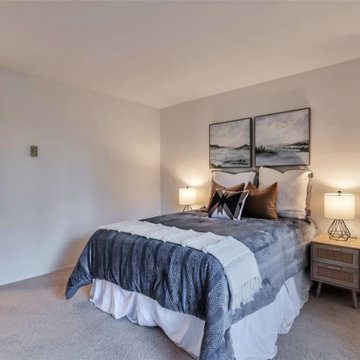
Our team carefully assessed the Bellevue home, developed a cohesive staging plan, and selected furnishings and décor that enhanced each space while complementing the home’s style. We then installed and styled the pieces with attention to layout, scale, and visual balance to create a polished and inviting presentation for prospective buyers.
 Kitchen Solvers of Spring Hill
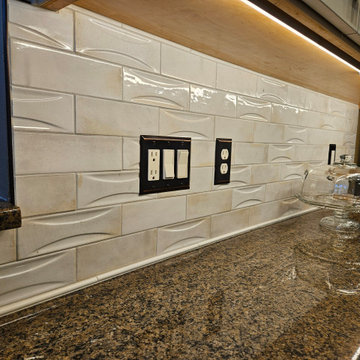
After having a bad experience with a contract that remodeled their bathrooms this homeowner was very inquisitive, did all her own research on the materials that were suggested, did her research on us which built her confidence in what we could do for their kitchen. She started out wanting to lighten and brighten the cabinets and retrofit some new appliances. After assessing all of their current frustrations in their space we found that modifying some of their cabinets to be drawer stacks and adding a few storage solutions would be helpful. Discovering that their countertops were not installed flush with the wall we added pencil tile to cover the gap making a problem into a feature that she couldn’t be happier with. Our attention to detail and suggestions for efficiency has left them ecstatic for all the extra suggestions though they each had some doubts of what the other wanted. Now they plan to add above cabinet lighting in the future and possibly more storage solutions!
 Windy City Painters
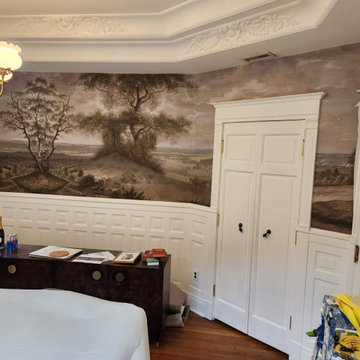
Professional wallpaper installation Old Town requires expertise that honors the neighborhood's historic character while delivering modern durability and beauty.
Project Overview and Architecture
This Old Town wallpaper installation showcased our ability to work with the area's distinctive architecture, from classic greystones to renovated vintage condos that define this prestigious neighborhood.
Materials and Products
We selected premium wallpaper materials specifically designed for Chicago's climate conditions, using high-quality adhesives and primers that ensure long-lasting adhesion on various surface types.
Installation Process
Step 1: Surface preparation including cleaning, smoothing, and addressing imperfections common in older buildings
Step 2: Professional repairs to walls ensuring perfect foundation for wallpaper application
Step 3: Quality primer application designed specifically for wallpaper adhesion and longevity
Step 4: Expert wallpaper installation with precise pattern matching and seamless application techniques
Chicago-Specific Challenges
Old Town homes present unique challenges including weather exposure, aging building materials, potential lead paint considerations, and vintage surfaces requiring specialized preparation techniques.
Results Achieved
Windy City Painters delivered flawless wallpaper installation that enhanced the room's aesthetic while respecting the architectural integrity of this historic Old Town property.
Professional Tips
Homeowners should always hire experienced professionals for wallpaper installation, especially in historic properties where surface preparation and material selection significantly impact long-term success and beauty.
See more work and request free estimate at windypainters.com.
FAQs
Q: Why hire professionals for wallpaper installation Old Town homes? / A: Expert installation prevents costly mistakes, ensures proper adhesion, and preserves historic property values through quality craftsmanship.
Q: What wallpaper materials work best in Chicago climate? / A: High-quality papers with proper backing designed for humidity fluctuations and temperature changes typical in Chicago homes.
Q: How do you prepare Old Town walls for wallpaper? / A: Thorough cleaning, surface smoothing, repairs, and specialized primers ensure optimal wallpaper installation adhesion and longevity.
Q: Can wallpaper be installed over existing paint? / A: Sometimes, but professional assessment determines if surface preparation or primer application is needed for successful wallpaper installation.
Q: How long does professional wallpaper installation take? / A: Most rooms completed within one day, depending on size, pattern complexity, and surface preparation requirements.
Q: What about removing old wallpaper first? / A: We safely remove existing wallpaper using proper techniques that protect walls and prepare surfaces for new installation.
Q: Do you offer design consultation for wallpaper selection? / A: Yes, we help choose patterns and materials that complement Old Town architectural character and personal style preferences.
Q: How do you handle pattern matching across walls? / A: Precise measurements and expert techniques ensure seamless wallpaper installation with perfect pattern alignment throughout rooms.
Q: What's your wallpaper installation warranty coverage? / A: Comprehensive warranties cover both materials and workmanship, giving you confidence in your wallpaper installation investment.
Q: Can you work around furniture and schedules? / A: Absolutely! We coordinate timing and setup to minimize disruption during your professional wallpaper installation project.
 Nathan James Construction Inc.
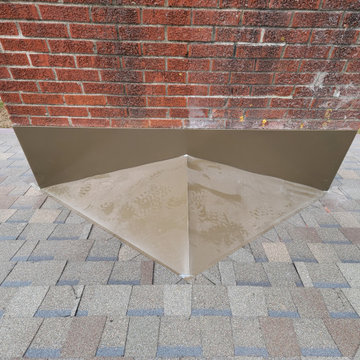
Here's a chimney that had been neglected for far too long. Roofers rarely assess & address the flashing needs of the chimney, and they typically just leave it.
In this case, the diverter had started leaking, leaving the original 70+ year old flashing on the house. We removed the original flashing & counter flashing. Then, we framed a larger diverter, and installed a custom fabricated diverter, colored to match.
Before & after pictures are outstanding!
 A.P.S. Ayala Painting & Services LLC.
At A.P.S. Ayala Painting & Services LLC we have professional painters that are AMAZING. They get the job done with quality and speed. We have 5 star ratings from each customer that has rated us. We also work closely with a network of other professionals that includes plumbers, electricians, gutter repair and roofing.
We been in business for 12+ years. We offer free consultations and will come to your home or business to assess your needs. Please contact us for an appointment.
Greensboro, North Carolina

 Furnishr
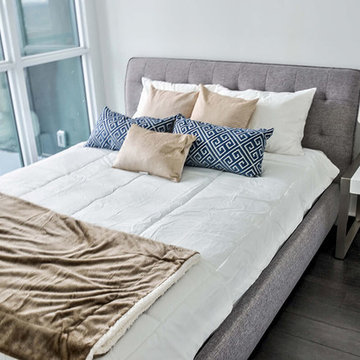
Furnishr was hired to furnish this high rise condo so that the owner can sell the unit as a furnished unit to yield a higher return. We created this furniture package by assessing the contemporary architecture of the building and the interior finishes of the unit. This bedroom has a modern upholstered queen bed with an easy lift system to access the under-bed storage.
 Versa Homes
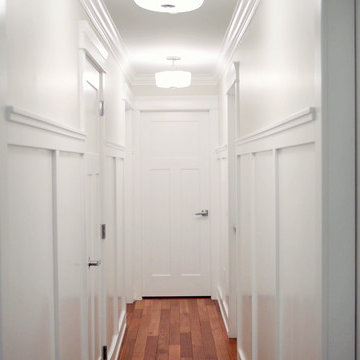
When we first assessed the property on Southridge Cres. in Langley, we learned that the previous owners had renovated the space and left a lot of small mistakes behind. Aside from the challenge of repairing the mistakes from the previous renovation, the client was looking for a bigger space for their growing family... their third baby was on the way! Some of the renovations to this space included:
Addition of an extra bedroom
Expansion of master bedroom and ensuite bathroom
Craftsman style millwork throughout the home with modern flare and a classic finish
Added reclaimed wood Barn Door feature
Radiant heated floors
Grand elongated fireplace in master bedroom
 Hay Design Furnishings & Decor
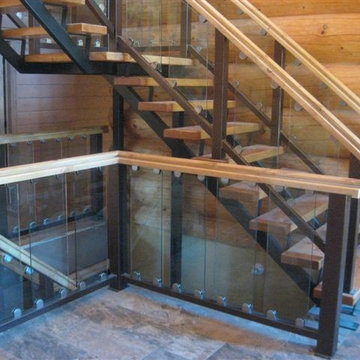
Hay Design Incorporated was retained to Study and Analyze the Space Requirement and provide complete Interior Design Services related to 294 m2 of residential space. The primary objective was to examine ways to present interior finishes and preliminary layout, meeting Client requirements and staying within their space envelope. Hay design presented services including functional programming (information gathering, inventory and assessment, equipment usage chart and electrical load requirements, and test plans), schematic design (schematic concept plans and colour boards), and design development (partition layout and finishes plan, and finishes presentation boards).
 ShadeFX
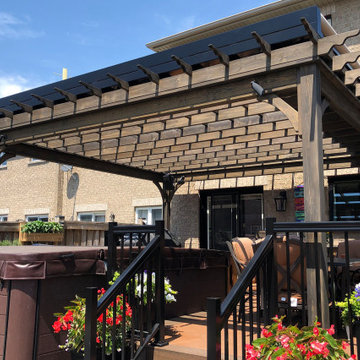
ShadeFX assessed an existing pergola and installed a custom 16′ x 16′ retractable roof in a neutral Sunbrella Linen. The motorized system is powder-coated Traffic black, completing the look and feel of the overall space.
 ShadeFX
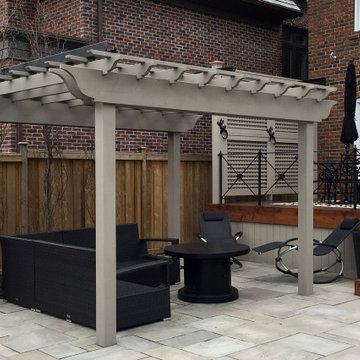
ShadeFX provided a site assessment for this East York pergola. After taking measurements, ShadeFX customized and installed a 10’ x 12’ retractable roof. The homeowners chose a Sunbrella Black fabric and painted the components black to match the outdoor décor.
 homeprojects
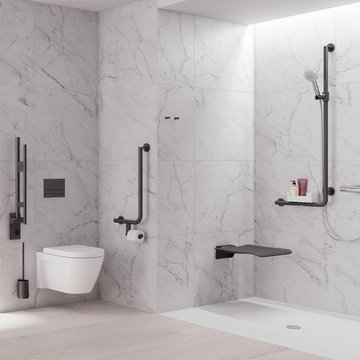
Accessible bathrooms don't need to look like a hospital bathroom.We listen to your needs to create your solution.
Example of a mid-sized trendy white tile and marble tile ceramic tile, brown floor and single-sink wet room design in Auckland with a wall-mount toilet and white walls
Example of a mid-sized trendy white tile and marble tile ceramic tile, brown floor and single-sink wet room design in Auckland with a wall-mount toilet and white walls
27