
Search results for "Benefiting" in Home Design Ideas
 Save home
The kitchen space in your house is where you will be preparing meals for yourself and your family, sharing dinner with your loved ones after a long day at work, and maybe even entertaining guests from time to time. Therefore, it is imperative for your kitchen – which is at the heart of your household – to be functional, durable, comfortable, and aesthetically appealing. Please click Verdivurdering Oslo
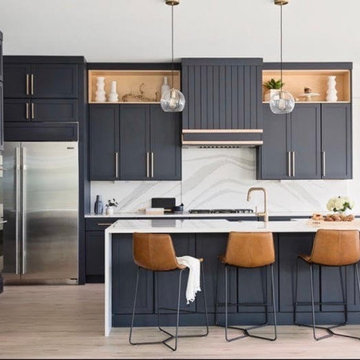
If you want to bring an element of vibrant color and sophistication into your kitchen space, then you might consider investing in a set of high-quality navy blue kitchen cabinets manufactured by a reputed brand or company such as Cabinet DIY. Navy is a chic and smart shade of blue that can create an ambiance of calm and elegant modernity in your interiors.
Navy blue kitchen cabinets will be unique enough to help you stand out without too much extra effort, while also blending in perfectly with most types of kitchen décor. If your kitchen is otherwise monochrome or light-colored, then a set of navy blue kitchen cabinets will also imbue the space with some much-needed energy and radiance. You can also accessorize navy blue cabinets with chrome hinges and knobs, colorful accents, and other elements that will breathe more life into your interiors.
Another advantage of installing navy blue RTA cabinets in your kitchen is that they are extremely affordable, durable, and easy to maintain. Moreover, RTA cabinets are widely available in a variety of shades, finishes, and textures. As they are quite easy to install, navy blue RTA kitchen cabinets are becoming more and more popular among homeowners around the country.
Ideas for Designing a Kitchen with Navy Blue Cabinets
To make the most of your world-class navy blue kitchen cabinets, you should know about some of the most popular design trends that have enthralled interior decorators in recent years. Mentioned below are some unique ideas to make the most of navy blue kitchen cabinets by designing the kitchen space in a thoughtful and innovative manner.
1. Navy Blue Base Cabinets
If you want to try out a set of navy blue kitchen cabinets in your interiors but don’t want to commit fully yet, then you can consider buying a set of blue base cabinets. The base cabinets are often ignored because they’re below the eye level, so using a vibrant and remarkable color for these cabinets will allow them to draw attention and stand out. The upper cabinets can be white or gray, so that the color scheme doesn’t become too overwhelming.
2. Narrow Focus
If you don’t want to paint every cabinet in your kitchen navy blue, then another alternative is to choose a focal piece for the entire kitchen. One popular option is to install a large, spacious pantry cabinet with a painted, navy blue finish. All the other cabinets – including the upper and base cabinets – can be painted in muted whites and grays. This will help make your kitchen space feel minimalistic, chic, and stylish.
3. Proper Lighting
To emphasize the beauty of the elegant navy blue kitchen cabinets, you must ensure sufficient lighting in your kitchen area. The navy blue cabinets must receive adequate natural light, for which they need to be placed close to a window or balcony. Alternatively, you could also use artificial lights including strategically placed chandeliers or pendant lights to illuminate your unique navy blue kitchen cabinets and enhance the visual appeal of your home.
4. Contrasting Backsplashes
You can make the navy blue kitchen cabinets stand out by investing in a set of contrasting backsplashes or feature walls. Hence, light-colored, marble backsplashes might be ideal for such a kitchen, as they would not draw your eyes away from the cabinets or make the kitchen look too busy and colorful. Warm wooden shades and sophisticated grays are some other options that you could consider when designing a kitchen around navy blue cabinetry.
5. Metallic Appliances
Clean-lined gloss cabinets can create an aura of chic, sophisticated modernity when combined with metallic kitchen appliances such as chimneys, ovens, and coffee machines. Metallic appliances, if maintained properly, will make the kitchen look glossy and state-of-the-art. Paired with a set of cool blue cabinets, this design could work wonders for small, urban kitchens. Those who want to make the most of a small space would benefit most from choosing this décor.
In Conclusion
As you can see, there are many ways of creating a beautiful and elegant kitchen space with the help of navy blue RTA cabinets. All you have to do is use your imagination (and a bit of help from a design professional) to create the type of kitchen that suits your personal needs and preferences. High-quality and well-maintained navy blue kitchen cabinets can enhance the functionality and visual appeal of almost any home.
If you want to bring an element of vibrant color and sophistication into your kitchen space, then you might consider investing in a set of high-quality navy blue kitchen cabinets manufactured by a reputed brand or company such as Cabinet DIY. Navy is a chic and smart shade of blue that can create an ambiance of calm and elegant modernity in your interiors.
Navy blue kitchen cabinets will be unique enough to help you stand out without too much extra effort, while also blending in perfectly with most types of kitchen décor. If your kitchen is otherwise monochrome or light-colored, then a set of navy blue kitchen cabinets will also imbue the space with some much-needed energy and radiance. You can also accessorize navy blue cabinets with chrome hinges and knobs, colorful accents, and other elements that will breathe more life into your interiors.
Another advantage of installing navy blue RTA cabinets in your kitchen is that they are extremely affordable, durable, and easy to maintain. Moreover, RTA cabinets are widely available in a variety of shades, finishes, and textures. As they are quite easy to install, navy blue RTA kitchen cabinets are becoming more and more popular among homeowners around the country.
Ideas for Designing a Kitchen with Navy Blue Cabinets
To make the most of your world-class navy blue kitchen cabinets, you should know about some of the most popular design trends that have enthralled interior decorators in recent years. Mentioned below are some unique ideas to make the most of navy blue kitchen cabinets by designing the kitchen space in a thoughtful and innovative manner.
1. Navy Blue Base Cabinets
If you want to try out a set of navy blue kitchen cabinets in your interiors but don’t want to commit fully yet, then you can consider buying a set of blue base cabinets. The base cabinets are often ignored because they’re below the eye level, so using a vibrant and remarkable color for these cabinets will allow them to draw attention and stand out. The upper cabinets can be white or gray, so that the color scheme doesn’t become too overwhelming.
2. Narrow Focus
If you don’t want to paint every cabinet in your kitchen navy blue, then another alternative is to choose a focal piece for the entire kitchen. One popular option is to install a large, spacious pantry cabinet with a painted, navy blue finish. All the other cabinets – including the upper and base cabinets – can be painted in muted whites and grays. This will help make your kitchen space feel minimalistic, chic, and stylish.
3. Proper Lighting
To emphasize the beauty of the elegant navy blue kitchen cabinets, you must ensure sufficient lighting in your kitchen area. The navy blue cabinets must receive adequate natural light, for which they need to be placed close to a window or balcony. Alternatively, you could also use artificial lights including strategically placed chandeliers or pendant lights to illuminate your unique navy blue kitchen cabinets and enhance the visual appeal of your home.
4. Contrasting Backsplashes
You can make the navy blue kitchen cabinets stand out by investing in a set of contrasting backsplashes or feature walls. Hence, light-colored, marble backsplashes might be ideal for such a kitchen, as they would not draw your eyes away from the cabinets or make the kitchen look too busy and colorful. Warm wooden shades and sophisticated grays are some other options that you could consider when designing a kitchen around navy blue cabinetry.
5. Metallic Appliances
Clean-lined gloss cabinets can create an aura of chic, sophisticated modernity when combined with metallic kitchen appliances such as chimneys, ovens, and coffee machines. Metallic appliances, if maintained properly, will make the kitchen look glossy and state-of-the-art. Paired with a set of cool blue cabinets, this design could work wonders for small, urban kitchens. Those who want to make the most of a small space would benefit most from choosing this décor.
In Conclusion
As you can see, there are many ways of creating a beautiful and elegant kitchen space with the help of navy blue RTA cabinets. All you have to do is use your imagination (and a bit of help from a design professional) to create the type of kitchen that suits your personal needs and preferences. High-quality and well-maintained navy blue kitchen cabinets can enhance the functionality and visual appeal of almost any home.
 Studio Munroe
Photography by Thomas Kuoh
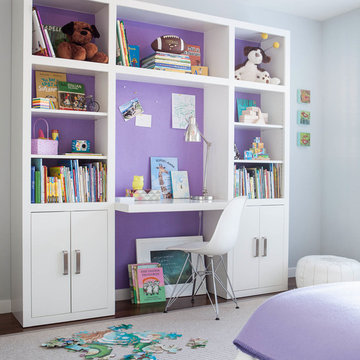
Kids' bedroom - bedroom contemporary girl dark wood floor kids' bedroom idea in San Francisco
Kids' bedroom - bedroom contemporary girl dark wood floor kids' bedroom idea in San Francisco
 BMC Cabinet Specialists
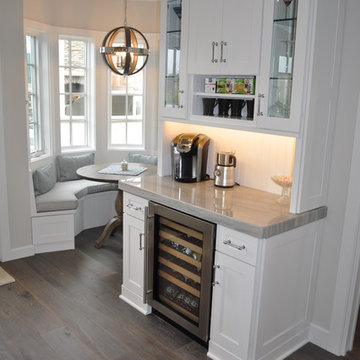
Home bar - small traditional single-wall dark wood floor home bar idea in Los Angeles with white cabinets, quartzite countertops, stainless steel appliances, an island, no sink and shaker cabinets
Find the right local pro for your project
 Raad Studio
Daniel Shea
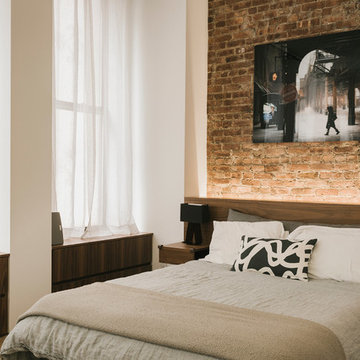
Urban master medium tone wood floor bedroom photo in New York with no fireplace and beige walls
Urban master medium tone wood floor bedroom photo in New York with no fireplace and beige walls

 River Valley Landscapes
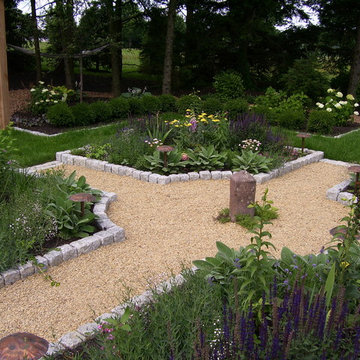
The property is one of the original farm houses located on the main street of a small town. It has been in the family for many years and our client just inherited the property. They were trying to have balance of preserving the old while realizing modern day living has its benefits too. The house had a large addition added using mostly old style materials, but designed with function and modern day luxuries. Our goal was to carry that theme to the outside.
Our first problem we had to address was how to transition between the first floor elevation changes. The lower room was the husband’s office. He stated in the future he may have clients over and it would be nice to have an area to sit outside. The wife’s main concern was to renew the four corner garden. She also felt it was very important to be able to see it from the kitchen area. Finally there was an old wishing well stuck right outside the kitchen. They both felt it would be neat to be able to incorporate this in some how. They wanted a patio area with a built in grill to accommodate there family and friends. They also wanted to keep a large play area for the kids.
We were able to pull this off successfully. We addressed the first issue by having a small lower level flagstone area. This area is large enough for 1 to 2 people to sit comfortably. It also provides a transition from his office to the larger patio area. We installed a simple small gravel sitting area opposite of the main patio. This provides our client a secluded place to relax or do business. Mrs.... told me she is amazed how much her and her husband enjoys this area. It is so peaceful looking at the small creek over a glass of wine.
We built a natural limestone retaining wall to create the patio terrace. The stone was chosen to extend the houses architectural elements into the landscape. Irregular broken flagstone was used to give it a more casual feel. We installed three Serviceberries into the patio terrace to replace some trees that were taken down during the remodeling. She was very concern that they would block the view of the four corner garden. We new they were crucial to nestle in the terrace, so we placed them for a couple days for her to decide. Fortunately she agreed they not only kept the view open, but helped frame the garden.
The four corner garden was designed to be viewed from afar and experienced up close. We wanted the space to have some formal structure while keeping with the casual farm house feel. Another natural limestone retaining wall was created. This leveled the garden terrace and helped associate it with the rest of the property. The four corner garden is nestled into the existing woods edge. This provides three distinct experiences to entering the garden; a more formal from the driveway, an open feel from the lower lawn, and a more natural / casual experience from the wooded area. The Plymouth brown gravel was used for the center of the garden. This helped highlight the stone post that was found during construction. The gravel also brings the sense of sound into the garden space. Lamb’s ear was chosen as a fun way to get kids interest in horticulture.
The balance of using the new to create the old feel is what makes this project a success. The property has already hosted a local historical society event and won an award for its preservation efforts. When Mrs.... can’t find her husband, she knows he is either reading the newspaper by the grill or resting in the hammock along the wood’s path.
 Ike Kligerman Barkley
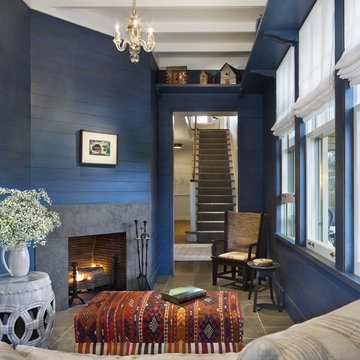
Small beach style enclosed porcelain tile and gray floor family room photo in Boston with blue walls, a corner fireplace and a concrete fireplace
 Anne Sneed Architectural Interiors
Jim Brady Architectural Photography
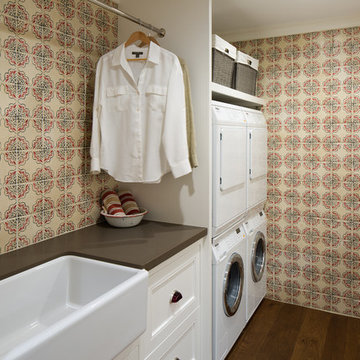
Example of a country galley dark wood floor dedicated laundry room design in San Diego with a farmhouse sink, multicolored walls, a stacked washer/dryer, white cabinets and recessed-panel cabinets
Example of a country galley dark wood floor dedicated laundry room design in San Diego with a farmhouse sink, multicolored walls, a stacked washer/dryer, white cabinets and recessed-panel cabinets
 Change Your Bathroom©
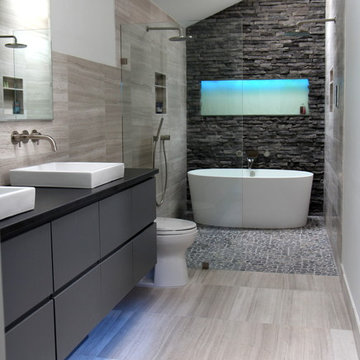
The goal of this project was to upgrade the builder grade finishes and create an ergonomic space that had a contemporary feel. This bathroom transformed from a standard, builder grade bathroom to a contemporary urban oasis. This was one of my favorite projects, I know I say that about most of my projects but this one really took an amazing transformation. By removing the walls surrounding the shower and relocating the toilet it visually opened up the space. Creating a deeper shower allowed for the tub to be incorporated into the wet area. Adding a LED panel in the back of the shower gave the illusion of a depth and created a unique storage ledge. A custom vanity keeps a clean front with different storage options and linear limestone draws the eye towards the stacked stone accent wall.
Houzz Write Up: https://www.houzz.com/magazine/inside-houzz-a-chopped-up-bathroom-goes-streamlined-and-swank-stsetivw-vs~27263720
The layout of this bathroom was opened up to get rid of the hallway effect, being only 7 foot wide, this bathroom needed all the width it could muster. Using light flooring in the form of natural lime stone 12x24 tiles with a linear pattern, it really draws the eye down the length of the room which is what we needed. Then, breaking up the space a little with the stone pebble flooring in the shower, this client enjoyed his time living in Japan and wanted to incorporate some of the elements that he appreciated while living there. The dark stacked stone feature wall behind the tub is the perfect backdrop for the LED panel, giving the illusion of a window and also creates a cool storage shelf for the tub. A narrow, but tasteful, oval freestanding tub fit effortlessly in the back of the shower. With a sloped floor, ensuring no standing water either in the shower floor or behind the tub, every thought went into engineering this Atlanta bathroom to last the test of time. With now adequate space in the shower, there was space for adjacent shower heads controlled by Kohler digital valves. A hand wand was added for use and convenience of cleaning as well. On the vanity are semi-vessel sinks which give the appearance of vessel sinks, but with the added benefit of a deeper, rounded basin to avoid splashing. Wall mounted faucets add sophistication as well as less cleaning maintenance over time. The custom vanity is streamlined with drawers, doors and a pull out for a can or hamper.
A wonderful project and equally wonderful client. I really enjoyed working with this client and the creative direction of this project.
Brushed nickel shower head with digital shower valve, freestanding bathtub, curbless shower with hidden shower drain, flat pebble shower floor, shelf over tub with LED lighting, gray vanity with drawer fronts, white square ceramic sinks, wall mount faucets and lighting under vanity. Hidden Drain shower system. Atlanta Bathroom.
 Alvarez Homes
Photography by Jorge Alvarez.
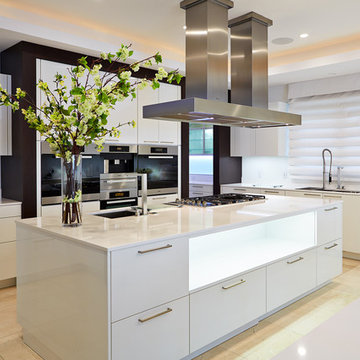
Enclosed kitchen - mid-sized contemporary l-shaped travertine floor and beige floor enclosed kitchen idea in Tampa with an undermount sink, flat-panel cabinets, white cabinets, white backsplash, stainless steel appliances, solid surface countertops, glass sheet backsplash and two islands
Enclosed kitchen - mid-sized contemporary l-shaped travertine floor and beige floor enclosed kitchen idea in Tampa with an undermount sink, flat-panel cabinets, white cabinets, white backsplash, stainless steel appliances, solid surface countertops, glass sheet backsplash and two islands
 Melinamade - Residential Design + Interiors
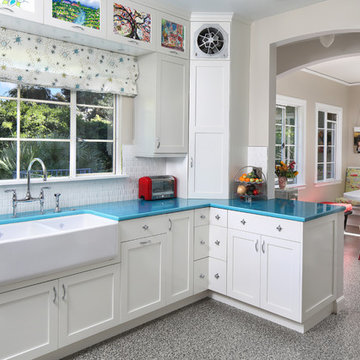
A remodeled retro kitchen mixed with a few original architectural elements of this Spanish home. Highlights here are aqua glazed lava stone counter tops, custom designed hand silk-screened fabrics, and children's art inside the upper cabinet panels. To know more about this makeover, please read the "Houzz Tour" feature article here: http://www.houzz.com/ideabooks/32975037/list/houzz-tour-midcentury-meets-mediterranean-in-california
Bernard Andre photography.
 Marie Burgos Design
Established in 1895 as a warehouse for the spice trade, 481 Washington was built to last. With its 25-inch-thick base and enchanting Beaux Arts facade, this regal structure later housed a thriving Hudson Square printing company. After an impeccable renovation, the magnificent loft building’s original arched windows and exquisite cornice remain a testament to the grandeur of days past. Perfectly anchored between Soho and Tribeca, Spice Warehouse has been converted into 12 spacious full-floor lofts that seamlessly fuse Old World character with modern convenience. Steps from the Hudson River, Spice Warehouse is within walking distance of renowned restaurants, famed art galleries, specialty shops and boutiques. With its golden sunsets and outstanding facilities, this is the ideal destination for those seeking the tranquil pleasures of the Hudson River waterfront.
Expansive private floor residences were designed to be both versatile and functional, each with 3 to 4 bedrooms, 3 full baths, and a home office. Several residences enjoy dramatic Hudson River views.
This open space has been designed to accommodate a perfect Tribeca city lifestyle for entertaining, relaxing and working.
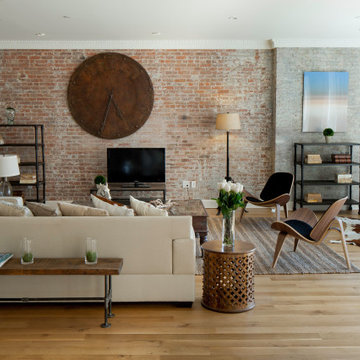
This living room design reflects a tailored “old world” look, respecting the original features of the Spice Warehouse. With its high ceilings, arched windows, original brick wall and iron columns, this space is a testament of ancient time and old world elegance.
The design choices are a combination of neutral, modern finishes such as the Oak natural matte finish floors and white walls, white shaker style kitchen cabinets, combined with a lot of texture found in the brick wall, the iron columns and the various fabrics and furniture pieces finishes used thorughout the space and highlited by a beautiful natural light brought in through a wall of arched windows.
The layout is open and flowing to keep the feel of grandeur of the space so each piece and design finish can be admired individually.
As soon as you enter, a comfortable Eames Lounge chair invites you in, giving her back to a solid brick wall adorned by the “cappucino” art photography piece by Francis Augustine and surrounded by flowing linen taupe window drapes and a shiny cowhide rug.
The cream linen sectional sofa takes center stage, with its sea of textures pillows, giving it character, comfort and uniqueness. The living room combines modern lines such as the Hans Wegner Shell chairs in walnut and black fabric with rustic elements such as this one of a kind Indonesian antique coffee table, giant iron antique wall clock and hand made jute rug which set the old world tone for an exceptional interior.
Photography: Francis Augustine
 User
UserPhoto: Ten Ten Creative
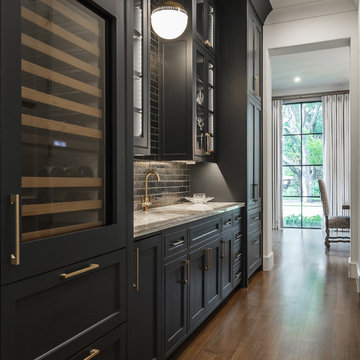
Wet bar - transitional single-wall dark wood floor and brown floor wet bar idea in Dallas with shaker cabinets, black cabinets, black backsplash, subway tile backsplash and gray countertops
Wet bar - transitional single-wall dark wood floor and brown floor wet bar idea in Dallas with shaker cabinets, black cabinets, black backsplash, subway tile backsplash and gray countertops


 PORCELANOSA Group
 Find a Porcelanosa Showroom near you today: http://www.porcelanosa-usa.com/home/locations.aspx
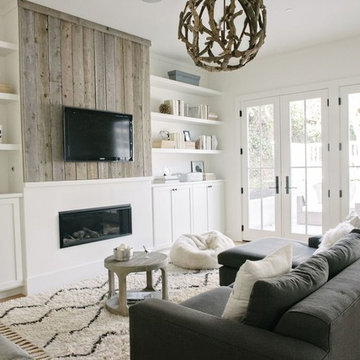
 DesignDot
Family room library - coastal family room library idea in New York with white walls, a ribbon fireplace and a wall-mounted tv
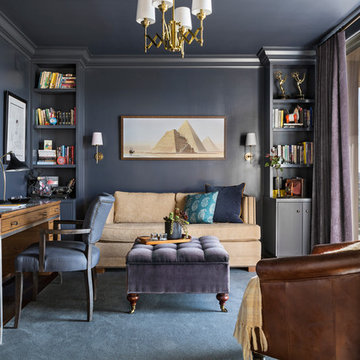
 Tim Barber Architects
Photography by Laura Hull.
Example of a small transitional freestanding desk dark wood floor home office design in Los Angeles with blue walls
Example of a small transitional freestanding desk dark wood floor home office design in Los Angeles with blue walls
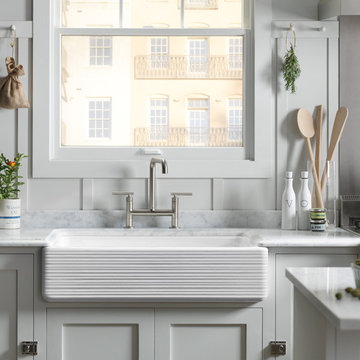
 Kohler
The Whitehaven Hayridge apron-front kitchen sink features the benefits of the Whitehaven with a gentle pattern of horizontal ridges on the apron-front. A large single basin accommodates large pots and pans, while the sloped bottom helps with draining and cleanup.
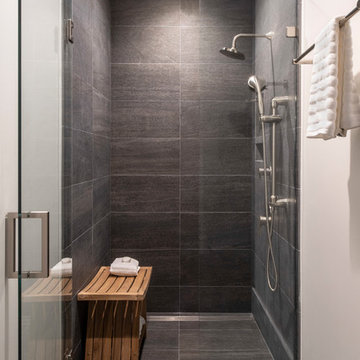
 John McClain Design
This barrier free (curbless) shower was designed for easy access. The perfect solution for the elderly or anyone who wants to enter the shower without any issues. The dark gray concrete look floor tile extends uninterrupted into the shower. Satin nickel fixtures and a teak shower stool provide some contrast. Walls are also built with plywood substrate in order to any grab bars if the situation ever arises.
Photo: Stephen Allen
7