
Search results for "Clean up" in Home Design Ideas

 Tile Doctor Ltd
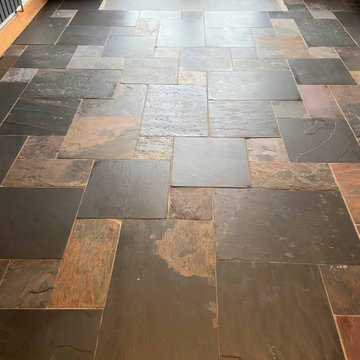
The pictures below are of Chinese Slate floor in the Kitchen of a property in the small village of Clifton just south of Penrith. We often get asked what the difference is between Rough and Semi Riven Slate, and this floor was a mixture of both.
If you look closely at the pictures and check out the darker parts of the floor you will see these smoother Semi Riven Slate, whereas the light copper-coloured parts of the floor were of the rougher textured variety. It’s not that unusual for stone to be mixed in this fashion as it can be supplied from different quarries in order to achieve a particular look.
The blend of different slates makes little difference when it comes to cleaning as the process is essentially the same. I would advise though if you intend to clean the floor using a mop then you should opt for Semi Riven Slate as Rough Slate can shred your mops and make it harder to maintain. We tend to use industrial floor buffing machines which work well on both surfaces so are less effected.
There was a bit of wax on this floor so to remove this Tile Doctor Wax Away was applied. The product was left to stand for fifteen minutes before being scrubbed into the stone, rinsed and then the soil extracted with a wet vacuum.
We then finished the cleaning with an Acid Rinse which involves scrubbing the Slate with Tile Doctor Grout Clean-up. This not only works well at cleaning up the stone and grout but also neutralises the alkaline pH left over from using Wax Away. I am very wary of the pH level of the floor as it could have an impact on the new sealer, giving the floor an acid rinse before sealing also ensures a better bond with the sealer.
Naturally, you can’t leave a strong product like Grout Clean-up on the Stone for long as it could etch the surface so once done the floor was thoroughly rinsed with water and extracted again with a wet vacuum. A mop and bucket and lots of sponges won’t do the job on a large area like this.
Once we finished the clean, we left it to dry off overnight and came back the next day to apply the sealer. We were originally going to apply a satin finish sealer, but the client had a big dog with sharp claws which could of scratched and marked the sealer so decided against it. I advised the client to use an Impregnating sealer called Tile Doctor Colour Grow, which lifts the natural colours in the stone, but is not a topical shiny sealer as the seal soaks into the Slate and leaves a a nice matt finish instead. Only two coats of sealer were needed, and the floor looked like new again.
My client was very happy with the difference in the appearance of the stone and how much cleaner the grout was, so much so they the following feedback for us, which is always appreciated.
“Totally impressed with the team they couldn’t have been more professional and even left me with some cleaner. My horrible 12 year old slate tiles look fabulous”
As usual we left a free bottle of Tile Doctor Neutral Tile Cleaner for aftercare, it’s very important not to undo all that hard work by using a product which will damage the seal, using a pH neutral cleaner will keep the seal looking sharp and fresh for years to come.
Heidi Taylor
North Cumbria Tile Doctor

 Simply Home Decorating
This beautiful North Vancouver home belongs to a nature-loving and health-conscious couple, Emma and Vince (names changed), their two young children, and their dog, Jasper. When they contacted us about renovating and furnishing their kitchen and family room, we walked in and saw a world of potential waiting to be uncovered.
Before: Larkhall Crescent Home:
Like many original North Vancouver homes, the interior was definitely dated. We encountered late ‘80s finishes in powder pink and teal green, old carpet, and a kitchen that wasn’t maximized to suit this family’s modern-day lifestyle. However, the size of the rooms offered us a ton of space with which to get creative.
Knowing our clients’ love of cooking, need for work spaces (Emma and Vince both work remotely), and growing family, we developed a design concept that would increase usable space, optimize storage, and create intimacy in this large area. As for the style, we were inspired by their European roots, inventing a new and modern take on “Belgian Farmhouse” style. Now, the home is truly one-of-a-kind.
After: Warm & Cozy Family Room:
Fresh, bright, and comfortable, this living area has been transformed! We started with the fireplace as a focal point, selecting aged brick tiles for added texture and a crisp wood mantle. The taupe-coloured sectional infuses the room with visual warmth and serves the added purpose of separating the family room from the kitchen.
Emma and Vince were also keen on using non-toxic materials in their home, and we were happy to oblige. To meet their needs, we sourced natural wood elements and sought out Canadian-made products - that adhere to high health standards - whenever possible.
Look closer at the elements of this space, and you will find this stunning, honeycomb-patterned rug in earthy gold, beige, and charcoal tones. It’s plush to the touch and full of visual texture that brings this room’s colour palette together. We sourced these two-tone chairs with caning, petrified wood side table, black sconces, and botanical prints in greyscale from local artist, Heather Johnston.
We topped off the space with this dark wood and rattan console that offers storage facing the kitchen and presents an opportunity to display cherished items. The result is a cozy lounging space brimming with comfort and functionality. It’s perfect for enjoying quality family time, or Emma can simply slide the coffee table away to make room for her morning yoga practice.
Now, let’s turn around and give some attention to the kitchen. Do you remember what the original kitchen looked like? If not, scroll back up, because the transformation is shocking…
Moody & Welcoming Kitchen for Healthy Living:
This kitchen looks very different from how it started, right? Though we didn’t touch any walls, the kitchen has almost doubled in usable space! We created a long, extended island with storage, an outlet for small appliances, and seating for comfortable prep, after-school snacking, or mingling among friends.
On the other side of the island, the family has even more storage and an integrated dishwasher within easy reach of the sink, perfect for quick clean-up. From this angle, you can also see the expansive custom Shaker cabinetry in white and the integrated double ovens. These facilitate their cooking experience and gave us the opportunity to add an additional surprise…
A coffee garage station and more hidden storage! Keeping these items located along the perimeter allows them to be accessed by the family or their guests without someone getting under the cook’s feet. These are the little details that make everyday life easier and more enjoyable.
Moving deeper into the kitchen, the seamless induction cooktop topped with a freestanding concealed hood fan commands attention in a soft yet prominent way. The natural wood accent mirrors the fireplace mantle, and the choice of off-black wood-grain cabinets not only continues our black-and-white colour palette but adds a sense of depth and contrast. The corner sink is located to the right and perfectly positioned with a view of their thriving backyard.
To invite more of this family’s character into the space, we mixed metals for interest — matte black, dark pewter, and warm brass — and created open shelves in white oak for their plants and decor. You can also glimpse the tumbled edge of the backsplash tile, which echoes the rustic brick of the fireplace. It adds that farmhouse charm while still feeling timeless and sophisticated.
Last but not least, we designed this dining banquette in the bay window (with integrated bench storage, of course), where the family can share a meal together, the kids can do homework, or Emma and Vince can work and enjoy a change of scenery from their offices. Like the other spaces in the home, it was designed to be beautiful, multi-functional, and long-lasting.
Praise from Our Clients:
It is clear that we love this home, but what did our clients have to say?
“Lori is a visionary and masters execution to the finest detail all at the same time. When she first met us to know more about who we are and how we live, she could right away envision how we could use the space in our kitchen and living room…The results exceeded our expectations.
Lori and her team were also a delight to work with — coordination with all the trades, fast problem-solving, regular updates, professional and friendly attitude of her entire team — made it the dream team. Thank you SHD for making our space so beautiful!”
In turn, we are so grateful for this family’s trust, their open communication, and for being wonderful people with whom to work. (So, thank you!)
Find the right local pro for your project
 Tile Doctor Ltd
I thought I would share this case history of a Yellow and Black Victorian Tiled floor that we worked on at a large house in Lancaster last year. It’s a great example of the typical problems we face with old Victorian floors, especially around door thresholds where the transition between the different foundation invariable cause problems.
I didn’t know the full history of the floor, but it was now in quite a state and recent renovation work had left the floor unstable with loose and cracked tiles. The tiles needed to be removed and then the damaged subfloor carefully scraped out and replaced. Once that was done the floor would need relaying and then cleaned and sealed so everything would blend in.
After visiting the property and providing a quotation we were given the go ahead and agreed a date to do the work.
We returned on the agreed date and set about carefully removing the loose and cracked Victorian tiles and put them aside for later use. Some would need replacing however this would not present a problem and they are still widely available, and I have several contacts I can turn to for this.
Once this was done and the subfloor exposed and cleaned up, I used self-levelling cement to bring the floor level up and in-line with the existing. This now needed to set hard, so the rest of the day was spent cleaning up the tiles we removed earlier with Tile Doctor Grout Clean-up and Pro-clean. Our goal is to reuse as many of the original tiles as possible to preserve the heritage of the floor.
The next day with the new subfloor set it was ready for tiling. This involves laying out the tiles first without adhesive carefully cutting and fitting new tiles as needed to maintain the overall pattern of the floor. Once I was happy the tiles were moved to a board and then fitted with fresh adhesive.
I came back on day three with the aim of cleaning the floor so it could be sealed however whilst inspecting my new tiling I was disappointed to discover some were not as level as I had hoped. I had noticed the replacement tiles were not the same thickness as the originals the previous day but I had worked around this by using different levels of adhesive, clearly this plan was not as effective as I had hoped for.
To counter this problem, I used a set of 50-Grit, 100-grit and then 200-grit diamond pads in sequence to mill the floor flat and remove the lippage between them. This is done with water to lubricate the process and a weighted floor buffer. The pads generate a lot of slurry and so you need to rinse this off with more water and extract all the soil after each pad.
I followed this up with various Diamond burnishing pads of increasingly finer grits across the whole floor until we achieved a consistent finish and had the added benefit of getting the whole floor clean. More water is used to rinse the tiles after burnishing and the soil extracted with a wet vacuum as before. Once done and inspected the floor was left to dry off overnight.
Tile Doctor Colour Grow was applied to enhance the appearance of the tiles and protect them going forward. This product copes well with damp which can always be a problem with old floors like this one with no damp proof membrane present.
The floor looked amazing when finished and our attention to detail had really paid off, in fact you simply could not tell we had done any tiling work or replaced any tiles. For aftercare I recommend the use of Tile Doctor Neutral Cleaner which is designed for the regular cleaning of sealed tiles.
Russell Taylor
Lancashire Tile Doctor

 Tile Doctor Ltd
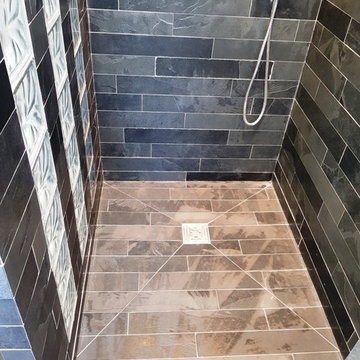
Our client contacted Tile Doctor as they were having problems cleaning their Slate tiled ensuite bathroom. We visited the property in nearby Stevenage, a London commuter town which is between Letchworth Garden City and Welwyn Garden City. The bathroom had been fitted some time ago, but due to the hard water in the area, there had been a large build up of limescale. The dark slate tiles showed this up even more.
My client had tried numerous household products on the tiles, but nothing was shifting the heavy build up. I discussed with them what Tile Doctor could do and completed a small demonstration. They were surprised how easily we were able to improve the tiles. We agreed a price and a timescale and booked the work in for a few weeks’ time.
The ensuite shower required intensive cleaning to the shower walls and floor where excessive limescale was present so we got to work cleaning with Tile Doctor Oxy-Gel, this is a strong alkaline based cleaner and degreaser, it is a gel so it works well on vertical surfaces where a long dwell time is required to break down dirt, grime, soap scum, oil based products. We left the product on the surface for approximately 10 minutes, removing all previous sealers and dirt. The residue was rinsed off and followed this up with a second clean using Tile Doctor Grout Clean-Up.
Grout Clean-Up is an acidic product designed to remove mineral deposits however you need to be careful with some types of stone as it can etch the surface if used incorrectly. To apply the product was diluted with water in a spray bottle and sprayed on to the wall tiles where it was scrubbed in and then rinsed off. The process was then repeated on the floor rinsing down thoroughly afterwards with water.
Once the slate was clean and dry we proceeded to cut out the existing silicone sealant which was equally stained and was beyond cleaning. This is a slow job and care needs to be taken not to scratch the tiles. It is important to ensure all the old silicone is removed so there is a nice clean surface to reapply the new. This also gave the shower area more time to dry out.
We tested with the moisture meter to ensure the shower area was fully dry and then applied the sealer. We chose to apply three coats of Tile Doctor Colour Grow, this is an impregnating sealer that works by occupying the pores in the stone, so dirt can’t become ingrained there, its also a colour enhancing sealer that provides durable protection. We applied the coats then lightly buffed off the excess with a soft cloth and allowed the slate to dry. The following day we returned to re-silicone all the edges and joints.
We recommended to the customer to use a mild solution of Tile Doctor Stone Soap as a maintenance cleaner for the slate. The client was very happy with the result and could see that cleaning with the appropriate product would ensure the ensuite bathroom continued to look good. The whole job took a day and a half to complete.
Robert Voyce
Hertfordshire Tile Doctor

 Paraclete Landscape LLC
Commercial landscape clean-up of a large parking lot area in preparation for site improvements. Our team cleared overgrown vegetation and debris along the fence line, restoring a clean, professional appearance to the property. Paraclete Landscape provides commercial landscape maintenance and clean-up services throughout Lakeland, Tampa, Plant City, Brandon, and Wesley Chapel.
Sponsored
Sunbury, OH

J.Holderby - Renovations
Franklin County's Leading General Contractors - 2X Best of Houzz!
 User
UserHoward Baker | www.howardbakerphoto.com
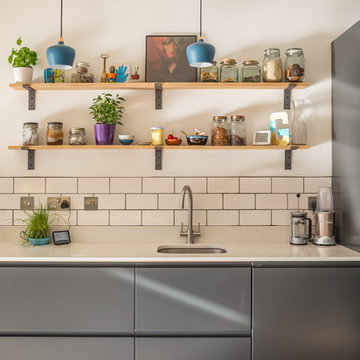
Inspiration for a contemporary light wood floor and brown floor kitchen remodel in Sussex with an undermount sink, flat-panel cabinets, gray cabinets, white backsplash and subway tile backsplash
Inspiration for a contemporary light wood floor and brown floor kitchen remodel in Sussex with an undermount sink, flat-panel cabinets, gray cabinets, white backsplash and subway tile backsplash
 Soda Pop Design Inc.
Stephani Buchman Photography
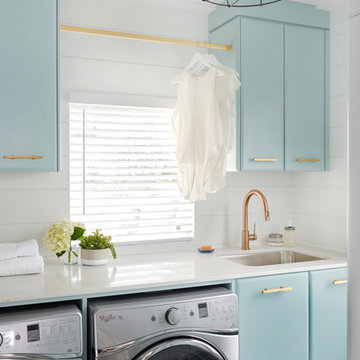
Transitional single-wall dedicated laundry room photo in Toronto with an undermount sink, blue cabinets, white walls and a side-by-side washer/dryer
Transitional single-wall dedicated laundry room photo in Toronto with an undermount sink, blue cabinets, white walls and a side-by-side washer/dryer


 KOZAK Hauling and Junk Removal
KOZAK Hauling and Junk Removal is a family owned and operated company which offers professional junk removal, dumpster rentals, clean-out and junk hauling services to homes and businesses in Port Richey FL, New Port Richey FL, Hudson FL, Spring Hill FL, Trinty FL, Holiday FL, and surrounding areas. Contact us today for a free estimates ☎️727-455-5144☎️ .
RESIDENTIAL AND COMMERCIAL JUNK REMOVAL & DUMPSTER RENTAL SERVICES
We offer complete junk removal and junk hauling services for property managers, realtors, businesses, and homeowners. Our complete services include tear down, hauling, and clean up.
✅Trash, Junk, & Yard Waste
✅Appliances & Electronics
✅Furniture & Mattresses
✅Garages, Sheds, & Hot Tubs
✅We haul almost anything!
✅Residential and Commercial Dumpster Rentals
✅ All 5 star reviews!!! ⭐️⭐️⭐️⭐️⭐️
RESIDENTIAL AND COMMERCIAL CLEAN-OUT SERVICES FOR REALTORS AND PROPERTY MANAGERS
All too often tenants leave garbage and junk behind after moving out creating a nightmare for the property manager. We will come in and quickly remove everything from the property.
• Foreclosure Clean-Outs
• Estate Clean-Outs
• Eviction Clean-Outs
• Construction Clean-Up
• One Time Yard Clean-Up
• Dumpster Rental for Events or Clean-Up
CONTACT US FOR MORE INFORMATION
Contact us today to receive a free estimate for all our junk removal and waste hauling needs. We are reliable, licensed, insured, and guarantee all our work.
• Licensed & Insured
• Residential & Commercial
• Satisfaction Guaranteed
• Dumpster Rental & Trailer Rental
• Free Estimates
Professional Clean-Out and Junk Removal Services for Realtors and Property Managers
• Foreclosure Clean-Outs
• Estate Clean-Outs
• Eviction Clean-Outs
• Construction Clean-Up
• One Time Yard Clean-Up
Are you a property manager, landlord or realtor that needs to remove the junk of a previous tenant or homeowner? KOZAK Hauling and Junk Removal offers affordable and reliable junk removal, waste hauling, and tear down services for foreclosure cleanouts, estate cleanouts, eviction cleanouts, and construction cleanouts. Whether we are just clearing the debris from the yard or a complete garage cleanout, we have the experience and equipment to get the job done quickly. Contact KOZAK Hauling and Junk Removal for fast and reliable junk removal services and dumpster rentals.
 Rustico Tile & Stone
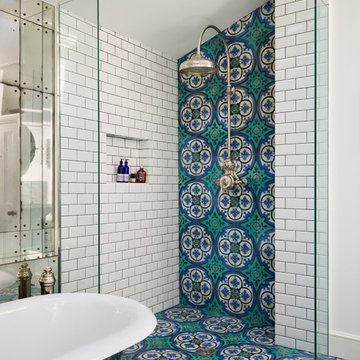
Philadelphia Encaustic-style Cement Tile - custom made and provided by Rustico Tile and Stone. Wholesale prices and worldwide shipping for Cement Tiles.
Rustico Tile and Stone offers 2 types of this Concrete Tile. Our MeaLu Collection features this specific tile and other in-stock, ready-to-ship Cement tiles. Or customize your tile with designs from our Traditional Collection.
Learn more by calling or emailing us today! (512) 260-9111 / info@rusticotile.com
Bathroom design and installation completed by Drummonds UK - "Makers of Bathrooms"

 Five Star Tree Care
Storms are nature’s way of cleaning out the atmosphere and showing off her awesome power. As essential as this process may be, it can also cause tree damage. If your trees suffer damage during a storm, there are a few things you should do to set things back to their proper order, such as hire a tree removal service. Before you start cleaning up the mess, however, take a look at our suggestions to ensure you are doing what’s best for your trees and your property.
Check the Damage
Before you do anything, you should take the time to check the damage on your property and to the trees themselves. Sometimes broken branches and fallen leaves can hide serious damage that may require special attention. Check to ensure that there is no damage to your property, home, cars, and electrical lines. Next, after you confirm that there is no immediate danger, you can start assessing the tree itself. If you find serious damage to your trees such as splitting, leaning, or even burns from a lightning strike, it is best to call in professionals for help. If the tree is leaning on your home or vehicle, it is also a good idea to have a professional tree care service move forward with the cleanup.
Clean Up Minor Damage and Debris
After the storm has calmed down, and you have assessed the fallout, you can start your yard cleanup. Stick to cleaning up small branches and twigs in addition to leaves and other debris. Avoid large branches, any trees that may be leaning or heavily damaged. Even if your tree is upright, but showing signs of damage you should steer clear until the professionals can assess the situation. Pay close attention to any branches or trees that may be leaning near overhead power lines and also avoid damaged trees that are planted near underground utilities such as gas or power mains.
Call the Professionals at Five Star Tree Services
Anytime a storm damages your landscape, plants, or trees, a professional team of arborists can help. Not only are they trained in the proper methods of cleaning up storm debris in a safe manner, but they can also help decide the best course of action to save or remove your damaged trees. As tree care professionals, every team from Five Star Tree Services will arrive with the proper equipment needed to get the job done safely.
Five Star is fully certified and will also work with your insurance company to assess the damage and coordinate extended cleanup services if needed. For trees that are damaged but still have a chance of surviving, our experienced arborists will create a customized treatment plant and pruning plant to give your tree the best chance of survival. If other treatments are needed, we will also support your tree during its recovery until it is back to its healthy state. For more information regarding our storm tree services in Richmond Hill or our regular tree care services, give us a call at (416) 990-3355 today.


 Toronto Interior Design Group
Gillian Jackson
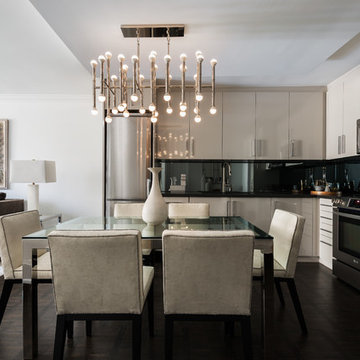
Inspiration for a small contemporary l-shaped dark wood floor and brown floor open concept kitchen remodel in Toronto with an undermount sink, flat-panel cabinets, gray cabinets, quartz countertops, stainless steel appliances, no island and black backsplash
Inspiration for a small contemporary l-shaped dark wood floor and brown floor open concept kitchen remodel in Toronto with an undermount sink, flat-panel cabinets, gray cabinets, quartz countertops, stainless steel appliances, no island and black backsplash
 Tile Doctor Ltd
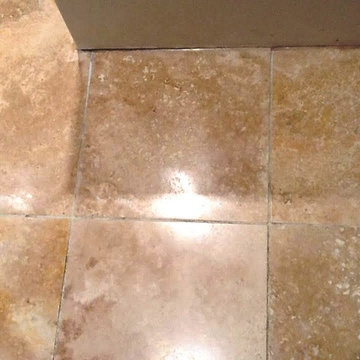
Earlier this month I was in the town of Northampton, to see a client who had reported a problem with her Travertine kitchen tiles. Basically the grout between the tiles was badly stained, to the point of appearing almost black.
The Travertine tiles were also in need of some maintenance, and so I was commissioned to provide a clean, polish and a fresh seal. Travertine is a popular choice for kitchen flooring due to its relatively high durability and distinct features. My task was to get this floor back to looking its best.
My priority was to address the badly stained grout so I cleaned the grout lines by hand using a combination of hand brushes and Tile Doctor Grout Clean-Up. The surface was pre-wet with water, before a solution of Grout-Clean Up and clean water was applied to the surface. The brushes were then used to agitate the solution. Grout Clean-Up contains a mix of concentrated phosphoric acid and cleaner designed to penetrate below the surface of the grout to remove grout stains, smears and mineral deposits.
As you can see from the photos, Grout Clean-Up made an immediate difference to the appearance of the tiles. This product is suitable for use on masonry and acid resistant surfaces. After completing the clean, I gave the floor a thorough rinse to neutralise the floor after cleaning and removed as much of the water as possible using a wet vacuum.
Following this, I paid attention to the tiles themselves, cleaning them to achieve a polished effect by using a system of burnishing pads. Tile Doctor burnishing pads comprise a set of four pads varying in grit type, from Coarse and Medium to Fine and Very Fine. I applied all four pads in turn to the floor, stopping to rinse the floor in between each. The result was a high quality polished finish.
I then left the floor to dry completely overnight, before commencing the seal the next day. My choice of sealing product was Tile Doctor Colour Grow which is a colour intensifying sealer that both enhances the natural appearance of the stone and provides a durable surface seal.
My client was very pleased with the finished product, and left the following comment on the Tile Doctor feedback system: “efficiently done”, yielding “good results”.
Phil Vissian
Northamptonshire Tile Doctor

 barlow reid design
Kerri Torrey Photography
Example of a transitional gray floor dedicated laundry room design in Toronto with an undermount sink, shaker cabinets, white cabinets, gray walls, a side-by-side washer/dryer and white countertops
Example of a transitional gray floor dedicated laundry room design in Toronto with an undermount sink, shaker cabinets, white cabinets, gray walls, a side-by-side washer/dryer and white countertops
 Moriq
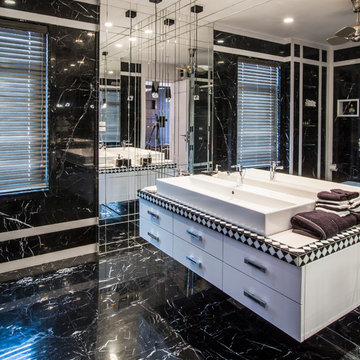
MoriqInspiration for a large contemporary stone tile marble floor bathroom remodel in Hyderabad with white cabinets and a vessel sink




 VisionScapes
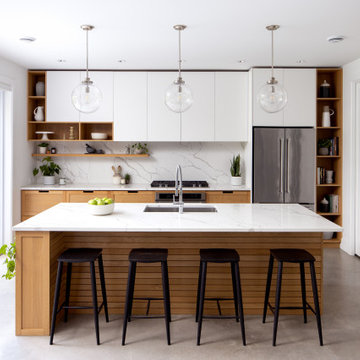
Surrounded by 30 year old trees, the homeowners were looking for an organic, modern, low maintenance finish to their outdoor environment. Utilizing the pre-existing mature apple tree in the backyard VisionScapes developed a tranquil retreat that extended the sq.ft of the home through a series of terraced concrete and wood decks. Pathways and patio systems were locally sourced from a quarry on the edge of the Rocky Mountains.
Photo credit: Jamen Rhodes
 HB DESIGN INC
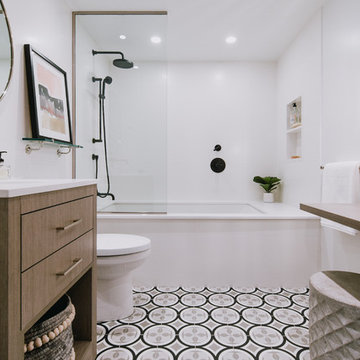
Example of a mid-sized trendy 3/4 white tile and ceramic tile porcelain tile and gray floor bathroom design in Montreal with flat-panel cabinets, medium tone wood cabinets, an undermount tub, a two-piece toilet, white walls, an undermount sink, quartz countertops and white countertops
9