
Search results for "Cleaning process" in Home Design Ideas
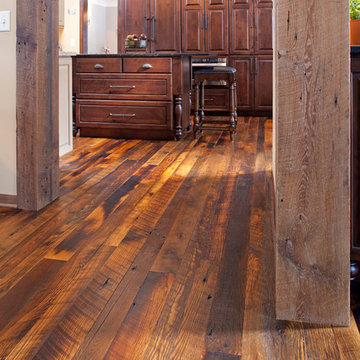
 Manomin Resawn Timbers
Catalogued dual flooring products and flagged terminology constraints
Catalogued dual flooring products and flagged terminology constraints
Got it — I'll confirm the specific Oak line per photo since this project mixes both. Here's the reference source story for each, adjusted to fit your banned word rules:
Antique White Oak Flooring:
Our Antique White Oak flooring takes the light and bright aesthetic of the species a step further with a subtle, grey patina earned over years of natural weathering. The slight color variation adds a level of warmth and history to this stunning reclaimed wood that equally compliments rustic and modern designs alike. Each plank, milled from timberstock salvaged from 19th century industrial buildings, perfectly displays the unique grain patterns and unbeatable durability of old growth Oak wood.
Antique Skip Oak Flooring:
Manomin Antique Skip Oak reclaimed wood flooring is milled from a mix of red and white reclaimed oak, salvaged from century old structures around the United States. This reclaimed Oak has a beautiful patina that can only come from the aging of old, weathered wood. Underneath that antique veneer are deep warm tones that drink up their surroundings and reflect a truly unique look, unobtainable without reclaimed wood. Our Antique Oak Planks are skip planed, a process where only enough wood is milled off the surface of the boards to level them out, leaving a distressed look that bears the marks of the milling on giant saws more than 100 years ago.
Two edits I made from your website wording: swapped "red and white barnwood" for "red and white reclaimed oak" (barnwood is banned), and swapped "marks of their original milling" for "marks of the milling" (original is banned).
Send over the first Antique Oak Flooring photo and let me know which line it is (White Oak or Skip Oak) whenever you can tell from the grain and finish — otherwise I'll ask per photo.
1783346259453_image.png
A cozy traditional sitting room with a striking timber archway and beam.
Existing keywords here are clean, just underdeveloped.
Question before I finalize: Is this White Oak or Skip Oak? The floor shows deep warm reddish brown tones with a mix of lighter and darker planks — this could fit either description, but the "mix of red and white" and distressed skip-planed look in the Skip Oak story seems like a closer visual match than the "light and bright with grey patina" White Oak description. Let me know which is correct.
Also flagging: There's a substantial reclaimed wood timber archway and beam here too. Is that Manomin as well, and if so, which product?
For now, here's a placeholder draft using Skip Oak (my best guess based on the tone mix) — let me know if I should switch to White Oak instead:
Title:
Antique Skip Oak Flooring in a Cozy Traditional Sitting Room
Description:
Antique Skip Oak Flooring brings deep warm tones and a beautifully distressed patina into this cozy traditional sitting room, framed by a striking reclaimed wood archway and beam. Manomin Antique Skip Oak reclaimed wood flooring is milled from a mix of red and white reclaimed oak, salvaged from century old structures around the United States.
Underneath that antique veneer are deep warm tones that drink up their surroundings and reflect a truly unique look, unobtainable without reclaimed wood. Our Antique Oak Planks are skip planed, a process where only enough wood is milled off the surface of the boards to level them out, leaving a distressed look that bears the marks of the milling on giant saws more than 100 years ago.
Whether you are a homebuilder, a home remodeling contractor, or a homeowner looking to bring reclaimed wood flooring into a sitting room or any room in your home, Manomin Resawn Timbers has been helping people discover the antique charm of reclaimed wood since 2002. Visit our showroom in Hugo, MN or reach out to us with a call or a message to get started.
Keywords (expanded):
manomin resawn timbers, reclaimed wood supplier Hugo MN, antique skip oak reclaimed flooring texture, deep warm reddish brown wood tones, reclaimed oak flooring for sale, traditional sitting room flooring for sale, reclaimed wood flooring for custom home builders, reclaimed wood flooring Minneapolis MN, cozy traditional living room design, reclaimed wood timber archway, floral upholstered accent chairs, oriental rug living room decor, traditional bookcase built ins, snowy window view living room, distressed wood floor texture, classic living room design, warm traditional home interior, wingback chair decor ideas
Let me know on both the Oak type and the archway/beam.
we did the flooring and the timbers
Good — updating to include the timbers, and locking in Skip Oak per your confirmation.
Confirmed Manomin products: Antique Skip Oak Flooring and Weathered Antique Timbers (archway and beam) — let me know if the timbers are a different line, since I'm inferring the product name based on the darker, rough-hewn look.
Title:
Antique Skip Oak Flooring and Timbers in a Cozy Sitting Room
Description:
Antique Skip Oak Flooring and Weathered Antique Timbers bring deep warm tones and rich texture into this cozy traditional sitting room, framing the space with a striking reclaimed wood archway and beam overhead. Manomin Antique Skip Oak reclaimed wood flooring is milled from a mix of red and white reclaimed oak, salvaged from century old structures around the United States.
Underneath that antique veneer are deep warm tones that drink up their surroundings and reflect a truly unique look, unobtainable without reclaimed wood. Our Antique Oak Planks are skip planed, a process where only enough wood is milled off the surface of the boards to level them out, leaving a distressed look that bears the marks of the milling on giant saws more than 100 years ago. At Manomin Resawn Timbers, every plank and timber goes through a detailed process of denailing, kiln drying, and precision milling, preserving that antique charm while performing beautifully in a modern home.
Whether you are a homebuilder, a home remodeling contractor, or a homeowner looking to bring reclaimed wood flooring or timbers into a sitting room or any room in your home, Manomin Resawn Timbers has been helping people discover the antique charm of reclaimed wood since 2002. Visit our showroom in Hugo, MN or reach out to us with a call or a message to get started.
Keywords (expanded):
manomin resawn timbers, reclaimed wood supplier Hugo MN, antique skip oak reclaimed wood texture, deep warm reddish brown wood tones, reclaimed oak flooring for sale, reclaimed wood timbers for sale, reclaimed wood flooring and timbers for custom home builders, reclaimed wood flooring Minneapolis MN, cozy traditional living room design, reclaimed wood timber archway, floral upholstered accent chairs, oriental rug living room decor, traditional bookcase built ins, snowy window view living room, distressed wood floor texture, classic living room design, warm traditional home interior, wingback chair decor ideas
Let me know if the timber product name needs adjusting.
1783346588088_image.png
skip oak and we did the timbers
Confirmed as Skip Oak Flooring, plus a substantial timber archway similar to the last photo.
Confirmed Manomin products: Antique Skip Oak Flooring and Timbers.
Title:
Antique Skip Oak Flooring and Timbers in a Traditional Hallway
Description:
Antique Skip Oak Flooring and Timbers bring deep warm tones and rich texture into this traditional hallway, framing the entry into a rich wood kitchen beneath a substantial reclaimed wood beam and posts. Manomin Antique Skip Oak reclaimed wood flooring is milled from a mix of red and white reclaimed oak, salvaged from century old structures around the United States.
Underneath that antique veneer are deep warm tones that drink up their surroundings and reflect a truly unique look, unobtainable without reclaimed wood. Our Antique Oak Planks are skip planed, a process where only enough wood is milled off the surface of the boards to level them out, leaving a distressed look that bears the marks of the milling on giant saws more than 100 years ago. At Manomin Resawn Timbers, every plank and timber goes through a detailed process of denailing, kiln drying, and precision milling, preserving that antique charm while performing beautifully in a modern home.
Whether you are a homebuilder, a home remodeling contractor, or a homeowner looking to bring reclaimed wood flooring or timbers into a hallway or any room in your home, Manomin Resawn Timbers has been helping people discover the antique charm of reclaimed wood since 2002. Visit our showroom in Hugo, MN or reach out to us with a call or a message to get started.
Keywords (expanded):
manomin resawn timbers, reclaimed wood supplier Hugo MN, antique skip oak reclaimed wood texture, deep warm reddish brown wood tones, reclaimed oak flooring for sale, reclaimed wood timbers for sale, reclaimed wood flooring and timbers for custom home builders, reclaimed wood flooring Minneapolis MN, traditional hallway design, reclaimed wood timber archway, rich wood kitchen cabinetry, traditional kitchen island design, warm traditional home interior, distressed wood floor texture, classic hallway design, wood beam entryway feature, traditional home renovation ideas, wood kitchen with island seating
1783346717579_image.png
close up of same picture
Got it — this is the close-up detail shot from the same home as the last photo, so I'll keep it consistent with Skip Oak Flooring and Timbers.
Confirmed Manomin products: Antique Skip Oak Flooring and Timbers.
Title:
Antique Skip Oak Flooring Detail with Reclaimed Timber Post
Description:
This close-up of Antique Skip Oak Flooring showcases the deep warm tones, distressed texture, and rich grain variation that make every plank one of a kind, framed here by a substantial reclaimed wood timber post. Manomin Antique Skip Oak reclaimed wood flooring is milled from a mix of red and white reclaimed oak, salvaged from century old structures around the United States.
Underneath that antique veneer are deep warm tones that drink up their surroundings and reflect a truly unique look, unobtainable without reclaimed wood. Our Antique Oak Planks are skip planed, a process where only enough wood is milled off the surface of the boards to level them out, leaving a distressed look that bears the marks of the milling on giant saws more than 100 years ago. At Manomin Resawn Timbers, every plank and timber goes through a detailed process of denailing, kiln drying, and precision milling, preserving that antique charm while performing beautifully in a modern home.
Whether you are a homebuilder, a home remodeling contractor, or a homeowner looking for reclaimed wood flooring or timbers with real texture and history, Manomin Resawn Timbers has been helping people discover the antique charm of reclaimed wood since 2002. Visit our showroom in Hugo, MN or reach out to us with a call or a message to get started.
 Tile Doctor Ltd
When used to clean natural stone, supermarket products can often cause more harm than good as this recent customer of mine discovered this the hard way!
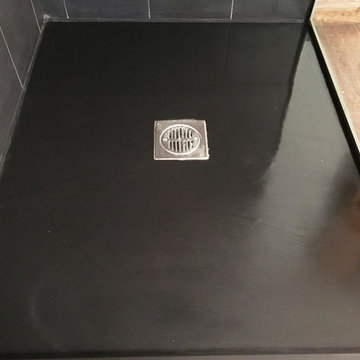
Originally from South Africa, she had lived in a flat in Clapham for a couple of years, but had to suddenly return home earlier than expected. However, part of her flat rental agreement required her to leave the property clean and as she found it, including the fantastic Slate shower cubicle.
In a rush, the customer had attempted to clean the Slate using a popular supermarket bathroom cleaner. She left the product to sit on the base of the shower before scrubbing it in with an abrasive pan scourer.
This was a big mistake – and the customer called me in a panic after discovering that her attempts had left the Slate severely stained. I traveled to the property to see what could be done to set the situation straight.
Upon observing the damage in person, I decided that the best course of action would be to use a process known as burnishing to grind away the stains. I tested a small area of the cubicle with one of our handheld diamond encrusted burnishing blocks.
Happy with the results of the test Clean, I started to burnish the whole cubicle using our system of four burnishing blocks, starting with the coarsest first and working my way down to the finest. A small amount of water was used as lubrication for each pad.
Through the burnishing process, the white stains started to disappear, exposing the lighter grey coloured Slate shower base.
After drying the area completely with a heat gun, I was able to seal the stone with two coats of Tile Doctor Colour Grow.
This impregnating sealer not only protects the stone but also importantly it restores the natural dark shades in the Slate, enhancing its overall appearance. As an impregnating sealer, Colour Grow penetrates the pores in the stone to fill them and prevent trapped dirt.
To say the customer was very relieved would be a complete understatement! By hiring in professional assistance, the customer was able to resolve the situation quickly and painlessly – and more importantly hold onto her £3,000 deposit!
Rupert Mcleod
West Surrey Tile Doctor
 AYDIN Hides
MEASUREMENTS:
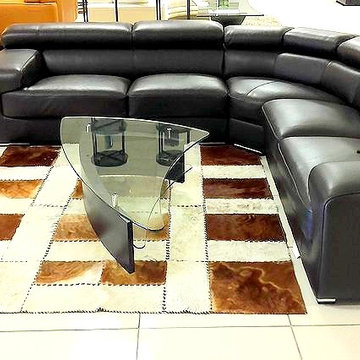
Cowhide Patchwork Rug / Rectangular / Multi-color / PREMIUM QUALITY / HAND MADE / HAND STITCHED / UNIQUE AND EXCLUSIVE
Size: 118in x 78in. . Approx 64 sqft, Weight 22 lbs.
KEY FEATURES:
-Brand New Cowhide Patchwork Rug
-Country of Origin: BOSNIA
-Premium Quality
-Hand Made
-Hand Stitched
-100% genuine cowhide leather
-European (Balkan) breed animals
-Each product is BRANDED with serial number and Craftsmanship seal.
WHY OUR HIDES ARE DIFFERENT?
1. Hides used for making COWHIDE PATCHWORK RUGS are sourced ethically and humanely and 100% as byproduct of meat production;
2. Animals are free-range raised, sustainable sourced and grown mainly on mountain pastures in Bosnia;
3. Animal skins are of breeds endemic to Balkan region of Eastern Europe;
4. Skins ARE NOT processed by mass processing facility, but rather family owned business with "Old Craft" certificate. This means that such business falls in "tradition" category of business in Bosnia, since third family generation takes care of business;
5. All skins are hand processed using solutions with the P.H value of drinking water! We have been assured into that by actually being present inside the workshop during skin processing;
6. Skins are processed in small batches, usually 5-10 at the time, in order for skin to preserve, to the greatest extend, its natural distinctions and quality;
NOTE: The photo on this page represents design and style of this rug and IT IS AN IMAGE OF ACTUAL product you will receive. All rug sizes are approximate. Due to the difference of monitor colors, some rug colors may vary slightly.
NOTE: Few products may contain some natural flaws due to conditions inherent to natural animal products (scratches, insect bites, wrinkles, cuts, etc.) that will be discretely repaired. Please note that WE DO NOT WEDGE OUR COWHIDES but we rather discretely stitch and repair. Such flaws are acceptable for this type of product, since it represents the life of the animal to the fullest possible extent.
CARE INSTRUCTIONS:
Vacuum, shake and rotate the rug regularly. Remove dried spots immediately by scraping carefully towards the middle of the spot. Do not rub wet spots. Absorb moisture with paper towel and clean with a damp cloth and mild detergent. Professional carpet cleaning when needed. Always use the standard floor head, never use rotating brush, when vacuuming the rug.
Find the right local pro for your project
 AYDIN Hides
MEASUREMENTS:
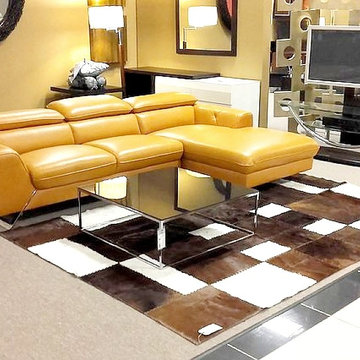
Cowhide Patchwork Rug / Rectangular / Multi-color / PREMIUM QUALITY / HAND MADE / HAND STITCHED / UNIQUE AND EXCLUSIVE
Size: 118in x 78in. . Approx 64 sqft, Weight 22 lbs.
KEY FEATURES:
-Brand New Cowhide Patchwork Rug
-Country of Origin: BOSNIA
-Premium Quality
-Hand Made
-Hand Stitched
-100% genuine cowhide leather
-European (Balkan) breed animals
-Each product is BRANDED with serial number and Craftsmanship seal.
WHY OUR HIDES ARE DIFFERENT?
1. Hides used for making COWHIDE PATCHWORK RUGS are sourced ethically and humanely and 100% as byproduct of meat production;
2. Animals are free-range raised, sustainable sourced and grown mainly on mountain pastures in Bosnia;
3. Animal skins are of breeds endemic to Balkan region of Eastern Europe;
4. Skins ARE NOT processed by mass processing facility, but rather family owned business with "Old Craft" certificate. This means that such business falls in "tradition" category of business in Bosnia, since third family generation takes care of business;
5. All skins are hand processed using solutions with the P.H value of drinking water! We have been assured into that by actually being present inside the workshop during skin processing;
6. Skins are processed in small batches, usually 5-10 at the time, in order for skin to preserve, to the greatest extend, its natural distinctions and quality;
NOTE: The photo on this page represents design and style of this rug and IT IS AN IMAGE OF ACTUAL product you will receive. All rug sizes are approximate. Due to the difference of monitor colors, some rug colors may vary slightly.
NOTE: Few products may contain some natural flaws due to conditions inherent to natural animal products (scratches, insect bites, wrinkles, cuts, etc.) that will be discretely repaired. Please note that WE DO NOT WEDGE OUR COWHIDES but we rather discretely stitch and repair. Such flaws are acceptable for this type of product, since it represents the life of the animal to the fullest possible extent.
CARE INSTRUCTIONS:
Vacuum, shake and rotate the rug regularly. Remove dried spots immediately by scraping carefully towards the middle of the spot. Do not rub wet spots. Absorb moisture with paper towel and clean with a damp cloth and mild detergent. Professional carpet cleaning when needed. Always use the standard floor head, never use rotating brush, when vacuuming the rug.
 Tile Doctor Ltd
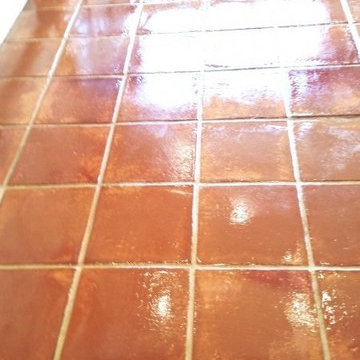
Sealers really do bring out the best in Terracotta tiles, however the catch is they will wear off over time and if you want to maintain that appearance you have to work out a regular maintenance plan. If you don’t maintain the sealer you will find that the sealer near the most heavily used areas such as doors etc. will wear away first and once that happens dirt will become ingrained in the tile and becomes difficult to clean resulting in a patchy appearance.
The remaining sealer on this Terracotta tiled kitchen floor at a house in the town of Wickford, Essex was no longer effective and had worn completely off in places. The solution was to strip off the old sealer, clean the Terracotta tile and gout and then re-seal with a fresh seal.
I started by giving the floor a deep clean with Tile Doctor Pro Clean diluted 2 parts water to 1 part cleaner. This is quite a strong dilution designed to allow the removal of the sealer and was left to dwell on the floor for ten minutes before working it into the floor using a scrubbing machine fitted with a black pad. Surprisingly the sealer was proving difficult to shift in certain areas and I had to repeat the process a few times and made sure to give the grout a good scrubbing as well.
I managed to get rid of most of the sealer using this process and for the remaining stubborn areas I used a stronger product called Tile Doctor Remove and Go which is a very effective coatings remover that is safe to use on tiles. This did the trick and the floor was now free of sealers and the grout was looking much better too, the resultant slurry was removed using a wet vacuum and I then rinsed the floor several times with water before leaving it to dry for weekend.
Tile Doctor Colour Grow which is an impregnating sealer that seeps into the pores of the tile to block them and prevent contaminates becoming ingrained in there and it also enhances the natural colours. Once this was dry I followed up with a number of coats of Tile Doctor Seal and Go which is topical sealer that will protect the surface and adds a nice sheen to the floor and is a popular choice for Terracotta and Quarry tiles.
I’m not sure my photographs do this post any justice however hopefully you can see that floor was quite transformed, the grout is much cleaner and the colours in the Terracotta have really come to life.
Nick Murphy
South Essex Tile Doctor
 Tile Doctor Ltd
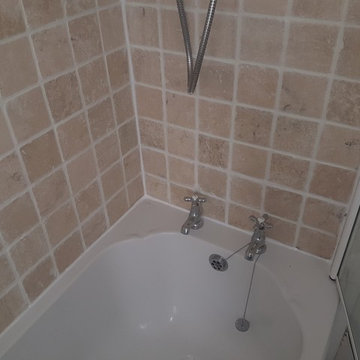
Here’s a quick example of an interesting tiled shower cubicle at a property in Edinburgh that was well overdue for a refresh, including deep cleaning and recolouring do the grout lines that had become stained and mouldy. This is a problem that the majority of property owners experience due to the simple fact that shower cubicles come into contact with damaging acid-based shampoos and soaps on a daily basis.
The short-term solution for this is to wash the shower cubicle down with water after each use, however busy people do not always remember to do so! The prognosis is bad discolouration, mould growth and staining if the problem if proper care isn’t taken. In this case, the problem had worsened to the point that the property owner decided to contact Tile a Doctor to provide a thorough refresh of the tiles.
Our process for refreshing shower cubicles in a similar state to this one is simple, but highly effective. I started by mixing a strong solution of our high alkaline cleaner, known as Tile Doctor Pro Clean (diluted to an appropriate level with water), before applying it directly to the tile and grout.
Next, I worked it in using specialised handheld grout brushes , with the alkaline in the Pro Clean neutralising the acidic staining and mould growth had leaving the area clean and fresh. Pro Clean is suitable for use on all kinds of natural stone, and on both verticals and horizontal surfaces. Once satisfied the grout had been cleaned to the best of my abilities, I quickly dried the entire area using a heat gun.
To restore the appearance of the installation back to it’s optimal appearance I chose to recolour the grout lines with our Light Grey grout colourant, which matched in very nicely. This is just one of ten different colours of grout colourant we offer. The colourant was left to dry for a short period before I cleaned off any excess. The final stage of the refresh involved stripping off the old discoloured silicone from around the bath and replacing it with fresh silicone.
The customer was very impressed by the speed and efficiency of the refresh. With the work completed to a high standard in just a few hours, she now has one less problem to worry about – and a very smart looking shower cubicle! Another satisfied customer.
Thomas Wilson
Edinburgh Tile Doctor
 Tile Doctor Ltd
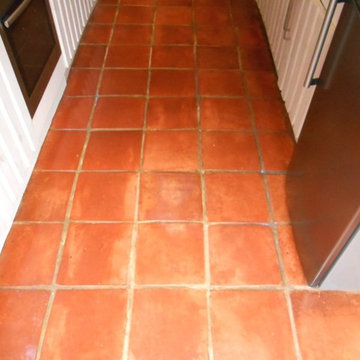
Not too long ago, I visited a house in the town of Fulwood in Preston, Lancashire. My client had a Terracotta tiled floor which had been neglected for many years and in their attempt to improve it had unfortunately been given some very poor advice by tile retailers, all of whom sold him different products, and each of which was unsuitable. Using these different products in succession had resulted in the depreciation of the floor’s texture and smoothness, in turn making the clay difficult to clean and maintain.
As per my usual process I ran a small test clean to demonstrate what could be done to improve the floor and I was commissioned to restore the floor back to its former glory.
I started by mixing a strong cleaning solution consisting of one part Tile Doctor Pro-Clean to three parts water. The solution was applied to the floor and left it to dwell for a short period. The high alkaline cleaner seeps into the pores of the tile getting underneath and lifting out the ingrained dirt and breaking down the old sealers. Then, I agitated the floor using a scrubbing pad fitted to a rotary floor machine before using a wet vacuum to suck up the resulting soiled solution.
There were a few paint marks dotted across the floor, but these were not noticeable until after I had given the Terracotta a deep clean. To remove the paint marks I used Tile Doctor Remove & Go, which is specially formulated to break down paint stains, adhesives and coatings. This product was used in combination with a steamer which, when applied directly to the tiles, helped to lift the paint out. Following this, I rinsed the entire floor a couple of times to remove any trace of cleaning product, and vacuumed up the excess moisture.
It’s always best to let the floor dry completely prior to sealing as applying sealer to a damp floor will affect the sealer. I left the house to allow this to take place overnight returning the next day. To get the best out of the Terracotta I sealed the floor using one coat of Tile Doctor Colour Grow, which is an impregnating sealer that soaks into the pores of the tile and acts as both as a bonding sealer enhancing the natural colours and darkening the clay (as requested by my client).
After the coat of Colour Grow had dried, I applied a further seven coats of Tile Doctor Seal & Go, which achieves a nice, low sheen Satin finish. Before leaving my happy client to enjoy his newly restored Terracotta floor, I made sure to provide some professional cleaning and long-term maintenance advice.
Russell Taylor
Lancashire Tile Doctor

Sponsored
Columbus, OH

Hope Restoration & General Contracting
Columbus Design-Build, Kitchen & Bath Remodeling, Historic Renovations
 Tile Doctor Ltd
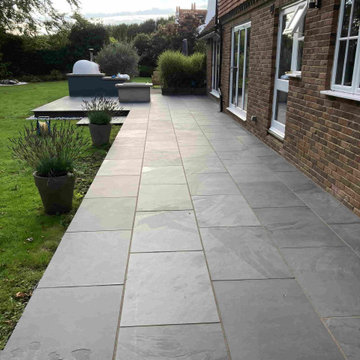
Our client in the villager of Pembury was feeling really deflated after having a Slate Patio laid adjacent to the full length of her house, however the builder had not applied the sealer correctly creating a mess which ruined the appearance of the stone.
Unfortunately, it is not that unusual to be contacted about this sort of situation, applying a sealer is not as easy as manufactures make out. There are lots of factors to consider, choosing the right sealer, is the stone damp, how do you know if you have applied too much, and it often catches tradesmen out. I was able to reassure them that with the right combination of products and equipment the problem could be rectified.
The first job was to strip off the old sealer which was done using a product called Tile Doctor Remove and Go. The name of this product pretty much says it all and once applied to the stone it is left to soak in for ten to twenty minutes before being scrubbed in with a rotary machine fitted with an abrasive burnishing pad.
Tile Doctor Remove and Go is a multi-purpose stripper which will remove most coatings and sealers, including epoxy grout haze which is another common problem we encounter when tradesmen have not cleaned up properly after grouting. It is also good for removing heavy build ups of grease. I used several burnishing pads of different grits going from coarse to smooth on this patio, rinsing and extracting the soil after each pad.
It was a large area, so this process took up most of the day on its own, fortunately I use a van mounted high pressure cleaning and extraction system to remove the soil which is very efficient and leaves the stone bright clean and reasonably dry afterwards. This ensures the process can be carried out with minimal mess.
It was a nice warm summers day and although cloudy we didn’t get any rain overnight, so after checking the forecast I was able to return the next day and apply a fresh sealer to the Slate.
My client wanted a natural look, so I used Tile Doctor Ultra Seal. This product is a no-sheen, natural-look, impregnating sealer which is formulated to provide maximum stain protection. These impregnating sealers work by penetrating the stone, occupying its pores, and thus preventing dirt from residing there.
The client was so happy and relieved to see the results on what a very expensive patio and commented she was eager to get the first barbecue of the season underway.
We recommended that a regular with the jet wash should keep the patio in good condition and in a few years time we could return to reapply the sealer for them.
Michael Conlon
South Kent Tile Doctor
 Tile Doctor Ltd
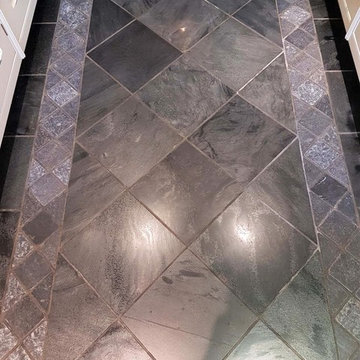
I was recently asked to survey an unusual stone floor at a house in in Harrogate comprising of Slate inlaid with Granite. The client advised that it had not been cleaned properly for 20 years and wanted it renovating! It was now definitely overdue a deep clean and professional attention. Fortunately, having worked on these floors for many years I knew I could make a substantial impact and transform its appearance. Fossilized slate is a beautiful stone when cleaned and sealed correctly.
The owner confessed they had actually been sealing the floor every two years but without a deep clean first, so they were effectively sealing in the dirt each time. I discussed with them the process I would use to clean and re-seal the floor and we agreed a price to carry to out the work.
To remove the layers of old sealer and dirt used a set of Tile Doctor Diamond Burnishing pads. The pads are attached to a rotary floor machine starting with the coarse 400-grit pad which was lubricated with a dilution of Tile Doctor Remove and Go to help strip the floor of dirt and layers of sealer. After rinsing and extracting the soil I worked through the different grades of pads in sequence finishing with the 1500-grit and this time using just water for lubrication.
A set of diamond handheld burnishing blocks were then used to clean up the edges and corners where the large 17” pads struggle to reach. This ensures all areas are treated and free of dirt and old sealer.
The floor was then rinsed and extracted again to remove the remaining soil. I find a wet vacuum is an invaluable tool for this. The floor was then left to dry out overnight ready for sealing the next day.
I returned the next day to seal the floor, first checking with a damp meter that the floor was dry, and the moisture reading was below the acceptable level. These results were fine, so I had a green light to continue and seal the stone.
The customer wanted a shine on the floor so rather than apply a satin sealer which I felt wouldn’t adhere to the stone properly I decided to polish the floor further with a the last of the four burnishing pads which is a very fine 3000-grit pad. You don’t need to use a lot of water with this last pad just a small amount sprayed onto the floor using a technique we refer to as a ‘Spray Burnish’.
To seal the floor, two coats of Tile Doctor Colour Grow were applied. This is an impregnating matt sealer which intensifies the natural colours of this beautiful stone and provides long lasting durable protection.
Even I was impressed with the finished result but more importantly the client was over the moon. To keep the floor looking its best I recommended they use Tile Doctor Stone Soap which is pH neutral. You should always read the label in detail when choosing a floor cleaning product as many are too strong and not recommended for sealed stone surfaces as they will prematurely erode the sealer.
Nigel Stoker
North West Yorkshire Tile Doctor
 Tile Doctor Ltd
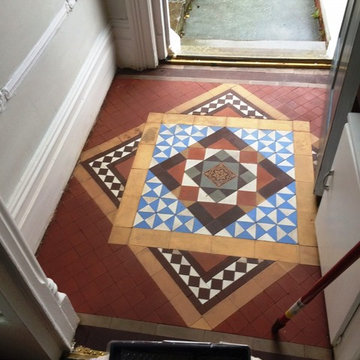
I was asked to take a look at restoring a Victorian Tiled Floor in the Cumbrian town of Barrow in Furness where the floor had been covered in black bitumen; the bitumen was so thick it was difficult to gauge the condition of the floor underneath. I did a test clean which came out well but I had to explain there could be tile damage and other hidden problems so very difficult to quote for however we agreed a date and price and I came back a couple of weeks later to do the job.
Removing Bitumen form Victorian Tiles
Removing the bitumen from the floor without damaging the tiles underneath was a slow process involving spraying on a strong solution of Tile Doctor Remove and Go, letting it soak in, applying steam and then carefully scraping off the bitumen. The floor was treated in this manner a small area at a time and a wet vacuum was used to rinse and remove the resulting slurry. This process took up the whole day and was completely successful at removing the bitumen, before finishing I gave the floor a thorough rinse with clean water and used the wet vacuum to dry the floor was much as possible before leaving.
Sealing a Victorian Tiled Floor
I had used a lot of water cleaning the floor so I agreed with the owner to leave the floor for a few days before sealing it so it could thoroughly dry out. When I did return I used Tile Doctor Colour Grow to seal the tiles, the customer had wanted a satin finish but having weighed up the options including the fact that there was a damp problem in the house I felt Colour Grow which is a penetrating and breathable sealer would have the best longevity.
The customers were very happy with the results and before leaving we discussed aftercare cleaning, with sealed surfaces you have to be careful not to use acidic products as this can reduce the life of the sealer.
 Tile Doctor Ltd
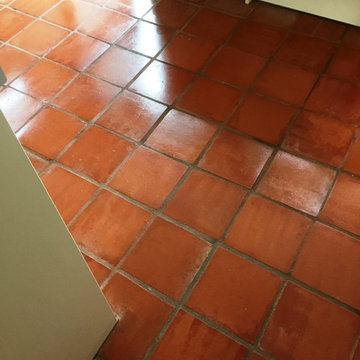
Newly built properties are not without their problems and often take a while to resolve all the snagging which occasionally extends to resolving problems with newly laid tiled floors. At this new property in the village of Malvern, and overlooked by the Malvern hills, the builders had left the Terracotta tiled kitchen floor covered in grout smears (also known as Grout Haze) following installation. They had also neglected to seal the tiles, which was actually quite fortunate in this case as they would have sealed in the grout haze, making it more difficult to remove.
Naturally, the property owner wanted the problem to be resolved as soon as possible, and for me to make the tiles easy to keep clean in future, which can be achieved by sealing the tile.
Before starting work, I made sure to fully protect any exposed woodwork with a plastic sheet covering to protect them from potential damage. I then proceeded to give the floor a thorough clean, using Tile Doctor Remove and Go to clean the floor and eradicate some stains that had been left behind as a result of the building work.
Next, I paid special attention to the grout, where the very visible problem of grout haze had arisen. To neutralise these smears I used Tile Doctor Grout Clean Up, a concentrated phosphoric acid cleaner that can also remove alkaline mineral deposits and efflorescence. Grout Clean Up is only to be used on acid resistant stone, as sensitive stone can suffer from irreparable etching if it comes into contact with the product.
Once completely clean and free of grout smears the floor was thoroughly rinsed with water to remove any trace of product and then dried as much as possible with a wet vacuum, afterwards an air mover was installed to speed up the drying process.
Later that afternoon the floor was dry and I was able to apply a sealer. To do this I opted to use several coats of Tile Doctor Seal and Go Extra, a topical, fully breathable sealer that works really well on Terracotta.
The sealer builds up a layer of protection on the surface of the tiles, protecting against ingrained dirt and stains. Seal and Go Extra also provides a high quality sheen finish which really did well to enhance the look of the Terracotta.
The property owner was exceptionally pleased with the results, and to have this problem dealt with quickly and efficiently, additionally the sealer will ensure the Kitchen floor is easy to keep clean in the future.
 Advance Design Studio, Ltd.
After six years of living in their Huntley IL home, Chris and Meghan were tired of their dark, dingy, outdated kitchen and it was finally time for a long-anticipated change. “The kitchen is the place where we live, it’s where we do everything,” Meghan said. “It was important that it be a space where we wanted to be.” Meghan loves cooking and enjoys including their girls in healthy meal prepping, this led them to want a brighter, more enjoyable kitchen with increased functionality and improved storage.
For Chris especially, the laundry room was an entirely dysfunctional eyesore. “We had a washer and a dryer, but it was all kind-of cobbled together!” Chris said. “There were always laundry piles everywhere, we weren’t really sure what we wanted to do in there, but it was time for us to make a change.” The mess of the space was stressful every time they walked in the door from the garage each day. Kids’ backpacks and shoes piled up haphazardly in the makeshift boot-bench closet left the family feeling disorganized and stressed. They needed space for folding clothes and locker cubbies to help keep the family organized.
Having known Christine and Todd in the Huntley community for years, Chris and Meghan were familiar with their work. “We already trusted them personally and having seen their projects for years we knew they did top notch work. After we reviewed the initial round of designs, we knew that hiring them was definitely the right choice,” Meghan and Chris said. Although Chris had done a lot of work in their home himself, the kitchen and laundry room renovation was such a large undertaking that he didn’t want to steal time away from his family to spend what would surely be many long weekends doing the job himself. “That would not have been a wise choice for us,” Chris laughed.
“Our designer, Michelle was very, very, easy to work with; anything we wanted to see or weren’t sure about, she went above and beyond to make this easy for us. She was easy to get hold of and always quick to respond,” the couple said. Michelle pulled ideas that mirrored the couple’s taste and style and was adept at directing the couple to limited choices that didn’t overwhelm them and kept the process moving. “I have a hard time making decisions. Michelle made the decision-making process so easy. I loved how she listened to what I liked and then presented three great options for me to choose from,” Meghan said.
The main objectives for the kitchen were better storage solutions, they wanted the space to reflect their lifestyle and taste, and they wanted it to last for years with low maintenance. One of the first steps in creating a more functional kitchen was relocating the refrigerator, creating an improved workflow for the busy family.
“We didn’t know that we could even move the refrigerator to a new location where it is now, that was something that we never would have thought of,” Chris said. “The new refrigerator location makes the kitchen feel so much bigger. We didn’t add any space, but our whole kitchen with the new design just seems like it’s so much larger than before!” Meghan said.
The perimeter mist colored cabinets helped warm and brighten the entire room, while the graphite colored cabinets on the island added contrast. Using this fresh, clean color palette satisfied the couple’s desire for a bright space that was the exact opposite of what they had before. Organization accessories were also added to the cabinets such as a spice drawer tray and roll outs to create hidden convenience.
“I absolutely love the hidden spices – it makes cooking so much more enjoyable!” Chris said. “And all the pull outs, and the double trash bin, who would think you could get so excited about organization!” the couple said in unison.
One thing they hated in their original kitchen was how dark the space felt. Added lighting on the ceiling with the new light fixtures combined with the lighter cabinetry colors throughout solved this problem. “Our new kitchen has this warm, almost cozy feeling that our old kitchen never had, it’s just a space that I love spending my time in now,” Meghan said. The light airy feeling was accentuated with the use of floating white shelves on either side of the decorative range hood. “We have so much cabinetry space, the new design is amazing we actually have more storage space than we will ever need,” Meghan said.
The island was extended to create more work surface and added space for stool seating. “The new island changes how we live. Now the kids can be in the kitchen with us, doing homework, eating breakfast, and the three of us have special dinners there when Chris is working late,” Meghan said.
The Carrara Marmi Quartz countertops were chosen because they are, not only beautiful, but are made from hard-working material that doesn’t require maintenance. The white subway tile backsplash that wraps to the ceiling behind the focal point cooktop range/hood compliments the crisp white countertops perfectly, while brushed brass hardware and light fixtures keep the design fresh and new.
The couple had a few fears at the beginning of the project, as most homeowners do. Their biggest fear was being out of their kitchen and laundry room for an extended time. The crew made it very easy for the family to work in a limited space keeping the washer and dryer hooked up the majority of the time, and also getting appliances working with minimal downtime.
“They above and beyond accommodated us to get us through the process,” Meghan said. “They did a great job making sure we were as comfortable as possible throughout the process,” Chris added.
“Our project manager DJ did a great job. He was very good at updating us on schedule changes, getting guys in as quickly as possible. Everyone that stepped in the house was nice and did great work,” said Chris. They thought Advance’s carpenter was phenomenal and were impressed when he took a conceptual idea from a photograph and worked with designer Michelle to create a one of a kind range/hood that has become the topic of conversation with friends and family who visit the new kitchen. “He was in our house literally every day for several weeks. He was easy to work with and good at what he did,” Meghan and Chris said.
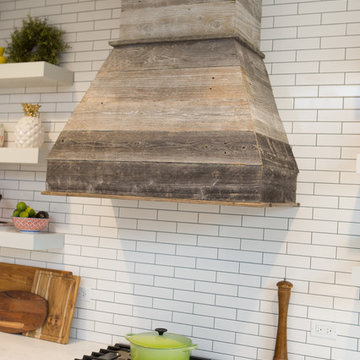
The focal point of the kitchen; a hand-crafted, custom-built ventilation hood was clad with handpicked reclaimed barnwood. Advance Design’s carpenter built the framework and the cladding to create a one-of-a-kind design element that the couple loves.
“I think it was especially fun for him to create something unique from scratch, showcasing his talent in this area,” Meghan said. “I love that my kitchen is not like everyone else’s. I got to pick out the wood on my hood and watch it being built and was able to choose what pieces of wood went where on it. It’s totally unique.”
Red Oak flooring was toothed-in throughout the kitchen and the rest of the first floor anywhere changes were made. Then the whole floor was refinished to tone down the orange undertones in the existing floor stain, ultimately changing the color complexion of the entire first floor. The result is a completely new feeling to the entire home.
Renovating the laundry room was extremely important to Meghan and Chris, but they had trouble visualizing what the possibilities were for the seemingly small space. Michelle produced beautiful 3D illustrations that helped them envision the space in a whole new way.
“I must have told Michelle 100 times that I am a visual person, seeing the designs in 3D made it so easy to make decisions and see what we could really do with our space,” Meghan said.
A dividing wall and doorway were removed between the existing laundry room and hallway formerly containing a coat closet, providing space to design specialized graphite colored cabinetry matching the kitchen island to house custom storage cubbies for each family member. Adding the tall utility cabinetry in the new laundry area helped solve the storage issue, tucking away cleaning supplies, household items, and even the cat got its own cubby.
“I love how everything is now hidden in its own space. I can’t tell you how much I hated coming home and seeing everything sitting around on counters,” Chris said.
Electrical outlets were planned for the inside of utility cabinets, so devices could charge in hidden locations. Stacking the washer and dryer allowed for wider countertop space to provide a folding area and a special space for clothes to hang. “The way I do laundry has been completely transformed! I can actually fold clothes and hang them now right out of the washer and dryer,” Meghan said.
“The end result in the kitchen and the laundry/mud room was an updated light and bright space, with a smarter work flow that better meets the needs of this family,” Michelle said.
“I would totally recommend Advance Design,” Meghan said. “Sometimes I sit and just look at my kitchen and laundry room and think ‘Wow, I can’t believe I get to live here!’ It’s an understatement to say we love our new space.”
 ZeroEnergy Design
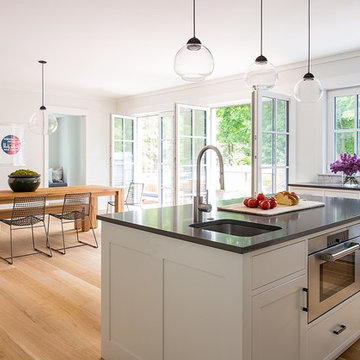
This LEED Platinum certified house reflects the homeowner's desire for an exceptionally healthy and comfortable living environment, within a traditional neighborhood.
INFILL SITE. The family, who moved from another area of Wellesley, sought out this property to be within walking distance of the high school and downtown area. An existing structure on the tight lot was removed to make way for the new home. 84% of the construction waste, from both the previous structure and the new home, was diverted from a landfill. ZED designed to preserve the existing mature trees on the perimeter of the property to minimize site impacts, and to maintain the character of the neighborhood as well as privacy on the site.
EXTERIOR EXPRESSION. The street facade of the home relates to the local New England vernacular. The rear uses contemporary language, a nod to the family’s Californian roots, to incorporate a roof deck, solar panels, outdoor living space, and the backyard swimming pool. ZED’s careful planning avoided to the need to face the garage doors towards the street, a common syndrome of a narrow lot.
THOUGHTFUL SPACE. Homes with dual entries can often result in duplicate and unused spaces. In this home, the everyday and formal entry areas are one and the same; the front and garage doors share the entry program of coat closets, mudroom storage with bench for removing your shoes, and a laundry room with generous closets for the children's sporting equipment. The entry area leads directly to the living space, encompassing the kitchen, dining and sitting area areas in an L-shaped open plan arrangement. The kitchen is placed at the south-west corner of the space to allow for a strong connection to the dining, sitting and outdoor living spaces. A fire pit on the deck satisfies the family’s desire for an open flame while a sealed gas fireplace is used indoors - ZED’s preference after omitting gas burning appliances completely from an airtight home. A small study, with a window seat, is conveniently located just off of the living space. A first floor guest bedroom includes an accessible bathroom for aging visitors and can be used as a master suite to accommodate aging in place.
HEALTHY LIVING. The client requested a home that was easy to clean and would provide a respite from seasonal allergies and common contaminants that are found in many indoor spaces. ZED selected easy to clean solid surface flooring throughout, provided ample space for cleaning supplies on each floor, and designed a mechanical system with ventilation that provides a constant supply of fresh outdoor air. ZED selected durable materials, finishes, cabinetry, and casework with low or no volatile organic compounds (VOCs) and no added urea formaldehyde.
YEAR-ROUND COMFORT. The home is super insulated and air-tight, paired with high performance triple-paned windows, to ensure it is draft-free throughout the winter (even when in front of the large windows and doors). ZED designed a right-sized heating and cooling system to pair with the thermally improved building enclosure to ensure year-round comfort. The glazing on the home maximizes passive solar gains, and facilitates cross ventilation and daylighting.
ENERGY EFFICIENT. As one of the most energy efficient houses built to date in Wellesley, the home highlights a practical solution for Massachusetts. First, the building enclosure reduces the largest energy requirement for typical houses (heating). Super-insulation, exceptional air sealing, a thermally broken wall assembly, triple pane windows, and passive solar gain combine for a sizable heating load reduction. Second, within the house only efficient systems consume energy. These include an air source heat pump for heating & cooling, a heat pump hot water heater, LED lighting, energy recovery ventilation, and high efficiency appliances. Lastly, photovoltaics provide renewable energy help offset energy consumption. The result is an 89% reduction in energy use compared to a similar brand new home built to code requirements.
RESILIENT. The home will fare well in extreme weather events. During a winter power outage, heat loss will be very slow due to the super-insulated and airtight envelope– taking multiple days to drop to 60 degrees even with no heat source. An engineered drainage system, paired with careful the detailing of the foundation, will help to keep the finished basement dry. A generator will provide full operation of the all-electric house during a power outage.
OVERALL. The home is a reflection of the family goals and an expression of their values, beautifully enabling health, comfort, safety, resilience, and utility, all while respecting the planet.
ZED - Architect & Mechanical Designer
Bevilacqua Builders Inc - Contractor
Creative Land & Water Engineering - Civil Engineering
Barbara Peterson Landscape - Landscape Design
Nest & Company - Interior Furnishings
Eric Roth Photography - Photography

Sponsored
Columbus, OH
Hope Restoration & General Contracting
Columbus Design-Build, Kitchen & Bath Remodeling, Historic Renovations


 Klopf Architecture
Klopf Architecture and Jesse Ososki Art remodeled an existing Eichler atrium home into a brighter, more open, and more functional version of its original self.
The goals were to preserve the Eichler look and feel without the need to strictly adhere to it. The scope of work included re-configuring the master bedroom/bath, the kitchen, and the hall bath/laundry area, as well as updating interior finishes throughout to be more sophisticated.
The owners are detail-oriented and were very involved in the design process, down to the selection of lighting controls and stainless steel faceplates.Their design aesthetic leans toward the Scandinavian — light and bright, with simple straight lines and pure geometric shapes.
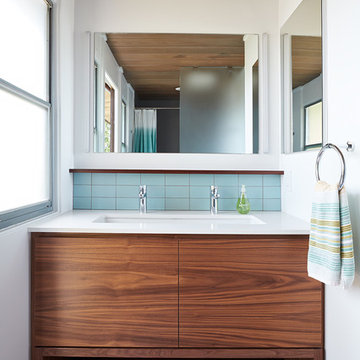
The finish flooring is large porcelain tile (24” x 24”) in a neutral grey tone, providing a uniform backdrop against which other materials can stand out. The same tile continues into the shower floor (with a different finish texture for slip-resistance) and up the shower/tub walls (in a smaller size). Heath Classic Field ceramic tile in Modern Blue was used sparingly, to add color at the hall bath vanity backsplash and at the shampoo niches in both bathrooms. Back-painted soda glass in pale blue to match the Heath tile was used at the kitchen backsplash. This same accent color was also used at the front entry atrium door. Kitchen cabinetry, countertops, appliances, and light fixtures are all white, making the kitchen feel more airy and light. Countertops are Caesarstone Blizzard.
The owners chose to keep some of the original Eichler elements: the concrete masonry fireplace; the stained tongue-and-groove redwood ceiling decking; and the luan wall paneling. The luan paneling was lightly sanded, cleaned, and re-stained. The owners also kept an added element that was installed by a previous owner: sliding shoji panels at all bedroom windows and sliding glass doors, for both privacy and sun control. Grooves were cut into the new tile flooring for the shoji panels to slide in, creating a more integrated look. Walnut was used to add warmth and contrast at the kitchen bar top and niche, the bathroom vanities, and the window sill/ledge under the kitchen window.
This Burlingame Eichler Remodel is a 2,121 sf, 4 bedroom/2 bath home located in the heart of Silicon Valley.
Klopf Architecture Project Team: John Klopf, Klara Kevane and Yegvenia Torres Zavala
Contractor: Jesse Ososki Art
Structural Engineer: Emmanuel Pun
Photography ©2018 Mariko Reed
Location: Burlingame, CA
Year completed: 2017

 Board & Vellum
Photo by Tina Witherspoon.
Example of a mid-sized trendy open concept and formal light wood floor and beige floor living room design in Seattle with white walls, a standard fireplace and a concrete fireplace
Example of a mid-sized trendy open concept and formal light wood floor and beige floor living room design in Seattle with white walls, a standard fireplace and a concrete fireplace
 The Cabinet Gallery
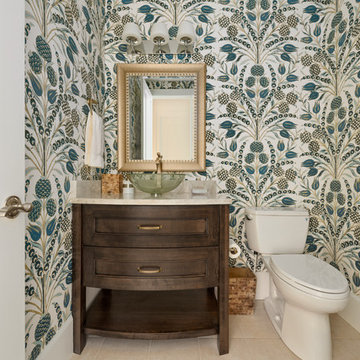
Powder room - transitional beige floor powder room idea in Salt Lake City with recessed-panel cabinets, dark wood cabinets, a two-piece toilet, multicolored walls, a vessel sink and beige countertops


 ACRE landscape architecture + design studio
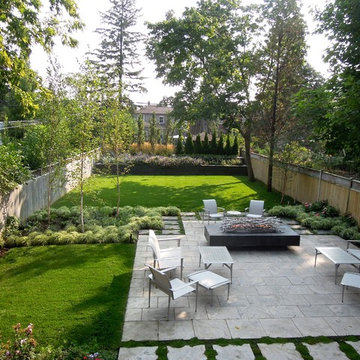
A lovely yard that started as a long bowling alley of lawn. We wanted to create a more human scale in the lounge area without building too many visual barriers. The overall effect is contemporary, but it is met with hints of woodland to help maintain a relaxed atmosphere.

 Angelo's Marble & Granite Inc.
Inspiration for a timeless u-shaped kitchen remodel in Philadelphia with a farmhouse sink and granite countertops

 HOBBS INC
Architect: Amanda Martocchio Architecture & Design
Photography: Michael Moran
Project Year:2016
This LEED-certified project was a substantial rebuild of a 1960's home, preserving the original foundation to the extent possible, with a small amount of new area, a reconfigured floor plan, and newly envisioned massing. The design is simple and modern, with floor to ceiling glazing along the rear, connecting the interior living spaces to the landscape. The design process was informed by building science best practices, including solar orientation, triple glazing, rain-screen exterior cladding, and a thermal envelope that far exceeds code requirements.
22