
Search results for "Cleaning process" in Home Design Ideas
 Tile Doctor Ltd
Bridgwater is known to be one of Somerset’s liveliest towns. With a history dating back over 1000 years, it has many traditions, including a carnival which happens every November, and is hailed as the world’s largest illumination procession.
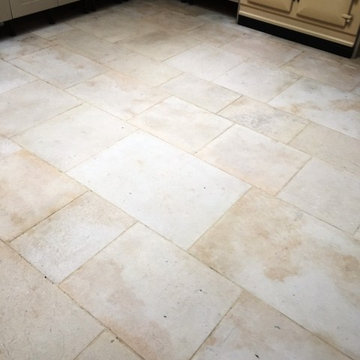
What wasn’t looking lively, however, was this Limestone tiled kitchen floor at a house in the town. It had been laid five years previously but at the time of laying hadn’t been sealed with adequate amounts of sealer.
As a result, the Limestone had absorbed a lot of wet footprints and other dirty stains. The sealer simply broke down after a while, leaving the homeowner with a floor that never looked clean no matter how much they cleaned it – using all kinds of products. In fact, the tiles looked blackened and mouldy, as you can see in the photos below.
It was time for the homeowner to seek out professional assistance, so she decided to contact her local Tile Doctor. I was asked to completely restore the look of the floor – something the homeowner had deemed impossible at this point.
In practice, I knew the floor could be restored using the right products and methods including a really deep clean and resealing with the right type of sealer for these tiles.
I scrubbed in Tile Doctor Remove and Go, which is a powerful coatings remover which draws out ingrained stains and strips away any old sealer remaining on the tiles. The floor was then rinsed thoroughly with plain water to neutralise it, and the resulting soiled solution was extracted using a wet vacuum. I repeated the process on stubborn areas, eventually transforming the floor back to its natural and clean state.
I allowed the Limestone to dry out completely overnight before returning to the property to seal the tiles. This is important as the slightest amount of excess moisture can damage the performance of the sealer, and we would’ve been back to square one!
After checking with a damp meter, I could see everything was fine, so I proceeded to seal the floor with Tile Doctor Colour Grow, which is not only a robust impregnating sealer that will protect the floor going forward but also enhancing the natural colours in the stone at the same time.
In the space of two days, the Limestone tiles had been completely transformed. Now it had been properly sealed, the floor will be much easier to clean and therefore should stay looking great for a long time to come. The customer was very happy to have finally resolved the problem with some assistance from the Somerset Tile Doctor!
Dave Hurst
Somerset Tile Doctor

 Steven Allen Designs, LLC
Photos By Simple Photography
Custom Russian Birch Cabinets, Exposed & Sealed Rich Portland Concrete Flooring by Dungan Miller Design, Farrow & Ball Paint, Marvin Windows and Doors, LED Lighting & Reclaimed Historic Houston's Salvage Warehouse Shiplap Ceiling
 Martha's Vineyard Construction Co., Inc.
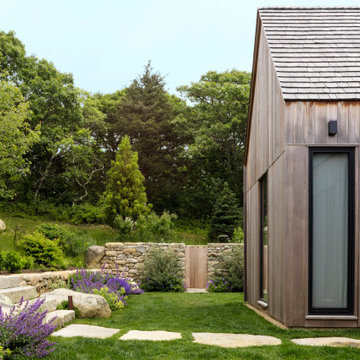
Inspiration for a contemporary exterior home remodel in Boston
Find the right local pro for your project

 BuildSense
Lissa Gotwals Photography
Example of a large classic white two-story wood exterior home design in Raleigh with a metal roof
Example of a large classic white two-story wood exterior home design in Raleigh with a metal roof
 Erica Peale Design
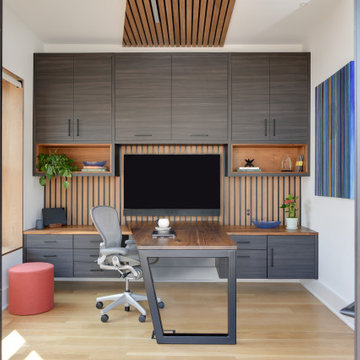
This modern custom home is a beautiful blend of thoughtful design and comfortable living. No detail was left untouched during the design and build process. Taking inspiration from the Pacific Northwest, this home in the Washington D.C suburbs features a black exterior with warm natural woods. The home combines natural elements with modern architecture and features clean lines, open floor plans with a focus on functional living.

 Seabreeze Sparkle Pressure Washing
Seabreeze Sparkle Pressure Washing completed this paver cleaning, re-sanding, and sealing project in Port Orange, Florida. The pavers had built-up dirt, organic growth, faded color, and loose joint sand before service.
We pressure cleaned the surface, removed debris from the joints, applied fresh joint sand where needed, and sealed the pavers with a commercial-grade sealer to help enhance color, protect the surface, stabilize the joints, and improve curb appeal. This project shows the full process of professional paver cleaning, paver sanding, and paver sealing for a cleaner, brighter, longer-lasting outdoor space.
 Tile Doctor Ltd
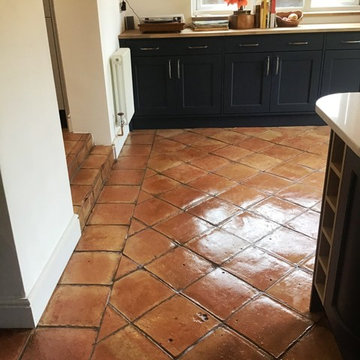
We were contacted by the owner of a property in Moulton with a problematic Terracotta tiled kitchen floor. She was seriously considering ripping up the entire area of tiling and replacing it as she was having a new kitchen installed. Both her and her husband were concerned that unless I could restore this floor to somewhere near to its original condition, they would need to replace it.
I went over to inspect the Terracotta tiles and could see the entire surface was deeply ingrained with soiling and the grout lines were filthy. After carrying out a test it became obvious that the previous sealer had been applied very sparingly and had mostly worn away, leaving the stone prone to staining. Terracotta is a very porous tile and dirt had become ingrained in the pores leaving it looking very dull and difficult to clean.
I completed the test on a small part of the floor and the customer could see the results which could be achieved. Happy with the result they agreed my quote and we set a date for my return to complete the floor.
The tiles turned out to be made of a fairly soft Terracotta which meant that we were able to deep clean them extremely effectively using a strong dilution of Tile Doctor Pro-Clean. We used Tile Doctor Remove and Go in particularly stubborn areas.
The process I use is to spray the Pro-Clean onto the floor and leave it to soak in for about ten minutes before being worked in using a heavy rotary machine fitted with a black scrubbing pad. The resulting slurry is removed using a wet pick up vacuum. All the dirt and virtually all of the old sealer was removed at this stage; the remaining patches around the edges of the area being finished by hand with a 200-grit burnishing block. The grout lines were then cleaned by hand with an angled grout brush.
Finally, the deep-seated oil stains in front of the cooker were brought out using Tile Doctor Oxy-Gel which was left to dwell on the marks for an hour before being agitated with a diamond burnishing pad and rinsed away with a wet pick up machine. The floor was rinsed with water and allowed to dry off overnight.
The following day I inspected the floor and checked it was ready to be sealed. All was well so I applied an initial coat of Tile Doctor Colour Grow which is an impregnating sealer that occupies the pores in the tile enhancing the natural colours of the Terracotta and provide a base layer of protection from staining.
I returned at a convenient time once the kitchen was completely installed to finish the job. This involves carrying out a light maintenance clean with Tile Doctor Neutral Cleaner and once the floor was dry, I applied 5 further coats of Tile Doctor Seal and Go which provides a pleasing satin finish which is really suited to this type of floor.
The customer was very happy with the results and has left the following feedback.
“We were really pleased with the results, thank you!”
Phil Vissian
Northamptonshire Tile Doctor


 Tile Doctor Ltd
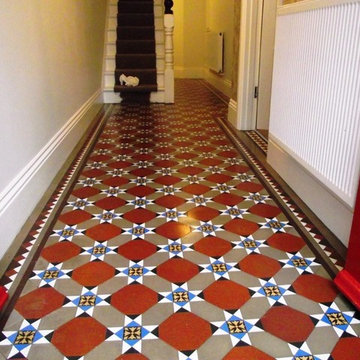
These Victorian hallway tiles were cleaned at a residence in the historic town of Bideford. As you can see from the photograph below the tiles were dull and had lost their vitality due to ingrained dirt, clearly it had been some time since they were given a good deep clean.
Cleaning a Victorian Floor
The first job was to protect the skirting with tape and then vacuum to remove any loose debris and grit. The next step was to cover the entire floor with a strong dilution of Tile Doctor Remove and Go which is a powerful cleaning and coating remover that is safe to use on tile and stone. It was left to dwell on the floor for twenty minutes so it could soak into the tile and make the job of removing any remaining sealer and ingrained dirt easier.
The solution was scrubbed into the tile using a black scrubbing pad fitted to a rotary machine and then the soiled cleaning solution rinsed off using a wet vacuum. This process was repeated a number of times until I was satisfied with the condition of the floor and followed with a final rinse with clean water to remove any trace of cleaning product. The water was extracted with the wet vacuum to get the floor as dry as possible before leaving for the day.
Sealing a Victorian Floor Sealing
The tiles were left to dry for 24 hours and I came back to seal the tiles using eight to nine coats of Tile Doctor Seal and Go which is an ideal sealer for Victorian Tiles as it leaves a nice sheen and provides excellent stain protection.
I think you will agree the hallway floor came up really well and now been given a new lease of life.
 Tile Doctor Ltd
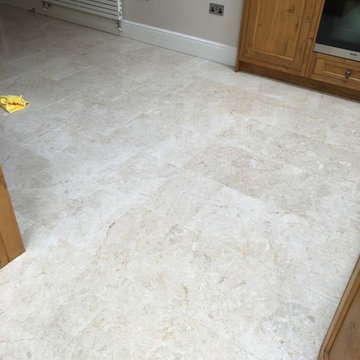
Marble tiles can be tumbled in large drums to achieve an aged and softened effect, and this can look very nice providing that the stone is adequately maintained.
In the case of this floor at a property in Twickenham South West London, the Marble tiles that had been laid over five years ago, and in that time the sealer had worn down offering the floor little protection. Dirt had now become ingrained in the pores of the stone and grout, and a deep clean and fresh seal were required to restore the stone’s original colour and lustre. The property owner asked me to complete the job and I was more than happy to oblige.
To begin the restoration, I applied both Tile Doctor Pro-Clean, which is a high alkaline cleaner, and Tile Doctor Remove and Go, which a heavy-duty stripper and remover, to the floor and scrubbed the products in using a scrubbing pad fitted to a professional rotary machine.
The chemical solvents in the Remove and Go helped to break down any old sealer that remained inside the stone, allowing the Pro Clean to then work its magic on the stubborn ingrained dirt the customer had struggled to remove previously. Some of the deeper veins and grout lines I chose to scrub by hand to ensure the fullest and most meticulous clean possible.
The resulting soiled cleaning solution was then pressure rinsed with water and the soil extracted with a wet-vacuum, leaving a completely clean floor that was now ready to be sealed using a new sealant.
I returned to the property the following day after allowing the Marble tiles to dry fully. Drying the tiles is a crucial part of the restoration process, since even a small quantity of excess moisture can cloud the sealer and prevent it from working to its fullest capabilities.
I applied two coats of our solvent-based impregnating sealer known as Tile Doctor Colour Grow. As the name of the product suggests, Colour Grow not only protects the tiles against ingrained soil, it also thoroughly lifts and enhances the natural colours in the stone.
The new seal will make it easy for our customer to maintain the floor, making daily cleaning easier. It will also protect the stone against the nasty spillages that are common in kitchens and living rooms.
The customer was thrilled with the much-improved appearance of the Marble tiles and is very reassured that they will now stay in great condition for a long time. Another satisfied client!
Jonathan Oldham
South Middlesex Tile Doctor
 Tile Doctor Ltd
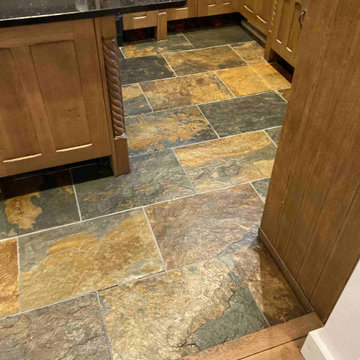
This Multi-Coloured Slate floor looks nice in the Kitchen of this property in Hythe, however due to the riven surface of the tile and the deep grout lines my customer had struggled to keep it clean. Additionally, the Slate has lost all of its lustre over the years since it had been installed and it was now due a deep clean and reseal.
The combination of durability and price makes Slate a popular choice for floor covering, it is also available in a number of colours, ranging from plain black to a more diverse array of shades. Like any natural stone floor though it need sealing to keep the dirt out of the pores of the stone however sealers wear off with use
Hythe by the way is a lovely medieval coastal market town with its own beach on the edge of Romney Marsh and close to Folkestone.
Before starting I removed the kickboards underneath the kitchen units and protected the exposed woodwork with a thin film. To deep clean the Slate floor and remove any remaining sealer I applied Tile Doctor Remove and Go and left it to soak in for ten minutes before scrubbing it in with a light carbide brush. As well as removing the old sealer this process releases the dirt from the pores of the stone and brings it to the surface where it can be extracted.
I have probably mentioned this before, but I’ve invested in a powerful van mounted pressure extraction system for removing the dirt, old sealer and emulsified soils released from the stone. The system works by applying water at high pressure on the floor via a spinner tool and then simultaneously extracts the waste under suction back to a grey water tank on the van. From the customers point of view, it makes light work of cleaning the floor and more importantly leaves the floor dry and leaves no mess.
Having a dry floor at this stage is important as it means I can usually seal the floor on the same day. Its not a good idea to apply a sealer to damp floor as it will affect the way it cures and lead to an undesirable finish. The way to make sure the floor its dry is to use a moisture meter and take readings in several places around the floor. You can use an air mover to improve drying times however older floors can take a very long time to dry and for those I tend to book another day to apply the sealer.
With the floor dry I set about applying the first of two coats of Tile Doctor X-Tra Seal which provides both a hardwearing sheen to the slate as well as enhancing its natural colourings. It has strong water repellency characteristics which makes it ideal for use in a kitchen where spillages are quite common.
This was quite a small kitchen, so the work was completed in one day. My client was amazed at the transformation and grateful for our advice on continued maintenance which for this floor I recommended the use of Tile Doctor Stone Soap for daily cleaning.
Michael Conlon
South Kent Tile Doctor
 Advance Design Studio, Ltd.
After six years of living in their Huntley IL home, Chris and Meghan were tired of their dark, dingy, outdated kitchen and it was finally time for a long-anticipated change. “The kitchen is the place where we live, it’s where we do everything,” Meghan said. “It was important that it be a space where we wanted to be.” Meghan loves cooking and enjoys including their girls in healthy meal prepping, this led them to want a brighter, more enjoyable kitchen with increased functionality and improved storage.
For Chris especially, the laundry room was an entirely dysfunctional eyesore. “We had a washer and a dryer, but it was all kind-of cobbled together!” Chris said. “There were always laundry piles everywhere, we weren’t really sure what we wanted to do in there, but it was time for us to make a change.” The mess of the space was stressful every time they walked in the door from the garage each day. Kids’ backpacks and shoes piled up haphazardly in the makeshift boot-bench closet left the family feeling disorganized and stressed. They needed space for folding clothes and locker cubbies to help keep the family organized.
Having known Christine and Todd in the Huntley community for years, Chris and Meghan were familiar with their work. “We already trusted them personally and having seen their projects for years we knew they did top notch work. After we reviewed the initial round of designs, we knew that hiring them was definitely the right choice,” Meghan and Chris said. Although Chris had done a lot of work in their home himself, the kitchen and laundry room renovation was such a large undertaking that he didn’t want to steal time away from his family to spend what would surely be many long weekends doing the job himself. “That would not have been a wise choice for us,” Chris laughed.
“Our designer, Michelle was very, very, easy to work with; anything we wanted to see or weren’t sure about, she went above and beyond to make this easy for us. She was easy to get hold of and always quick to respond,” the couple said. Michelle pulled ideas that mirrored the couple’s taste and style and was adept at directing the couple to limited choices that didn’t overwhelm them and kept the process moving. “I have a hard time making decisions. Michelle made the decision-making process so easy. I loved how she listened to what I liked and then presented three great options for me to choose from,” Meghan said.
The main objectives for the kitchen were better storage solutions, they wanted the space to reflect their lifestyle and taste, and they wanted it to last for years with low maintenance. One of the first steps in creating a more functional kitchen was relocating the refrigerator, creating an improved workflow for the busy family.
“We didn’t know that we could even move the refrigerator to a new location where it is now, that was something that we never would have thought of,” Chris said. “The new refrigerator location makes the kitchen feel so much bigger. We didn’t add any space, but our whole kitchen with the new design just seems like it’s so much larger than before!” Meghan said.
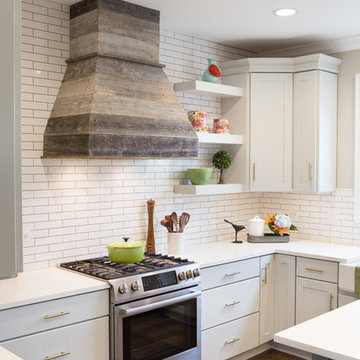
The perimeter mist colored cabinets helped warm and brighten the entire room, while the graphite colored cabinets on the island added contrast. Using this fresh, clean color palette satisfied the couple’s desire for a bright space that was the exact opposite of what they had before. Organization accessories were also added to the cabinets such as a spice drawer tray and roll outs to create hidden convenience.
“I absolutely love the hidden spices – it makes cooking so much more enjoyable!” Chris said. “And all the pull outs, and the double trash bin, who would think you could get so excited about organization!” the couple said in unison.
One thing they hated in their original kitchen was how dark the space felt. Added lighting on the ceiling with the new light fixtures combined with the lighter cabinetry colors throughout solved this problem. “Our new kitchen has this warm, almost cozy feeling that our old kitchen never had, it’s just a space that I love spending my time in now,” Meghan said. The light airy feeling was accentuated with the use of floating white shelves on either side of the decorative range hood. “We have so much cabinetry space, the new design is amazing we actually have more storage space than we will ever need,” Meghan said.
The island was extended to create more work surface and added space for stool seating. “The new island changes how we live. Now the kids can be in the kitchen with us, doing homework, eating breakfast, and the three of us have special dinners there when Chris is working late,” Meghan said.
The Carrara Marmi Quartz countertops were chosen because they are, not only beautiful, but are made from hard-working material that doesn’t require maintenance. The white subway tile backsplash that wraps to the ceiling behind the focal point cooktop range/hood compliments the crisp white countertops perfectly, while brushed brass hardware and light fixtures keep the design fresh and new.
The couple had a few fears at the beginning of the project, as most homeowners do. Their biggest fear was being out of their kitchen and laundry room for an extended time. The crew made it very easy for the family to work in a limited space keeping the washer and dryer hooked up the majority of the time, and also getting appliances working with minimal downtime.
“They above and beyond accommodated us to get us through the process,” Meghan said. “They did a great job making sure we were as comfortable as possible throughout the process,” Chris added.
“Our project manager DJ did a great job. He was very good at updating us on schedule changes, getting guys in as quickly as possible. Everyone that stepped in the house was nice and did great work,” said Chris. They thought Advance’s carpenter was phenomenal and were impressed when he took a conceptual idea from a photograph and worked with designer Michelle to create a one of a kind range/hood that has become the topic of conversation with friends and family who visit the new kitchen. “He was in our house literally every day for several weeks. He was easy to work with and good at what he did,” Meghan and Chris said.
The focal point of the kitchen; a hand-crafted, custom-built ventilation hood was clad with handpicked reclaimed barnwood. Advance Design’s carpenter built the framework and the cladding to create a one-of-a-kind design element that the couple loves.
“I think it was especially fun for him to create something unique from scratch, showcasing his talent in this area,” Meghan said. “I love that my kitchen is not like everyone else’s. I got to pick out the wood on my hood and watch it being built and was able to choose what pieces of wood went where on it. It’s totally unique.”
Red Oak flooring was toothed-in throughout the kitchen and the rest of the first floor anywhere changes were made. Then the whole floor was refinished to tone down the orange undertones in the existing floor stain, ultimately changing the color complexion of the entire first floor. The result is a completely new feeling to the entire home.
Renovating the laundry room was extremely important to Meghan and Chris, but they had trouble visualizing what the possibilities were for the seemingly small space. Michelle produced beautiful 3D illustrations that helped them envision the space in a whole new way.
“I must have told Michelle 100 times that I am a visual person, seeing the designs in 3D made it so easy to make decisions and see what we could really do with our space,” Meghan said.
A dividing wall and doorway were removed between the existing laundry room and hallway formerly containing a coat closet, providing space to design specialized graphite colored cabinetry matching the kitchen island to house custom storage cubbies for each family member. Adding the tall utility cabinetry in the new laundry area helped solve the storage issue, tucking away cleaning supplies, household items, and even the cat got its own cubby.
“I love how everything is now hidden in its own space. I can’t tell you how much I hated coming home and seeing everything sitting around on counters,” Chris said.
Electrical outlets were planned for the inside of utility cabinets, so devices could charge in hidden locations. Stacking the washer and dryer allowed for wider countertop space to provide a folding area and a special space for clothes to hang. “The way I do laundry has been completely transformed! I can actually fold clothes and hang them now right out of the washer and dryer,” Meghan said.
“The end result in the kitchen and the laundry/mud room was an updated light and bright space, with a smarter work flow that better meets the needs of this family,” Michelle said.
“I would totally recommend Advance Design,” Meghan said. “Sometimes I sit and just look at my kitchen and laundry room and think ‘Wow, I can’t believe I get to live here!’ It’s an understatement to say we love our new space.”
 User
UserPhilip Crocker
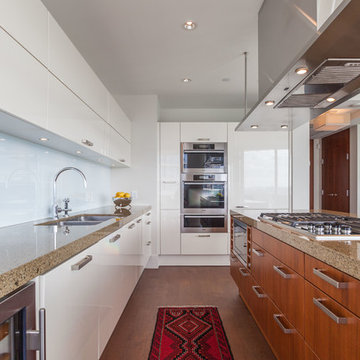
Collaborative design work between our clients and ourselves incorporating their own tastes, furniture and artwork as they downsized from a large home to an almost new condo. As with many of our projects we brought in our core group of trade specialists to consult and advise so that we could guide our clients through an easy process of option selections to meet their standards, timeline and budget. A very smooth project from beginning to end that included removal of the existing hardwood and carpet throughout, new painting throughout, some new lighting and detailed art glass work as well as custom metal and millwork. A successful project with excellent results and happy clients!
Do you want to renovate your condo?
Showcase Interiors Ltd. specializes in condo renovations. As well as thorough planning assistance including feasibility reviews and inspections, we can also provide permit acquisition services. We also possess Advanced Clearance through Worksafe BC and all General Liability Insurance for Strata Approval required for your proposed project.
Showcase Interiors Ltd. is a trusted, fully licensed and insured renovations firm offering exceptional service and high quality workmanship. We work with home and business owners to develop, manage and execute small to large renovations and unique installations. We work with accredited interior designers, engineers and authorities to deliver special projects from concept to completion on time & on budget. Our loyal clients love our integrity, reliability, level of service and depth of experience. Contact us today about your project and join our long list of satisfied clients!
We are a proud family business!
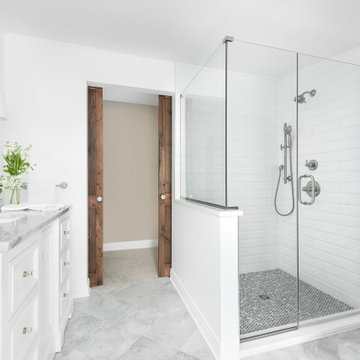
Inspiration for a mid-sized timeless master white tile and subway tile marble floor and white floor walk-in shower remodel in Chicago with recessed-panel cabinets, white cabinets, a two-piece toilet, white walls, an undermount sink, marble countertops, a hinged shower door and white countertops

Sponsored
Columbus, OH

Hope Restoration & General Contracting
Columbus Design-Build, Kitchen & Bath Remodeling, Historic Renovations
 HDR Remodeling Inc.
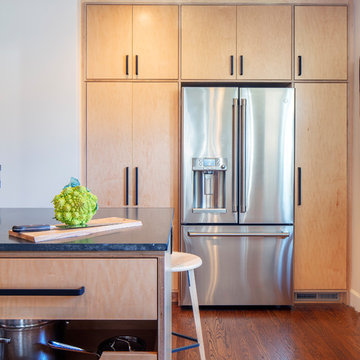
The asymmetry of this layout allowed for playfulness and informality. Photo Credit: Michael Hospelt
Eat-in kitchen - mid-sized modern l-shaped medium tone wood floor and brown floor eat-in kitchen idea in San Francisco with an undermount sink, flat-panel cabinets, light wood cabinets, granite countertops, blue backsplash, ceramic backsplash, stainless steel appliances, a peninsula and black countertops
Eat-in kitchen - mid-sized modern l-shaped medium tone wood floor and brown floor eat-in kitchen idea in San Francisco with an undermount sink, flat-panel cabinets, light wood cabinets, granite countertops, blue backsplash, ceramic backsplash, stainless steel appliances, a peninsula and black countertops
 Gappsi
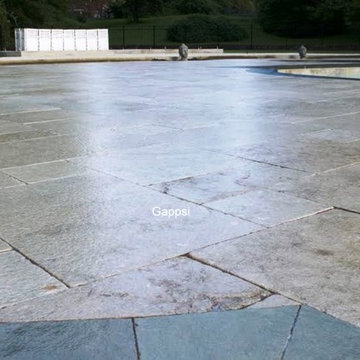
Natural stone swimming pool coping and patio built by Gappsi in Huntington NY with Scogli di Mare limestone; selected from the Gappsi natural stone collection. The sizes of the Scogli di Mare pavers are randomly mixed in rectangular and square sizes; the Scogli di Mare texture finish is flames and tumbled. The pavers surface consist of natural sea shell fossils exposed by the finishing process. The sealing process begins with pressure washing the entire patio, removing all dirt/debris from the stone surface and in between the joints. Next, Nexgel Techniseal synthetic sand is applied in between the pavers joints and vibrated with a mechanical plate compactor. The plate compactor has rubber rollers to prevent the stones from cracking or scratching. This vibrating process allows the sand to fall in between the joints and density. Then, we clean the pavers with brooms and landscape blowers, to clean the excess sand from the pavers surface and to evenly spread the sand in between the pavers joints. The next step is to wash the pavers by misting water to penetrate the synthetic sand into the paver joints all the way down below the pavers. The sand and water activate a chemical reaction of the pollen that's in the sand to cause the sand to harden. Finally, the application of the sealer, two parts components urethane dealer, specially formulated for Gappsi, is applied to the pavers surface and the sand joints to prevent stones from staining, extend their life cycle and further enhance their texture, color, and surface.
Follow the link to watch the sealing process of this property: https://www.youtube.com/watch?v=xNBxlg5jaLI
Gappsi provides power washing and sealing in both Nassau and Suffolk county on Long Island NY.
 safe ZOnea
Staging a home for sale or for a major transition is a strange in-between state. You are still living in the space, but you are also preparing it to impress strangers, support showings, and remain functional until the final move-out day. That tension between “home” and “product” is where storage quietly becomes one of your smartest tools. Used well, storage lets you reduce clutter, protect important items, and create the kind of rooms that photograph beautifully and feel calm when buyers walk through the door.
A staged move is rarely just about shifting boxes from one address to another. It is about managing timing, presentation, and stress at the same time. When storage is built into the plan from day one, the entire process feels less rushed and more strategic. Rooms open up gradually, essentials stay accessible, and you never feel like you are drowning in half-packed chaos. Understanding how to use storage as a staging partner, not just a place to dump excess stuff, is what turns a messy transition into a controlled, professional-looking move.
Why Storage Is the Backbone of Every Staged Move
Visual space is emotional space. When every surface is covered, and every corner is full, buyers feel crowded before they have even evaluated the layout. Storage gives you a way to pull back without making drastic decisions about what to keep or donate. Seasonal décor, bulky furniture, duplicate items, archives, and personal collections can be moved out early, so the home reads cleaner and more open while still feeling lived-in. That balance between warmth and simplicity is exactly what good staging tries to achieve.
In more complex situations, such as live-work properties or home offices, storage becomes even more important. You may need to keep a business running while also presenting a polished environment to viewers. Partnering with local movers in Boston makes it easier to shift equipment, files, and nonessential pieces into storage in phases, so work can continue while the visible areas of the property stay controlled and presentable.
How Staging and Storage Work Together to Control Visual Impact
Staging works best when every object in a room has a clear purpose. A sofa frames a conversation. A table suggests gathering. A lamp softens the mood. Everything else that is not essential to that story competes for attention. Storage supports staging by giving you a clean staging bench off-site, where nonessential items can wait without being constantly shuffled between rooms or piled into overstuffed closets.
The art lies in deciding what stays and what goes. Family photos, extensive collections, excess seating, and rarely used appliances often move into storage first. What remains should be enough to show scale, comfort, and function without revealing the full weight of daily life. Commercial properties go through a similar filtering process. Extra desks, surplus equipment, outdated signage, and inactive files often move out early so the active workspace feels lean, efficient, and future-ready before a relocation supported by commercial movers takes place.
Strategic Timing of Storage before the Actual Move
The worst time to think about storage is when boxes are already stacked in the hallway. In a staged move, storage decisions ideally begin as soon as you know the property will be listed or the space will be transitioned. That might be a month or more before the main moving date. Starting early gives you time to sort, label, and prioritize instead of throwing things together in a panic.
An early storage phase also helps you test how the home feels with less in it. You may discover that removing a few large pieces transforms a cramped room into an open, inviting space. For commercial spaces, early storage lets operations continue with fewer interruptions. Departments can send nonessential items out in waves. When the main relocation comes, much of the excess is already safely stored, and what remains is easier for a commercial movers Boston team to handle with speed and care.
The Emotional Psychology behind Letting Storage Hold Your Belongings
Letting belongings leave the house ahead of you can feel unsettling. There is always a quiet fear that once something is out of sight, it will be forgotten, damaged, or harder to reclaim. That is why some people resist using storage even when they know it would make the staging process easier. Acknowledging that emotion instead of dismissing it helps you plan more honestly and avoids last-minute regret.
The reality is that good storage is not a black hole; it is a temporary pause. When items are packed thoughtfully, labeled clearly, and placed in an environment you trust, they become easier to manage than when they are tucked into random cupboards or stacked in spare rooms. For many people, living with fewer visible possessions during staging actually reduces tension. The home feels lighter and easier to maintain. Businesses notice the same effect when storage removes outdated equipment and clutter from the floor. The workspace looks more focused, and staff can concentrate on current tasks instead of navigating around accumulated history.
Protecting Assets While They Live in Storage
Sending belongings into storage is only a good idea if they come back in the same or better condition. That is where quality control matters. Furniture, textiles, electronics, files, and artwork each have different vulnerabilities. Moisture, temperature swings, dust, and rough handling can all damage them in ways that only become obvious later. Choosing the right type of storage and packing accordingly is central to the genius of using storage as part of a staged move rather than as a desperate overflow container.
Climate-controlled units, padded wrapping, elevated pallets, careful stacking, and clearly marked boxes all reduce risk. The goal is to handle items fewer times, not more. When storage is integrated into the move plan, belongings can travel directly from the home to storage and later from storage to the new address with minimal extra movement. Many owners coordinate those transfers through a well trusted movers in Boston, so the same team that moves items out early also manages their final delivery, preserving continuity and accountability.
How Storage Reduces Risk during Multi-Phase Moves
Few staged moves happen in a single clean step. There are often gaps between listing and selling, between selling and closing, between closing and final move-out. If renovations, inspections, or office reconfigurations are involved, the timeline becomes even more layered. Storage absorbs those gaps, so you are not forced to live among towers of boxes or stack equipment in hallways waiting for the next phase.
By treating storage as a flexible middle ground, you can move things out gradually while still having access when needed. For example, archived files can go first, followed by seasonal décor, then surplus furniture. As each stage ends, fewer items remain to be shifted on the final date. This phased approach reduces the risk of rushed, late-night packing sessions, careless stacking, and damaged items. It also makes it easier for commercial moving crews to work efficiently because they are handling a manageable volume of goods at each phase rather than everything at once.
Using Storage to Maintain Clean Show-Ready Conditions
One of the hardest parts of staging is keeping the property consistently show-ready. Every viewing becomes its own small event. Floors need to be cleared, surfaces wiped, and personal items tucked away. When too many belongings remain in the home, each showing takes a heavy amount of effort. Storage cuts that workload dramatically by taking nonessentials completely off the stage.
With fewer items to move and hide, maintaining a neutral, inviting look becomes much more realistic. You are not scrambling to stuff things into closets or push items under the bed. Instead, the home sits closer to show condition all the time, and the final touches before a viewing are minimal. In commercial environments, using storage helps maintain a professional appearance for clients and staff, even while the space is being prepared for a larger transition. Active tools and furniture stay in play, while inactive pieces quietly support the future from storage.
Storage as a Strategic Tool in Business Relocation Planning
For businesses, storage is more than a convenience; it is part of risk management. Office relocations and staged commercial moves have to juggle lease deadlines, equipment deliveries, IT cutovers, and staffing realities. Trying to shift everything in one move often results in downtime, lost files, and strained teams. Storage turns the move into a series of controlled steps instead of a single disruptive jump.
Unused furniture, archived documents, and non-critical inventory can be moved into storage weeks ahead of the main relocation. As the new space becomes ready, items can move out of storage and directly into position. This reduces double-handling and keeps the old and new locations from filling with half-unpacked material. A business that coordinates these flows with professional commercial movers in Boston usually experiences smoother transitions, because storage is treated as a working part of the operational plan rather than a leftover problem.
The Hidden Cost Benefits of Proper Storage Planning
On paper, storage looks like an extra expense. In reality, poorly managed moves cost far more. When everything is rushed into boxes at the last minute, items are damaged, misplaced, or transported multiple times. Extra labor hours, emergency packing supplies, replacement furniture, and extended timelines quickly outweigh the cost of well-used storage. Staging without storage also tends to keep homes and offices crowded longer, which can hurt impressions and, in the case of a sale, influence offers.
When storage is integrated from the beginning, you minimize waste. You handle items fewer times, you know where things are, and you avoid paying people to shift the same objects repeatedly. Staged homes that look better often sell faster or draw stronger interest, which helps recover investment on the back end. Businesses benefit from less downtime, safer handling of equipment, and predictable work schedules. Those gains are why many clients prefer partnering with a commercial moving company in Boston that understands storage as a cost-control tool, not just a place to park overflow.
Conclusion
The true genius of using storage during a staged home move is that it quietly rewrites the rules of transition. Instead of treating space as something that must absorb every box and belonging until the last possible moment, you treat storage as a flexible extension of the home or office. This shift in thinking opens rooms, clears sightlines, and makes every phase of the move more intentional. Staging becomes easier, maintenance becomes lighter, and the stress of living in a half-moved environment drops noticeably. When storage is chosen carefully, used early, and coordinated with the overall moving plan, it protects both physical assets and emotional energy. Buyers and visitors see a calm, collected space. You experience a less chaotic path from “here” to “there.” Whether you are selling a home, repositioning a business, or managing a complex phased relocation, storage can turn a disruptive event into a managed, almost elegant process.
For people who want that level of control and care during a staged move, Stairhopper movers have built a strong reputation by treating storage, timing, and transport as parts of one connected strategy. Their team is known for listening closely, planning around real-life constraints, and moving both residential and commercial clients through transitions with calm, steady execution. They approach every project as a partnership, aligning storage use, staging needs, and final delivery so that what matters most arrives safely, on schedule, and with as little disruption as possible.
Frequently Asked Questions
Q1. When should I arrange storage for a staged home move?
Ideally, four to six weeks before listing or transition, so clearing, packing, and staging can happen gradually without rushed decisions or last-minute stress.
Q2. Is climate-controlled storage necessary for staged moves?
It is highly recommended for wood furniture, electronics, artwork, and documents, since temperature and humidity swings can quietly damage materials over time.
Q3. How does storage help keep a home show-ready?
By moving nonessential items off-site, daily tidying becomes simpler, and each room can stay closer to a staged condition between viewings or inspections.
Q4. Can storage reduce the length of the final moving day?
Yes. When many items are moved into storage in advance, the final moving day focuses on essentials, which shortens timelines and reduces physical and mental strain.
Q5. Is storage useful for short-term business relocations?
Even in short relocations, storage helps prevent overcrowded offices and allows departments to move in phases without interrupting everyday operations.
Q6. How do I decide what should go into storage first?
Start with rarely used items, seasonal décor, surplus furniture, and archived materials, then work toward pieces that are visually distracting or make rooms feel cramped.
Q7. Will using storage make it harder to find things later?
Not if packing and labeling are done carefully. Clear categories, room-based labels, and simple inventories make stored items easier to locate than when scattered at home.
Q8. Does storage still make sense if my move happens in one day?
Yes, because staging and preparation begin well before that day. Storage keeps the home functional and attractive during the weeks leading up to the final move.
 Advance Design Studio, Ltd.
Richard and Monica of Huntley, IL, needed to make better use of their kitchen as well as more storage for pots, pans, and countertop appliances. Their space was laid out unconventionally, making cooking a challenge. A triangular nook held their refrigerator, hard-to-reach cabinets, and a cramped pantry. They needed to find a solution, so they searched Facebook for home remodeling companies in their area. Soon they found Advance Design Studio’s profile and were immediately impressed.
“Advance Design was the first and last studio I contacted,” Richard said.
Richard called Advance Design and felt an immediate connection with Project Designer Nicole. She was knowledgeable and thorough and offered many unique solutions to their kitchen layout problem.
A week later, Nicole came out to their home to meet the couple. They talked about their kitchen remodeling project and told Nicole what they wanted in their dream kitchen. Nicole saw that the kitchen had weird angles that hindered the cabinets you could use. She knew that designing a space that met both the client’s needs and dreams would be challenging.
Nicole worked with Richard and Monica to create an innovative design. When the couple came out to Advance Design Studio in Gilberts, they were blown away by the 3D illustrations Nicole showed them.
“I incorporated a hidden pantry cabinet to not only be a cool feature but also allowed me to square off the walls to gain more cabinet space,” Nicole said.
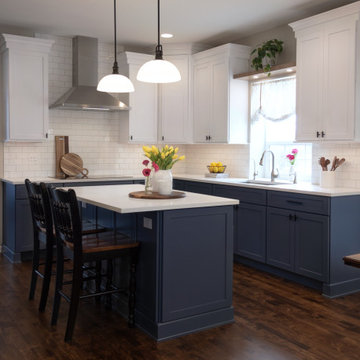
The hidden pantry added storage and squared off the strange triangular nook, creating a more traditional and functional kitchen layout. With the layout problems solved, they worked together to select materials. Richard and Monica wanted something brighter than their previous dark brown kitchen. They chose a combination of blue and white cabinetry with a white subway tile backsplash and white quartz countertops. The design was finalized, the materials were selected. It was time to begin construction.
One fear most homeowners have when beginning a home remodel is dust. Advance Design uses BuildClean HEPA filters to eliminate dust throughout the house while construction is going on. Project Manager Jason and his crew created temporary walls and cleaned up after every day of work.
“We were very impressed with how clean and organized the crew kept things while the remodeling process was underway,” Richard said.
The result is just what Richard and Monica envisioned when they began the process. Richard’s love for cooking can be explored through all-new Thermador appliances, featuring an easy-to-use induction cooktop, built-in double oven, and spacious refrigerator. Matte black hardware contrasts the bright white backsplash, countertops, and cabinets, while the stunning blue cabinets complement the dark hardwood floor and stainless-steel appliances. The dual pendant light fixtures over the reconfigured island are eye-catching and add necessary lighting.
This Huntley kitchen renovation turned out better than Richard and Monica hoped. Their experience with Advance Design’s Common Sense Remodeling process has them thinking about other projects they could do in the future.
Our award-winning design team would love to create a beautiful, functional, and spacious place for you and your family. With our “Common Sense Remodeling” approach, the process of renovating your home has never been easier. Contact us today at 847-665-1711 or schedule an appointment.


 Tile Doctor Ltd
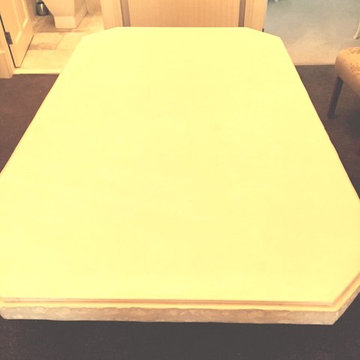
Here is a Limestone table that we stripped, cleaned and sealed in Edinburgh city centre. As you can see from the photographs below the old sealer/wax coating had started to deteriorate and wear off in places leaving the table looking dirty and the client hated the waxy/yellow shine finish it left so asked us to remove the old seal completely and make the Limestone look completely natural.
To remove the remaining wax coating the table was smothered in strong solution of Tile Doctor Pro-Clean which is an effective cleaning product that will strip off old sealers when used in a concentrated form. The solution was left to dwell for a while before being scrubbed in by hand and then rinsed off with water.
To make the job easier the table was cleaned in two sections and the process repeated a number of times in order to remove all the wax. Once complete the table was given a final clean using Tile Doctor Neutral Clean which is a PH neutral cleaning product to remove any trace of Pro-Clean and neutralise the stone before sealing.
The table was dried thoroughly before being sealed using three coats of Tile Doctor Colour Grow which is a penetrating sealer that soaks into the pores of the stone improving its natural colours and protecting it against staining from within.
The difference was remarkable and my client was delighted with the result.
Thomas Wilson
Edinburgh Tile Doctor
 Advance Design Studio, Ltd.
Richard and Monica of Huntley, IL, needed to make better use of their kitchen as well as more storage for pots, pans, and countertop appliances. Their space was laid out unconventionally, making cooking a challenge. A triangular nook held their refrigerator, hard-to-reach cabinets, and a cramped pantry. They needed to find a solution, so they searched Facebook for home remodeling companies in their area. Soon they found Advance Design Studio’s profile and were immediately impressed.
“Advance Design was the first and last studio I contacted,” Richard said.
Richard called Advance Design and felt an immediate connection with Project Designer Nicole. She was knowledgeable and thorough and offered many unique solutions to their kitchen layout problem.
A week later, Nicole came out to their home to meet the couple. They talked about their kitchen remodeling project and told Nicole what they wanted in their dream kitchen. Nicole saw that the kitchen had weird angles that hindered the cabinets you could use. She knew that designing a space that met both the client’s needs and dreams would be challenging.
Nicole worked with Richard and Monica to create an innovative design. When the couple came out to Advance Design Studio in Gilberts, they were blown away by the 3D illustrations Nicole showed them.
“I incorporated a hidden pantry cabinet to not only be a cool feature but also allowed me to square off the walls to gain more cabinet space,” Nicole said.
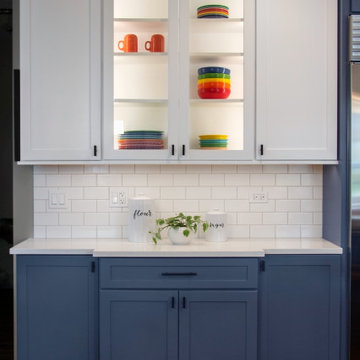
The hidden pantry added storage and squared off the strange triangular nook, creating a more traditional and functional kitchen layout. With the layout problems solved, they worked together to select materials. Richard and Monica wanted something brighter than their previous dark brown kitchen. They chose a combination of blue and white cabinetry with a white subway tile backsplash and white quartz countertops. The design was finalized, the materials were selected. It was time to begin construction.
One fear most homeowners have when beginning a home remodel is dust. Advance Design uses BuildClean HEPA filters to eliminate dust throughout the house while construction is going on. Project Manager Jason and his crew created temporary walls and cleaned up after every day of work.
“We were very impressed with how clean and organized the crew kept things while the remodeling process was underway,” Richard said.
The result is just what Richard and Monica envisioned when they began the process. Richard’s love for cooking can be explored through all-new Thermador appliances, featuring an easy-to-use induction cooktop, built-in double oven, and spacious refrigerator. Matte black hardware contrasts the bright white backsplash, countertops, and cabinets, while the stunning blue cabinets complement the dark hardwood floor and stainless-steel appliances. The dual pendant light fixtures over the reconfigured island are eye-catching and add necessary lighting.
This Huntley kitchen renovation turned out better than Richard and Monica hoped. Their experience with Advance Design’s Common Sense Remodeling process has them thinking about other projects they could do in the future.
Our award-winning design team would love to create a beautiful, functional, and spacious place for you and your family. With our “Common Sense Remodeling” approach, the process of renovating your home has never been easier. Contact us today at 847-665-1711 or schedule an appointment.
 Tile Doctor Ltd
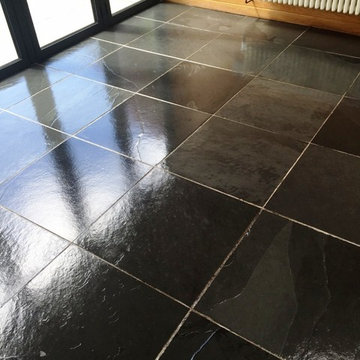
Tenuous link I know but I worked on this semi riven Black Brazilian Slate Tiles in the kitchen and dining room of a house in the seaside town of Thornton-Cleveleys around the time of the Rio Olympics. I love working on Slate as although it’s appearance can degrade without proper maintenance due to a build-up of dirt I knew they would look fantastic by the time I had finished.
The tile itself had lost its rich black colour and the grout lines had become stained, leaving the floor as a whole looking very unattractive. Out of interest honed Slate has a smooth, refined texture whereas the riven Slate has a rougher, more natural texture, and this can make it more difficult to keep clean. Needless to say, the customer was keen to have the tiles restored to looking their best.
To restore the appearance of the Slate, I cleaned the floor and removed what remained of the old sealer off using Tile Doctor Remove and Go. This was scrubbed into the floor using a scrubbing pad fitted to a rotary machine. The floor was then rinsed with water, and the process repeated where necessary to tackle particularly stubborn areas of dirt.
As mentioned previously, the grout lines were in a particularly bad state, and would need special cleaning attention. I cleaned carefully with a strong 5-to-1 dilution of Tile Doctor Pro Clean with water, which is our high alkaline cleaner. The cleaning solution was scrubbed I’m using a stiff handheld grout brush, with the grout lines looking immediately cleaner. When I was satisfied that the grout lines had been restored to the best possible condition, I gave the floor a thorough rinse using the wet pickup function of a wet wax machine to get the floor as dry as possible and then left the whole floor to dry off overnight.
Upon my return to the property I ran some quick damp tests to check that the floor was completely dry. This is important as any excess moisture would have prevented me from sealing the tiles, since it can cloud the sealer and damage it performance.
Previously I discussed sealer options with the customer and they stated that they would prefer a Satin finish, so I applied a sealer called Tile Doctor Seal and Go, our topical sealer which will both protect the Slate from dirt and stains, and also gave it the desired finish. As you can see from the below photographs, the rich, dark shades in the Slate were really enhanced.
The customer was very pleased with the finished result, but was also concerned about keeping the Slate clean in the long-term. For regular cleaning I advised the customer to use a pH neutral cleaner for aftercare called Tile Doctor Neutral Cleaner. As a pH neutral cleaner, it will not erode the sealer compared to acidic cleaners you so often find in supermarkets.
Russell Taylor
Lancashire Tile Doctor
18