
Search results for "Commence" in Home Design Ideas
 Paul Lopa Designs
See what our client say about Paul Lopa Designs:
We recently remodeled a studio we purchased for guests who visit us. The project included the demolition of a kitchenettem and a bathroom, and the installation of new cabinets, wood flooring, granite countertops, appliances, wood molding and a custom Murphy bed in the sleeping area.
My husband and I wanted a contractor who specializes in high end kitchens. We hired Paul Lopa (who had previously done two projects for us—a kitchen remodel and a bathroom remodel) as we were extremely impressed with his work, from beginning to end.
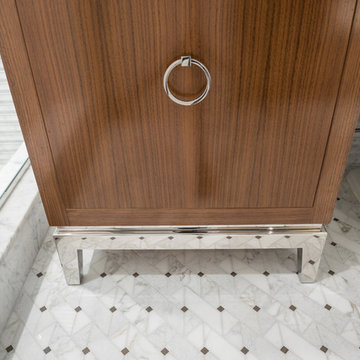
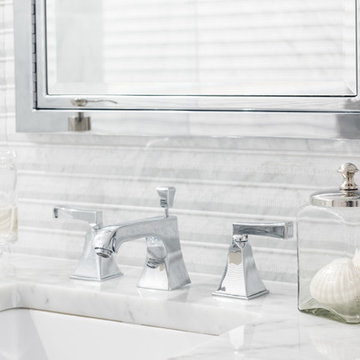
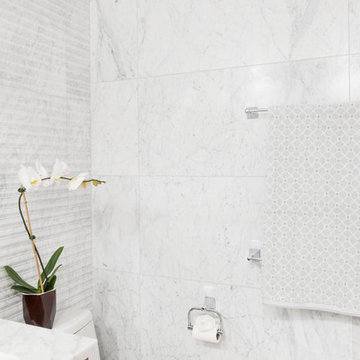
For the studio project, Paul brought many samples to our home before the project commenced. It was very easy for us to select the materials, from the wood used for the cabinets and Murphy bed to the granite countertop and wood floor. We were also very pleased with the appliances he helped us select as well, as the kitchen was transformed into a full-fledged kitchen with an eat-at counter. Paul helped us select custom marble for the bathroom which is gorgeous! Every suggestion he made was great. The studio is now worthy of being photographed by Architectural Digest!
Paul and his crew are very professional. His staff is friendly and were always on time. Upon completion of the job, the whole area was clean and ready to use.
Paul was always accessible and available to answer questions whenever we had one. We were impressed that the project finished on time and on budget!
We will definitely use Paul for all future work. He is a consummate professional and very nice to work with.
 Paul Lopa Designs
See what our client say about Paul Lopa Designs:
We recently remodeled a studio we purchased for guests who visit us. The project included the demolition of a kitchenettem and a bathroom, and the installation of new cabinets, wood flooring, granite countertops, appliances, wood molding and a custom Murphy bed in the sleeping area.
My husband and I wanted a contractor who specializes in high end kitchens. We hired Paul Lopa (who had previously done two projects for us—a kitchen remodel and a bathroom remodel) as we were extremely impressed with his work, from beginning to end.
For the studio project, Paul brought many samples to our home before the project commenced. It was very easy for us to select the materials, from the wood used for the cabinets and Murphy bed to the granite countertop and wood floor. We were also very pleased with the appliances he helped us select as well, as the kitchen was transformed into a full-fledged kitchen with an eat-at counter. Paul helped us select custom marble for the bathroom which is gorgeous! Every suggestion he made was great. The studio is now worthy of being photographed by Architectural Digest!
Paul and his crew are very professional. His staff is friendly and were always on time. Upon completion of the job, the whole area was clean and ready to use.
Paul was always accessible and available to answer questions whenever we had one. We were impressed that the project finished on time and on budget!
We will definitely use Paul for all future work. He is a consummate professional and very nice to work with.
 Paul Lopa Designs
See what our client say about Paul Lopa Designs:
We recently remodeled a studio we purchased for guests who visit us. The project included the demolition of a kitchenettem and a bathroom, and the installation of new cabinets, wood flooring, granite countertops, appliances, wood molding and a custom Murphy bed in the sleeping area.
My husband and I wanted a contractor who specializes in high end kitchens. We hired Paul Lopa (who had previously done two projects for us—a kitchen remodel and a bathroom remodel) as we were extremely impressed with his work, from beginning to end.
For the studio project, Paul brought many samples to our home before the project commenced. It was very easy for us to select the materials, from the wood used for the cabinets and Murphy bed to the granite countertop and wood floor. We were also very pleased with the appliances he helped us select as well, as the kitchen was transformed into a full-fledged kitchen with an eat-at counter. Paul helped us select custom marble for the bathroom which is gorgeous! Every suggestion he made was great. The studio is now worthy of being photographed by Architectural Digest!
Paul and his crew are very professional. His staff is friendly and were always on time. Upon completion of the job, the whole area was clean and ready to use.
Paul was always accessible and available to answer questions whenever we had one. We were impressed that the project finished on time and on budget!
We will definitely use Paul for all future work. He is a consummate professional and very nice to work with.
Find the right local pro for your project
 Paul Lopa Designs
See what our client say about Paul Lopa Designs:
We recently remodeled a studio we purchased for guests who visit us. The project included the demolition of a kitchenettem and a bathroom, and the installation of new cabinets, wood flooring, granite countertops, appliances, wood molding and a custom Murphy bed in the sleeping area.
My husband and I wanted a contractor who specializes in high end kitchens. We hired Paul Lopa (who had previously done two projects for us—a kitchen remodel and a bathroom remodel) as we were extremely impressed with his work, from beginning to end.
For the studio project, Paul brought many samples to our home before the project commenced. It was very easy for us to select the materials, from the wood used for the cabinets and Murphy bed to the granite countertop and wood floor. We were also very pleased with the appliances he helped us select as well, as the kitchen was transformed into a full-fledged kitchen with an eat-at counter. Paul helped us select custom marble for the bathroom which is gorgeous! Every suggestion he made was great. The studio is now worthy of being photographed by Architectural Digest!
Paul and his crew are very professional. His staff is friendly and were always on time. Upon completion of the job, the whole area was clean and ready to use.
Paul was always accessible and available to answer questions whenever we had one. We were impressed that the project finished on time and on budget!
We will definitely use Paul for all future work. He is a consummate professional and very nice to work with.
 Paul Lopa Designs
See what our client say about Paul Lopa Designs:
We recently remodeled a studio we purchased for guests who visit us. The project included the demolition of a kitchenettem and a bathroom, and the installation of new cabinets, wood flooring, granite countertops, appliances, wood molding and a custom Murphy bed in the sleeping area.
My husband and I wanted a contractor who specializes in high end kitchens. We hired Paul Lopa (who had previously done two projects for us—a kitchen remodel and a bathroom remodel) as we were extremely impressed with his work, from beginning to end.
For the studio project, Paul brought many samples to our home before the project commenced. It was very easy for us to select the materials, from the wood used for the cabinets and Murphy bed to the granite countertop and wood floor. We were also very pleased with the appliances he helped us select as well, as the kitchen was transformed into a full-fledged kitchen with an eat-at counter. Paul helped us select custom marble for the bathroom which is gorgeous! Every suggestion he made was great. The studio is now worthy of being photographed by Architectural Digest!
Paul and his crew are very professional. His staff is friendly and were always on time. Upon completion of the job, the whole area was clean and ready to use.
Paul was always accessible and available to answer questions whenever we had one. We were impressed that the project finished on time and on budget!
We will definitely use Paul for all future work. He is a consummate professional and very nice to work with.
 Xpand Inc. | Homes of Xcellence
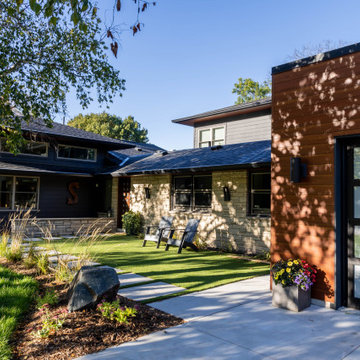
At the outset, this project began with the transformation of a 2-car attached garage. The goal was to create a mudroom, an exercise room, and a breezeway to seamlessly connect the spacious detached garage with the main part of the house. Additionally, the project involved partial roof removal and the addition of a new front entry.
But then came an unexpected twist – scope creep.
We found ourselves veering away from the initial client-supplied architectural plans. After numerous consultations with the clients and several iterations of the design, we arrived at a significantly improved plan for the remodel and addition.
Our journey commenced with the demolition of almost the entire former 2-car garage, making space for a new, oversized 3-car garage measuring 40′ x 28′. This garage was strategically placed between the existing house and the large detached garage. We introduced a custom low-sloped flat roof, designed to address historical drainage issues.
To mitigate water pooling, we created a custom concrete step at the back corner of the garage, equipped with a sturdy metal grate that sits flush with the step. We also installed a PVC drainage system, commencing at the step and running beneath a newly designed patio, ultimately draining into the yard. These measures have significantly reduced water accumulation around the house.
The new garage boasts several features, including Longboard aluminum siding, custom full glass garage doors, interior drywall finished to a level 4, an abundance of can lights, an epoxy floor coating, vinyl base trim, a new forced air garage heater, and more.
The clients also requested a designated space for their three kids and their friends to enjoy, thus giving birth to the “Kid Zone.” We partitioned a section of the existing oversized garage, resulting in a space measuring approximately 22′ x 32′, brimming with entertainment possibilities. To enhance control over the temperature in the Kid Zone, we collaborated with our licensed HVAC partner to install a cold weather mini-split system.
One of the most significant challenges was the modernization and consolidation of the home’s main electrical systems. We reconfigured and combined 6-7 different electrical panels into just two. One panel serves the main house, while the second is dedicated to backup power from a generator. These panels, along with the boiler for the in-floor heating system, are housed in a newly constructed mechanical room within the Kid Zone.
Inside the main house, we completed various tasks, such as removing the ceiling in the hallway from the new garage to address prior water damage, improve insulation, and rework electrical and HVAC systems. We also replaced the ceiling from the front door to the base of the stairs, adding new can lighting and enhancing insulation. Skilled drywall specialists then installed and finished new drywall to a level 5 standard.
The exterior of the house underwent a complete overhaul. Before installing new roofing on the entire house and garage, we modified an existing flat roof by adding custom lumber and plywood to enhance the pitch, preventing future ice dams. A new rubber roof was expertly installed on the oversized 3-car garage, and the flat roof section we re-framed.
Our meticulous exterior team removed old white aluminum soffit, fascia, and gutters, replacing them with new framing to accommodate Longboard soffit material. This task was particularly challenging due to the age of the house and the non-standard wall and roof framing. Our skilled exterior subcontractors ensured a perfect fit.
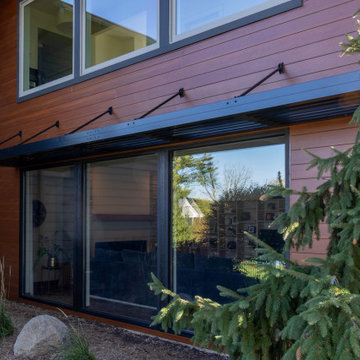
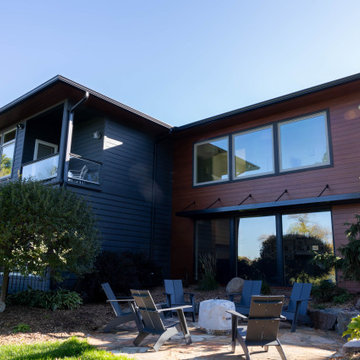
Near the pool area, we discovered severe rot and decay from years of water intrusion. After informing the homeowners, we ordered and installed five new commercial-style block framed windows and a custom 8′ high Anderson patio door. This involved careful removal and replacement of window headers from the outside to avoid disturbing the finished part of the house. We reframed the large openings to fit the new windows, and our skilled trim carpenters installed new walnut casing, base, and window sills.
In total, we replaced around 900 lineal feet of soffit and installed approximately 32 squares of aluminum siding. The entire house was meticulously prepped, repaired, and painted according to the client’s chosen color.
Throughout the project, we incorporated numerous custom touches and unique design elements, some of which you can see in the pictures. Our team also addressed various unforeseen challenges, from soil issues to rot and decay repair, roof leaks, drainage problems, electrical and HVAC complexities, and much more.
At Xpand Inc., we take pride in making it all happen, turning your remodeling and renovation dreams into reality.
 Xpand Inc. | Homes of Xcellence
At the outset, this project began with the transformation of a 2-car attached garage. The goal was to create a mudroom, an exercise room, and a breezeway to seamlessly connect the spacious detached garage with the main part of the house. Additionally, the project involved partial roof removal and the addition of a new front entry.
But then came an unexpected twist – scope creep.
We found ourselves veering away from the initial client-supplied architectural plans. After numerous consultations with the clients and several iterations of the design, we arrived at a significantly improved plan for the remodel and addition.
Our journey commenced with the demolition of almost the entire former 2-car garage, making space for a new, oversized 3-car garage measuring 40′ x 28′. This garage was strategically placed between the existing house and the large detached garage. We introduced a custom low-sloped flat roof, designed to address historical drainage issues.
To mitigate water pooling, we created a custom concrete step at the back corner of the garage, equipped with a sturdy metal grate that sits flush with the step. We also installed a PVC drainage system, commencing at the step and running beneath a newly designed patio, ultimately draining into the yard. These measures have significantly reduced water accumulation around the house.
The new garage boasts several features, including Longboard aluminum siding, custom full glass garage doors, interior drywall finished to a level 4, an abundance of can lights, an epoxy floor coating, vinyl base trim, a new forced air garage heater, and more.
The clients also requested a designated space for their three kids and their friends to enjoy, thus giving birth to the “Kid Zone.” We partitioned a section of the existing oversized garage, resulting in a space measuring approximately 22′ x 32′, brimming with entertainment possibilities. To enhance control over the temperature in the Kid Zone, we collaborated with our licensed HVAC partner to install a cold weather mini-split system.
One of the most significant challenges was the modernization and consolidation of the home’s main electrical systems. We reconfigured and combined 6-7 different electrical panels into just two. One panel serves the main house, while the second is dedicated to backup power from a generator. These panels, along with the boiler for the in-floor heating system, are housed in a newly constructed mechanical room within the Kid Zone.
Inside the main house, we completed various tasks, such as removing the ceiling in the hallway from the new garage to address prior water damage, improve insulation, and rework electrical and HVAC systems. We also replaced the ceiling from the front door to the base of the stairs, adding new can lighting and enhancing insulation. Skilled drywall specialists then installed and finished new drywall to a level 5 standard.
The exterior of the house underwent a complete overhaul. Before installing new roofing on the entire house and garage, we modified an existing flat roof by adding custom lumber and plywood to enhance the pitch, preventing future ice dams. A new rubber roof was expertly installed on the oversized 3-car garage, and the flat roof section we re-framed.
Our meticulous exterior team removed old white aluminum soffit, fascia, and gutters, replacing them with new framing to accommodate Longboard soffit material. This task was particularly challenging due to the age of the house and the non-standard wall and roof framing. Our skilled exterior subcontractors ensured a perfect fit.
Near the pool area, we discovered severe rot and decay from years of water intrusion. After informing the homeowners, we ordered and installed five new commercial-style block framed windows and a custom 8′ high Anderson patio door. This involved careful removal and replacement of window headers from the outside to avoid disturbing the finished part of the house. We reframed the large openings to fit the new windows, and our skilled trim carpenters installed new walnut casing, base, and window sills.
In total, we replaced around 900 lineal feet of soffit and installed approximately 32 squares of aluminum siding. The entire house was meticulously prepped, repaired, and painted according to the client’s chosen color.
Throughout the project, we incorporated numerous custom touches and unique design elements, some of which you can see in the pictures. Our team also addressed various unforeseen challenges, from soil issues to rot and decay repair, roof leaks, drainage problems, electrical and HVAC complexities, and much more.
At Xpand Inc., we take pride in making it all happen, turning your remodeling and renovation dreams into reality.
 Xpand Inc. | Homes of Xcellence
At the outset, this project began with the transformation of a 2-car attached garage. The goal was to create a mudroom, an exercise room, and a breezeway to seamlessly connect the spacious detached garage with the main part of the house. Additionally, the project involved partial roof removal and the addition of a new front entry.
But then came an unexpected twist – scope creep.
We found ourselves veering away from the initial client-supplied architectural plans. After numerous consultations with the clients and several iterations of the design, we arrived at a significantly improved plan for the remodel and addition.
Our journey commenced with the demolition of almost the entire former 2-car garage, making space for a new, oversized 3-car garage measuring 40′ x 28′. This garage was strategically placed between the existing house and the large detached garage. We introduced a custom low-sloped flat roof, designed to address historical drainage issues.
To mitigate water pooling, we created a custom concrete step at the back corner of the garage, equipped with a sturdy metal grate that sits flush with the step. We also installed a PVC drainage system, commencing at the step and running beneath a newly designed patio, ultimately draining into the yard. These measures have significantly reduced water accumulation around the house.
The new garage boasts several features, including Longboard aluminum siding, custom full glass garage doors, interior drywall finished to a level 4, an abundance of can lights, an epoxy floor coating, vinyl base trim, a new forced air garage heater, and more.
The clients also requested a designated space for their three kids and their friends to enjoy, thus giving birth to the “Kid Zone.” We partitioned a section of the existing oversized garage, resulting in a space measuring approximately 22′ x 32′, brimming with entertainment possibilities. To enhance control over the temperature in the Kid Zone, we collaborated with our licensed HVAC partner to install a cold weather mini-split system.
One of the most significant challenges was the modernization and consolidation of the home’s main electrical systems. We reconfigured and combined 6-7 different electrical panels into just two. One panel serves the main house, while the second is dedicated to backup power from a generator. These panels, along with the boiler for the in-floor heating system, are housed in a newly constructed mechanical room within the Kid Zone.
Inside the main house, we completed various tasks, such as removing the ceiling in the hallway from the new garage to address prior water damage, improve insulation, and rework electrical and HVAC systems. We also replaced the ceiling from the front door to the base of the stairs, adding new can lighting and enhancing insulation. Skilled drywall specialists then installed and finished new drywall to a level 5 standard.
The exterior of the house underwent a complete overhaul. Before installing new roofing on the entire house and garage, we modified an existing flat roof by adding custom lumber and plywood to enhance the pitch, preventing future ice dams. A new rubber roof was expertly installed on the oversized 3-car garage, and the flat roof section we re-framed.
Our meticulous exterior team removed old white aluminum soffit, fascia, and gutters, replacing them with new framing to accommodate Longboard soffit material. This task was particularly challenging due to the age of the house and the non-standard wall and roof framing. Our skilled exterior subcontractors ensured a perfect fit.
Near the pool area, we discovered severe rot and decay from years of water intrusion. After informing the homeowners, we ordered and installed five new commercial-style block framed windows and a custom 8′ high Anderson patio door. This involved careful removal and replacement of window headers from the outside to avoid disturbing the finished part of the house. We reframed the large openings to fit the new windows, and our skilled trim carpenters installed new walnut casing, base, and window sills.
In total, we replaced around 900 lineal feet of soffit and installed approximately 32 squares of aluminum siding. The entire house was meticulously prepped, repaired, and painted according to the client’s chosen color.
Throughout the project, we incorporated numerous custom touches and unique design elements, some of which you can see in the pictures. Our team also addressed various unforeseen challenges, from soil issues to rot and decay repair, roof leaks, drainage problems, electrical and HVAC complexities, and much more.
At Xpand Inc., we take pride in making it all happen, turning your remodeling and renovation dreams into reality.

 Heritage Construction Companies, LLC.
Example of a huge trendy metal floating open staircase design in Minneapolis
 Tile Doctor Ltd
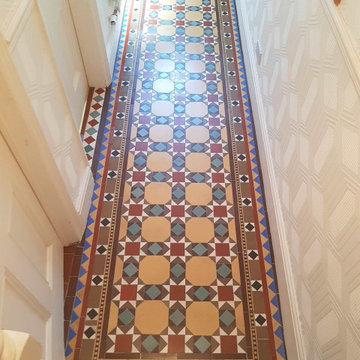
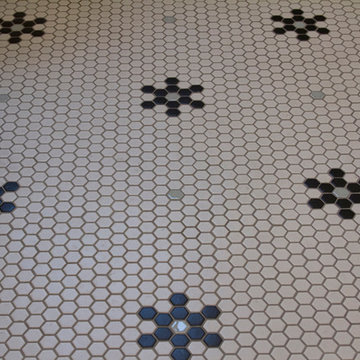
Recently we were asked to quote on restoring a Victorian tiled hallway floor in one of the large houses in the North Wales seaside resort of Rhos-on-Sea. It was a lovely period property that overlooked the sea and the floor a fine example of Victorian tiling and a real asset to the property.
Naturally, we have to take precautions when visiting properties these days, especially when surveying floors inside properties however we have amended our working practices to include more PPE and social distancing and so its not a problem.
On first impressions the floor looked to be in good order however it had some broken and loose tiles that needed replacing and then the floor given a good clean and seal. Fortunately, Victorian tiles are still popular, and you can find replacements, I also know that difficult to source tiles can often be found by asking other Tile Doctors many of whom have quite a collection. A quote was given for the work, which was accepted, and a date set to commence the work which would take three days.
Rhos-on-Sea is a very picturesque town situated between Llandudno and Colwyn Bay by passed by north wales main trunk road A55 leading to the main ferry port of Holyhead to Ireland. When you turn off the A55 into Rhos-on-Sea your transferred to a large seaside promenade with a wide walkway which is used by the towns many retired residents who appreciate the splendid coastal views.
The first job was to cut out and remove the damaged tiles then prepare the subbase with rapid set self-levelling compound to take the new tiles. Once this had set, I was able to cut and fit the replacements. There were a few areas that needed attention and so this work took up by most of the first day.
Once the sealer was dry, we were able to let the owner see the result who was really pleased and apparently has since received many compliments. For aftercare we recommend using Tile Doctor Neutral Cleaner which has a effective neutral pH formula that won’t prematurely erode the sealer with use like stronger products you find in supermarkets.
Andrew Robb
North Wales Tile Doctor
 Bloomington Carpet One
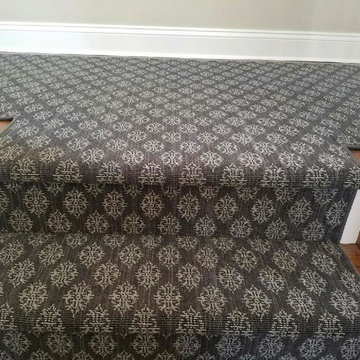
Example of a mid-sized classic carpeted hallway design in Minneapolis with white walls
 J&S by STARK
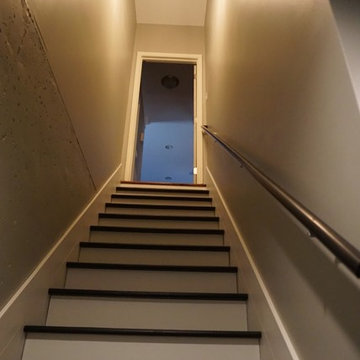
Mid-sized elegant carpeted straight wood railing home design photo in New York with carpeted risers
 projectkj
Self
Inspiration for a small modern wooden straight staircase remodel in Louisville with wooden risers
Inspiration for a small modern wooden straight staircase remodel in Louisville with wooden risers
 Tile Doctor Ltd
Not too long ago, I was called up to the harbour town and seaside resort of Ilfracombe, situated on the North Devon coast. Ilfracombe is a historic area within Devon, with the Celts having first settled on its hilly plains during the Iron Age.
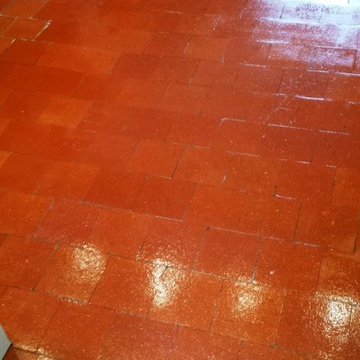
My client asked me to take a look at a Quarry tiled floor which was in need of a serious amount of cleaning. This largely due to the fact that there were dozens of layers of old sealer on the floor which had been left untouched from many years previously, as well as a significant build-up of general dirt and muck.
In order to give this floor a thorough cleaning, I needed to use a strong combination of products, namely NanoTech HBU Remover mixed with Tile Doctor Remove & Go. Nanotech HBU is a heavy build-up remover which uses nano-sized particles to penetrate below tough stains, and lift them out of the stone, whilst Remove & Go is a multi-purpose stripper that provided additional help in removing the many layers of sealer left on the floor. I applied the solution to the floor and left it to dwell for 40 minutes, before using a Polybrush to work it into the Quarry tiles.
Since the floor really was in dire need of a deep clean after years of neglect, I also used a black buffing pad attached to a buffing machine, as well as a steam machine to make sure I removed as much of the old sealer and dirt as possible. This was slow and painstaking work, but it was worth it to get the Quarry tiles back to looking their best again. Once this was complete, I rinsed the floor several times before leaving it for a few days to dry before sealing.
On my return visit, the floor was dry enough to commence sealing. It was important that the floor was dry and any excess moisture had evaporated because it has the potential to compromise the sealer as it cures leading to unexpected results. My sealer of choice was Tile Doctor Seal & Go, a sealer which is suitable for use on internal unsealed, porous surfaces including textured Quarry, Slate, Victorian tile and several others. I carefully applied several coats allowing each coat to dry before applying the next to provide a subtle low-sheen finish that will help protect the surface from stains in the future.
The results were excellent, especially considering that the floor had evidently not been treated to a proper clean for many years.
 Tile Doctor Ltd
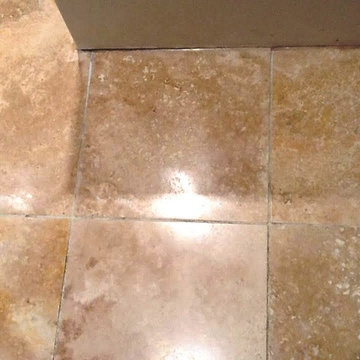
Earlier this month I was in the town of Northampton, to see a client who had reported a problem with her Travertine kitchen tiles. Basically the grout between the tiles was badly stained, to the point of appearing almost black.
The Travertine tiles were also in need of some maintenance, and so I was commissioned to provide a clean, polish and a fresh seal. Travertine is a popular choice for kitchen flooring due to its relatively high durability and distinct features. My task was to get this floor back to looking its best.
My priority was to address the badly stained grout so I cleaned the grout lines by hand using a combination of hand brushes and Tile Doctor Grout Clean-Up. The surface was pre-wet with water, before a solution of Grout-Clean Up and clean water was applied to the surface. The brushes were then used to agitate the solution. Grout Clean-Up contains a mix of concentrated phosphoric acid and cleaner designed to penetrate below the surface of the grout to remove grout stains, smears and mineral deposits.
As you can see from the photos, Grout Clean-Up made an immediate difference to the appearance of the tiles. This product is suitable for use on masonry and acid resistant surfaces. After completing the clean, I gave the floor a thorough rinse to neutralise the floor after cleaning and removed as much of the water as possible using a wet vacuum.
Following this, I paid attention to the tiles themselves, cleaning them to achieve a polished effect by using a system of burnishing pads. Tile Doctor burnishing pads comprise a set of four pads varying in grit type, from Coarse and Medium to Fine and Very Fine. I applied all four pads in turn to the floor, stopping to rinse the floor in between each. The result was a high quality polished finish.
I then left the floor to dry completely overnight, before commencing the seal the next day. My choice of sealing product was Tile Doctor Colour Grow which is a colour intensifying sealer that both enhances the natural appearance of the stone and provides a durable surface seal.
My client was very pleased with the finished product, and left the following comment on the Tile Doctor feedback system: “efficiently done”, yielding “good results”.
Phil Vissian
Northamptonshire Tile Doctor


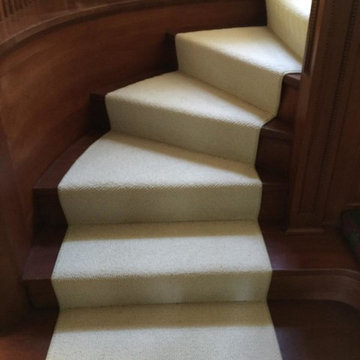 Bloomington Carpet One
Beautiful custom runner to match the unique measurements of this staircase.
Small wooden curved staircase photo in Minneapolis with wooden risers
Small wooden curved staircase photo in Minneapolis with wooden risers


17