
Search results for "Coverage" in Home Design Ideas

 hairpowder
100% Scalp Coverage Thicken It 100% Scalp coverage is a talc-free product that completely covers gray hair, fills in bald spots, and help thinning hair to look fuller. Thicken It powders are all-natural, available in five varieties of shades and will not come off on clothing or on your pillowcase.
 Windy City Painters
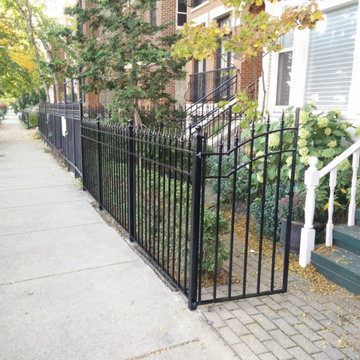
Iron Fence Painting Wicker Park Homeowners Can Trust: A Windy City Painters Case Study
Wicker Park is full of architectural character — ornate 1890s greystone two-flats, vintage brick facades, and wrought iron fencing that has framed these streets for well over a century. However, what iron fence painting Wicker Park properties require is not a simple weekend job. Winters here are brutal on metal, and consequently Windy City Painters has spent years perfecting the restoration process that keeps these fences standing strong. In particular, this case study walks through a recent project completed for a classic Wicker Park property.
Project Overview
The property featured a full wrought iron perimeter fence that had suffered years of freeze-thaw cycling and road salt exposure. Paint had failed across most of the pickets, and oxidation had progressed into active rust at several base rails. Consequently, the homeowners needed more than a fresh coat of paint. They needed a genuine metal restoration, and that is precisely what Windy City Painters delivered.
Materials Used
Windy City Painters selected products specifically rated for Chicago's climate extremes:
Rust-Oleum Professional Rust Inhibitor Primer
Sherwin-Williams DTM Acrylic Enamel (two finish coats)
3M rust converter gel for active oxidation zones
Wire brushes, angle grinders, and detail brushes for precision work
The Process: How Windy City Painters Restores Rusted Iron
Every iron fence painting Wicker Park project follows a disciplined, multi-stage process:
Preparation. Wire brushing and angle grinding remove all loose, flaking, and compromised material. Rust converter gel is applied directly to active oxidation zones, chemically stabilizing the metal underneath.
Repairs. Pitted sections and structurally weak joints are addressed before any coating touches the surface. Notably, skipping this step is the most common reason fence paint fails prematurely.
Priming. A full rust-inhibiting primer coat seals every bare metal surface, preventing moisture from reaching the iron beneath.
Application. Two finish coats of direct-to-metal enamel are applied by hand for even coverage across pickets, finials, and rail joints.
Finishing. A final inspection confirms full coverage, sharp lines, and a smooth, uniform sheen from every angle.
Furthermore, this same process protects the ornate details so common on Wicker Park fencing — decorative finials, scrollwork, and gate hardware — without losing the historic character that makes these properties special.
Advice for Wicker Park Homeowners
Before starting a similar project, homeowners in this neighborhood should keep a few things in mind:
Never paint over active rust. Untreated oxidation will continue spreading beneath the new coating, and the paint will fail within a season or two.
Always prime bare metal before applying a finish coat. Skipping primer is the single fastest path to peeling.
Choose coatings rated for temperature extremes, since Chicago's freeze-thaw cycles are harder on metal than most climates.
Inspect ground-contact areas each spring, as base rails typically rust fastest due to snow melt and road salt runoff.
Budget for prep time. In fact, most of the labor in a quality iron fence painting Wicker Park project happens before a single coat of paint is applied.
Similarly, ask whether the contractor uses rust converter on active oxidation, since skipping this step often shortens the life of the finish considerably.
Moreover, historic greystone properties often have decorative ironwork that requires extra care during grinding and priming so the original detailing is preserved rather than sanded away.
What to Expect: Timeline and Investment
Homeowners often ask how long an iron fence painting Wicker Park project takes from start to finish. In general, prep work — wire brushing, grinding, rust conversion, and repairs — takes up the largest share of the schedule, while primer and enamel application move relatively quickly once the surface is properly stabilized. Cure time between coats also affects the overall timeline, since rushing this stage undermines durability. Consequently, Windy City Painters builds a realistic schedule around weather conditions rather than forcing the job into a tight window. In addition, investment varies based on fence length, the amount of active rust present, and whether ornate detailing requires extra hand-finishing. Homeowners considering this project should request a full on-site walkthrough rather than a rough phone estimate, since rust severity is difficult to judge accurately without seeing the fence in person.
Why Wicker Park Homeowners Choose Windy City Painters
Windy City Painters has become the trusted painting contractor for Chicago's North Side and Near West Side, and iron fence painting Wicker Park residents request most often reflects that reputation directly. In contrast to quick-fix contractors who paint straight over rust, Windy City Painters treats every project as a full restoration. As a result, clients get a finish that holds up through multiple Chicago winters rather than one.
In addition, for related projects, Windy City Painters also offers interior painting, cabinet painting, drywall and plaster repair, and full metal refinishing services for fences, gates, and porches throughout the neighborhood. Ultimately, that range of services is what makes us a true one-stop contractor for Wicker Park homeowners.
See more of our work and request a free estimate at www.windypainters.com.
Ready to transform your Wicker Park home? Contact Windy City Painters for a free estimate — visit www.windypainters.com today. Proudly serving Wicker Park, West Town, Lincoln Park, Roscoe Village, Lakeview, Ukrainian Village, River North, and all of Chicago.

 Atlas Roofing - Shingles
DARIS BROWN, WRITER
If you think choosing the right shingle color is hard, you are not alone. With an endless array of colors to choose from, getting started can be difficult. But don't worry – we’ve got a great system to help you pick the perfect shingle color. If you are ready to look at shingles in a way you probably never have before, our three-step process can help you choose the color that works best for your home.
Choosing By Style
Before you can start flipping through a collection of earth-tone samples, you need to determine which shingle style best fits your home — and your price range. You don’t want to waste time falling in love with a beautiful shade of brown (let’s say hickory) if it’s not available in a style you like.
Most homeowners are not aware that shingles come in different styles, including three-tab, architectural and slate-look.
Three-Tab: These shingles have a traditional, flatter look and are considered the most affordable. They also are available in a wide range of colors.
Slate: These asphalt shingles, as the name reveals, are meant to mimic the look of slate but offer the easy care and affordability of asphalt. They come in a variety of colors.
Architectural: Also known as laminated or dimensional shingles, architectural shingles are manufactured with aesthetic appeal in mind. Layered to resemble wood shake, they are thicker and provide a more dimensional, interesting look than traditional three-tab shingles.
Choosing By Features
By comparing the available features, you can systematically narrow down your options to determine the best shingle available. Here are a few features to consider:
Class 4 Impact Resistance – Do you live in an area of the country that experiences regular hailstorms? Class 4 impact resistant shingles deliver superior impact resistance to help protect your home during hail season.
Algae Resistance – How humid is your region? Do you see roofs all around you with black streaks? Shingles manufactured with Scotchgard Protector help resist those ugly black streaks caused by algae.
High Wind Rating – Do you get nervous anytime a strong wind blows? Shingles with high wind resistance, up to 130 mph wind speed coverage, are designed to stay put – and look good in the process.
Comprehensive Warranty Protection – Do you want to feel secure with your investment? For maximum protection and warranty coverage, have a full roof system installed and receive an enhanced Premium Protection Period for total peace of mind.
Extensive Color Palette – Are you tired of plain black shingles? Get ready for an explosion of color, as there are many different options available. Woodland Green, Desert Shake, Burnt Sienna and Pristine Oyster are a few of the many great colors you can explore.
Choosing By Color
By choosing shingle style and features first, you can significantly narrow your list of colors. Now go through your shortened list and pick the best color for your home. You could match the shingle color to your shutters or door. If you want to enhance your home, lighter-colored shingles can help make it look bigger. Finally, opposites attract. If you have a light-colored home, you can go with a dark roof, and vice-versa for a dark-colored home. The contrast will help your entire home pop. Don’t be afraid to spread out your sample boards and make a side-by-side comparison to help with your selection process. Likewise, don't hesitate to lean on the advice of your roofer. Years of experience and thousands of homes roofed make them a valuable resource for homeowners trying to choose the best shingle color.
Choosing By Heart
While many homeowners will go straight to color, taking a methodical approach often provides better results. Take a step back. Decide what style you truly like and what features are available, and the best color for your home will fall right into your lap. Visit AtlasRoofing.com for a quick start to your shingle selection process. Atlas offers a broad range of beautiful designer colors and styles, which makes it easy to find an exceptional shingle to boost your home’s curb appeal.
Find the right local pro for your project
 Central Coast Audio Visual
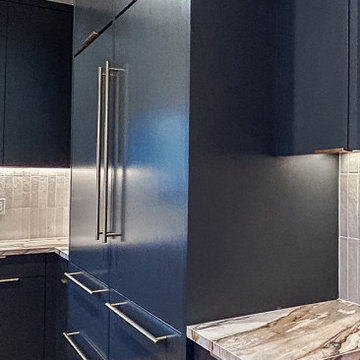
This Hope Ranch smart home takes advantage of technology to give the home personality. Simple to use, elegant wall panels set the scene for movie nights, poolside entertaining, gourmet meal prep, and more.
 Lagois Design Build Renovate
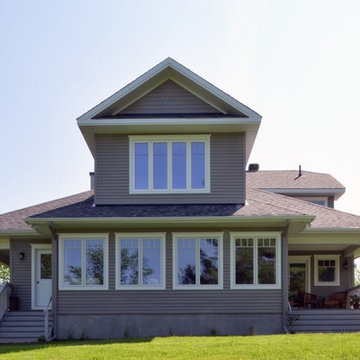
This addition and extensive interior renovation optimizes front and rear river views, natural light and indoor / outdoor integration. The use of craftsman detailing – adding a front porch – makes this home naturally inviting, functional and extremely livable.
The design was challenged due to the waterfront lot restrictions, lot coverage restrictions (car port instead of garage), slope stability challenges and septic restrictions (only 15% of existing footprint was allowed). The rear eating area / sunroom addition was built on pillars to achieve septic clearances. The second storey addition utilized sloped ceilings, which finished at 10 ft. in order to create spacial volume. Open to below areas allow more sunlight in and help achieve square footage requirements. The carport helped meet lot coverage restrictions, but more importantly, helped lessen the environmental impact. Driveways and walkways feature natural stone for water runoff.
The home exceeded the design objectives by maintaining formal entertaining, by eliminating walls and organizing spaces, creating comfortable family areas and by introducing natural light throughout the home.
2012 Finalist in the Canadian Home Builder’s SAM Awards for a Whole House
Renovation $250,000-$500,000
2012 Ontario Home Builders Association Awards Finalist for Most Outstanding Home Renovation $100,000 – $500,000
2012 Greater Ottawa Home Builders Association Awards Finalist for
Renovations/Additions $350,000 – $499,999
 Lagois Design Build Renovate
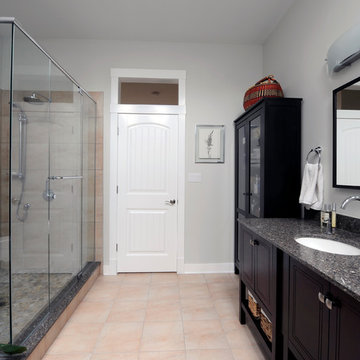
This addition and extensive interior renovation optimizes front and rear river views, natural light and indoor / outdoor integration. The use of craftsman detailing – adding a front porch – makes this home naturally inviting, functional and extremely livable.
The design was challenged due to the waterfront lot restrictions, lot coverage restrictions (car port instead of garage), slope stability challenges and septic restrictions (only 15% of existing footprint was allowed). The rear eating area / sunroom addition was built on pillars to achieve septic clearances. The second storey addition utilized sloped ceilings, which finished at 10 ft. in order to create spacial volume. Open to below areas allow more sunlight in and help achieve square footage requirements. The carport helped meet lot coverage restrictions, but more importantly, helped lessen the environmental impact. Driveways and walkways feature natural stone for water runoff.
The home exceeded the design objectives by maintaining formal entertaining, by eliminating walls and organizing spaces, creating comfortable family areas and by introducing natural light throughout the home.
2012 Finalist in the Canadian Home Builder’s SAM Awards for a Whole House
Renovation $250,000-$500,000
2012 Ontario Home Builders Association Awards Finalist for Most Outstanding Home Renovation $100,000 – $500,000
2012 Greater Ottawa Home Builders Association Awards Finalist for
Renovations/Additions $350,000 – $499,999
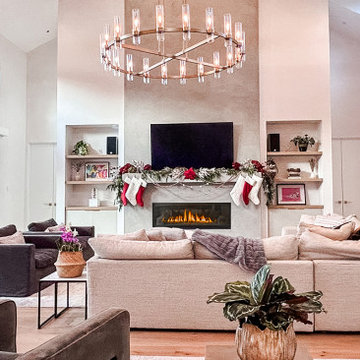 Central Coast Audio Visual
This Hope Ranch smart home takes advantage of technology to give the home personality. Simple to use, elegant wall panels set the scene for movie nights, poolside entertaining, gourmet meal prep, and more.
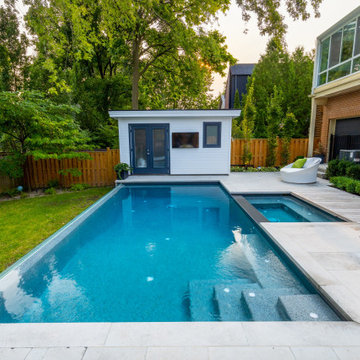
 Betz Pools Limited
The tree protection and lot coverage restrictions limited the size of the pool and deck. They could not encroach on the roots of their neighbour’s massive trees and the lot coverage was limited to 50%. This, along with the steeply sloping yard, meant the pool and deck would have to be kept close to the house.

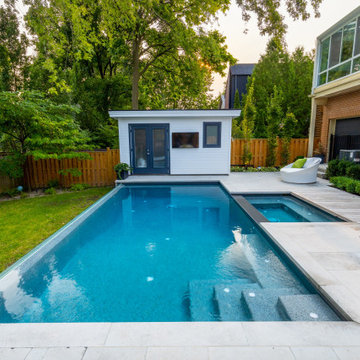 Betz Pools Limited
The tree protection and lot coverage restrictions limited the size of the pool and deck. They could not encroach on the roots of their neighbour’s massive trees and the lot coverage was limited to 50%. This, along with the steeply sloping yard, meant the pool and deck would have to be kept close to the house.
 Proline Range Hoods
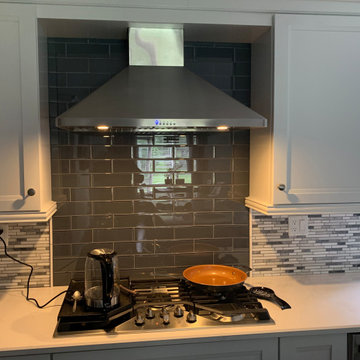
The PLJW 129 fits perfectly between the white shaker style cabinets in this kitchen. It will provide great coverage for the small range. And what an elegant tile backsplash, softly lit by the LED lights in the wall range hood. Beautiful!
The PLJW 129 is a powerful wall mounted range hood. It pulls an impressive 900 CFM of air – this is enough power to cover a wide variety of foods: shrimp, stir fry, steaks, soups, sauces, greasy foods, and much more. One cool feature of the PLJW 129 is that it doesn't have to be running at 900 CFM all the time. Change the speed using the stainless steel push buttons in the front of the hood. There's four different levels!
You'll surely have a smooth cooking experience thanks to four long-lasting LED lights. These provide great coverage of your range! Once you've finished cooking, turn your lights off using the control panel. Then, simply toss the stainless steel baffle filters into your dishwasher. It's that easy!
To browse these products, visit the link below.
https://www.prolinerangehoods.com/catalogsearch/result/?q=pljw%20129
 Proline Range Hoods
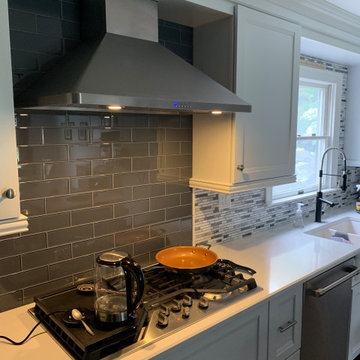
The PLJW 129 fits perfectly between the white shaker style cabinets in this kitchen. It will provide great coverage for the small range. And what an elegant tile backsplash, softly lit by the LED lights in the wall range hood. Beautiful!
The PLJW 129 is a powerful wall mounted range hood. It pulls an impressive 900 CFM of air – this is enough power to cover a wide variety of foods: shrimp, stir fry, steaks, soups, sauces, greasy foods, and much more. One cool feature of the PLJW 129 is that it doesn't have to be running at 900 CFM all the time. Change the speed using the stainless steel push buttons in the front of the hood. There's four different levels!
You'll surely have a smooth cooking experience thanks to four long-lasting LED lights. These provide great coverage of your range! Once you've finished cooking, turn your lights off using the control panel. Then, simply toss the stainless steel baffle filters into your dishwasher. It's that easy!
To browse these products, visit the link below.
https://www.prolinerangehoods.com/catalogsearch/result/?q=pljw%20129
 Lagois Design Build Renovate
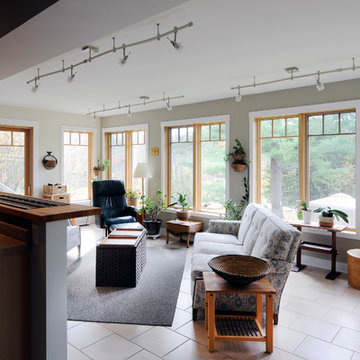
This addition and extensive interior renovation optimizes front and rear river views, natural light and indoor / outdoor integration. The use of craftsman detailing – adding a front porch – makes this home naturally inviting, functional and extremely livable.
The design was challenged due to the waterfront lot restrictions, lot coverage restrictions (car port instead of garage), slope stability challenges and septic restrictions (only 15% of existing footprint was allowed). The rear eating area / sunroom addition was built on pillars to achieve septic clearances. The second storey addition utilized sloped ceilings, which finished at 10 ft. in order to create spacial volume. Open to below areas allow more sunlight in and help achieve square footage requirements. The carport helped meet lot coverage restrictions, but more importantly, helped lessen the environmental impact. Driveways and walkways feature natural stone for water runoff.
The home exceeded the design objectives by maintaining formal entertaining, by eliminating walls and organizing spaces, creating comfortable family areas and by introducing natural light throughout the home.
2012 Finalist in the Canadian Home Builder’s SAM Awards for a Whole House
Renovation $250,000-$500,000
2012 Ontario Home Builders Association Awards Finalist for Most Outstanding Home Renovation $100,000 – $500,000
2012 Greater Ottawa Home Builders Association Awards Finalist for
Renovations/Additions $350,000 – $499,999
 Betz Pools Limited
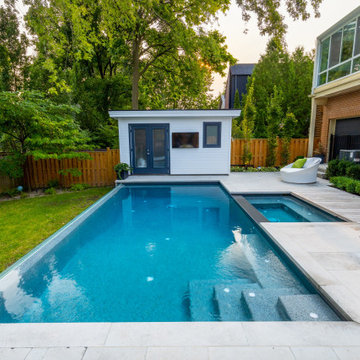
The tree protection and lot coverage restrictions limited the size of the pool and deck. They could not encroach on the roots of their neighbour’s massive trees and the lot coverage was limited to 50%. This, along with the steeply sloping yard, meant the pool and deck would have to be kept close to the house.
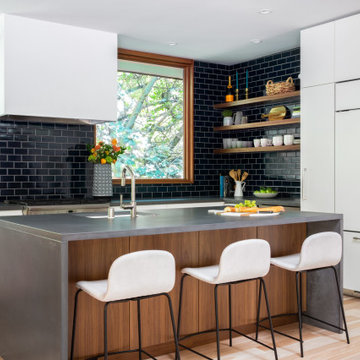
 Emerson Grace Design
Example of a 1950s l-shaped light wood floor and beige floor kitchen design in San Francisco with an undermount sink, flat-panel cabinets, white cabinets, black backsplash, subway tile backsplash, stainless steel appliances, an island and gray countertops
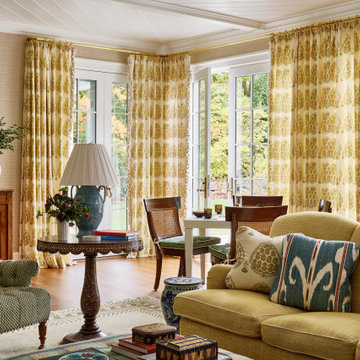
 VanderHorn Architects
Example of a classic medium tone wood floor, brown floor and wallpaper family room design in New York with beige walls
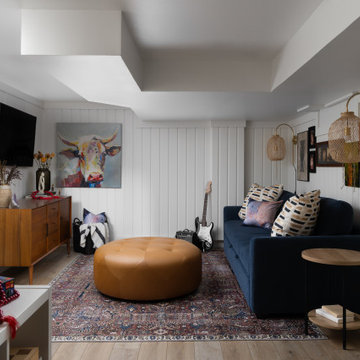
 Clark and Aldine
Family basement area remodel and designed. Blue sofa bed with leather coffee table and walnut tv console. Sconce lighting with art gallery.
Example of a mid-sized transitional underground wood wall and vinyl floor basement design in Detroit with white walls
Example of a mid-sized transitional underground wood wall and vinyl floor basement design in Detroit with white walls


16