
Search results for "Determine final" in Home Design Ideas
 Houston Bath and Kitchen
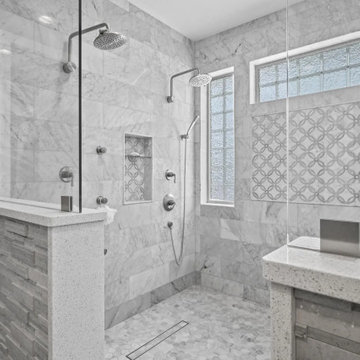
In a beautiful suburb on the north side of Houston, Texas, Joe and Kristen discovered their dream home—a property with a great lot, situated in a fantastic neighborhood with a thoughtfully designed floor plan. They had been drawn to the house for its charm and had admired the kitchen, which had been tastefully remodeled a few years earlier by a contractor who, despite doing excellent work, was no longer in business. However, upon moving in, they quickly realized that their master bathroom was woefully inadequate and in dire need of immediate repair.
Determined to turn their bathroom into a luxurious retreat, Joe and Kristen sought out Houston Bath & Kitchen, a reputable design-build firm renowned for their meticulous process and outstanding results. They were impressed from the outset with the efficiency and expertise. In just 90 minutes, their design team presented a complete concept plan and provided a detailed estimate—a promising start to what would become an inspiring collaboration.
Guided by Houston Bath & Kitchen's comprehensive approach, Joe and Kristen embarked on a thorough "design tour." The team expertly navigated them through the selection process, ensuring every choice aligned perfectly with their aesthetic preferences and practical needs. Together, they crafted a vision that included an oversized shower for two, creatively integrating a freestanding tub within the shower area—an innovative solution that maximized space and luxury.
As the project progressed, The Houston Bath & Kitchen production team conducted a thorough "trade walk," meticulously inspecting the jobsite to uncover potential complexities and ensure no detail was overlooked. This step was crucial in setting reliable expectations and eliminating surprises.
Detailing the scope of work was another pivotal phase, emphasizing transparency and clarity. Joe and Kristen felt reassured knowing exactly what to expect at each stage of the remodel. Houston Bath & Kitchen then moved into the "master planning phase," coordinating materials, surveys, and permits with precision. Trades were scheduled, and critical paths were identified—laying a solid foundation for a seamless execution.
Throughout the process, communication remained robust, and the meticulous planning ensured the project stayed on track both in terms of time and budget. One of the standout features of the design was the intricate tile work that adorned the walls and floors, fulfilling Joe and Kristen's desire for a design with variation and detail. Natural light was ingeniously incorporated through strategically placed windows and skylights, providing a serene ambiance without sacrificing privacy—a testament to Houston Bath & Kitchen's expertise in balancing functionality with aesthetics.
The final touch of luxury came in the form of a heated floor, adding warmth and comfort to the space—a detail that epitomized Houston Bath & Kitchen's commitment to fulfilling every customer priority.
Less than a year after the project was complete, Joe and Kristen made a decision to sell their home. Remarkably, the property went on the market and sold for $75,000 over asking price—a testament to the transformative impact of their newly remodeled master bathroom. While the exact influence of the bathroom on the bidding war remains speculative, it undoubtedly played a significant role in the home's appeal and ultimate sale price.
The success of their home sale not only underscored the value of their investment but also highlighted the expertise and dedication of Houston Bath & Kitchen in delivering a space that not only met but exceeded their expectations. Joe and Kristen stepped into their newly remodeled master bathroom with hearts full of joy. The space surpassed their dreams, reflecting their style and enhancing their daily lives—a sanctuary that would be cherished for years to come, thanks to Houston Bath & Kitchen's skillful guidance and commitment to excellence.

 Industrial Projects
Creating a comfortable outdoor living space is a priority for many homeowners and DIY enthusiasts. With rising summer temperatures, installing a shade tarp in your backyard offers an affordable and effective solution for sun protection. We’ve developed this detailed, step-by-step guide to help you confidently install a shade tarp that not only shields you from the sun but also adds aesthetic appeal to your outdoor area.
Benefits of Installing a Backyard Shade Tarp
Before diving into the installation process, let’s explore the key benefits of having a backyard shade tarp:
Provides UV Protection: Keeps your family and guests safe from harmful sun exposure.
Reduces Outdoor Temperatures: Creates a cooler, more enjoyable outdoor space.
Protects Outdoor Furniture: Extends the life of patio furniture by reducing sun damage.
Enhances Outdoor Aesthetics: Adds a modern, stylish look to your yard.
Budget-Friendly: More affordable compared to permanent structures like pergolas.
Materials and Tools You’ll Need
To begin your DIY backyard shade project, gather the following materials and tools:
Materials:
Shade tarp (UV-resistant and breathable)
Sturdy posts or existing structures (trees, fences, walls)
Mounting hardware (eye bolts, D-rings, turnbuckles, snap hooks)
Nylon or polyester rope, or stainless-steel wire
Concrete (if installing new posts)
Tools:
Power drill
Measuring tape
Level
Ladder
Wrench or adjustable spanner
Post hole digger (if installing new posts)
Step 1: Plan Your Shade Tarp Layout
The first step in installing your backyard shade tarp is careful planning. Take time to assess your outdoor area and answer these key questions:
Where is the sun’s path throughout the day?
What size and shape of tarp best suits your space?
Will you anchor the tarp to existing structures or install new posts?
What height do you want the tarp to sit at for maximum shade and airflow?
Pro Tip: Use string or garden hoses to visualize the tarp layout on the ground before making permanent decisions.
Step 2: Measure and Mark Anchor Points
Once you’ve determined the tarp’s location and orientation:
Measure the tarp dimensions.
Mark the exact points where each corner of the tarp will be anchored.
Ensure that the anchor points are at least 5–10% longer than the tarp size to allow for tensioning and slight adjustments.
Consider slope angles for water runoff. Aim for at least a 20-degree angle to prevent water pooling on the tarp.
Step 3: Install Support Posts (If Necessary)
If your backyard lacks existing anchor points like trees or fences, you’ll need to install sturdy support posts:
Dig post holes at least 24 inches deep and 8-12 inches wide for stability.
Set posts in concrete, making sure they remain plumb and level.
Allow the concrete to cure for at least 24–48 hours before applying tension from the tarp.
We recommend using pressure-treated wood, galvanized steel poles, or aluminum posts for longevity and strength.
Step 4: Install Mounting Hardware
With your anchor points ready, it’s time to install the necessary hardware:
Attach eye bolts or pad eyes securely into walls, posts, or other fixed structures.
For added flexibility and adjustability, install turnbuckles or tensioners to fine-tune the tarp’s tightness.
Connect snap hooks, D-rings, or carabiners to make assembly and disassembly easier.
Make sure all hardware is rated for outdoor use to prevent rust and corrosion.
Step 5: Attach and Tension the Shade Tarp
Now it’s time for the most satisfying part—mounting the shade tarp:
Begin by attaching one corner of the tarp to an anchor point.
Gradually attach the remaining corners, moving diagonally for even tension.
Adjust each connection point using your turnbuckles, ropes, or cables.
Pull the tarp tight enough to avoid sagging, but not so tight that it risks tearing.
Check that the tarp maintains the desired slope for rainwater runoff and adjust tension as needed.
Step 6: Final Adjustments and Safety Check
Before enjoying your new shaded area:
Inspect all anchor points and hardware for stability.
Test the tarp’s tension and make adjustments for even distribution.
Ensure that no sharp edges or loose connections remain that could damage the tarp or pose a safety hazard.
Confirm that the tarp is secure in windy conditions by giving it a gentle tug.
If you live in an area with frequent high winds, consider removing the tarp during storms to prevent damage.
Step 7: Enjoy Your Shaded Backyard Oasis
Once installed, your backyard shade tarp provides a comfortable and protective space for outdoor gatherings, relaxation, or family activities. You can decorate underneath with outdoor furniture, string lights, or potted plants to create a personalized outdoor retreat.
Maintenance Tips for Long-Lasting Shade Tarp Performance
To extend the life of your shade tarp, follow these maintenance guidelines:
Regularly check for wear and tear, especially around anchor points and seams.
Clean the tarp periodically with mild soap and water to prevent mildew buildup.
Store the tarp indoors during harsh weather seasons if it's not designed for year-round use.
Tighten hardware as needed to maintain proper tension and avoid sagging.
By following these simple care steps, your shade tarp will continue to deliver years of sun protection and outdoor comfort.
Conclusion: Upgrade Your Outdoor Space with a DIY Shade Tarp
Installing a shade tarp in your backyard is a cost-effective and rewarding DIY project. With careful planning, quality materials, and proper installation techniques, you’ll enjoy cool, shaded outdoor living all season long. This step-by-step guide ensures your project goes smoothly from start to finish.
 Talon Construction Inc.
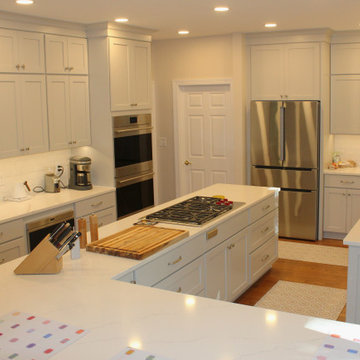
Renovating an open kitchen can be an exciting project that can improve the functionality, aesthetics, and value of your home. Here are some steps to guide you through the process:
Planning and Design:
Define your goals and budget for the renovation.
Determine the layout of your open kitchen. Consider factors like the work triangle (the relationship between the stove, sink, and refrigerator) and the flow of traffic.
Choose a design style and color scheme that suits your preferences and complements the rest of your home.
Research and Inspiration:
Collect inspiration from magazines, websites, and social media platforms to get ideas for your open kitchen design.
Create a mood board or vision board to help you visualize the final look.
Hiring Professionals:
Depending on the scale of your renovation, you may need to hire professionals, such as architects, interior designers, contractors, and electricians. Make sure to check references and get multiple quotes.
Demolition and Structural Work:
If your renovation involves structural changes, like removing walls, this is the time to do it. Ensure that the necessary permits are obtained.
Plumbing and Electrical Work:
Update or reconfigure plumbing and electrical systems as needed. This may include adding or moving outlets, switches, and lighting fixtures.
Cabinetry and Countertops:
Choose and install new kitchen cabinets and countertops. This is a significant part of your renovation and will greatly influence the kitchen's appearance and functionality.
Appliances:
Update or install new kitchen appliances, including the refrigerator, stove, oven, microwave, and dishwasher.
Flooring:
Select and install flooring that is suitable for a kitchen, such as hardwood, tile, laminate, or vinyl. Ensure it complements the overall design.
Backsplash and Wall Finishes:
Install a backsplash that matches your design and protects your walls. Consider materials like tile, glass, or stainless steel.
Lighting:
Choose and install various types of lighting, including ambient, task, and accent lighting. Pendant lights above an island or breakfast bar can add style and functionality.
Paint and Finishing Touches:
Paint the walls and ceiling in the colors you've selected. Add finishing touches like hardware, window treatments, and decorative elements.
Furniture and Accessories:
Bring in furniture, such as a dining table and chairs, barstools, and any other pieces you need to complete the space. Decorate with accessories like artwork, plants, and decorative items.
Final Inspection and Cleanup:
Ensure that all work meets safety and building code requirements. Clean the entire area thoroughly.
Enjoy Your New Kitchen:
Once the renovation is complete and everything is in its place, enjoy your beautiful, functional open kitchen.
Remember that open kitchen renovations can be complex and may require careful planning. It's essential to stay within your budget, communicate with your contractors and designers, and be flexible as unexpected issues may arise during the process. Ultimately, a well-executed open kitchen renovation can enhance the heart of your home and improve your overall living space.
Find the right local pro for your project

 Advance Design Studio, Ltd.
See "Cottage Kitchen in Elburn" for the kitchen featured in this description
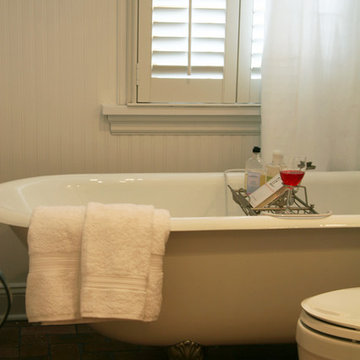
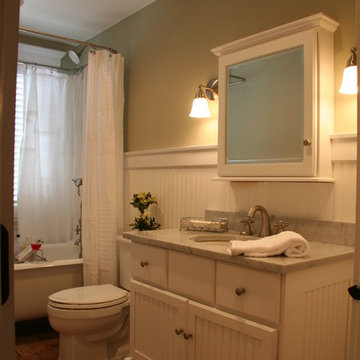
Located on a partially wooded lot in Elburn, Illinois, this home needed an eye-catching interior redo to match the unique period exterior. The residence was originally designed by Bow House, a company that reproduces the look of 300-year old bow roof Cape-Cod style homes. Since typical kitchens in old Cape Cod-style homes tend to run a bit small- or as some would like to say, cozy – this kitchen was in need of plenty of efficient storage to house a modern day family of three.
Advance Design Studio, Ltd. was able to evaluate the kitchen’s adjacent spaces and determine that there were several walls that could be relocated to allow for more usable space in the kitchen. The refrigerator was moved to the newly excavated space and incorporated into a handsome dinette, an intimate banquette, and a new coffee bar area. This allowed for more countertop and prep space in the primary area of the kitchen. It now became possible to incorporate a ball and claw foot tub and a larger vanity in the elegant new full bath that was once just an adjacent guest powder room.
Reclaimed vintage Chicago brick paver flooring was carefully installed in a herringbone pattern to give the space a truly unique touch and feel. And to top off this revamped redo, a handsome custom green-toned island with a distressed black walnut counter top graces the center of the room, the perfect final touch in this charming little kitchen.
 Advance Design Studio, Ltd.
Jennifer and Dan have lived in their Deer Park Illinois home for 15 years, slowly making minor fixes like painting and decorating; but they had a new plan for their kitchen the entire time. An awkwardly placed garage door, and an island cooktop with a terrible downdraft made a full-scale kitchen remodel an absolute must. Jennifer had many ideas in mind and wanted to work with a company that could provide high-end work, while partnering with a designer that would tailor the kitchen to her ideas.
She was intrigued by the phrase “Common Sense Remodeling” in Advance Design’s feature she discovered while perusing an issue of the community’s Quintessential Barrington Magazine. Doing further research on the company’s website, as she looked through project profiles and read about Advance Design’s “Common Sense Remodeling” philosophy, she promptly scheduled an appointment to see if the people and ideas she read about were truly who they said they were. The more she read, the more she knew that the “Common Sense” approach to remodeling they described was exactly the type of company she was looking for.
The partnership was sealed after an initial consultation with Owner Todd Jurs and Project Designer Michelle Lecinski. They displayed a combination of friendliness, professionalism and respect that was unmatched by any of the other companies Jennifer talked to. She knew that with Advance Design, she would be able to retain the vision that she had in mind with high-quality craftsmanship.
“I reached out to Advance Design because of the ‘Common Sense Remodeling’ tagline,” Jennifer said. “That’s what lingered for me”. “Advance Design was the most respectful- of the house and of my design ideas, and the most professional of the handful of companies that looked at my project”.
Soon after the meeting Jennifer began working with Michelle on the project design. They quickly developed chemistry. Jennifer loved how Michelle researched and located every detail that Jennifer wanted for the kitchen. Between the two of them, every concept and idea was worked through and perfected. “Jennifer had definite ideas about what she wanted the new kitchen to look like, she just didn’t know how to bring it all together. We worked together really well to make her ideas into the practical reality necessary for a well-functioning kitchen, with the look and feel that she had envisioned”, says Michelle.
“Michelle was wonderful in using the CAD system she would show me new drawings every time we changed the layout while working through the design,” Jennifer said. “She was a really wonderful partner in execution, she made sure everything happened quickly and easily.”
The finished design drew out elements of Jennifer’s style and personality. The pair call the look “sophisticated farmhouse” to describe the kitchen renovation to family and friends. The result was a beautifully crafted, authentic-feeling space that satisfied Jennifer’s dreams 15 years in the making. The whole project consisted of a kitchen remodel, mudroom upgrade with powder room, and garage entry relocation. “The projects I personally like the best, are the ones that put the client’s dreams on display,” Project Designer Michelle said. “And this is one of those projects.”
The main focal point of the kitchen is custom zinc and brass ventilation hood with a vintage sheen, which was hand made to order by a small company in Indiana named Vogler Metalworking. “It’s like sculpture, a true work of art”, says Jennifer. Your eye is immediately drawn towards this elegant yet practical hood that eliminated the home’s downdraft problem and added a striking conversation piece at the same time. The carpenters had to use special gloves when transporting and installing it, so they didn’t smudge it with fingerprints. The beautiful hood centers proudly over the stunning black enamel and brass LaCornue Range. “I had a friend who had a LaCornue range and after learning how easy it was to cook perfect meals, I was convinced I wanted to have one”, says Jennifer. This unique, breathtaking combination anchors the entire kitchen and is apparent immediately as you walk into the great room the surrounds the space.
DuraSupreme Crestwood cabinets with a Kendall Panel add function and sophistication. A custom gray paint color paired with a storm blue was developed so that the new kitchen looked like it belonged to the existing space. Unlacquered brass faucets and hardware were important to Jennifer because she wanted the living finishes to age over time. Remarkable brass diamond mesh cabinet door inserts imported from the UK continue to add this one-of-a-kind kitchen renovation; giving it a “you won’t see this everywhere” quality. The use of old railcar flooring for the coffee bar countertop and reclaimed oak for the open shelving gives an authenticity to the space uncommon in kitchens today.
Jennifer and Michelle fell in love with the Limestone Grey Stone while they were investigating unique island countertop ideas. They liked the fact that the limestone as a living finish will age and change over time. Calcutta Miel Quartz countertops made for an excellent pairing around the perimeter, as it’s durable and perfect for cooking preparations. A textured white subway tile backsplash that runs to the ceiling keeps your eye moving towards the open shelving, and to the main focal point of the stunning range hood combination.
“The kitchen functions beautifully, and it’s gorgeous,” beams Jennifer as she gestures with both hands while smiling ear to ear. “The most important thing was I wanted a kitchen that had a wonderful flow, cooked beautiful meals and was a great gathering place for family and friends, and this space does that perfectly! Beauty wise, it turned out exactly how I had envisioned. I felt the function part was the hardest part, and that was nailed”!
Relocating the garage entry to the new mudroom was a huge priority and has finally separated the family’s arriving home functions from their kitchen. Now coats and shoes and bags have their own area for dropping once members arrive home. Matching gray DuraSupreme cabinetry helped create gorgeous, purposeful lockers for the family. A reclaimed vintage sink and custom wall paper were added to the tiny powder room to beautify the once previously only functional space. Advance Design was even able to create a custom space for their dog to sleep while the family is away.
“It was unbelievable that a project of this size was completed in such a short time, and I think that’s because of the large amount of planning and preparation that went into it,” Jennifer marveled, “When we started, we were ready, and everything was prepared”.
When it came to execution, Project Manager Justin Davis and his crew were quick, accessible, and organized. Projects like this kitchen are typically completed in as little as 8-10 weeks. Jennifer’s kitchen however despite the relocation of some challenging HVAC in a soffit and moving of an exterior door was completed remarkably fast in part because the team was working with an existing tile floor that ran throughout the first floor that the client really loved.
“You get to know these people really well because they’re living in your house while you’re living in your house. They were so fast and really good, it didn’t take as long as even planned” reported Jennifer. “I would text Justin and he always responded almost immediately. I got to know all the guys who were working in our house and they were all wonderful people”.
Details in a customized kitchen like this one require skill and care from the people who install it. “All the guys on the job were skilled at what the did. I wanted small details like little feet to look like furniture, that is where their carpentry skill came in to make these all perfect”, said Jennifer. “The tile guys were wonderful. They even let me determine how I wanted the texture with the grout to appear for a salt and pepper look; now that is a very skilled trade person making it custom”.
In Jennifer’s interview, she continued to reference Advance Design’s “Common Sense Remodeling”, so I took a minute to ask her exactly what that phrase meant to her and how it played out in her experience with her project and the Advance Design team. Here is what she said: “I was intrigued about Common Sense Remodeling and in my head that there would be clear costs and prices, great communication between the design team, the execution team and me”, said Jennifer. They did deliver on that, it was so clear about the cost breakdown, what I could expect from everyone who came to my house, and everything that we had ordered. That to me is the Common Sense”!
It’s great to see a client take literally our assertion that a well-planned remodeling project is simply “Common Sense”! She anticipated each step of the way would be clear, concise, and predictable, all the while protecting the outcome due to the careful upfront planning. “Advance Design delivered on their ‘Common Sense Remodeling’ promise,” Jennifer said. “From the design team, to the execution team - everything was straight forward like I imagined. The project turned out exactly how I envisioned, I enjoyed this process and absolutely would recommend Advance Design Studio to anyone.”
 Victor Mulbauer
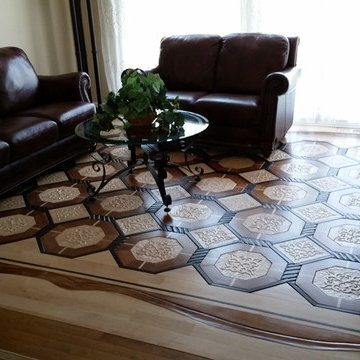
We wanted to create a floor that represents our customers - unique, determined, and excited about the hardwood floor makeover in their homes. After months of drafting, planning, preparation, installation and re-installation, we are pleased to share with you our final product! Each of the carved pieces is hand-carved using low-relief carving technique. This hand-carved hardwood floor was meticulously put together piece by piece, with each wood telling a different story.
 Novu Designs
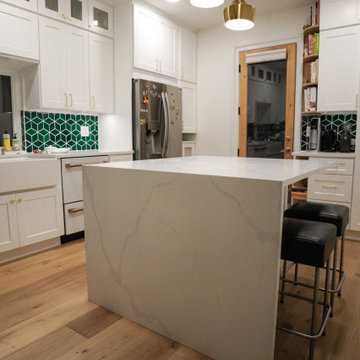
Our goal is to make your kitchen remodel as comfortable as possible. After establishing rapport with our client, we used our ingenuity to redesign and build their ideal kitchen in this stunning 10-foot-ceiling Brooklyn home. The warm tones of wood, quartz, and rich greens strike the ideal balance in creating this appealing design.
How did we achieve this look?
The Backsplash
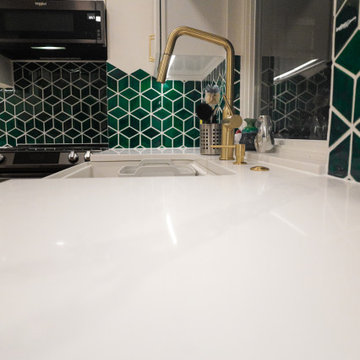
Our client wanted a simple kitchen remodel in the shaker design, but she also wanted to include green. Initially, we proposed green cabinets to create a bold green look in the kitchen. The main objective was to incorporate our complimenting colors while keeping a feeling of lightness. After going through a number of ideas and 3D prototypes, installing as many cabinets as we could without overpowering the kitchen was our goal of optimizing space. We determined that the best way to brighten the space would be to install white shaker cabinets in addition to higher lumen recessed LED lighting. We decided that finding exquisite green backsplash tiles would be the best way to give it the desired green pop. After numerous searches, we came across a company called Mercury Mosaics.
While there were many green backsplash tiles to choose from, we opted for the mercury mosaics bluegrass diamond tiles. We loved these tiles because its created an illusion of cubes but at times, diamonds. The pattern is an art of illusion and its really gave us the personality we were looking for.
The Flooring of Choice
The flooring of choice was made by our client. We wanted the floors to feel soft and natural while capturing every bit of warmth to balance the whites and the greens and bring them together. While we could’ve opted for wood look tiles or luxury vinyl plank flooring, we ended up going with a premium slightly distressed white oak engineered hardwood flooring from Floor and Decor.
Accents
Although the flooring and the backsplash brought most of the kitchen together, we were still missing the cherry on top. The hardware and maybe something else?
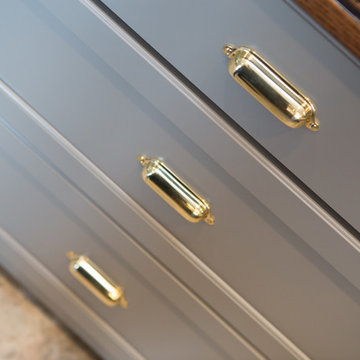
We decided on thin profiled brushed brass hardware to give us that luxurious feel we were looking for every time we opened the cabinet. The cherry on top for us were the hand made quarter round oak shelves which really tied in the floors and cabinets together and gave us that final pop we were looking for. It truly added the perfect character for our client who is also a teen-fiction author of multiple books.
 Advance Design Studio, Ltd.
Located on a partially wooded lot in Elburn, Illinois, this home needed an eye-catching interior redo to match the unique period exterior. The residence was originally designed by Bow House, a company that reproduces the look of 300-year old bow roof Cape-Cod style homes. Since typical kitchens in old Cape Cod-style homes tend to run a bit small- or as some would like to say, cozy – this kitchen was in need of plenty of efficient storage to house a modern day family of three.
Advance Design Studio, Ltd. was able to evaluate the kitchen’s adjacent spaces and determine that there were several walls that could be relocated to allow for more usable space in the kitchen. The refrigerator was moved to the newly excavated space and incorporated into a handsome dinette, an intimate banquette, and a new coffee bar area. This allowed for more countertop and prep space in the primary area of the kitchen. It now became possible to incorporate a ball and claw foot tub and a larger vanity in the elegant new full bath that was once just an adjacent guest powder room.
Reclaimed vintage Chicago brick paver flooring was carefully installed in a herringbone pattern to give the space a truly unique touch and feel. And to top off this revamped redo, a handsome custom green-toned island with a distressed black walnut counter top graces the center of the room, the perfect final touch in this charming little kitchen.
 Novu Designs
Our goal is to make your kitchen remodel as comfortable as possible. After establishing rapport with our client, we used our ingenuity to redesign and build their ideal kitchen in this stunning 10-foot-ceiling Brooklyn home. The warm tones of wood, quartz, and rich greens strike the ideal balance in creating this appealing design.
How did we achieve this look?
The Backsplash
Our client wanted a simple kitchen remodel in the shaker design, but she also wanted to include green. Initially, we proposed green cabinets to create a bold green look in the kitchen. The main objective was to incorporate our complimenting colors while keeping a feeling of lightness. After going through a number of ideas and 3D prototypes, installing as many cabinets as we could without overpowering the kitchen was our goal of optimizing space. We determined that the best way to brighten the space would be to install white shaker cabinets in addition to higher lumen recessed LED lighting. We decided that finding exquisite green backsplash tiles would be the best way to give it the desired green pop. After numerous searches, we came across a company called Mercury Mosaics.
While there were many green backsplash tiles to choose from, we opted for the mercury mosaics bluegrass diamond tiles. We loved these tiles because its created an illusion of cubes but at times, diamonds. The pattern is an art of illusion and its really gave us the personality we were looking for.
The Flooring of Choice
The flooring of choice was made by our client. We wanted the floors to feel soft and natural while capturing every bit of warmth to balance the whites and the greens and bring them together. While we could’ve opted for wood look tiles or luxury vinyl plank flooring, we ended up going with a premium slightly distressed white oak engineered hardwood flooring from Floor and Decor.
Accents
Although the flooring and the backsplash brought most of the kitchen together, we were still missing the cherry on top. The hardware and maybe something else?
We decided on thin profiled brushed brass hardware to give us that luxurious feel we were looking for every time we opened the cabinet. The cherry on top for us were the hand made quarter round oak shelves which really tied in the floors and cabinets together and gave us that final pop we were looking for. It truly added the perfect character for our client who is also a teen-fiction author of multiple books.
 Michael Nash Design, Build & Homes
2012 NARI CAPITAL COTY, MERIT AWARD WINNER, RESIDENTIAL BATH $30,000 to $60,000
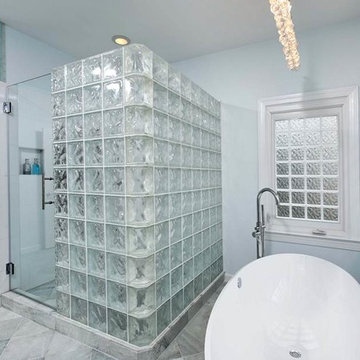
The owners of this contemporary home in Centreville, Virginia, had a dated master bathroom suite that didn’t meet their modern tastes or their needs.
To make the changes they wanted, the design team at Michael Nash Design, Build & Homes determined that the room would need to be gutted. All the partition walls had to go, as did the old whirlpool tub. And all of the plumbing and fixtures had to be relocated to new positions to meet the new design’s criteria.
The clients previously replaced the bathroom windows with glass blocks. Thus, contemporary glass blocks were used instead of partition walls to add openness to this new bathroom layout.
Large polished limestone tiles were used on the bathroom floors and walls, and stylish glass tiles were used as an accent. A free-standing oval tub adds to the room’s contemporary look and saves a lot of space as well. A two-person shower stall with a modern body spray shower system was also installed.
Custom built high level cabinetry and vanities, and modern lighting—both recessed and hanging fixtures— contribute greatly to the success of the final project.
 Talon Construction Inc.
Designing and building a kitchen addition is a complex process that involves multiple steps and considerations. Here is a general outline to help you get started on your kitchen addition project:
Define Your Goals and Budget:
• Determine the purpose of the kitchen addition. Is it for more cooking space, a dining area, or a combination of both?
• Establish a realistic budget for your project. Consider all costs, including construction, permits, materials, and furnishings.
Hire a Design Professional:
• Seek the services of a design build company who specializes in kitchen additions.
• Discuss your vision, needs, and budget with the design professional to create a design concept.
Site Evaluation:
• Assess the existing space and structural condition of your home to ensure it can support the addition.
• Consider factors like zoning regulations, setbacks, and building codes.
Design Development:
• Collaborate with your design professional to refine the concept, including the layout, size, and architectural style.
• Choose materials, finishes, and fixtures that fit your design and budget.
Obtain Permits:
• Consult with your local design build contractor to determine the necessary permits and approvals.
• Prepare and submit all required documents, including architectural drawings and engineering plans.
Create Construction Documents:
• Work with your design build professional to develop detailed construction drawings and specifications.
• These documents will serve as a guide for contractors during construction.
Hire a design build contractor:
• Check references, credentials, and licenses before selecting a contractor.
• Sign a detailed contract that outlines the scope of work, timeline, and payment schedule.
Construction Phase:
• Demolition: If needed, remove any existing structures or walls.
• Foundation: Construct the foundation for the addition.
• Framing: Build the structural framework of the addition.
• Plumbing, Electrical, and HVAC: Install or update utilities as required.
• Insulation: Ensure proper insulation for energy efficiency.
• Drywall and Finish Work: Complete the walls and ceilings.
• Flooring and Cabinetry: Install flooring and kitchen cabinets.
• Appliances and Fixtures: Add appliances, plumbing fixtures, and lighting.
• Paint and Finish: Apply paint and finishes to achieve the desired look.
• Final Inspection: Schedule inspections to ensure compliance with building codes.
Final Inspections and Approvals:
• Arrange for final inspections to ensure the addition meets all safety and code requirements.
• Obtain any necessary certificates of occupancy or compliance.
Move In and Enjoy:
• Once all inspections and approvals are received, you can move into your new kitchen addition and start enjoying it.
Remember that every kitchen addition project is unique, so adapt this outline to your specific needs and circumstances. Consulting with professionals and obtaining the required permits and inspections is crucial to a successful and safe project.
 Sweeney Design Remodel
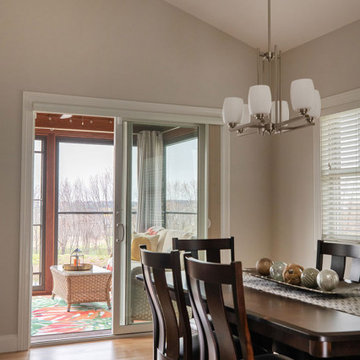
Renovation of the screened porch into a three-season room required Sweeney to perform structural modifications, including determining wind shear calculations and working with a structural engineer to provide the necessary calculations and drawings to modify the walls, roof, and floor joists. Finally, we removed the screens on all three exterior walls and replaced them with new floor-to-ceiling Scenix tempered glass porch windows with retractable screens.
 Innovative Renovation Services
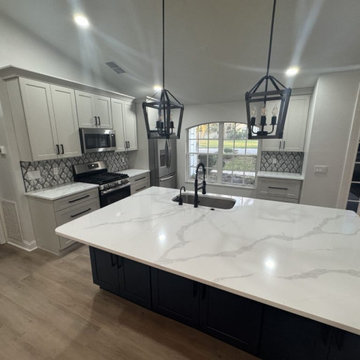
Innovative Renovation Services handles kitchen remodel Orange County projects from demolition through final finishing, so each stage of the work is ready for the next. We focus on the construction and installation quality that determines whether a renovated kitchen holds up or starts showing problems within a year.
 Talon Construction Inc.
Designing and building a kitchen addition is a complex process that involves multiple steps and considerations. Here is a general outline to help you get started on your kitchen addition project:
Define Your Goals and Budget:
• Determine the purpose of the kitchen addition. Is it for more cooking space, a dining area, or a combination of both?
• Establish a realistic budget for your project. Consider all costs, including construction, permits, materials, and furnishings.
Hire a Design Professional:
• Seek the services of a design build company who specializes in kitchen additions.
• Discuss your vision, needs, and budget with the design professional to create a design concept.
Site Evaluation:
• Assess the existing space and structural condition of your home to ensure it can support the addition.
• Consider factors like zoning regulations, setbacks, and building codes.
Design Development:
• Collaborate with your design professional to refine the concept, including the layout, size, and architectural style.
• Choose materials, finishes, and fixtures that fit your design and budget.
Obtain Permits:
• Consult with your local design build contractor to determine the necessary permits and approvals.
• Prepare and submit all required documents, including architectural drawings and engineering plans.
Create Construction Documents:
• Work with your design build professional to develop detailed construction drawings and specifications.
• These documents will serve as a guide for contractors during construction.
Hire a design build contractor:
• Check references, credentials, and licenses before selecting a contractor.
• Sign a detailed contract that outlines the scope of work, timeline, and payment schedule.
Construction Phase:
• Demolition: If needed, remove any existing structures or walls.
• Foundation: Construct the foundation for the addition.
• Framing: Build the structural framework of the addition.
• Plumbing, Electrical, and HVAC: Install or update utilities as required.
• Insulation: Ensure proper insulation for energy efficiency.
• Drywall and Finish Work: Complete the walls and ceilings.
• Flooring and Cabinetry: Install flooring and kitchen cabinets.
• Appliances and Fixtures: Add appliances, plumbing fixtures, and lighting.
• Paint and Finish: Apply paint and finishes to achieve the desired look.
• Final Inspection: Schedule inspections to ensure compliance with building codes.
Final Inspections and Approvals:
• Arrange for final inspections to ensure the addition meets all safety and code requirements.
• Obtain any necessary certificates of occupancy or compliance.
Move In and Enjoy:
• Once all inspections and approvals are received, you can move into your new kitchen addition and start enjoying it.
Remember that every kitchen addition project is unique, so adapt this outline to your specific needs and circumstances. Consulting with professionals and obtaining the required permits and inspections is crucial to a successful and safe project.
 Talon Construction Inc.
Designing and building a kitchen addition is a complex process that involves multiple steps and considerations. Here is a general outline to help you get started on your kitchen addition project:
Define Your Goals and Budget:
• Determine the purpose of the kitchen addition. Is it for more cooking space, a dining area, or a combination of both?
• Establish a realistic budget for your project. Consider all costs, including construction, permits, materials, and furnishings.
Hire a Design Professional:
• Seek the services of a design build company who specializes in kitchen additions.
• Discuss your vision, needs, and budget with the design professional to create a design concept.
Site Evaluation:
• Assess the existing space and structural condition of your home to ensure it can support the addition.
• Consider factors like zoning regulations, setbacks, and building codes.
Design Development:
• Collaborate with your design professional to refine the concept, including the layout, size, and architectural style.
• Choose materials, finishes, and fixtures that fit your design and budget.
Obtain Permits:
• Consult with your local design build contractor to determine the necessary permits and approvals.
• Prepare and submit all required documents, including architectural drawings and engineering plans.
Create Construction Documents:
• Work with your design build professional to develop detailed construction drawings and specifications.
• These documents will serve as a guide for contractors during construction.
Hire a design build contractor:
• Check references, credentials, and licenses before selecting a contractor.
• Sign a detailed contract that outlines the scope of work, timeline, and payment schedule.
Construction Phase:
• Demolition: If needed, remove any existing structures or walls.
• Foundation: Construct the foundation for the addition.
• Framing: Build the structural framework of the addition.
• Plumbing, Electrical, and HVAC: Install or update utilities as required.
• Insulation: Ensure proper insulation for energy efficiency.
• Drywall and Finish Work: Complete the walls and ceilings.
• Flooring and Cabinetry: Install flooring and kitchen cabinets.
• Appliances and Fixtures: Add appliances, plumbing fixtures, and lighting.
• Paint and Finish: Apply paint and finishes to achieve the desired look.
• Final Inspection: Schedule inspections to ensure compliance with building codes.
Final Inspections and Approvals:
• Arrange for final inspections to ensure the addition meets all safety and code requirements.
• Obtain any necessary certificates of occupancy or compliance.
Move In and Enjoy:
• Once all inspections and approvals are received, you can move into your new kitchen addition and start enjoying it.
Remember that every kitchen addition project is unique, so adapt this outline to your specific needs and circumstances. Consulting with professionals and obtaining the required permits and inspections is crucial to a successful and safe project.
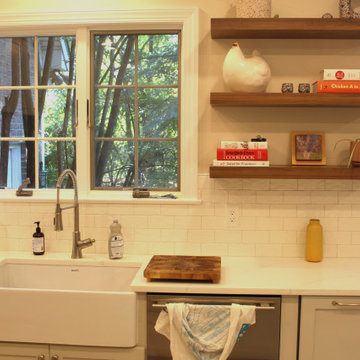 Talon Construction Inc.
Renovating an open kitchen can be an exciting project that can improve the functionality, aesthetics, and value of your home. Here are some steps to guide you through the process:
Planning and Design:
Define your goals and budget for the renovation.
Determine the layout of your open kitchen. Consider factors like the work triangle (the relationship between the stove, sink, and refrigerator) and the flow of traffic.
Choose a design style and color scheme that suits your preferences and complements the rest of your home.
Research and Inspiration:
Collect inspiration from magazines, websites, and social media platforms to get ideas for your open kitchen design.
Create a mood board or vision board to help you visualize the final look.
Hiring Professionals:
Depending on the scale of your renovation, you may need to hire professionals, such as architects, interior designers, contractors, and electricians. Make sure to check references and get multiple quotes.
Demolition and Structural Work:
If your renovation involves structural changes, like removing walls, this is the time to do it. Ensure that the necessary permits are obtained.
Plumbing and Electrical Work:
Update or reconfigure plumbing and electrical systems as needed. This may include adding or moving outlets, switches, and lighting fixtures.
Cabinetry and Countertops:
Choose and install new kitchen cabinets and countertops. This is a significant part of your renovation and will greatly influence the kitchen's appearance and functionality.
Appliances:
Update or install new kitchen appliances, including the refrigerator, stove, oven, microwave, and dishwasher.
Flooring:
Select and install flooring that is suitable for a kitchen, such as hardwood, tile, laminate, or vinyl. Ensure it complements the overall design.
Backsplash and Wall Finishes:
Install a backsplash that matches your design and protects your walls. Consider materials like tile, glass, or stainless steel.
Lighting:
Choose and install various types of lighting, including ambient, task, and accent lighting. Pendant lights above an island or breakfast bar can add style and functionality.
Paint and Finishing Touches:
Paint the walls and ceiling in the colors you've selected. Add finishing touches like hardware, window treatments, and decorative elements.
Furniture and Accessories:
Bring in furniture, such as a dining table and chairs, barstools, and any other pieces you need to complete the space. Decorate with accessories like artwork, plants, and decorative items.
Final Inspection and Cleanup:
Ensure that all work meets safety and building code requirements. Clean the entire area thoroughly.
Enjoy Your New Kitchen:
Once the renovation is complete and everything is in its place, enjoy your beautiful, functional open kitchen.
Remember that open kitchen renovations can be complex and may require careful planning. It's essential to stay within your budget, communicate with your contractors and designers, and be flexible as unexpected issues may arise during the process. Ultimately, a well-executed open kitchen renovation can enhance the heart of your home and improve your overall living space.
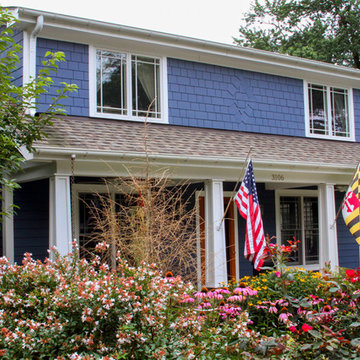

 Talon Construction Inc.
Designing and building a kitchen addition is a complex process that involves multiple steps and considerations. Here is a general outline to help you get started on your kitchen addition project:
Define Your Goals and Budget:
• Determine the purpose of the kitchen addition. Is it for more cooking space, a dining area, or a combination of both?
• Establish a realistic budget for your project. Consider all costs, including construction, permits, materials, and furnishings.
Hire a Design Professional:
• Seek the services of a design build company who specializes in kitchen additions.
• Discuss your vision, needs, and budget with the design professional to create a design concept.
Site Evaluation:
• Assess the existing space and structural condition of your home to ensure it can support the addition.
• Consider factors like zoning regulations, setbacks, and building codes.
Design Development:
• Collaborate with your design professional to refine the concept, including the layout, size, and architectural style.
• Choose materials, finishes, and fixtures that fit your design and budget.
Obtain Permits:
• Consult with your local design build contractor to determine the necessary permits and approvals.
• Prepare and submit all required documents, including architectural drawings and engineering plans.
Create Construction Documents:
• Work with your design build professional to develop detailed construction drawings and specifications.
• These documents will serve as a guide for contractors during construction.
Hire a design build contractor:
• Check references, credentials, and licenses before selecting a contractor.
• Sign a detailed contract that outlines the scope of work, timeline, and payment schedule.
Construction Phase:
• Demolition: If needed, remove any existing structures or walls.
• Foundation: Construct the foundation for the addition.
• Framing: Build the structural framework of the addition.
• Plumbing, Electrical, and HVAC: Install or update utilities as required.
• Insulation: Ensure proper insulation for energy efficiency.
• Drywall and Finish Work: Complete the walls and ceilings.
• Flooring and Cabinetry: Install flooring and kitchen cabinets.
• Appliances and Fixtures: Add appliances, plumbing fixtures, and lighting.
• Paint and Finish: Apply paint and finishes to achieve the desired look.
• Final Inspection: Schedule inspections to ensure compliance with building codes.
Final Inspections and Approvals:
• Arrange for final inspections to ensure the addition meets all safety and code requirements.
• Obtain any necessary certificates of occupancy or compliance.
Move In and Enjoy:
• Once all inspections and approvals are received, you can move into your new kitchen addition and start enjoying it.
Remember that every kitchen addition project is unique, so adapt this outline to your specific needs and circumstances. Consulting with professionals and obtaining the required permits and inspections is crucial to a successful and safe project.

 Diego Bringas
vi-deo! Person of Interest S.eason 5, E.pisode 12 F.ull O.nline. Here we go thhen for sure all the fans, this is the nice and wonderful time for all of us to start watch into the rest about Person of Interest season 5, episode 12 online. Entitled as .exe, here's such a wonderful over view to explore more, As Reese and Shaw race to catch up with Finch, he infiltrates a maximum-security government facility in a desperate mission which could mean the end for not only Samaritan, but for himself and The Machine as well.
"Synecdoche" reminder looks fantastic, When Reese, Shaw and Fusco travel to Washington, D.C. to protect their next number, The President of the United States, the Machine classifies this threat as extremely relevant - in terms of national security - but Shaw is worried about the implications behind Samaritan's neglecting to intervene. The threat is neutralized, but the inner-governmental privacy-activist group with a mole in the U.S.S.S. has turned the full force of the Secret Service on Reese and Shaw.
The Machine has secretly enlisted Logan Pierce, Joey Durban and Harper Rose to secure a clever exit strategy, with each of whom camouflaging into various resourceful associations; when Reese and Fusco are extracted, they band together with Logan, Joey and Harper to discuss their enlistment by the Machine, what has happened and what is to come.
Harold, meanwhile, is grieving over the loss of Root, and reaches a conclusion that brings him to a highly-secured government facility in San Antonio, Texas with a weaponized virus capable of destroying Samaritan. Harold has become ready to go to any lengths, and Reese and Shaw prepare for their final battle.
Series over view, They are helped by NYPD Detectives Lionel Fusco, a corrupt officer whom Reese coerces into helping them, and Joss Carter, who in early episodes investigates Reese for his vigilante activities.
Reese arranges for Fusco to spy on Carter by becoming her partner, but Carter eventually becomes Reese's ally and drops her investigation on him. Nevertheless, for the entirety of season one neither Fusco nor Carter is aware that the other is also working with Finch and Reese and both detectives are kept in the dark about the Machine. Periodically, the team enlists the aid of Zoe Morgan, a professional "fixer" who applies her skills to particularly difficult tasks.
The series features several subplots. One significant story arc involves "HR", an organization of corrupt NYPD officers who are initially in league with budding mob boss Carl Elias and later with the Russian mafia; in earlier parts of this arc, Fusco is forced to go undercover. Another important story line revolves around Root, a psychopathic hacker who is determined to gain access to The Machine.
During season two, another organization of powerful business figures, Decima Technologies, is revealed to be attempting to gain access to the Machine. Carter vows vengeance against HR after they have her boyfriend, Detective Cal Beecher, murdered. Reese and Finch encounter Sameen Shaw, an ISA assassin, on the run after being betrayed by her employers.
Shaw learns about The Machine in the season two finale and subsequently becomes a member of Reese and Finch's team. In Season three, Carter delves deeper into her investigation of HR, eventually uncovering its leader; but she is killed. In his grief, Reese briefly leaves the team. The team also battles Vigilance, a violent anti-government organization devoted to securing people's privacy.
100% working here:
http://tinyurl.com/zkfrsad
http://tinyurl.com/j6kjlsz
During the second half of season three, Decima Technologies starts to acquire hardware to bring to life a new artificial intelligence called Samaritan, using the codes from Harold's old college classmate, Arthur Claypool. In the season three finale, it is revealed that Vigilance was created by Decima to make them appear as domestic terrorists. This allowed Decima to obtain all the NSA feeds to make Samaritan operational. The Machine creates new identities for the Team so that they can fly beneath Samaritan's radar. Go for it finally fans, start watching for Person of Interest season 5, episode 12 : .exe online.
8