
Search results for "Determine final" in Home Design Ideas
 Architect
Why Mattress Thickness Is One of the Most Misunderstood Specs
When most people shop for a memory foam mattress, they focus on firmness, materials, and brand. Thickness tends to be an afterthought — or worse, treated as a proxy for quality. The assumption goes: thicker equals better. That assumption is wrong in a meaningful number of cases, and getting it wrong means waking up with exactly the kind of stiffness, pressure pain, or lower back ache you bought a new mattress to avoid.
The right thickness for a memory foam mattress is not a single number. It is a combination of your body weight, your sleep position, and any specific health conditions you are managing. A 14-inch mattress that provides ideal support for a 250-pound side sleeper may cause a 115-pound stomach sleeper to experience spinal misalignment all night. A 10-inch mattress that works perfectly for a back sleeper of average build offers inadequate pressure relief for a heavier side sleeper whose hips need to sink further into the comfort layer before the support base engages.
This guide maps thickness to the factors that actually determine whether a mattress works for your body. It covers the science of mattress layers, the three primary variables (weight, position, condition), and a complete decision table so you can find your ideal thickness without guesswork.
Understanding Mattress Thickness: Layers, Not Just Height
A memory foam mattress’s total thickness is the sum of its individual layers, and those layers serve entirely different functions. Two mattresses that are both 12 inches thick may feel radically different because their comfort layer depths and support core thicknesses are distributed differently.
The Two Parts That Matter
Every memory foam mattress has two functional zones: the comfort layer at the top and the support core at the bottom. The comfort layer — which in quality mattresses consists of gel-infused viscoelastic foam, transition foam, and a cooling cover — is the zone that contours to your body, relieves pressure, and cushions the joints. The support core — high-density foam or pocketed springs in a hybrid — is the zone that keeps the spine aligned and prevents the entire body from sinking into the mattress.
The key relationship is this: the comfort layer must be deep enough for your body’s heaviest pressure points to sink in fully before the firmer support core pushes back. If it is too shallow, those pressure points press against a firm surface and cause localised pain. If the support core is too thin, the whole mattress sags under body weight and the spine loses alignment regardless of how comfortable the top feels.
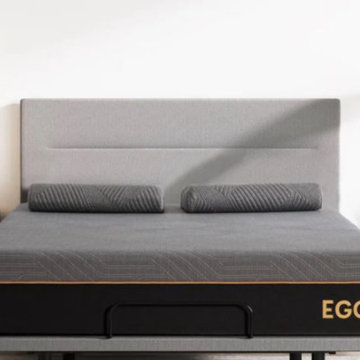
Here is how EGOHOME’s Black series layers map to these functions:
Layer
Material
Function
EGOHOME Technology
Cover (0.5–1")
Fabric + cooling tech
Temperature regulation, hygiene
Anti-heat™ Graphene Cooling Cover
Comfort layer (2–6")
Gel foam, AeroFusion™
Pressure relief, contouring
Copper Gel AeroFusion™ Foam
Transition layer (1–2")
Mid-density foam
Prevents sinkage past comfort zone
BraceSleeper™ Support Foam (upper)
Support core (6–12")
High-density foam or coils
Spinal alignment, edge support
BraceSleeper™ Support Foam (core)
Thickness alone does not tell you how a mattress will perform. A 14-inch mattress with a 2-inch comfort layer and a 12-inch support core will feel firm and supportive. A 14-inch mattress with a 6-inch comfort layer and an 8-inch support core will feel plush and contouring. Always check the comfort layer depth, not just the total inches.
Memory Foam Mattress Thickness Ranges: What Each Category Delivers
Here is a complete breakdown of what to expect from each thickness range and who each suits best:
Thickness
Profile
Best Use Case
Body Weight
Best Sleep Position
6–8"
Low profile
Children, bunk beds, guest rooms, adjustable bases
Under 130 lbs
Kids, lightweight, occasional use
8–10"
Standard-thin
Stomach sleepers, lightweight adults, budget setups
Under 130 lbs
Stomach, lightweight back sleepers
10–12"
Standard
Most adults, back sleepers, back pain relief
130–230 lbs
Back, stomach, combo sleepers
12–14"
High-profile
Side sleepers, plus-size, pressure relief
130–230 lbs+
Side sleepers, hip/shoulder pain
14"+
Premium
Plus-size sleepers, heavy duos, luxury setups
230 lbs+
Plus-size, side sleepers, chronic pain
6–8 Inches: Low-Profile (Specific Use Cases Only)
Low-profile mattresses in the 6 to 8 inch range are designed for specific applications rather than general adult use. They work well on bunk beds and trundle beds where height clearance is limited, for children’s beds where a lower sleep surface is safer, on adjustable bases where the mattress needs to flex significantly, and for lightweight individuals under 130 pounds who need minimal depth to reach the support core. For a standard adult of average build, a mattress under 8 inches is unlikely to provide adequate comfort layer depth for sustained pressure relief.
8–10 Inches: Standard-Thin (Stomach Sleepers and Lightweight Adults)
The 8 to 10 inch range is the practical starting point for most adult use. At this thickness, there is enough comfort layer to provide basic pressure relief without the excessive depth that allows heavier body sections to sink past the support zone. Stomach sleepers in particular benefit from this range: when sleeping face down, the goal is to keep the hips from sinking lower than the shoulders and chest, which would create a downward bow in the lumbar spine. A thinner mattress with a firmer feel prevents this hyperextension more reliably than a thicker, softer model. EGOHOME offers 8-inch memory foam options suited to this profile.
10–12 Inches: Standard (The Sweet Spot for Most Adults)
The 10 to 12 inch range is the most broadly appropriate thickness for adults of standard build. At this depth, a quality memory foam mattress contains enough comfort layer material to contour genuinely around the hips and shoulders without allowing the body to bottom out into the support core. It also contains enough support core depth to maintain spinal alignment under continuous body weight across seven or eight hours. Back sleepers of standard weight (130 to 230 pounds) typically find this range the most supportive, as the lumbar region receives adequate underlying resistance without the excessive softness that taller mattresses can develop under consistent pressure.
12–14 Inches: High-Profile (Side Sleepers and Plus-Size Sleepers)
The 12 to 14 inch range addresses two specific needs: side sleepers who require a deep enough comfort layer to allow the shoulder and hip to sink in while the waist remains supported, and heavier individuals whose body weight requires more foam depth before reaching full support core engagement. For a side sleeper of standard or higher body weight, a comfort layer of less than 4 to 6 inches is often not deep enough for the shoulder to sink fully into an aligned position. The result is an upward lateral bow in the thoracic spine that causes shoulder and upper back pain upon waking. The EGOHOME Black 14-inch Pro and Hybrid models are built specifically for this thickness range.
14 Inches and Above: Premium and Plus-Size
Mattresses at 14 inches or more are appropriate for plus-size sleepers over 230 pounds and for couples where one partner is significantly heavier. At higher body weights, a greater depth of both comfort material and support foam is required because the heavier load compresses the foam more aggressively. A support core that adequately resists a 160-pound sleeper may allow excessive sinkage under a 280-pound sleeper, causing the hips to drop past the point of lumbar support. EGOHOME’s Black 14-inch Firm model includes a 12-inch BraceSleeper™ Support Foam core specifically designed to resist this deep compression under higher body weights.
Thickness by Body Weight: The Primary Determining Factor
Body weight is the single most important variable in thickness selection because it directly determines how far the body sinks into the foam. The same mattress will feel completely different to a 120-pound sleeper versus a 240-pound sleeper, because the heavier person compresses the foam significantly more deeply.
Lightweight Sleepers (Under 130 lbs)
Lightweight sleepers do not need and often cannot benefit from thick mattresses. Because they exert less pressure on the foam, they may not compress a 14-inch mattress deeply enough to feel the support core at all, resulting in a floating sensation with insufficient underlying resistance. For lightweight sleepers, 8 to 10 inches provides adequate comfort layer depth for full pressure relief. The EGOHOME Black 10-inch Classic (medium feel) is the appropriate starting point for this weight category.
Standard-Weight Sleepers (130–230 lbs)
Standard-weight adults represent the broadest population of mattress buyers, and the 10 to 12 inch range was designed specifically for this group. At this weight range, the body compresses the comfort layer meaningfully enough for the foam to contour around pressure points, while the support core remains thick enough to prevent excessive sinkage. The EGOHOME Black 12-inch and the Black 10-inch ranges both address this category, with the 12-inch models being more appropriate for side sleepers who need the extra comfort layer depth.
Plus-Size Sleepers (Over 230 lbs)
Heavier sleepers require 12 to 14 inches at minimum to prevent bottoming out — the point at which body weight compresses through the comfort layer entirely and the sleeper feels the firm support core directly. Bottoming out eliminates pressure relief completely and can significantly worsen joint pain and lower back stiffness. EGOHOME recommends a suggested maximum of 300 pounds per person across their mattress range, and the 14-inch Hybrid and 14-inch Firm models are engineered with the deeper support cores required to handle higher body weights without performance degradation over time.
Thickness by Sleep Position: Matching Depth to Alignment Needs
Side Sleepers: 12 Inches or More
Side sleeping places the body’s heaviest pressure points — the shoulder and hip — in direct contact with the mattress. These points need to sink into the comfort layer deeply enough that the spine remains horizontal from head to toe. If the comfort layer is too thin or too firm, the shoulder cannot descend fully into the mattress, and the spine develops an upward lateral curve between the shoulder and the head. This causes the neck, shoulder, and upper back tension that many side sleepers report upon waking.
Side sleepers of standard weight need at least 12 inches, with a soft to medium-soft comfort layer. EGOHOME’s Black 12-inch Pro (soft feel, 7.5 out of 10 cooling score) is specifically recommended for side sleepers managing back, shoulder, or joint pain. The Black 14-inch Pro (medium-soft, 8 out of 10 cooling) adds additional comfort layer depth for those who need greater pressure relief.
Back Sleepers: 10–12 Inches
Back sleeping is the most spinal-alignment-friendly position because the body’s weight is distributed relatively evenly across the mattress. The primary challenge for back sleepers is lumbar support: the natural inward curve of the lower back creates a gap between the lumbar spine and the mattress surface that must be filled by the foam contouring upward into it. A mattress that is too soft allows the pelvis to sink excessively, flattening this curve and creating lower back compression. A mattress that is too firm cannot conform into the lumbar curve at all.
For back sleepers, 10 to 12 inches with a medium or medium-firm feel provides the optimal combination. EGOHOME’s Black 12-inch Hybrid (medium-firm, 6.5 out of 10 cooling) is specifically noted as ideal for back sleepers, combining pocketed spring zoned support with gel foam contouring for precise lumbar engagement.
Stomach Sleepers: 8–10 Inches
Stomach sleepers face the opposite alignment challenge from side sleepers. Rather than needing the mattress to yield deeply at the joints, they need the mattress to maintain a flat, firm surface that prevents the hips from sinking below the chest. If the hips drop lower than the upper body, the lumbar spine hyperextends into an arched position that compresses the posterior vertebral joints and causes significant lower back pain.
Stomach sleepers need a thinner mattress with a firmer feel. The EGOHOME Black 14-inch Firm is specifically recommended for stomach sleepers and heavier sleepers who need maximum surface resistance. Its 12-inch BraceSleeper™ Support Foam core provides the deep, unyielding base that prevents hip sinkage without requiring a thin mattress that compromises comfort.
Best Thickness for Back Pain: The Medium-Firm 10–12 Inch Principle
For people managing chronic lower back pain, herniated discs, sciatica, or general spinal stiffness, mattress thickness interacts with back health in a specific way that differs from general sleep comfort recommendations.
The key principle for back pain is controlled contouring. You need enough foam depth to relieve pressure at the hips and shoulders, but not so much depth that the foam develops a sag under the heavier sections of the body over time. Excessive thickness combined with a soft comfort layer is one of the most common causes of mattress-induced back pain — the sleeper sinks into a gentle hammock shape that feels comfortable initially but compresses the lumbar discs continuously throughout the night.
10–12 Inches: The Optimal Back Pain Range
A medium-firm mattress of 10 to 12 inches addresses both needs simultaneously. It provides adequate foam depth for genuine pressure relief at the hips and shoulders without the risk of comfort layer collapse that taller, softer mattresses can develop. The support core at this thickness is deep enough to maintain consistent lumbar support from the first night through years of regular use.
For side sleepers with lower back pain, the recommendation extends to 12 inches with a soft feel to ensure the hip can sink into full alignment. For back sleepers with lower back pain, 10 to 12 inches with a medium-firm feel is the target. For stomach sleepers with lower back pain, a firmer feel at any thickness is more important than depth — preventing hip sinkage is the priority.
⚠️ Mattresses over 14 inches with very soft comfort layers are a common hidden cause of lower back pain. The deep softness feels luxurious initially but allows the lumbar region to sag into misalignment through the night. If you sleep on a thick, very soft mattress and wake with lower back stiffness, the mattress — not your position — may be the cause.
Complete Thickness Decision Table: Your Position × Your Weight
Use this table to find your recommended thickness and the matching EGOHOME model:
Sleep Position
Body Weight
Ideal Thickness
EGOHOME Recommendation
Side sleeper
Under 130 lbs
12"
EGOHOME Black 12” Pro (soft, 7.5/10 cool)
Side sleeper
130–230 lbs
12–14"
EGOHOME Black 14” Pro (medium-soft, 8/10 cool)
Side sleeper
Over 230 lbs
14"
EGOHOME Black 14” Hybrid (medium-firm, 8.5/10 cool)
Back sleeper
Under 130 lbs
10"
EGOHOME Black 10” Classic (medium, 6/10 cool)
Back sleeper
130–230 lbs
10–12"
EGOHOME Black 12” Hybrid (medium-firm, 6.5/10 cool)
Back sleeper
Over 230 lbs
12–14"
EGOHOME Black 14” Hybrid (medium-firm, 8.5/10 cool)
Stomach sleeper
Under 130 lbs
8–10"
EGOHOME 8" Memory Foam (firm, standard support)
Stomach sleeper
130–230 lbs
10–12"
EGOHOME Black 10” Hybrid (medium-firm, 6.5/10 cool)
Stomach sleeper
Over 230 lbs
12–14"
EGOHOME Black 14” Firm (firm, 7/10 cool)
Combination
Any weight
10–14"
EGOHOME Black 14” Pro or 14” Hybrid
? If you are between two categories — for example, a 220-pound back sleeper with occasional side sleeping — choose the model suited to your heavier variable. A 12” hybrid model handles the heavier weight and still adapts to position changes. When in doubt, go medium-firm over soft.
EGOHOME Memory Foam Mattresses by Thickness
EGOHOME’s range spans 6 to 14 inches across memory foam and hybrid constructions, with every model carrying CertiPUR-US® and OEKO-TEX® Standard 100 certification, a 10-year warranty, a 100-night home trial, and free shipping and returns across the contiguous U.S.
For 8–10 Inch Needs
The EGOHOME 8-inch memory foam and Black 10-inch Classic and Hybrid models cover the lightweight and stomach sleeper range. The 10-inch Classic offers a medium feel suited to back and side sleepers under 130 pounds. The 10-inch Hybrid adds pocketed spring support for better lumbar engagement and airflow.
For 10–12 Inch Needs
The EGOHOME Black 12-inch range — Classic, Pro, and Hybrid — is the most widely applicable thickness tier. The 12-inch Classic (soft, cool 6/10) suits side sleepers and those with joint pain. The 12-inch Hybrid (medium-firm, cool 6.5/10) is specifically recommended for back sleepers and standard-weight adults across positions. The 12-inch Pro (soft, cool 7.5/10) is the top choice for side sleepers dealing with shoulder or hip pain.
For 12–14 Inch Needs
The EGOHOME Black 14-inch series is the flagship range. The 14-inch Pro (medium-soft, cool 8/10) is designed for side sleepers and pressure-relief-first buyers. The 14-inch Hybrid (medium-firm, cool 8.5/10) handles all sleep positions and is the strongest all-rounder in the range. The 14-inch Firm is built for stomach sleepers and heavier individuals, with a 12-inch BraceSleeper™ Support Foam core that resists sinkage under higher body weights.
Frequently Asked Questions
Is a thicker memory foam mattress always better?
No. Thickness should match your body weight and sleep position, not simply be maximised. A 14-inch mattress with a very soft comfort layer can cause back pain in lightweight sleepers or stomach sleepers by allowing excessive sinkage. A well-calibrated 10-inch mattress will consistently outperform an oversized 14-inch model for the wrong body type.
What thickness of memory foam is good for back pain?
A medium-firm mattress of 10 to 12 inches is the most widely recommended range for lower back pain. It provides enough foam depth for genuine pressure relief without the risk of comfort layer collapse that causes lumbar sagging. Side sleepers with back pain may benefit from 12 inches with a softer feel to ensure hip and shoulder alignment.
What is the minimum thickness for a memory foam mattress for adults?
For most adults, 8 inches is the practical minimum for sustained comfort. Below 8 inches, there is often insufficient comfort layer depth for pressure relief across a full night of sleep. The exception is stomach sleepers who may intentionally choose 8 inches for a firmer surface that prevents hip sinkage.
Does mattress thickness affect how long it lasts?
Yes, indirectly. A mattress that is too thin for the body weight it supports will experience faster comfort layer compression and develop sags and pressure indentations earlier than one appropriately sized for that load. Choosing the correct thickness for your weight extends the usable lifespan of the mattress. EGOHOME mattresses are expected to last 6 to 8 years with proper care, with regular rotation every 3 to 6 months recommended.
Can I use a thick mattress on an adjustable base?
Memory foam mattresses up to 14 inches are generally compatible with adjustable bases, though the mattress should be flexible enough to bend at the head and foot sections without cracking or deforming. EGOHOME mattresses are confirmed compatible with adjustable bases. For very thick or firm mattresses, check the specific flex requirements of your adjustable base before purchasing.
Final Thoughts
The best thickness for a memory foam mattress is not the thickest you can find or the most expensive number on the specification sheet. It is the thickness that aligns precisely with your body weight, your sleep position, and any specific conditions you are managing — then pairs that depth with a comfort layer and support core calibrated to work
 Tile Doctor Ltd
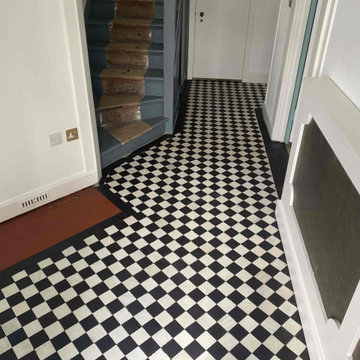
This client from North London had recently bought a property in Highgate N6 and during renovation had discovered an original Victorian tiled floor in the hallway. The floor was laid in a classic black and white diamond pattern but unfortunately a large section was missing and had been filled with concrete. Furthermore, most of the remaining floor had been covered in cement and glue.
I carried out a survey of the floor to determine the main issues and was then able to email over a quote later that day that included rebuilding the missing section of flooring. I suspect the floor had been excavated at some point in the past to install central heating and then rather than have the excavated section restored it was simply back filled and then levelled with a cement screed before finally gluing down a carpet on top.
Once the quote was accepted, I sourced replacement tiles from the Vintage Floor Tile company. Situated in Kent they are a reclamation yard that specialises in supplying original geometric and encaustic tiles including the major historical makers such as Minton and Craven Dunnill.
Armed with replacement tiles I started by removing the concrete that had been used to backfill the missing section and prepare a new surface for tiling with quick drying cement. When ready I was able to carefully build back the original pattern using the replacements. The tiles were secured with tile adhesive and once that had gone off, they were grouted.
The floor was left to set fully overnight and then the next day I was able to return and clean the whole floor using a strong dilution of Tile Doctor Remove and Go. As usual this was left to soak into the tiles for a good ten minutes before being scrubbed into the tiles using a black scrubbing pad. The Tile Doctor Remove and Go did a good job of cleaning the floor and the cleaning solution soon turned black with dirt during the scrubbing. The floor was rinsed with water and the soil extracted with a wet vacuum. After inspecting the floor any areas that needed further work were hand scrubbed and rinsed again until I was happy the floor was clean.
The last part of the cleaning process was to give the tiles an acid wash using Tile Doctor Acid Gel which further cleans the floor by removing old cement residue and grout haze. It also neutralises efflorescent salts in the tiles which are a common issue with floors of this age with no damp proof membrane. After another rinse and extraction, the floor was given a final rinse and then dried as much as possible using the wet vacuum.
I left the floor to dry out for a couple of days before returning to apply a protective sealer. Tile and Stone should be dry before sealing so I use a damp meter first to double check. All was well so to seal the tiles I proceeded to apply the first of what would be three coats of sealer. I used Tile Doctor Colour Grow for this, it works by impregnating the tile occupying the pores and thereby preventing dirt from becoming ingrained there. This product also enhances the black and white colour of the tiles and makes the floor much easier to clean.
Once done the floor was transformed and needless to say my customer was very pleased with the result. For the aftercare of Victorian Tiled floors, I recommend the use of a ph neural tile cleaner such as Tile Doctor Neutral Cleaner; most supermarket tile cleaners are simply too strong for use on sealed floors and can strip off the sealer prematurely.
Andrew Newstead
North London Tile Doctor
 CCG Creative Concepts Group Interior Design & Deco
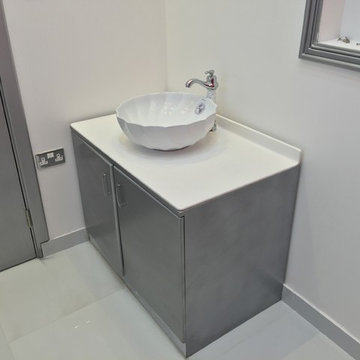
Nail Institute Center-Al Ain-2015
Owner Name: Dr. Ziad – Al Ain Pharmacy
Location: Al Safa Hili, Al Ain, U.A.E.
Project Type : Nail Institute Center
Project Area: 45 m²
Project cost: 250,000 AED
Work Type: Design & Decoration
CCG- CREATIVE CONCEPTS GROUP-Interior Design & Decoration
ABOUT US:
• CCG Creative Concepts Group- Interior Design & Decoration was establishing in 2006 at Al Ain, United Arab Emirates.
• Our talent to stay abreast of the latest in interior design industry coupled with the creativity and imagination of our experienced professionals has made Creative Concepts, a dominant player in this filed. We have successfully completed a diverse range of projects for hotels, restaurants, financial institutions, hospitality installations, offices, shops and luxury homes throughout U.A.E.
• at easiest way we carry out any type of project from initial planning to final implementation. One of our primary responsibilities as interior designer and decorator is to focus on all of the key elements in your home or office space. The next step is to create a functional environment in each of these elements that optimizes space and finally, create a unique design solution that relates to client’s vision while maintaining a balance between functionality and aesthetics.
• we are passionate about design and strive to create timeless and harmonious interiors for our wide range of clients.
• While working closely with you, our talented team of designers will evaluate your needs and interpret your requirements in order to create your perfect space.
• We offer a complete range of innovative interior designs including planning, purchasing and project management services for residential & corporate clients, residential developers and the hospitality industry. Our design work extends to the creation of custom furnishings, rugs, millwork and lighting.
Mission & Vision:
• To be the most premier and complete one stop Interior Design solutions brand by providing unparalleled quality, services, and management while utilizing our global resources and systems, caring for the environment, and enabling our employees to deliver uncompromising excellence to our clients and shareholders.
• We are determined to maintain its consistency in the provision of quality ‘total solution’ packages for its interior design & fit-out services, to the highest local and international standards using high quality, durable materials and finishes.
• By providing its customers with a personalized, unique service, which caters to both corporate and personal needs, we intend to position itself as an organization that understands and maintains a respect for the design and integrity of the customer’s needs.
OUR SERVICES
1. Interior design
1) Staging consultation and implementation
2) Design concept & recommendation
3) AutoCAD drawings
A. Space Planning & Furniture Layouts
B. Elevations & Sections
C. Details
4) 3D design view & perspectives.
5) Material Selection and FF&E Sourcing.
6) BOQ bill of quantity preparation.
7) Design management and implementation
8) Project management / site supervision.
2. Turnkey contracts & Fit-out
1) Shop, Retail Fit-Out Services
2) Commercial Fit-Out Services
3) Office Fit-Out Services
4) Hospitality Fit-Out Services
3. Renovations, Maintenance & Refurbishment
1) Civil Works
2) Painting
3) All types of false ceilings (Gypsum, Wooden, Aluminum etc.)
4) Flooring (marble, Granite, ceramic, parquet)
5) Joinery & Carpentry works – Furniture’s, Doors, pergola, trellis etc.
6) Supply & fixing of kitchen counters, cabinets and wardrobes.
7) All types of glazing and shop fronts (doors, windows, partitions etc.).
8) Blinds.
9) Decoration works
4. Authority approvals
1) Al Ain Municipality
A. Maintenance permit.
B. Décor Permit.
2) AD Abu Dhabi Municipality
A. Maintenance permit.
B. Décor Permit.
Our Project Types:
1. Gov. Building facilities Management
2. Mall, Showrooms, SHOPS & Retails
3. BEAUTY CENTER, BARBER SHOP & SALOON
4. EXHIBITION STANDS & KIOSKS
5. OFFICES & Banks
6. Restaurants / Coffee Shops
7. Residential, Accommodations / Villas / Flats
8. Hotels
9. Health Projects (Hospitals, Clinics)
Our Clients:
1. Gov.:
a. Etisalat
b. Musanada
c. Abu Dhabi Tourism Authority
d. Al Ain Police Department
e. Emirates Post Office
f. AL Foah Dates
g. ADNEC
h. ADFCA- Abu Dhabi Food Control Authority
i. FDF- Family Development Foundation
2. Mall
a. Al Buraimi Mall
b. Al Ain Mall
c. Bawadi Mall
d. Al Foah Mall
e. RAK Mall
f. Bawabat Al Sharq Mall
g. Matajer Mall
h. Hili Mall
i. Wahat Hili Mall
3. Contractors:
a. Al Faraa Group
b. El Race General Contracting
c. Al Jaheli General Contracting.
d. Al Qabda General Contracting.
e. Qaser Al Ezz General Contracting
4. Offices:
a. Al Ghussun Glass Factory
b. Al Aqarea TV
c. Al Ain Water
d. SSAT Al Ain Office
Kindly don’t hesitate to contact me for any detail any time.
Assuring you of our close cooperation at all times.
Thanks & best regards,
Mohammed Subhi Daoud
Architect , LEED GA
Managing Director
CREATIVE CONCEPTS GROUP
Interior Design & Decoration
Mobile : +971-050-6732533
Tel : +971-03-7216304
Fax : +971-03-7216305
Official Email: creative2006@eim.ae
Web Site: www.ccguae.com
Facebook: http://facebook.com/creative2006
Instagram: http://instagram.com/creative2006
linkedin : ae.linkedin.com/pub/creative-concepts-interior-design-decoration/38/387/a34/
YouTube : http://youtu.be/2d30IkD9AXA
Location Map : http://maps.google.ae/maps/ms?ie=UTF8&hl=en&oe=UTF8&msa=0&msid=207573730792943159475.0004c06322b21a3f286f1
Official Address: Flat No. 1 , First Floor, Eisa Al Khaily (AADC) Building ,Electricity authority Building , Behind LULU Hypermarket , Al Sanaia Area, P. O. Box 84329, Al Ain , United Arab Emirates
Notice of Confidentiality:
The information contained in this email is confidential and is intended solely for the addressee. If you are not the intended recipient, please notify the sender immediately and delete this email from your system. Any unauthorized use, disclosure, copying, printing, forwarding or dissemination of any part of this information is prohibited. Creative Concept does not accept responsibility for the content of any email transmitted by its staff for any reason other than bona fide business purposes.
Please consider the environment before printing this email
ممكن نبذة عن الشركة؟
ممكن نبذة عن الشركة؟تأسست أفكار إبداعية للتصميم الداخلي و الديكور في عام 2006.قدرتنا لمواكبة أحدث التصاميم الداخلية بالبراعة وخيال المهنيين ذوي الخبرة لدينا في أفكار إبداعية، جعلنا مصممين مبدعين في هذه المجال.شو الخدمات إلي تقدمونها؟عندنا نوعين من الخدمات:النوع الاول: تصميم الديكور الداخلي.النوع الثاني: تصميم الديكور الداخلي مع الإشراف و التنفيذ.لقد أكملنا بنجاح مجموعة متنوعة من المشاريع مثل الفنادق والمطاعم، والمؤسسات المالية، ومنشآت الضيافة، والشركات القصور و الفلل والمنازل فاخرة بمختلف أحجامها الصغيرة و الكبيرة، و الشقق و حتى لو كانت غرفة وحدة في جميع أنحاء دولة الإمارات العربية المتحدة ممكن نشوف بعض التصاميم الخاصة بأعمالكم؟ نعم، هذه بعض الأعمال الخاصة بنا، و هي تصاميم ثلاثية الأبعاد 3D Designفيسبوك: http://m.facebook.com/شو هي أسعاركم و على أي أساس يتم التسعير؟نحن نركز بشكل كبير على النوعية الممتازة و الجودة العالية في أعمالنا و نسويها بالسعر المناسب. الأهم من هذا كله أننا ننتهي من العمل على حسب المدة المتفق عليها، حيث أننا نهتم بالوقت بشكل كبير للغاية.بالنسبة للتصميم، فالتكلفة تشمل الرسومات الكاملة لجميع مراحل تجهيز المكان، و تبدأ الأسعار من ١٥ درهم للقدم المربع و ترتفع إلى ٣٥ درهم للقدم المربع، و هذا يعتمد على التصميم المطلوب سواء كان مودرن أو كلاسك، بالإضافة إلى السرعة التي يحتاج إليها الزبون للانتهاء من التصميم بالنسبة لأسعار الإشراف و التنفيذ، فهي تعتمد على المنتجات المستخدمة و تشمل الأرضيات و الجدران و السقف. وبالنسبة للأثاث فأسعارها تعتمد على المساحة الموجودة وحجم الأثاث المطلوب. تفاصيل هذه الأسعار نوفرها بعد الاجتماع مع الزبون أسعارنا في المنتجات و الأثاث دائماً تكون أقل من سعر السوق لأننا نستورد من المصنع بشكل مباشر و عندنا علاقات عمل مميزة مع مختلف المصدرين ملاحظة: تختلف الأسعار للمساحات الصغيرة للغاية و الضخمة للغاية و نحتاج إلى اجتماع مع الزبون لمعرفة التفاصيل عندكم مصممة ديكور نعم، عندنا مصممة ديكور تقدرون تتعاملون معاها بشكل مباشر عندكم خدمة زيارة لمعرفة تفاصيل شغلكم نعم، نزور الزبائن في البيت في كل إمارات الدولة حسب جدول المواعيد.ما عليكم سوى الاتصال ونحن علينا القدوم اليكم أينما تكونون ومعنا كافة الصور والتصاميم للاختيار على أرض الواقع إذا في تصميم من التصاميم المعروضة في هذه الصفحة عجبتني و بغيت نفس الشي بالضبط، كم بطلع السعر دائما نحاول تكون تصاميمنا مميزة و نعدل عليها حتى ما تتكرر و تناسب كل الأذواق. في أغلب الأحيان أحجام الغرف تختلف عن غيرها ونحتاج عمل تعديلات على التصاميم حتى لو كانت متشابهة في المظهر و هذا يأخذ بعض الوقت و الجهد. الشكل النهائي قد يكون مشابه تماماً، ولكن التفاصيل الخاصة بالقياسات والمواصفات تختلف من مساحة إلى أخرى و العمل سيحتاج إلى [03:03, 6/13/2016] Mohammed | Mohamed Subhi Daoud: الإعادة بالنسبة للسعر يكون أقل من أسعار التصاميم ولكن من الأفضل أن نجتمع لنعرف كافة التفاصيل المطلوبة حتى نظهر بأسعار مناسبة. كيف طريقة الدفع و كم العربون يكون؟ نقبل المبالغ النقدية والشيكات. بداء مشروعك بدفعه اولى 4900الاسعار 15-35 للقدم8 أقساط مريحه1- بالنسبة للعربون نستلم 25٪ من المبلغ مقدماً،2- و 25٪ عند تسليم التصميم الأولي.3- و 25٪ عند تسليم التصميم النهائي.4- المبلغ المتبقي يتم استلامه عند تسليم التصاميم النهائية التي تحوي على تفاصيل المواصفات و القياسات و أسعار الأثاث و الأماكن التي بإمكان الزبون أن يشتري الأثاث منها.5- اذا حب الزبون أن نشرف على العمل و ننفذه، فنستلم 50٪ مقدماً، و التي تشمل قيمة الأثاث و غيرها من الأمور،6- ثم نستلم 20٪ قبل خروج الأثاث للمصنع7- ثم نستلم 15٪ عند و التركيب8- ، و بقية المبلغ عند الانتهاء من العمل. كم المدة إلي تحتاجونها لتجهيز التصميم؟ تعتمد المدة على الحجم أو المكان و نوعية التصميم، و قد تأخذ من شهر إلى ٣ أشهر. فترة التنفيذ تأخذ من 1إلى ٨ شهور حسب التصميم. للأماكن الصغيرة ، تأخذ فترة التصميم أسبوعين تقريباً و التنفيذ ٣ أشهر. مسألة التصاريح من البلدية و غيرها بتكون على منو؟إذا اختار الزبون أن نقوم بتنفيذ التصميم، نحن بنتولى التصاريح بالكامل باختلاف أنواعها.هل عندكم ستايل معين تتمسكون فيه؟إبداعنا يرتكز على التصاميم الحديثة و المودرن، ولكن دائماً ما نقترح على الزبون أن ينوع بين الغرف بمختلف التصاميم، إذا كانت الفيلا كبيرة، و ممكن نصمم تصاميم كلاسك من الطراز القديم بشكل ممتاز أيضاً، مثل ما شفتوا في الصور.إذا عندي فكرة معينة في بالي ممكن تسوونها؟أكيد بنسويها، نحن نقبل كل الأفكار و الإبداعات من الزبائن، و نحب ننفذ أصعب التصاميم.إذا بغيت تصميم لغرفة وحدة بس يعني مب بيت كامل يصير؟نعم، ممكن و التفاصيل بخصوص هذه الطلبات تحتاج إلى اجتماع مع الزبون لنستوعب الفكرة بالضبط.بشو تتميزون عن غيركم من شركات التصميم الداخلي؟التصاميم التي نقدمها فريدة للغاية، و صعبة التقليد، لأننا نهتم في الجانب الإبداعي بشكل كبير. أسعارنا دائماً تكون منافسة و نستطيع أن نوفر الأثاث بأسعار أقل من السوق بشكل أكيد، و دايماً نقوم بالتنفيذ على الوقت المحدد و المتفق عليه.في عملنا عندنا 3 أولويات. الأولى هي معايير السلامة للزبون من ناحية جودة العمل و الأثاث، ثانياً الراحة في استخدام الأثاث، و من ثم يأتي المظهر الرائع و المميز.عندكم خدمات ثانية؟نقوم بخدمات التصميم الداخلي للمطاعم، الفنادق، المحلات و المكاتب و المعارض.1. التصميم الداخلي.2. . الديكور الابداعي3. الصيانة العامة4. اعمال النجارة5. المفروشات6. الصبغ7. الاسقف المستعارة الجبس و الخشب8. الارضيات سيراميك رخام خشب باركيهما رأي الزبائن فيكم؟مالك المحل/ النشمي للخياط الرجالية – الهيلي صناعية العين:1- التصميم : لا يعلى عليه ، كل من شاف المحل اعجب فيه.2- الجودة : أكثر من رائع.3- المعاملة : ما قصرت.4- كلمه عامه: روعه في التصميم والابداع والتنفيذ على حسب رغبة العميلمالك المحل/ شكسبير للحلاقة الرجالية :1- التصميم : غير.2- الجودة : أكثر من رائع.3- المعاملة : ما قصرت.4- كلمه عامه: روعه في التصميم والابداع والتنفيذ على حسب رغبة العميلمالك المحل/ اللمسة الملكية للخياط الرجالية:1- التصميم : بسيط .2- الجودة : امورها طيبه.3- المعاملة : ما قصرت.4- كلمه عامه: انجاز في مده خياليهمسؤول / نائب المدير :مجموعة مصابغ ومغاسل عاتي للملابس:1- التصميم : روعه .2- الجودة : راقيه.3- المعاملة : متعاونين.4- كلمه عامه: تأخذ منها نتيجة مرضية فيها ناس بتفكر
#Company #CCG @CCG #CCGUAE @CCGUAE @creative2006 #Creative #Concepts #Interior #Design #InteriorDesign #Decoration #Decor #Fitout #Fitouts #Fit-outs #Fit-out #Turnkey #contracts #Renovations #Maintenance #REFURBISHMENT #Renovation
#location #AlAin #AD #DXB #AUH #Dubai #UAE #Gulf #Instagram
#Services #2D #Drawings #3D #Max #rendering #Detailed #Furniture# #plan #layout #Elevations #sections #approvals #permit #Facility #management #supervision #Civil #Works #Flooring #false #ceilings #Ceiling #Painting #gypsum #aluminum #Flooring #granite #marble #ceramic #parquet #Joinery# works #Furniture #Doors #All #partitions #works
Projects #Mall #Malls #Showrooms #SHOPS #Retails #Saloon #Beauty #center #Spa #Municipality #Authorities #Exhibition #STANDS #KIOSKS #Government #Gov. #Offices #Restaurants #Coffee #Shops #Residential #Villas #Flats #Hospital #Shopping #center
#أفكار #إبداعية #تصميم #داخلي #ديكور #العين #أعم# الامارات #التصميم #الداخلي #مناظير #ثردي #ماكس #مخططات #رسومات #تفصيلية #المفروشات #الاثاث #الواجهات #المقاطع #الارضيات #الاسقف #موافقات #المولات #البلدية #الهيئات #المخططات #الديكورات #الداخلية #التشطيبات #عقود #تسليم #المفتاح #اعادة #التأهيل #الصيانة #الاعمال #المدنية #الصبغ #تركيب #الاسقف #المستعارة #جبس #المنيوم #تركيب #الارضيات #الجرانيت #الرخام #السيراميك #الباركيه #اعمال #النجارة #تصنيع #الاخشاب #الابواب #الاثاث #اعمال #القواطع #الخشبية #الجبس #الزجاج #المولات #المعارض #المحلات #مراكز #البيع #الصالونات #مراكز #التجميل #مراكز #العناية #بالجسم #الستاندات #الكيوسك #المكاتب #المطاعم #المقاهي #السكني #فيلل #شقق
Company, CCG ,CCGUAE, Creative ,Concepts ,Interior ,Design , InteriorDesign ,Decoration ,Decor , Fitout , Fitouts ,Fit-outs ,Fit-out ,Turnkey ,contracts ,Renovations ,Maintenance ,REFURBISHMENT ,Renovation,
,location ,AlAin ,AD ,DXB ,AUH ,Dubai ,UAE ,Gulf ,Instagram
,Services ,2D ,Drawings ,3D ,Max ,rendering ,Detailed ,Furniture, ,plan ,layout ,Elevations ,sections ,approvals ,permit ,Facility ,management ,supervision ,Civil ,Works ,Flooring ,false ,ceilings ,Ceiling ,Painting ,gypsum ,aluminum ,Flooring ,granite ,marble ,ceramic ,parquet ,Joinery, works ,Furniture ,Doors ,All ,partitions ,works
Projects ,Mall ,Malls ,Showrooms ,SHOPS ,Retails ,Saloon ,Beauty ,center ,Spa ,Municipality ,Authorities ,Exhibition ,STANDS ,KIOSKS ,Government ,Gov. ,Offices ,Restaurants ,Coffee ,Shops ,Residential ,Villas ,Flats ,Hospital ,Shopping ,center
,أفكار ,إبداعية ,تصميم ,داخلي ,ديكور ,العين ,أعم, الامارات ,التصميم ,الداخلي ,مناظير ,ثردي ,ماكس ,مخططات ,رسومات ,تفصيلية ,المفروشات ,الاثاث ,الواجهات ,المقاطع ,الارضيات ,الاسقف ,موافقات ,المولات ,البلدية ,الهيئات ,المخططات ,الديكورات ,الداخلية ,التشطيبات ,عقود ,تسليم ,المفتاح ,اعادة ,التأهيل ,الصيانة ,الاعمال ,المدنية ,الصبغ ,تركيب ,الاسقف ,المستعارة ,جبس ,المنيوم ,تركيب ,الارضيات ,الجرانيت ,الرخام ,السيراميك ,الباركيه ,اعمال ,النجارة ,تصنيع ,الاخشاب ,الابواب ,الاثاث ,اعمال ,القواطع ,الخشبية ,الجبس ,الزجاج ,المولات ,المعارض ,المحلات ,مراكز ,البيع ,الصالونات ,مراكز ,التجميل ,مراكز ,العناية ,بالجسم ,الستاندات ,الكيوسك ,المكاتب ,المطاعم ,المقاهي ,السكني ,فيلل ,شقق
Find the right local pro for your project
 Greensleeves Landscaping
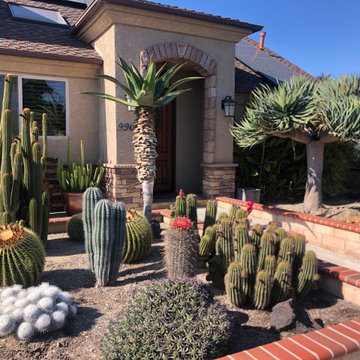
The garden beds are the icing on your cake. With such a huge variety of plant palettes available, consultation is vital. We specialise in drought tolerant plants and gardens which may range from thicker bushier species to more localised succulents and cactus based palettes. Allow our irrigation specialists to determine what, if any, systems may be required before we then design the planting and mulching accordingly. With increasing water costs and state water restrictions this final stage of the design / build is critical.
 Land Design Associates, Inc.
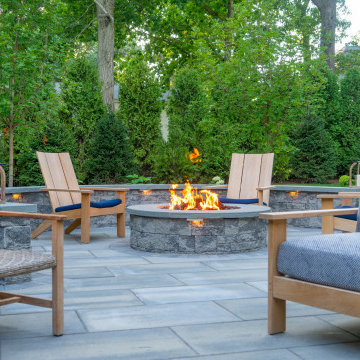
The homeowners of this beautiful Needham home approached our team with the goal of creating an inviting and functional outdoor living space for their young family. After many discussions to determine the exact features that would make this landscape complete, it was time to hit the drawing board. Taking this yard from a blank slate, it was necessary to craft a design with distinct and useful spaces. A lush lawn for the kids to kick around the soccer ball was a must, a toasty gas fire pit surrounded by a large patio for lounging with friends and family was also top of the list for the homeowners. Finally, a grill island for some proper grilling was a necessary and seamless extension of the home.

 Eric N. Rohlfing, ENR architects
The family of a local firefighter purchased a raw 15.7 acre ranch in the woody, rolling hills of Thousand Oaks to build their 4ksf, 1-story home with a view of the valley to the NE beyond. The husband and wife team, with an abundance of energy and fortitude, tackled every hurdle with optimistic determination and persistence, including the myriad of agency regulations, construction supervision, and material selections & purchases.
They came to ENRarchitects with a developed seed of an idea and a manila file full of handmade sketches. Together we continuously refined the ideas and produced the final design, documents and engineering to obtain timely permits and competitive bids from subcontractors and suppliers. The owner’s diligence in research and negotiation paid off significantly in a completed budget that was less than half the typical general contracting rate.
The welcoming home, features 4 bedrooms, 3-1/4 baths, kitchen, laundry & pantry, living, dining & family rooms, office, and a 3-car garage with a stall for the speedboat. With the latest in high-density insulation, foil-backed roof sheathing, energy efficient windows, the energy usage is very low, especially considering a whole house fan keeps the usage of the A/C system to a minimum, and a pellet-burning iron stove supplements the furnace.
The result is a beautiful oasis, perched in the hills, with ever-changing views in every direction.

 Rechsteiner Signature Homes
This transitional home blends a modern aesthetic with a character home in a historic neighborhood of Metro Vancouver. Featuring custom architectural concrete, paving stones, horizontal cedar fencing and siding, backyard metal trellis and a very unique and modern landscape, this home is a perfect space for entertaining.
 White Pebble Interiors
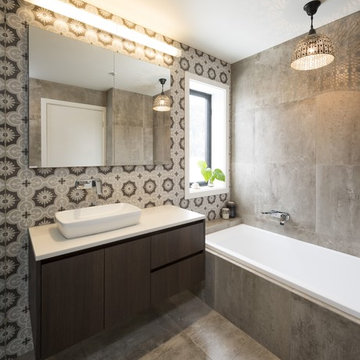
Moroccan inspired bathroom.Best Ecological Sustainable Design winner in Bayside 2015. House & Garden Top 50 rooms 2015. As featured in Australian House & Garden October 2016 & The Herald Sun October 8, 2016. Photo credit: Matthew Mallet
 Talon Construction Inc.
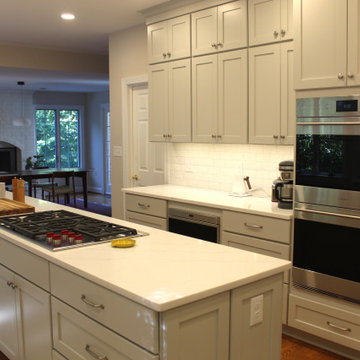
Renovating an open kitchen can be an exciting project that can improve the functionality, aesthetics, and value of your home. Here are some steps to guide you through the process:
Planning and Design:
Define your goals and budget for the renovation.
Determine the layout of your open kitchen. Consider factors like the work triangle (the relationship between the stove, sink, and refrigerator) and the flow of traffic.
Choose a design style and color scheme that suits your preferences and complements the rest of your home.
Research and Inspiration:
Collect inspiration from magazines, websites, and social media platforms to get ideas for your open kitchen design.
Create a mood board or vision board to help you visualize the final look.
Hiring Professionals:
Depending on the scale of your renovation, you may need to hire professionals, such as architects, interior designers, contractors, and electricians. Make sure to check references and get multiple quotes.
Demolition and Structural Work:
If your renovation involves structural changes, like removing walls, this is the time to do it. Ensure that the necessary permits are obtained.
Plumbing and Electrical Work:
Update or reconfigure plumbing and electrical systems as needed. This may include adding or moving outlets, switches, and lighting fixtures.
Cabinetry and Countertops:
Choose and install new kitchen cabinets and countertops. This is a significant part of your renovation and will greatly influence the kitchen's appearance and functionality.
Appliances:
Update or install new kitchen appliances, including the refrigerator, stove, oven, microwave, and dishwasher.
Flooring:
Select and install flooring that is suitable for a kitchen, such as hardwood, tile, laminate, or vinyl. Ensure it complements the overall design.
Backsplash and Wall Finishes:
Install a backsplash that matches your design and protects your walls. Consider materials like tile, glass, or stainless steel.
Lighting:
Choose and install various types of lighting, including ambient, task, and accent lighting. Pendant lights above an island or breakfast bar can add style and functionality.
Paint and Finishing Touches:
Paint the walls and ceiling in the colors you've selected. Add finishing touches like hardware, window treatments, and decorative elements.
Furniture and Accessories:
Bring in furniture, such as a dining table and chairs, barstools, and any other pieces you need to complete the space. Decorate with accessories like artwork, plants, and decorative items.
Final Inspection and Cleanup:
Ensure that all work meets safety and building code requirements. Clean the entire area thoroughly.
Enjoy Your New Kitchen:
Once the renovation is complete and everything is in its place, enjoy your beautiful, functional open kitchen.
Remember that open kitchen renovations can be complex and may require careful planning. It's essential to stay within your budget, communicate with your contractors and designers, and be flexible as unexpected issues may arise during the process. Ultimately, a well-executed open kitchen renovation can enhance the heart of your home and improve your overall living space.
 Darlene Shaw Design Inc.
kwestimages.com
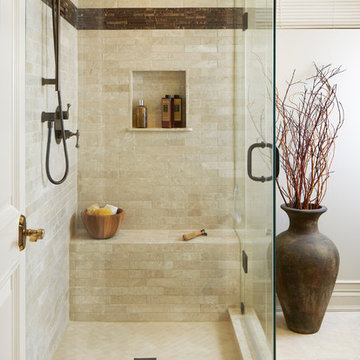
Inspiration for a transitional beige tile bathroom remodel in Toronto with a niche
Inspiration for a transitional beige tile bathroom remodel in Toronto with a niche
 Talon Construction Inc.
Designing and building a kitchen addition is a complex process that involves multiple steps and considerations. Here is a general outline to help you get started on your kitchen addition project:
Define Your Goals and Budget:
• Determine the purpose of the kitchen addition. Is it for more cooking space, a dining area, or a combination of both?
• Establish a realistic budget for your project. Consider all costs, including construction, permits, materials, and furnishings.
Hire a Design Professional:
• Seek the services of a design build company who specializes in kitchen additions.
• Discuss your vision, needs, and budget with the design professional to create a design concept.
Site Evaluation:
• Assess the existing space and structural condition of your home to ensure it can support the addition.
• Consider factors like zoning regulations, setbacks, and building codes.
Design Development:
• Collaborate with your design professional to refine the concept, including the layout, size, and architectural style.
• Choose materials, finishes, and fixtures that fit your design and budget.
Obtain Permits:
• Consult with your local design build contractor to determine the necessary permits and approvals.
• Prepare and submit all required documents, including architectural drawings and engineering plans.
Create Construction Documents:
• Work with your design build professional to develop detailed construction drawings and specifications.
• These documents will serve as a guide for contractors during construction.
Hire a design build contractor:
• Check references, credentials, and licenses before selecting a contractor.
• Sign a detailed contract that outlines the scope of work, timeline, and payment schedule.
Construction Phase:
• Demolition: If needed, remove any existing structures or walls.
• Foundation: Construct the foundation for the addition.
• Framing: Build the structural framework of the addition.
• Plumbing, Electrical, and HVAC: Install or update utilities as required.
• Insulation: Ensure proper insulation for energy efficiency.
• Drywall and Finish Work: Complete the walls and ceilings.
• Flooring and Cabinetry: Install flooring and kitchen cabinets.
• Appliances and Fixtures: Add appliances, plumbing fixtures, and lighting.
• Paint and Finish: Apply paint and finishes to achieve the desired look.
• Final Inspection: Schedule inspections to ensure compliance with building codes.
Final Inspections and Approvals:
• Arrange for final inspections to ensure the addition meets all safety and code requirements.
• Obtain any necessary certificates of occupancy or compliance.
Move In and Enjoy:
• Once all inspections and approvals are received, you can move into your new kitchen addition and start enjoying it.
Remember that every kitchen addition project is unique, so adapt this outline to your specific needs and circumstances. Consulting with professionals and obtaining the required permits and inspections is crucial to a successful and safe project.
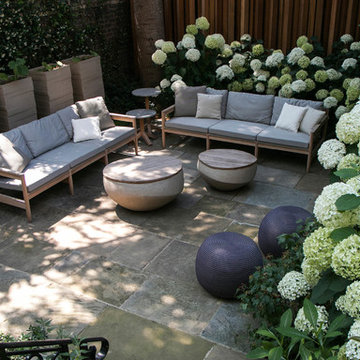
 Stefano Marinaz Landscape Architecture
19 July 2016 -
Plants: Hydrangea arborescens 'Annabelle', Trachelospermum jasminoides, Ficus carica
- Stefano Marinaz Landscape Architecture
Example of a minimalist patio design in Other
Example of a minimalist patio design in Other

 Father & Son Construction
The City approved our Final Inspection and Bill said that we would be back in the Fall to reshingle the roof on the front of his home. After a few minutes of discussion, he was just concerned about the moss that was on his shingles. After looking at everything, it was determined that he could just have the roof "washed" to take care of the moss instead of going through the expense of the replacement of the shingles. We even provided a name of a Company that does that type of work. He said "That is why Mom & Dad loved working with you all...you are honest people".
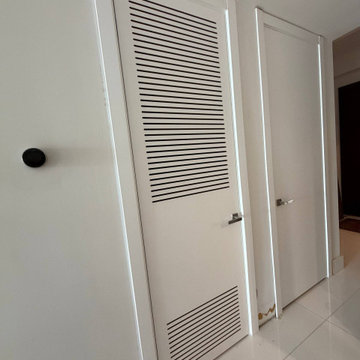
 United Porte Inc
Our Double Barn Doors come in a stunning shade of White. A paradigm of elegance and minimalism, these doors blend seamlessly with your existing decor, adding a touch of sophistication and style. They believe in the saying that 'less is more,' and these doors perfectly encapsulate that spirit.
The Perfect Balance
In design, achieving harmony through a balance of contrasts is a treasured accomplishment. This notion is echoed explicitly in our Double Barn Doors. While the Color Palette is predominantly white, the doors are complemented by a handsome Black Rail. This combination is a testament to a well-balanced palette that never fails to impress.
Essence of Simplicity
Our Double Barn Doors perfectly blend practicality with simplicity. They circumvent the complexity of adding glass elements and instead, focus on providing a robust and hassle-free solution to your interior door needs.
The Mark of Quality
When you buy interior doors from us, you can be assured of impeccable quality. Each door is meticulously crafted and checked for quality to ensure it not only meets but exceeds your expectations.
We hold ourselves to an exceptionally high standard, and our Double Barn Doors are a reflection of our dedication to providing top-quality components to discerning homeowners.
Discover the mark of quality by choosing our Double Barn Doors for your home. Experience the tangible difference they can make in elevating your space from ordinary to extraordinary.
Take The Step Today
So, why wait? Elevate your living space with the addition of stunning Double Barn Doors. Bring in the perfect balance between style and functionality by making a change that will truly distinguish your home.
Order and buy doors from us today and rest assured, your home will be better for it. With a streamlined process and a commitment to providing only the best, we assure you of a home transformation that is nothing short of amazing.
A Final Note
We specialize in providing high-quality doors that are more than just functional installations. We provide timeless creations that serve to enhance the beauty and charm of your home. This philosophy coupled with our determination to serve you in the best way possible sets us apart. Choose us for a world-class door buying experience and make a statement with your doors today.
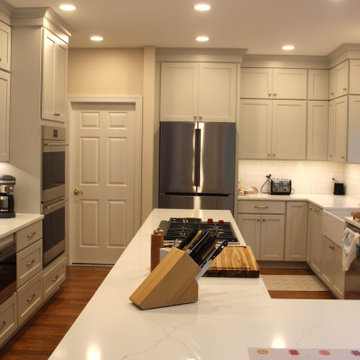 Talon Construction Inc.
Renovating an open kitchen can be an exciting project that can improve the functionality, aesthetics, and value of your home. Here are some steps to guide you through the process:
Planning and Design:
Define your goals and budget for the renovation.
Determine the layout of your open kitchen. Consider factors like the work triangle (the relationship between the stove, sink, and refrigerator) and the flow of traffic.
Choose a design style and color scheme that suits your preferences and complements the rest of your home.
Research and Inspiration:
Collect inspiration from magazines, websites, and social media platforms to get ideas for your open kitchen design.
Create a mood board or vision board to help you visualize the final look.
Hiring Professionals:
Depending on the scale of your renovation, you may need to hire professionals, such as architects, interior designers, contractors, and electricians. Make sure to check references and get multiple quotes.
Demolition and Structural Work:
If your renovation involves structural changes, like removing walls, this is the time to do it. Ensure that the necessary permits are obtained.
Plumbing and Electrical Work:
Update or reconfigure plumbing and electrical systems as needed. This may include adding or moving outlets, switches, and lighting fixtures.
Cabinetry and Countertops:
Choose and install new kitchen cabinets and countertops. This is a significant part of your renovation and will greatly influence the kitchen's appearance and functionality.
Appliances:
Update or install new kitchen appliances, including the refrigerator, stove, oven, microwave, and dishwasher.
Flooring:
Select and install flooring that is suitable for a kitchen, such as hardwood, tile, laminate, or vinyl. Ensure it complements the overall design.
Backsplash and Wall Finishes:
Install a backsplash that matches your design and protects your walls. Consider materials like tile, glass, or stainless steel.
Lighting:
Choose and install various types of lighting, including ambient, task, and accent lighting. Pendant lights above an island or breakfast bar can add style and functionality.
Paint and Finishing Touches:
Paint the walls and ceiling in the colors you've selected. Add finishing touches like hardware, window treatments, and decorative elements.
Furniture and Accessories:
Bring in furniture, such as a dining table and chairs, barstools, and any other pieces you need to complete the space. Decorate with accessories like artwork, plants, and decorative items.
Final Inspection and Cleanup:
Ensure that all work meets safety and building code requirements. Clean the entire area thoroughly.
Enjoy Your New Kitchen:
Once the renovation is complete and everything is in its place, enjoy your beautiful, functional open kitchen.
Remember that open kitchen renovations can be complex and may require careful planning. It's essential to stay within your budget, communicate with your contractors and designers, and be flexible as unexpected issues may arise during the process. Ultimately, a well-executed open kitchen renovation can enhance the heart of your home and improve your overall living space.
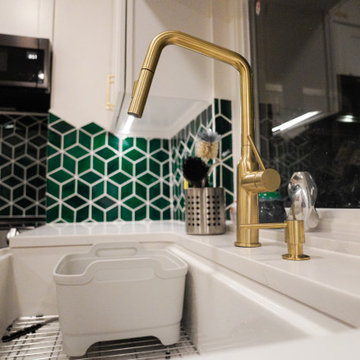
 Novu Designs
Our goal is to make your kitchen remodel as comfortable as possible. After establishing rapport with our client, we used our ingenuity to redesign and build their ideal kitchen in this stunning 10-foot-ceiling Brooklyn home. The warm tones of wood, quartz, and rich greens strike the ideal balance in creating this appealing design.
How did we achieve this look?
The Backsplash
Our client wanted a simple kitchen remodel in the shaker design, but she also wanted to include green. Initially, we proposed green cabinets to create a bold green look in the kitchen. The main objective was to incorporate our complimenting colors while keeping a feeling of lightness. After going through a number of ideas and 3D prototypes, installing as many cabinets as we could without overpowering the kitchen was our goal of optimizing space. We determined that the best way to brighten the space would be to install white shaker cabinets in addition to higher lumen recessed LED lighting. We decided that finding exquisite green backsplash tiles would be the best way to give it the desired green pop. After numerous searches, we came across a company called Mercury Mosaics.
While there were many green backsplash tiles to choose from, we opted for the mercury mosaics bluegrass diamond tiles. We loved these tiles because its created an illusion of cubes but at times, diamonds. The pattern is an art of illusion and its really gave us the personality we were looking for.
The Flooring of Choice
The flooring of choice was made by our client. We wanted the floors to feel soft and natural while capturing every bit of warmth to balance the whites and the greens and bring them together. While we could’ve opted for wood look tiles or luxury vinyl plank flooring, we ended up going with a premium slightly distressed white oak engineered hardwood flooring from Floor and Decor.
Accents
Although the flooring and the backsplash brought most of the kitchen together, we were still missing the cherry on top. The hardware and maybe something else?
We decided on thin profiled brushed brass hardware to give us that luxurious feel we were looking for every time we opened the cabinet. The cherry on top for us were the hand made quarter round oak shelves which really tied in the floors and cabinets together and gave us that final pop we were looking for. It truly added the perfect character for our client who is also a teen-fiction author of multiple books.
 Talon Construction Inc.
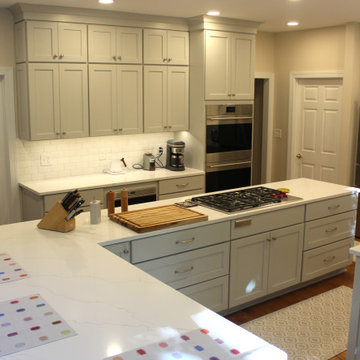
Renovating an open kitchen can be an exciting project that can improve the functionality, aesthetics, and value of your home. Here are some steps to guide you through the process:
Planning and Design:
Define your goals and budget for the renovation.
Determine the layout of your open kitchen. Consider factors like the work triangle (the relationship between the stove, sink, and refrigerator) and the flow of traffic.
Choose a design style and color scheme that suits your preferences and complements the rest of your home.
Research and Inspiration:
Collect inspiration from magazines, websites, and social media platforms to get ideas for your open kitchen design.
Create a mood board or vision board to help you visualize the final look.
Hiring Professionals:
Depending on the scale of your renovation, you may need to hire professionals, such as architects, interior designers, contractors, and electricians. Make sure to check references and get multiple quotes.
Demolition and Structural Work:
If your renovation involves structural changes, like removing walls, this is the time to do it. Ensure that the necessary permits are obtained.
Plumbing and Electrical Work:
Update or reconfigure plumbing and electrical systems as needed. This may include adding or moving outlets, switches, and lighting fixtures.
Cabinetry and Countertops:
Choose and install new kitchen cabinets and countertops. This is a significant part of your renovation and will greatly influence the kitchen's appearance and functionality.
Appliances:
Update or install new kitchen appliances, including the refrigerator, stove, oven, microwave, and dishwasher.
Flooring:
Select and install flooring that is suitable for a kitchen, such as hardwood, tile, laminate, or vinyl. Ensure it complements the overall design.
Backsplash and Wall Finishes:
Install a backsplash that matches your design and protects your walls. Consider materials like tile, glass, or stainless steel.
Lighting:
Choose and install various types of lighting, including ambient, task, and accent lighting. Pendant lights above an island or breakfast bar can add style and functionality.
Paint and Finishing Touches:
Paint the walls and ceiling in the colors you've selected. Add finishing touches like hardware, window treatments, and decorative elements.
Furniture and Accessories:
Bring in furniture, such as a dining table and chairs, barstools, and any other pieces you need to complete the space. Decorate with accessories like artwork, plants, and decorative items.
Final Inspection and Cleanup:
Ensure that all work meets safety and building code requirements. Clean the entire area thoroughly.
Enjoy Your New Kitchen:
Once the renovation is complete and everything is in its place, enjoy your beautiful, functional open kitchen.
Remember that open kitchen renovations can be complex and may require careful planning. It's essential to stay within your budget, communicate with your contractors and designers, and be flexible as unexpected issues may arise during the process. Ultimately, a well-executed open kitchen renovation can enhance the heart of your home and improve your overall living space.

 Windy City Painters
Painter Near Me Chicago - Professional Painting Services by Windy City Painters
Finding a skilled painter near me in Chicago is easier when you know what to look for, and Windy City Painters delivers the craftsmanship Chicago homeowners trust for greystones, vintage two-flats, classic bungalows, and modern condos throughout the city.
Project Overview
This project showcases Windy City Painters completing professional interior and exterior painting services for a Chicago-area client. The building's vintage character called for careful color selection and precise application to honor original architectural details while refreshing every surface.
Materials and Products Used
Windy City Painters selects premium paints from trusted manufacturers including Sherwin-Williams and Benjamin Moore, chosen specifically for Chicago's climate demands. Primers, fillers, and caulks are all professional-grade for lasting adhesion and durability.
Our Step-by-Step Process
Step 1 - Prep and Repairs: All surfaces are cleaned, sanded, and patched. Cracks in plaster or drywall are filled and feathered smooth before any painting begins.
Step 2 - Priming: A quality primer is applied to ensure proper adhesion, uniform sheen, and long-term durability across all surfaces.
Step 3 - Paint Application: Multiple coats are applied using the right tools for each surface - brushes, rollers, and sprayers where appropriate.
Step 4 - Final Inspection: Windy City Painters conducts a detailed walkthrough with the homeowner to confirm every detail meets our high standard.
Chicago-Specific Challenges
Older Chicago homes present unique challenges including lead paint layers, aging horsehair plaster, moisture from harsh winters, and intricate vintage millwork. Windy City Painters is trained to handle all of these safely and professionally.
Results
Clients consistently report dramatic improvements in curb appeal, interior atmosphere, and overall home value after working with Windy City Painters.
Pro Tips Before You Start
Always test for lead paint in homes built before 1978. Budget for surface prep - it determines final quality. Choose paints rated for Chicago's freeze-thaw cycles for exterior projects.
See more work and request a free estimate at windypainters.com.
Frequently Asked Questions
Q: How do I find a reliable painter near me in Chicago? / A: Look for licensed, insured contractors with strong local reviews. Windy City Painters is a trusted painter near me in Chicago with a proven track record serving greystones, bungalows, and vintage buildings throughout the city.
Q: What surfaces can a painter near me in Chicago handle? / A: Windy City Painters handles drywall, plaster, wood trim, cabinets, brick, and metal surfaces, making us a comprehensive painter near me in Chicago for any project large or small.
Q: How important is surface preparation? / A: Proper preparation is the foundation of any quality paint job. As your painter near me in Chicago, Windy City Painters dedicates significant time to prep work ensuring flawless, long-lasting results every time.
Q: Do you handle lead paint safely in older Chicago homes? / A: Yes, Windy City Painters follows all safety protocols for lead paint in older homes, making us the responsible painter near me in Chicago for vintage and pre-1978 buildings.
Q: What paint brands does Windy City Painters recommend? / A: As a professional painter near me in Chicago, Windy City Painters recommends Sherwin-Williams and Benjamin Moore for their durability, color accuracy, and performance in Chicago's demanding climate.
Q: Can you paint exterior surfaces in Chicago winters? / A: Exterior painting requires temperatures above 50 degrees Fahrenheit. Windy City Painters, your painter near me in Chicago, schedules exterior projects during appropriate seasonal windows for best results.
Q: How many coats of paint are typically needed? / A: Most projects require two finish coats over primer. Your painter near me in Chicago at Windy City Painters assesses each surface individually to determine the right number of coats.
Q: Do you offer color consultation services? / A: Yes, Windy City Painters provides color guidance as part of our painter near me in Chicago service, helping you select shades that complement your home's architecture and style.
Q: Can Windy City Painters match existing paint colors? / A: Absolutely, as your skilled painter near me in Chicago, Windy City Painters uses professional color-matching technology to seamlessly blend new paint with existing finishes throughout your home.
Q: How do I get a free estimate from a painter near me in Chicago? / A: Simply visit windypainters.com or call us directly. Windy City Painters makes it easy to connect with a professional painter near me in Chicago for a no-obligation estimate.
 Talon Construction Inc.
Designing and building a kitchen addition is a complex process that involves multiple steps and considerations. Here is a general outline to help you get started on your kitchen addition project:
Define Your Goals and Budget:
• Determine the purpose of the kitchen addition. Is it for more cooking space, a dining area, or a combination of both?
• Establish a realistic budget for your project. Consider all costs, including construction, permits, materials, and furnishings.
Hire a Design Professional:
• Seek the services of a design build company who specializes in kitchen additions.
• Discuss your vision, needs, and budget with the design professional to create a design concept.
Site Evaluation:
• Assess the existing space and structural condition of your home to ensure it can support the addition.
• Consider factors like zoning regulations, setbacks, and building codes.
Design Development:
• Collaborate with your design professional to refine the concept, including the layout, size, and architectural style.
• Choose materials, finishes, and fixtures that fit your design and budget.
Obtain Permits:
• Consult with your local design build contractor to determine the necessary permits and approvals.
• Prepare and submit all required documents, including architectural drawings and engineering plans.
Create Construction Documents:
• Work with your design build professional to develop detailed construction drawings and specifications.
• These documents will serve as a guide for contractors during construction.
Hire a design build contractor:
• Check references, credentials, and licenses before selecting a contractor.
• Sign a detailed contract that outlines the scope of work, timeline, and payment schedule.
Construction Phase:
• Demolition: If needed, remove any existing structures or walls.
• Foundation: Construct the foundation for the addition.
• Framing: Build the structural framework of the addition.
• Plumbing, Electrical, and HVAC: Install or update utilities as required.
• Insulation: Ensure proper insulation for energy efficiency.
• Drywall and Finish Work: Complete the walls and ceilings.
• Flooring and Cabinetry: Install flooring and kitchen cabinets.
• Appliances and Fixtures: Add appliances, plumbing fixtures, and lighting.
• Paint and Finish: Apply paint and finishes to achieve the desired look.
• Final Inspection: Schedule inspections to ensure compliance with building codes.
Final Inspections and Approvals:
• Arrange for final inspections to ensure the addition meets all safety and code requirements.
• Obtain any necessary certificates of occupancy or compliance.
Move In and Enjoy:
• Once all inspections and approvals are received, you can move into your new kitchen addition and start enjoying it.
Remember that every kitchen addition project is unique, so adapt this outline to your specific needs and circumstances. Consulting with professionals and obtaining the required permits and inspections is crucial to a successful and safe project.
 United Porte Inc
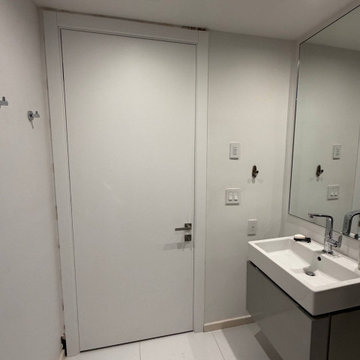
Our Double Barn Doors come in a stunning shade of White. A paradigm of elegance and minimalism, these doors blend seamlessly with your existing decor, adding a touch of sophistication and style. They believe in the saying that 'less is more,' and these doors perfectly encapsulate that spirit.
The Perfect Balance
In design, achieving harmony through a balance of contrasts is a treasured accomplishment. This notion is echoed explicitly in our Double Barn Doors. While the Color Palette is predominantly white, the doors are complemented by a handsome Black Rail. This combination is a testament to a well-balanced palette that never fails to impress.
Essence of Simplicity
Our Double Barn Doors perfectly blend practicality with simplicity. They circumvent the complexity of adding glass elements and instead, focus on providing a robust and hassle-free solution to your interior door needs.
The Mark of Quality
When you buy interior doors from us, you can be assured of impeccable quality. Each door is meticulously crafted and checked for quality to ensure it not only meets but exceeds your expectations.
We hold ourselves to an exceptionally high standard, and our Double Barn Doors are a reflection of our dedication to providing top-quality components to discerning homeowners.
Discover the mark of quality by choosing our Double Barn Doors for your home. Experience the tangible difference they can make in elevating your space from ordinary to extraordinary.
Take The Step Today
So, why wait? Elevate your living space with the addition of stunning Double Barn Doors. Bring in the perfect balance between style and functionality by making a change that will truly distinguish your home.
Order and buy doors from us today and rest assured, your home will be better for it. With a streamlined process and a commitment to providing only the best, we assure you of a home transformation that is nothing short of amazing.
A Final Note
We specialize in providing high-quality doors that are more than just functional installations. We provide timeless creations that serve to enhance the beauty and charm of your home. This philosophy coupled with our determination to serve you in the best way possible sets us apart. Choose us for a world-class door buying experience and make a statement with your doors today.
9