
Search results for "Double pencil edge" in Home Design Ideas
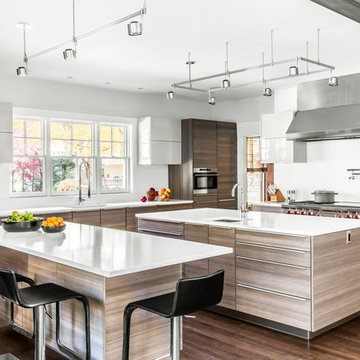
 LDa Architecture & Interiors
TEAM
Architect: LDa Architecture & Interiors
/// Interior Design: Emilie Tucker
/// Builder: Macomber Carpentry & Construction
/// Landscape Architect: Michelle Crowley Landscape Architecture
/// Photographer: Sean Litchfield Photography
 Alair Homes Plano
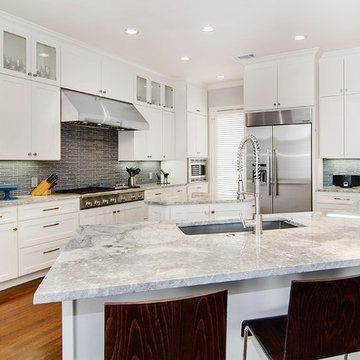
This kitchen had a unique goal, the clients wanted to recreate a dream kitchen from a house they had sold. Careful planning, strategic finish out and customized options gave way to a beautiful kitchen that the clients love which both blends to the current home and matches to the style and class of their prior kitchen! Floorplan design by Chad Hatfield, CR, CKBR. Interior Design by Lindy Jo Crutchfield, Allied ASID, our on staff designer. Photography by Lauren Brown of Versatile Imaging.
 Remodeling Designs, Inc.
©2014 Daniel Feldkamp, Visual Edge Imaging Studios
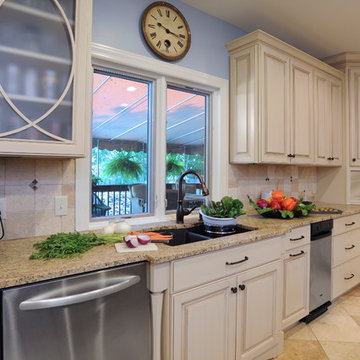
Large elegant l-shaped porcelain tile enclosed kitchen photo in Other with a double-bowl sink, raised-panel cabinets, light wood cabinets, granite countertops, beige backsplash, stone tile backsplash, stainless steel appliances and an island
Large elegant l-shaped porcelain tile enclosed kitchen photo in Other with a double-bowl sink, raised-panel cabinets, light wood cabinets, granite countertops, beige backsplash, stone tile backsplash, stainless steel appliances and an island
Find the right local pro for your project
 River Valley Landscapes
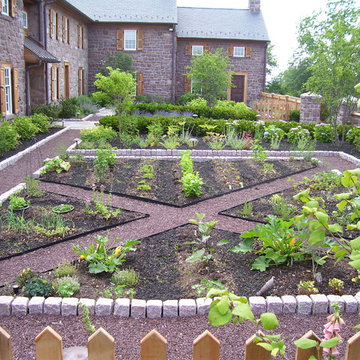
 This project presented unique opportunities that are not often found in residential landscaping. The homeowners were not only restoring their 1840's era farmhouse, a piece of their family’s history, but also enlarging and updating the home for modern living. The landscape designers continued this idea by creating a space that is a modern day interpretation of an 1840s era farm rather then a strict recreation. The resulting design combines elements of farm living from that time, as well as acknowledging the property’s history as a horse farm, with staples of 21st century landscapes such as space for outdoor living, lighting, and newer plant varieties.
Guests approach from the main driveway which winds through the property and ends at the main barn. There is secondary gated driveway just for the homeowners. Connected to this main driveway is a narrower gravel lane which leads directly to the residence. The lane passes near fruit trees planted in broken rows to give the illusion that they are the remains of an orchard that once existed on the site. The lane widens at the entrance to the gardens where there is a hitching post built into the fence that surrounds the gardens and a watering trough. The widened section is intended as a place to park a golf cart or, in a nod to the home’s past, tie up horses before entering. The gravel lane passes between two stone pillars and then ends at a square gravel court edged in cobblestones. The gravel court transitions into a wide flagstone walk bordered with yew hedges and lavender leading to the front door.
Directly to the right, upon entering the gravel court, is located a gravel and cobblestone edged walk leading to a secondary entrance into the residence. The walk is gated where it connects with the gravel court to close it off so as not to confuse visitors and guests to the main residence and to emphasize the primary entrance. An area for a bench is provided along this walk to encourage stopping to view and enjoy the gardens.
On either side of the front door, gravel and cobblestone walks branch off into the garden spaces. The one on the right leads to a flagstone with cobblestone border patio space. Since the home has no designated backyard like most modern suburban homes the outdoor living space had to be placed in what would traditionally be thought of as the front of the house. The patio is separated from the entrance walk by the yew hedge and further enclosed by three Amelanchiers and a variety of plantings including modern cultivars of old fashioned plants such as Itea and Hydrangea. A third entrance, the original front door to the 1840’s era section, connects to the patio from the home’s kitchen, making the space ideal for outdoor dining.
The gravel and cobblestone walk branching off to the left of the front door leads to the vegetable and perennial gardens. The idea for the vegetable garden was to recreate the tradition of a kitchen garden which would have been planted close to the residence for easy access. The vegetable garden is surrounded by mixed perennial beds along the inside of the wood picket fence which surrounds the entire garden space. Another area designated for a bench is provided here to encourage stopping and viewing. The home’s original smokehouse, completely restored and used as a garden shed, provides a strong architectural focal point to the vegetable garden. Behind the smokehouse is planted lilacs and other plants to give mass and balance to the corner and help screen the garden from the neighboring subdivision. At the rear corner of the garden a wood arbor was constructed to provide a structure on which to grow grapes or other vines should the homeowners choose to.
The landscape and gardens for this restored farmhouse and property are a thoughtfully designed and planned recreation of a historic landscape reinterpreted for modern living. The idea was to give a sense of timelessness when walking through the gardens as if they had been there for years but had possibly been updated and rejuvenated as lifestyles changed. The attention to materials and craftsmanship blend seamlessly with the residence and insure the gardens and landscape remain an integral part of the property. The farm has been in the homeowner’s family for many years and they are thrilled at the results and happy to see respect given to the home’s history and to its meticulous restoration.
 Alair Homes Arlington
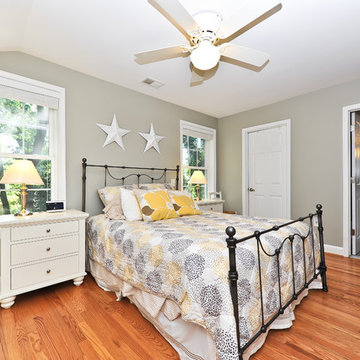
Addition and whole house renovation to 1940's Arlington colonial home; doubling the square-footage. Includes new Kraftmaid Cabinets, new appliances, new dining area, new living room area, full basement playroom, new master, and new guest room.
 Glas Associates
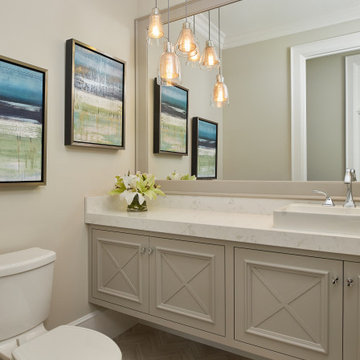
A beige powder room with beautiful multi light pendant and floating vanity
Photo by Ashley Avila Photography
Mid-sized elegant marble floor, gray floor and vaulted ceiling powder room photo in Grand Rapids with furniture-like cabinets, beige cabinets, a one-piece toilet, a vessel sink, quartz countertops, white countertops and a floating vanity
Mid-sized elegant marble floor, gray floor and vaulted ceiling powder room photo in Grand Rapids with furniture-like cabinets, beige cabinets, a one-piece toilet, a vessel sink, quartz countertops, white countertops and a floating vanity
 SRCI Design Build
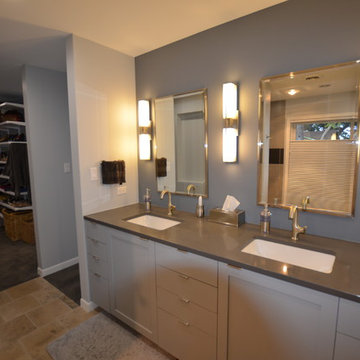
-Paint: Ceiling: Sherwin Williams Bright White/ flat. Walls: Sherwin Williams Gray Screen/eg-shell. Trim: Sherwin Williams Extra White/ semi gloss. Wall behind Vanity: Sherwin Williams Software/eg-shell.
-Vanity Lights: Eurostyle Lighting/ Possini Euro Midtown. #MU2M681/ satin Nickle. Dimmer w/ white LED bulb.
-Cabinets: Mokett. Sherwin Williams Network Gray/ semi glass. satin nickel.
-Counter tops: Sile stone. Cemento. pencil Edge. 3cm.
-Tile: Floors, Dal Tile Limestone. Juraston Gray-Blue L712. 12x12. Patter, Broken joint. Grout: Delorean gray.
-Glass: 24x36 Restoration Hardware Traditional Wall Mirror. Satin nickel.
-Sink: Kohler Ladena K-2214. Undermount, white. 18x12.
-Vanity Valves: Moen Fina S41707BN. Brushed nickel, single hole.
Steve Reitz Company, Inc.

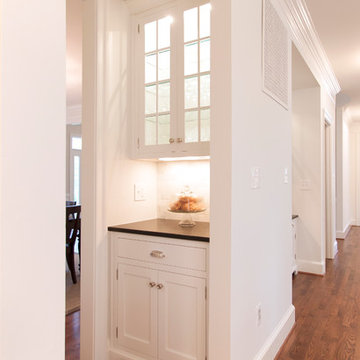

 Warren Techentin Architecture
Nick Cope
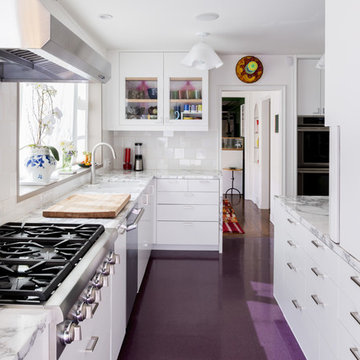
Inspiration for a large transitional l-shaped kitchen remodel in Los Angeles with glass-front cabinets, white cabinets, marble countertops, stainless steel appliances and no island
Inspiration for a large transitional l-shaped kitchen remodel in Los Angeles with glass-front cabinets, white cabinets, marble countertops, stainless steel appliances and no island
 TimeLine Renovations Inc.
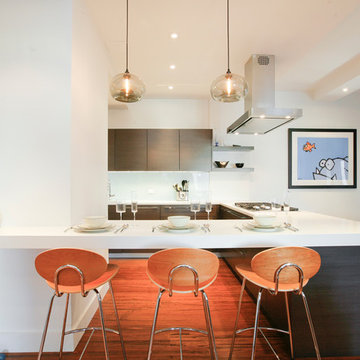
Going house hunting to find the dream home is difficult in every aspect, especially in NYC. The first apartment may have a feature that the other has but very rarely will one place have all. Most important is making sure the location and size works and everything else can be incorporated later. As the apartment our clients selected was "move in" condition its surely was not for what they work looking for in creating their dream home. We first started by creating a "wish list" of all of the essentials, which included; open kitchen, walk in closet, office space , larger master bathroom with stand up shower and soaking tub. With creating many different floor plan options, the only way we would achieve this was by sacrificing the 3rd bedroom. At this stage the 3rd bedroom was very easy for them to sacrifice as it gave them all of the wish list for now. In the future ,they could easily take the square footage from the new oversized living room and add that 3rd bedroom if it were necessary. Our first goal in the demolition stage was to remove all existing interior partition walls and start with a fresh new slate. By removing the existing kitchen walls the New Kitchen layout now combines it with the living room. The cabinetry is 2 tone color, flat slab doors for the modern look. State of the art appliances were installed; Integrated panels were installed on the fridge, wall oven, microwave, cook top. The sink is the ultimate chefs prep station sliding butcher block with bowls that slide over the sink. A garage cabinet was installed to conceal smaller appliances. The cantilever counter top adds the additional seating space for guests while keeping the bottom portion open for the view. The existing walk in closet was relocated to achieve the New Master Bathroom, Combining the spaces now gave us the option to add all the features. Floating vanity with double sinks, soaking tub, stand up shower. The glossy rectified tiles used are 12x36 and when installed make the grout line disappear and make it look like a solid wall. The chocolate floor tiles are randomly staggered then wrap up the tub platform and continue up one wall to create an accent. No tile edge was used but all tiles that meet on a 90 degree outside corner are mitered; tub platform, walls and shower niches. Heated floors were installed to keep the feet warm on the cold winter days. In the Master Bedroom we built a bed frame accent wall. Serves for multiple functions; eliminates night stands by using the niches for alarm clock / phone charger station, lights were added inside the niches for accent lights and raised wall paper was used to finish this beautiful feature. Each his and hers niche has an outlet, 4 way switch for the accent lights and 4 way switch for the recessed lights above when they are done reading in bed. Custom steps were built for easy up and down off the bed for the little puppies that could not possibly make the jump up. Other features throughout the apartment include; New bamboo floors throughout. Since the concrete ceiling slab cannot be chopped , soffits and drop ceilings were built throughout the apartment to accommodate recessed lights. Low voltage recessed lights were used with multiple zone dimmers for energy efficiency. Remote operated shades were installed The overall design was for the apartment was modern, simple lines and true elegance. The newly renovated apartment will be enjoyed by them, friends and family for many years to come...
edit
 Infinity Pools of Texas
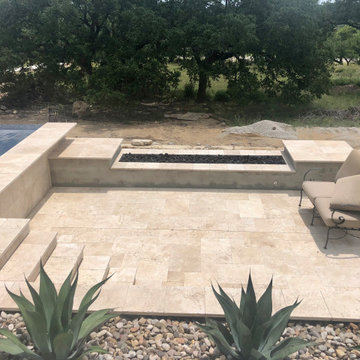
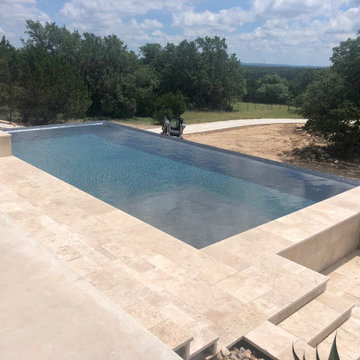
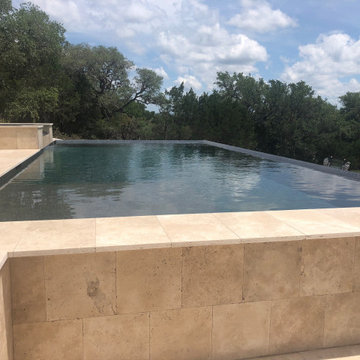
A double vanishing edge on this pool and the clean lines make this a modern, yet classic pool design. The spa also features an infinity edge spillway. This whole pool is wrapped in beautiful travertine. Plus a sunk-in patio that creates a bar area, along with the fire feature!
 CO Interiors
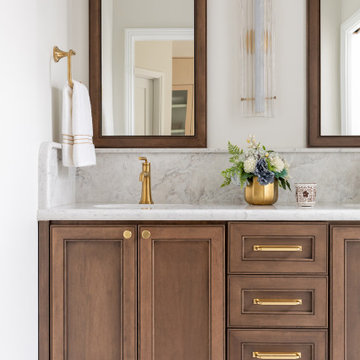
This custom bathroom vanity was designed to feel rich, luxurious, and timeless through a carefully layered combination of warm materials, tailored detailing, and elevated craftsmanship.
The vanity cabinetry features a rich dark brown stain applied to a custom double-beaded shaker profile, adding depth, sophistication, and a furniture-like quality to the space. Bright brass hardware and luxurious brass plumbing fixtures introduce warmth and refinement, creating a striking contrast against the darker wood tones while enhancing the overall sense of elegance.
A honed quartz countertop and backsplash bring softness and subtle movement to the design. To further elevate the space, the backsplash was extended to 8 inches high — double the standard height — creating a more custom and luxurious feel while also providing added durability and visual impact. The backsplash edge was finished with a gentle curve detail that softens the linearity of the vanity and adds another thoughtful layer of craftsmanship.
Above the vanity, custom medicine cabinets were designed to seamlessly coordinate with the vanity cabinetry, creating a cohesive and integrated architectural look. Tall proportions, layered lighting, and reflective surfaces help the room feel bright, balanced, and elevated while maintaining a timeless aesthetic that will endure for years to come.
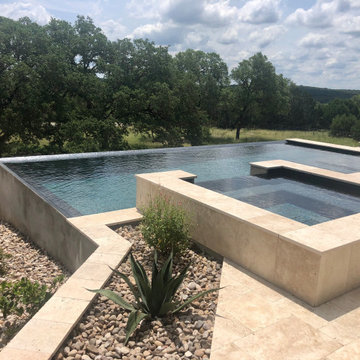 Infinity Pools of Texas
A double vanishing edge on this pool and the clean lines make this a modern, yet classic pool design. The spa also features an infinity edge spillway. This whole pool is wrapped in beautiful travertine. Plus a sunk-in patio that creates a bar area, along with the fire feature!

 Infinity Pools of Texas
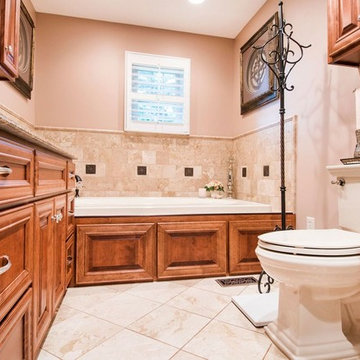
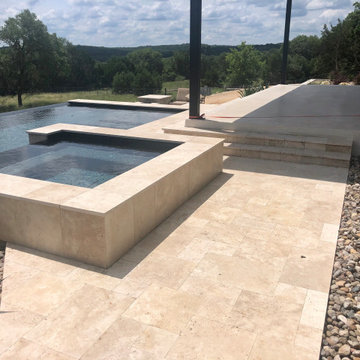
A double vanishing edge on this pool and the clean lines make this a modern, yet classic pool design. The spa also features an infinity edge spillway. This whole pool is wrapped in beautiful travertine. Plus a sunk-in patio that creates a bar area, along with the fire feature!
 Infinity Pools of Texas
A double vanishing edge on this pool and the clean lines make this a modern, yet classic pool design. The spa also features an infinity edge spillway. This whole pool is wrapped in beautiful travertine. Plus a sunk-in patio that creates a bar area, along with the fire feature!
 Infinity Pools of Texas
A double vanishing edge on this pool and the clean lines make this a modern, yet classic pool design. The spa also features an infinity edge spillway. This whole pool is wrapped in beautiful travertine. Plus a sunk-in patio that creates a bar area, along with the fire feature!
 StoneWorks, Inc.
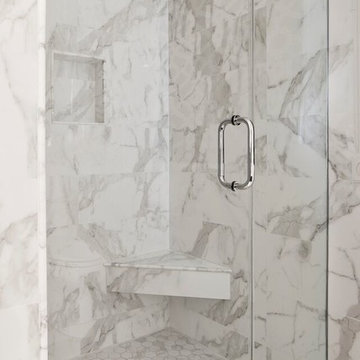
This walk-in shower in the Master Bath features glazed porcelain tile, 10 x 24 large format size for the walls and a 2” hex tile shower floor. Looking closely, we see the edges of the niche, rolled front of the step-in and shower seat - these pencil liners complete the look, in Calacatta Gold Marble! The beauty is in the details.

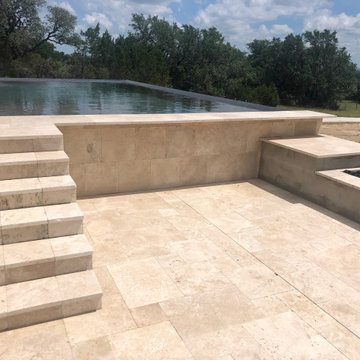 Infinity Pools of Texas
A double vanishing edge on this pool and the clean lines make this a modern, yet classic pool design. The spa also features an infinity edge spillway. This whole pool is wrapped in beautiful travertine. Plus a sunk-in patio that creates a bar area, along with the fire feature!
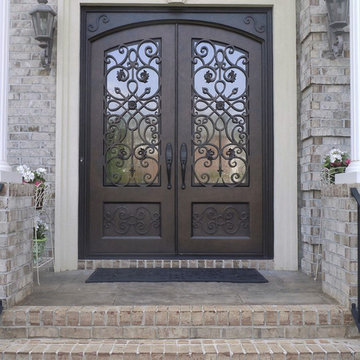
 Clark Hall Doors
Follow the lines and they'll lead you home. This intricate, fully functional piece of art is a custom double door finished in Bronze and equipped with sleek hardware and insulated glass.
 Twelve Stones Designs, LLC
The owners of this kitchen had spent the money to upgrade the finishes in their kitchen upon building the home 12 years ago, but after living in the space for several years they realized how nonfunctional the layout really was. The (then) two preschool aged children had grown into busy, hungry teenagers with many friends who also liked to hang out at the house. So the family needed a more functional kitchen with better traffic flow, space for daily activities revolving around the kitchen at different times of day, and a kitchen that could accommodate cooking for and serving large groups. Furthermore, the dark, traditional finishes no longer reflected the homeowners’ style. They requested a brighter, more relaxed, coastal style that reflected their love of the seaside cities they like to visit.
Originally, the kitchen was U-shaped with a narrow island in the middle. The island created narrow aisles that bottle-necked at the dishwasher, refrigerator, and cooktop areas. There was a pass-through from the foyer into the kitchen, but the owners never liked that the pass-through was also located so close to the powder room. The awkward proximity was unappealing and made guests feel uncomfortable.
The kitchen’s storage was made up of lots of narrow cabinets, apothecary drawers, clipped corner units, and very few drawers. It lacked useful storage for the larger items the family used on a daily basis. And the kitchen’s only pantry was small closet that had only builder-grade, narrow shelving with no illumination to be able to see the contents inside.
Overall, the kitchen’s lighting plan was poorly executed. Only six recessed cans illuminated the entire kitchen and nook areas. The under cabinet lighting was not evenly distributed either. In fact, the builder had mis-placed the under cabinet lighting around the decorative pilasters which made for choppy, dark cubbies. Further, the builder didn’t include any lighting over the sink or the bar area, which meant whoever was doing the dishes was always in their own shadow. That, coupled with the steep overhang of the game room above made the bar area feel like a dim, cavernous space that wasn’t inviting or task oriented. The kitchen looked out into the main living space, but the raised bar and a narrow wall (which held the only large cabinet in the kitchen) created more of a barrier than a relationship to the living room or breakfast nook. In fact, one couldn’t even see the breakfast nook from the cooktop or sink areas due to its orientation. The raised bar top was too narrow to comfortably sit to either dine at or chat from due to the lack of knee space. The the homeowners confided that the kitchen felt more like a dark, dirty prison than place where the family, or their guests, wanted to gather and commune.
The clients' needs and desires were:
➢ to create a kitchen that would be a space the family loved to be in; to relate to the adjacent spaces all around, and to have better flow for entertaining large groups
➢ to remove the walls between the breakfast nook and living area and to be able to utilize the natural light from the windows in both those areas
➢ to incorporate a functional chopping block for prepping fresh food for home cooked meals, an island with a large sink and drain board, 2 pull out trash cans, and seating for at least the 2 teens to eat or do homework
➢ to design a kitchen and breakfast nook with an airy, coastal, relaxed vibe that blended with the rest of the house's coastal theme
➢ to integrate a layered lighting plan which would include ample general illumination, specific task lighting, decorative lighting, and lots of illuminated storage
➢ to design a kitchen with not only more storage for all the husband’s kitchen gadgets and collection of oils and spices, but smart storage, including a coffee/breakfast bar and a place to store and conceal the toaster oven and microwave
➢ to find a way to utilize the large open space between the kitchen, pantry area, and breakfast nook
Twelve Stones Designs achieved the owner's goals by:
➢ removing the walls between the kitchen and living room to allow the natural light to filter in from the adjacent rooms and to create a connection between the kitchen, nook, and living spaces for a sense of unity and communion
➢ removing the existing pantry and designing 3 large pantry style cabinets with LED tape lights and rollout drawers to house lots of kitchen appliances, gadgets, and tons of groceries. We also took the cabinets all the way up to the 9’ ceiling for additional storage for seasonal items and bulk storage.
➢ designing 2 islands - 1 with a gorgeous black walnut chopping block that houses a drawer for chopping and carving knives and a custom double pull out trash unit for point of use utilization - and 1 that houses the dishwasher, a large Blanco Gourmet sink with integrated drain board, woven baskets for fresh root vegetables and kitchen towels, plenty of drawer storage for kitchen items, and bar seating for up to 4 diners.
➢ closing off the space between the kitchen and the powder room to create a beautiful new private alcove for the powder room as well as adding some decorative storage. This also gave us space to include more tall storage near the new range for precision placement of the husband’s extensive oil and spice collection as well as a location for a combo-steam oven the wife wanted for baking and cooking healthy meals.
The project is enhanced functionally by:
➢ incorporated USB and standard receptacles for the kids’ laptops and phone charging in the large island
➢ designing the small island to include additional open shelving for items used on a daily basis such as a variety of bowls, plates, and colanders. This set up also works well for the husband who prefers to “plate” his dinners in restaurant-style fashion before presenting them to the table.
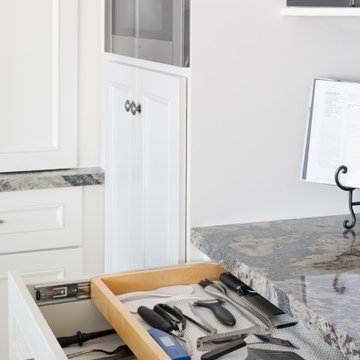
➢ the integration of specific storage units, such as double stacked cutlery drawers, a custom spice pull-out, a Kuerig coffee and tea pod drawer, and custom double stacked utensil drawers
➢ moving the refrigerator to the old oven location - this eliminated the bottle neck as well as created a better relationship to the eating table. It also utilizes the floor space between the pantry, nook, and kitchen
➢ creating a banquet style breakfast nook - this banquette seating not only doubles the amount of seating for large gatherings but it better utilizes the odd space between the kitchen and the previous nook area. It also helps to create a distinct pathway from the mudroom room through the pantry area, kitchen, nook, and living room.
➢ the coffee/breakfast bar area which includes the perfect location for the concealed microwave and toaster oven, convenient storage for the coffee pods and tea accoutrements. Roll-out drawers below also house the smoothie maker, hot water kettle, and a plethora of smoothie-making ingredients such as protein powders, smoothie additives, etc. Furthermore, the drawers below the Keurig house measuring utensil, cutlery, baking supplies and tupperware storage.
➢ incorporating lots of wide drawers and pullouts to accommodate large cookware.
➢ utilizing as much vertical space as possible by building storage to the ceiling which accommodates the family’s abundant amount of serving platters, baking sheets, bakeware, casserole dishes, and additional cutting boards.
The project is enhanced aesthetically by:
➢ new 5-piece Versailles pattern porcelain tile that now seamlessly joins the entire down stairs area together creating a bright, cohesiveness feeling instead of choppy separated spaces - it also adds a coastal feeling
➢ designing a cabinet to conceal the microwave and toaster oven
➢ the coastal influenced light fixtures over the nook table and island
➢ the sandy colors of the Langdon Cambria countertops. The swirling pattern and sparkling quartz pieces remind the homeowner of black-and-tan sandy beaches
➢ the striped banquet seating whose creamy white background and blue-green stripes were the inspiration for the cabinet and wall colors.
➢ All the interior doors were painted black to coordinate with the blacks and grays in the backsplash tile and countertop. This also adds a hint of tailored formality to an otherwise casual space.
➢ the use of WAC's Oculux small aperture LED units for the overhead lighting complimented with Diode LED strips for task lighting under the cabinets and inside the pantry and glass wall cabinets. All of the lighting applications are on separate dimmer switches.
Innovative uses of materials or construction methods by Realty Restoration LLC:
➢ Each 1-1/2” x 3” block of reclaimed end-grain black walnut that makes up the center island chopping block was hand milled and built in the shop. It was designed to look substantial and proportional to the surrounding elements, executed by creating the 4 inch tall top with a solid wood chamfered edge band.
➢ The metal doors on either side of the vent hood were also custom designed for this project and built in the Realty Restoration LLC shop. They are made 1x2, 11-gauge mild steel with ribbed glass. Weighing 60 lbs a piece, heavy duty cabinet hinges were added to support the weight of the door and keep them from sagging.
➢ Under-cabinet receptacles were added along the range wall in order to have a clean, uninterrupted backsplash.
Design obstacles to overcome:
➢ Because we were removing the demising walls between the kitchen and living room, we had to find a way to plumb and vent the new island. We did this by tunneling through the slab (the slab had post tension cables which prevented us from just trenching) to run a new wet vent through a nearby structural wall. We pulled the existing hot and cold lines between upper floor joists and ran them down the structural wall as well and up through a conduit in the tunnel.
➢ Since we were converting from wall overs to a gas range it allowed us to utilize the 220 feed for the wall ovens to provide a new sub panel for all the new kitchen circuits
➢ Due to framing deficiencies inherited from the original build there was a 1-1/2” differential in the floor-to-ceiling height over a 20 foot span; by utilizing the process of cutting and furring coupled with the crown moulding details on the cabinet elevations we were able to mask the problem and provide seamless transitions between the cabinet components.
Evidence of superior craftsmanship:
➢ uniquely designed, one-of-a-kind metal “X” end panels on the large island. The end panels were custom made in the Realty Restoration LLC shop and fitted to the exact dimensions of the island. The welding seams are completely indistinguishable - the posts look like they are cut from a single sheet of metal
➢ square metal posts on the small island were also custom made and designed to compliment and carry through the metal element s throughout the kitchen
➢ the beautiful, oversized end panels on the pantry cabinets which give the breakfast nook a tailored look
➢ integrating a large format 5 piece Versailles tile pattern to seamlessly flow from the existing spaces into the new kitchen space
➢ By constructing a custom cabinet that jogged around a corner we could not remodel (housing the entry way coat closet) we were able to camouflage the adjacent wall offset within the upper and lower cabinets. By designing around the existing jog in the structural walls we accomplished a few things: we were able to find the space to house, and hide, the microwave and toaster oven yet still have a clean cohesive appearance from the kitchen side. Additionally, the owners were able to keep their much needed coat closet and we didn’t have to increase the budget with unnecessary structural work.
22