
Search results for "Extract" in Home Design Ideas
 Marie Burgos Design
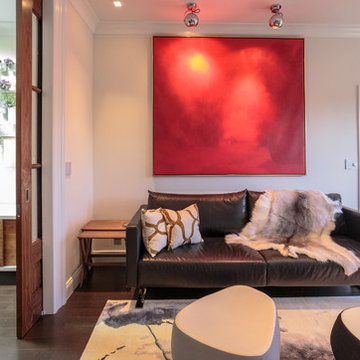
While neutral colors form the background that extracts all the attention for the artwork, some focused lighting plays the role of an exhibit-like showcase. Smart controls for temperature, sound, and light are hidden away within the architecture, so a concerted existence in the room becomes paramount. With the knowledge that a great day or season epitomizes quiet appreciation, the whole space can keep the craving for social interaction.
Photography by Francis Augustine
 Elica Americas Range Hoods
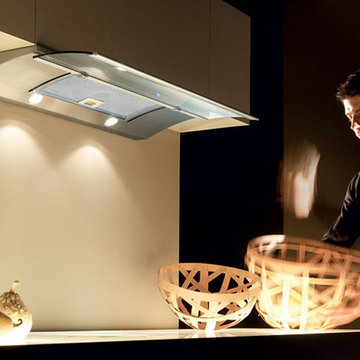
The curved glass surface of Glide allows to extract vapors easily and, when not in use, it can slide in to give more space to the kitchen or to use its controls. Glide also has a 450 CFM blower of 4 speeds, electronic buttons, halogen ligthing and a dishwasher-safe, stainless steel mesh filters.
 Cabinet Joint
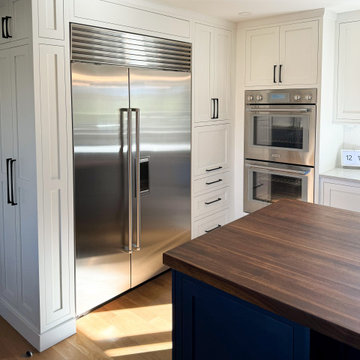
Step into this fusion of functionality and family fun: this remodel hosts a sprawling 14 ft. island at its core, containing an induction cooktop, a commercial hood, and plenty of room for family and friends to gather. Some of the customized concepts are hidden from users’ views, such as the warming drawer in the island, perfect for keeping food or plates warm before dinner, or the beverage bar in the dining room with an under-counter fridge. Overall, this space uniquely harmonizes cooking and gathering.
Find the right local pro for your project
 ERIN KYLE design
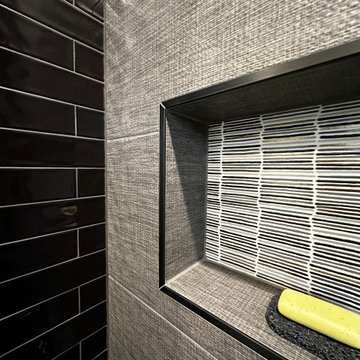
This precision remodel extracted the tub and replaced it with an alcove walk-in shower with tile in linear drain and long horizontal niche. Maintaining a wall spout offers flexibility for all uses. The back wall and shower floor tile extends into the whole bathroom space which was the only element changed outside of the shower. Careful demo preserved the existing paint treatment on the walls as requested by the homeowner. The glossy black subway tile on either end of the new shower balances the existing black counter and toilet on the opposite side of the room. Linen-textured 12x24 tile completes the shower and flooring. Richards & Sterling tile in the niche pulls together the mixed metals in the space and adds a great feature . Three different carefully selected Schluter edges finishes off the tile perfectly. A single hinged glass partition door keeps the space feeling open and reflects the giant existing window.

 Elletipi Inc.
Innovative waste bins ELLETIPI, equipped with a patented mechanism for the automatic opening of the lids when opening the cabinet door. The lid opens and the bin is extracted when you open the cabinet door; the lid also closes automatically when the bin returns in the cabinet when you close the door, guaranteeing odor protection. This object is made of polymers, and the fitting and attachment components are filled and reinforced. This system was designed to be installed on the side of the cabinet and connected to the door (not compulsory). Its main objective is to be used internally in kitchen base cabinets, under the sink. Its installation is practical and rapid, thanks to the instructions that can be used as a drilling guide and the supplied 12 self-tapping screws.
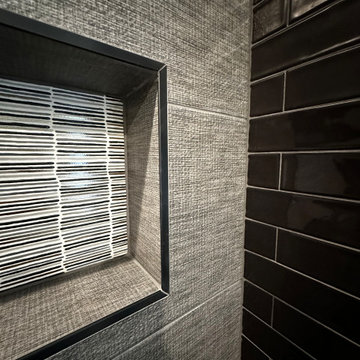 ERIN KYLE design
This precision remodel extracted the tub and replaced it with an alcove walk-in shower with tile in linear drain and long horizontal niche. Maintaining a wall spout offers flexibility for all uses. The back wall and shower floor tile extends into the whole bathroom space which was the only element changed outside of the shower. Careful demo preserved the existing paint treatment on the walls as requested by the homeowner. The glossy black subway tile on either end of the new shower balances the existing black counter and toilet on the opposite side of the room. Linen-textured 12x24 tile completes the shower and flooring. Richards & Sterling tile in the niche pulls together the mixed metals in the space and adds a great feature . Three different carefully selected Schluter edges finishes off the tile perfectly. A single hinged glass partition door keeps the space feeling open and reflects the giant existing window.
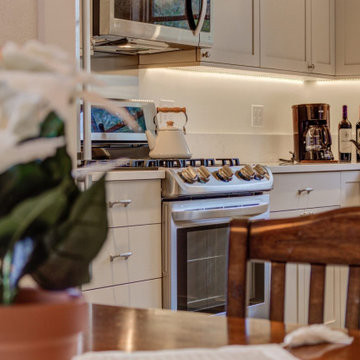
 Better Builders
"This 1929 Lakewood home featured classic architectural details like coved ceilings and arched doorways but had a small, dim kitchen lacking storage. To create a modern, spacious layout, the breakfast nook and covered porch were combined, adding square footage. Relocating the sink allowed for a larger window, more natural light, and space for a dishwasher.
The wall between the kitchen and dining room was removed, improving flow and revealing a beautiful arched passageway to the living room. Preserving the coved ceiling required careful extraction and reinstallation during structural upgrades, which included new footings and beams to support the kitchen bump-out.
Finished with matching cedar lap siding and blended paint, the expanded kitchen honors the home’s historic charm while offering improved functionality, natural light, and seamless indoor-outdoor access."
 Tile Doctor Ltd
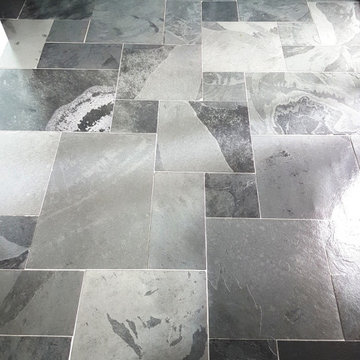
The pictures below are of a Riven Slate floor at a house in in the Leeds suburb of Horsforth which had been laid ten years prior. It’s probably difficult to appreciate from the images but the sealer on this floor was well worn through in the high traffic areas making it patchy in places. Without the protection of the sealer dirt was now ingrained in the pores of the stone leaving it looking dull. Riven slate is always tricky to clean thoroughly due to the rough surface and that combined with the ingrained dirt was making it very difficult to keep clean.
The floor now needed to be stripped of old sealer and then resealed and although I can provide a price for this over the phone my preference is to visit the property and survey the floor. In the case the owner had sent me some photographs via email however they were not too clear and so I felt it would be best if I paid the customer a visit to ensure I could give them an accurate price.
The floor was indeed overdue a clean and seal, as suspected dirt was ingrained into the areas where the seal had worn off. The house was home to a very busy family, so the area was subject to the significant traffic. I carried out a test clean on a small area and they were surprised by the results, when you live with a floor for so long you don’t notice the very slow decline in its appearance. They agreed to my quote and we arranged a time to return and carry the deep clean out.
When I arrived, I started off by protecting the skirting and surrounding woodwork. Given the rough surface of the floor I first applied Tile Doctor Wax Away which is a very effective coatings remover that is designed for removing wax but works very well in these situations. The product was left to dwell for a round ten minutes so it could get to work breaking down the old sealer and then scrubbed in using a black scrubbing pad fitted to a rotary machine.
This process removed most of the dirt and old sealer, but some stubborn patches remained. To treat these, I replaced the black pad with a coarse 200-grit burnishing pad and finally some handheld diamond burnishing blocks for the edges and corners where more intricate work was required, and the circular pads struggle to reach.
I gave the floor a rinse, and extracted the soil with a wet vacuum, the floor was then left to dry off overnight.
The next day I returned, first the slate floor was checked for moisture using the moisture meter. Once I was happy it was within the correct parameters, I then sealed with four coats of Tile Doctor Seal and Go. This is a modern water-based blend of acrylic polymers that provides both a stain resistant surface seal and a durable low-sheen finish also being water based there’s no smell as it dries.
The sealer really brought the stone to back to life and the lovely colours in the natural stones were now evident. The patchy appearance of the floor was gone, and the customer was happy.
I discussed with them how they should maintain the floor and advised them to use Tile Doctor Neutral Tile Cleaner. This is pH neutral cleaner that won’t prematurely erode the new sealer like the stronger products you find in Supermarkets which are only for use on Vinyl and Ceramic floors.
Nigel Stoker
North West Yorkshire Tile Doctor
 Tile Doctor Ltd
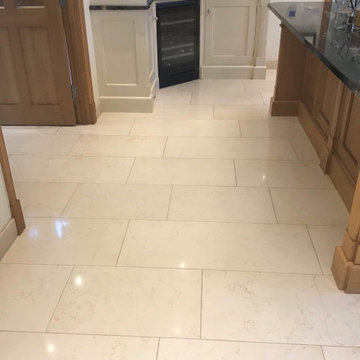
These photos are of a four-year-old Limestone kitchen floor at a property in Boughton that the customer was finding hard to keep clean and maintain a shine. Part of the problem was he owned two dogs and we often warn about the problems of dog urine on sealed tile and stone due to it being high in nitrogen.
On my initial visit I was able to ascertain that the sealer had almost completely worn off, leaving the stone vulnerable to dirt becoming ingrained into the pores of the stone. I come across this problem a lot, in my experience when stone floors are installed by tilers, they generally apply a single coat of sealant which wears off over time, and as discussed earlier can be prematurely degraded by strong chemicals.
My quote to renovate the Limestone floor was accepted and included a deep clean to the stone and grout, stone polish and then re-seal.
I arrived on site on the arranged date and began by scrubbing all the grout lines with Tile Doctor grout brushes and a 3:1 dilution of Tile Doctor Pro-Clean. I then moved on to a small handheld polishing machine to clean around the tile edges using 800 and 1500 grit diamond encrusted burnishing pad to achieve a deep clean.
The process was then repeated throughout the rest of the area using larger 17” burnishing pads fitted to a floor polishing machine. The burnishing pads I used come in a set of four starting with 400-grit and moving up to 800, 1500 and 3000 grit, after each pad is applied the floor is rinsed with water and the soil extracted with a wet vacuum.
It took me much of the day to complete this stage of the renovation and the floor was still damp so once done I left for the day, allowing the floor to dry off overnight.
I returned the following day to complete the final polish using the 3000-grit burnishing pad, this gave a high polished finish which the customer had requested. This last pad is applied dry with only a little water splashed onto the tile, a process we call a spray burnish.
The floor was then sealed with three applications of Tile Doctor Ultra Seal Sealant to protect the newly restored and polished tiles. Ultra-Seal is a penetrating sealer that soaks into those recently cleaned pores in the stone, occupying the space and preventing any dirt from becoming ingrained there. It’s also a natural look sealer so it doesn’t change the colour of the stone in anyway and is almost indetectable once applied.
“Hard work from Philip has left us with a kitchen floor brought back to life – cleaned and sealed in little over 24 hours – brilliant job – Thanks”
Before leaving I gave the customer some tips on maintenance and a complimentary bottle of Tile Doctor Stone Soap to enable him to keep the floor looking its best, this product works well with the sealant we applied and is PH neutral so won’t degrade the new sealer.
Phil Vissian
Northamptonshire Tile Doctor

 Tile Doctor Ltd
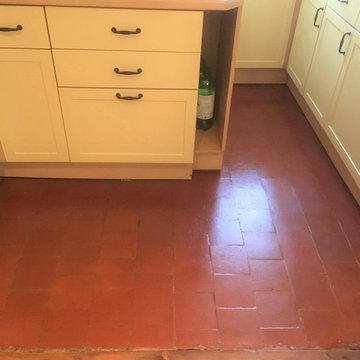
I received a call from this client in Old Marston around two miles north east of the centre of Oxford. They had lifted a lino floor in their kitchen and found an old Quarry Tiled floor underneath and decided to see if they could have it restored.
I went over to survey the floor and could see that the tiles had been covered with a thin layer of levelling screed to ensure the lino didn’t sink into the recesses. I ran some tests to demonstrate how the screed could be removed which worked well and it was apparent that the tiles underneath were intact and could be renovated. I submitted a quotation for removing all the screed, deep cleaning the Quarry tiles and then sealing the tiles to protect them. The client was really pleased that we could restore the floor and the quote was accepted, with a date booked to do the work.
To start the work, I applied undiluted Tile Doctor Grout Clean-up worked in with a small carbide brush attached to a hand-held rotary buffer. The combination of the acid in the Tile Doctor Grout Clean-up combined with the scrubbing action of the brush were effective at removing most of the screed. The small bits of remaining screed were carefully removed by hand, using a floor scraper. The floor was then rinsed with water and the soil removed with a wet vacuum.
For the second phase of the cleaning process I applied Tile Doctor Oxy-Gel which was scrubbed into the floor with a stiff brush rinsing after with water and the soil extracted again using the wet vacuum. After cleaning the floor to remove the dirt I could still see some evidence of the screed on the tiles, so I decided to give the floor an Acid Wash using Tile Doctor Acid Gel which was scrubbed into the floor and rinsed off as before. Tile Doctor Acid Gel is of course an acidic product so once it was removed, I decided to rinse the floor with Tile Doctor Neutral Cleaner to neutralise the pH levels in the floor. The wet vacuum was used again to remove as much moisture from the Quarry tiles as possible before leaving the now clean floor to dry off fully overnight.
I returned to seal this floor the next day. First, I checked the floor was fully dry with the damp meter, it was within the recommended range, so I was ready to complete the sealing process.
The client was not too sure if they wanted a matt or sheen finish, so I first put a coat of Tile Doctor Colour Grow on the floor to show them the matt finish. Colour Grow is an impregnating sealer that enhances natural colour and protects from within by occupying the pores in the tile. After reviewing the floor, they decided it was not for them, so I followed up by applying several coats of Tile Doctor Seal & Go which adds a nice sheen finish and is compatible with Colour Grow.
The combination of sealers worked very well together, and they were very satisfied with the final result and of course that we had been able to restore the Quarry tiles.
Barry Woodward
Oxfordshire Tile Doctor
 Patience Designs Studio Ltd
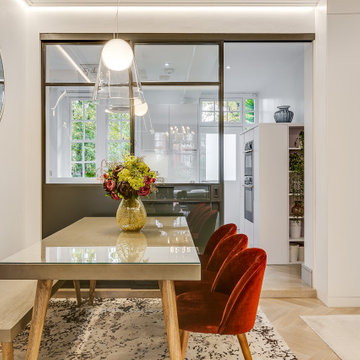
This St Johns Wood mansion block flat was one of our recent projects with a luxurious property developer in the area. We opened up spaces between the hallway, living area and kitchen to create a much more open feel throughout. A bespoke bench wrapped around the living space providing extra seating as well as storage whilst, keeping as much of the floor space free. Hidden cabling, Samsung Frame TV and biofires helped to add the luxuries without drawing away from the tranquillity.
Another view of the St Johns Wood mansion block flat, the modern kitchen layout with it's central island and induction hob and ceiling mounted extraction pendant above. The brushed bronze finish on the island's facade contrasts with the sleek minimal gloss white cabinetry for the rest of the kitchen.
 Rebecca Randall Colour and Design
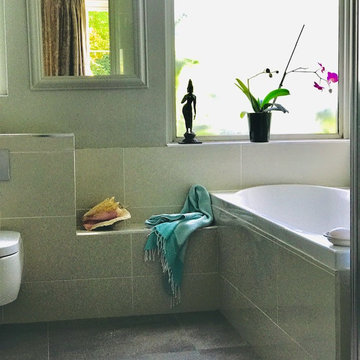
Our clients sought to transform a functional but uninspired ensuite into a high-end, spa-like retreat. The original room occupied a converted garage space, which presented a unique architectural hurdle: an excessively high ceiling that made the room feel cold and cavernous rather than intimate. The goal was to balance this industrial heritage with the "pampered relaxation" of a luxury hotel.
To achieve a cohesive, tranquil atmosphere, we focused on tactile materials and atmospheric volume:
Spatial Proportions: We lowered the ceiling to a more intimate height, which not only improved the acoustics but also allowed for the installation of integrated, soft-glow lighting and high-performance extraction.
Climate Control: To ensure comfort throughout the year, we installed a high-efficiency underfloor heating (UFH) system. This was essential to mitigate the thermal mass of the large-format porcelain tiles, ensuring the floor remains warm to the touch.
Dual-Purpose Luxury: The layout was meticulously planned to accommodate both a deep soaking bath and a spacious walk-in shower, providing the couple with versatile options for both quick refreshment and long, indulgent soaks.
 Tile Doctor Ltd
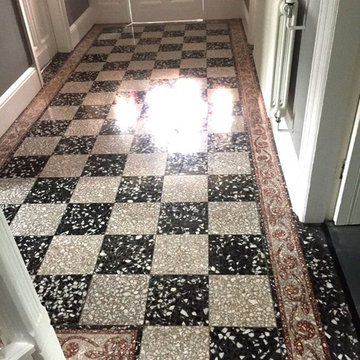
For this job, I paid a visit to the bustling town of Windermere in South Cumbria. My client asked me to refinish a black and white Terrazzo tiled entrance and hallway floor. Terrazzo if you’re not familiar is a very interesting and beautiful stone of Italian origin, which has been used for flooring in houses for centuries.
We had previously quoted to do the work on this floor however the customer has also received a quote from another firm in Glasgow and had chosen to go with them solely because they were more expensive. However, it stands to reason that the most expensive companies are not always the best quality and Tile Doctor prides itself on the amount of customer feedback we display on our websites which we believe is a far better indicator.
On the arranged day no one from the Glasgow firm showed up and after following up with the firm a young man in his early 20s arrived five hours late and began work on the floor. According to the customer he spent three days attempting to complete the job, but ran out of time and asked the client to apply the sealer themselves. The client applied the sealer, but as she had never done it before the floor turned out blotchy in appearance and she was far from happy.
To cut a long story short, my client complained to the Glaswegian company, after all she had paid for a full service and not received it. Unable to get a satisfactory conclusion from them she decided to call in Tile Doctor to put the matter right. I must point out that although I have included before and after photos one this post it’s really difficult to appreciate the extent of the problem without seeing the floor in real life.
To resolve the sealer, and to provide my client with the polished finish she had originally wanted, I burnished the floor using a set of four Tile Doctor Diamond encrusted burnishing pads. Each of the four pads has a different grit: I first applied the coarse pad and worked my way through medium, fine and eventually very fine using a little water to lubricate and rinsing the floor between each pad to remove any residue; after the burnishing process was complete I gave the entire floor a final, thorough wash.
I then used a wet-vac machine to extract the water and get the floor as dry as possible before leaving for the day and allowing it to fully dry completely overnight, it’s very important that the floor is as moisture free as possible before being sealed as it can affect the final result.
The next day I returned to the house and sealed the floor with two coats of Tile Doctor Colour Grow, an impregnating, colour-enhancing sealer that really accentuates the look of the black and white tiles.
Now that the problem has been resolved, my client is very happy with the condition of her Terrazzo tiled entrance and hallway floor.
Heidi Taylor
South Cumbria Tile Doctor
 Tile Doctor Ltd
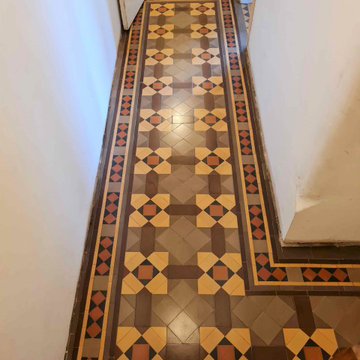
We were contacted by a customer in West Kirby who needed help renovating a Victorian tiled hallway in a house they had just purchased. Kirby is a desirable seaside location North of Heswall that expanded with the arrival of the railway in 1848. The railway brought a demand for property and so it’s not unusual to find housing stock in this area dating back to the Victorian era.
The Victorian tiles at this property appear to have been neglected by the previous owner and were now looking very dull and marked by paint from decorating; all the colours looked washed out and the floor was now looking very unappealing.
The good news however is that this problem is not uncommon and with a deep clean and a fresh sealer applied it can be transformed. I gave the owner a quote which was accepted a date agreed for my return to do the work.
On the first day the floor was sprayed with a neat solution of Tile Doctor Remove and Go which is a powerful alkaline cleaning and stripping agent used to remove old seals and paint. The solution was left to dwell for about twenty minutes so it could soak in and get to work. It was then scrubbed into the tiles using a coarse 200-grit pad fitted to a heavy buffing machine. Water was then added to the floor for lubrication and the soils released from the pores of the tile during scrubbing was removed by with a wet vacuum.
To treat the stubborn paint stains and remains of what I suspect was carpet adhesive a hand scraper and wire brush was used, this was made easier by the Remove and Go which had softened the paint etc.
The next stage was to give the Victorian tiles a mild acid wash using Acid Gel which is applied to the floor, scrubbed in, and rinsed off with a little water then extracted using the wet vacuum. We always recommend an acid wash for old floors like these as it will counter any efflorescent salts resident in the tiles and helps to remove other mineral contaminates and old grout that can mask the true beauty of the tiles.
I left the tiles to dry out for two days before returning to apply the sealer, first checking it was dry by testing for moisture in various places with an electronic damp tester. It’s not a good idea to apply a sealer to a damp floor so we always check first.
Satisfied the floor was dry, I started applying a coat of Tile Doctor Colour Grow which is a colour enhancing impregnating sealer that helps to bring out the true colours in the tile. This was allowed to dry for thirty minutes and then followed up five coats of Tile Doctor Seal and Go Extra which is a breathable sealer that leaves a lovely satin finish and builds on the protection.
Once done the Victorian hallway tiles looked so much cleaner and healthier. It was quite a transformation and the new sealer had given the floor a nice low sheen shine which the customer was very happy with.
For aftercare cleaning I left them with a bottle of Tile Doctor Neutral Cleaner which is specially formulated for cleaning sealed tiles. We don’t recommend tile cleaning products you find on supermarket shelves as the are usually too strong and can strip a sealer off the floor prematurely. If your choosing another product to clean your floor always read the label to make sure its compatible.
Andrew Robb
Merseyside Tile Doctor
 Tile Doctor Ltd
Slate is a popular choice for tiled kitchen floors and when properly maintained looks fantastic, however like all natural stone products without an effective cleaning plan dirt will become ingrained in the stone and will start to lose its appearance.
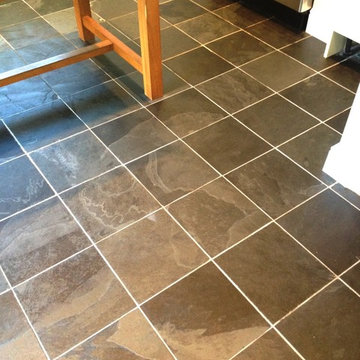
This was the case with this fantastic Slate tiled kitchen floor in Twickenham which had the potential to look really nice, but hadn’t received the proper maintenance for a long while, leaving it looking very tired. It now needed what was left of its old surface sealer stripped off, followed by a deep cleaning of the tile and grout before having a fresh seal applied.
To begin the restoration, I mixed a 50:50 solution of Tile Doctor Remove and Go and Tile Doctor Pro Clean. This was applied to the floor and allowed to dwell. Remove and Go functions as a stripper that breaks down the old sealer, while Pro Clean is a versatile, high alkaline cleaner that is safe to use on all types of natural stone flooring.
To use it to full effect, I machine scrubbed this solution into the floor to completely remove all dirt, stains, and old sealer. I also ran a stiff brush along the grout lines to remove the particularly stubborn dirt ingrained in the grout. The resulting cleaning slurry was then rinsed with water and extracted using a wet vacuum and the floor checked for stubborn marks which were retreated using the same process.
The floor was left to dry overnight and I came back the next day to apply a new seal. It’s important to leave a tiled floor to dry completely before sealing and at this time of year 24 hours is usually enough. This is necessary to ensures there is no excess moisture in the tile as this has the potential to cloud the sealer and affect its effectiveness.
The customer required a low sheen finish and a floor that was easy to maintain. I opted to use Seal & Go, which provides exactly that. It is a water-based with a high sheen blend of acrylic polymers that offers a both a stain resistant surface seal and a durable low sheen finish, also being water based it doesn’t leave a smell as it dries. Seal and Go is also a breathable sealer that will allow moisture to rise up through the tile and allow the floor to breathe.
As you can see from the pictures, the lustre has been completely restored to the Slate tiles and the sealer will allow for easy maintenance for the customer in the future.
Jonathan Oldham
South Middlesex Tile Doctor
 Williamsons Kitchens
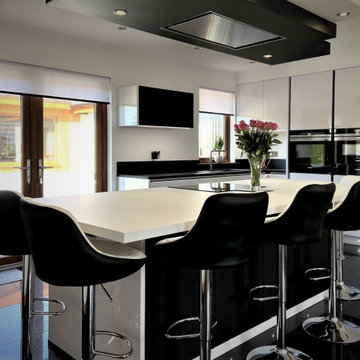
The client had an existing kitchen that we installed over 15 years ago at the front of their house. They wanted to update and move the kitchen to the rear of the home, requiring the removal of partitions and a full redesign. The goal was to create a modern, functional kitchen suitable for entertaining friends and family.
The kitchen was outfitted with the Nolte Lux range featuring Black MatrixArt handleless trims with integrated lighting. The main door colour was selected in Arctic White with an accent in Plus Black Fingerprint proof. This monochrome scheme achieved a sleek, modern look.
We opted for Nolte 25mm Black worktops on the perimeter and a Nolte 40mm White worktop for the island. The kitchen is equipped with high-quality Siemens appliances, including a single oven, combination microwave, induction hob, ceiling extraction, and a full-height fridge.
Extra details include a Blanco Zia 1 ½ sink in Anthracite and a Quooker Fusion Square Stainless Steel instant boiling water tap. The extractor is cleverly integrated into a ceiling drop box with stepped ledge lighting, adding a layer of sophistication.
Interested in a modern, functional kitchen like this? Contact us today to discuss your kitchen design needs.
 Williamsons Kitchens
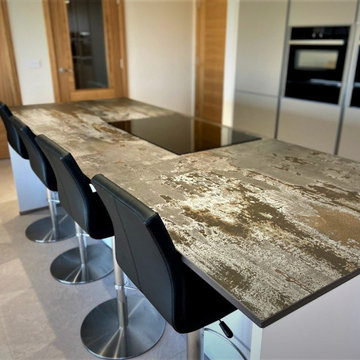
Our client was in the process of building a new house to their specification in Fraserburgh. The centrepiece? A contemporary, open-plan kitchen that not only serves as a functional space but also as an inviting hub for family gatherings.
Opting for the Nolte SoftLack range, we integrated the Silver MatrixArt handleless trims, complemented by elegant integrated lighting. The main furniture showcases a soothing Sahara hue, contrasted smartly by the Lava accent.
The 20mm Dekton Trilium worktop exudes sophistication, while the 40mm Nolte Platinum Bough Oak table adds a touch of warmth. We included a full suite of NEFF appliances: a single oven, combination microwave, induction hob, ceiling extraction, and a full-height fridge and freezer, meeting every culinary need.
Special requests are what make a design truly personal. We incorporated a Blanco Subline undermounted sink in Alumetallic, a state-of-the-art Quooker Fusion Square Stainless Steel instant boiling water tap, and durable Pergo flooring. Notably, the elevated dishwasher was positioned conveniently beside the sink, based on the client's preference. The tall units were seamlessly integrated into the ceiling, complemented by an artful goal-post niche. Furthermore, the extractor finds its home within a stylish ceiling drop box, highlighted by a subtly lit stepped ledge.
Dreaming of your own bespoke kitchen? Let us transform your vision into reality.
 Cuibul de Design
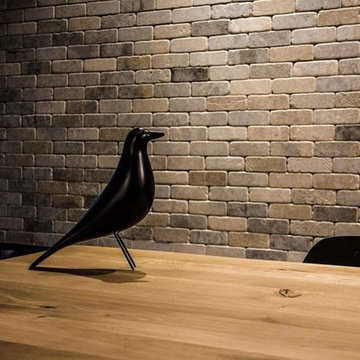
SKY-NATURA NATURAL SIDES C.R. & S. RIVA1920 Table made with a solid wood top having glued boards, with squared or natural edges in combination with iron legs characterised by double sheet metal semi-folded in the shape of a rhombus.Finish: base of oil / natural wax of vegetable origin with pine extracts.
 Tile Doctor Ltd
Recently Heidi and I worked on a Victorian tiled hallway floor at a house in Turton, Lancashire, an area which lies on the southern slopes of the West Pennine Moors. Victorian tile floors are commonly found in the reception area and hallways of older houses and public buildings, many of which date back to the reign of Queen Victoria (hence ‘Victorian’ tiles). It was during this time that the tile industry really started to boom.
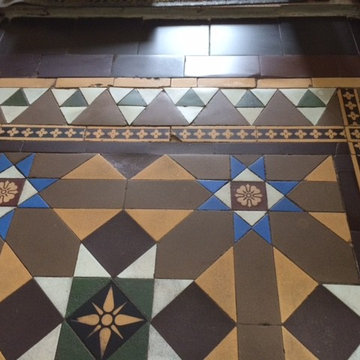
Upon inspection it was evident that the floor in question had suffered from some settlement in the past resulting in a crack in the base under the tiles which had lifted one side and dropped the other; this is quite common in old houses resulting in some of the tiles becoming loose and would need to be fixed back in place before the floor could be given a good clean and re-seal.
Removing Lippage from Victorian Tiles
The concrete floor under the tile was patched as best as could be without pulling up more of the floor and the tiles were fixed in place, unfortunately however many of the triangular tiles in the adjacent border would not lay flat resulting in a lippage issue between them which naturally the customer was not very happy about.
Not wishing to cause the customer the extra expense of pulling up more tiles and relaying the concrete subfloor I left the tiles to fully set and then came back a few days later with a handheld Flex Machine fitted with a small 220 Grit Diamond pad to grind the tiles flat. As the pictures show, this made the difference and the diamond did not scratch the tiles despite the surface being dry.
Diamond pads are usually used on stone floors but after some investigation back at the Tile Doctor training centre we also realised they can be used on other types of tile including Victorian.
Once this was resolved the entire floor was given a thorough clean using a strong dilution of Tile Doctor Pro-Clean worked in with a scrubbing pad. As well as cleaning the tile and grout it also removed any remaining sealer which is important if you don’t know the history of the floor as the previous coating maybe incompatible with the new sealer. Once done the floor was given a thorough rinse with water which was then extracted from the floor with a wet vacuum.
Sealing Victorian Tiles
The floor was left to dry and I returned later to seal the tiles with a couple of coats of Tile Doctor Colour Grow which is an impregnating sealer that soaks into the pores of the tile and intensifies colour whilst also providing durable protection from within. Normally I use Seal and Go on Victorian Tiles however in this case the customer had specified a matt finish.
The results were fantastic and the client was very pleased with the now flat Victorian tiled floor which, thanks to the cleaning and sealing, was back to looking its best. Another happy customer for the Lancashire Tile Doctor!
18