
Search results for "Extract" in Home Design Ideas
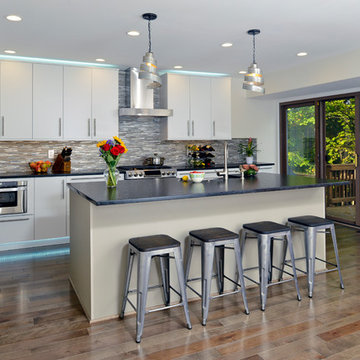
 Expert Kitchen Designs, LLC
June Stanich Photography
Inspiration for a mid-sized modern kitchen remodel in DC Metro
Inspiration for a mid-sized modern kitchen remodel in DC Metro
 Zuver Construction
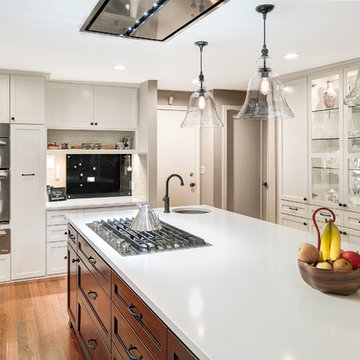
This kitchen designed by Susan Bond is comfortably crisp. Notice the contrasting painted island and attached built-in table. The flush ceiling mount stainless steel hood vent is a great solution for homeowners who desire a cleaner look. The Brazilian cherry hardwood floors warm up the space and the paint grade shaker style cabinets pull the color palette together while lightening up the space. The 3 cm Onixxa Quarts countertops and 4 X 12 inch ceramic subway set tile backsplash are stunning. The built-in table off the island provides extended entertaining space and makes dinner time easy. A desk with a magnetic black board also seamlessly blends beautiful design functionality with aesthetics.
Photo credit: Real Estate Tours Oregon
 Cabinet Joint
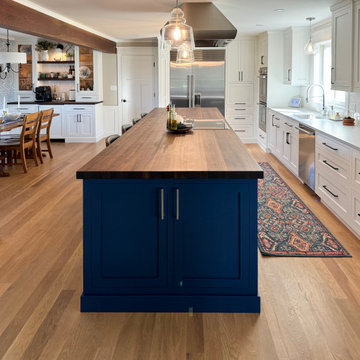
Step into this fusion of functionality and family fun: this remodel hosts a sprawling 14 ft. island at its core, containing an induction cooktop, a commercial hood, and plenty of room for family and friends to gather. Some of the customized concepts are hidden from users’ views, such as the warming drawer in the island, perfect for keeping food or plates warm before dinner, or the beverage bar in the dining room with an under-counter fridge. Overall, this space uniquely harmonizes cooking and gathering.
Find the right local pro for your project
 T&C Contractor Services LLC
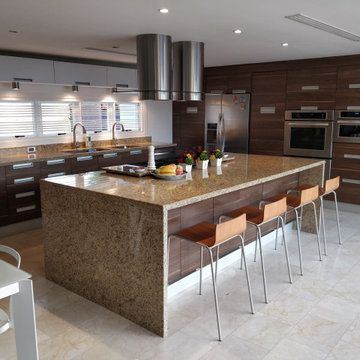
Spacious kitchen with an central island on wood and cascading granite top, sits four in front of the entertaining cook. Double stainless steel cylindrical vent hood provide enough extraction power to keep area smokeless and beautiful. All white breakfast table on one side and a wood wall with flat front appliances

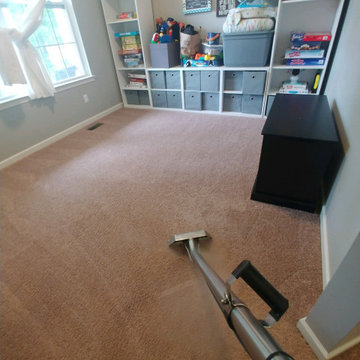
 South Lyon Carpet Cleaning
South Lyon Carpet Cleaning offers truck mounted hot water extraction (steam cleaning), upholstery cleaning, pet stain & odor removal, 3M carpet protection, encapsulation cleaning, as well as flood and water restoration. Not all carpet cleaning services are created equally; choose a company with a great reputation for service and excellence, and one with years of experience behind them. Our pictures speak for themselves! Residential/Commercial. Family Owned & Operated Since 1991. Licensed, Bonded, & Insured.
Free Estimates! (734) 635-8124


 GreenWorks Environmental, LLC
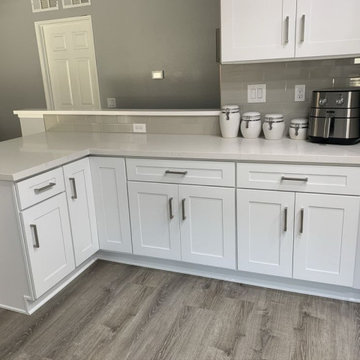
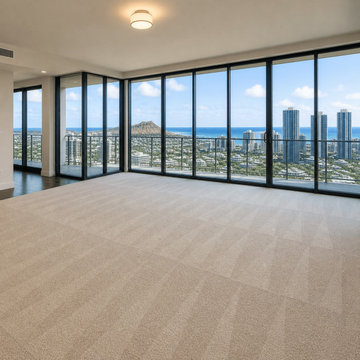
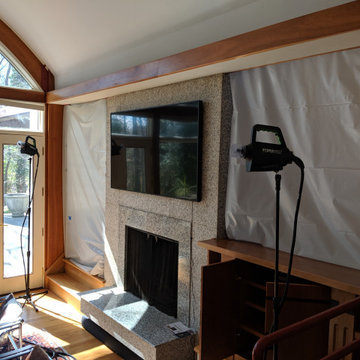
Odors impacted entire home. Need to use a fast and safe extraction method. This is where SteraMist is the bomb! https://greenworksllc.com/steramist/
 ERIN KYLE design
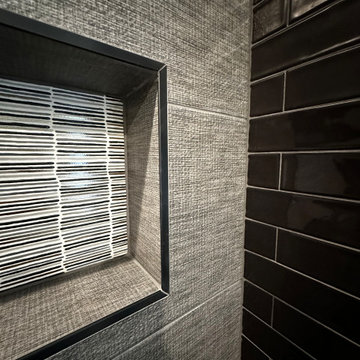
This precision remodel extracted the tub and replaced it with an alcove walk-in shower with tile in linear drain and long horizontal niche. Maintaining a wall spout offers flexibility for all uses. The back wall and shower floor tile extends into the whole bathroom space which was the only element changed outside of the shower. Careful demo preserved the existing paint treatment on the walls as requested by the homeowner. The glossy black subway tile on either end of the new shower balances the existing black counter and toilet on the opposite side of the room. Linen-textured 12x24 tile completes the shower and flooring. Richards & Sterling tile in the niche pulls together the mixed metals in the space and adds a great feature . Three different carefully selected Schluter edges finishes off the tile perfectly. A single hinged glass partition door keeps the space feeling open and reflects the giant existing window.
 ERIN KYLE design
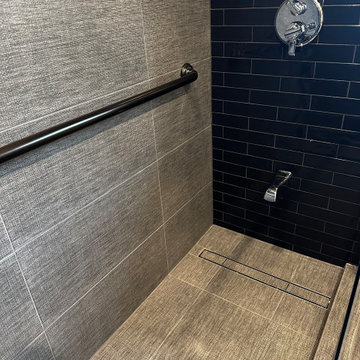
This precision remodel extracted the tub and replaced it with an alcove walk-in shower with tile in linear drain and long horizontal niche. Maintaining a wall spout offers flexibility for all uses. The back wall and shower floor tile extends into the whole bathroom space which was the only element changed outside of the shower. Careful demo preserved the existing paint treatment on the walls as requested by the homeowner. The glossy black subway tile on either end of the new shower balances the existing black counter and toilet on the opposite side of the room. Linen-textured 12x24 tile completes the shower and flooring. Richards & Sterling tile in the niche pulls together the mixed metals in the space and adds a great feature . Three different carefully selected Schluter edges finishes off the tile perfectly. A single hinged glass partition door keeps the space feeling open and reflects the giant existing window.

 ERIN KYLE design
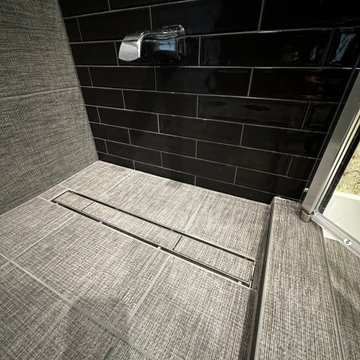
This precision remodel extracted the tub and replaced it with an alcove walk-in shower with tile in linear drain and long horizontal niche. Maintaining a wall spout offers flexibility for all uses. The back wall and shower floor tile extends into the whole bathroom space which was the only element changed outside of the shower. Careful demo preserved the existing paint treatment on the walls as requested by the homeowner. The glossy black subway tile on either end of the new shower balances the existing black counter and toilet on the opposite side of the room. Linen-textured 12x24 tile completes the shower and flooring. Richards & Sterling tile in the niche pulls together the mixed metals in the space and adds a great feature . Three different carefully selected Schluter edges finishes off the tile perfectly. A single hinged glass partition door keeps the space feeling open and reflects the giant existing window.
 Utopia 360 Studio
SieMatic Kitchen 3D Visualization
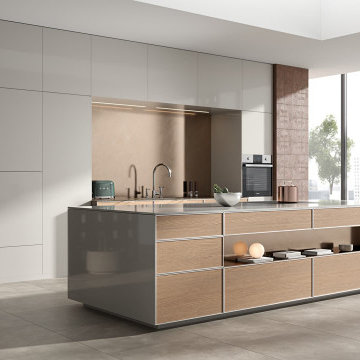
This 3D visualization captures the timeless elegance and precision engineering of a luxury SieMatic kitchen. Designed around the brand’s iconic handleless aesthetic (inspired by the SieMatic SLX concept), the render highlights a harmonious balance between functional minimalism and warm, tactile materials.
Key Visual Highlights
Signature Handleless Cabinetry: Features SieMatic’s integrated recessed handle channels with subtle, dimmable LED strip lighting that creates a floating effect across seamless matte-lacquered cabinet fronts.
Monolithic Island: A central waterfall island crafted from book-matched Calacatta marble, paired with an integrated cantilevered smoked-oak breakfast bar to introduce organic warmth.
Material Palette: A refined contrast of velvety, finger-print-resistant matte slate surfaces, warm dark timber, and subtle bronze anodized aluminum accents.
Lighting & Atmosphere: Soft, natural daylight streams through floor-to-ceiling glass doors, creating realistic soft shadows and highlighting the micro-textures of the stone grain and wood veneers.
Architectural Integration: Flush-mounted induction cooktops, concealed pocket-door appliance garages, and integrated ceiling extraction maintain a clean, uncluttered spatial flow.
 Tile Doctor Ltd
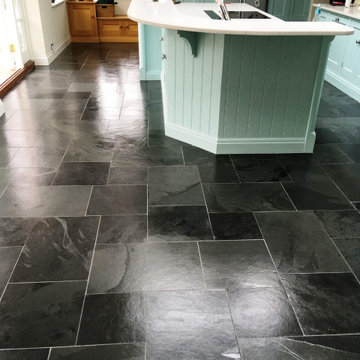
Our client had previously employed another company to tackle this large Slate floor in Walton on Thames but they hadn’t managed to remove the old sealer due to it being an old varnish seal. Varnish was used as a traditional way of sealing stone but can be damaged by scratching and it does little to improve the look of the stone. Varnish is also very difficult to break down which is a problem as it’s important to remove the old sealant before applying new, applying a new sealer onto Varnish simply wouldn’t work.
I visited the property to survey the floor and work out which combination of products and methods would work best and after some testing and I was able to confirm that not only could the old varnish be removed but once re-sealed with a modern sealer the slate would be transformed.
The client was over the moon to hear this news as they had thought there was nothing, they could do to improve the floor.
With a price and schedule agreed I returned to the property at a later date and started by tackling the varnish. The method I used was to apply Tile Doctor Remove and Go, let it soak into the floor for ten minutes and then work it in with a heavy rotary scrubbing machine fitted with a black pad. The soil was then rinsed with water and extracted off the floor with a wet vacuum.
The floor was then inspected, and each tile checked to ensure the varnish was completely gone, any stubborn areas were then spot treated and scrubbed by hand. Once I was satisfied, I set about giving the stone a deep clean by repeating the same process with Tile Doctor Pro-Clean. As before all the soil and cleaning products were then low pressure rinsed off the stone and vacuumed away. The floor was then left to dry overnight.
I returned the following day to apply a new modern sealer. First, I tested the floor was dry using the moisture meter. It was in the acceptable readings range, so I was able to start applying the sealer straight away.
For this floor I chose to apply Tile Doctor Seal and Go, it works really well on Slate tiles and as you can see from the photographs it completely transformed the appearance of the stone. Seal and Go is a water-based blend of acrylic polymers that provides both a stain resistant surface seal and a durable low-sheen finish, being water based it has the added advantage of not giving off any odour as it dries. The client had specified earlier that they didn’t want the floor to look shiny to the resultant silky appearance was the perfect solution. Thee coats were applied, and my client was very pleased with the finish.
Jonathan Oldham
South Middlesex Tile Doctor
 Cuibul de Design
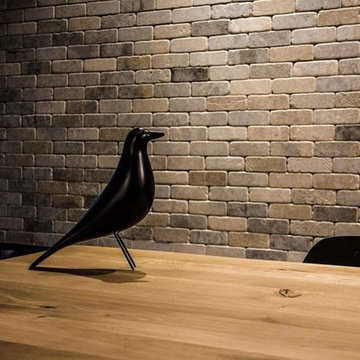
SKY-NATURA NATURAL SIDES C.R. & S. RIVA1920 Table made with a solid wood top having glued boards, with squared or natural edges in combination with iron legs characterised by double sheet metal semi-folded in the shape of a rhombus.Finish: base of oil / natural wax of vegetable origin with pine extracts.
 Tile Doctor Ltd
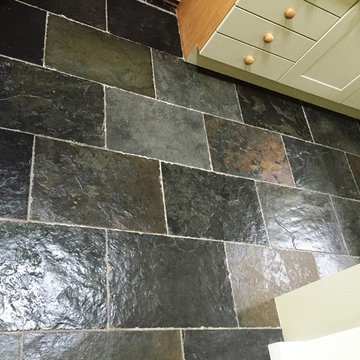
This small rough Chinese Slate floor in the kitchen of a house in the village of Cheadle near Stockport in Greater Manchester had not had any sealer put on it for many years and was very grubby (dishevelled as described by the customer) looking even after the customer had tried to clean it.
Sealers do take a lot of punishment, especially in a high traffic area such as a small kitchen and will wear off over time and once this happens the floor will start to lose its appearance as dirt becomes ingrained in the stone and it can no longer be cleaned effectively.
As we have to apply a liberal amount of water with this sort of work, the first step was to remove the Kicker boards at the bottom of the Kitchen units and silicone the Kitchen units that were fixed; this stops water seeping in and blowing the MDF allowing us to concentrate on cleaning the Slate without causing any damage.
I started the cleaning process by applying a strong dilution of Tile Doctor Pro-Clean to get rid of the built up dirt and any remaining sealer, leaving it to soak into the Slate before scrubbing the floor with a black scrub pad fitted to buffing machine running at slow speed. Tile Doctor Pro-Clean is a strong alkaline cleaner/stripper that is safe to use on natural stone, we do have stronger products available if required but in this case a strong dilution of Pro-Clean was sufficient to tackle any remaining sealer.
This process gave the Slate and grout lines a good deep clean and after rinsing the floor with water which was then extracted using a wet vacuum I repeated the process on stubborn areas until satisfied the floor was as clean and free of old sealer. Last stage of the cleaning process was to give the floor a final rinse and then get it as dry as possible using the wet vacuum to soak up the moisture.
The floor was quite small so I was able to leave the floor to dry off over lunch time and then on my return managed to get it fully dry with a little heat from a heat gun. The customer wanted a mat finish so once dry I applied Tile Doctor Colour Grow sealer which impregnates into the pores of the natural stone protecting it from within and enhancing the natural colours of the Slate at the same time.
For general cleaning of Sealed stone floors, we recommend the use of a PH Neutral Cleaner as anything with a strong PH will degrade the life of the sealer over time.
Steve Keary
Greater Manchester Tile Doctor
 Patience Designs Studio Ltd
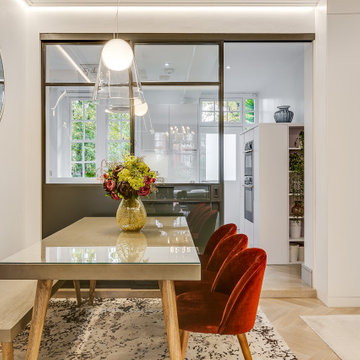
This St Johns Wood mansion block flat was one of our recent projects with a luxurious property developer in the area. We opened up spaces between the hallway, living area and kitchen to create a much more open feel throughout. A bespoke bench wrapped around the living space providing extra seating as well as storage whilst, keeping as much of the floor space free. Hidden cabling, Samsung Frame TV and biofires helped to add the luxuries without drawing away from the tranquillity.
Another view of the St Johns Wood mansion block flat, the modern kitchen layout with it's central island and induction hob and ceiling mounted extraction pendant above. The brushed bronze finish on the island's facade contrasts with the sleek minimal gloss white cabinetry for the rest of the kitchen.
 Tile Doctor Ltd
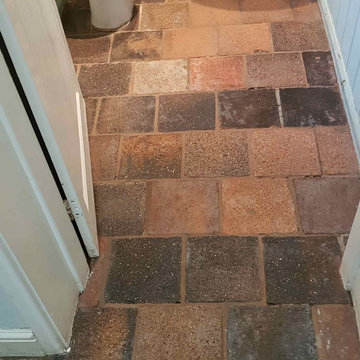
We were contacted by a client from Formby asking for advice on how to remove a thick layer of floor leveller from her Quarry tiled floor. I suspect at some point in the past a previous owner had decided to cover the tiles with lino and a cement-based levelling compound was applied to level the floor first. My client had tried to remove it herself but found it very hard going and after realising she had quite a project on her hands decided to call us instead and see if we could help with the restoration.
I worked out a quote for the client which would include removing the self-levelling compound, cleaning up the tiles and then sealing them to improve its appearance and protect it going forward. The quote was accepted, and a date agreed for the restoration to be completed which would take two days.
We have a variety of tools that we can use for removing cement but in this case, I decided to use an air operated pin gun. The head of the gun has long pins of different length which are fired at the floor gently chipping away at the floor compound, this made short work of breaking up the cement so it could be swept away. A lot easier than the method the client had previously tried.
With the floor clear of cement, it was given an acid wash with Tile Doctor Acid Gel scrubbed in with a buffing machine fitted with a black pad. The acidic formula cleans up the stone of old cement including fine particles of dust. Afterwards the gel was rinsed off the floor with water and extracted with a wet vacuum.
We let the floor dry out overnight and returned the next morning to apply the sealer. For the best results, the stone needs to be dry so before sealing I always take several moisture readings with a damp meter to make sure. The results were good so the first of what would be three coats of sealer were applied to the floor. I used Tile Doctor Colour Grow for sealing, it is an impregnating sealer that works by occupying the pores in the store thereby protecting it from within, it also brings out the colour in the stone.
Once done the floor looked great, the old self-levelling compound was gone and the rich colours in the tile had been restored. In fact is was only when finished did we realise these were in fact Baked Clay Quarry Tiles, minerals are added during manufacturing to give then colour, although 95% clay they are very tough like stone. The client was over the moon with the outcome, the floor had been restored to its’ former glory.
For aftercare I recommended the use of Tile Doctor Neutral Tile Cleaner to keep the floor in good condition. It is pH neutral so will ensure the newly applied sealer is not compromised and the floor will continue to look good for a long while to come.
Andrew Robb
Merseyside Tile Doctor
 Tile Doctor Ltd
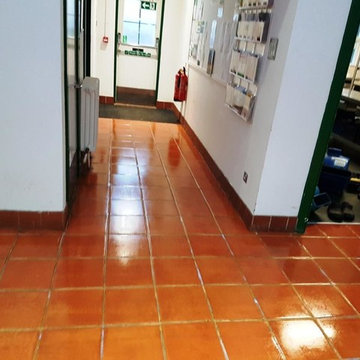
A local cleaning contractor called us in to work on the Terracotta tiled floors at a council building in Amersham. The Terracotta had not been deep cleaned and resealed for about ten years and the sealer had worn off leaving the tile vulnerable to dirt becoming ingrained in the pores of the tile. The grout had also suffered the same fate and had almost gone black in many areas.
This is a common problem with Terracotta which is quite porous and once those pores become ingrained with dirt the tile becomes difficult to clean effectively. The solution is to seal the tile however sealers wear off over time and this was basically the problem.
After discussing the issues we agreed on a plan of action to deep clean the Terracotta tile and grout and then re-seal to protect it. Due to the busy nature of the building we agreed to do the work between Christmas and New Year when we knew the building would be empty.
We started by applying a strong dilution of Tile Doctor Oxy-Gel which is a strong tile cleaning product that being in a gel form ensures it sits on the tile for longer, giving it a longer effective dwell time so it can really eat into and loose the dirt. After approximately twenty minutes the gel was scrubbed into the tile with a black scrubbing pad fitted to a rotary machine. This broke down most of the dirt and removed any remaining sealer. Once the whole floor had been treated in this manner it was rinsed thoroughly with water which was then extracted using a wet vacuum.
With the soiled cleaning solution removed I could see the next step would be to spot clean stubborn staining and clean the grout. For this task I used a strong dilution of Tile Doctor Pro-Clean scrubbing it in by hand using stiff brushes and aided with a hand-held steamer to help treat the stubborn staining. Once done the floor was given a final rinse and then as much moisture as possible removed with the wet vacuum.
We then left the floor to dry off completely and came back a couple of days later to seal the Terracotta tile.
I mentioned earlier that Terracotta is porous; in fact it’s probably the most porous material I deal with, so to fully seal the floor I had to apply eight coats of Tile Doctor Seal and Go which will provide complete and long lasting protection against staining and dirt. Seal and Go also adds an appealing satin sheen to the tile and the new seal will make it much easier to clean in future.
The floor tile and grout now look much healthier and I’m sure the council will be very impressed when they go back to work after the holidays.
Happy New Year…
Andrew Newstead
North Buckinghamshire Tile Doctor
19