
Search results for "Extracts" in Home Design Ideas

 Tile Doctor Ltd
This is a large 17.2 m2 Sandstone Floor installed throughout the living and kitchen areas of a property in the beautiful village of Disley close to Lyme Park which is run by the National Trust. The floor had been installed four years ago and my client was unhappy with the original sealer which hadn’t lasted very long. Without the protection of a sealer dirt had become ingrained in the pores of the stone which was now difficult to clean. Another issue was the rough nature of the Sandstone meant it was impossible to mop as it shreds the mop! As a result, the floor was mainly cleaned with a hoover which was not ideal, especially in a kitchen.
I went over to survey the floor and before quoting I ran a small test clean in the kitchen which took the floor back to its natural pale colour and really showed how dirty the floor had become. Test cleans are great as it helps me to formulate an effective cleaning plan and provide an accurate quote. My client was impressed with the result and so I was booked to come back and deep clean and then reseal the whole floor. Due to its size I estimated the floor would take two days to deep clean and a further day to apply a new sealer, so three days in total.
Working in large sections I started by cleaning the floor and stripping off the old sealer with a strong dilution of Tile Doctor Remove and Go which is a coatings remover that is safe to use on stone. The solution was left to soak into the pores of the Sandstone for ten minutes before being worked in with a 200-grit diamond pad fitted to a rotary floor machine. This action not only removed the old sealer and cleaned the floor but the 200-grit pad being vey coarse removed a lot of the roughness from the surface of the Sandstone so it shouldn’t shred any more mops.
After rinsing the floor with water and removing the slurry with a wet vacuum I set about cleaning the grout with Tile Doctor Pro-Clean worked into the grout line with a stiff brush and assisted with steam from a professional steam cleaner with a grout attachment. Once done the floor was rinsed and extracted again to remove the soil from the grouting. There was also an area near one of the doors where the grout had become loose and needed replacing so I made up a batch of matching grout and filled this in. The floor was then left overnight to dry with assistance from a couple of air movers.
I returned the next day to finish the floor by applying a sealer. First, I double checked the floor was dry with the damp meter. The readings confirmed the air movers had done a good job and that the floor was within the accepted parameters, so I was ready to seal. The sealer I chose was Tile Doctor Seal and Go which being water based doesn’t leave a smell as it dries, it really works well on Sandstone and adds a nice subtle sheen to the stone.
Once finished the floor looked much cleaner, lighter in colour overall more inviting, you could even see the fossils in some of the tiles.
The surface was also smoother so the customer should find cleaning with a mop much easier in future. On that subject its worth pointing out that owners of sealed floors should always use a neutral pH tile cleaner on their floors as most supermarket products are simply too strong and will prematurely strip the sealer off a tile if used repeatedly. Tile Doctor sell a product called Tile Doctor Neutral Cleaner which is ideal for cleaning sealed Sandstone floors like this one.
My client was really happy with the results and sent me a message later saying: “the floor looks amazing!”
Kamila Logonzy
East Cheshire Tile Doctor

 Diego Bringas
vi-deo! Person of Interest S.eason 5, E.pisode 12 F.ull O.nline. Here we go thhen for sure all the fans, this is the nice and wonderful time for all of us to start watch into the rest about Person of Interest season 5, episode 12 online. Entitled as .exe, here's such a wonderful over view to explore more, As Reese and Shaw race to catch up with Finch, he infiltrates a maximum-security government facility in a desperate mission which could mean the end for not only Samaritan, but for himself and The Machine as well.
"Synecdoche" reminder looks fantastic, When Reese, Shaw and Fusco travel to Washington, D.C. to protect their next number, The President of the United States, the Machine classifies this threat as extremely relevant - in terms of national security - but Shaw is worried about the implications behind Samaritan's neglecting to intervene. The threat is neutralized, but the inner-governmental privacy-activist group with a mole in the U.S.S.S. has turned the full force of the Secret Service on Reese and Shaw.
The Machine has secretly enlisted Logan Pierce, Joey Durban and Harper Rose to secure a clever exit strategy, with each of whom camouflaging into various resourceful associations; when Reese and Fusco are extracted, they band together with Logan, Joey and Harper to discuss their enlistment by the Machine, what has happened and what is to come.
Harold, meanwhile, is grieving over the loss of Root, and reaches a conclusion that brings him to a highly-secured government facility in San Antonio, Texas with a weaponized virus capable of destroying Samaritan. Harold has become ready to go to any lengths, and Reese and Shaw prepare for their final battle.
Series over view, They are helped by NYPD Detectives Lionel Fusco, a corrupt officer whom Reese coerces into helping them, and Joss Carter, who in early episodes investigates Reese for his vigilante activities.
Reese arranges for Fusco to spy on Carter by becoming her partner, but Carter eventually becomes Reese's ally and drops her investigation on him. Nevertheless, for the entirety of season one neither Fusco nor Carter is aware that the other is also working with Finch and Reese and both detectives are kept in the dark about the Machine. Periodically, the team enlists the aid of Zoe Morgan, a professional "fixer" who applies her skills to particularly difficult tasks.
The series features several subplots. One significant story arc involves "HR", an organization of corrupt NYPD officers who are initially in league with budding mob boss Carl Elias and later with the Russian mafia; in earlier parts of this arc, Fusco is forced to go undercover. Another important story line revolves around Root, a psychopathic hacker who is determined to gain access to The Machine.
During season two, another organization of powerful business figures, Decima Technologies, is revealed to be attempting to gain access to the Machine. Carter vows vengeance against HR after they have her boyfriend, Detective Cal Beecher, murdered. Reese and Finch encounter Sameen Shaw, an ISA assassin, on the run after being betrayed by her employers.
Shaw learns about The Machine in the season two finale and subsequently becomes a member of Reese and Finch's team. In Season three, Carter delves deeper into her investigation of HR, eventually uncovering its leader; but she is killed. In his grief, Reese briefly leaves the team. The team also battles Vigilance, a violent anti-government organization devoted to securing people's privacy.
100% working here:
http://tinyurl.com/zkfrsad
http://tinyurl.com/j6kjlsz
During the second half of season three, Decima Technologies starts to acquire hardware to bring to life a new artificial intelligence called Samaritan, using the codes from Harold's old college classmate, Arthur Claypool. In the season three finale, it is revealed that Vigilance was created by Decima to make them appear as domestic terrorists. This allowed Decima to obtain all the NSA feeds to make Samaritan operational. The Machine creates new identities for the Team so that they can fly beneath Samaritan's radar. Go for it finally fans, start watching for Person of Interest season 5, episode 12 : .exe online.
 Tile Doctor Ltd
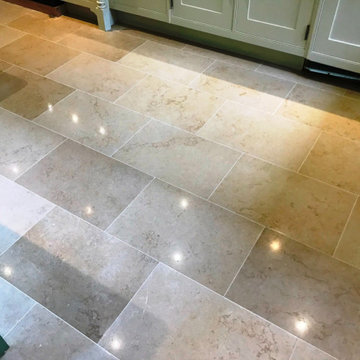
The owner of this recently purchased property in the Berkshire village of Twyford had inherited a Jerusalem limestone floor that had been installed throughout the ground floor including the Kitchen. The previous owner hadn’t maintained the stone floor very well and as a result it had become dull, patchy and the new owner was finding it impossible to keep clean. The floor was becoming a problem for them and they had been considering ripping it all up and getting it replaced. However due to the size of the floor and potential cost of replacing it they searched for other solutions and contacted Tile Doctor to see if it could be renovated.
I scheduled an appointment with the owners to survey the floor and it wasn’t long before I realised that we could achieve a great result by polishing the Limestone using a set of diamond burnishing pads. To prove how well I thought the floor would clean up I offered to complete a demo within the small utility room. This was arranged and completed a week later, as I expected once I had finished the demo the floor looked fantastic, more importantly the client was ecstatic with the results and couldn’t wait to book us in to complete the rest of the house.
It was a large floor so I estimated the process would take 4-5 days to complete and would need to work in sections starting with the kitchen then progressing into the study and cloakroom, dining room and finishing off with the entrance hall. Thankfully I had an empty house to work in which helped as I could start sealing the area I worked on the prior day.
The limestone had become quite pitted in the high traffic area, these pits had filled up with soil and become unsightly. My first task was to deep clean the dirt filled pits and grout, to do this I used a strong dilution of Tile Doctor Pro Clean and a stiff nylon brush making sure I could get into the pits releasing the dirt, then vacuuming up all the chemical slurry as I went along.
The next task was to fill these pits I used a two-part epoxy filler that matched the colour of the stone. Once the filler had dried, I worked through the hand burnishing blocks from 100 grit to 400 and I smoothed out the areas that had been filled.
Now the holes/pits had been filled I continued with the restoration of the floor by moving onto the burnishing process using diamond encrusted floor burnishing pads. This involves honing the Limestone with a set of burnishing pads starting at 400-grit. The pads are applied to the floor with a heavy floor buffing machine using water to lubricate the process. The pad is run over each tile around three times and the fine slurry this process generates is rinsed off afterwards with water and then extracted with a wet vacuum. You then move onto the 800-grit and then 1500-grit slowly building back the appearance of the stone.
As I had worked in sections/rooms at a time I was able to allow a full day drying time before sealing. Happy with the depth of colour from the pad system I opted to seal the floor with two coats of Tile Doctor Ultra-Seal. I had a range of sealers to choose from an in this case I felt Ultra-Seal would be most suited as it doesn’t change the natural appearance of the Limestone yet will provide years of protection and make it much easier to keep clean.
The owners were over the moon with how the limestone now looked and relieved that their problem floor had been restored. For aftercare cleaning I recommended Tile Doctor Stone Soap which is designed for maintaining the patina on polished stone floors.
Dennis Buckland
Berkshire Tile Doctor
Find the right local pro for your project
 Convict Hill Floor Covering & Design, Inc.
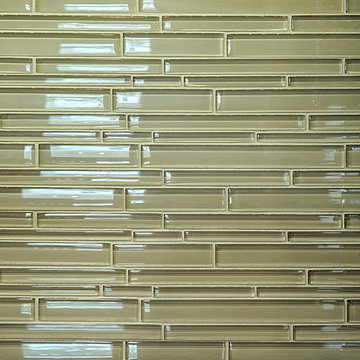
Example of a mid-sized classic l-shaped ceramic tile open concept kitchen design in Austin with an undermount sink, shaker cabinets, dark wood cabinets, granite countertops, green backsplash, matchstick tile backsplash, stainless steel appliances and an island
 North State Custom Builders
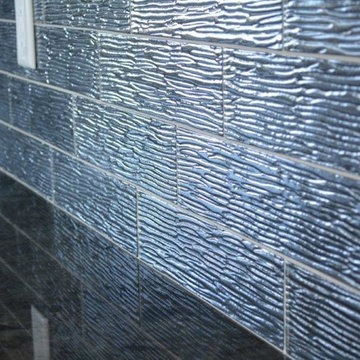
Inspiration for a large coastal l-shaped medium tone wood floor and brown floor open concept kitchen remodel with a double-bowl sink, shaker cabinets, white cabinets, granite countertops, blue backsplash, subway tile backsplash, stainless steel appliances and an island
 Tile Doctor Ltd
During an inspection for alteration work, this customer from Cheshunt discovered what appeared to be an original encaustic tiled floor under the hallway carpet. Keen to work out what it was, and have it restored, I was asked to pop round and look.
I went over as requested to survey the hallway floor and confirm their suspicions. The carpet had been secured with gripper rods glued onto the floor and that came away easily enough. Underneath, the tiles had been covered with self-levelling cement which had to be carefully scraped away to reveal the tiles.
I ran a test to see if the cement leveller could be easily removed and using a combination of a scraper with Tile Doctor Pro-Clean, I was able to confirm the tiled floor was indeed salvageable. The house was Edwardian, and the tiles had been laid in a classic black and white geometric pattern typical of the period so I suspect the floor was indeed original.
I worked out a quote to restore the whole floor including the removal of the cement, deep cleaning and then sealing the tiles. Without removing all the cement, it would be difficult to price for replacing broken tiles, but I suspected there may be a few as its quite usual for a floor of this age. Keen to have the floor restored we were given the go-ahead and a date scheduled for the work to start.
The first step was to remove all the carpet and gripper rod so we could see the full extent of the self-levelling screed. Once done it was a case of carefully chipping and scraping away to break up the cement until the tiled floor had been fully revealed. Its slow and detailed work but quite rewarding when the tiled floor is finally revealed. The tiles had survived well under the carpet and cement but as suspected a few repairs and replacement would be needed.
With all the cement brushed away work moved onto cleaning which started with a strong dilution of Tile Doctor Pro-Clean applied to the floor and left to soak in for fifteen minutes the scrubbed in with a rotary machine fitted with a Black pad. A lot of soiling is generated from this which is rinsed off with water and extracted with a wet vacuum. The floor was then inspected and the process repeated where required.
The next step was to treat the tiles to an acid wash using Tile Doctor Grout Clean-up. This is applied as before and has several benefits including dissolving the remaining cement residue and neutralising the pH of the floor after the use of Tile Doctor Pro-Clean which is a strong alkaline.
The floor was then inspected and the broken tiles carefully removed so they could be replaced. This is delicate work as lifting a tile can sometimes upset its neighbour and before you know it the size of the work has tripled. Replacement tiles were then cut to fit the existing geometric pattern and secured into place with a rapid set adhesive and grouted in.
Once the replacement tile and grout had set, the floor was given a light clean using Tile Doctor Neutral Tile Cleaner and then left to dry out overnight.
The next day the tiles were sealed using a single coat of Tile Doctor Colour Grow and the followed up with give coats of Tile Doctor Seal & Go. Colour Grow is an impregnator that soaks into the pores of the tile protecting it from within and improving colour, where as Seal and Go adds a nice subtle sheen to the tiles. Both products are breathable which is an important feature with old floors that don’t have a damp proof membrane.
For aftercare I recommended Neutral Tile Cleaner which is a gentle but effective tile cleaning product that won’t damage the sealer.
Robert Voyce
Hertfordshire TIle Doctor
 Tile Doctor Ltd
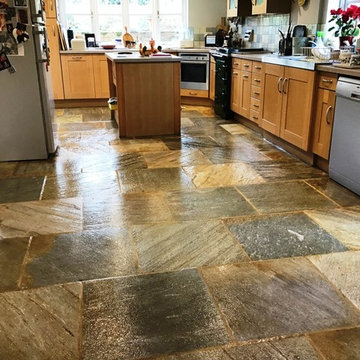
I recently visited a customer living in the village of Ravensthorpe, just outside Northampton to rejuvenate a 15-year-old multi coloured Chinese riven slate floor that needed a deep professional clean. Slate is a hard-wearing tile used for flooring high traffic areas but does need sealing to bring out its best features. In this case the sealer had long since worn off and dirt had become ingrained in the stone making it difficult to clean effectively.
We discussed the client’s requirements and the cleaning process I planned to follow to rejuvenate the floor. I had to check on availability, so I e-mailed over a quote and some dates later that day. They were happy with my proposal and agreed for the work to be done whilst the customers were on holiday.
My first task was to test a small area to determine which products would give the best results. In this case, I decided to start with a strong dilution of Tile Doctor Remove and Go which is a strong alkaline cleaner/coatings remover that’s safe to use on Tile and Stone. I spread this solution across a section of the floor and left it to seep into the pores of the stone and lift out the ingrained dirt.
After allowing the solution adequate time to dwell, I scrubbed the slate with a carbon brush fitted to a rotary machine to gradually reveal the fantastic natural colours of the Slate hidden beneath the dirt. Happy with my choice of cleaning product I repeated this process in sections until it had been carried out throughout the entire area. Following this, I rinsed the entire floor several times with clean water, before soaking up the resulting soiled residue with a wet vacuum.
The next part of the cleaning process entailed paying attention to the grout lines which were scrubbed using Tile Doctor Grout Clean-Up. The resulting residue was promptly extracted with the wet vacuum and I finished by giving the whole floor a rinse with Tile Doctor pH Neutral Tile Cleaner. This is a day to day tile cleaning product which is recommended for stone floors, many supermarket tile cleaning products are only suitable for ceramic tiles due to their acidic formula and can damage a floor over years of use so you should always read the label. However, I always leave my clients with a complimentary bottle of a suitable Tile Doctor product to maintain their floors.
The floor was left to dry off overnight and I returned on the second day to seal the floor. Before starting I checked the floor was dry using a damp meter which confirmed the Slate was dry and ready to seal. The floor must be completely dry before sealing as any excess moisture has the potential to the damage the performance of the sealer. Since my client had specifically requested a silk finish, I opted to use Tile Doctor Seal and Go which dries to leave a lovely subtle sheen that really enhances the look of the stone. Five coats were applied to ensure a good hard-wearing protection.
My client was very pleased with the results, particularly as they hadn’t realised how much colour it had lost over the years and left the following feedback on our website.
”I despaired of having a clean-looking floor again. Phil Vissian assured me that intensive deep cleaning and resealing could restore our fifteen year old, subtly coloured, Chinese riven slate kitchen floor. He has done a fantastic job. Looks like new, and I shall book Phil for an annual professional clean, so that it never gets as bad again.” Sally M, Northampton
Phil Vissian
Northamptonshire Tile Doctor

 threshold interiors
Location: New York, NY, United States
This Loft was tastefully renovated back in the '90s, but was due for an update and an expansion of the kitchen and dining areas to accommodate the client's cooking skills and entertaining needs. EnlargIing the island and adding cabinetry to delineate the office, bar and dining areas was a priority. The bathroom was updated to feel like a tranquil spa with beautiful new tile, plumbing fixtures and cabinets. Our biggest challenge was coordinating the entire renovation while our client was out of town for the Summer!
Photographed by: James Salomon
 Tile Doctor Ltd
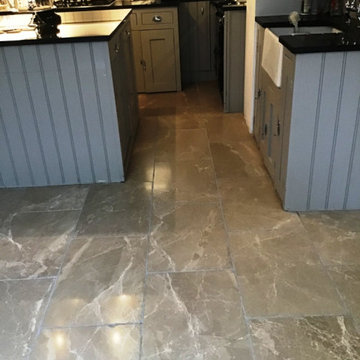
This Limestone tiled floor installed in a kitchen and family room at a property in Wellingborough is a great example of how this material can lose its appearance without a regular maintenance plan in place.
The customer called me as not only was she concerned that the floor had lost its lustre the grey grout had become very stained and almost black in heavy traffic areas, in fact my customer had originally asked about re-grouting but I was confident it could be cleaned.
I provided a quote which they were happy to accept.
The area was a nice wide 6 metre by 5 metre space and except for a few items of furniture that would need moving around there were relatively few obstacles. I reasoned the most efficient way to restore the polished appearance of the Limestone would be to use a set of diamond encrusted Burnishing Pads. These are fitted to a rotary machine and applied to the stone in sequence from coarse to smooth. It’s an effective process that cuts back the layer of dirt on the floor and then we build back up the polish.
We started burnishing the Limestone with a coarse 400-grit pad fitted to a rotary machine and applied with a little water for lubrication. The coarse pad is very good at removing dirt and old sealers from stone and once completed the resultant surface water and loose dirt is removed using a wet vacuum.
At this point I turned my attention to the badly stained grout lines, and applied a strong solution of Tile Doctor Pro-Clean which was scrubbed in along the grout lines using a stiff grout brush, this is necessary as the recessed nature of the grout makes it difficult for the rotary pads to reach it.
I then repeated the burnishing process with the medium 800-grit pad and fine 1500-grit pad, the 800-grit pad removes any small surface scratches and the 1500-grit further refines the look of the Limestone slowly restoring its polished appearance.
After the whole floor had been burnished in this way it was given a further rinse with water and the soil extracted as before. I then inspected the floor to see if more work would be needed.
I was not fully happy with how some of the grout lines had responded, some were still slightly stained, and some marks were visible in the high traffic areas. I had already discussed on my initial visit with the client that this might be the case and it was agreed between us that should this be the case I would apply a Tile Doctor Grout Colourant in Light Grey to recolour all the grout lines and achieve a uniform finish.
The stone and grout was still damp from cleaning and polishing, so I decided to leave the grout colouring until the following day.
On day two I started by grout recolouring all the grout lines, it’s a straight forward process but can be a little tedious where there is a lot of grout to cover. Once complete I allowed the grout colour to dry for a couple of hours before moving onto the next step.
The last pad to be applied in the stone burnishing process is the very fine 3000-grit polishing pad which is applied dry to the tiles using a small amount of water sprayed onto the floor and leaves the stone dry and with a polished silk finish.
The floor was then sealed using two coats of Tile Doctor Ultra Seal Sealant allowing the first coat to dry before applying the second. Ultra-Seal is an impregnating sealer that works by occupying the pores in the stone thereby preventing dirt from becoming ingrained there. It’s also a natural look sealer that doesn’t affect the appearance of the stone.
My customer was very happy with the transformation of her floor and provided the feedback copies below. In-fact she was so impressed with the results that she also used our services to restore the grout and silicon in one of her bathrooms.
“Phil was on time & easy to deal with and did an amazing job on my kitchen and bathroom floors and the carpets & sofa. No fuss, just a great job. Liz O.”
Phil Vissian
Northamptonshire Tile Doctor

 Neumann & Rudy Architecture
**I. Spatial Composition & Architectural Volume**
This vignette operates as a masterclass in the choreography of compressed urban space, deploying a classic enfilade strategy to extract depth from a modest footprint. The composition is organized around a cased opening — flanked by heavy, mitered pilaster-style jambs and a substantial crown-capped header — that frames the kitchen beyond like a proscenium, establishing a telescoping sightline from the foreground banquette nook through to the range wall and its marble backsplash. The immediate volume is a canted, faceted room; the angled corner walls and the polygonal ceiling perimeter generate a subtle rotational geometry that is echoed, with deliberate rhyme, in the octagonal tabletop and its faceted plinth base. Architectural discipline is supplied by comprehensive millwork: recessed applied-molding wall panels calibrated to the wall heights, a built-in bibliothèque with adjustable shelving and integrated media niche on the left, and a bench base detailed as cabinetry with a plinth and reveal, so the seating reads as architecture rather than furniture. The crowning gesture is a stone-clad soffit and cove above the multi-part cornice, which visually lifts the ceiling plane and dissolves the corner conditions of the canted plan into a continuous, luminous band.
**II. Materiality, Color & Texture**
The palette is a study in low-chroma tonal layering, structured on a base of dove-grey lacquered joinery whose cool, faintly greige undertone reads as both patrician and contemporary. Against this, book-matched white marble with grey and taupe veining appears in three registers — the ceiling cove, the kitchen backsplash, and the honed tabletop — creating a vertical and horizontal continuity of stone that binds the two rooms into one material narrative. Underfoot, wide-plank white oak laid in a herringbone pattern is finished in a wire-brushed, cerused grey-brown, its open grain supplying essential tactility and directional energy that counteracts the smoothness of the cabinetry. The tonal reserve is punctured by a single decisive chromatic move: the oxblood-to-cognac aniline leather banquette, its capitonné-adjacent piping and channeled seat cushion delivering saturated warmth and a supple, patinating counterpoint to the cool minerals. Metals are deliberately stratified — brushed stainless on the appliance suite, polished nickel on the cabinet hardware and pendant collars, and a high-mirror chromed column and base on the table that pulls reflected fragments of the room into itself. Textile relief arrives through a heather-grey wool bolster and the woven, honeycomb-textured sconce shades, while the sunflowers and pantry provisions behind glazed muntin doors introduce a curated, humanizing note of the quotidian.
**III. Lighting, Atmosphere & Style Profile**
The lighting scheme is layered and hierarchical. Ambient illumination is borrowed rather than direct: the kitchen functions as a light well, its own concealed under-cabinet lighting and cove-washed ceiling projecting a cool, diffuse glow forward through the cased opening, so the brighter volume beyond reads as both destination and light source. In the foreground, symmetrically paired wall sconces with textured drum shades cast a warm, amber-filtered ellipse of light onto the paneling — providing intimate, low-level modeling that emphasizes the millwork's shadow lines and flatters the leather's depth. The kitchen's aligned trio of spun-metal dome pendants, with polished collars and diffused lenses, reinforce the axial perspective and supply task-appropriate downlight, while the marble cove above serves as an indirect reflector, softening any residual harshness. The cumulative atmosphere is hushed, refined, and slightly cinematic — a quiet formality more contemplative than performative. Stylistically, the project synthesizes into a form of Transitional Classicism, or more precisely a tailored American Neoclassicism recalibrated for contemporary living: the vocabulary of paneled millwork, crown profiles, and cased openings is retained, but stripped of ornament, flattened in profile, and rendered in a monochrome envelope, then energized by faceted geometries, mirror-finish metal, and a single confident stroke of leather. It is restraint deployed as luxury.
 LL Flooring
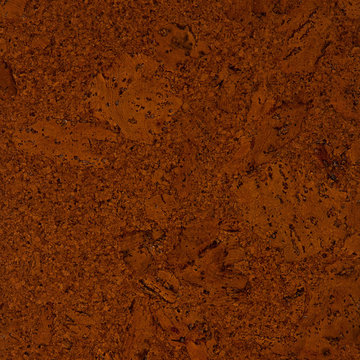
Lisbon Cork Co. Ltd. Fine Cork Flooring combines the beauty of a natural material with the comfort of a cushioned surface. It is durable, acoustical, and a great insulator. The bark of the cork tree is peeled without destroying the tree and it grows back within nine years, ready to be harvested again. Warm to the touch and resilient, cork floors are a joy to live with. Cork is considered a green product because the same tree can be harvested numerous times.
 Tile Doctor Ltd
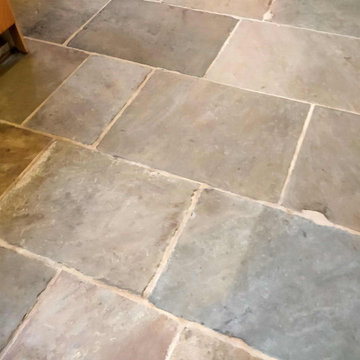
The owner of this period cottage in the old market town of Tadcaster near Leeds, had what was once a beautiful Yorkshire stone floor in the kitchen. It has been a long time since it had been given a proper clean so over the years and with the Kitchen being a high traffic area the whole floor including the grout had darkened and he now wanted it refurbished in time for Christmas.
I visited the property to assess what needed to be done and could see straight away that any protective sealer that was once on the floor had long since worn off. In fact, it was so consistently dirty with years of built-up grease and dirt I had to wonder if one had ever been applied.
I explained what the floor needed was a really deep intensive clean and then a sealer applied to make it easy to keep clean. The problem with most tile and stone is its porosity and if left unprotected dirt easily becomes lodged into its pores making cleaning a struggle.
To prove the difference that can be achieved and to allow me to work out a process on which I could base an accurate quote I ran a test clean on part of the kitchen floor. The test clean went very well, the difference was remarkable, and the cleaned section really stood out. Pleased with the potential of a clean floor they accepted my quote, and we pencilled a date in the diary.
I returned on the appointed date and began by removing the kickboards from under the kitchen units to protect them from splashing. Next, I set about spaying the floor with a strong dilution of Tile Doctor Pro-Clean, this is a purpose made tile and grout cleaner that eats into the grease and dirt so it can be removed. This product works best if you leave it for ten minutes before scrubbing in using a heavy-duty machine fitted with a heavy-duty brush. The soil released from the floor was then extracted using a wet vacuum.
The Pro-Clean did a good job on the grout however it was clear something stronger was required to really get the stone clean, so I stepped up a gear and applied Tile Doctor Remove and Go using the same process as before. This is a really good product for removing deeply ingrained grease and dirt.
The final step of the cleaning process was to give the stone and acid wash using Tile Doctor Grout Clean-Up to remove old grout haze and other mineral deposits; additionally, being an acidic product, it counters the alkaline cleaning products used earlier neutralising the pH level of the floor and leaving it ready for sealing.
Before sealing I like to discuss the different products available and the finishes they can provide. In this case my clients’ main concerns were that they wanted the stone to look natural and easy to maintain going forward.
With this in mind, Tile Doctor Seal & Go Extra was chosen, it’s a modern acrylic-based sealer that brings out the natural colours in the stone and gives a very slight smooth finish. The protection it provides will prevent dirt becoming ingrained int the pores of the stone and ensure the floor is easier to maintain. Several coats were applied, until we achieved the required finish.
The deep cleaning process and fresh sealer transformed the stone floor bringing out its original beauty and my customer couldn’t believe the difference in the floor and was highly delighted.
For aftercare I gave the client a bottle of Tile Doctor Neutral Cleaner, this product is pH neutral so it will clean the floor but won’t damage the sealer. Often people use household cleaners for cleaning tiled floors, but due to the strong chemicals they contain, they can do more harm than good by slowly stripping away the protective sealer and taking the floor back to square one. Tile Doctor Neutral Tile Cleaner is reasonably priced, and the concentrated formula means a small amount goes a long way so it’s well worth using.
This was a pleasurable job for me as it was good to see the floor transform from dull and lifeless to clean and showing the natural colour and beauty of the York stone, and always lovely to have another satisfied client.
Simon Testa
North East Yorkshire Tile Doctor
 Angela Todd Studios | Portland, OR
We went all out on the detail in this home. From the large floor-to-ceiling windows in the living room to the powerful statement tiles in the bathroom, we gave this home a seriously stylish punch, keeping the interior contemporary with unconventional accents that our clients love.
For more about Angela Todd Studios, click here: https://www.angelatoddstudios.com/
 Smithcraft Fine Construction
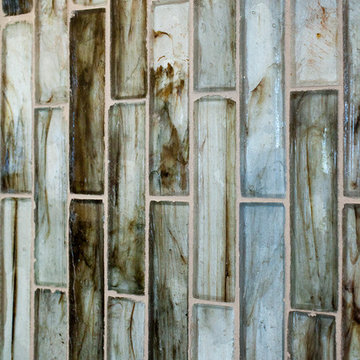
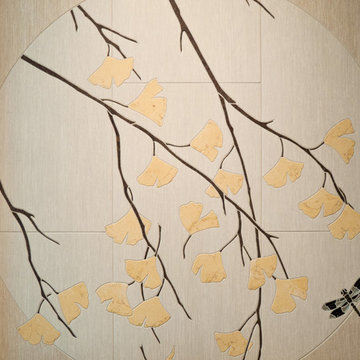
Relaxing fall ginkgo inlay.
Inspiration for a beige tile and porcelain tile walk-in shower remodel in Portland with an undermount sink, furniture-like cabinets and light wood cabinets
Inspiration for a beige tile and porcelain tile walk-in shower remodel in Portland with an undermount sink, furniture-like cabinets and light wood cabinets
 Tile Doctor Ltd
We received a request to renovate Victorian tiled hallway floor at a house in the London borough of Harlesden NW10. My client had modernised the heating system and this unfortunately required a section of the tiled flooring to be dug up so new pipework could be laid.
After speaking on the phone, I arranged an initial visit to the property so I could properly assess the work required and provide a price for restoring the floor. During my visit I could see there was another section of missing tiles at one of the door thresholds which would need attention. Except for the missing sections of floor I could see that the tiles themselves were in good condition for their age and would respond well to a deep clean and fresh seal.
I was confident on being able to source matching replacements for the missing tiles and reassured my client that we would be able not only repair the floor but also renovate it to a good standard. I gave them a price to do the restoration which they were happy to accept, and the work was booked.
After some research I managed to source replacement tiles from the Vintage Floor Tile Company in Kent; Victorian tiles are still popular so there a few companies that keep stock so we can usually find a match.
With the replacements in hand, work started by removing the cement and loose material from the missing sections of flooring and backfilling with self-levelling compound to bring the exposed base up to the right level for tiling.
The tiles were then cut to shape as required to match the existing patten and fixed into place with a quick setting adhesive and then grouted.
The floor was left to overnight to allow the adhesive to harden fully, and I returned the next day to deep clean the whole floor. To give the tiles are deep clean a strong dilution of Tile Doctor Remove and Go was sprayed onto the floor and left to soak in for ten minutes. It was then scrubbed into the floor using a rotary machine fitted with a with a black pad. This action lifted the dirt out of the tiles and the resulting slurry was removed with the wet vacuum.
It turned out that the pores of the tiles were holding a lot of dirt, so the process was repeated until I was satisfied. Due to the age of the property, there was no damp-proof membrane installed so I do try to minimise the amount of water I use in this process as there is always a chance of exacerbating any latent efflorescence issues.
Efflorescence occurs where moisture rises through the tile bringing with it salts from underneath the floor as it evaporates on the surface. This can lead to unsightly white marks appearing on the tile. To counteract this potential problem the cleaning was followed by an acid wash using Tile Doctor Acid Gel applied with a 100 then 200-grit pad, before finishing on a 400-grit burnishing pad. The floor was again rinsed with water after the application of each pad to remove the slurry and extracted with a wet vacuum.
Once I was satisfied the floor was as clean as possible, we left site and the area was left to dry over the weekend ready for application of a new sealer.
I returned on the Monday and started by taking a few moisture readings to check the floor was dry. The floor was in an acceptable range, so I applied the first of 4 coats of sealer. For this floor I chose Tile Doctor Seal and Go Extra which is specially formulated product that provides stain resistance with a hard wearing low-sheen finish.
This product is also breathable which is an important feature for old floors, anything that blocks moisture from rising through the tile will cause it to become trapped underneath where it will pool and eventually reach out to the walls and result in rising damp.
Once complete the floor looked brand new and I’m pleased to say with the deep clean and a fresh sealer applied it was impossible to tell the difference between the original and repaired sections of flooring.
For the aftercare of sealed Victorian tiled floors, I recommend Tile Doctor Neutral Cleaner, it’s a mild day to day cleaner with a neutral pH that won’t damage the sealer. Many of the tile cleaning products you find in supermarkets are simply too strong.
Andrew Newstead
North London Tile Doctor

 VIVA TILES INC
Modern Bathroom Design.
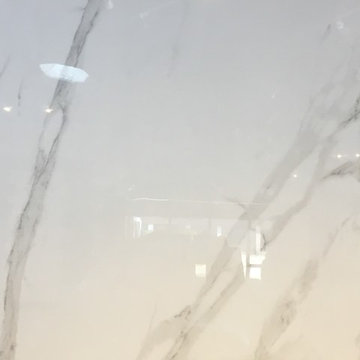
By using Carrera Polished White Porcelain Tiles on the floor you will get the most "wow" reaction from any guest.
You also can use another two selections which are Statuario White Polished and Astoria White Polished porcelain tiles.
Designer & Builder #Alireza Ghanbari
Provided by #Dizeh Design Build
Tile Supplier #VIVA TILES INC
 Tile Doctor Ltd
These pictures of a Victorian Tiled Hallway are from a property in Canterbury that was once a nursing home and was now being renovated to become a children’s home. The building was being gutted and extended at the same time and when the carpet was pulled up in the hallway, they were surprised to find a relatively intact Victorian tiled floor underneath.
Whilst they thought it bizarre that anyone would want to cover up such an attractive floor the carpet had protected it over the years. They realized it would make a marvellous feature at the entrance to the property, but professional restoration would be needed to do it justice. After a bit of research, they came across Tile Doctor and got in touch.
Canterbury comes under my North Kent designation, so I went to visit the property and survey the floor and quote for doing the restoration. There were a few missing and loose tiles that would need replacing and refixing also there was a lot of ingrained dirt so a deep clean and application of a new sealer would be required. I gave them a price for the work which they readily accepted, and we arranged a suitable time to carry out the work. Subject to the building schedule I had calculated the floor would take three days to restore.
On the first day I set about replacing and re-fixing the missing, broken, and loose tiles. This is delicate work as you need to extract the old tile without disturbing its neighbours and then clean up the area ready for its replacement. Being a Tile Doctor I keep a selection of stock tiles for repairs, some are reclaimed, and some are replica. Also, there are several companies still making Victorian style tiles so I can usually source what I need.
After the individual missing and broken tiles had been replaced and the adhesive had set, it was then a matter of renovating the floor as a whole. The tiles were covered in a thick layer of carpet adhesive which needed a combination of specialist tools and products to remove. First, a liberal layer of Tile Doctor Remove and Go was applied and left to dwell for thirty minutes. Next, Tile Doctor Pro-Clean was added and scrubbed in with a black pad.
This process softened the adhesive sufficiently in readiness for the next stage which involves using a set of diamond burnishing pads on a weighted buffing machine. Several applications were needed, each time with a successively finer grade of diamond pad and rinsing off the slurry in between. The tiles were first milled using a very coarse 50-grit pad, followed by 100, 200 and finally burnished with a 400-grit burnishing pads. This removed all the adhesive and dirt in the tiles, which was cleaned up using the wet vacuum.
Old Victorian floors like this do not have a damp proof membrane installed under the floor, and with a lot of water being used in the cleaning process I was concerned White efflorescence salts could appear later as the floor dried. To counter this, I gave the floor an acid wash using Tile Doctor Acid Gel to counter and dissolve the salts, it also gives the tiles another clean and will remove any old grout smears further improving the appearance of the tiles. Once done the floor was left to dry overnight.
On my return I tested the floor was dry by taking several moisture readings around the floor with a damp meter. Applying sealer to a damp floor is never advised and can lead to clouding and an unwanted finish.
Happy that the tiles were dry, a single coat of Tile Doctor Colour Grow sealer was applied. This is an impregnating sealer with a colour enhancing component to ‘lift’ the stronger colours of the floor. Colour Grow however does leave a matt appearance and as the client had asked for a shiny finish it was topped up with five coats of Tile Doctor Seal and Go. This is a compatible topical sealer which added a mid to high sheen.
By the end of the third day the Victorian floor looked brand new, and I received the following feedback from the client. Its rare to receive feedback from commercial customers so they were clearly overwhelmed with the transformation.
Did not think this glued covered bad old floor could look sooooo good Fabulous Fantastic job Looks Amazing Thank you
For aftercare I recommend the use of Tile Doctor Neutral Cleaner which isn’t as harsh as many of the products you find in supermarket. Stronger products can actually strip off the sealer over time leaving it vulnerable to dirt and detracting from its appearance.
Graham Davis
North Kent Tile Doctor



36