
Search results for "Involves electrical" in Home Design Ideas
 Maverick City Builders
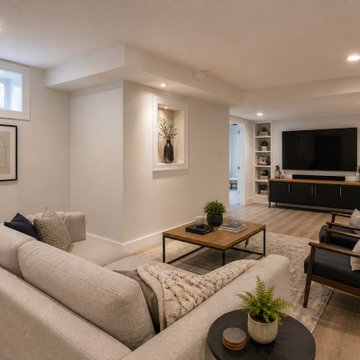
This basement renovation project in Harvard, Massachusetts showcases a complete transformation from an unfinished, underutilized space into a modern, fully functional living area. The project began with a raw basement featuring exposed concrete walls, outdated mechanical systems, and minimal lighting. Through a structured renovation process, the space was reimagined into a high-end finished basement designed for comfort, functionality, and long-term value.
The initial phase involved thorough site preparation, including debris removal, cleaning, and reorganization of existing utilities. From there, the framing stage established a new layout, allowing for defined spaces while maintaining an open-concept feel. Electrical upgrades were implemented, including new wiring, outlets, and energy-efficient recessed LED lighting to create a bright and welcoming environment.
Insulation and drywall installation followed, significantly improving energy efficiency and overall comfort. The walls were finished with a smooth, modern texture and painted in soft neutral tones to maximize light reflection and create a clean aesthetic. The ceiling was carefully finished with recessed lighting, providing even illumination throughout the space while maintaining a sleek appearance.
The flooring installation featured durable luxury vinyl plank, chosen for its water resistance, longevity, and high-end look. This material adds warmth to the space while remaining practical for basement conditions. Trim work, including baseboards and detailed finishing touches, enhanced the overall craftsmanship and gave the space a polished, cohesive feel.
In the final stage, the basement was styled into a modern living area, complete with a comfortable seating arrangement, entertainment setup, and minimal yet elegant décor. The layout was designed to be versatile, allowing homeowners to use the space as a family room, media room, or additional living area.
This Harvard basement renovation highlights the importance of thoughtful planning, quality materials, and skilled execution. The result is a functional, beautiful space that not only enhances daily living but also adds significant value to the home. Projects like this demonstrate how a previously unused basement can become one of the most valuable and enjoyable areas in a house.
 Sosna Inc
This young couple, busy raising two young boys (plus a playful cat), had always planned to renovate—it was just a matter of finding the right people for the job.
Their biggest concern? Hiring a contractor they could truly rely on to bring their vision to life without added stress.
The master ensuite simply wasn’t working. A large, unused deck-mount tub dominated the space, while the tiny, dim shower made daily routines uncomfortable. The layout didn’t make sense for how they actually used the room, which ended up being mostly for the toilet and vanity. On top of that, the master bedroom sat in an open loft without proper walls or a door, making privacy nearly impossible.
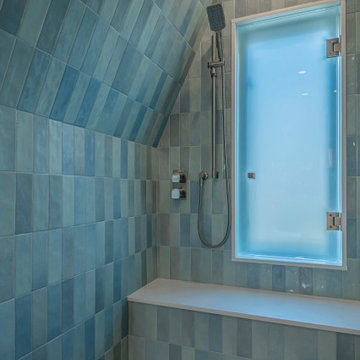
Our solution involved a thoughtful reconfiguration of the ensuite. We removed the oversized tub and replaced it with a spacious walk-in shower. The old, cramped shower space became the perfect spot for a relocated vanity, allowing for better flow and use of the room. Up in the loft, we built a new wall with a door to give the bedroom the privacy it was missing. The stairway was also refreshed with new oak treads and a stained handrail to match the existing flooring.
One challenge during construction was installing the custom shower glass and tile within the sloped ceilings and angled walls—but our team carefully managed every detail to ensure a precise and polished finish.
The new master ensuite now feels like a retreat.
Handmade-style blue subway tiles add a calming pop of colour in the shower, paired with crème porcelain floor tiles. A prefabricated solid wood vanity with quartz countertop, brushed nickel fixtures, and an electric towel warmer complete the space—bringing comfort and functionality together beautifully.
A fun moment during the design phase? We used stools, tables, and even a piano to mock up the future layout—helping the homeowners get a real feel for the spacing between the new vanity and toilet. It was a creative, hands-on way to ensure everyone felt confident moving forward.
Now, the ensuite functions exactly as it should: a fully usable and relaxing 3-piece bathroom, styled just the way they wanted. And with the new loft wall and door, the bedroom finally feels like a true primary suite—private, peaceful, and made for them.
 Carter Fox Design Build
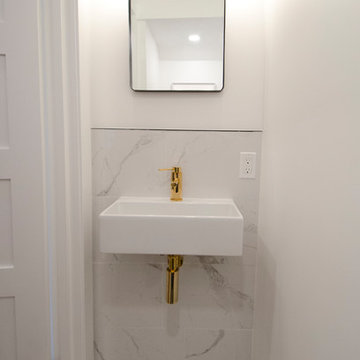
Carter Fox Renovations was hired to do a complete renovation of this semi-detached home in the Gerrard-Coxwell neighbourhood of Toronto. The main floor was completely gutted and transformed - most of the interior walls and ceilings were removed, a large sliding door installed across the back, and a small powder room added. All the electrical and plumbing was updated and new herringbone hardwood installed throughout.
Upstairs, the bathroom was expanded by taking space from the adjoining bedroom. We added a second floor laundry and new hardwood throughout. The walls and ceiling were plaster repaired and painted, avoiding the time, expense and excessive creation of landfill involved in a total demolition.
The clients had a very clear picture of what they wanted, and the finished space is very liveable and beautifully showcases their style.
Photo: Julie Carter
Find the right local pro for your project
 Halcyon Contracting
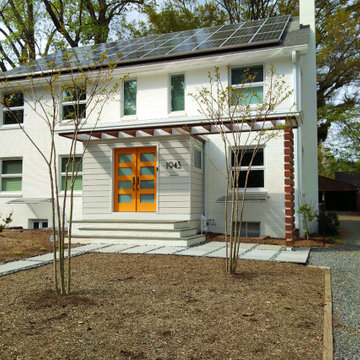
This was a mid century duplex that we gut-renovated and converted into a single family home with an updated modern aesthetic.
The original house was a mix of styles: midcentury modern with Jeffersonian windows- a bit muddled! We worked with the owners to create a clean, unified aesthetic for an updated modern family home.
The scope of the work involved completely new systems (plumbing, electric and HVAC) and gut-renovating all three floors in phases that allowed the homeowners to remain in occupancy throughout the project!
 Dream Home Construction
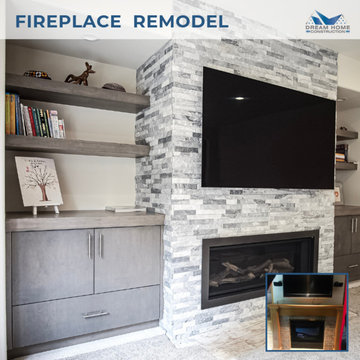
This fireplace/living room project was a quick 11 days turn around and was involved new heart, framing, electrical, custom cabinets, stone installation, new tv wall mounted and led recesses lights.
 Billdr Renovation
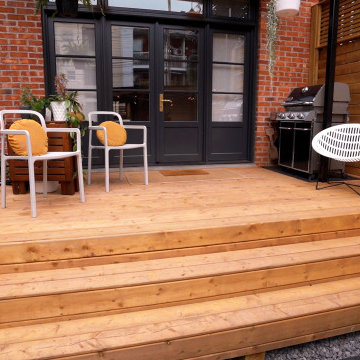
The aim of this project was to bring intimacy and versatility to a duplex backyard with the addition of a new patio, garden, shed, and fence, sourced from treated wood. This project involved removing the existing soil, landscaping, installing fences, building a patio and a shed. The client also took the opportunity to install a charging station for their electric vehicle.
 Mara Solow Interiors
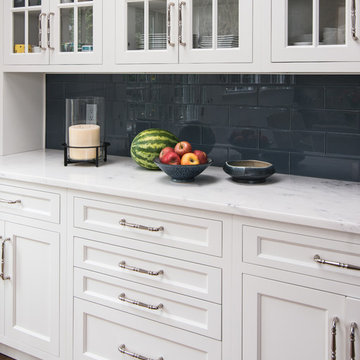
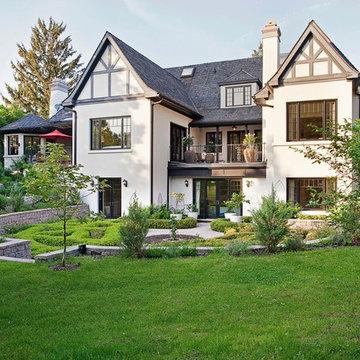
This House is located in a Historic Area of Westchester NY. The Tudor Homes which have been lovingly restored add charm to the tree lined streets. This project was a total renovation which involved resurfacing stucco walls, electrical, plumbing, flooring, and restoration of existing oak details.
Photo by: Stefan Radtke


 Murakami Design Inc.
At Murakami Design Inc., we are in the business of creating and building residences that bring comfort and delight to the lives of their owners.
Murakami provides the full range of services involved in designing and building new homes, or in thoroughly reconstructing and updating existing dwellings.
From historical research and initial sketches to construction drawings and on-site supervision, we work with clients every step of the way to achieve their vision and ensure their satisfaction.
We collaborate closely with such professionals as landscape architects and interior designers, as well as structural, mechanical and electrical engineers, respecting their expertise in helping us develop fully integrated design solutions.
Finally, our team stays abreast of all the latest developments in construction materials and techniques.
 Homeowner Services of Michigan LLC
Our clients envisioned a complete basement renovation that would transform the space into a functional and inviting area. We began by thoroughly understanding their needs and preferences, ensuring that every detail was aligned with their vision. The project involved installing spray foam insulation to enhance energy efficiency and comfort. We carefully removed existing partition walls to accommodate the new design, seamlessly constructing and installing new interior walls.
Our team provided and installed updated electrical and plumbing services, ensuring everything met current codes and specifications. To create a comfortable environment, we introduced a new HVAC zone, seamlessly integrating it with the home’s existing system. The renovation included the construction of a new bathroom, kitchen, office space, and living area, all tailored to the client’s specifications.
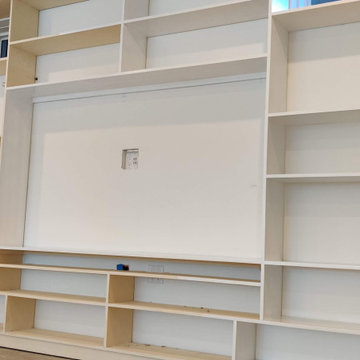
Attention to detail was paramount, with custom shelving and vinyl plank flooring adding both functionality and aesthetic appeal. Throughout the project, we maintained open communication, ensuring the clients were informed and satisfied with every step.
Our dedication to excellence and client satisfaction resulted in a beautifully renovated basement that perfectly matched the client's vision. At Homeowner Services of Michigan, we are committed to bringing your home renovation dreams to life with precision, care, and a focus on your needs.
 Murakami Design Inc.
At Murakami Design Inc., we are in the business of creating and building residences that bring comfort and delight to the lives of their owners.
Murakami provides the full range of services involved in designing and building new homes, or in thoroughly reconstructing and updating existing dwellings.
From historical research and initial sketches to construction drawings and on-site supervision, we work with clients every step of the way to achieve their vision and ensure their satisfaction.
We collaborate closely with such professionals as landscape architects and interior designers, as well as structural, mechanical and electrical engineers, respecting their expertise in helping us develop fully integrated design solutions.
Finally, our team stays abreast of all the latest developments in construction materials and techniques.
 User
UserAll Weather teamed up with the Property Brothers and Queen of Broadway Idina Menzel on this week’s episode of HGTV’s hit show CELEBRTIY IOU. In the Idina Menzel’s Slam Dunk Reno episode, Idina pivots from her award-winning stage, film and music success to give back and surprise her good friend and son’s basketball coach James, by transforming his detached garage into a dedicated office and athletic retreat.
James Hunt founded Culture Run, a youth basketball program that gives kids the skills to succeed in both basketball and life. With IDINA MENZEL’S surprise renovation, James is one step closer to running a centralized training facility and headquarters where kids can drop by for counseling, basketball tips, and more.
When the PROPERTY BROTHERS meet up with Idina to demo the garage, they involve her in every step. Menzel gets her hands dirty by swinging a sledgehammer, operating an electric hand saw and removing storage bins. “I didn’t know they get as down and dirty as they do,” Menzel commented. “I also didn’t know they were gonna have me do so much!” Menzel also helped choose the tile, cabinets, hardware, flooring and the overall color palette.
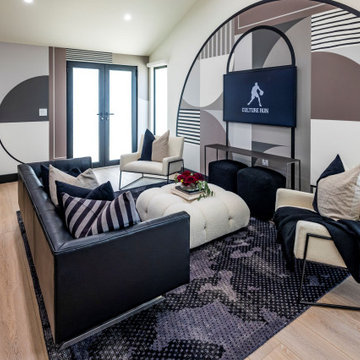
All the effort was worthwhile because Menzel was able to surprise James with the basketball hangout and showstopping of his dreams. The newly dedicated office and athletic retreat features All Weather SERIES 7000 French Swing Doors and SERIES 5000 casement and fixed windows to allow natural light and fresh air in; a sleek kitchenette with an induction cooktop; a modern bathroom with a 7 1/2′ tall shower head for basketball players; a comfortable seating area for James to review film, meet with his players or simply relax; and a unique basketball themed wall mural.
Check out more PROJECT PHOTS here.
Now in its third season, Celebrity IOU gives celebrities a chance to show their deepest gratitude to friends, family and mentors by giving them a surprise renovation courtesy of Drew and Jonathan Scott.
 Aegis Construction
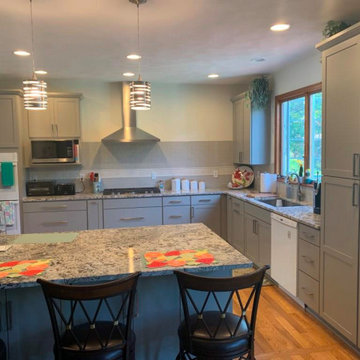
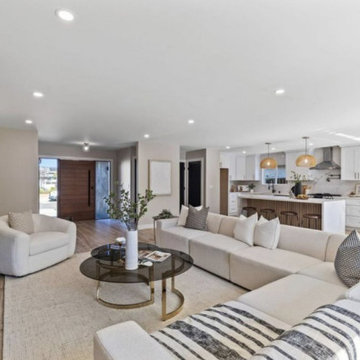
This kitchen remodel involved combing the space of the original kitchen and the dining room. The wall between the two was removed and the new space was formed. The walls and ceilings were stripped down to the framing and the plumbing, electrical and HVAC were modified. New plaster walls and ceilings were installed. The original hardwood floors were weaved together and refinished. The window over the sink was replaced with a new shorter window. The design and selections for this project were provided by a 3rd party designer.
 DevArt8 Construction
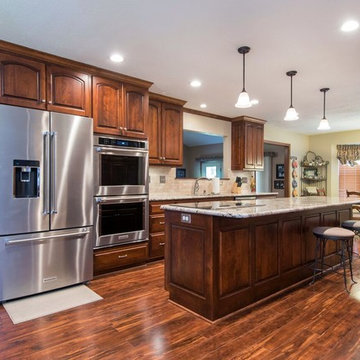
DevArt8 takes immense pride in showcasing one of our most remarkable achievements - a full home remodel that exemplifies the perfect fusion of creativity, innovation, and craftsmanship. This comprehensive transformation was more than just a renovation; it was a complete reimagination of the space.
From the moment our team stepped foot into the project, we knew that we had the opportunity to create something truly extraordinary. With a seamless blend of contemporary aesthetics and functional design, every aspect of the home was carefully curated to reflect the client's unique taste and lifestyle. The project involved intricate structural modifications, innovative use of space, and the finest selection of materials sourced from trusted suppliers. As we navigated through each phase of the remodel, our team ensured clear communication, unparalleled attention to detail, and unwavering commitment to delivering excellence. The result? A breathtaking home that not only surpassed the client's expectations but also set new standards in the world of luxury living.
At DevArt8, we thrive on the joy of turning houses into dream homes, and this full home remodel serves as a true testament to our dedication to transforming spaces into works of art.

 Talon Construction Inc.
Designing and building a kitchen addition is a complex process that involves multiple steps and considerations. Here is a general outline to help you get started on your kitchen addition project:
Define Your Goals and Budget:
• Determine the purpose of the kitchen addition. Is it for more cooking space, a dining area, or a combination of both?
• Establish a realistic budget for your project. Consider all costs, including construction, permits, materials, and furnishings.
Hire a Design Professional:
• Seek the services of a design build company who specializes in kitchen additions.
• Discuss your vision, needs, and budget with the design professional to create a design concept.
Site Evaluation:
• Assess the existing space and structural condition of your home to ensure it can support the addition.
• Consider factors like zoning regulations, setbacks, and building codes.
Design Development:
• Collaborate with your design professional to refine the concept, including the layout, size, and architectural style.
• Choose materials, finishes, and fixtures that fit your design and budget.
Obtain Permits:
• Consult with your local design build contractor to determine the necessary permits and approvals.
• Prepare and submit all required documents, including architectural drawings and engineering plans.
Create Construction Documents:
• Work with your design build professional to develop detailed construction drawings and specifications.
• These documents will serve as a guide for contractors during construction.
Hire a design build contractor:
• Check references, credentials, and licenses before selecting a contractor.
• Sign a detailed contract that outlines the scope of work, timeline, and payment schedule.
Construction Phase:
• Demolition: If needed, remove any existing structures or walls.
• Foundation: Construct the foundation for the addition.
• Framing: Build the structural framework of the addition.
• Plumbing, Electrical, and HVAC: Install or update utilities as required.
• Insulation: Ensure proper insulation for energy efficiency.
• Drywall and Finish Work: Complete the walls and ceilings.
• Flooring and Cabinetry: Install flooring and kitchen cabinets.
• Appliances and Fixtures: Add appliances, plumbing fixtures, and lighting.
• Paint and Finish: Apply paint and finishes to achieve the desired look.
• Final Inspection: Schedule inspections to ensure compliance with building codes.
Final Inspections and Approvals:
• Arrange for final inspections to ensure the addition meets all safety and code requirements.
• Obtain any necessary certificates of occupancy or compliance.
Move In and Enjoy:
• Once all inspections and approvals are received, you can move into your new kitchen addition and start enjoying it.
Remember that every kitchen addition project is unique, so adapt this outline to your specific needs and circumstances. Consulting with professionals and obtaining the required permits and inspections is crucial to a successful and safe project.
 Talon Construction Inc.
Designing and building a kitchen addition is a complex process that involves multiple steps and considerations. Here is a general outline to help you get started on your kitchen addition project:
Define Your Goals and Budget:
• Determine the purpose of the kitchen addition. Is it for more cooking space, a dining area, or a combination of both?
• Establish a realistic budget for your project. Consider all costs, including construction, permits, materials, and furnishings.
Hire a Design Professional:
• Seek the services of a design build company who specializes in kitchen additions.
• Discuss your vision, needs, and budget with the design professional to create a design concept.
Site Evaluation:
• Assess the existing space and structural condition of your home to ensure it can support the addition.
• Consider factors like zoning regulations, setbacks, and building codes.
Design Development:
• Collaborate with your design professional to refine the concept, including the layout, size, and architectural style.
• Choose materials, finishes, and fixtures that fit your design and budget.
Obtain Permits:
• Consult with your local design build contractor to determine the necessary permits and approvals.
• Prepare and submit all required documents, including architectural drawings and engineering plans.
Create Construction Documents:
• Work with your design build professional to develop detailed construction drawings and specifications.
• These documents will serve as a guide for contractors during construction.
Hire a design build contractor:
• Check references, credentials, and licenses before selecting a contractor.
• Sign a detailed contract that outlines the scope of work, timeline, and payment schedule.
Construction Phase:
• Demolition: If needed, remove any existing structures or walls.
• Foundation: Construct the foundation for the addition.
• Framing: Build the structural framework of the addition.
• Plumbing, Electrical, and HVAC: Install or update utilities as required.
• Insulation: Ensure proper insulation for energy efficiency.
• Drywall and Finish Work: Complete the walls and ceilings.
• Flooring and Cabinetry: Install flooring and kitchen cabinets.
• Appliances and Fixtures: Add appliances, plumbing fixtures, and lighting.
• Paint and Finish: Apply paint and finishes to achieve the desired look.
• Final Inspection: Schedule inspections to ensure compliance with building codes.
Final Inspections and Approvals:
• Arrange for final inspections to ensure the addition meets all safety and code requirements.
• Obtain any necessary certificates of occupancy or compliance.
Move In and Enjoy:
• Once all inspections and approvals are received, you can move into your new kitchen addition and start enjoying it.
Remember that every kitchen addition project is unique, so adapt this outline to your specific needs and circumstances. Consulting with professionals and obtaining the required permits and inspections is crucial to a successful and safe project.
 Ashton Renovations
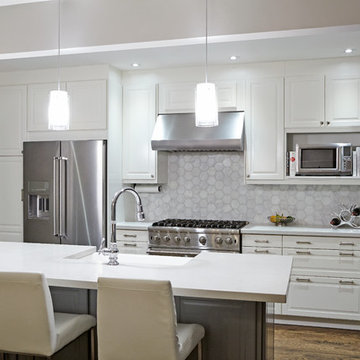
Our clients wanted to open up the first floor of their home from front to back. This involved removing a bearing wall, and a block outside partition. This included the back room into the main floor space and opened up more light from the double doors in the backyard. The main floor included renovation of the entire HVAC boiling system, electrical, plumbing, and finishing materials. The traditional features of the main floor work well with the IKEA cabinets and London Gray CeasarStone Quartz countertops.
 Katie Hutchison Studio
Custom-built in the early eighties, this contemporary home was cloaked in all brown board siding with brown windows and a cumbersome street-facing carport. The current owners had raised their family there on property that borders serene conservation land. Now they were ready for a new, brighter exterior look that would include all new windows to take in the exquisite view, unobscured by the fog of failing window seals; new siding that wouldn’t be subject to woodpecker wear and tear; a refinished screen porch; a new garage to replace the undersized carport; and new entry access. On the interior, they wanted the new, fresh vibe to extend to the design of three renovated modern bathrooms.
In response, KHS proposed black-framed windows throughout in simpler configurations; fiber-cement (and PVC) exterior cladding in three textures to differentiate functions and features; a unifying light-gray and white palette teamed with clear-finished mahogany/sapele to carry across the exterior as well as the bathroom renovations; a stream-lined screen porch with cable rails; a new shed-roofed garage to resolve the exterior massing; and a new covered walkway entrance delivering those arriving into a repurposed interior space.
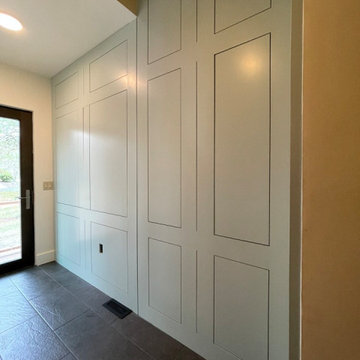
Once the overall design was resolved, the owners elected to complete the work in phases over several years. Phase 1 included renovating the powder room, guest bathroom, and primary bathroom, and refreshing the screen porch. See the reconceived modern bathrooms here on the KHS website. Next came constructing the new garage and entry, which on the interior included new floor tile and a new entry wall-paneling system to conceal electrical, solar, and security panels/controls. Phase III involved installing the rest of the new windows and completing the comprehensive new exterior cladding and palette to tie the earlier phases together. To cap it off, KHS worked with the owners to select new clean-lined furnishings for the living area in colors inspired by their coastal view.
 Renovisions
This North Shore of Boston client wanted to make a change; she decided to purchase a seaside antique home and was up for the challenge to re-design and remodel. Her plan involved re-locating her mother from Florida to the newly added wing of the house when the remodel was in full swing.
We believed that what was standing between our client and the kitchen of her dreams was a well thought out, creative design and a wall or two…
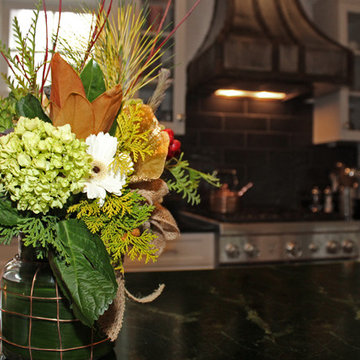
Once outdated and worn, this 1830 antique kitchen was closed off from the family room and dining spaces. The newly re-configured kitchen with re-claimed wide-plank wood floors and restorations to wood cladding on the ceiling, beam and open corner shelving really warmed up the room and welcomes friends, neighbors and relatives. Wood bead board paneling around the island cabinetry along with mixed metals, tie in nicely with the stunning soapstone countertops with distinctive copper-colored veining, creating a beautiful vintage appeal.
Styled to look like an old-fashioned stove, this steel range boasts modern conveniences such as dual-fuel (gas burners and electric oven) and a convection oven crowned by a custom steel hood adorned with rivets and metal trims.
To enrich the vintage feel, a white farm-style fire clay apron sink was installed that also evokes a classic and time- honored feel.
Although the process was daunting as it presented several challenges, it was a rewarding experience when the project was completed. Our client and her mother were absolutely thrilled with the final results.
“Thank you to Cathy and Ed very much for all your assistance with my kitchen planning! I’m fortunate to have had your input and expertise! It was great seeing you and spending time together and my mom really liked you both. I would welcome you to stop by and say hello when you’re headed to Portsmouth or the north shore. All the best!”
-Jill P.
 SKP Design
Located in a wooded setting which backs up to a golf course, The Woods is a vacation condo community in Canadian Lakes, Michigan. The owners asked us to create a comfortable modern design that would appeal to golfers and also families visiting relatives in the area. This complete renovation brought the design from 80's basic to rustic transitional. Colors and design elements echo the natural area surrounding the property.
SKP Design was involved in multiple aspects of this project. Our services included:
space planning for kitchen and both bathrooms
selecting finishes for walls, floors, trim, cabinets and countertops
reviewing construction details and electrical plans
specification of plumbing fixtures, appliances and accent lighting
furniture layout, specification and purchasing
fireplace design and stone selection
reviewing branding and signage ideas
In the great room, wrought iron accents are featured in a new staircase handrail system. Other metal accents are found in the new chandelier, barstools and the legs of the live edge coffee table. An open area under the staircase was enclosed with recessed shelving which gives a focal point to the dinette area. Recessed built-in cabinets near the fireplace store TV technology and accessories. The original tiled hearth was replaced by poured concrete with stone accents.
A queen sleeper sofa from Edgecomb provides additional sleeping. Fabrics and upholstery throughout the condo were selected for durability and cleanability.
Basic white laminate kitchen cabinets were replaced with beautiful dark stained wood. Floor tile is a wood-look porcelain from Daltile called Saddle Brook. Countertops in the kitchen and bathrooms are solid surface Corian Quartz (formerly called DuPont Zodiaq). Broadloom carpet is from Durkan. The first floor bedroom is Mona Vista pattern from Modesto Collection; all other carpet is Inviting Spaces pattern from Timeless Compositions. Walls are painted with Sherwin Williams 7647 Crushed Ice.
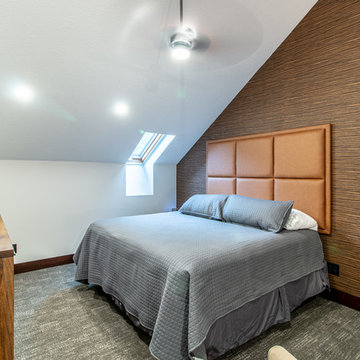
The main floor bedroom has a custom headboard mounted on a feature wall with plaid wallcovering. A freestanding vanity with undermount sink was added to the alcove area, creating space for a larger walk-in tiled shower with custom bench. On both levels, backlit mirrors highlight the sink areas. The upstairs bath has a blue tile feature wall and vessel sink.
A fiberglass bathtub surround was removed and replaced by a custom tiled shower. Vinyl wallcovering from D.L. Couch provides a focal point behind the king headboard in the loft bedroom. A twin sleeper chair adds an extra bed.
 YORK ENTERPRISES LLC
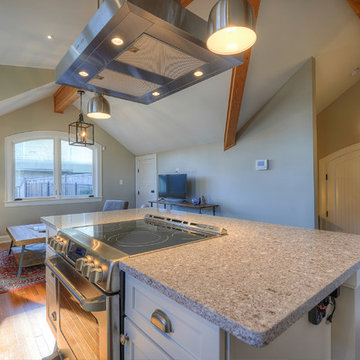
This detached accessory dwelling unit/garage combo was a labor of love by the homeowner to provide a place for family to comfortably live independently. Everyone involved is proud of the workmanship. This project was a part of the Residential Infill Pilot Program. Over 150 yards of dirt/mud was removed. Our mason successfully matched the brick to the main home. The vaulted ceiling and short wall give the living space an open feel. This project is a perfect example of a homeowner working with the government and the trades to achieve a new space that blends in with the neighborhood.
25