
Search results for "Involves soaking" in Home Design Ideas
 Dream Home Construction
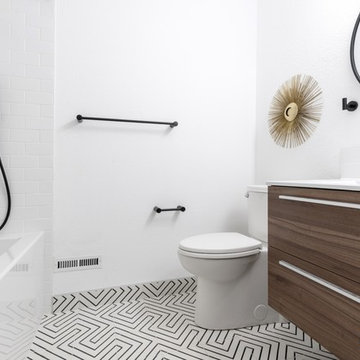
2nd bathroom remodel on Renton project which involved tub replacement, retiling the floor and walls with this beautiful pattern cement tile and subway wall tiles, added new pocket door and fresh paint. 3 weeks start to finish on this project.
 Acton ADU
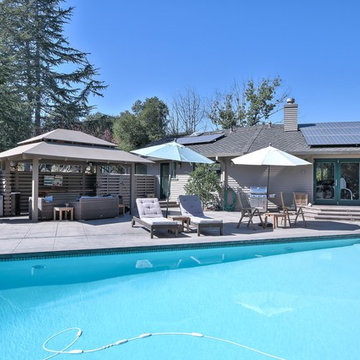
This whole house remodel involved revamping the layout, and redoing kitchen, bedrooms, bathrooms, living area, laundry room, lighting, and more. In addition, hardscaping was done including a terraced hill adjacent to a swimming pool. Highlights include a vaulted ceiling, large fireplace and french doors in the great room, a large soaking tub and curbless glass shower in the bathroom(s) and high ceilings and a skylight in the revamped contemporary kitchen.
 Acton ADU
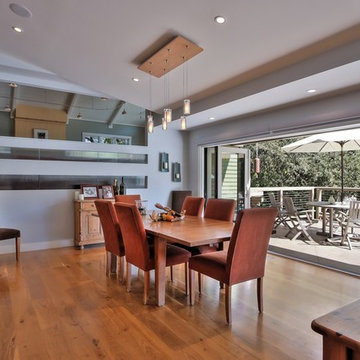
This whole house remodel involved revamping the layout, and redoing kitchen, bedrooms, bathrooms, living area, laundry room, lighting, and more. In addition, hardscaping was done including a terraced hill adjacent to a swimming pool. Highlights include a vaulted ceiling, large fireplace and french doors in the great room, a large soaking tub and curbless glass shower in the bathroom(s) and high ceilings and a skylight in the revamped contemporary kitchen.
Find the right local pro for your project
 ZeroEnergy Design
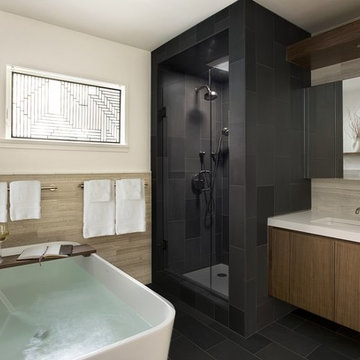
MOON HILL BATH - WINNER 2013 PRISM AWARD - BEST BATHROOM
Initially designed in 1950, this antiquated bathroom was ready for an update. The home, envisioned by The Architect’s Collaborative (a progressive group founded in part by Bauhaus architect Walter Gropius), is part of a community inspired by the modernism movement. Clearly in need of aesthetic and functional improvements, the new renovation stays true to its utilitarian modern heritage.
SPACE
By reclaiming underutilized closet space from an abutting home office, the re-visioned plan feels more spacious, even with the addition of a deep soaking tub. The new layout also shields the toilet from view when the door is left open.
COLORS
The harsh yellow tones have been replaced by a warm palette of soft grays and browns. Daylight is refracted through cut glass window art, created by the homeowner.
SIMPLICITY
Contiguous tile work, carefully patterned, weaves through the space. Simplicity and added storage complete the design by removing the normal visual clutter of a bathroom and offering the reassurance of clean organization. Pegboards inside the custom medicine cabinet create a discrete place for every bathroom accessory.
RESULT
The final result is a modern oasis with soothing spa-like qualities that offers an escape from frenetically paced everyday life.
TEAM
Architecture – ZeroEnergy Design
Construction – S+H Construction
Photography – Eric Roth
SOURCES
Fixtures – Victoria+Albert, Duravit, Kohler, Gerberit
Finishes – Ann Sacks, StoneWood, Ivy Coatings

 John
JohnCoco coir is a versatile and sustainable growing medium that is gaining popularity among gardeners. Made from the fibrous husk of coconuts, it’s an eco-friendly alternative to peat moss and can greatly enhance the quality of your soil. In gardening, it is often utilized in systems like Coco Coir Hydroponic, where it helps create an efficient water and nutrient delivery system.
What is Coco Coir?
Coco coir is a natural fiber extracted from coconut husks. It has a neutral pH, excellent water retention, and is reusable, making it a favorite among gardeners who prefer organic and sustainable practices. It is available in different forms such as blocks, bricks, or loose coir, each requiring some preparation before use in gardening.
Benefits of Using Coco Coir in Gardening
Coco coir offers several advantages for gardening. Here are the benefits of using coco coir in gardening:
Holds up to 10 times its weight in water, ensuring plants have consistent moisture.
Promotes oxygen flow to plant roots, leading to healthier root systems.
Coco coir is a renewable and eco-friendly alternative to peat moss.
It can be washed, rehydrated, and reused, reducing waste.
Naturally pH neutral, making it suitable for various plants without major adjustments.
Enhances the texture and moisture retention of garden soil.
How to Prepare Coco Coir for Planting
Preparing coco coir for planting involves a few essential steps. First, you need to hydrate the coir block, as it typically comes in a compressed form. Place the block in a large container and add warm water, allowing the block to expand and absorb the water. Once fully expanded, the coir should be fluffed up by breaking it apart with your hands or a tool to ensure it becomes loose and airy. After the coir has been fluffed, it is important to drain any excess water, as overly wet coir can lead to root suffocation. Finally, since coco coir is inert and does not contain nutrients, it’s a good idea to add organic compost or liquid fertilizer to enrich the coir before planting.
Do You Need to Soak Coco Coir Before Planting?
Yes, soaking coco coir before planting is necessary. Since it comes in a compressed form, it needs to be broken down and hydrated for proper use. The soaking process allows the coir to expand and release the fibers, making it usable as a growing medium. After soaking, the coir should be fluffed to ensure the water is evenly distributed. Draining any excess water is crucial because overly wet coir may impede plant root health.
How to Prepare Coco Peat for Planting
Coco peat, a fine, powdery form of coco coir, is highly beneficial for seed starting and improving water retention in soil. To prepare coco peat, it first needs to be hydrated, similar to how you prepare coir blocks. Slowly add water to the peat in a container and allow it to absorb and fluff up. Once hydrated, coco peat can be used on its own or mixed with other growing media such as perlite or vermiculite for added aeration and drainage. It is advisable to check the pH level of your final mix, as coco peat generally has a neutral pH, but adjustments may be necessary depending on the plants being grown.
Can You Use Just Coco Coir for Plants?
Yes, coco coir can be used by itself to grow plants, especially in hydroponic systems or as a seed-starting medium. However, because coco coir does not naturally contain nutrients, you will need to provide regular fertilizer to support plant growth. This makes it particularly suitable for plants grown in controlled environments, such as hydroponics, where nutrient solutions can be carefully managed. In traditional soil-based gardening, mixing coco coir with other organic materials like compost is recommended to provide essential nutrients and improve the overall soil structure.
How to Use Coco Coir in Hydroponics
Coco coir is widely used in hydroponic systems due to its water retention and aeration properties. To use coco coir in hydroponics, it first needs to be soaked and hydrated, as discussed earlier. Once the coir is fully prepared, it can be placed in the hydroponic system. Since coco coir does not contain natural nutrients, you will need to supply a balanced nutrient solution tailored for hydroponic plants. Regular monitoring of water and nutrient levels is essential to prevent nutrient imbalances or root rot. One of the benefits of coco coir in hydroponics is its reusability. After completing a growing cycle, the coir can be washed, rehydrated, and used again in future plantings.
Using Coco Coir as a Soil Amendment
Coco coir is also an excellent soil amendment, as it improves the texture and moisture retention of garden soil. To use coco coir in this way, mix loose coir with your existing garden soil at a ratio of one part coco coir to two parts soil. This will help retain moisture without compacting the soil, improving both water drainage and root growth. For optimal results, you can also add organic compost to the mix, ensuring that the nutrient levels are sufficient for plant growth. Coco coir works particularly well in raised beds, where it helps maintain proper soil structure over time.
Advantages of Using Coco Coir Over Peat Moss
While peat moss has been traditionally used as a growing medium, coco coir offers several advantages over it. Coco coir is a renewable resource, as it is a byproduct of coconut processing, while peat moss is harvested from peat bogs that take centuries to regenerate. Coco coir is also more durable, as it can be reused multiple times without breaking down, while peat moss disintegrates after a single use. Another key benefit is its neutral pH, whereas peat moss is more acidic and may require balancing to meet the needs of specific plants.
Conclusion
Coco coir is a highly versatile and sustainable growing medium that benefits both novice and experienced gardeners alike. Whether you are using it for hydroponics, as a soil amendment, or as a standalone medium for growing plants, knowing how to properly prepare and use it is key to maximizing its benefits. By following the steps detailed above, you can improve water retention, aeration, and overall plant health in your garden, all while contributing to eco-friendly gardening practices.
 Xpand Inc. | Homes of Xcellence
Transforming a client's dream into reality is always an exhilarating journey, especially when it involves creating a luxurious BBQ kitchen that blends seamlessly with the natural beauty of a lakefront view.
Xpand's design blended with the homeowner's vision: a year-round culinary haven where one could grill to their heart's content while soaking in the serene landscape. The transformation of the screen porch into a stone and tile sanctuary, complete with state-of-the-art air exchange and climate control systems ensures a smoke-free environment. The installation of custom Dekton countertops and Twin Eagles grilling and smoking appliances elevates the space, making it not just functional but also a statement of elegance. The 12' glass garage door with a motorized screen, invites the outdoors in, creating an immersive experience.
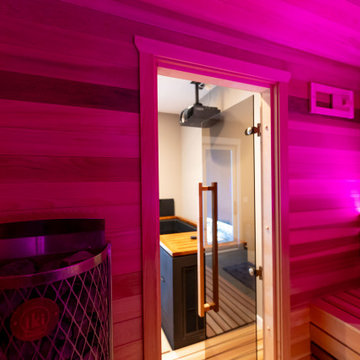
Descending to the lower level, the wellness center awaits as a haven of relaxation. The custom-built sauna, with its warm cedar interior and soothing LED lighting, promises a tranquil escape. Adjacent to it, the large cold plunge tub stands ready to invigorate and contribute to a holistic wellness routine.
Whether seeking warmth in the embrace of the sauna or the refreshing chill of the tub, this space is a testament to the art of living well, a perfect complement to its idyllic setting on Prior Lake!
 G. Christianson Construction, Inc.
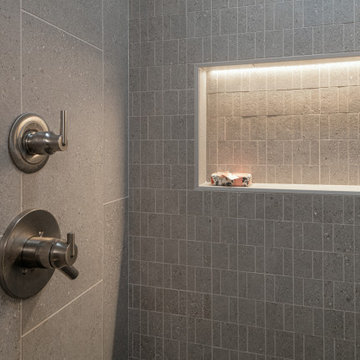
This compact modern bathroom remodel features intentionally placed colors, patterns, materials, and finishes to perfectly execute the homeowner’s style. In addition to a distaste for the bathroom’s existing brown color scheme, there was an extremely large and deep soaking tub with a shower combo that had been installed by a previous owner which made accessibility extremely difficult for these new homeowners to use the shower. The homeowners expressed a love for modern, contemporary, and sleek design styles with strong preferences for grey and slate tones and a dislike of brown tones and ornate patterns. In addition, Interior Designer Elizabeth noticed that they would get excited when discussing whimsical features. The final bathroom design involved replacing the bath vanity, toilet, flooring, and removing the obtrusive tub to create an easy-access tile shower with a sliding shower glass barn door. The existing unique bathroom layout was a narrow room open to the Primary Bedroom with no door and contained all fixtures on the interior wall facing away from the Primary Bedroom entrance. We utilized a floating vanity to give the illusion of a wider bathroom and the open space below the cabinet makes it easier to round the corner to enter the bathroom without running into the cabinet. To create a bathroom design that expressed the homeowner’s style of modern, grey, and whimsy, Interior Designer Elizabeth proposed a grey mosaic tile that formed a whimsical pattern via the grout lines, and maintained the desired modern feel by having this mosaic tile installed over the entirety of the back wall with large format tiles of the same color/collection installed on the side walls. The cool tones of the grey tile shower and charcoal tile floor are balanced with the warmth of a natural rift white oak vanity and recessed medicine cabinet mirror to create this luxurious modern bathroom.
Sponsored
Delaware, OH

Buckeye Basements, Inc.
Central Ohio's Basement Finishing ExpertsBest Of Houzz '13-'21
 kimberly peck architect
Our latest project in Harlem involves the transformation of the lower two floors of a four-story
brownstone into a vibrant and playful duplex apartment. The design balances functionality with
whimsy, creating a bright, welcoming home full of character and personality.
The main floor is designed as an open-concept living and kitchen area that maximizes both light
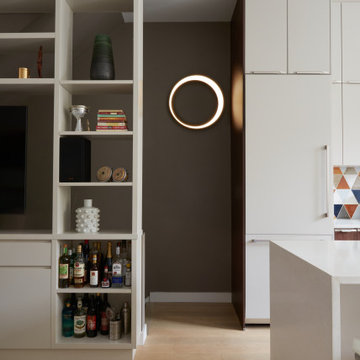
and space. The living room is anchored by a striking custom-built floor-to-ceiling unit, which
serves as a multifunctional centerpiece, combining a TV entertainment center, a bar, and display
shelving. This elegant feature also subtly divides the living area from the staircase leading to the
lower level. The kitchen, a focal point of the home, features floor-to-ceiling cabinetry that makes
full use of the high ceilings, blending grey tones with walnut finishes. A playful multicolored
triangular-tiled backsplash adds an element of fun, while large glass sliding doors lead to a newly
constructed deck overlooking the backyard. Above the kitchen sink, a generously sized window
allows natural light to flood in, transforming what was once a dimly lit space into a bright and
inviting area. At the front of the main floor, a small music studio offers flexibility and creativity.
This space can be enclosed with floor-to-ceiling aluminum and glass sliding partitions,
maintaining the open flow of the layout while offering privacy when needed. A bold powder
room further enhances the personality of the space. It features a custom black wall-mounted
concrete sink with an angular design that wraps around the toilet. The sink is set against a fullheight
mirrored wall, which reflects the dynamic black-and-white graffiti wallpaper, making the
compact space both striking and memorable.
The lower level is dedicated to the private quarters, designed with comfort and luxury in mind.
The primary bedroom suite is a true sanctuary, boasting a spacious ensuite bath with a luxurious
open wet-room concept. At its heart is a freestanding white soaking tub, complemented by dark
blue hexagonal tiles that cover the floor and extend up the wall behind the double vanities,
creating a dramatic and cohesive effect. The toilet is tucked away in a separate room painted in a
matching deep blue, adding to the suite’s serene and cohesive ambiance. This level also includes
a second bedroom and a guest bath, each reflecting the playful design theme of the home. The
guest bathroom is particularly delightful, with sunny white and yellow hexagonal tiles on the
walls and a matching yellow tile floor, creating a cheerful and uplifting space.
Every detail of this Harlem duplex reflects the client’s vision for a home that feels modern yet
full of personality. From the playful material choices to the thoughtful use of light and space, the
design celebrates the character of the historic brownstone while embracing contemporary living.
 Morris Black Designs
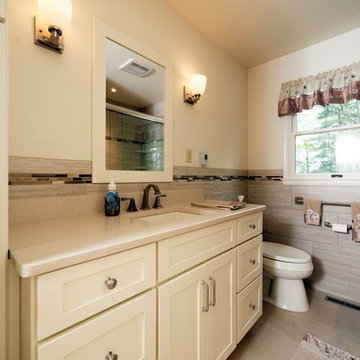
Slatington, PA Shaker Style Bathroom Design by #DanForMorrisBlack
https://www.morrisblack.com
This shaker style bathroom was a complete renovation. The renovation involved re-locating the entry door, removing a linen closet, relocating the vanity and creating space for soaking Jacuzzi tub and separate shower.
 Morris Black Designs
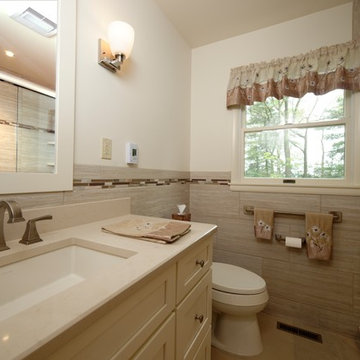
Slatington, PA Shaker Style Bathroom Design by #DanForMorrisBlack
https://www.morrisblack.com
This shaker style bathroom was a complete renovation. The renovation involved re-locating the entry door, removing a linen closet, relocating the vanity and creating space for soaking Jacuzzi tub and separate shower.
 Acton ADU
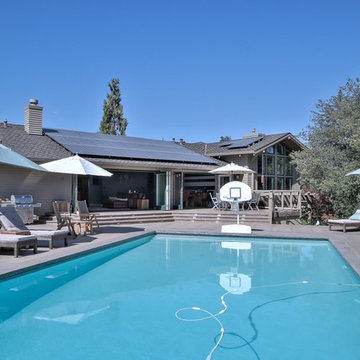
This whole house remodel involved revamping the layout, and redoing kitchen, bedrooms, bathrooms, living area, laundry room, lighting, and more. In addition, hardscaping was done including a terraced hill adjacent to a swimming pool. Highlights include a vaulted ceiling, large fireplace and french doors in the great room, a large soaking tub and curbless glass shower in the bathroom(s) and high ceilings and a skylight in the revamped contemporary kitchen.
 Roomscapes Cabinetry and Design Center
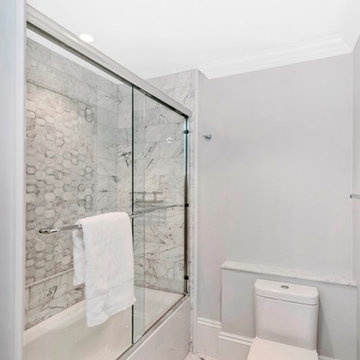
Reworking a classic Boston Brownstone today always involves updated kitchen and baths. And if possible, adding a powder room and flexible room that could function as a guest room or office on the main floor. This project did not have an owner and was being remarketed for sale.
Creating an ideal space that prospective buyers would identify with requires the designer to research the target market for the home and detail/design spaces tailored to fit that niche.
Relocating the kitchen to the other side of the space provided for a small ¾ bath – yes, we were able to achieve a shower for a full Ensuite feel.
Pocket Three-Quarter Bath
Classic and formal marble tile patterns
Modern wall hung vanity and vessel sink
Master Bath
Well light double vanity with in room linen storage
Soaking tub and double shower
Class white and grey color scheme with floor to ceiling marble
Guest-Family Bath
Reworking the layout to add a linen closet along side the tub
Generous vanity with storage
 Reflections Interior Design
Reflections was hired to update a 1980's bath with a new color concept, plumbing fixtures and overall design of the space. The footprint of the bathroom stayed the same but with our help the room has been transformed. The client is a business professional who did not have a lot of time so she did not want to be involved in the project. We presented an overall plan and selected all of the materials for the room. The one thing that was required by the client was a nice tub. We gutted the whole bathroom, redesigned the vanity with built in storage towers, created an open shower area, and put in a large free standing tub. We selected the tile, plumbing fixtures, lighting, mirror, custom window treatments, and art work. The end result was a glamorous bathroom with a dramatic counter top and vanity area. This space is not only beautiful but fully functional for all the client needs.
Sponsored
Delaware, OH
Buckeye Basements, Inc.
Central Ohio's Basement Finishing ExpertsBest Of Houzz '13-'21
 Acton ADU
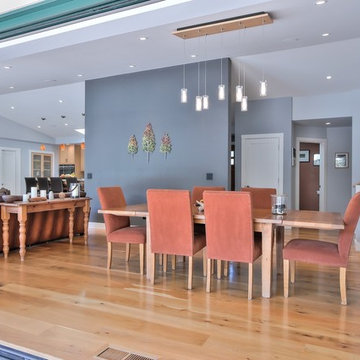
This whole house remodel involved revamping the layout, and redoing kitchen, bedrooms, bathrooms, living area, laundry room, lighting, and more. In addition, hardscaping was done including a terraced hill adjacent to a swimming pool. Highlights include a vaulted ceiling, large fireplace and french doors in the great room, a large soaking tub and curbless glass shower in the bathroom(s) and high ceilings and a skylight in the revamped contemporary kitchen.
 Reflections Interior Design
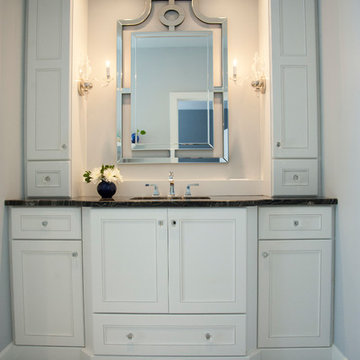
Reflections was hired to update a 1980's bath with a new color concept, plumbing fixtures and overall design of the space. The footprint of the bathroom stayed the same but with our help the room has been transformed. The client is a business professional who did not have a lot of time so she did not want to be involved in the project. We presented an overall plan and selected all of the materials for the room. The one thing that was required by the client was a nice tub. We gutted the whole bathroom, redesigned the vanity with built in storage towers, created an open shower area, and put in a large free standing tub. We selected the tile, plumbing fixtures, lighting, mirror, custom window treatments, and art work. The end result was a glamorous bathroom with a dramatic counter top and vanity area. This space is not only beautiful but fully functional for all the client needs.
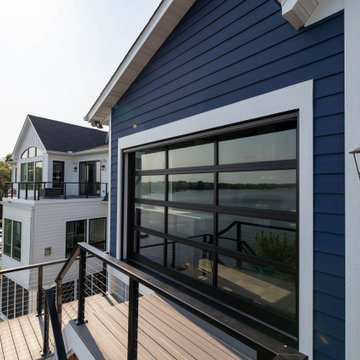 Xpand Inc. | Homes of Xcellence
Transforming a client's dream into reality is always an exhilarating journey, especially when it involves creating a luxurious BBQ kitchen that blends seamlessly with the natural beauty of a lakefront view.
Xpand's design blended with the homeowner's vision: a year-round culinary haven where one could grill to their heart's content while soaking in the serene landscape. The transformation of the screen porch into a stone and tile sanctuary, complete with state-of-the-art air exchange and climate control systems ensures a smoke-free environment. The installation of custom Dekton countertops and Twin Eagles grilling and smoking appliances elevates the space, making it not just functional but also a statement of elegance. The 12' glass garage door with a motorized screen, invites the outdoors in, creating an immersive experience.
Descending to the lower level, the wellness center awaits as a haven of relaxation. The custom-built sauna, with its warm cedar interior and soothing LED lighting, promises a tranquil escape. Adjacent to it, the large cold plunge tub stands ready to invigorate and contribute to a holistic wellness routine.
Whether seeking warmth in the embrace of the sauna or the refreshing chill of the tub, this space is a testament to the art of living well, a perfect complement to its idyllic setting on Prior Lake!
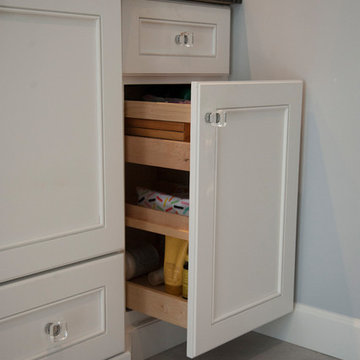 Reflections Interior Design
Reflections was hired to update a 1980's bath with a new color concept, plumbing fixtures and overall design of the space. The footprint of the bathroom stayed the same but with our help the room has been transformed. The client is a business professional who did not have a lot of time so she did not want to be involved in the project. We presented an overall plan and selected all of the materials for the room. The one thing that was required by the client was a nice tub. We gutted the whole bathroom, redesigned the vanity with built in storage towers, created an open shower area, and put in a large free standing tub. We selected the tile, plumbing fixtures, lighting, mirror, custom window treatments, and art work. The end result was a glamorous bathroom with a dramatic counter top and vanity area. This space is not only beautiful but fully functional for all the client needs.
Sponsored
Delaware, OH
Buckeye Basements, Inc.
Central Ohio's Basement Finishing ExpertsBest Of Houzz '13-'21
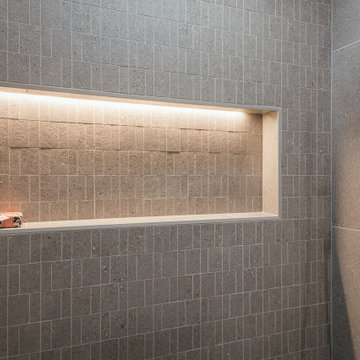 G. Christianson Construction, Inc.
This compact modern bathroom remodel features intentionally placed colors, patterns, materials, and finishes to perfectly execute the homeowner’s style. In addition to a distaste for the bathroom’s existing brown color scheme, there was an extremely large and deep soaking tub with a shower combo that had been installed by a previous owner which made accessibility extremely difficult for these new homeowners to use the shower. The homeowners expressed a love for modern, contemporary, and sleek design styles with strong preferences for grey and slate tones and a dislike of brown tones and ornate patterns. In addition, Interior Designer Elizabeth noticed that they would get excited when discussing whimsical features. The final bathroom design involved replacing the bath vanity, toilet, flooring, and removing the obtrusive tub to create an easy-access tile shower with a sliding shower glass barn door. The existing unique bathroom layout was a narrow room open to the Primary Bedroom with no door and contained all fixtures on the interior wall facing away from the Primary Bedroom entrance. We utilized a floating vanity to give the illusion of a wider bathroom and the open space below the cabinet makes it easier to round the corner to enter the bathroom without running into the cabinet. To create a bathroom design that expressed the homeowner’s style of modern, grey, and whimsy, Interior Designer Elizabeth proposed a grey mosaic tile that formed a whimsical pattern via the grout lines, and maintained the desired modern feel by having this mosaic tile installed over the entirety of the back wall with large format tiles of the same color/collection installed on the side walls. The cool tones of the grey tile shower and charcoal tile floor are balanced with the warmth of a natural rift white oak vanity and recessed medicine cabinet mirror to create this luxurious modern bathroom.
 Che Bella Interiors Design + Remodeling
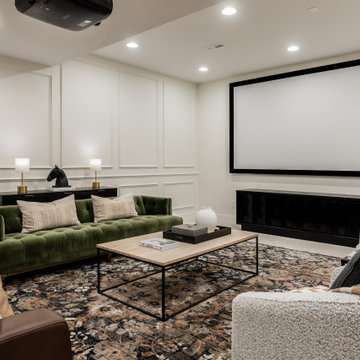
This project involved remodeling the main floor living areas as well as the lower level family room. We updated the spaces by adding new wood flooring, lighting, paint, window treatments and new custom furniture. We created a functional lower level fit for a family movie night or game time. A large (and incredibly comfortable) leather sofa with custom ottoman wrapped in commercial fabric allow for the space to be used by grand kids of all ages.
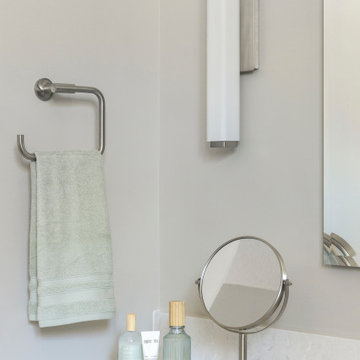
In addition, we transformed the owner’s bath suite into a luxe retreat, complete with an inviting soaking tub with a floor-mounted tub spout that makes you feel like you’re next to a waterfall. This 1980’s bathroom has been replaced with a modern, crisp aesthetic featuring white wood cabinets set against soft neutral gray walls, contemporary brushed nickel finishes, and beautiful LVP plank flooring in warm wood tones. The clean, simple lines throughout give this bath a spa-like feel. Even the mirrors were cleverly designed to set into the wall to maximize their function as medicine cabinets. This is the perfect place to indulge and relax right in the comfort of home.
 Reflections Interior Design
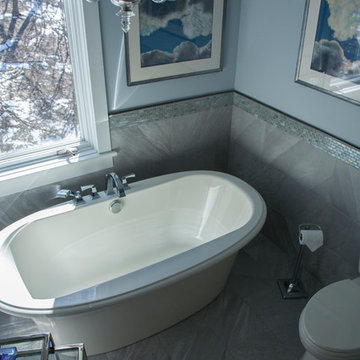
Reflections was hired to update a 1980's bath with a new color concept, plumbing fixtures and overall design of the space. The footprint of the bathroom stayed the same but with our help the room has been transformed. The client is a business professional who did not have a lot of time so she did not want to be involved in the project. We presented an overall plan and selected all of the materials for the room. The one thing that was required by the client was a nice tub. We gutted the whole bathroom, redesigned the vanity with built in storage towers, created an open shower area, and put in a large free standing tub. We selected the tile, plumbing fixtures, lighting, mirror, custom window treatments, and art work. The end result was a glamorous bathroom with a dramatic counter top and vanity area. This space is not only beautiful but fully functional for all the client needs.
6