
Search results for "Nightmare" in Home Design Ideas
 Erika Bruder Interior Design LLC
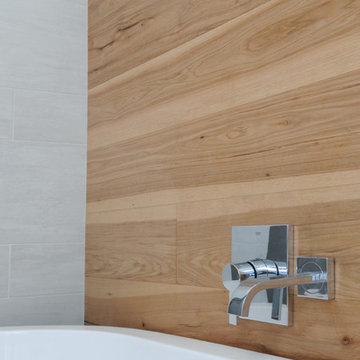
This master bathroom was a nightmare prior to construction. It is a long, narrow space with an exterior wall on a diagonal. I was able to add a water closet by taking some of the bedroom walk-in closet and also added an open shower complete with body sprays and a linear floor drain. The cabinetry has an electric outlet and pull outs for storage. I changed the large windows to higher awning windows to work with the style of the house.
 Mom's Design Build
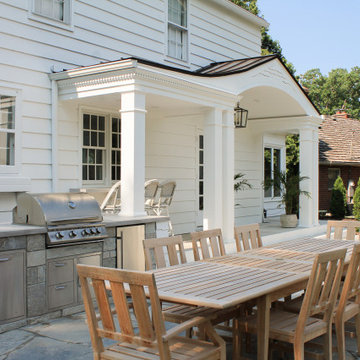
The clients purchased the home about 15 years ago and never knew what to do with the porch addition off the back of the home. In addition to being a general eye sore and cutting off a large portion of their small back yard, it was always a little damp, smelly, and not very well arranged. This also impeded access to the back yard by forcing passage through a secondary space. The size of the porch restricted light into the home which they did not like. The at-grade cedar deck was a maintenance nightmare and a terrible misuse of space.
 Baseline Inspections
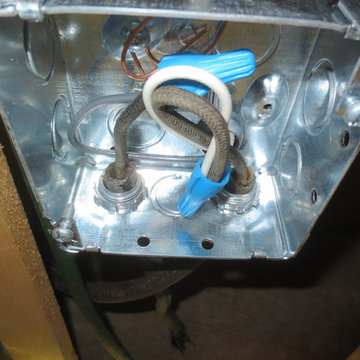
The listing on this home said the electrical had been updated. Our inspection found a new panel and service, but 30-40% of the knob and tube wiring was left in all of the hard to reach spaces. Now this house is a mixture of old and new wiring. An electricians nightmare moving forward! Baseline Inspections
Find the right local pro for your project

 MIREWORKS
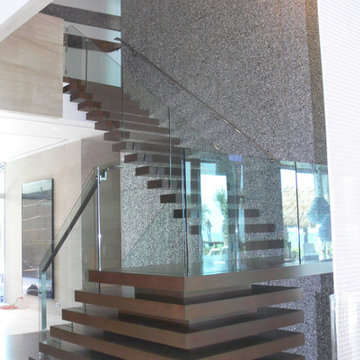
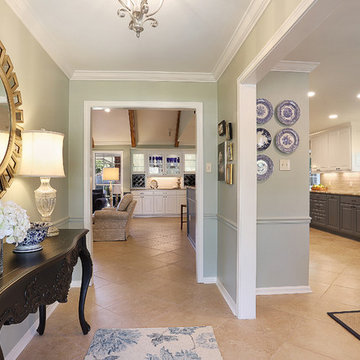
The homeowners invited us in to their home with hopes of updating it's aesthetics, fixing some functional nightmares, and creating an open but still intimate space for small gatherings. Our changes included; removing a large wet bar area, partially removing the wall between the living and kitchen, and opening the formal dining to the kitchen by removing a cased opening between the two rooms. By making these changes, along with many cabinet and appliance location adjustments, a cordially inviting space was achieved. Now the home matches the owner's charm and hospitable spirit.
 A. Bollman & Sons.
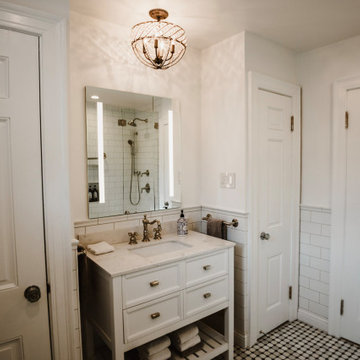
The original main bathroom for this 1930's brick colonial hadn't seen the light of white since it's last re-haul in the 70s, It has been completely transformed from a heavy pink-tiled nightmare (walls, ceilings, arches everywhere) and returned to it's classic black and white architectural roots.

 Erika Bruder Interior Design LLC
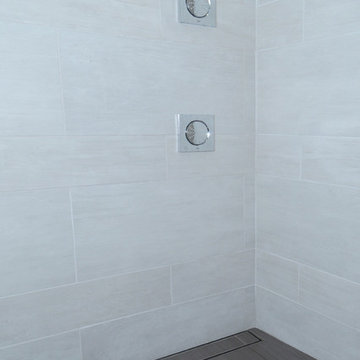
This master bathroom was a nightmare prior to construction. It is a long, narrow space with an exterior wall on a diagonal. I was able to add a water closet by taking some of the bedroom walk-in closet and also added an open shower complete with body sprays and a linear floor drain. The cabinetry has an electric outlet and pull outs for storage. I changed the large windows to higher awning windows to work with the style of the house.
 TATCOR DESIGN BUILD
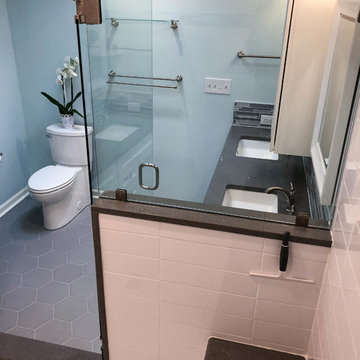
A convenient shower bench with quartz top is against the back wall next to helpful corner shelves and a handheld shower head. A line of tiles matching the backsplash at the double vanity create a border around the top of the shower amongst the rectangular white tile walls. Think cleaning these tiles and glass is going to be a nightmare? Well we left a hook for a squeegee in the corner for easy use without being in the way. In the corner is a one-piece toilet unit with useful hanging racks on the same wall for towels. The walls are painted a blue-gray color to help the rest of the design aspects pop but not feel plain.
 MIREWORKS
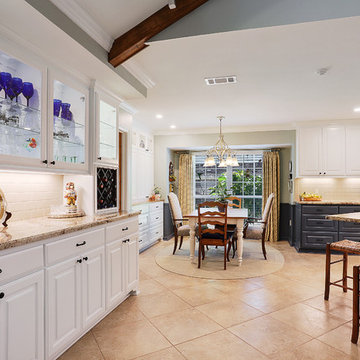
The homeowners invited us in to their home with hopes of updating it's aesthetics, fixing some functional nightmares, and creating an open but still intimate space for small gatherings. Our changes included; removing a large wet bar area, partially removing the wall between the living and kitchen, and opening the formal dining to the kitchen by removing a cased opening between the two rooms. By making these changes, along with many cabinet and appliance location adjustments, a cordially inviting space was achieved. Now the home matches the owner's charm and hospitable spirit.
 Tailored Living of Central CT
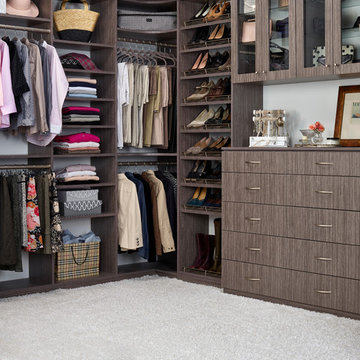
A walk in closet without an organizational storage system can be a chaotic nightmare. Unplanned space is always underutilized space. By installing a custom closet design, you’ll be able to utilize all the space for maximum function and beauty.
 Mom's Design Build
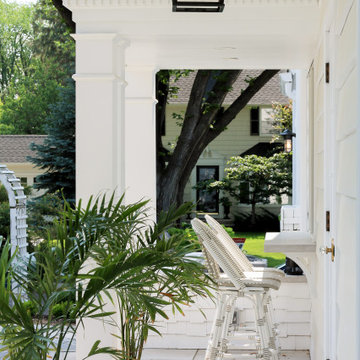
The clients purchased the home about 15 years ago and never knew what to do with the porch addition off the back of the home. In addition to being a general eye sore and cutting off a large portion of their small back yard, it was always a little damp, smelly, and not very well arranged. This also impeded access to the back yard by forcing passage through a secondary space. The size of the porch restricted light into the home which they did not like. The at-grade cedar deck was a maintenance nightmare and a terrible misuse of space.
 San Luis Kitchen Co.
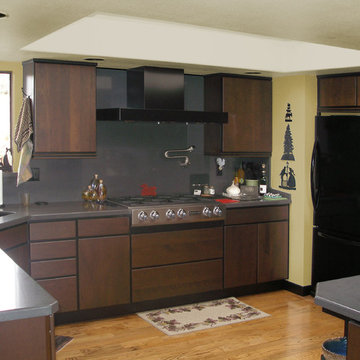
Doors and drawer-heads stained Dark Lager contrast with black face-frames for a dramatic look. The gray quartz counter is extended full height at the back splash.
A bank of floor to ceiling cabinets separates the dining area from the kitchen, confining the space in both rooms. Note the massive blank end of the cabinets – in desperation to reduce the scale of this monolith, the homeowners decorated it with a clock and small nick-knacks, but it didn’t help. This is not a welcoming entrance to the kitchen. On the dining side, there is a hutch (with mirrored back), which ostensibly could serve as a buffet, however it is inconvenient to the prep area of the kitchen as it is tucked behind the tall pantry cabinets. And on the opposite wall is a separate wet bar which could serve more conveniently with a more unified kitchen and dining space.
You would think that the large pantry cabinets would be a plus in a kitchen, however their placement and the deep fixed shelves belie any positive contribution.
The looming wall of cabinetry confines the space and is a claustrophobe’s nightmare. Then note the clutter and chaos of storing small food items (normally most of your daily supplies don’t come in giant bulk quantities and sizes) on deep fixed shelves. Nothing really fits and canned goods become lost behind cereal boxes while baking supplies are piled on top of the snacks!
The decision to remodel – the lady of the house wanted her kitchen to reflect the couples’ modern lifestyle. They are passionate people who love to entertain their friends and family – they need an open and accessible space that is both dramatic in bearing and easy to use on a daily basis.
San Luis Kitchen began design by helping the homeowners choose a style and color scheme for their kitchen. The decision was made – a slab style cabinet door in a “Dark Lager” stain on maple wood. Because the homeowners did not want handles on their cabinets, we used a face frame cabinet construction to allow for “finger-pull” opening of the doors and drawers. The face frame is colored black as a contrast to the doors for a bold finish. Dark gray engineered-quartz counters and full height backsplash complete the picture.
Kitchen layout and design is next. The sink remains at the corner window with the dishwasher moved to the left wall – giving space for a 36” range-top and dramatic 42” rectilinear hood. The refrigerator remains in place but is replaced with a black model. The cabinet above it is now 24” deep for a custom look and a built-in microwave/oven combo are placed to the right. Simple-line contemporary trim and uniform black and stainless modern appliances reinforce the linear aesthetic created by the doorstyle and face frame detailing.
In place of the pantry, San Luis Kitchen designed a true buffet – accessible from both kitchen and dining sides. The storage needs are met by upper cabinets, base corner swing-out shelves and drawers, and a tall (adjustable) roll-out shelf unit on the dining side. We added an end wall (with niches) and extended the cabinetry and counter beyond as a welcome to the kitchen. In the dining room glass doors for display items grace the buffet. The wet bar is now visually and functionally joined to the kitchen – matching cabinetry and the more open overall plan tie everything together as a whole.
Now in their new kitchen, the homeowners can prepare, serve, and enjoy a meal with their guests. The mosaic glass backsplash used at the bar adds pizzazz for fun gatherings and an evening’s entertainment.
 Cascade West Development
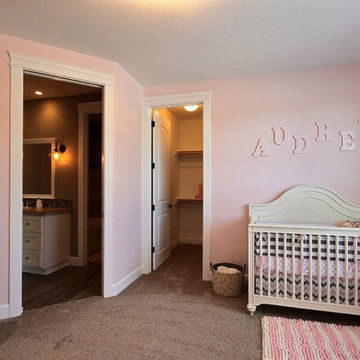
“Just a quick thank you to You, Lester and your team at Cascade West. I also wanted you to know that if it wasn’t for Dustin at DeWils, this would have been a nightmare. He was fabulous and helped us out in any way he could. Both him and Ron are professionals that have my referrals going forward. You all there build a great home.”
 Kristen James, AIA, WELL AP + LEED AP
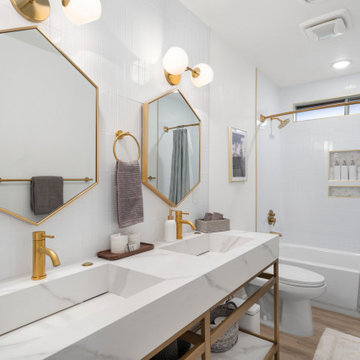
This bathroom was a nightmare with a large built in closet taking up valuable space, toilet on the opposite wall, and old outdated fixtures. It's now a light and bright space that is welcoming to guests.
 Erika Bruder Interior Design LLC
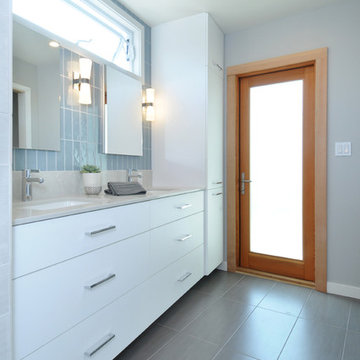
This master bathroom was a nightmare prior to construction. It is a long, narrow space with an exterior wall on a diagonal. I was able to add a water closet by taking some of the bedroom walk-in closet and also added an open shower complete with body sprays and a linear floor drain. The cabinetry has an electric outlet and pull outs for storage. I changed the large windows to higher awning windows to work with the style of the house.
 Nicole Arnold Interiors
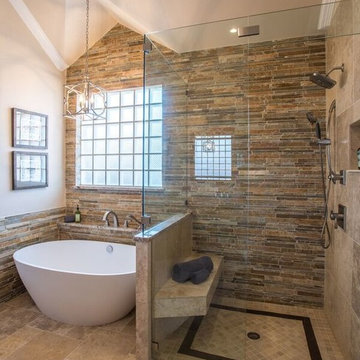
This master bath was previously a logistical nightmare with virtually no space in the most important areas: the shower and the water closet. We moved some walls to open the space to what’s now a couple’s dream bathroom with plenty of space to do everything they desire in comfort.
 Nicole Arnold Interiors
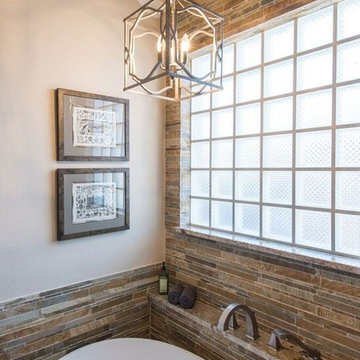
This master bath was previously a logistical nightmare with virtually no space in the most important areas: the shower and the water closet. We moved some walls to open the space to what’s now a couple’s dream bathroom with plenty of space to do everything they desire in comfort.
 Cascade West Development
“Just a quick thank you to You, Lester and your team at Cascade West. I also wanted you to know that if it wasn’t for Dustin at DeWils, this would have been a nightmare. He was fabulous and helped us out in any way he could. Both him and Ron are professionals that have my referrals going forward. You all there build a great home.”

 C.E. Pontz Sons
This Project included bringing an 18 year old pond back to life. We began this project by dismantling the existing pond and removing all rocks, gravel, liner and catching the fish and frogs and stored them in a safe aeration tank during the construction of the new pond. We ran into a ton of cement blocks from the existing pond which were a nightmare to remove, but none the less we prevailed. After everything was removed we shaped up the the soil for the new pond installation. A fabric underlayment is first installed beneath the liner to protect it. A new 45 mil fish safe epdm liner was installed on top and we then began to rock in the pond using larger rocks so that kids can enter safely and access for pond plant maintenance. Shelves were installed at different elevations for aquatic plants. The skimmer installation makes for easier pond maintenance and to keep the pond pump free from pond debris. An overflow was plumbed from the skimmer to the downspout to allow the pond to take on rain water and dewater more cleanly. A biofalls filtration unit was installed on the top pond to filter the system and is also the upper waterfall area that aims towards the dining room window for viewing from inside the home and upper patio area. What an amazing transformation.
17