
Search results for "Pipes installation" in Home Design Ideas
 Diana Bier Interiors, LLC
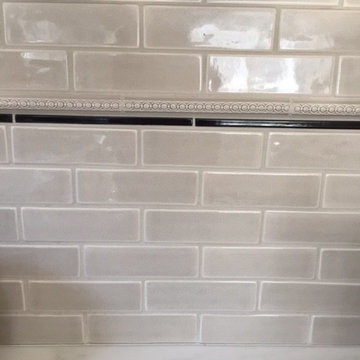
Kitchen in a 1920s Colonial Revival home was totally gutted and renovated. In addition to updated electrical, plumbing, and lighting, new windows were added bringing in lots of natural light. Antique oak beams and used brick veneer provide contrast and lend a rustic touch. Warm site-finished white oak floors ground the space and provide more contrast, as do the natural grass shades. Stainless steel appliances provide a sleek modern edge without overwhelming the space, while a crackle subway tile accented with beaded and black liners give a nod to the traditional. Countertops of Olympian White Vermont Danby marble in the main work area have a subtle gray veining.

 Kowalske Kitchen & Bath
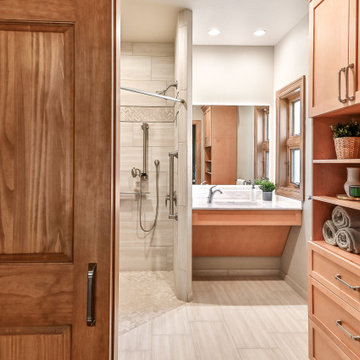
This Waukesha bathroom remodel was unique because the homeowner needed wheelchair accessibility. We designed a beautiful master bathroom and met the client’s ADA bathroom requirements.
Original Space
The old bathroom layout was not functional or safe. The client could not get in and out of the shower or maneuver around the vanity or toilet. The goal of this project was ADA accessibility.
ADA Bathroom Requirements
All elements of this bathroom and shower were discussed and planned. Every element of this Waukesha master bathroom is designed to meet the unique needs of the client. Designing an ADA bathroom requires thoughtful consideration of showering needs.
Open Floor Plan – A more open floor plan allows for the rotation of the wheelchair. A 5-foot turning radius allows the wheelchair full access to the space.
Doorways – Sliding barn doors open with minimal force. The doorways are 36” to accommodate a wheelchair.
Curbless Shower – To create an ADA shower, we raised the sub floor level in the bedroom. There is a small rise at the bedroom door and the bathroom door. There is a seamless transition to the shower from the bathroom tile floor.
Grab Bars – Decorative grab bars were installed in the shower, next to the toilet and next to the sink (towel bar).
Handheld Showerhead – The handheld Delta Palm Shower slips over the hand for easy showering.
Shower Shelves – The shower storage shelves are minimalistic and function as handhold points.
Non-Slip Surface – Small herringbone ceramic tile on the shower floor prevents slipping.
ADA Vanity – We designed and installed a wheelchair accessible bathroom vanity. It has clearance under the cabinet and insulated pipes.
Lever Faucet – The faucet is offset so the client could reach it easier. We installed a lever operated faucet that is easy to turn on/off.
Integrated Counter/Sink – The solid surface counter and sink is durable and easy to clean.
ADA Toilet – The client requested a bidet toilet with a self opening and closing lid. ADA bathroom requirements for toilets specify a taller height and more clearance.
Heated Floors – WarmlyYours heated floors add comfort to this beautiful space.
Linen Cabinet – A custom linen cabinet stores the homeowners towels and toiletries.
Style
The design of this bathroom is light and airy with neutral tile and simple patterns. The cabinetry matches the existing oak woodwork throughout the home.
Find the right local pro for your project
 Rowland+Broughton Architecture & Urban Design
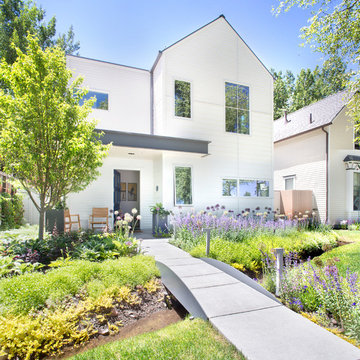
Inspiration for a scandinavian front yard concrete paver garden path.
 Care Free Homes, Inc.
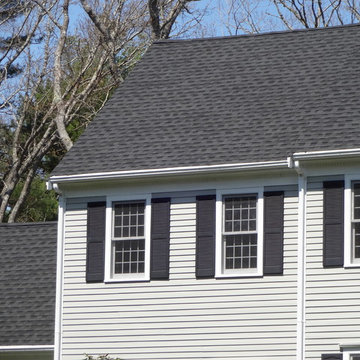
This beautiful colonial in Marion, Massachusetts is even more gorgeous with its new GAF Timberline HD roof!
There is more to a roof than shingles – in fact there are several components to a professionally installed GAF Lifetime Roofing System. Here is the anatomy of our Marion homeowner’s roof:
GAF Timberline HD Shingles Marion, MAGAF Timberline HD Roof Shingles: A beautiful architectural shingle at an affordable price! This is our most popular roof shingle here at Care Free Homes! Our Marion customer selected the classic color, Charcoal. This high performance shingle features a 130 mph wind rating and highest possible fire rating.
Underlayment: A felt/paper product that is installed over the entire roof deck, underlayment provides an additional layer of protection between the roof deck and the roof shingles.
Ice Dam and Water Shield: After a brutal winter and unprecedented snow fall, many New England homes suffered damage from ice dams. Ice Dam and Water Shield provides added protection for eves, rakes, valleys as well as flashed areas around vent pipes, chimneys, dormers, and skylights. Whether it’s a winter wonderland or a hurricane, this homeowner will not have to worry about ice dams or driving rain.
GAF Timberline HD, Marion, MA Dormers
Premium Aluminum Drip Edge: Installed along the rakes, drip edge serves several purposes. It improves the efficiency of water shedding, prevents leaking from a wind-driven rain as well as movement between the deck and fascia boards. Drip edge also keeps pesky insects from infiltrating the space between the roof deck and the fascia boards. With a choice of three colors, white, brown and gray, it provides a finished look for a roof.
GAF Pro-Start Eave/Rake Starter Strip: Every story has a beginning and every roof should have a starter strip. Here in New England we’ve got to have our roof be tougher than mother nature. To prevent shingle blow off, an ultra-adhered starter strip properly secures shingles in place during a storm. In contrast, the amateur roofer will often use cut-up shingles as a starter course. This weakened “starter course” lowers the wind resistance of a roof and makes it more susceptible to both wind and water damage. With straighter edges, Dura-Grip adhesive, and outstanding warranties – starter strip will provide beauty, performance and peace of mind.
GAF Cobra Ridge Vent: Ridge vents provide necessary airflow to remove excess heat and moisture in an attic. It inhibits the growth of mold and protects the health of the homeowners as well as their stored possessions. A properly vented attic will also protect homes in harsh winter climates from ice damming.
Why wait? Contact us today and make your house a Care Free home!
 Gappsi
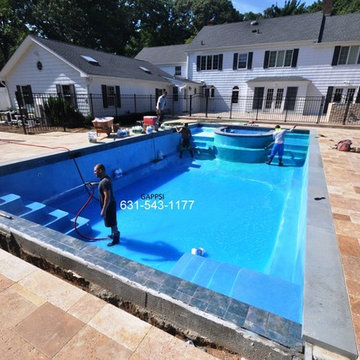
Gunite swimming pool was constructed with 10 inches concrete wall shell and 8 inches gunite floor. With ½ inches rebar 12 inches on center, radiuses built in gunite shell spa has been built in the center of shallow end with sundecks on each side of it with steps that lead in the pool. Along both side of the 40 ft wall a stand ledge was created in the pool floor to allow small kids to cross the pool by walking on it. The deep end of the swimming pool incorporates 2 sets of corner stairs and a bench connecting them both.
Pool depth is 5 ft, wich makes this Gunite swimming pool is a non-diving pool. This Gunite swimming pool also has an automated safety cover this feature allows the pool area to be open to the rest of the yard and fencing around the pool is not requested thus making the pool patio more accessible and functional. This safety cover also functions as a solar cover, keeping the water warmer without the use of the heater. The auto cover can also be used as a winter cover, while keeping the swimming pool safe in the winter; it also keeps clean, avoiding drilling ugly holes in the patio stones if you decide to install a mash cover. The plumbing was done using 2 inches 40 schedule hard pvc pipes, this allows water to flow and filtered fester. The pool plaster finish consists Tahoe blue diamond bright quarts. Unlike Marble dust quarts plaster is a much harder material making the finish of this Gunite swimming pool last 2 or 3 times longer with the proper maintenance. A 6 inches gray blue porcelain tiles bend was installed to The top perimeter of the pool walls, the tiles line is used to avoid the water in the pool to create a mark on the walls , the porcelain tiles are frost and whether resistant and pool water level is set to be at the center of the tiles. The pool coping used is 2 inches thick 12 wide in 6 ft long section Pennsylvania bluestone treads as pool coping and 14 inches double-sided easy edge for spa coping. The patio pavers are Moca travertine French pattern all from the Gappsi natural stone products selection. The equipment is Totally Hayward, pump, Filter and heater, to keep the water sanitized a salt chlorine generator and an ozone system were installed, the combination of these 2 will keep water free of alleges and impurities easily and automatically thus making this a maintenance and Chemicals free Gunite swimming pool. The back yard patio outdoor kitchen and raised patio all paved with moca travertine pavers and veneer products. For more information about Gunite pools design and installation contact Gappsi at 631-543-1177 or visit
http://gappsi.com/long-island-gunite-pool-inground-construction-design
 W.L. Heating & Cooling LLC
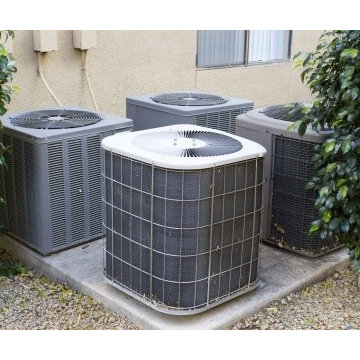
Air Conditioning System Installation And Repair, Heating Unit Installation And Repair, Ventilation Services, Refrigerator Installation And Repair, HVAC Maintenance Services, Air Quality Services, Refrigerator Maintenance, Ice Machine Repair, Freezer Services, Cooler Repairs And Replacements, Air Quality Testing, Custom Work, Estimates, Inspections, System Cleaning, Custom Work, Humidifier Installation
 Pennsylvania Landscape & Nursery Association
Kimicata Brothers, INC http://www.kimicatabrothers.com
Project Entry: Johnson
2014 PLNA Awards for Landscape Excellence Winner
Category: Hardscaping-Residential $30,000-$60,000
Award Level: Honorable Mention
Photo Description:
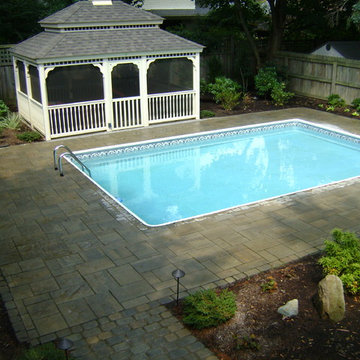
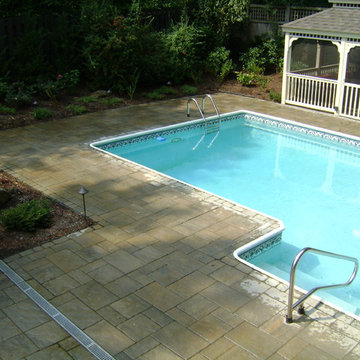
We were contacted by the Johnson’s to update their backyard fenced in pool area in the summer of 2012. Over the years the deck around the pool had deteriorated and the plants had become over grown and made walking around the deck difficult. The old concrete patio was small and only lit by bright 120 volt spot lights. What made this job difficult was the access to the backyard was limited to using a neighbor’s backyard for the project. We had to bring all debris out and materials in from a neighboring street, down the neighbor’s driveway, across the backyard, through an 8’ section that was in the far corner of the neighbor’s yard that corresponded to the entrance to Johnson’s backyard. They had a plan that they wanted to work from. Since access was a problem, we had to secure permission from the neighbor before we could consider bidding the job. After the neighbor’s permission was obtained we discussed materials for the drawing they had. It only included the hardscape and gazebo. Other difficulties included not damaging lighting and plumbing for the pool during excavation and construction. Also the ladders into the pool fit into cups screwed to the deck. These had to be replaced with precisely placed pipes mounted into the base for stability. Care had to be taken to make sure water would not drain from the deck into the pool. So we had to place channel drains between the patio area and pool deck area. A channel drain was placed between the exposed aggregate finished slab for the gazebo and the pool deck. This allowed for proper sloping of the hardscape to provide the drains to move rain away from the pool. We used polymeric sand in the paver joints to prevent breakdown of the installation and avoid wind and water moving sand into the pool. The slab for the gazebo was an exposed aggregate finish that measured 12’ 6” x 16’ 6”. The pagoda style roof for the gazebo and screening make it attractive and functional as a bug free area to entertain in. We discussed adding low voltage lighting, 120 volt plugs and drip irrigation early on so we could place conduits during the construction. After the hardscape installation we installed the low voltage lighting. We installed a transformer with a timer and an optional dusk to dawn photocell. The Johnsons did not like the old 120 volt spot light to light the back, they wanted something softer. We installed 20 path lights to illuminate the hardscape and 3 wall wash lights to add evening depth to the yard. We installed the plantings and Hunter drip irrigation system in the spring of 2013. It was easy to convince them that the drip system was the proper way to irrigate the area. There would be no spray to blow onto patio furniture or into the gazebo. Also drip irrigation uses less water so they are economical to operate. This gave them a low maintenance yard, a nice finished look and something blooming throughout the growing season. The Johnsons have been very happy with the look and the functionality of the pool deck, patio, lights, irrigation and gazebo.
 Tile Doctor Ltd
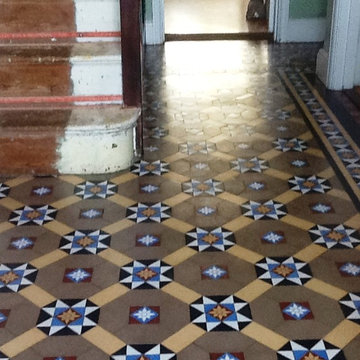
I was recently called down to a client’s house in the market town of Wellingborough, situated approximately 11 miles from Northampton. My client’s situation was an interesting one, as she had an old gas pipe sticking out of her Victorian tiled floor, very close to a doorway. Not only was this a bit of an eyesore, it was also significant trip hazard. The floor had been previously covered by carpet, so it is understandable that my client would have been initially unaware of the obstructive gas pipe.
Rather than risking an accident in the future, she asked me to see what I could do to rectify the issue. At the same time, I was commissioned to give the floor a much needed clean and re-seal.
My first priority was, of course, to deal with the exposed gas pipe. I was unsure whether the pipe was live or not, so I carefully removed the surrounding tiles, allowing a certified engineer access to it. He ensured that the pipe was capped below the tile line, allowing me to safely proceed with my repairs.
I returned a few days later, rescreened the area, and began to refit the tiles, carefully hand painting some of the black tiles to hide the damage and cracks. I also applied new grout to fix all of the replaced tiles into position, and this was left to set overnight.
Returning to the house the next day, I set about treating the floor to a normal strip, clean and re-seal of the entire floor. There was very little old sealer still remaining on the tiles, so I mixed a solution of Tile Doctor Pro Clean and water, before applying this to the floor. Pro Clean is a strong alkaline cleaner which also contains stripping properties, allowing it to both clean and break down any old sealer. The solution was worked into the tiles using a black scrubbing pad, and any excess residue was quickly absorbed using a wet-vac machine.
With older floors you never can tell if a damp proof membrane was installed and it can be troublesome applying a sealant to a damp floor so I left the whole floor to dry for seven days, giving it more than sufficient time to dry completely before the re-seal. To seal the tiles I used five coats of Tile Doctor Seal & Go Extra, which provides both a robust surface seal and the pleasing sheen finish requested by my client; Seal and Go Extra is especially suitable for exterior applications or damp floors due to its increased breathability.
My client was very glad to see the back of the gas pipe and pleased with the overall results of the clean and seal, as it had given this Victorian tiled floor – once hidden under carpet – new life and character. Additionally I’m sure that restoring such an original feature for the property has increased its value.
Phil Vissian
Northamptonshire Tile Doctor
 Pennsylvania Landscape & Nursery Association
Kimicata Brothers, INC http://www.kimicatabrothers.com
Project Entry: Johnson
2014 PLNA Awards for Landscape Excellence Winner
Category: Hardscaping-Residential $30,000-$60,000
Award Level: Honorable Mention
Photo Description:
We were contacted by the Johnson’s to update their backyard fenced in pool area in the summer of 2012. Over the years the deck around the pool had deteriorated and the plants had become over grown and made walking around the deck difficult. The old concrete patio was small and only lit by bright 120 volt spot lights. What made this job difficult was the access to the backyard was limited to using a neighbor’s backyard for the project. We had to bring all debris out and materials in from a neighboring street, down the neighbor’s driveway, across the backyard, through an 8’ section that was in the far corner of the neighbor’s yard that corresponded to the entrance to Johnson’s backyard. They had a plan that they wanted to work from. Since access was a problem, we had to secure permission from the neighbor before we could consider bidding the job. After the neighbor’s permission was obtained we discussed materials for the drawing they had. It only included the hardscape and gazebo. Other difficulties included not damaging lighting and plumbing for the pool during excavation and construction. Also the ladders into the pool fit into cups screwed to the deck. These had to be replaced with precisely placed pipes mounted into the base for stability. Care had to be taken to make sure water would not drain from the deck into the pool. So we had to place channel drains between the patio area and pool deck area. A channel drain was placed between the exposed aggregate finished slab for the gazebo and the pool deck. This allowed for proper sloping of the hardscape to provide the drains to move rain away from the pool. We used polymeric sand in the paver joints to prevent breakdown of the installation and avoid wind and water moving sand into the pool. The slab for the gazebo was an exposed aggregate finish that measured 12’ 6” x 16’ 6”. The pagoda style roof for the gazebo and screening make it attractive and functional as a bug free area to entertain in. We discussed adding low voltage lighting, 120 volt plugs and drip irrigation early on so we could place conduits during the construction. After the hardscape installation we installed the low voltage lighting. We installed a transformer with a timer and an optional dusk to dawn photocell. The Johnsons did not like the old 120 volt spot light to light the back, they wanted something softer. We installed 20 path lights to illuminate the hardscape and 3 wall wash lights to add evening depth to the yard. We installed the plantings and Hunter drip irrigation system in the spring of 2013. It was easy to convince them that the drip system was the proper way to irrigate the area. There would be no spray to blow onto patio furniture or into the gazebo. Also drip irrigation uses less water so they are economical to operate. This gave them a low maintenance yard, a nice finished look and something blooming throughout the growing season. The Johnsons have been very happy with the look and the functionality of the pool deck, patio, lights, irrigation and gazebo.

 JWR Sprinklers
Having a brand new sprinkler system installed is a serious amount of work and often involves unearthing large parts of your yard to take properly run the needed piping. This is why it is easiest to undergo the installation process when your home is being first built. However, at JWR Sprinklers we have the experience, skills, and tools needed to handle sprinkler installation at any time, whether you have a home that is under construction or you are ready to upgrade your lawn.
A new automated lawn sprinkler system will bring new convenience to your watering, and ensure that you are able to have a great looking lawn year round, without the hassle of having to remember to turn your sprinklers on and off. You can even have your sprinklers set to only operate at periods of low consumption during the day to reduce your water costs!
A new sprinkler system can make having a great looking lawn easier than ever before, making the choice to have one installed an easy decision.
 JWR Sprinklers
Having a brand new sprinkler system installed is a serious amount of work and often involves unearthing large parts of your yard to take properly run the needed piping. This is why it is easiest to undergo the installation process when your home is being first built. However, at JWR Sprinklers we have the experience, skills, and tools needed to handle sprinkler installation at any time, whether you have a home that is under construction or you are ready to upgrade your lawn.
A new automated lawn sprinkler system will bring new convenience to your watering, and ensure that you are able to have a great looking lawn year round, without the hassle of having to remember to turn your sprinklers on and off. You can even have your sprinklers set to only operate at periods of low consumption during the day to reduce your water costs!
A new sprinkler system can make having a great looking lawn easier than ever before, making the choice to have one installed an easy decision.
 TVL Creative Ltd.
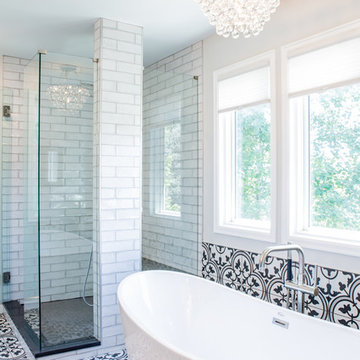
This project is an incredible transformation and the perfect example of successful style mixing! This client, and now a good friend of TVL (as they all become), is a wonderfully eclectic and adventurous one with immense interest in texture play, pops of color, and unique applications. Our scope in this home included a full kitchen renovation, main level powder room renovation, and a master bathroom overhaul. Taking just over a year to complete from the first design phases to final photos, this project was so insanely fun and packs an amazing amount of fun details and lively surprises. The original kitchen was large and fairly functional. However, the cabinetry was dated, the lighting was inefficient and frankly ugly, and the space was lacking personality in general. Our client desired maximized storage and a more personalized aesthetic. The existing cabinets were short and left the nice height of the space under-utilized. We integrated new gray shaker cabinets from Waypoint Living Spaces and ran them to the ceiling to really exaggerate the height of the space and to maximize usable storage as much as possible. The upper cabinets are glass and lit from within, offering display space or functional storage as the client needs. The central feature of this space is the large cobalt blue range from Viking as well as the custom made reclaimed wood range hood floating above. The backsplash along this entire wall is vertical slab of marble look quartz from Pental Surfaces. This matches the expanse of the same countertop that wraps the room. Flanking the range, we installed cobalt blue lantern penny tile from Merola Tile for a playful texture that adds visual interest and class to the entire room. We upgraded the lighting in the ceiling, under the cabinets, and within cabinets--we also installed accent sconces over each window on the sink wall to create cozy and functional illumination. The deep, textured front Whitehaven apron sink is a dramatic nod to the farmhouse aesthetic from KOHLER, and it's paired with the bold and industrial inspired Tournant faucet, also from Kohler. We finalized this space with other gorgeous appliances, a super sexy dining table and chair set from Room & Board, the Paxton dining light from Pottery Barn and a small bar area and pantry on the far end of the space. In the small powder room on the main level, we converted a drab builder-grade space into a super cute, rustic-inspired washroom. We utilized the Bonner vanity from Signature Hardware and paired this with the cute Ashfield faucet from Pfister. The most unique statements in this room include the water-drop light over the vanity from Shades Of Light, the copper-look porcelain floor tile from Pental Surfaces and the gorgeous Cashmere colored Tresham toilet from Kohler. Up in the master bathroom, elegance abounds. Using the same footprint, we upgraded everything in this space to reflect the client's desire for a more bright, patterned and pretty space. Starting at the entry, we installed a custom reclaimed plank barn door with bold large format hardware from Rustica Hardware. In the bathroom, the custom slate blue vanity from Tharp Cabinet Company is an eye catching statement piece. This is paired with gorgeous hardware from Amerock, vessel sinks from Kohler, and Purist faucets also from Kohler. We replaced the old built-in bathtub with a new freestanding soaker from Signature Hardware. The floor tile is a bold, graphic porcelain tile with a classic color scheme. The shower was upgraded with new tile and fixtures throughout: new clear glass, gorgeous distressed subway tile from the Castle line from TileBar, and a sophisticated shower panel from Vigo. We finalized the space with a small crystal chandelier and soft gray paint. This project is a stunning conversion and we are so thrilled that our client can enjoy these personalized spaces for years to come. Special thanks to the amazing Ian Burks of Burks Wurks Construction for bringing this to life!
 TVL Creative Ltd.
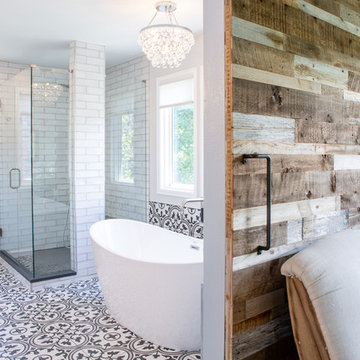
This project is an incredible transformation and the perfect example of successful style mixing! This client, and now a good friend of TVL (as they all become), is a wonderfully eclectic and adventurous one with immense interest in texture play, pops of color, and unique applications. Our scope in this home included a full kitchen renovation, main level powder room renovation, and a master bathroom overhaul. Taking just over a year to complete from the first design phases to final photos, this project was so insanely fun and packs an amazing amount of fun details and lively surprises. The original kitchen was large and fairly functional. However, the cabinetry was dated, the lighting was inefficient and frankly ugly, and the space was lacking personality in general. Our client desired maximized storage and a more personalized aesthetic. The existing cabinets were short and left the nice height of the space under-utilized. We integrated new gray shaker cabinets from Waypoint Living Spaces and ran them to the ceiling to really exaggerate the height of the space and to maximize usable storage as much as possible. The upper cabinets are glass and lit from within, offering display space or functional storage as the client needs. The central feature of this space is the large cobalt blue range from Viking as well as the custom made reclaimed wood range hood floating above. The backsplash along this entire wall is vertical slab of marble look quartz from Pental Surfaces. This matches the expanse of the same countertop that wraps the room. Flanking the range, we installed cobalt blue lantern penny tile from Merola Tile for a playful texture that adds visual interest and class to the entire room. We upgraded the lighting in the ceiling, under the cabinets, and within cabinets--we also installed accent sconces over each window on the sink wall to create cozy and functional illumination. The deep, textured front Whitehaven apron sink is a dramatic nod to the farmhouse aesthetic from KOHLER, and it's paired with the bold and industrial inspired Tournant faucet, also from Kohler. We finalized this space with other gorgeous appliances, a super sexy dining table and chair set from Room & Board, the Paxton dining light from Pottery Barn and a small bar area and pantry on the far end of the space. In the small powder room on the main level, we converted a drab builder-grade space into a super cute, rustic-inspired washroom. We utilized the Bonner vanity from Signature Hardware and paired this with the cute Ashfield faucet from Pfister. The most unique statements in this room include the water-drop light over the vanity from Shades Of Light, the copper-look porcelain floor tile from Pental Surfaces and the gorgeous Cashmere colored Tresham toilet from Kohler. Up in the master bathroom, elegance abounds. Using the same footprint, we upgraded everything in this space to reflect the client's desire for a more bright, patterned and pretty space. Starting at the entry, we installed a custom reclaimed plank barn door with bold large format hardware from Rustica Hardware. In the bathroom, the custom slate blue vanity from Tharp Cabinet Company is an eye catching statement piece. This is paired with gorgeous hardware from Amerock, vessel sinks from Kohler, and Purist faucets also from Kohler. We replaced the old built-in bathtub with a new freestanding soaker from Signature Hardware. The floor tile is a bold, graphic porcelain tile with a classic color scheme. The shower was upgraded with new tile and fixtures throughout: new clear glass, gorgeous distressed subway tile from the Castle line from TileBar, and a sophisticated shower panel from Vigo. We finalized the space with a small crystal chandelier and soft gray paint. This project is a stunning conversion and we are so thrilled that our client can enjoy these personalized spaces for years to come. Special thanks to the amazing Ian Burks of Burks Wurks Construction for bringing this to life!
 Robin Amorello, CKD CAPS - Atmoscaper Design
Photos by Robin Amorello, CKD CAPS
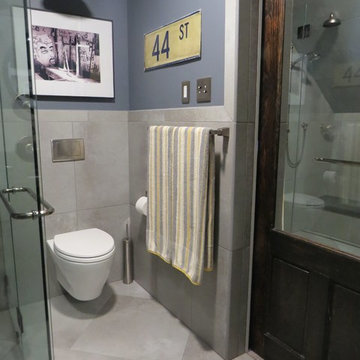
Inspiration for a small industrial 3/4 porcelain tile and gray tile porcelain tile walk-in shower remodel in Portland Maine with an undermount sink, recessed-panel cabinets, dark wood cabinets, a wall-mount toilet and gray walls
Inspiration for a small industrial 3/4 porcelain tile and gray tile porcelain tile walk-in shower remodel in Portland Maine with an undermount sink, recessed-panel cabinets, dark wood cabinets, a wall-mount toilet and gray walls
 Rowlette Design & Installation
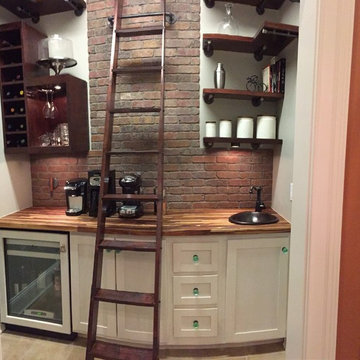
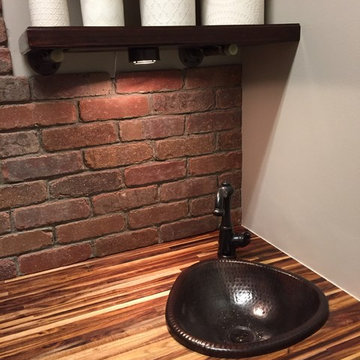
This butlers pantry was conceptualized, designed, built, and installed by Rowlette Design & Installation. It features a brick backsplash, butcher block countertop, open shelving supported by metal screw pipes, wine cooler and cabinetry, and a library ladder for easy access to hard-to-reach items. The room is converted from a small laundry room off a larger kitchen and makes use of all space available.
 Rowlette Design & Installation
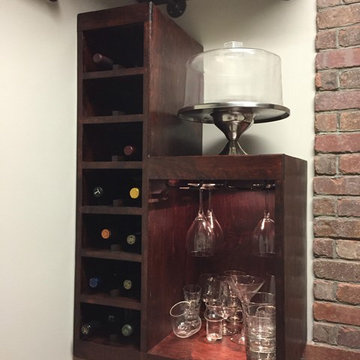
This butlers pantry was conceptualized, designed, built, and installed by Rowlette Design & Installation. It features a brick backsplash, butcher block countertop, open shelving supported by metal screw pipes, wine cooler and cabinetry, and a library ladder for easy access to hard-to-reach items. The room is converted from a small laundry room off a larger kitchen and makes use of all space available.

 Rowlette Design & Installation
This butlers pantry was conceptualized, designed, built, and installed by Rowlette Design & Installation. It features a brick backsplash, butcher block countertop, open shelving supported by metal screw pipes, wine cooler and cabinetry, and a library ladder for easy access to hard-to-reach items. The room is converted from a small laundry room off a larger kitchen and makes use of all space available.
 A&S Enterprises Landscaping Patios & Yard Drainage
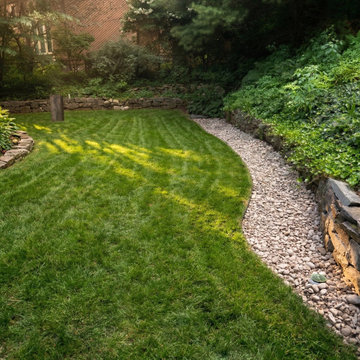
French Drain Installation Niskayuna Drainage Solutions Landscaping Company - professional installation in Schenectady by A&S Enterprises. Quality craftsmanship in landscaping, hardscaping and drainage for Capital Region homeowners.
25