
Search results for "Plastic material" in Home Design Ideas
 Davida's Kitchen & Tiles
Bob Narod, Photographer
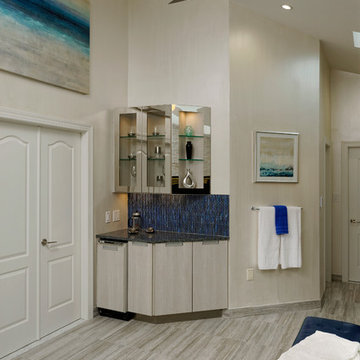
View of master bathroom tub deck clad in quartz and accented with cobalt blue glass tiles, and silver 12x24 tile.
Inspiration for a large contemporary master blue tile and glass tile ceramic tile bathroom remodel in DC Metro with a bidet, an undermount sink, flat-panel cabinets, white cabinets, quartz countertops and white walls
Inspiration for a large contemporary master blue tile and glass tile ceramic tile bathroom remodel in DC Metro with a bidet, an undermount sink, flat-panel cabinets, white cabinets, quartz countertops and white walls
 Nar Design Group
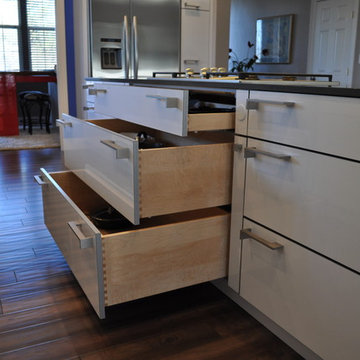
This bright and clean contemporary kitchen features Columbia frameless cabinetry, Caesarstone quartz countertops, and Miele appliances. Special features in this kitchen include: a spice pull out, tray dividers, Fisher & Paykel dish drawer and trash pull out.
PhotographerLink
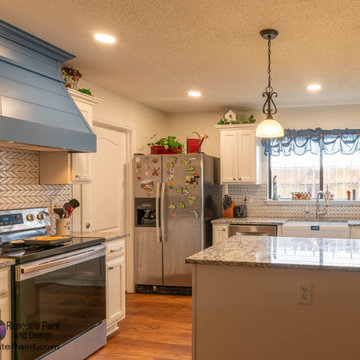
 Renovate Paint and Design
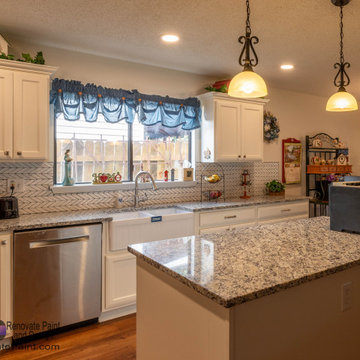
Updating Process:
> Prepare/Demo: Protect flooring and furniture with plastic. Remove: flooring, fixtures, countertops and cabinets, vent hood ,stove, ceiling light boxes. Tape, float, and texture area as needed. Haul off all debris.
> Construct, paint, and install new wall, soft-close cabinets. Install door and drawer pulls.
> Construct, paint, and install new island, soft-close cabinets. Install door and drawer pulls.
Kitchen Countertops and Tile Backsplash:
> Install new quartz countertops Level 3 with standard edge profile and cut out for farm house sink.
> Prepare wall surfaces between cabinets for tile backsplash.
> Install and grout tile backsplash.
Kitchen Plumbing and Appliances Installed:
> Install new farm house sink and faucet and connect up plumbing.
> Install stove, vent hood, dishwasher, garbage disposal.
Kitchen Electrical:
> Install 2 pendant lights over bar. Install new switch.
> Install 4 new recess LED lights in front of kitchen cabinets.
Flooring Installed:
> Where flooring was removed prepare concrete surfaces.
> Install new Luxury Vinyl Floor in kitchen, eating area, laundry room, living space, foyer, and small hall.
> Once flooring is installed, install shoe molding along baseboards. Caulk and fill nail holes.
Additions:
> Install 24 inch new credenza on cabinet wall. Credenza will have two rows of drawers.
> At the end of the island, install new personal desk.
> Prime and paint ceiling light over dining table.
Find the right local pro for your project
 Glenwood Carpentry
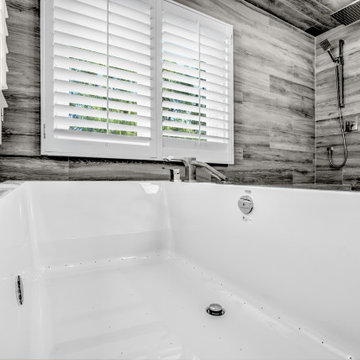
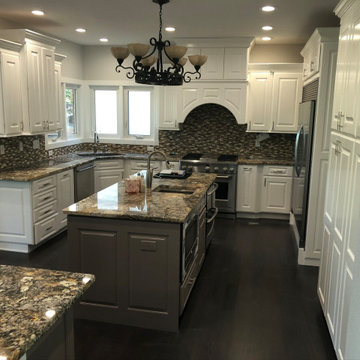
This 250sq.ft. bathroom renovation replaced a 30 year old bathroom with a raised floor at the tub area and plastic shower insert. We leveled the floor and moved all the plumbing to make the space function better and look more aesthetically pleasing. Shower glass door and panels have since been installed. We installed 8x48 wood look porcelain tiles on the floor and throughout the shower area and ceiling. Custom shower niche and corner shower seat along with a full hydrotherapy tub make this a personal spa.
 Stellar Painting and Remodeling
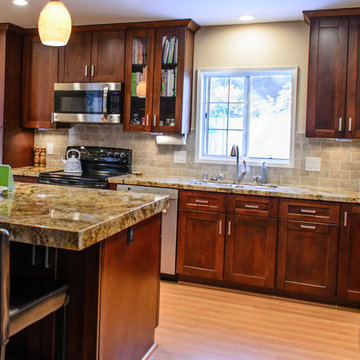
Great Kitchen Cabinet Painting Project
Pre-stained Cabinets
Tented off Kitchen Area w/ Plastic and Covered all Countertops and set up a Spray Booth to Garage.
We Removed the Doors & Prev. Handles , Applied a Bonding primer to all Surfaces including Island, Caulked in the Panels of Cabinet Doors Both Sides, Applied a Premium Urethane Paint , Re-installed Doors & New Handles and Painted the Island an Accent color.
 TaylorPro Design and Remodeling, Inc.
"Kerry completely remodeled my kitchen. He demoed old cabinets and plumbing, knocked out a wall, took out some drywall. He redid all the kitchen electrical and plumbing. New wood cabinets, granite countertops, stone tile backsplash, sink and faucet. Installed 3 new ceiling fans. He ran home theater wiring inside the wall and attic so it would be hidden. I supplied certain fixtures and appliances, and I separately arranged for new flooring, painting, and carpeting for the rest of the house. Total project cost, including TaylorPro's part and everything else, was about $57,000.
I was delighted with Kerry and his crew. They did a high quality job, and kept me informed at all times. Among the four excellent contractors we interviewed, Kerry struck me as highly experienced and confident he would complete the job on time. The work was estimated at 4 weeks; it turned out to take 5 weeks, mainly because the countertop fabricator took longer than expected.
We have shown off the new kitchen to many friends, neighbors, and Facebook friends. They are stunned, it's just sooo beautiful! I get up every morning, turn on the new under cabinet lights, pour my coffee, and smile at the look of the granite.
I had a special request for an island countertop that would slide back and forth. With 350 pounds of granite this is not an easy request. Kerry designed it and built it. At our unveiling we had old ladies moving it back and forth with one finger, yet it locks in place easily.
A major kitchen remodel is an ordeal. You go 3 or 4 weeks with no sink or dishwasher. There's dust everywhere, even with the plastic wall they put up to keep it out. Washing dishes in the bathtub is no fun. But we designated a spare room as a temporary kitchen, and Kerry moved the fridge and microwave in there for us. We had the outdoor grill, so we didn't eat out very much. This is true with everybody, but Kerry kept the dust down to about 3 weeks.
I had many detailed requests that were probably a lot fussier than the average customer. Kerry's crew was on top of every one of them, making sure I was completely satisfied. Jake, Randall, and Kevin, his crew, accommodated my every request.
The cabinets are subbed out to Kitchen Emporium, who provided a high quality result, and Kerry passed along his deep discount to me. Jerry at KE was also very impressive, redesigning my kitchen layout much better than my original request. Jerry's team, Gil, Abraham, and Cesar were also very attentive to detail and made sure everything was perfect."
~ Mary Ann H, Client
Shaker cabinets, Kohler faucet, custom sliding counter top, pendant lights, glass door cabinets, pocket door, custom cabinets
Photo By: Kerry W. Taylor
 Stacey Romano Interiors
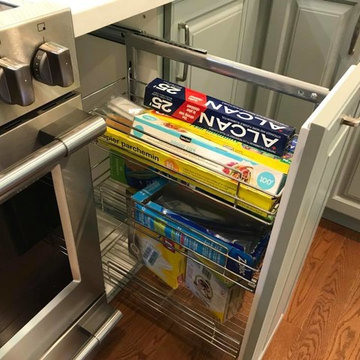
Custom Kitchen Design incorporating a washer and dryer, loads of storage, spice pullout, garbage/recycle centre, corner pullout storage and counterspace galore!
Stacey Romano Interiors
Sponsored
Columbus, OH

Wannemacher Interiors
Customized Award-Winning Interior Design Solutions in Franklin Cnty OH
 Kustom Home Design
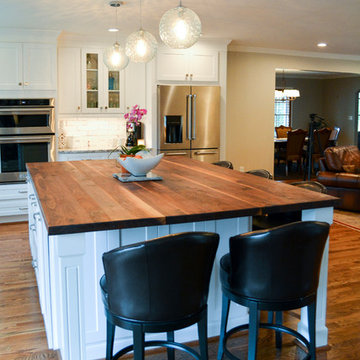
We created an open concept kitchen with keeping room from a closed off kitchen with tight layout. The oversized island comfortably seats 5 in an L-shaped arrangement. The white shaker style cabinets have a rustic, yet refined farmhouse look that is accentuated by the gorgeous oiled wood counter top. Ample island storage with specialized pull-outs, deep drawers and classic pulls make the island the heart of this home. The chef grade gas cooktop is crowned with a beautiful custom hood with vent insert and roman style brick wall tile with a herringbone pattern accent. The granite counters along the L-shaped outer walls blends the dark and light tones found through the home. A shiny metal farmhouse sink with dimpled texture is centered on the window overlooking the courtyard garden. Unique storage features such as a pull-out recycling center, pet food drawer, coffee station, recessed bread box / appliance garage, spice columns and plastic wrap pull-out provide ease of use and an organizers dream come true. A hidden walk-in pantry is seamlessly integrated into the cabinetry providing a secret reservoir of storage potential. Daylight floods the space and spills into the adjacent family room and formal dining room. Entertaining is easy in this clean crisp new kitchen redesigned for large family gatherings and intimate dinners at home. Photos By: Kimberly Kerl, Kustom Home Design
 Renovate Paint and Design
Updating Process:
> Prepare/Demo: Protect flooring and furniture with plastic. Remove: flooring, fixtures, countertops and cabinets, vent hood ,stove, ceiling light boxes. Tape, float, and texture area as needed. Haul off all debris.
> Construct, paint, and install new wall, soft-close cabinets. Install door and drawer pulls.
> Construct, paint, and install new island, soft-close cabinets. Install door and drawer pulls.
Kitchen Countertops and Tile Backsplash:
> Install new quartz countertops Level 3 with standard edge profile and cut out for farm house sink.
> Prepare wall surfaces between cabinets for tile backsplash.
> Install and grout tile backsplash.
Kitchen Plumbing and Appliances Installed:
> Install new farm house sink and faucet and connect up plumbing.
> Install stove, vent hood, dishwasher, garbage disposal.
Kitchen Electrical:
> Install 2 pendant lights over bar. Install new switch.
> Install 4 new recess LED lights in front of kitchen cabinets.
Flooring Installed:
> Where flooring was removed prepare concrete surfaces.
> Install new Luxury Vinyl Floor in kitchen, eating area, laundry room, living space, foyer, and small hall.
> Once flooring is installed, install shoe molding along baseboards. Caulk and fill nail holes.
Additions:
> Install 24 inch new credenza on cabinet wall. Credenza will have two rows of drawers.
> At the end of the island, install new personal desk.
> Prime and paint ceiling light over dining table.
 Crystal Kitchen + Bath
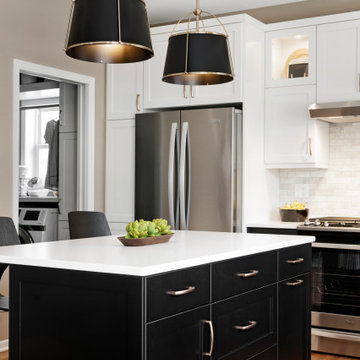
This kitchen was outdated with builder grade cabinets and plastic laminate countertops. The bold kitchen flows seamlessly with the remodeled laundry/mudroom and ties beautifully with the newly updated half bath, both designed by Crystal Kitchen + Bath.
Although the configuration remained similar, a few adjustments to the layout and new cabinets with accessories creates a more functional kitchen. A shallow pantry closet was eliminated from the room to gain much needed square footage in the adjacent Laundry/Mudroom. Replacing this closet is a tall pantry cabinet next to the refrigerator, which allows for the refrigerator door to fully swing open now.
The black and white color scheme and marble backsplash tile add a bold new look to this room. Rich hickory wood flooring brings in warmth to the space, while a mixture of finishes on the hardware, lighting and plumbing fixtures adds interest. A new island with a pull-out waste basket allowed the homeowners to get rid of their free- standing trash bin. Additional accessories, such as, spice drawer, roll-out shelves, silverware tray and appliance garage keep things in order. Dinnerware and accessories can be showcased in the illuminated glass front cabinets.
 Aras Interiors, LLC.
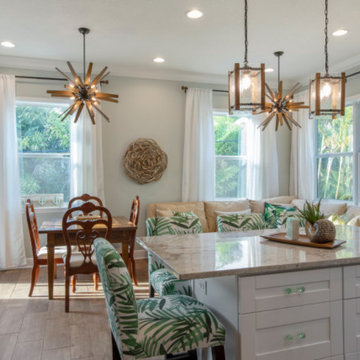
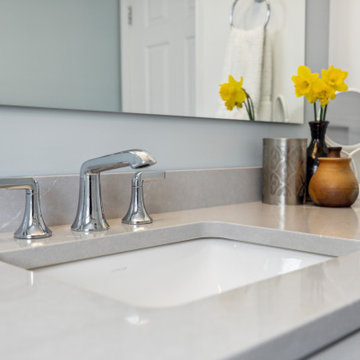
Example of a beach style single-wall ceramic tile and brown floor eat-in kitchen design in Tampa with shaker cabinets, white cabinets, quartzite countertops, stone tile backsplash and multicolored countertops
 Hillcrest Construction
These clients looked to Hillcrest Construction to design and remodel three bathrooms at their West Chester, Pa home. This part of the remodel included all fixtures and finishes in the hall bath being replaced and a custom vanity being designed, constructed, and finished to better suit the updated storage needs of their family. The original 1980s acrylic tub was replaced by a classic cast iron alcove tub and the shower niche layout was designed to facilitate both a quick morning rinse or a long evening soak. The original mosaic floor tile and plastic tub surround were supplanted by large format tile on the floor and walls with an eye-catching sea-green listello wrapping the shower area. This hall bath project offered the perfect update to the bathroom shared by guests, grown kids returning home from a college break, and all others enjoying a fresh start to their day.
 FAMURAT BUILDERS, LLC
Marcin JM @ Diamond Shot Studio
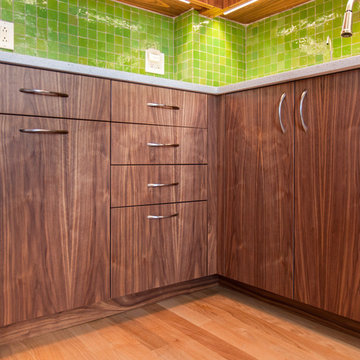
Example of a mid-sized 1950s u-shaped light wood floor open concept kitchen design in New York with a single-bowl sink, flat-panel cabinets, dark wood cabinets, quartz countertops, green backsplash, ceramic backsplash, stainless steel appliances and no island
Example of a mid-sized 1950s u-shaped light wood floor open concept kitchen design in New York with a single-bowl sink, flat-panel cabinets, dark wood cabinets, quartz countertops, green backsplash, ceramic backsplash, stainless steel appliances and no island

 Hillcrest Construction
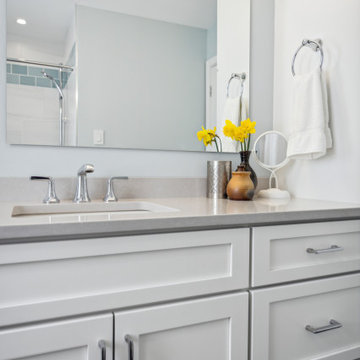
These clients looked to Hillcrest Construction to design and remodel three bathrooms at their West Chester, Pa home. This part of the remodel included all fixtures and finishes in the hall bath being replaced and a custom vanity being designed, constructed, and finished to better suit the updated storage needs of their family. The original 1980s acrylic tub was replaced by a classic cast iron alcove tub and the shower niche layout was designed to facilitate both a quick morning rinse or a long evening soak. The original mosaic floor tile and plastic tub surround were supplanted by large format tile on the floor and walls with an eye-catching sea-green listello wrapping the shower area. This hall bath project offered the perfect update to the bathroom shared by guests, grown kids returning home from a college break, and all others enjoying a fresh start to their day.
 Glenwood Carpentry
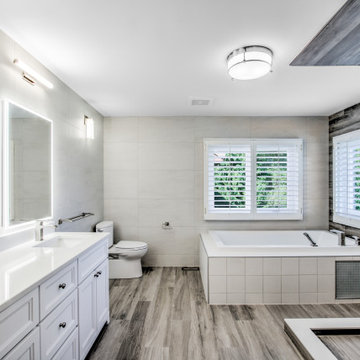
This 250sq.ft. bathroom renovation replaced a 30 year old bathroom with a raised floor at the tub area and plastic shower insert. We leveled the floor and moved all the plumbing to make the space function better and look more aesthetically pleasing. Shower glass door and panels have since been installed. We installed 8x48 wood look porcelain tiles on the floor and throughout the shower area and ceiling. Custom shower niche and corner shower seat along with a full hydrotherapy tub make this a personal spa.
 123 Remodeling Inc.
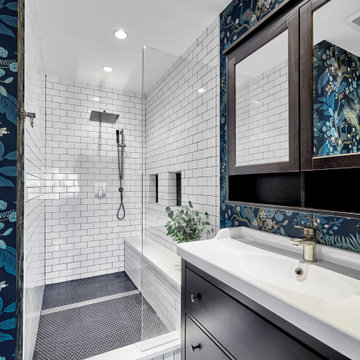
The client’s existing bathroom was in quite bad condition with chipped tiles, outdated design and an awkward layout, so it required a complete remodel.
The client wanted to add some charm to the space, so 123 Remodeling’s designer decorated the vanity wall with elegant floral pattern wallpaper that makes the space look unique. We matched the nature-inspired design with dark wood mirror frames and vanity of the same finish. We removed the shower curb and re-tiled floors and walls with modern subway tile. Old plastic shelves were replaced with built-in niches to increase the shower space.
https://123remodeling.com/
 Hillcrest Construction
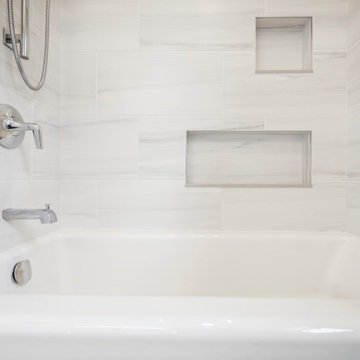
These clients looked to Hillcrest Construction to design and remodel three bathrooms at their West Chester, Pa home. This part of the remodel included all fixtures and finishes in the hall bath being replaced and a custom vanity being designed, constructed, and finished to better suit the updated storage needs of their family. The original 1980s acrylic tub was replaced by a classic cast iron alcove tub and the shower niche layout was designed to facilitate both a quick morning rinse or a long evening soak. The original mosaic floor tile and plastic tub surround were supplanted by large format tile on the floor and walls with an eye-catching sea-green listello wrapping the shower area. This hall bath project offered the perfect update to the bathroom shared by guests, grown kids returning home from a college break, and all others enjoying a fresh start to their day.

Sponsored
Sunbury, OH

J.Holderby - Renovations
Franklin County's Leading General Contractors - 2X Best of Houzz!
 Kitchen & Bathroom Remodel by Cutting Edge
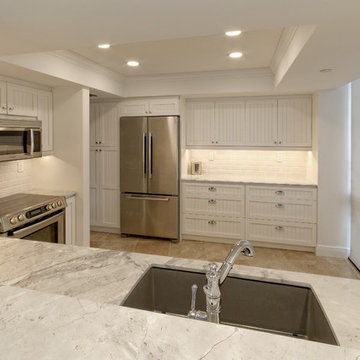
We removed the old plastic tray ceiling and utilized LED lighting in the new coffered ceiling with crown molding, which really makes this medium sized kitchen seem more spacious.
Photos by Scot Trueblood
 User
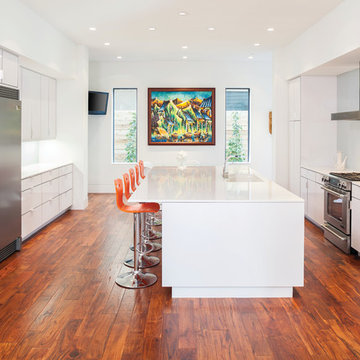
UserPORTA S2 | High Gloss | Bianco Gloss
PHOTO: BMC (Houston, TX)
Our High Gloss and Super-Matte product is a lightweight, durable, chemical resistant, UV-light stable plastic. It is a ‘green‘ product that releases no harmful chemicals and can be recycled, unlike PVC products. The gloss surface is treated with a transparent coating cured under special temperature and UV light processes to further enhance its durability.
 BMR BelMax Remodeling
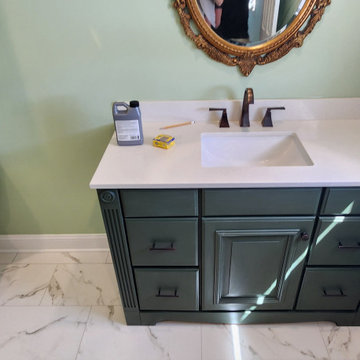
Master Bathroom Remodel by BMR Belmax Remodeling: Project Overview
Initial Condition
Size and Layout: The master bathroom was small, featuring a plastic shower enclosure.
Client’s Request: The client wanted to enlarge the bathroom to create a more spacious and luxurious environment.
Renovation Details
Expansion:
Wall Movement: The wall between the hallway and the master bathroom was moved 2 feet to increase the bathroom’s size.
Plumbing Upgrades:
New Water Pipes: Installed for the new shower, vanity, and toilet.
Drainage: A new shower drain and toilet drain were installed to accommodate the updated layout.
Electrical Enhancements:
Recessed Lighting: Installed 4 new recessed lights to improve illumination.
Heated Floor: Added a new heated floor for enhanced comfort.
Fixtures and Finishes:
Vanity: Installed a beautiful, modern vanity to improve storage and aesthetics.
Medicine Cabinet: Included a new medicine cabinet to provide additional storage and convenience.
Exhaust Fan and HVAC Outlet: Added to improve ventilation and climate control.
Tiles: Small format tiles were installed in the shower area, and 12×24 tiles were laid on the floor to create a cohesive and stylish look.
Conclusion This comprehensive remodel transformed a small, outdated master bathroom into a spacious, modern, and functional retreat, perfectly tailored to the client’s needs and preferences.
88