
Search results for "Preparation" in Home Design Ideas
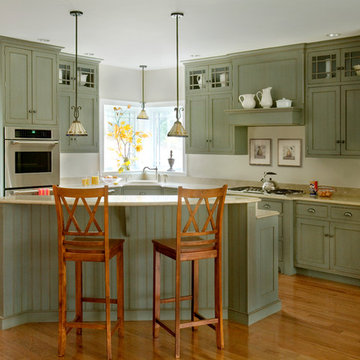
 Quality Custom Cabinetry, Inc
Photography by Eric Roth Photography
Designed by Heartwood Kitchens, Danvers MA. The Heartwood showroom is located on Boston's North Shore.
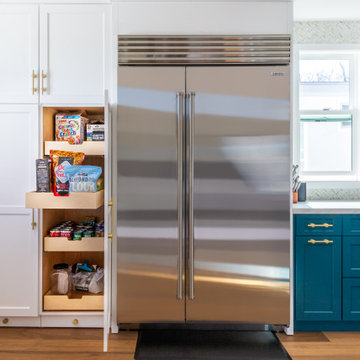
Example of a mid-sized classic l-shaped medium tone wood floor eat-in kitchen design in Boston with recessed-panel cabinets, green cabinets, stainless steel appliances and white walls
Example of a mid-sized classic l-shaped medium tone wood floor eat-in kitchen design in Boston with recessed-panel cabinets, green cabinets, stainless steel appliances and white walls


Find the right local pro for your project
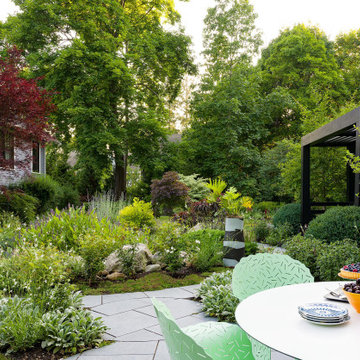

 The Home Co.
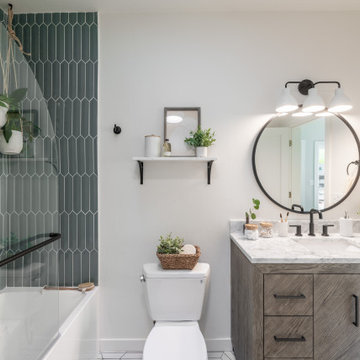
Inspiration for a mid-sized contemporary 3/4 green tile and porcelain tile porcelain tile, white floor and single-sink alcove bathtub remodel in San Francisco with flat-panel cabinets, distressed cabinets, a two-piece toilet, white walls, an undermount sink, marble countertops, white countertops and a freestanding vanity
 Jay Sifford
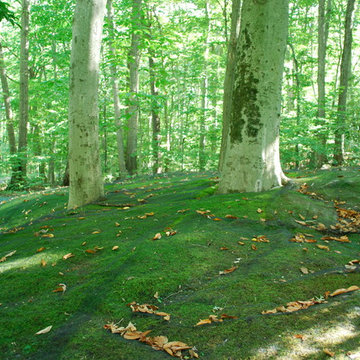
Photo taken in the garden of David Benner. Photo by Jay Sifford
Design ideas for a traditional landscaping in Charlotte.
Design ideas for a traditional landscaping in Charlotte.

 Ginkgo Leaf Studio
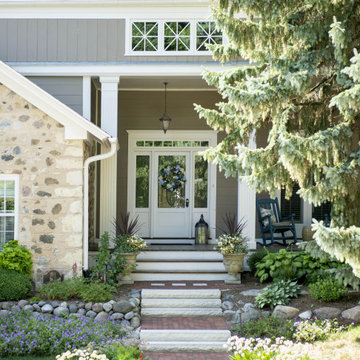
We designed a new front walk with more stone steps to eliminate the odd pitch of the existing front walk. Lannon stone medallions mimic the tri-window detail above on the home.
Renn Kuhnen Photography
 Advance Design Studio, Ltd.
Jennifer and Dan have lived in their Deer Park Illinois home for 15 years, slowly making minor fixes like painting and decorating; but they had a new plan for their kitchen the entire time. An awkwardly placed garage door, and an island cooktop with a terrible downdraft made a full-scale kitchen remodel an absolute must. Jennifer had many ideas in mind and wanted to work with a company that could provide high-end work, while partnering with a designer that would tailor the kitchen to her ideas.
She was intrigued by the phrase “Common Sense Remodeling” in Advance Design’s feature she discovered while perusing an issue of the community’s Quintessential Barrington Magazine. Doing further research on the company’s website, as she looked through project profiles and read about Advance Design’s “Common Sense Remodeling” philosophy, she promptly scheduled an appointment to see if the people and ideas she read about were truly who they said they were. The more she read, the more she knew that the “Common Sense” approach to remodeling they described was exactly the type of company she was looking for.
The partnership was sealed after an initial consultation with Owner Todd Jurs and Project Designer Michelle Lecinski. They displayed a combination of friendliness, professionalism and respect that was unmatched by any of the other companies Jennifer talked to. She knew that with Advance Design, she would be able to retain the vision that she had in mind with high-quality craftsmanship.
“I reached out to Advance Design because of the ‘Common Sense Remodeling’ tagline,” Jennifer said. “That’s what lingered for me”. “Advance Design was the most respectful- of the house and of my design ideas, and the most professional of the handful of companies that looked at my project”.
Soon after the meeting Jennifer began working with Michelle on the project design. They quickly developed chemistry. Jennifer loved how Michelle researched and located every detail that Jennifer wanted for the kitchen. Between the two of them, every concept and idea was worked through and perfected. “Jennifer had definite ideas about what she wanted the new kitchen to look like, she just didn’t know how to bring it all together. We worked together really well to make her ideas into the practical reality necessary for a well-functioning kitchen, with the look and feel that she had envisioned”, says Michelle.
“Michelle was wonderful in using the CAD system she would show me new drawings every time we changed the layout while working through the design,” Jennifer said. “She was a really wonderful partner in execution, she made sure everything happened quickly and easily.”
The finished design drew out elements of Jennifer’s style and personality. The pair call the look “sophisticated farmhouse” to describe the kitchen renovation to family and friends. The result was a beautifully crafted, authentic-feeling space that satisfied Jennifer’s dreams 15 years in the making. The whole project consisted of a kitchen remodel, mudroom upgrade with powder room, and garage entry relocation. “The projects I personally like the best, are the ones that put the client’s dreams on display,” Project Designer Michelle said. “And this is one of those projects.”
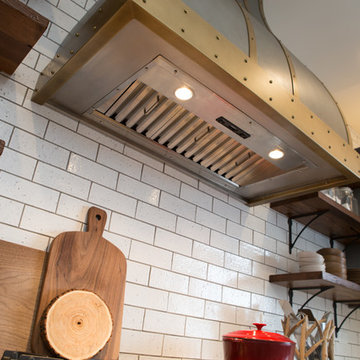
The main focal point of the kitchen is custom zinc and brass ventilation hood with a vintage sheen, which was hand made to order by a small company in Indiana named Vogler Metalworking. “It’s like sculpture, a true work of art”, says Jennifer. Your eye is immediately drawn towards this elegant yet practical hood that eliminated the home’s downdraft problem and added a striking conversation piece at the same time. The carpenters had to use special gloves when transporting and installing it, so they didn’t smudge it with fingerprints. The beautiful hood centers proudly over the stunning black enamel and brass LaCornue Range. “I had a friend who had a LaCornue range and after learning how easy it was to cook perfect meals, I was convinced I wanted to have one”, says Jennifer. This unique, breathtaking combination anchors the entire kitchen and is apparent immediately as you walk into the great room the surrounds the space.
DuraSupreme Crestwood cabinets with a Kendall Panel add function and sophistication. A custom gray paint color paired with a storm blue was developed so that the new kitchen looked like it belonged to the existing space. Unlacquered brass faucets and hardware were important to Jennifer because she wanted the living finishes to age over time. Remarkable brass diamond mesh cabinet door inserts imported from the UK continue to add this one-of-a-kind kitchen renovation; giving it a “you won’t see this everywhere” quality. The use of old railcar flooring for the coffee bar countertop and reclaimed oak for the open shelving gives an authenticity to the space uncommon in kitchens today.
Jennifer and Michelle fell in love with the Limestone Grey Stone while they were investigating unique island countertop ideas. They liked the fact that the limestone as a living finish will age and change over time. Calcutta Miel Quartz countertops made for an excellent pairing around the perimeter, as it’s durable and perfect for cooking preparations. A textured white subway tile backsplash that runs to the ceiling keeps your eye moving towards the open shelving, and to the main focal point of the stunning range hood combination.
“The kitchen functions beautifully, and it’s gorgeous,” beams Jennifer as she gestures with both hands while smiling ear to ear. “The most important thing was I wanted a kitchen that had a wonderful flow, cooked beautiful meals and was a great gathering place for family and friends, and this space does that perfectly! Beauty wise, it turned out exactly how I had envisioned. I felt the function part was the hardest part, and that was nailed”!
Relocating the garage entry to the new mudroom was a huge priority and has finally separated the family’s arriving home functions from their kitchen. Now coats and shoes and bags have their own area for dropping once members arrive home. Matching gray DuraSupreme cabinetry helped create gorgeous, purposeful lockers for the family. A reclaimed vintage sink and custom wall paper were added to the tiny powder room to beautify the once previously only functional space. Advance Design was even able to create a custom space for their dog to sleep while the family is away.
“It was unbelievable that a project of this size was completed in such a short time, and I think that’s because of the large amount of planning and preparation that went into it,” Jennifer marveled, “When we started, we were ready, and everything was prepared”.
When it came to execution, Project Manager Justin Davis and his crew were quick, accessible, and organized. Projects like this kitchen are typically completed in as little as 8-10 weeks. Jennifer’s kitchen however despite the relocation of some challenging HVAC in a soffit and moving of an exterior door was completed remarkably fast in part because the team was working with an existing tile floor that ran throughout the first floor that the client really loved.
“You get to know these people really well because they’re living in your house while you’re living in your house. They were so fast and really good, it didn’t take as long as even planned” reported Jennifer. “I would text Justin and he always responded almost immediately. I got to know all the guys who were working in our house and they were all wonderful people”.
Details in a customized kitchen like this one require skill and care from the people who install it. “All the guys on the job were skilled at what the did. I wanted small details like little feet to look like furniture, that is where their carpentry skill came in to make these all perfect”, said Jennifer. “The tile guys were wonderful. They even let me determine how I wanted the texture with the grout to appear for a salt and pepper look; now that is a very skilled trade person making it custom”.
In Jennifer’s interview, she continued to reference Advance Design’s “Common Sense Remodeling”, so I took a minute to ask her exactly what that phrase meant to her and how it played out in her experience with her project and the Advance Design team. Here is what she said: “I was intrigued about Common Sense Remodeling and in my head that there would be clear costs and prices, great communication between the design team, the execution team and me”, said Jennifer. They did deliver on that, it was so clear about the cost breakdown, what I could expect from everyone who came to my house, and everything that we had ordered. That to me is the Common Sense”!
It’s great to see a client take literally our assertion that a well-planned remodeling project is simply “Common Sense”! She anticipated each step of the way would be clear, concise, and predictable, all the while protecting the outcome due to the careful upfront planning. “Advance Design delivered on their ‘Common Sense Remodeling’ promise,” Jennifer said. “From the design team, to the execution team - everything was straight forward like I imagined. The project turned out exactly how I envisioned, I enjoyed this process and absolutely would recommend Advance Design Studio to anyone.”
 House Doctors of Scotch Plains-Fanwood, NJ
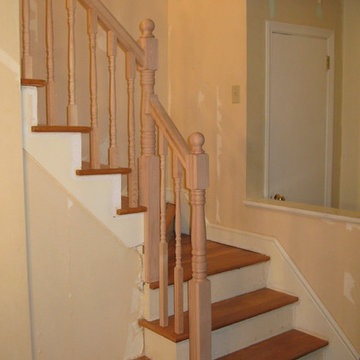
Stairways that have a baluster add beauty to a home. However, if the baluster is broken, then this can cause the stairs to look bad. Fortunately, it is not that difficult to replace a broken baluster. Below are some of the steps you will need to take:
Remove The End Cap
It is important to be very careful when you are replacing the baluster. You will need to keep the baluster intact so that a wood turner will be able to make an exact copy of it. You will most likely need to remove the end cap from the stairs. Break the seal that is between the tread and the end cap using a sturdy knife or pry bar.
Breaking The Baluster
If you do not want to salvage the baluster, then you do have other options. You can use a hammer to loosen the nails at the top of the baluster. Make sure that you do not damage the adjacent balusters or handrail. You can use your hands to loosen the bottom half of the baluster. Make sure you use gentle force.
Create A New Baluster
Unless you are fortunate enough to have the same baluster at a local home center, you are going to need a wood turner to make a new baluster. Make sure you tell your wood turner the specific type of wood you need. If you are not concerned about the original color, then you will need to select the wood that is the hardest. Ask the wood turner to leave the spindles intact. This may make it harder for you to fit the baluster into the staircase. However, this reduces the chances of getting a misfit from the wood turner.
Prepare The Stairs
It will likely take one or two weeks to turn a baluster. You can prepare the stairs during this time. Clean up the area around the stairs. Put the end cap back on the stair tread. Measure the tread to where the new baluster and handrail will meet on the upstairs side.
Prepare The Baluster
You can prepare the baluster by sanding it smooth. Measure from the bottom of the baluster to the bottom of the tenon joint. Cut the top end of the baluster so that it matches the handrail's slope. Hold a T-Bevel against the handrail's underside where the new baluster will go. Mark the angle with a pencil.
Install The Bottom Of The Baluster
Insert the tenon inside of the mortise. After that, position the top of it in the middle of the handrail's underside.
Install The Top Of The Baluster
Make sure the tenon is straight by using a carpenter's level. Have someone hold it in place in order to ensure that it matches the angle of the other balusters. Place one nail into the baluster's upstairs side. You most likely will not need more than two finishing nails. Remove dust by wiping off the baluster. Use painter's tape to mask off the handrail and stair tread. Stain or paint the new baluster.
Since this project involves a lot of work, you can save a lot of time and stress by contacting House Doctors to help. Thanks to our highly experienced team, you can depend on us to get the work done promptly and properly.
by Ken Benedetto, Owner of House Doctors of Scotch Plains - Fanwood
 R&J Painting LLC
Upon Completion
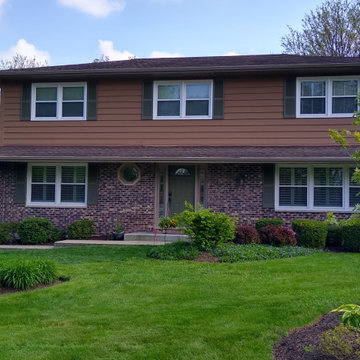
Removed and Replace 185 lft of Cedar Siding
Prepared and Scraped all loose and peeling paint
Oil Primed all bare wood
Caulked all Cracks and Filled all holes
Re-nailed loose Siding and Trim Boards
Stained all Siding and Trim
Front Entry Door, Sidelights and Frame –
Prepared and Scrape loose paint
Spot Primed bare wood
Caulk Cracks and Filled Holes
Painted per-customer color choice
Rear access doors and storm doors - Prepare, clean, scrape loose paint. Spot prime bare wood. Caulk cracks and fill holes. Paint per-customer color 2 coats -
Shutters – Remove, Prepare, paint 2 coats per-customer color and re-install
 Tracey Stephens Design, LLC
Wing Wong/Memories TTL
Transitional l-shaped linoleum floor home design photo in New York with an undermount sink, shaker cabinets, white cabinets, wood countertops, white backsplash, ceramic backsplash, stainless steel appliances and no island
Transitional l-shaped linoleum floor home design photo in New York with an undermount sink, shaker cabinets, white cabinets, wood countertops, white backsplash, ceramic backsplash, stainless steel appliances and no island
 Windy City Painters
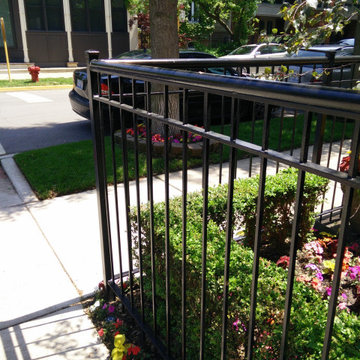
Does your iron fence look like Chicago winters have been winning the battle for years? That slow orange spread across pickets and rails is not just an eyesore - it is active corrosion undermining the structural integrity of metalwork that frames some of Chicago's most architecturally significant residential properties. Windy City Painters addresses iron fence rust at the source, using professional-grade rust conversion chemistry and direct-to-metal coatings engineered for the specific abuse Chicago's climate delivers.
PROJECT OVERVIEW
This project involved a heavily rusted ornamental iron fence on a Chicago North Side residential property. Rust had progressed beyond surface oxidation into moderate pitting on lower rails, a pattern Windy City Painters sees frequently on properties within blocks of treated roadways where salt drift accelerates corrosion. The scope included mechanical descaling, chemical rust conversion, DTM priming, and a durable gloss topcoat matched to the original fence color.
MATERIALS AND PRODUCTS
Ospho Rust Converter: A phosphoric acid-based treatment that chemically reacts with iron oxide, converting it to iron phosphate - a stable, paintable compound. Corroseal Water-Based Rust Converter is an alternative for situations requiring lower VOC handling. Rust-Oleum Professional DTM Primer and Sherwin-Williams DTM Acrylic Coating serve as the primary coating system, formulated for direct metal adhesion with built-in rust inhibitors. For structurally compromised sections, welding is coordinated before any chemical or coating work begins.
THE PROCESS
Step 1 - Mechanical Preparation: Wire wheel grinding on an angle grinder removes loose rust scale, mill scale, and flaking paint. For advanced pitting, Windy City Painters deploys a needle gun descaler, which impacts the metal surface thousands of times per minute to drive scale from deep cavities. This step determines whether the fence can be coated or needs welding first.
Step 2 - Chemical Rust Conversion: Ospho or Corroseal is brushed onto all remaining rust surface. These products do not simply seal rust - they react with it. The conversion process takes 24 hours to fully cure before topcoating. Skipping this step is the single most common reason iron fence paint jobs fail prematurely.
Step 3 - DTM Priming: Sherwin-Williams DTM or Rust-Oleum DTM primer is applied by brush to ensure full penetration around decorative elements, picket tips, and weld joints. Spray application is used on open sections for even film build. DTM formulations bond directly to prepared metal without a separate shop primer.
Step 4 - Finish Coating: A DTM topcoat in gloss or semi-gloss provides the final weather barrier. Gloss is preferred for iron fencing because the harder surface sheds water more effectively and resists dirt adhesion between maintenance cycles. Windy City Painters applies two finish coats for maximum film thickness.
CHICAGO-SPECIFIC CHALLENGES
Chicago's freeze-thaw cycle is the primary enemy of iron fence coatings. Water infiltrates micro-cracks in paint film, freezes, expands, and delaminate coating from beneath. Properties on the North Side and Near West Side also contend with lake-effect humidity that keeps metal surfaces damp for extended periods, slowing cure times and promoting under-film corrosion if preparation is inadequate. Greystones and Victorian brownstones typically feature ornate cast iron or wrought iron fencing with complex geometries that trap moisture and demand hand-brush application to fully coat recesses.
WHAT TO EXPECT LONG-TERM
A properly prepared and coated iron fence in Chicago should hold 5-8 years before requiring recoating. Annual inspection of weld joints, picket tips, and base rails closest to grade will identify early rust return. Addressing small spots with touch-up converter and primer extends service life significantly between full recoats.
PRO TIPS
Tip 1: Never pressure wash a rusted iron fence immediately before painting. Water drives moisture into pits and delays the surface drying needed for chemical converter adhesion. Allow 48 hours of dry weather before prep begins.
Tip 2: Picket tips and rail ends are the first failure points. These end-grain equivalent areas on metal concentrate corrosion. Ask your painter to apply an extra brush coat to every tip and terminus.
Tip 3: Black is the traditional and most durable color choice for iron fencing. Dark pigments absorb UV rather than reflecting it, reducing thermal cycling stress on the paint film at color change boundaries.
FAQ
Q: What does iron fence painting cost in Chicago?
A: Most residential iron fence painting in Chicago ranges from $400 to $1,200 depending on linear footage, rust severity, prep method required, and whether structural welding is needed before Windy City Painters can coat the surface.
Q: How do I know if my fence needs a welder before painting?
A: If you can press a screwdriver through a rail or picket, the metal wall has failed. Windy City Painters inspects all fencing before quoting and identifies weld-required sections so repairs happen before any coating investment.
Q: Is Ospho or Corroseal better for my fence?
A: Both convert rust effectively. Ospho is solvent-based and fast-acting, preferred for heavy rust. Corroseal is water-based with lower odor, preferred in enclosed or residential settings where off-gassing is a concern. Windy City Painters selects based on site conditions.
Q: Can iron fence painting be done in winter in Chicago?
A: Application requires temperatures above 50 degrees Fahrenheit for DTM coatings to cure properly. Most iron fence painting in Chicago runs April through October, with scheduling flexibility based on extended warm stretches.
Q: How do I maintain my fence between professional recoats?
A: Inspect annually in spring. Sand any rust spots to bare metal with 80-grit paper, apply Ospho, let cure 24 hours, then spot-prime with DTM primer and touch up with finish coat. Windy City Painters offers maintenance inspections.
Q: Do you paint courtyard building fences and coach house gates?
A: Yes. Multi-unit courtyard buildings and coach houses are common in the North Side neighborhoods Windy City Painters serves. We coordinate with property managers and HOAs for larger perimeter fence projects.
Q: How long after painting can I touch the fence?
A: DTM coatings are typically dry to touch in 2-4 hours and hard dry in 24 hours. Full cure for maximum hardness takes 7 days. Windy City Painters advises against pressure washing or heavy contact during that cure window.
Visit windypainters.com to request your free iron fence assessment and project quote.
 Habitations Residential Design Group
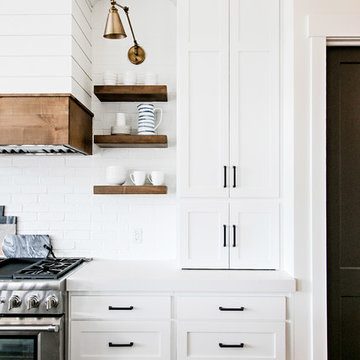
Mid-sized farmhouse medium tone wood floor and brown floor kitchen photo in Salt Lake City with a farmhouse sink, shaker cabinets, white cabinets, quartz countertops, white backsplash, subway tile backsplash, stainless steel appliances, an island and white countertops
 Windy City Painters
Ever notice how your iron fence looks worse every spring after Chicago winters? That steady seasonal decline is not inevitable - it is a preparation and coating problem that Windy City Painters solves with systematic metal restoration.
PROJECT OVERVIEW
Iron fence painting in Chicago requires more than a fresh coat of paint. Chicago's freeze-thaw cycles, road salt exposure, and high seasonal humidity create conditions that destroy inadequately prepared metal coatings within a year or two. Windy City Painters approaches every iron fence project as a corrosion control job first and a painting job second. The result is a finish that holds up through multiple Chicago winters without peeling, bubbling, or allowing rust to spread beneath the surface.
MAterials AND PRODUCTS
Windy City Painters selects products specifically rated for ferrous metal in high-corrosion environments. For rust conversion, we use Ospho phosphoric acid treatment or Corroseal water-based rust converter, both of which chemically transform active rust into a stable iron phosphate compound. For priming and finish coats, Rust-Oleum DTM and Sherwin-Williams DTM rust-inhibitive direct-to-metal coatings provide excellent adhesion, flexibility, and moisture resistance. These products are formulated to expand and contract with metal through temperature swings without cracking.
THE PROCESS
Step 1 - Mechanical Surface Preparation: Wire wheel grinding and needle gun descaling remove all loose rust, failing paint, and mill scale. This step is non-negotiable. No rust-inhibitive coating performs correctly over contaminated or loosely adhered substrate. Windy City Painters treats this phase as the foundation of the entire project.
Step 2 - Rust Conversion Treatment: Ospho or Corroseal is applied to any remaining rust after mechanical prep. These products do not simply cover rust - they react with iron oxide to create iron phosphate, a chemically stable surface that accepts primer without ongoing corrosion underneath. Contact time and full surface saturation are critical.
Step 3 - Rust-Inhibitive Priming: Rust-Oleum DTM or Sherwin-Williams DTM rust-inhibitive primer is applied by brush to ensure full penetration into ornamental details, crevices, and rail joints where moisture collects. Spray application alone misses critical contact points on older Chicago ironwork.
Step 4 - Finish Coat Application: Two finish coats of Rust-Oleum DTM or Sherwin-Williams DTM topcoat deliver color saturation, UV stability, and a hard film that resists chipping from foot traffic, landscaping equipment, and seasonal debris impact common to Chicago urban properties.
CHICAGO-SPECIFIC CHALLENGES
Chicago iron fences face a combination of stressors that accelerates failure compared to milder climates. Road salt spray migrates well beyond the street surface and deposits chlorides on fence metal throughout winter. Freeze-thaw cycles - sometimes occurring multiple times in a single week - expand and contract metal enough to crack coatings that lack flexibility. Older ornamental iron on greystones, Victorian brownstones, two-flats, and courtyard buildings often has decades of paint buildup that must be addressed before any restoration coating will perform correctly.
WHAT TO EXPECT LONG-TERM
A properly prepared and coated iron fence painted by Windy City Painters typically performs five to seven years before requiring recoating in Chicago conditions. Annual spring inspection for salt residue, minor touch-up of any chips within the first season, and a light rinse to remove winter road chemicals all extend coating life. Structural rust that has compromised rail integrity should be addressed by a welder before painting - Windy City Painters identifies these conditions during initial assessment.
PRO TIPS
Tip 1: Never paint over rust without a conversion treatment first. Paint applied over active rust creates a sealed environment where corrosion accelerates invisibly until the coating fails completely.
Tip 2: Budget for welded repairs on iron fences older than twenty-five years. Ornamental iron on Chicago historic properties often has pitting or section loss that painting alone cannot address structurally.
Tip 3: Time your iron fence painting project for late spring or early fall when temperatures stay consistently above fifty degrees overnight. DTM coatings need adequate cure time before the first freeze to achieve full hardness.
Call Windy City Painters to schedule your iron fence assessment at windypainters.com.
FAQ
Q: What is the cost of iron fence painting in Chicago?
A: Iron fence painting cost in Chicago varies by linear footage, rust severity, and ornamental complexity. Windy City Painters provides free on-site estimates so you receive an accurate number before any commitment is made.
Q: Do you need to remove all old paint before repainting an iron fence?
A: Not always. Windy City Painters assesses existing coating adhesion. Sound paint in good condition can remain. Peeling, bubbling, or paint over active rust must be removed for the new coating to perform correctly.
Q: Can structural rust on an iron fence be repaired without replacing the fence?
A: Depends on severity. Surface and moderate rust responds well to conversion treatment and DTM coatings. If rust has caused section loss or structural weakness, Windy City Painters recommends a welder address those areas before painting.
Q: How long does iron fence painting take?
A: Most residential iron fence projects take one to three days including prep, rust conversion, priming, and two finish coats. Windy City Painters sequences cure time between coats to ensure full adhesion at every stage.
Q: What is the best paint for iron fences in Chicago?
A: Rust-Oleum DTM and Sherwin-Williams DTM rust-inhibitive coatings are among the best options for Chicago iron fences due to their flexibility, moisture resistance, and ability to handle freeze-thaw temperature swings without cracking.
Q: Is it worth painting an old iron fence or should I replace it?
A: Painting is almost always more cost-effective than replacement for structurally sound iron. Windy City Painters assesses every fence honestly and only recommends replacement when restoration would not deliver a durable result.
Q: How do I find a reliable iron fence painting contractor near me in Chicago?
A: Look for contractors who specify rust conversion products by name, explain their mechanical prep process, and provide references from similar Chicago properties. Windy City Painters documents every step and warranties our work.
 C. Watkins Construction
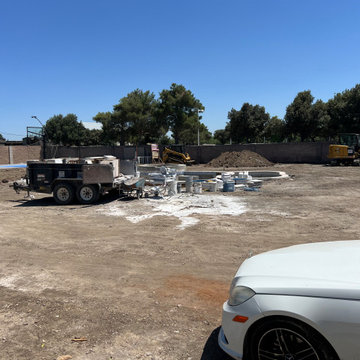
This photo captures the pre-construction phase of a pool house and landscaping project, with site preparation and groundwork underway. The pool installation, handled by another company, is in progress, while the surrounding area is being prepared for custom landscaping and outdoor living space enhancements. This stage highlights the initial steps of transforming open land into a functional and beautiful backyard design.
 Windy City Painters
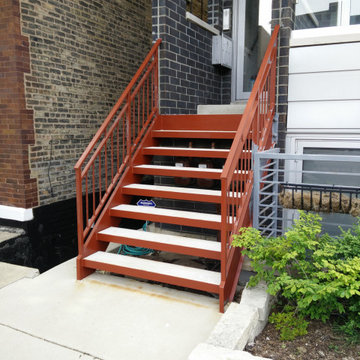
Metal Porch Stairs Painting in Lakeview, Chicago | Windy City Painters
Lakeview is one of Chicago's most architecturally diverse neighborhoods — vintage courtyard buildings, rooftop-deck condos, newly converted three-flats, and classic brick two-flats all line the same block. What they share is this: exposed metal. Back porch stairs, handrails, balconies, and exterior landings define the rear streetscape of nearly every building in the neighborhood. And in Chicago, exposed metal without proper protective coatings doesn't last.
Windy City Painters recently completed a full metal porch stairs painting project in Lakeview that illustrates exactly what professional metal refinishing looks like — and why preparation is everything.
The Problem: Years of Chicago Weather Had Done Their Damage
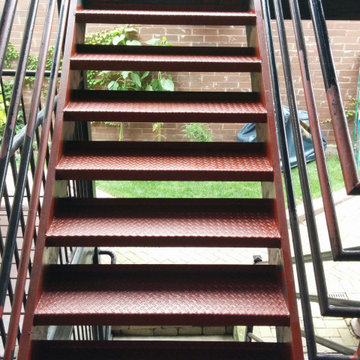
The client's back porch stairs were structurally sound — the diamond-plate steel treads were solid underfoot and the handrails were stable. However, the original paint system had long since failed. Surface rust had spread across the treads and risers. The old coating was peeling at every seam, edge, and weld point. Meanwhile, the black handrails were chalky and beginning to show rust at the bases.
Notably, this is a pattern Windy City Painters sees constantly in Lakeview. The neighborhood's diverse housing stock — ranging from pre-war courtyard buildings to 1990s condo conversions — often features original metal porch work that has never received a proper professional refinish. Homeowners and property managers patch-paint over rust for years, which ultimately accelerates the problem rather than solving it.
The solution isn't more paint. It's a complete system: mechanical rust removal, chemical treatment, primer, and a durable topcoat engineered for exterior metal.
The Windy City Painters Process for Metal Porch Stairs Painting
Windy City Painters approaches every metal porch stairs painting project with the same disciplined sequence. Consequently, our finishes outlast the competition by years.
Step 1 — Mechanical Preparation Our crew wire-brushes all loose rust, flaking paint, and surface contamination from every tread, riser, stringer, and handrail section. For heavier rust accumulation, we use grinding discs to cut down to clean, bare metal. This step is non-negotiable. Additionally, we pay particular attention to weld seams, bolt plates, and edge returns — the spots where moisture consistently hides and rust reliably starts.
Step 2 — Chemical Rust Treatment After mechanical prep, we apply a rust-converting primer to any remaining rust residue. This chemically neutralizes active rust and converts it into a stable, paintable surface. Moreover, the converter bonds to the metal and creates an additional barrier against future oxidation.
Step 3 — Rust-Inhibiting Primer Windy City Painters then applies a full coat of oil-based, rust-inhibiting primer to all prepared metal surfaces. This primer penetrates bare metal and creates the critical bond layer that everything else depends on. Skipping this step — or substituting a latex primer — is the single biggest reason DIY metal paint jobs fail within one season.
Step 4 — Two Topcoats of Industrial Enamel We apply two full coats of oil-based industrial enamel in the client's chosen color. For this Lakeview project, the stairs received a deep red finish and the handrails received gloss black — a classic combination that reads beautifully against the surrounding brick. Each coat is allowed to cure fully before the next is applied. Furthermore, we back-roll every surface to eliminate lap marks and ensure consistent film build.
Step 5 — Final Inspection and Cleanup Windy City Painters inspects every inch of the completed work before calling a project done. We remove all masking, clean up the work area completely, and walk the client through the finished result. In addition, we advise on a maintenance schedule to maximize the life of the coating system.
Why Metal Porch Stairs Painting Matters for Lakeview Properties
Metal porch stairs are among the most visible exterior features of Chicago residential buildings. Therefore, their condition directly affects curb appeal, property value, and — most importantly — structural safety. Rust that penetrates deeply enough will compromise the structural integrity of stairs and railings. Meanwhile, peeling paint signals to buyers, renters, and neighbors that a property is deferred.
In contrast, freshly refinished metal porch stairs signal exactly the opposite. They say the property is maintained, the owner takes pride in the building, and the structure is safe. For Lakeview landlords and homeowners alike, metal porch stair refinishing delivers an exceptional return on investment.
Professional Advice for Lakeview Homeowners
Before starting a metal porch stairs painting project, Windy City Painters recommends the following:
Don't paint over rust. Any rust left beneath a topcoat will continue to spread and will lift the new paint within months. Mechanical removal is essential.
Choose oil-based products for exterior metal. Latex paints don't adhere to metal as reliably and lack the film hardness needed to withstand foot traffic and freeze-thaw cycles.
Time your project right. Ideal conditions for metal painting are 50°F–90°F with low humidity. Chicago's spring and early fall are perfect windows.
Don't skip the primer. A properly applied rust-inhibiting primer is what separates a seven-year finish from a one-year failure.
Budget for full prep. Preparation typically represents 60–70% of the labor on a metal refinishing project. That's where the money is well spent.
Windy City Painters: Lakeview's Trusted Metal Refinishing Contractor
Windy City Painters has refined the process of exterior metal painting and refinishing across Chicago's North Side and Near West Side. We work in Lakeview regularly — on courtyard buildings, two-flats, coach houses, and commercial properties — and we understand the unique demands that Chicago's climate places on exterior metal. As a result, our coating systems are selected and applied for maximum longevity in this specific environment.
See more of our work and request a free estimate at www.windypainters.com.
Ready to transform your Lakeview home? Contact Windy City Painters for a free estimate — visit www.windypainters.com today. Proudly serving Wicker Park, West Town, Lincoln Park, Roscoe Village, Lakeview, Ukrainian Village, River North, and all of Chicago.
 Advance Design Studio, Ltd.
Jennifer and Dan have lived in their Deer Park Illinois home for 15 years, slowly making minor fixes like painting and decorating; but they had a new plan for their kitchen the entire time. An awkwardly placed garage door, and an island cooktop with a terrible downdraft made a full-scale kitchen remodel an absolute must. Jennifer had many ideas in mind and wanted to work with a company that could provide high-end work, while partnering with a designer that would tailor the kitchen to her ideas.
She was intrigued by the phrase “Common Sense Remodeling” in Advance Design’s feature she discovered while perusing an issue of the community’s Quintessential Barrington Magazine. Doing further research on the company’s website, as she looked through project profiles and read about Advance Design’s “Common Sense Remodeling” philosophy, she promptly scheduled an appointment to see if the people and ideas she read about were truly who they said they were. The more she read, the more she knew that the “Common Sense” approach to remodeling they described was exactly the type of company she was looking for.
The partnership was sealed after an initial consultation with Owner Todd Jurs and Project Designer Michelle Lecinski. They displayed a combination of friendliness, professionalism and respect that was unmatched by any of the other companies Jennifer talked to. She knew that with Advance Design, she would be able to retain the vision that she had in mind with high-quality craftsmanship.
“I reached out to Advance Design because of the ‘Common Sense Remodeling’ tagline,” Jennifer said. “That’s what lingered for me”. “Advance Design was the most respectful- of the house and of my design ideas, and the most professional of the handful of companies that looked at my project”.
Soon after the meeting Jennifer began working with Michelle on the project design. They quickly developed chemistry. Jennifer loved how Michelle researched and located every detail that Jennifer wanted for the kitchen. Between the two of them, every concept and idea was worked through and perfected. “Jennifer had definite ideas about what she wanted the new kitchen to look like, she just didn’t know how to bring it all together. We worked together really well to make her ideas into the practical reality necessary for a well-functioning kitchen, with the look and feel that she had envisioned”, says Michelle.
“Michelle was wonderful in using the CAD system she would show me new drawings every time we changed the layout while working through the design,” Jennifer said. “She was a really wonderful partner in execution, she made sure everything happened quickly and easily.”
The finished design drew out elements of Jennifer’s style and personality. The pair call the look “sophisticated farmhouse” to describe the kitchen renovation to family and friends. The result was a beautifully crafted, authentic-feeling space that satisfied Jennifer’s dreams 15 years in the making. The whole project consisted of a kitchen remodel, mudroom upgrade with powder room, and garage entry relocation. “The projects I personally like the best, are the ones that put the client’s dreams on display,” Project Designer Michelle said. “And this is one of those projects.”
The main focal point of the kitchen is custom zinc and brass ventilation hood with a vintage sheen, which was hand made to order by a small company in Indiana named Vogler Metalworking. “It’s like sculpture, a true work of art”, says Jennifer. Your eye is immediately drawn towards this elegant yet practical hood that eliminated the home’s downdraft problem and added a striking conversation piece at the same time. The carpenters had to use special gloves when transporting and installing it, so they didn’t smudge it with fingerprints. The beautiful hood centers proudly over the stunning black enamel and brass LaCornue Range. “I had a friend who had a LaCornue range and after learning how easy it was to cook perfect meals, I was convinced I wanted to have one”, says Jennifer. This unique, breathtaking combination anchors the entire kitchen and is apparent immediately as you walk into the great room the surrounds the space.
DuraSupreme Crestwood cabinets with a Kendall Panel add function and sophistication. A custom gray paint color paired with a storm blue was developed so that the new kitchen looked like it belonged to the existing space. Unlacquered brass faucets and hardware were important to Jennifer because she wanted the living finishes to age over time. Remarkable brass diamond mesh cabinet door inserts imported from the UK continue to add this one-of-a-kind kitchen renovation; giving it a “you won’t see this everywhere” quality. The use of old railcar flooring for the coffee bar countertop and reclaimed oak for the open shelving gives an authenticity to the space uncommon in kitchens today.
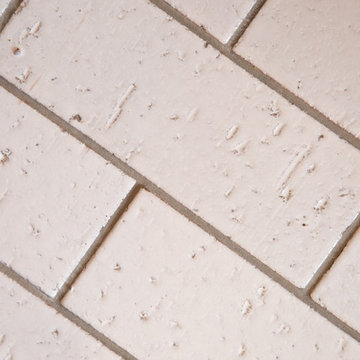
Jennifer and Michelle fell in love with the Limestone Grey Stone while they were investigating unique island countertop ideas. They liked the fact that the limestone as a living finish will age and change over time. Calcutta Miel Quartz countertops made for an excellent pairing around the perimeter, as it’s durable and perfect for cooking preparations. A textured white subway tile backsplash that runs to the ceiling keeps your eye moving towards the open shelving, and to the main focal point of the stunning range hood combination.
“The kitchen functions beautifully, and it’s gorgeous,” beams Jennifer as she gestures with both hands while smiling ear to ear. “The most important thing was I wanted a kitchen that had a wonderful flow, cooked beautiful meals and was a great gathering place for family and friends, and this space does that perfectly! Beauty wise, it turned out exactly how I had envisioned. I felt the function part was the hardest part, and that was nailed”!
Relocating the garage entry to the new mudroom was a huge priority and has finally separated the family’s arriving home functions from their kitchen. Now coats and shoes and bags have their own area for dropping once members arrive home. Matching gray DuraSupreme cabinetry helped create gorgeous, purposeful lockers for the family. A reclaimed vintage sink and custom wall paper were added to the tiny powder room to beautify the once previously only functional space. Advance Design was even able to create a custom space for their dog to sleep while the family is away.
“It was unbelievable that a project of this size was completed in such a short time, and I think that’s because of the large amount of planning and preparation that went into it,” Jennifer marveled, “When we started, we were ready, and everything was prepared”.
When it came to execution, Project Manager Justin Davis and his crew were quick, accessible, and organized. Projects like this kitchen are typically completed in as little as 8-10 weeks. Jennifer’s kitchen however despite the relocation of some challenging HVAC in a soffit and moving of an exterior door was completed remarkably fast in part because the team was working with an existing tile floor that ran throughout the first floor that the client really loved.
“You get to know these people really well because they’re living in your house while you’re living in your house. They were so fast and really good, it didn’t take as long as even planned” reported Jennifer. “I would text Justin and he always responded almost immediately. I got to know all the guys who were working in our house and they were all wonderful people”.
Details in a customized kitchen like this one require skill and care from the people who install it. “All the guys on the job were skilled at what the did. I wanted small details like little feet to look like furniture, that is where their carpentry skill came in to make these all perfect”, said Jennifer. “The tile guys were wonderful. They even let me determine how I wanted the texture with the grout to appear for a salt and pepper look; now that is a very skilled trade person making it custom”.
In Jennifer’s interview, she continued to reference Advance Design’s “Common Sense Remodeling”, so I took a minute to ask her exactly what that phrase meant to her and how it played out in her experience with her project and the Advance Design team. Here is what she said: “I was intrigued about Common Sense Remodeling and in my head that there would be clear costs and prices, great communication between the design team, the execution team and me”, said Jennifer. They did deliver on that, it was so clear about the cost breakdown, what I could expect from everyone who came to my house, and everything that we had ordered. That to me is the Common Sense”!
It’s great to see a client take literally our assertion that a well-planned remodeling project is simply “Common Sense”! She anticipated each step of the way would be clear, concise, and predictable, all the while protecting the outcome due to the careful upfront planning. “Advance Design delivered on their ‘Common Sense Remodeling’ promise,” Jennifer said. “From the design team, to the execution team - everything was straight forward like I imagined. The project turned out exactly how I envisioned, I enjoyed this process and absolutely would recommend Advance Design Studio to anyone.”
 Margot Hartford Photography
Photo: Margot Hartford © 2016 Houzz
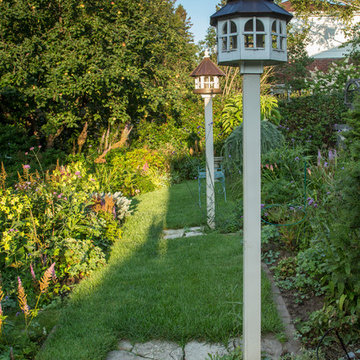
Photo of a traditional landscaping in Toronto.
Photo of a traditional landscaping in Toronto.
 Margot Hartford Photography
Photo: Margot Hartford © 2016 Houzz
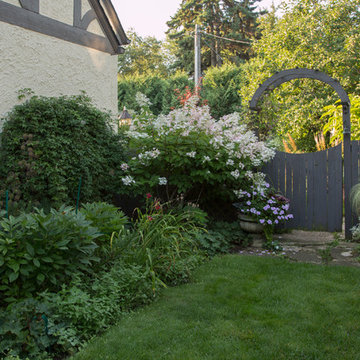
Photo of a traditional landscaping in Toronto.
Photo of a traditional landscaping in Toronto.
10