
Search results for "Prevent damage" in Home Design Ideas

 Five Star Tree Care
Spring brings the first rays of steady sunlight that encourage your trees to start sprouting fruit and flowers. However, sometimes at the start of spring, the cold weather makes a sudden and abrupt turn as winter tries to reassert its dominance. This can cause a late freeze, which is difficult for many trees to combat. Fruit trees are the most vulnerable during a late freeze, but Five Star Tree Services has some suggestions to help you protect your fruit and flowering trees from a late freeze.
Protecting Your Trees
Some fruit trees are better able to protect themselves from the cold, but all trees need to be protected from the frost. Depending on the type of tree you have, several methods of protection are effective.
Peach Trees: To protect peach trees, cover them with a blanket or a sheet during the day. This will allow heat to build up that will protect them at night during the freeze. Make sure to leave the cover in place until the freeze passes.
Citrus Trees: These are the most fragile of all trees. Small trees should be draped with burlap, a sheet, a tree frost blanket, or any other type of fabric at least a day before the freeze occurs. The cover has to surround the whole tree to trap the heat and prevent frost.
Apple Trees: These trees are pretty sturdy compared to other fruit-bearing trees. They can handle the cold, but it is still a good idea to cover them during sudden frost.
It is important to avoid placing ground covers, mulch, and weeds from around the base of a tree during cold weather and frost periods. The moist bare soil emits more heat than soil that is mulched. Watering trees ahead of a frost can also help to protect them as water also emits heat. When you expect a freeze, it is also best to furrow-irrigate at night or use a sprinkler on its low setting while ensuring there is proper drainage for your trees. Any time the outside temperature is forecast to drop below 32 degrees; you should cover your trees.
Which Trees Can Survive in the Cold?
No fruit-bearing trees are made for cold climates, but some are better equipped to handle the cold than others. The Plant Hardiness Zone can help you choose the right trees to plant for the area where you live. For example, lemon trees and other citrus trees need to be planted in zones 9-11 where the risk of cold weather is minimal. Pear trees, on the other hand, need cold weather to thrive and should be planted in zones 4-8.
Freezing Dangers
Some fruit or flowering trees that are caught unguarded during the late frost may lose their blossoms. In many cases, these trees will no longer sprout during the current growing season but will come back next spring as healthy as ever.
Younger trees are more prone to damage than mature trees. Trees that have closed buds are also able to handle the cold better than those that have already started to bloom. Of course, the longer a freeze is present, the more dangerous it is for your trees.
How We Can Help
The skilled arborists here at Five Star Tree Services are always on hand to help protect your trees from frost and with regular maintenance. Some of the other services we provide include tree removal, tree planting, and tree pruning in Richmond Hill and the Greater Toronto Area. If you require our assistance, give us a call at (416) 990-3355 today.
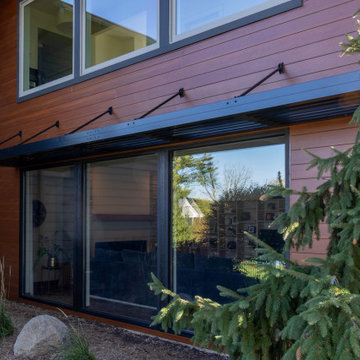
 Xpand Inc. | Homes of Xcellence
At the outset, this project began with the transformation of a 2-car attached garage. The goal was to create a mudroom, an exercise room, and a breezeway to seamlessly connect the spacious detached garage with the main part of the house. Additionally, the project involved partial roof removal and the addition of a new front entry.
But then came an unexpected twist – scope creep.
We found ourselves veering away from the initial client-supplied architectural plans. After numerous consultations with the clients and several iterations of the design, we arrived at a significantly improved plan for the remodel and addition.
Our journey commenced with the demolition of almost the entire former 2-car garage, making space for a new, oversized 3-car garage measuring 40′ x 28′. This garage was strategically placed between the existing house and the large detached garage. We introduced a custom low-sloped flat roof, designed to address historical drainage issues.
To mitigate water pooling, we created a custom concrete step at the back corner of the garage, equipped with a sturdy metal grate that sits flush with the step. We also installed a PVC drainage system, commencing at the step and running beneath a newly designed patio, ultimately draining into the yard. These measures have significantly reduced water accumulation around the house.
The new garage boasts several features, including Longboard aluminum siding, custom full glass garage doors, interior drywall finished to a level 4, an abundance of can lights, an epoxy floor coating, vinyl base trim, a new forced air garage heater, and more.
The clients also requested a designated space for their three kids and their friends to enjoy, thus giving birth to the “Kid Zone.” We partitioned a section of the existing oversized garage, resulting in a space measuring approximately 22′ x 32′, brimming with entertainment possibilities. To enhance control over the temperature in the Kid Zone, we collaborated with our licensed HVAC partner to install a cold weather mini-split system.
One of the most significant challenges was the modernization and consolidation of the home’s main electrical systems. We reconfigured and combined 6-7 different electrical panels into just two. One panel serves the main house, while the second is dedicated to backup power from a generator. These panels, along with the boiler for the in-floor heating system, are housed in a newly constructed mechanical room within the Kid Zone.
Inside the main house, we completed various tasks, such as removing the ceiling in the hallway from the new garage to address prior water damage, improve insulation, and rework electrical and HVAC systems. We also replaced the ceiling from the front door to the base of the stairs, adding new can lighting and enhancing insulation. Skilled drywall specialists then installed and finished new drywall to a level 5 standard.
The exterior of the house underwent a complete overhaul. Before installing new roofing on the entire house and garage, we modified an existing flat roof by adding custom lumber and plywood to enhance the pitch, preventing future ice dams. A new rubber roof was expertly installed on the oversized 3-car garage, and the flat roof section we re-framed.
Our meticulous exterior team removed old white aluminum soffit, fascia, and gutters, replacing them with new framing to accommodate Longboard soffit material. This task was particularly challenging due to the age of the house and the non-standard wall and roof framing. Our skilled exterior subcontractors ensured a perfect fit.
Near the pool area, we discovered severe rot and decay from years of water intrusion. After informing the homeowners, we ordered and installed five new commercial-style block framed windows and a custom 8′ high Anderson patio door. This involved careful removal and replacement of window headers from the outside to avoid disturbing the finished part of the house. We reframed the large openings to fit the new windows, and our skilled trim carpenters installed new walnut casing, base, and window sills.
In total, we replaced around 900 lineal feet of soffit and installed approximately 32 squares of aluminum siding. The entire house was meticulously prepped, repaired, and painted according to the client’s chosen color.
Throughout the project, we incorporated numerous custom touches and unique design elements, some of which you can see in the pictures. Our team also addressed various unforeseen challenges, from soil issues to rot and decay repair, roof leaks, drainage problems, electrical and HVAC complexities, and much more.
At Xpand Inc., we take pride in making it all happen, turning your remodeling and renovation dreams into reality.
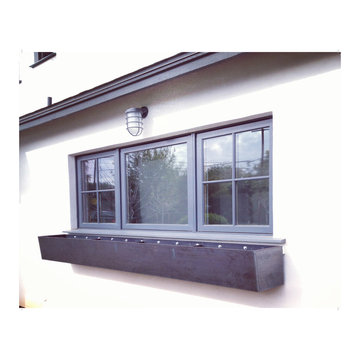
 Temac Development Inc.
Prevent dry-rot with water damage to your wood planers and go customized metal window boxes! Let your boxes last a lifetime! Boxes include small holes on the bottom for water trip-out. Built by Temac Development Inc. visit Temac.com for more photos!
Find the right local pro for your project

 E_ Designs
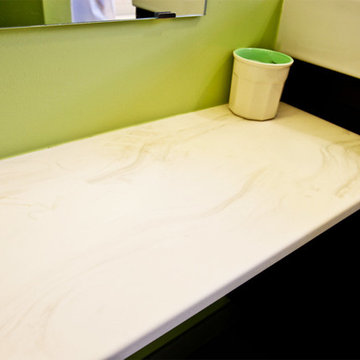
Falcon Heights family was in need of a bathroom overhaul. Pealing ceilings and water damage in the bathroom was preventing the homeowner from enjoying their ONLY bathroom. The must have list included, deep tub, comfort height toilet, low maintenance, and transitioning the home for retirement. Simple selections were made geared towards low maintenance and function; large scale tile floors (less grout!), opening the cramped space for potential wheelchair access, 2nd cultured marble countertop at a lower height, comfort height toilet, multi-showering system, and multiple grab bars. Sprucing up the space with a fun splash of paint, the homeowners will enjoy the bathroom for many years to come.
Photographer: Hannah Lloyd
 MAdkins
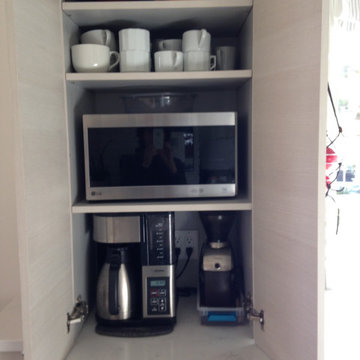
Appliance garage opened. Coffee maker slides forward when in use to prevent steam from damaging the shelf above.
Example of a mid-century modern kitchen design in Portland
Example of a mid-century modern kitchen design in Portland
 Haven Pools, Inc.
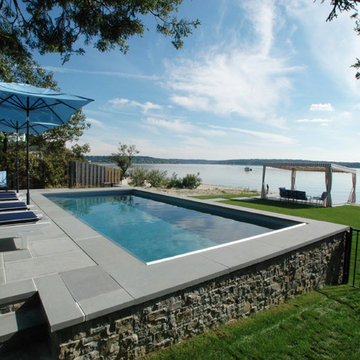
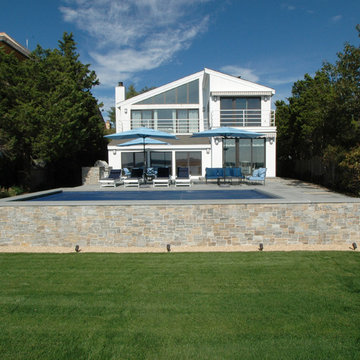
The perfect alignment of form and function and the seamless elevation change, achieved prudently and practically, allow for graceful and unimpeded views throughout the yard. A massive key was built into the structure of the floor to prevent slippage and frost damage. The raised wall of the pool on the bay side satisfies the requirements for a barrier fence. Impeccable craftsmanship and careful planning allow this beautiful covered water vessel to blend harmoniously with the natural beauty.
 Sun Control of Minnesota
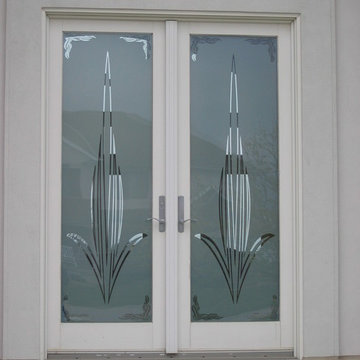
Custom frosted film on glass front door
Sun Control of Minnesota is a family owned and operated business that offers Professional Window Tinting Services. We first started out in one office with two part time installers, and we have now grown our business with over 15 employees badge-1980and four different locations in the metro area. We continue to expand our relationships with customers, as well as our service and quality of work.
We offer a complete line of Window Tinting services for Automotive, Commercial, Residential, & Marine applications. Our products include Decorative Frost Films, for glass enhancement; Safety/ Security Films, for Anti-Theft and Blast Protection; and 3M Paint Protection Film, for Automotive Rock Chip Prevention.
We focus on helping our customers reduce damaging UV rays, excessive solar heat gain, and glare from their interior spaces. UV rays, solar heat, and visible light are the main contributors to fading concerns in homes. Window Film reduces these elements to provide a beautiful view without having to close out the natural sunlight with a shade or blind. We provide the quality that competitors can’t even touch.
Our Mission is to Provide the Highest Quality Service, Products, and Installation in the Solar Energy Control Tint & Glass Film industry.
 Castle Building & Remodeling
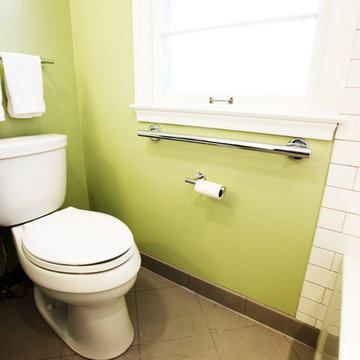
Falcon Heights family was in need of a bathroom overhaul. Pealing ceilings and water damage in the bathroom was preventing the homeowner from enjoying their ONLY bathroom. The must have list included, deep tub, comfort height toilet, low maintenance, and transitioning the home for retirement. Simple selections were made geared towards low maintenance and function; large scale tile floors (less grout!), opening the cramped space for potential wheelchair access, 2nd cultured marble countertop at a lower height, comfort height toilet, multi-showering system, and multiple grab bars. Sprucing up the space with a fun splash of paint, the homeowners will enjoy the bathroom for many years to come.
 Trillium Tile
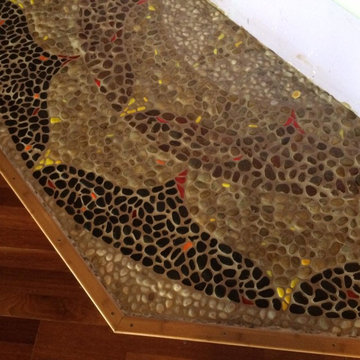
This mandala mosaic was put in to prevent further water damage from the drinking fountains. At a yoga studio and dance space, the pebble mosaic feels great on bare feet!
 Largo Green Inc
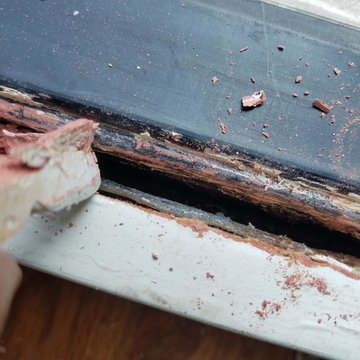
That's a deep, softened, dangerous gap that does NOT prevent water from getting inside the house.
Example of a balcony design in Houston
Example of a balcony design in Houston
 VisionScapes
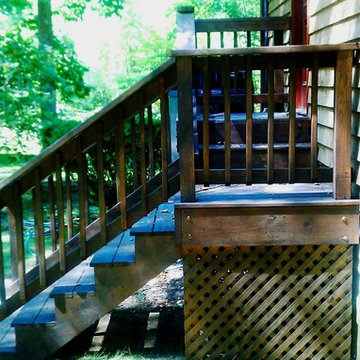
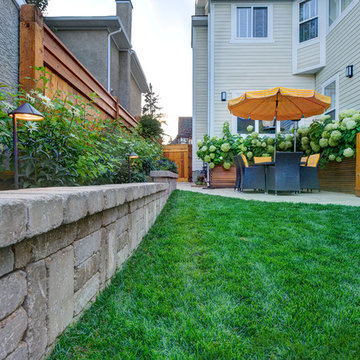
This front yard features an eye-catching natural stone walkway that leads you up to the home. The same stone is used in the backyard patio to tie together both the entrance to the home and the entertaining areas. A custom built mahogany planter is filled with stunning oversized hydrangea plants. Although the yard is relatively small there was still room to incorporate a beautiful built in BBQ with room for food prep and storage.
Photo Credit: Jamen Rhodes
 Houseplay Renovations LLC
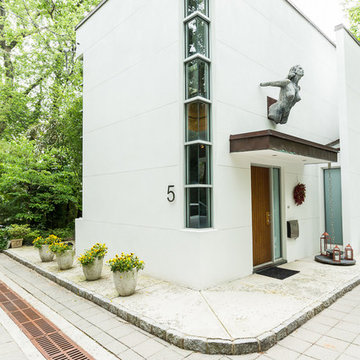
It is a truth universally acknowledged that a homeowner in possession of a leaking roof must be in want of repairs.
And though it makes for a fun Jane Austen allusion, an unreliable roof is a serious problem. Water can cause a great deal of damage in a short time, so this homeowner wisely called us in to help.
The roof of this custom-designed home was leaking in myriad locations, so our team removed the existing roof decks to access and repair the exterior trouble spots.
The new deck was constructed atop a Bison pedestal system; in fact, we custom-designed the deck in panels that can be lifted for seasonal roof sweeping and simpler maintenance.
The various roof decks were rebuilt with both reclaimed decking and new ipe decking. Our team also removed several faulty parapet walls and replaced them with a mixture of stainless steel cables and ipe railings.
Finally, we took steps to prevent future drainage problems by applying a sealcoat to the exterior stucco and creating a copper drip-edge too.
Leaking roofs are no laughing matter, but thanks to Houseplay, this story — like Austen’s Pride and Prejudice — had a happy ending.
Photo Credit: Anne Ruthmann Photography
 Tile Doctor Ltd
Having an effective sealer in place is essential for ensuring the long term condition of tiled floors in fact a lack of sealer can make cleaning the tiles exceptionally difficult as the sealer prevents dirt becoming ingrained in the tile.
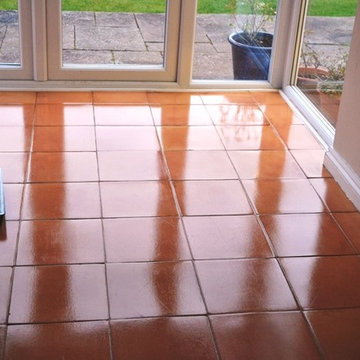
This property owner, living in the former spa town of Matlock in Derbyshire, was experiencing problems with their Terracotta tiled kitchen floor since they had applied some kind of wax to act as a sealer, and this had worn off within a few weeks. After this happened the tiles were not sealed again, making cleaning a big problem. Terracotta is a highly porous stone and thus easily soaks in spillages and stains, and allows dirt to become very easily trapped.
In this situation, the property owner resolved to contact me about some professional maintenance. I suggested that the tiles would need a deep clean followed by the application of a fresh, high quality sealer. The work was agreed on and I made my way down to the property the following week.
When I arrived at the property and saw the tiles first hand it became clear that a professional clean had been in need for a long time: greasy looking stains were particularly prevalent and covered large areas of the kitchen floor.
To remove I mixed a strong solution of Tile Doctor Pro Clean, which is a multi-purpose, high-alkaline cleaner, stripper and degreaser, and, working in small areas, applied it to the floor. Working in small sections was important because the stone is very porous and quickly soaked in any product laid down. I scrubbed the cleaner into the stone using a rotary machine fitted with a black scrubbing pad, with the dirt and stains coming away nicely. Pro Clean is highly versatile and can be used for similar cleaning purposes on most types of natural stone floor.
After cleaning each section, I quickly removed the excess dirty water and chemicals with my wet vax machine. Once the whole floor had been cleaned I rinsed it several times with fresh water just to make sure all cleaning chemicals were gone. I then left the floor to dry completely for 36 hours.
When I returned to the property, I conducted several damp tests to check for any areas of the floor that needed further drying. As is almost always the case, there were a few areas that remained slightly damp, and I set about speeding the drying process along using my heat gun. In fact, it actually took me more than three hours to get the floor completely dry, but this was worth the effort as even the slightest excess moisture can damage the performance of the sealer.
Once the floor was finally dried I began sealing the floor with one coat of Tile a Doctor Colour Grow sealer. Colour Grow is an impregnating sealer that penetrates deep into the pores of the stone, thus acting as a shield against ingrained dirt, and also raises the colour of the tiles to provide an aesthetically appealing appearance. sealer. After sealing with Colour Grow, I left the floor to dry for couple of hours and then applied six coats of Tile Doctor Seal & Go, which is a topical sealer that builds up durable protection on the surface of the tiles.
The combination of through cleaning and the application of not one, but two high quality sealers really did wonders for the appearance of these Terracotta tiles. Looking at the final results you wouldn’t have believed they had been without a proper clean and seal for so long! Needless to say the customer was exceptionally pleased and will surely be able to keep her floor looking great for a long time to come.
Tony Olmet
Derbyshire Tile Doctor
 Allman Remodeling Contractors
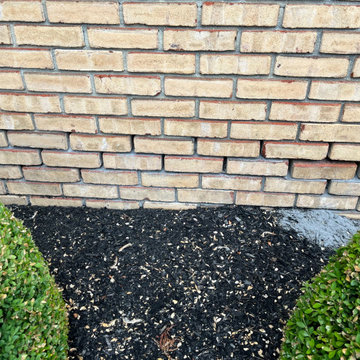
 Foundation & Masonry Repairs Complete! ?
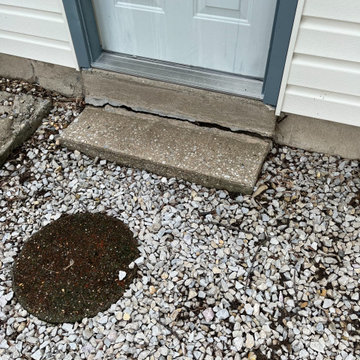
We recently tackled a project repairing cracked and deteriorating masonry around the foundation, steps, and entryways. The results? Stronger, cleaner, and longer-lasting protection against the elements.
✔️ Repaired cracked foundations
✔️ Restored damaged steps and landings
✔️ Repointed brickwork for a fresh, solid finish
Protecting your home’s foundation isn’t just about looks—it’s about structural integrity and preventing bigger issues down the road.
 Tile Doctor Ltd
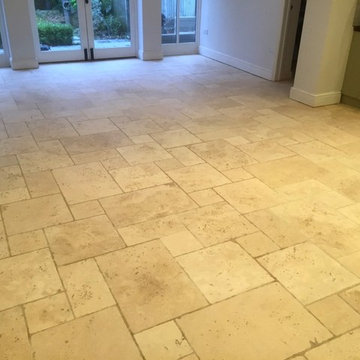
Recently I visited a client in the town of Maidenhead, Berkshire who needed assistance restoring a very dirty pitted Limestone tiled floor which had suffered over the years due to poor maintenance choices. The pressures of a busy family life had, understandably, prevented my client from undertaking regular cleaning and the products and methods used for cleaning were by and large unsuitable for this type of natural stone. In addition, the pits in the tiles had been filled with grout; however, they were not flush to the tile and therefore a large amount of soil had collected in the pockets. The result was a Limestone tiled floor in considerably poor condition that was increasingly difficult to keep clean.
My client had tried and tried to get the floor clean, using methods such as scrubbing with toothbrushes, steam cleaners, and mopping – but they weren’t getting anywhere! I explained to my client that steaming is, in fact, one of the worst cleaning systems to use on natural stone floors. Steam not only damages sealers, it also thins out greasy soils. Some of these soils are absorbed onto the domestic microfiber pads, however a lot of the soil becomes thinner allowing it to penetrate deeper into the pours of the stone and grout. This in itself starts the vicious circle to rapidly soiled and dirty tiles and grout. This happens because the grease soils magnetise dirt!
My first task in the cleaning process was to mix a strong solution of Tile Doctor Pro-Clean, which is a high alkaline cleaner. This solution was applied liberally across the entire Limestone tiled floor and grout. It was allowed to dwell for 30-40 minutes, giving it time to seep into the stone to get underneath and lift the ingrained dirt to the surface. During this time, I scrubbed the grout lines using a specialist stiff grout brush. The Limestone tiles were then scrubbed with heavy mechanical rotary agitation machine.
I then gave the floor a thorough rinse using the latest in cleaning and capture technology, which involves firing hot water at high pressure in a spinning motion across the floor, in effect blasting away the ingrained soils from the grout and pitting in the limestone. The high pressure is delivered from a system mounted inside my van which also contains waste tanks to capture the extracted soiled water.
After being allowed to dry thoroughly for 24 hours, I returned to seal the floor with Tile Doctor Colour Grow which would have brought out the deep colours in the stone, however after discussing the options with the client it became clear that they wanted to keep the floor looking as light as possible so Tile Doctor Ultra Seal was applied. Ultra Seal is a natural look impregnating sealer that soaks into the pores of the stone and protects it from within.
The floor now looks fantastic and the sealer should ensure it remains looking that way for some time to come and before leaving I made sure to provide my client with some professional maintenance advice.
Tim Colenutt
Berkshire Tile Doctor
 Allman Remodeling Contractors
 Foundation & Masonry Repairs Complete! ?
We recently tackled a project repairing cracked and deteriorating masonry around the foundation, steps, and entryways. The results? Stronger, cleaner, and longer-lasting protection against the elements.
✔️ Repaired cracked foundations
✔️ Restored damaged steps and landings
✔️ Repointed brickwork for a fresh, solid finish
Protecting your home’s foundation isn’t just about looks—it’s about structural integrity and preventing bigger issues down the road.
 Haven Pools, Inc.
The perfect alignment of form and function and the seamless elevation change, achieved prudently and practically, allow for graceful and unimpeded views throughout the yard. A massive key was built into the structure of the floor to prevent slippage and frost damage. The raised wall of the pool on the bay side satisfies the requirements for a barrier fence. Impeccable craftsmanship and careful planning allow this beautiful covered water vessel to blend harmoniously with the natural beauty.
 Allman Remodeling Contractors
 Foundation & Masonry Repairs Complete! ?
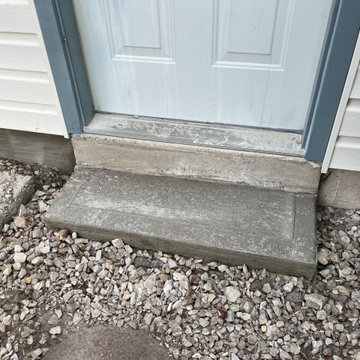
We recently tackled a project repairing cracked and deteriorating masonry around the foundation, steps, and entryways. The results? Stronger, cleaner, and longer-lasting protection against the elements.
✔️ Repaired cracked foundations
✔️ Restored damaged steps and landings
✔️ Repointed brickwork for a fresh, solid finish
Protecting your home’s foundation isn’t just about looks—it’s about structural integrity and preventing bigger issues down the road.
31