
Search results for "Proceeds" in Home Design Ideas
 De Young Properties
With overwhelming support by the community who dug deep and donated, the 2018 Central Valley St. Jude Dream Home Giveaway successfully raised $957,100 for St. Jude Children’s Research Hospital! Since 2007, De Young Properties has been a major donor and builder of 12 St. Jude Dream Homes, helping to raise $11,628,545 to help the kids of St. Jude fight cancer and other life-threatening childhood diseases. One hundred percent of the proceeds will be donated to St. Jude Children’s Research Hospital, which works around the clock to develop cures to save the lives of boys and girls, including children in the San Joaquin Valley.
“We strongly believe in our responsibility to help others, which is why the St. Jude’s Dream Home Giveaway is so important to us and our entire De Young team. We are grateful to our community’s continued support of our business – a community that has given so much to us, which is why we are so passionate about giving back. In fact, we are even more passionate today than we were in 2007 when we first partnered with St. Jude Children’s Research Hospital. We are honored to be a donor and builder of our 12th St. Jude Dream Home in this war against childhood cancer. St. Jude Children’s Research Hospital positively affects the lives of families across the country, in addition to giving us the opportunity to change the life of a local family,” said Paula De Young of De Young Properties. “This amazing pediatric research center, that not only treats life threatening cases in children, also freely gives guidance to doctors around the world and here in the Central Valley. We count ourselves fortunate to be able to help such an important cause”
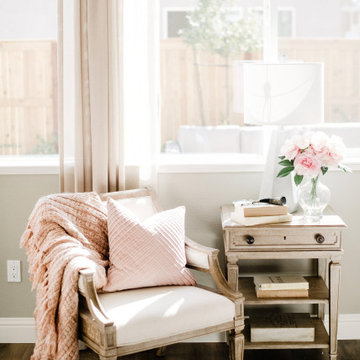
The 2018 St. Jude Dream Home is one of the most popular De Young floorplans, the Residence 210 with a beautiful Cottage elevation, and will offer three bedrooms, two full bathrooms, a formal dining room, spacious den and an open-air courtyard with a gorgeous stone accented fireplace.
With celebrity designer, Michael Moloney, donating his design talent and resources once again as Design Ambassador for this year’s St. Jude Dream Home, the home boasts a long list of special features, including fashionable quartz and granite counters from Granite Mountain Stone Design, premium designer maple cabinetry and professional closet design from KraftMaid Cabinetry and stainless steel Bosch appliances with a gas range, washer, dryer and built-in refrigerator. In addition, premium-grade wood-look porcelain tile floors by Shaw Floors, spacious 10’ ceilings, professional and water efficient front and back yard landscaping, and Energy Star approved Eagle Brand Cool Roof Tile.
The prime Clovis location of the St. Jude Dream Home is in the De Young Trailside at Loma Vista community which is within walking distance to Reagan Educational Center and located within the greater 3,300-acre Loma Vista master-planned community designed by the City of Clovis. In addition, it is a short drive from Clovis Community Medical Center and a variety of entertainment and dining options including the Sierra Vista Mall, The Square at Campus Pointe, Old Town Clovis and even Wild Water Adventure Park. Easy access to Highway 168 and Herndon Avenue can provide a fast work commute during the week and a family outing to Shaver or Huntington lakes on the weekend and even more.
De Young Properties would like to once again thank everyone in the community who contributed their hard-earned dollars to this worthy cause. They are appreciative of everyone who donated, volunteered or purchased a ticket to win this year’s St. Jude Dream Home, and feel privileged to be able to help such an important cause.
 Dixie Belle Paint Company
Materials Needed:
Side Console
Dixie Belle White Lightning Cleaner
Dixie Belle Weeping Willow Chalk Paint
Dixie Belle Best Dang Wax (Clear)
Dixie Belle Chocolate Chalk Mineral Paint
Dixie Belle Retro Lattice Stencil
Dixie Belle Coffee Bean Chalk Mineral Paint
Dixie Belle Synthetic Paintbrush
Clean, lint-free cloths
Before You Begin:
Ensure that your side console is clean and free from any dust, dirt, or grease. If necessary, sand the surface lightly to create a smooth painting surface.
Step 1: Clean with White Lightning
Use Dixie Belle White Lightning Cleaner to thoroughly clean the side console. This will remove any lingering residues and prepare the surface for painting. Follow the instructions on the cleaner, and make sure the surface is completely dry before proceeding.
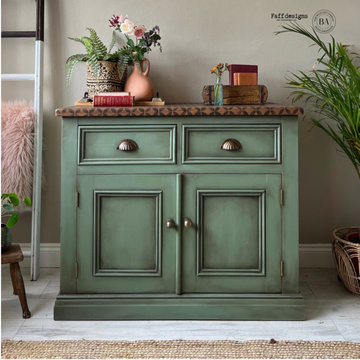
Step 2: Paint with Weeping Willow
Stir the Weeping Willow Chalk Paint well before use. Apply an even coat of Weeping Willow paint to the entire side console using a paintbrush or foam roller. Allow the first coat to dry completely before applying a second coat if needed. The chalk paint dries relatively quickly, but follow the recommended drying time on the product.
Step 3: Apply Best Dang Wax with Chocolate Chalk Paint
After the Weeping Willow paint has dried, use a clean cloth or brush to apply a layer of Best Dang Wax (Clear) over the painted surface. For added depth and dimension, mix a small amount of Chocolate Chalk Mineral Paint into the wax. Apply the wax mixture evenly, focusing on details and edges. Allow the wax to dry and buff it to a desired sheen using a clean, lint-free cloth.
Step 4: Stencil the Top with Retro Lattice
Secure the Retro Lattice Stencil to the top of the side console using painter's tape to prevent it from moving during the stenciling process. Using a brush or foam roller, apply Coffee Bean Chalk Mineral Paint over the stencil, ensuring even coverage. Carefully remove the stencil while the paint is still wet to reveal the pattern. Allow the painted design to dry completely.
Step 5: Finishing Touches
Inspect the entire side console for any touch-ups or additional detailing. If needed, apply extra coats of paint or wax to achieve the desired finish. Once satisfied with the results, allow the piece to cure fully according to the paint manufacturer's recommendations.
Step 6: Enjoy Your Upcycled Side Console
Place your revamped side console in its designated space and revel in the transformation. The combination of Weeping Willow, Best Dang Wax, and the Retro Lattice stencil has turned a simple side console into a unique and visually appealing piece of upcycled furniture, adding charm and character to your living space.
 Main Line Kitchen Design
Call Today and begin our process:
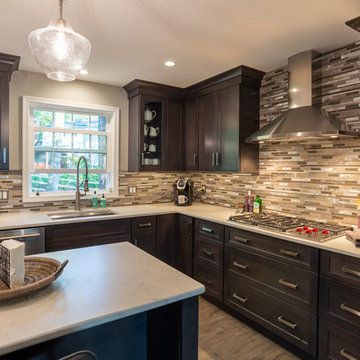
First, we cover any questions you have over the phone. Usually we can give you a close approximation of what you are likely to spend on your kitchen by simply asking you a few important questions. If you would like to proceed, we charge you a $150 deposit. For this deposit our expert designer will measure your kitchen, transfer the measurements to their computer and create your individual kitchen design. And at a second 2 hour appointment they will go over the detailed 3D designs with you.
At our second meeting we display and go over our completed designs and make changes to them on our laptops with you present. Depending on your and our availability, this meeting can take place within the following week. Pricing for the cabinetry you select is just the click of a button and if you are able to provide us preferences in counter tops, fixtures, appliances, flooring, and back splash, we can give you reliable pricing estimates for each area as well as estimates for the construction costs.
We are glad to work with a contractor you have selected or with one of the many we regularly refer on the basis of the quality of their work and with no remuneration to Main Line Kitchen Design.
Unless you require printouts of our work, everything to this point is included in our initial $150 deposit.
Find the right local pro for your project
 Southern Scape, LLC
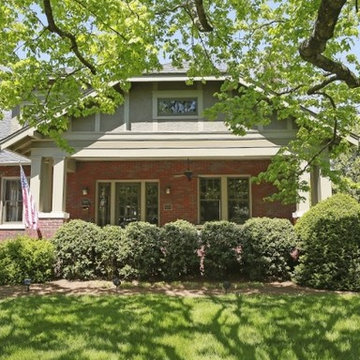
Ca. 1919 Craftsman Style Home, Revisioned by the South’s Leading Designers
Twenty‐two leading interior designers from three different states completely restored this historic home on Franklin’s historic Main Street as part of the O’More Show House, which was opened to the public from May 12‐27, 2016 and presented by leading sponsor, PARKS.
This is the third O’More Show House event in recent years, with participating designers having ties to O’More College of Design in downtown Franklin and proceeds benefiting the College’s School of Interior Design. The 2016 home, a 5,200 square‐foot ca. 1919 brick and stucco Craftsman‐style cottage, is a significant contributing property to the National Register‐listed Hincheyville Historic District. The owners have undertaken a total renovation of the home’s interior while leaving the street‐view exterior intact.
We were recommended to project managers and O'More College for the entire landscape design and installation: landscaping, irrigation, lighting, paver walks and patios, paver-raised porch with steps, paver banding in driveway!
 Top Ciment USA
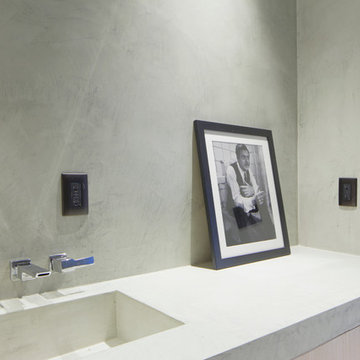
Example of a trendy bathroom design in Miami with an integrated sink and concrete countertops
 RAJ Kitchen and Bath, LLC
 “Full apartment design”.
IF you have not yet seen this apartment conversion before, we strongly urge you to go to the bottom left of this page and click on the short 2-minutes video. It would put a lot of things into perspective when you come back and continue reading this.
It is true we were literally handed the keys and told a list of things that they wanted to have happen and we were to go into the apartment, look at the space and come up with a design that would satisfy all of that need. UNTIL we showed up! The unit had really seen some better days but we knew we had to look past that and come up with a concept that would work for them.
The immediate challenges were centered around 3 big ideas:
1. Adding a second bedroom to the already small footprint
2. Figuring out a way to make the kitchen bigger, better and brighter
3. Creating a master room walk in closet
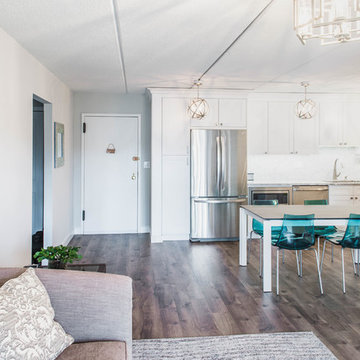
It’s always difficult to add new rooms into existing footprint without expanding out or up and not incurring any opportunity cost. In this case, that was exactly what we had to do. Item one and two above had to be tackled as one. We went ahead and switched out the location of the dining room and eliminating an area where there was a “nook” type eat-in area. By doing so, we were able to cut right into that footprint and change the layout of the kitchen.
That one move allowed us to dig into the kitchen design because it was now the main focal point in the apartment. It was no longer an option to keep it in that tiny hole where it was, so we had to ensure that this design was functional and aesthetically pleasing at the same time. By adding the table into the space where an Island typically would go, we were able to both cut cost and still provide a dining experience. The Table serves as an Island as well when cooking.
We then proceeded to block in the existing doorway to the dining room. By doing this, we were able to create a full room which allowed us to put a door on the other side and called that room Bedroom #2. This was easier to do because all of the mechanicals were already in that space (light, heater and windows). By shifting things around, we also achieved a huge wall to wall closet from inside. PERFECT!
Then we moved into the Single bedroom. We thought it was a big room with a small closet, so by creatively adding an L shaped wall and steal some footprint into the bedroom side, we were able to put a door on that new room and design it for the walk-in closet. Even after this, the bedroom still holds a queen size bed with 2 night stands, a TV on the wall, a sitting chair and plenty of room to walk around. This was done by rethinking the location for the bed and night stands.
The bathroom was gutted to make sure there was no leaks and rebuild from the ground up. We kept all of the plumbing where it was, added a new vanity, medicine cabinet, tiles and lighting and it was done.
From there, the rest of the unit had new flooring all throughout, paint, and lighting. After completion and walk through, this project was handed over back to the clients.
Execution and collaboration between all the trades were: Reggie and his team from Premier Interiors and Rohan from RD Mechanical Services.
p.s. Please see our website to see the video.
 Tile Doctor Ltd
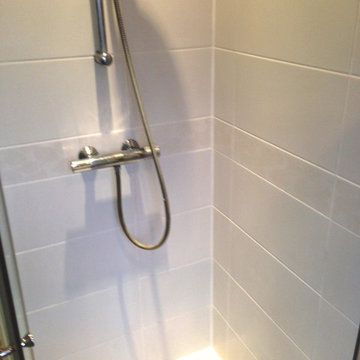
Shower cubicles can be the most difficult of tiled features to keep clean. Most are exposed to various acid-based soaps and shampoos on a daily basis, allowing mould and general muck to quickly build up along the grout lines and silicone. This leaves the entire area looking quite unappealing. In some cases, the grout lines become stained beyond a point where they can be restored to their original condition, so property owners will typically request to have the grout cut out and replaced however a faster and cheaper method is to have the grout completely recoloured.
Such was the case with this Ceramic tiled shower cubicle at a house in Wigan. It would take a lot to get the cubicle looking great again, having not been cleaned properly for a long time. The property owner decided to contact me for a professional refresh, including cleaning, new silicone sealer and recolouring of the grout.
I started the refresh by applying Tile Doctor Mould Away spray to the tiles and grout, and leaving it to dwell for an hour. As the name of the product suggests, Mould Away is a fast and effective cleaner for the removal of mould from silicone and grout, making it ideal for use on shower cubicles similar to this one. I then rinsed the entire area down with water before scrubbing the grout lines and tiles with a stiff grout brush to remove any remaining mould and lime scale, leaving them looking a lot cleaner.
The cleaning process made a big improvement however the grout was still too stained so after removing the silicone strip from around the base of the shower I proceeded to recolour with our white Grout Colourant. The colourant is painted onto the grout and any excess is wiped of the tile before it dries which both improves the appearance of the grout and seals it in to protect it from further staining. The last step was to apply fresh white silicone along the base of the shower.
The customer was very pleased with the refreshed appearance of their shower and you must admit it looks much more inviting now.
Steve Keary
Greater Manchester Tile Doctor
 Linda Edelwich Realtor
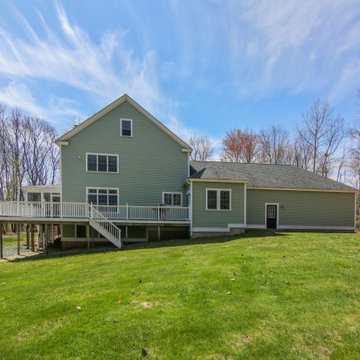
Nestled on 2.57 private acres in a highly sought-after neighborhood adjacent to Glastonbury line, this meticulously maintained custom home welcomes you through gracious double doors into a residence that emanates coastal charm. Richly toned floors contrast beautifully w/crisp neutral walls throughout, while the front-to-back living room serves as a stunning centerpiece w/its elegant gas-fireplace & French doors on either side opening to a screened porch-creating a delightful cross-breeze when open. No popcorn ceilings here! Open floor plan features a versatile home office with built-ins, flowing seamlessly into a gourmet kitchen showcasing a stylish island, custom cabinetry, & stainless-steel appliances adjacent to an expansive dining area w/stylish twin chandeliers. Practical luxury continues with a generous walk-in pantry & custom drop zone with shiplap detailing and shoe cubbies near the three-car garage with soaring ceilings. Upstairs, discover a sumptuous primary suite featuring a stylishly remodeled bathroom w/walk-in shower. Also complemented by a spacious walk-in closet & window flanked by custom built-ins, while two additional bedrooms share another beautifully updated bathroom & convenient 2nd-floor laundry. Additional space w/an unfinished walk-up attic & 880sf of finished extra living space in the walk-out lower level, complete with built in sauna, laminate flooring and ample storage-all crowned by the property's signature wrap-around porch. Roof '17
 O'Connor Contracting LLC
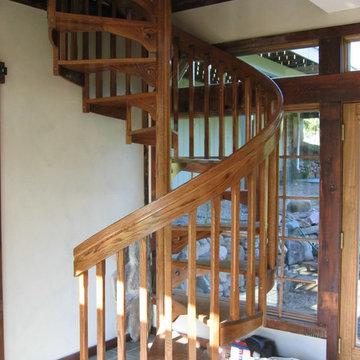
O'Connor Contracting raised the entire building to fix the foundation, then proceeded to completely renovate and reinvigorate the structure. The result was a stunning remodel that blends traditional craftsmanship with the latest in low-maintenance materials.
 G and S Installation USA, LLC.
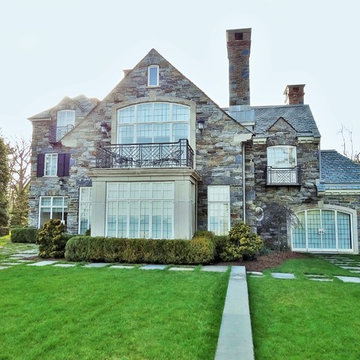
Another shot of the rear of the home as we proceed back to the front entrance.
Huge elegant three-story stone exterior home photo in Bridgeport
Huge elegant three-story stone exterior home photo in Bridgeport

 Eccentricity Designs LLC
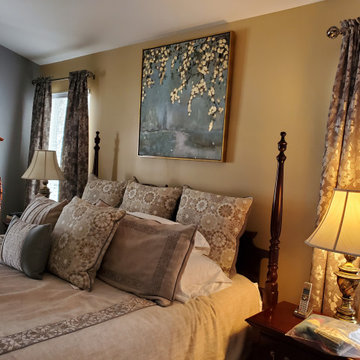
This client asked for help to upgrade her bedroom. She said her "safe" decorating style left something to be desired and she didn't know how to wake it up. The furniture was to remain however the room had great architectural lines to accent. I selected two colors that helped define the lines in the architecture. The bedding was added and we proceeded to move forward on the window treatments. The fabric is a rich cotton blend with a slight shimmer in the leaf pattern. With such short window walls I felt valances drew the eye down (shown in the before images) so they were not added to the new draperies. There is a custom cornice on the small window by the dressing area that coordinates with the draperies. The bench was reupholstered and a new centerpiece was added for the top of the television.
The client is soo pleased with the changes.
 MP DESIGN
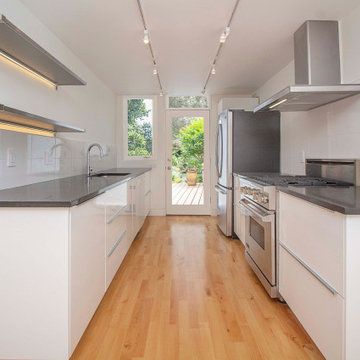
The kitchen remodel was not planned at the beginning of the project. But as the demo proceeded, the client agreed that the older kitchen cabinets and counters were not going to blend too well with all the new interiors. This is a low budget kitchen remodel. The range was existing. The refrigerator, dishwasher, sink and faucet were replaced. A new hood and ducting was added.

 Patrick J. Baglino, Jr. Interior Design
Benefiting the Pediatric Oncology Program at Georgetown University Hospital, Patrick J. Baglino, Jr. Interior Design was honored to decorate the Christmas Candy Tree which was displayed at the Four Seasons Hotel Georgetown. The tree was auctioned off with proceeds going to the charity.
 Simply Perfect
Advice on interior design is available everywhere—from TV shows and websites to books, magazines and apps.
We love seeing people become engaged in design and educated on the wide range of possibilities. But we hope you’ll proceed with caution.
It’s not that style errors are a matter of life and death. It’s just that it’s easy to choose designs that aren’t necessarily reflective of your own personality and character. And since you’re typically stuck with your interior design decisions for years, styles that don’t quite fit can tend to grate on you.
Interiors that give one person comfort may unleash chaos in someone else. This goes beyond favorite colors or hot trends, right to the heart of interior design, where you find questions of composition, balance, repetition, space and more.
The goal is to find that unique combination of design elements that gives you comfort, support and balance.
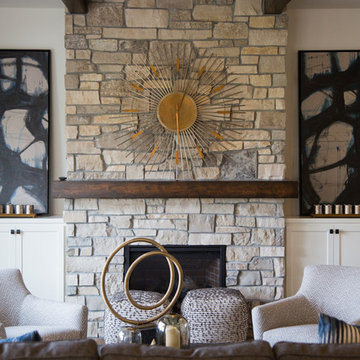
In one home, that perfect balance was struck through the use of symmetry. A pair of comfortable swivel chairs sit beneath matching indigo patterned paintings. Matching bookcases below the paintings contain similar, but not identical, arrangements of books, vases and bowls. Woods and bronzes help warm up the simple white bookcase shelving.
Two matching poufs in front of the fireplace provide additional seating. The sofa is accented with a pair of pillows with a blue pattern that echoes the artwork.
The effect of the symmetry is to achieve order and simplicity, which I promote at every opportunity. After all, your home interiors should be the setting or the backdrop of your life—not center stage.
Antique bronze and blue are complementary colors. Together, they offer a rich palette of richness and depth, which brings out the beauty of wood and stone.
In the home office, a unique, whitewash-stained wooden desk rests on metal, Sawhorse-inspired legs for a warm, rustic look. The black leather chair features a contemporary silhouette with an antique brass frame. An adjustable desk lamp has bronze accents.
The bookcase combines a sleek, black metal frame with concrete shelves, for another unusual pairing. It’s kept uncluttered for an orderly, peaceful look. Items on the shelves include a bronze-accented lamp and a pair
of high gloss-finished wooden bookends.
The elegant artwork behind the desk is a simple midnight-blue and bronze with mottled white. Deep blues are again picked up in the rug, which adds a stately vibe with a modern pattern and satisfying texture.
Within the framework of symmetry, the living room repeats the blue-and-bronze color scheme.
A large midcentury brass clock above the fireplace keeps the natural stone visible, rather than hidden behind a painting or television, while its straight lines and color create a beautiful contrast.
The sofa is a soft, neutral blue. The pattern on the round brass side table features echoes the darker blue-patterned rug, as well as the rug in the office, tying the rooms together.
Indigo blue books adjacent to bronze vases on the shelves repeat the color scheme. The soapstone-topped coffee table echoes the shape of the fireplace. A pair of tall, matching floor lamps with long wooden bases, brass pulls and simple linen shades combine both the colors and symmetry found throughout the home.
 User
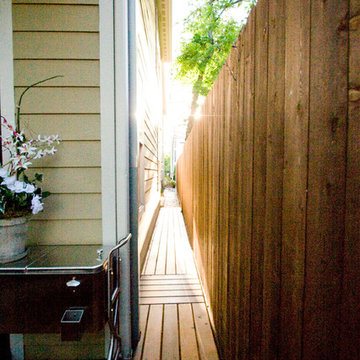
UserA side entrance was created so that when entertaining, guests could proceed directly to the backyard. Previously, this was dirt filled area that had little use.
 Classic Kitchens Designs & Renovations Ltd.
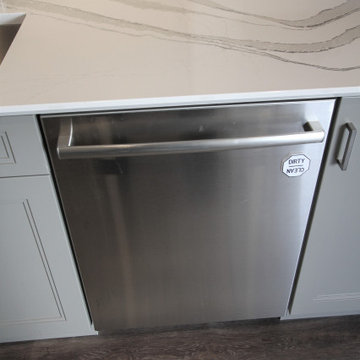
We started with a cool older bungalow that really needed updating, and the eating area to be connected to the kitchen itself, which required the removal of a loadbearing wall and installation of a new support beam. From there, we proceeded to install new waterproof luxury vinyl plank flooring and beautiful cabinetry painted in the customers chosen Benjamin Moore colours with the island with seating area done in a complimentary colour. Stunning Cambria "Brittanica" quartz countertops were then installed, followed by a grey glass subway style backsplash to tie it all together. We also revised the lighting to work with the great new layout and provide more light where it is needed. The end result is transformational and we are pleased that the customers absolutely love it!
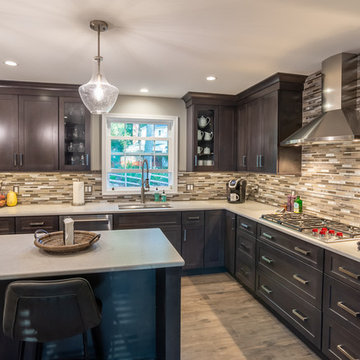 Main Line Kitchen Design
Call Today and begin our process:
First, we cover any questions you have over the phone. Usually we can give you a close approximation of what you are likely to spend on your kitchen by simply asking you a few important questions. If you would like to proceed, we charge you a $150 deposit. For this deposit our expert designer will measure your kitchen, transfer the measurements to their computer and create your individual kitchen design. And at a second 2 hour appointment they will go over the detailed 3D designs with you.
At our second meeting we display and go over our completed designs and make changes to them on our laptops with you present. Depending on your and our availability, this meeting can take place within the following week. Pricing for the cabinetry you select is just the click of a button and if you are able to provide us preferences in counter tops, fixtures, appliances, flooring, and back splash, we can give you reliable pricing estimates for each area as well as estimates for the construction costs.
We are glad to work with a contractor you have selected or with one of the many we regularly refer on the basis of the quality of their work and with no remuneration to Main Line Kitchen Design.
Unless you require printouts of our work, everything to this point is included in our initial $150 deposit.
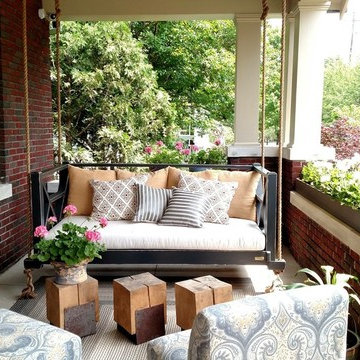 Southern Scape, LLC
Ca. 1919 Craftsman Style Home, Revisioned by the South’s Leading Designers
Twenty‐two leading interior designers from three different states completely restored this historic home on Franklin’s historic Main Street as part of the O’More Show House, which was opened to the public from May 12‐27, 2016 and presented by leading sponsor, PARKS.
This is the third O’More Show House event in recent years, with participating designers having ties to O’More College of Design in downtown Franklin and proceeds benefiting the College’s School of Interior Design. The 2016 home, a 5,200 square‐foot ca. 1919 brick and stucco Craftsman‐style cottage, is a significant contributing property to the National Register‐listed Hincheyville Historic District. The owners have undertaken a total renovation of the home’s interior while leaving the street‐view exterior intact.
We were recommended to project managers and O'More College for the entire landscape design and installation: landscaping, irrigation, lighting, paver walks and patios, paver-raised porch with steps, paver banding in driveway!
 User
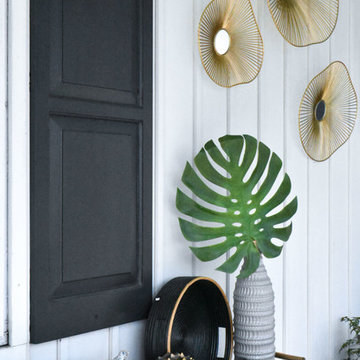
User44th Annual Bucks County Designer Showhouse + Gardens on historic Peppermint Farm. All proceeds benefit the Doylestown VIA.
Designed by Lotus + Lilac Design Studio
Items available for sale at Lotus + Lilac Shoppe- online designer furnishings + artisan made goods shoppe
Paint donated by Benjamin Moore
Outdoor sconce donated by Ferguson Lighting
43