
Search results for "Process specific options" in Home Design Ideas

 Patio Productions
Give your poolside a splash of elegant, sophisticated style with the addition of the 7 Pc. Coronado Wicker Poolside Sofa Set by Sunset West (2101-PS7Pc). With two chaise lounges, two club chairs and a loveseat included in the set, all of your guests can enjoy your backyard?s poolside side in complete comfort. All pieces in the Coronado collection are made to last as they are built with powder coated aluminum frames and synthetic resin wicker that is fade and split resistant. The cushions in the set are made with your choice of many Sunbrella brand fabrics, which offer unmatched comfort, lifespan, and protection against the elements.
This Sofa Set Includes: a love seat, two club chairs, two chaises, a coffee table, and an end table. Additional Coronado pieces can be quickly added by using the drop-down menus above, or alternatively, by scrolling further below to add related products.
Features at a Glance
Premium resin wicker in our new Driftwood color
QS Cushion fabric treated to be resistant to stains, water, and oil
UV Ray protection on wicker for increased longevity
Pictured cushions are included with an optional Sunbrella fabric upgrade
Set is completely customizable, please contact us by phone or email if you have any specific set desires
Dimensions
Love Seat: 75"W x 35"D x 35"H (2101-22)
Club Chair: 35"W x 35"D x 35"H (2101-21)
Adjustable Chaise: 31"W x 79"D x 28"H (2101-9)
Coffee Table: 48"W x 32"D x 20"H (2101-CT)
Optional Set Pieces
Ottoman: 32"W x 28"D x 18"H (2101-OTT)
End Table: 22"W x 22"D x 22"H (2101-ET)

 Innovative Design Build
Five stars isn’t enough! Our project was to reconfigure and update the main floor of a house we recently purchased that was built in 1961. We wanted to maintain some of the unique feeling it originally had but bring it up-to-date and eliminate the closed-in rooms and downright weird layout that was the result of multiple, partial remodeling projects. We began with a long wishlist of changes which also required replacement of very antiquated plumbing, electrical wiring and HVAC. We even found a fireplace that had been walled in and needed major re-construction. Many other aspects and details on this incredible list we made included an all new kitchen layout, converting a bedroom into a master closet, adding new half-bath, completely rebuilding the master bath, and adding stone, tile and custom built cabinetry. Our design plans included many fixtures and details that we specified and required professional installation and careful handling. Innovative helped us make reasonable decisions. Their skilled staff took us through a design process that made sense. There were many questions and all were answered with sincere conversation and positive – innovation – on how we could achieve our goals. Innovative provided us with professional consultants, who listened and were courteous and creative, with solid knowledge and informative judgement. When they didn’t have an answer, they did the research. They developed a comprehensive project plan that exceeded our expectations. Every item on our long list was checked-off. All agreed on work was fulfilled and they completed all this in just under four months. Innovative took care of putting together a team of skilled professional specialists who were all dedicated to make everything right. Engineering, construction, supervision, and I cannot even begin to describe how much thanks we have for the demolition crew! Our multiple, detailed project designs from Raul and professional design advice from Mindy and the connections she recommended are all of the best quality. Diego Jr., Trevor and his team kept everything on track and neat and tidy every single day and Diego Sr., Mark, Ismael, Albert, Santiago and team are true craftsmen who follow-up and make the most minuscule woodworking details perfect. The cabinets by Tim and electrical work and installation of fixtures by Kemchan Harrilal-BB and Navindra Doolratram, and Augustine and his crew on tile and stone work – all perfection. Aisling and the office crew were always responsive to our calls and requests. And of course Clark and Eric who oversaw everything and gave us the best of the best! Apologies if we didn’t get everyone on this list – you’re all great! Thank you for your hard work and dedication. We can’t thank you enough Innovative Construction – we kind of want to do it again!
Dave Hallman & Matt DeGraffenreid


Find the right local pro for your project

 Talon Construction Inc.
Designing and building a kitchen addition is a complex process that involves multiple steps and considerations. Here is a general outline to help you get started on your kitchen addition project:
Define Your Goals and Budget:
• Determine the purpose of the kitchen addition. Is it for more cooking space, a dining area, or a combination of both?
• Establish a realistic budget for your project. Consider all costs, including construction, permits, materials, and furnishings.
Hire a Design Professional:
• Seek the services of a design build company who specializes in kitchen additions.
• Discuss your vision, needs, and budget with the design professional to create a design concept.
Site Evaluation:
• Assess the existing space and structural condition of your home to ensure it can support the addition.
• Consider factors like zoning regulations, setbacks, and building codes.
Design Development:
• Collaborate with your design professional to refine the concept, including the layout, size, and architectural style.
• Choose materials, finishes, and fixtures that fit your design and budget.
Obtain Permits:
• Consult with your local design build contractor to determine the necessary permits and approvals.
• Prepare and submit all required documents, including architectural drawings and engineering plans.
Create Construction Documents:
• Work with your design build professional to develop detailed construction drawings and specifications.
• These documents will serve as a guide for contractors during construction.
Hire a design build contractor:
• Check references, credentials, and licenses before selecting a contractor.
• Sign a detailed contract that outlines the scope of work, timeline, and payment schedule.
Construction Phase:
• Demolition: If needed, remove any existing structures or walls.
• Foundation: Construct the foundation for the addition.
• Framing: Build the structural framework of the addition.
• Plumbing, Electrical, and HVAC: Install or update utilities as required.
• Insulation: Ensure proper insulation for energy efficiency.
• Drywall and Finish Work: Complete the walls and ceilings.
• Flooring and Cabinetry: Install flooring and kitchen cabinets.
• Appliances and Fixtures: Add appliances, plumbing fixtures, and lighting.
• Paint and Finish: Apply paint and finishes to achieve the desired look.
• Final Inspection: Schedule inspections to ensure compliance with building codes.
Final Inspections and Approvals:
• Arrange for final inspections to ensure the addition meets all safety and code requirements.
• Obtain any necessary certificates of occupancy or compliance.
Move In and Enjoy:
• Once all inspections and approvals are received, you can move into your new kitchen addition and start enjoying it.
Remember that every kitchen addition project is unique, so adapt this outline to your specific needs and circumstances. Consulting with professionals and obtaining the required permits and inspections is crucial to a successful and safe project.
 Talon Construction Inc.
Designing and building a kitchen addition is a complex process that involves multiple steps and considerations. Here is a general outline to help you get started on your kitchen addition project:
Define Your Goals and Budget:
• Determine the purpose of the kitchen addition. Is it for more cooking space, a dining area, or a combination of both?
• Establish a realistic budget for your project. Consider all costs, including construction, permits, materials, and furnishings.
Hire a Design Professional:
• Seek the services of a design build company who specializes in kitchen additions.
• Discuss your vision, needs, and budget with the design professional to create a design concept.
Site Evaluation:
• Assess the existing space and structural condition of your home to ensure it can support the addition.
• Consider factors like zoning regulations, setbacks, and building codes.
Design Development:
• Collaborate with your design professional to refine the concept, including the layout, size, and architectural style.
• Choose materials, finishes, and fixtures that fit your design and budget.
Obtain Permits:
• Consult with your local design build contractor to determine the necessary permits and approvals.
• Prepare and submit all required documents, including architectural drawings and engineering plans.
Create Construction Documents:
• Work with your design build professional to develop detailed construction drawings and specifications.
• These documents will serve as a guide for contractors during construction.
Hire a design build contractor:
• Check references, credentials, and licenses before selecting a contractor.
• Sign a detailed contract that outlines the scope of work, timeline, and payment schedule.
Construction Phase:
• Demolition: If needed, remove any existing structures or walls.
• Foundation: Construct the foundation for the addition.
• Framing: Build the structural framework of the addition.
• Plumbing, Electrical, and HVAC: Install or update utilities as required.
• Insulation: Ensure proper insulation for energy efficiency.
• Drywall and Finish Work: Complete the walls and ceilings.
• Flooring and Cabinetry: Install flooring and kitchen cabinets.
• Appliances and Fixtures: Add appliances, plumbing fixtures, and lighting.
• Paint and Finish: Apply paint and finishes to achieve the desired look.
• Final Inspection: Schedule inspections to ensure compliance with building codes.
Final Inspections and Approvals:
• Arrange for final inspections to ensure the addition meets all safety and code requirements.
• Obtain any necessary certificates of occupancy or compliance.
Move In and Enjoy:
• Once all inspections and approvals are received, you can move into your new kitchen addition and start enjoying it.
Remember that every kitchen addition project is unique, so adapt this outline to your specific needs and circumstances. Consulting with professionals and obtaining the required permits and inspections is crucial to a successful and safe project.


 GlassCrafters Inc
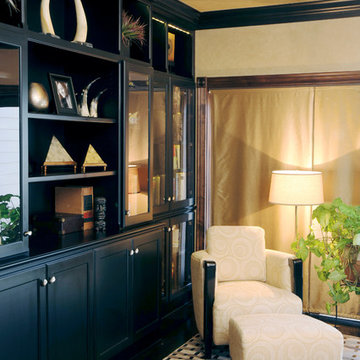
Vertical LED Task Lights - Corner Detail
GlassCrafters’ Vertical LED Task Lights illuminate your daily grooming activities with energy efficient, optimal warm white light and integrate seamlessly into any décor. Providing a minimal, low profile design aesthetic, the 2 - 1/2" wide Vertical LED Task Lights are easy to install and complement GlassCrafters’ 24", 30" and 36" high, frameless flat or beveled mirrored cabinets.


 BLDG Workshop Inc.
A home built on one of Canada's most beautiful lakes posed a design challenge. The home had originally been built almost directly in opposition to natural light and views to the lake. While most opinions were to tear the existing home down, BLDG Workshop worked closely with the client to recreate the home in a way that opened it up and became more fitting to the site.




 Vanity by Design
White and neutral colours will probably never go out of style in homes, but colour is slowly being introduced back into our homes. By adding colour through tiles, grout, stone and even wallpaper we can create these amazing areas that capture individuality and style. We are currently in the process of redesigning our Vanity by Design Brisbane showroom in Darra, and have some trendy new ideas that will definitely change your choice of neutral colours.
Wallpaper produces an elegant way to completely change the look of a space and allows you to put your own personal touch on the walls. Whether you’re on a budget or you just want to add more attention to your high-end interiors you can play around with your own creativity in so many different ways through wallpaper. Normally we are used to having spaces like our living rooms, dining rooms and bedrooms wallpapered, but we forget that our bathrooms and powder rooms can also be an uplifting and creative area within your homes.
It’s important to realise that by choosing the correct wallpaper for a space can make a room appear bigger, brighter and warmer than it is. If your bathroom has low ceilings try to pick patterns with cool colour backgrounds like greens and blues. For colder environments you want colours that make the room feel warmer, these colours are oranges, yellows and reds.
In regards to the type of wallpaper suitable for bathrooms usually vinyl wallpaper is the best option. This material is resistant to water and water vapour making it appropriate for kitchens and bathrooms. Wallpaper can make so much difference in a room, from creative patterns, smooth surfaces and a huge variety of colour you are sure to find a wallpaper that suits your individual flair and character.

 Vintage Renovation and Construction
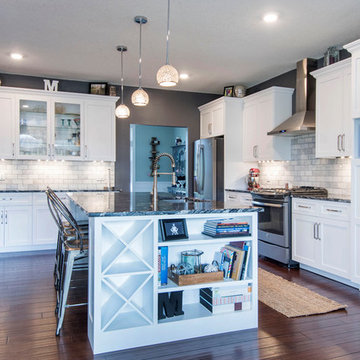
Example of a mid-sized classic u-shaped limestone floor and brown floor enclosed kitchen design in DC Metro with a farmhouse sink, beaded inset cabinets, green cabinets, soapstone countertops, beige backsplash, ceramic backsplash, stainless steel appliances and an island


 Alair Homes Georgian Bay
This Georgian Bay waterfront beach home is 4,500 sqft and features 5 bedrooms, 3.5 baths, office, gym, media room, main floor and upper floor great rooms with vaulted ceilings and a custom kitchen.


 Vision Design
What had been a very cramped, awkward master bathroom layout that barely accommodated one person became a spacious double vanity, double shower and master closet.
Sponsored
Westerville, OH

Custom Home Works
Franklin County's Award-Winning Design, Build and Remodeling Expert

 C. Kramer Interiors
photo by KRUSHgraphics
Example of a mid-sized mountain style metal straight staircase design in New York
Example of a mid-sized mountain style metal straight staircase design in New York

 Capozzoli Stairworks
Perforated painted steel railing made by Capozzoli.
Inspiration for an eclectic staircase remodel in Philadelphia
Inspiration for an eclectic staircase remodel in Philadelphia


244