
Search results for "Reduce anchor" in Home Design Ideas
 Nathan Taylor for Obelisk Home
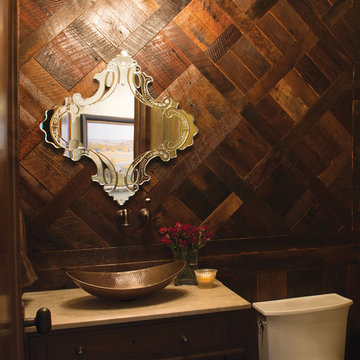
The interior of the home went from Colonial to Classic Lodge without changing the footprint of the home. Columns were removed, fur downs removed that defined space, fireplace relocated, kitchen layout and direction changed, breakfast room and sitting room flip flopped, study reduced in size, entry to master bedroom changed, master suite completely re-arranged and enlarged, custom hand railing designed to open up stairwell, hardwood added to stairs, solid knotty alder 8’ doors added, knotty alder crown moldings added, reclaimed beamed ceiling grid, tongue and groove ceiling in kitchen, knotty alder cabinetry, leather finish to granite, seeded glass insets, custom door to panty to showcase an antique stained glass window from childhood church, custom doors and handles made for study entry, shredded straw added to wall texture, custom glazing done to all walls, wood floor remnants created an antique quilt pattern for the back wall of the powder bath, custom wall treatment created by designer, and a mixture of new and antique furnishing were added, all to create a warm, yet lived in feeling for this special family.
A new central stone wall reversed with an over scaled fireplace and reclaimed flooring from the East became the anchor for this level of the home. Removing all the “divisions” of space and using a unified surface made unused rooms, part of the daily living for this family. The desire to entertain large group in a unified space, yet still feel like you are in a cozy environment was the driving force for removing divisions of space.
Photos by Randy Colwell
 Flavin Architects
Devereux Beach House
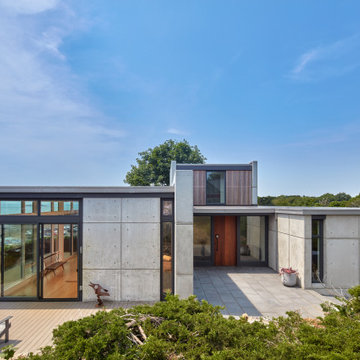
Our client presented Flavin Architects with a unique challenge. On a site that previously hosted two houses, our client asked us to design a modestly sized house and separate art studio. Both structures reduce the height and bulk of the original buildings. The modern concrete house we designed is situated on the brow of a steep cliff overlooking Marblehead harbor. The concrete visually anchors the house to stone outcroppings on the property, and the low profile ensures the structure doesn’t conflict with the surround of traditional, gabled homes.
Three primary concrete walls run north to south in parallel, forming the structural walls of the home. The entry sequence is carefully considered. The front door is hidden from view from the street. An entry path leads to an intimate courtyard, from which the front door is first visible. Upon entering, the visitor gets the first glimpse of the sea, framed by a portal of cast-in-place concrete. The kitchen, living, and dining space have a soaring 10-foot ceiling creating an especially spacious sense of interiority. A cantilevered deck runs the length of the living room, with a solid railing providing privacy from beach below. Where the house grows from a single to a two-story structure, the concrete walls rise magisterially to the full height of the building. The exterior concrete walls are accented with zinc gutters and downspouts, and wooden Ipe slats which softly filter light through the windows.

 Native Edge Landscape
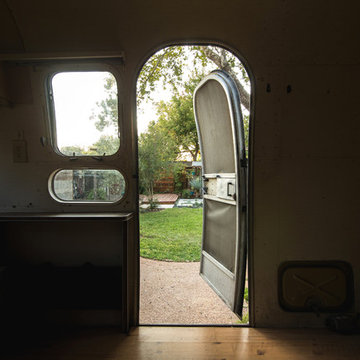
Another fun Crestview project! This young couple wanted a back yard that reflected their bohemian-eclectic style and could add additional privacy from the ever climbing construction around them. A place for “hanging out and drinking coffee or beer in the backyard.” But what was most exciting, was the air stream they had just purchased and were in the process of restoring. With the end goal of using it as a guest home for family and friends, we were challenged with creating a space that was cohesive and connected this new living space with the rest of the yard.
In the front we had another quark to fix. The sidewalk from their front door to the street suddenly stopped 5 feet from the curb, making a less than inviting entry for guests. So, creating a new usable entryway with additional curb appeal was a top priority.
We managed the entertainment space by using modern poured concrete pad’s as a focal. A poured concrete wall serves as a bench as well as creates a visual anchor for the patio area. To soften the hard materials, small plantings of succulents and ground cover were planted in the spaces between the pads. For a backdrop, a custom Cedar Plank wall and trellis combined to soften the vertical space and add plenty of privacy. The trellis is anchored by a Coral Vine to add interest. Cafe style lighting was strung across the area create a sense of intimacy.
We also completed the fence transition, and eliminated the grass areas that were not being utilized to reduce the amount of water waste in the landscape, and replaced these areas with beneficial plantings for the wildlife.
Overall, this landscape was completed with a cohesive Austin-friendly design in mind for these busy young professionals!
Caleb Kerr - http://www.calebkerr.com
Find the right local pro for your project
 Native Edge Landscape
Another fun Crestview project! This young couple wanted a back yard that reflected their bohemian-eclectic style and could add additional privacy from the ever climbing construction around them. A place for “hanging out and drinking coffee or beer in the backyard.” But what was most exciting, was the air stream they had just purchased and were in the process of restoring. With the end goal of using it as a guest home for family and friends, we were challenged with creating a space that was cohesive and connected this new living space with the rest of the yard.
In the front we had another quark to fix. The sidewalk from their front door to the street suddenly stopped 5 feet from the curb, making a less than inviting entry for guests. So, creating a new usable entryway with additional curb appeal was a top priority.
We managed the entertainment space by using modern poured concrete pad’s as a focal. A poured concrete wall serves as a bench as well as creates a visual anchor for the patio area. To soften the hard materials, small plantings of succulents and ground cover were planted in the spaces between the pads. For a backdrop, a custom Cedar Plank wall and trellis combined to soften the vertical space and add plenty of privacy. The trellis is anchored by a Coral Vine to add interest. Cafe style lighting was strung across the area create a sense of intimacy.
We also completed the fence transition, and eliminated the grass areas that were not being utilized to reduce the amount of water waste in the landscape, and replaced these areas with beneficial plantings for the wildlife.
Overall, this landscape was completed with a cohesive Austin-friendly design in mind for these busy young professionals!
Caleb Kerr - http://www.calebkerr.com
 Native Edge Landscape
Another fun Crestview project! This young couple wanted a back yard that reflected their bohemian-eclectic style and could add additional privacy from the ever climbing construction around them. A place for “hanging out and drinking coffee or beer in the backyard.” But what was most exciting, was the air stream they had just purchased and were in the process of restoring. With the end goal of using it as a guest home for family and friends, we were challenged with creating a space that was cohesive and connected this new living space with the rest of the yard.
In the front we had another quark to fix. The sidewalk from their front door to the street suddenly stopped 5 feet from the curb, making a less than inviting entry for guests. So, creating a new usable entryway with additional curb appeal was a top priority.
We managed the entertainment space by using modern poured concrete pad’s as a focal. A poured concrete wall serves as a bench as well as creates a visual anchor for the patio area. To soften the hard materials, small plantings of succulents and ground cover were planted in the spaces between the pads. For a backdrop, a custom Cedar Plank wall and trellis combined to soften the vertical space and add plenty of privacy. The trellis is anchored by a Coral Vine to add interest. Cafe style lighting was strung across the area create a sense of intimacy.
We also completed the fence transition, and eliminated the grass areas that were not being utilized to reduce the amount of water waste in the landscape, and replaced these areas with beneficial plantings for the wildlife.
Overall, this landscape was completed with a cohesive Austin-friendly design in mind for these busy young professionals!
Caleb Kerr - http://www.calebkerr.com
 Tonic Design + Tonic Construction
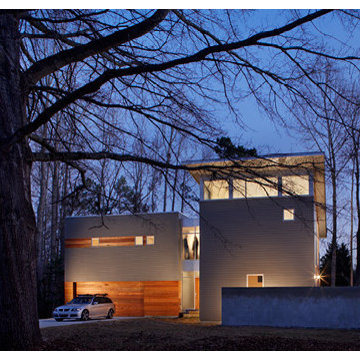
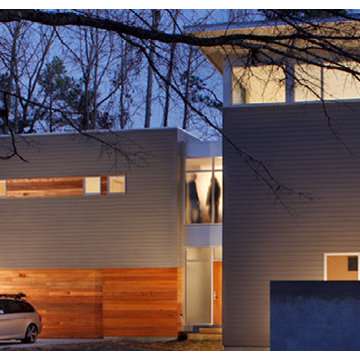
Designed for the lifestyle and budget of a young married couple and growing family, this home offers a viable alternative to the generic speculative home. Occupying a small leftover developer site, just under four tenths of an acre at the end of a suburban cul-de-sac, the Lanning Residence site is anchored by a one hundred year old oak tree. The parcel, once undesirable to developers and their speculative plans, became the inspiration for the project form.
Acting as both designers and builders, the decision was made early to utilize a strategy typical to most suburban construction; maximizing square footage while minimizing the building perimeter. An analysis of the surrounding suburban fabric revealed that the adjoining property lines were heavily planted. Views and window placement were organized to take advantage of the adjacent landscape while maximizing natural light.
The house program is distributed within two main volumes that are connected by a translucent circulation volume. The spacious interior volumes, large windows, plywood shear walls, sheetrock, and simple details allowed for a light construction budget. Spray foam insulation and well designed mechanical systems allowed the family to reduce their monthly utility bills by over half, creating a far more energy efficient lifestyle.
 Himsben Design Studio, LLC
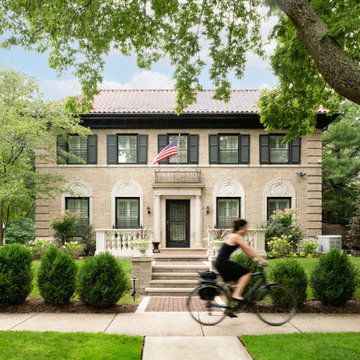
Our client acquired this historic home full of charm and details, but the architecture was hidden by an overgrown landscape that had a variety of styles, lacking cohesion. Our team worked with the client, the village, and the historical review committee to develop a new landscape design that highlighted the unique architectural features of the home.
The design intent was to create a new landscape that looked as though it had always been there. We reduced an oversized circle driveway, added clay brick paver walkways, and built a new terrace with balustrades in front of the home to evoke the original architectural drawings from the home’s design from the 1920s. The design also re-connected the face of the home to the public walkway, creating a more welcoming entry that had been abandoned sometime in the 1950s. Layers of color, textures, and seasonal interest create a foundation of plantings to anchor the home’s stately appearance.
 DHD Architecture and Interior Design
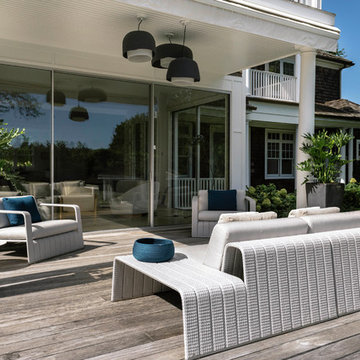
The Watermill House is a beautiful example of a classic Hamptons wood shingle style home. The design and renovation would maintain the character of the exterior while transforming the interiors to create an open and airy getaway for a busy and active family. The house comfortably sits within its one acre lot surrounded by tall hedges, old growth trees, and beautiful hydrangeas. The landscape influenced the design approach of the main floor interiors. Walls were removed and the kitchen was relocated to the front of the house to create an open plan for better flow and views to both the front and rear yards. The kitchen was designed to be both practical and beautiful. The u-shape design features modern appliances, white cabinetry and Corian countertops, and is anchored by a beautiful island with a knife-edge marble countertop. The island and the dining room table create a strong axis to the living room at the rear of the house. To further strengthen the connection to the outdoor decks and pool area of the rear yard, a full height sliding glass window system was installed. The clean lines and modern profiles of the window frames create unobstructed views and virtually remove the barrier between the interior and exterior spaces. The open plan allowed a new sitting area to be created between the dining room and stair. A screen, comprised of vertical fins, allows for a degree of openness, while creating enough separation to make the sitting area feel comfortable and nestled in its own area. The stair at the entry of the house was redesigned to match the new elegant and sophisticated spaces connected to it. New treads were installed to articulate and contrast the soft palette of finishes of the floors, walls, and ceilings. The new metal and glass handrail was intended to reduce visual noise and create subtle reflections of light.
Photo by Guillaume Gaudet

 Industrial Projects
Creating a comfortable outdoor living space is a priority for many homeowners and DIY enthusiasts. With rising summer temperatures, installing a shade tarp in your backyard offers an affordable and effective solution for sun protection. We’ve developed this detailed, step-by-step guide to help you confidently install a shade tarp that not only shields you from the sun but also adds aesthetic appeal to your outdoor area.
Benefits of Installing a Backyard Shade Tarp
Before diving into the installation process, let’s explore the key benefits of having a backyard shade tarp:
Provides UV Protection: Keeps your family and guests safe from harmful sun exposure.
Reduces Outdoor Temperatures: Creates a cooler, more enjoyable outdoor space.
Protects Outdoor Furniture: Extends the life of patio furniture by reducing sun damage.
Enhances Outdoor Aesthetics: Adds a modern, stylish look to your yard.
Budget-Friendly: More affordable compared to permanent structures like pergolas.
Materials and Tools You’ll Need
To begin your DIY backyard shade project, gather the following materials and tools:
Materials:
Shade tarp (UV-resistant and breathable)
Sturdy posts or existing structures (trees, fences, walls)
Mounting hardware (eye bolts, D-rings, turnbuckles, snap hooks)
Nylon or polyester rope, or stainless-steel wire
Concrete (if installing new posts)
Tools:
Power drill
Measuring tape
Level
Ladder
Wrench or adjustable spanner
Post hole digger (if installing new posts)
Step 1: Plan Your Shade Tarp Layout
The first step in installing your backyard shade tarp is careful planning. Take time to assess your outdoor area and answer these key questions:
Where is the sun’s path throughout the day?
What size and shape of tarp best suits your space?
Will you anchor the tarp to existing structures or install new posts?
What height do you want the tarp to sit at for maximum shade and airflow?
Pro Tip: Use string or garden hoses to visualize the tarp layout on the ground before making permanent decisions.
Step 2: Measure and Mark Anchor Points
Once you’ve determined the tarp’s location and orientation:
Measure the tarp dimensions.
Mark the exact points where each corner of the tarp will be anchored.
Ensure that the anchor points are at least 5–10% longer than the tarp size to allow for tensioning and slight adjustments.
Consider slope angles for water runoff. Aim for at least a 20-degree angle to prevent water pooling on the tarp.
Step 3: Install Support Posts (If Necessary)
If your backyard lacks existing anchor points like trees or fences, you’ll need to install sturdy support posts:
Dig post holes at least 24 inches deep and 8-12 inches wide for stability.
Set posts in concrete, making sure they remain plumb and level.
Allow the concrete to cure for at least 24–48 hours before applying tension from the tarp.
We recommend using pressure-treated wood, galvanized steel poles, or aluminum posts for longevity and strength.
Step 4: Install Mounting Hardware
With your anchor points ready, it’s time to install the necessary hardware:
Attach eye bolts or pad eyes securely into walls, posts, or other fixed structures.
For added flexibility and adjustability, install turnbuckles or tensioners to fine-tune the tarp’s tightness.
Connect snap hooks, D-rings, or carabiners to make assembly and disassembly easier.
Make sure all hardware is rated for outdoor use to prevent rust and corrosion.
Step 5: Attach and Tension the Shade Tarp
Now it’s time for the most satisfying part—mounting the shade tarp:
Begin by attaching one corner of the tarp to an anchor point.
Gradually attach the remaining corners, moving diagonally for even tension.
Adjust each connection point using your turnbuckles, ropes, or cables.
Pull the tarp tight enough to avoid sagging, but not so tight that it risks tearing.
Check that the tarp maintains the desired slope for rainwater runoff and adjust tension as needed.
Step 6: Final Adjustments and Safety Check
Before enjoying your new shaded area:
Inspect all anchor points and hardware for stability.
Test the tarp’s tension and make adjustments for even distribution.
Ensure that no sharp edges or loose connections remain that could damage the tarp or pose a safety hazard.
Confirm that the tarp is secure in windy conditions by giving it a gentle tug.
If you live in an area with frequent high winds, consider removing the tarp during storms to prevent damage.
Step 7: Enjoy Your Shaded Backyard Oasis
Once installed, your backyard shade tarp provides a comfortable and protective space for outdoor gatherings, relaxation, or family activities. You can decorate underneath with outdoor furniture, string lights, or potted plants to create a personalized outdoor retreat.
Maintenance Tips for Long-Lasting Shade Tarp Performance
To extend the life of your shade tarp, follow these maintenance guidelines:
Regularly check for wear and tear, especially around anchor points and seams.
Clean the tarp periodically with mild soap and water to prevent mildew buildup.
Store the tarp indoors during harsh weather seasons if it's not designed for year-round use.
Tighten hardware as needed to maintain proper tension and avoid sagging.
By following these simple care steps, your shade tarp will continue to deliver years of sun protection and outdoor comfort.
Conclusion: Upgrade Your Outdoor Space with a DIY Shade Tarp
Installing a shade tarp in your backyard is a cost-effective and rewarding DIY project. With careful planning, quality materials, and proper installation techniques, you’ll enjoy cool, shaded outdoor living all season long. This step-by-step guide ensures your project goes smoothly from start to finish.
 Tonic Design + Tonic Construction
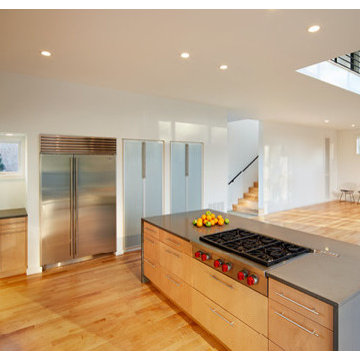
Designed for the lifestyle and budget of a young married couple and growing family, this home offers a viable alternative to the generic speculative home. Occupying a small leftover developer site, just under four tenths of an acre at the end of a suburban cul-de-sac, the Lanning Residence site is anchored by a one hundred year old oak tree. The parcel, once undesirable to developers and their speculative plans, became the inspiration for the project form.
Acting as both designers and builders, the decision was made early to utilize a strategy typical to most suburban construction; maximizing square footage while minimizing the building perimeter. An analysis of the surrounding suburban fabric revealed that the adjoining property lines were heavily planted. Views and window placement were organized to take advantage of the adjacent landscape while maximizing natural light.
The house program is distributed within two main volumes that are connected by a translucent circulation volume. The spacious interior volumes, large windows, plywood shear walls, sheetrock, and simple details allowed for a light construction budget. Spray foam insulation and well designed mechanical systems allowed the family to reduce their monthly utility bills by over half, creating a far more energy efficient lifestyle.
 Tonic Design + Tonic Construction
Designed for the lifestyle and budget of a young married couple and growing family, this home offers a viable alternative to the generic speculative home. Occupying a small leftover developer site, just under four tenths of an acre at the end of a suburban cul-de-sac, the Lanning Residence site is anchored by a one hundred year old oak tree. The parcel, once undesirable to developers and their speculative plans, became the inspiration for the project form.
Acting as both designers and builders, the decision was made early to utilize a strategy typical to most suburban construction; maximizing square footage while minimizing the building perimeter. An analysis of the surrounding suburban fabric revealed that the adjoining property lines were heavily planted. Views and window placement were organized to take advantage of the adjacent landscape while maximizing natural light.
The house program is distributed within two main volumes that are connected by a translucent circulation volume. The spacious interior volumes, large windows, plywood shear walls, sheetrock, and simple details allowed for a light construction budget. Spray foam insulation and well designed mechanical systems allowed the family to reduce their monthly utility bills by over half, creating a far more energy efficient lifestyle.
 User
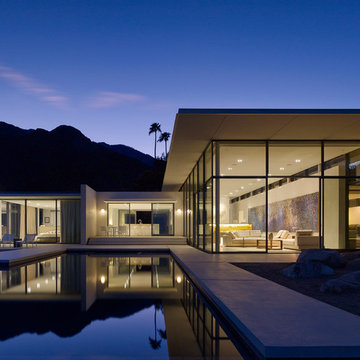
UserAnchored by the homeowner’s 42-foot-long painting, the interiors of this Palm Springs residence were designed to showcase the owner’s art collection, and create functional spaces for daily living that can be easily adapted for large social gatherings.
Referencing the environment and architecture in both form and material, the finishes and custom furnishings bring the interior to life. Alluding to the roofs that suspend over the building, the sofas seem to hover above the carpets while the knife-edge table top appears to float above a metal base. Bleached and cerused wood mimic the “desert effect” that would naturally occur in this environment, while the textiles on the sofa are the same shade as the rocks of the landscape.
Monolithic concrete floors connect all of the spaces while concealing mechanical systems, and stone thresholds signal vertical level changes and exterior transitions. Large wall masses provide the optimal backdrop for the homeowner’s oversized art. The wall structures ground the interior, while the opposing expanses of glass frame the desert views. The location and use of operable doors and windows allows the house to naturally ventilate, reducing cooling loads. The furnishings create spaces in an architectural fashion.
Designed and fabricated for flexibility, the pieces easily accommodate the owners’ large social gatherings. The dining table can be split into two and the sofas can be pushed out along the walls, opening the center of the space to entertain. The design of the interior spaces and furnishings seamlessly integrates the setting, architecture, artwork and spaces into a cohesive whole.
 Katie Hutchison Studio
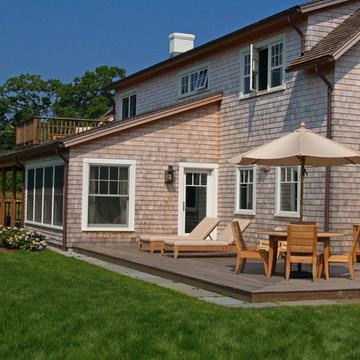
This larger home, constructed on Martha’s Vineyard, is a collection of informal, dormered gable components and grounding one-story, shed-roof elements that reduce its overall scale.
Designed to take advantage of a gently sloping up-Island property, this 5500 sq. ft. (not including finished basement) six-bedroom home includes staggered floor levels that climb from the front of the site to the rear. Generous, open living space on the entry level -- anchored on the west end by a fireplace and on the east end by the kitchen -- borders a dining area that’s nestled under a roof which also shelters the adjacent wrap-around porch. A deck off the rear of the dining space extends around the kitchen and is easily accessible from the nearby family room, too. Bedrooms occupy the other above-grade levels, including, at the upper-most level, the master suite comprised of a study, roof deck, master bath, walk-in closets and the master bedroom.
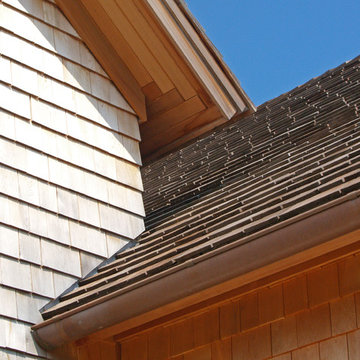
A clean-lined interior of warm neutrals sets a soothing tone in which the Island landscape is welcomed through expansive windows, porches and decks. Clad in white cedar shingles with a red cedar roof, the West Tisbury House will softly weather in-tune with its meadow site.
Katie Hutchison Studio collaborated with Geoffrey Koper Architect of Yarmouth Port, Mass. on the West Tisbury House. Kitchen fit-out and interior finishes, fixtures, and furnishings by others.
photo by Katie Hutchison
 Katie Hutchison Studio
This larger home, constructed on Martha’s Vineyard, is a collection of informal, dormered gable components and grounding one-story, shed-roof elements that reduce its overall scale.
Designed to take advantage of a gently sloping up-Island property, this 5500 sq. ft. (not including finished basement) six-bedroom home includes staggered floor levels that climb from the front of the site to the rear. Generous, open living space on the entry level -- anchored on the west end by a fireplace and on the east end by the kitchen -- borders a dining area that’s nestled under a roof which also shelters the adjacent wrap-around porch. A deck off the rear of the dining space extends around the kitchen and is easily accessible from the nearby family room, too. Bedrooms occupy the other above-grade levels, including, at the upper-most level, the master suite comprised of a study, roof deck, master bath, walk-in closets and the master bedroom.
A clean-lined interior of warm neutrals sets a soothing tone in which the Island landscape is welcomed through expansive windows, porches and decks. Clad in white cedar shingles with a red cedar roof, the West Tisbury House will softly weather in-tune with its meadow site.
Katie Hutchison Studio collaborated with Geoffrey Koper Architect of Yarmouth Port, Mass. on the West Tisbury House. Kitchen fit-out and interior finishes, fixtures, and furnishings by others.
This larger home, constructed on Martha’s Vineyard, is a collection of informal, dormered gable components and grounding one-story, shed-roof elements that reduce its overall scale.
Designed to take advantage of a gently sloping up-Island property, this 5500 sq. ft. (not including finished basement) six-bedroom home includes staggered floor levels that climb from the front of the site to the rear. Generous, open living space on the entry level -- anchored on the west end by a fireplace and on the east end by the kitchen -- borders a dining area that’s nestled under a roof which also shelters the adjacent wrap-around porch. A deck off the rear of the dining space extends around the kitchen and is easily accessible from the nearby family room, too. Bedrooms occupy the other above-grade levels, including, at the upper-most level, the master suite comprised of a study, roof deck, master bath, walk-in closets and the master bedroom.
A clean-lined interior of warm neutrals sets a soothing tone in which the Island landscape is welcomed through expansive windows, porches and decks. Clad in white cedar shingles with a red cedar roof, the West Tisbury House will softly weather in-tune with its meadow site.
Katie Hutchison Studio collaborated with Geoffrey Koper Architect of Yarmouth Port, Mass. on the West Tisbury House. Kitchen fit-out and interior finishes, fixtures, and furnishings by others.
photo by Katie Hutchison
 DDLA Design Landscape Architecture
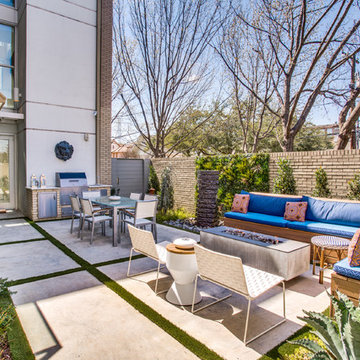
Located in the Uptown area of Dallas, this modern townhome features a new outdoor living area providing a private retreat for an owner retreat and entertaining. The space includes an outdoor cooking area, dining, fountain, built-in seating area and linear fire pit.
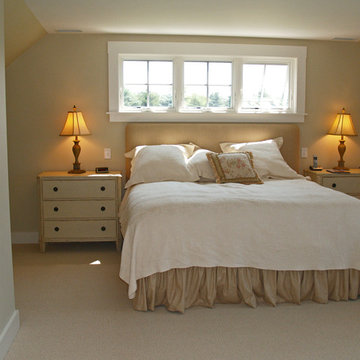 Katie Hutchison Studio
This larger home, constructed on Martha’s Vineyard, is a collection of informal, dormered gable components and grounding one-story, shed-roof elements that reduce its overall scale.
Designed to take advantage of a gently sloping up-Island property, this 5500 sq. ft. (not including finished basement) six-bedroom home includes staggered floor levels that climb from the front of the site to the rear. Generous, open living space on the entry level -- anchored on the west end by a fireplace and on the east end by the kitchen -- borders a dining area that’s nestled under a roof which also shelters the adjacent wrap-around porch. A deck off the rear of the dining space extends around the kitchen and is easily accessible from the nearby family room, too. Bedrooms occupy the other above-grade levels, including, at the upper-most level, the master suite comprised of a study, roof deck, master bath, walk-in closets and the master bedroom.
A clean-lined interior of warm neutrals sets a soothing tone in which the Island landscape is welcomed through expansive windows, porches and decks. Clad in white cedar shingles with a red cedar roof, the West Tisbury House will softly weather in-tune with its meadow site.
Katie Hutchison Studio collaborated with Geoffrey Koper Architect of Yarmouth Port, Mass. on the West Tisbury House. Kitchen fit-out and interior finishes, fixtures, and furnishings by others.
photo by Katie Hutchison
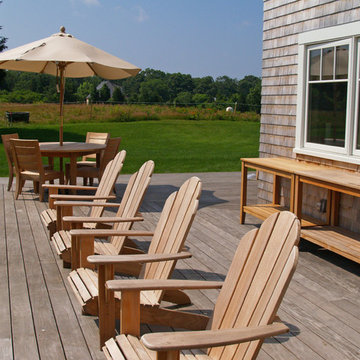 Katie Hutchison Studio
This larger home, constructed on Martha’s Vineyard, is a collection of informal, dormered gable components and grounding one-story, shed-roof elements that reduce its overall scale.
Designed to take advantage of a gently sloping up-Island property, this 5500 sq. ft. (not including finished basement) six-bedroom home includes staggered floor levels that climb from the front of the site to the rear. Generous, open living space on the entry level -- anchored on the west end by a fireplace and on the east end by the kitchen -- borders a dining area that’s nestled under a roof which also shelters the adjacent wrap-around porch. A deck off the rear of the dining space extends around the kitchen and is easily accessible from the nearby family room, too. Bedrooms occupy the other above-grade levels, including, at the upper-most level, the master suite comprised of a study, roof deck, master bath, walk-in closets and the master bedroom.
A clean-lined interior of warm neutrals sets a soothing tone in which the Island landscape is welcomed through expansive windows, porches and decks. Clad in white cedar shingles with a red cedar roof, the West Tisbury House will softly weather in-tune with its meadow site.
Katie Hutchison Studio collaborated with Geoffrey Koper Architect of Yarmouth Port, Mass. on the West Tisbury House. Kitchen fit-out and interior finishes, fixtures, and furnishings by others.
This larger home, constructed on Martha’s Vineyard, is a collection of informal, dormered gable components and grounding one-story, shed-roof elements that reduce its overall scale.
Designed to take advantage of a gently sloping up-Island property, this 5500 sq. ft. (not including finished basement) six-bedroom home includes staggered floor levels that climb from the front of the site to the rear. Generous, open living space on the entry level -- anchored on the west end by a fireplace and on the east end by the kitchen -- borders a dining area that’s nestled under a roof which also shelters the adjacent wrap-around porch. A deck off the rear of the dining space extends around the kitchen and is easily accessible from the nearby family room, too. Bedrooms occupy the other above-grade levels, including, at the upper-most level, the master suite comprised of a study, roof deck, master bath, walk-in closets and the master bedroom.
A clean-lined interior of warm neutrals sets a soothing tone in which the Island landscape is welcomed through expansive windows, porches and decks. Clad in white cedar shingles with a red cedar roof, the West Tisbury House will softly weather in-tune with its meadow site.
Katie Hutchison Studio collaborated with Geoffrey Koper Architect of Yarmouth Port, Mass. on the West Tisbury House. Kitchen fit-out and interior finishes, fixtures, and furnishings by others.
photo by Katie Hutchison
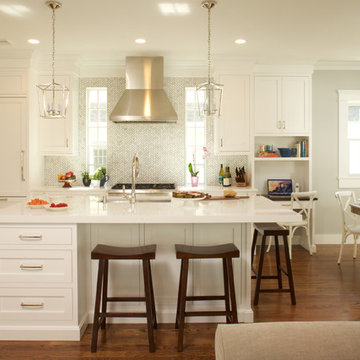
 JWH Design and Cabinetry LLC
A lot of function fits on the main wall, while still maintaining natural light. The 36" Sub Zero is closest to the Walk-in Pantry, and anchored with a desk area closest to the table.
Space planning and custom cabinetry by Jennifer Howard, JWH
Photography by Mick Hales, Greenworld Productions
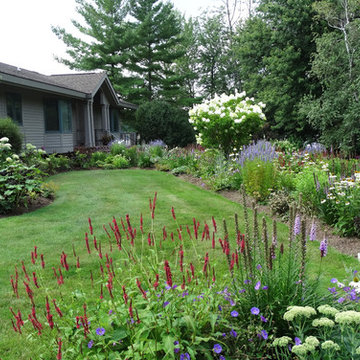
 Mariane Wheatley-Miller
Soft colourful plantings along the pathway, seasonal interest begins in early spring and the planting is still colourful in late summer.
Design ideas for a small craftsman partial sun front yard brick driveway in New York for summer.
Design ideas for a small craftsman partial sun front yard brick driveway in New York for summer.
 Katie Hutchison Studio
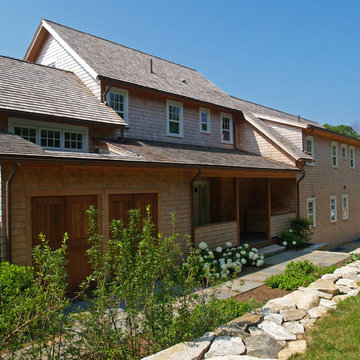
This larger home, constructed on Martha’s Vineyard, is a collection of informal, dormered gable components and grounding one-story, shed-roof elements that reduce its overall scale.
Designed to take advantage of a gently sloping up-Island property, this 5500 sq. ft. (not including finished basement) six-bedroom home includes staggered floor levels that climb from the front of the site to the rear. Generous, open living space on the entry level -- anchored on the west end by a fireplace and on the east end by the kitchen -- borders a dining area that’s nestled under a roof which also shelters the adjacent wrap-around porch. A deck off the rear of the dining space extends around the kitchen and is easily accessible from the nearby family room, too. Bedrooms occupy the other above-grade levels, including, at the upper-most level, the master suite comprised of a study, roof deck, master bath, walk-in closets and the master bedroom.
A clean-lined interior of warm neutrals sets a soothing tone in which the Island landscape is welcomed through expansive windows, porches and decks. Clad in white cedar shingles with a red cedar roof, the West Tisbury House will softly weather in-tune with its meadow site.
Katie Hutchison Studio collaborated with Geoffrey Koper Architect of Yarmouth Port, Mass. on the West Tisbury House. Kitchen fit-out and interior finishes, fixtures, and furnishings by others.
This larger home, constructed on Martha’s Vineyard, is a collection of informal, dormered gable components and grounding one-story, shed-roof elements that reduce its overall scale.
Designed to take advantage of a gently sloping up-Island property, this 5500 sq. ft. (not including finished basement) six-bedroom home includes staggered floor levels that climb from the front of the site to the rear. Generous, open living space on the entry level -- anchored on the west end by a fireplace and on the east end by the kitchen -- borders a dining area that’s nestled under a roof which also shelters the adjacent wrap-around porch. A deck off the rear of the dining space extends around the kitchen and is easily accessible from the nearby family room, too. Bedrooms occupy the other above-grade levels, including, at the upper-most level, the master suite comprised of a study, roof deck, master bath, walk-in closets and the master bedroom.
A clean-lined interior of warm neutrals sets a soothing tone in which the Island landscape is welcomed through expansive windows, porches and decks. Clad in white cedar shingles with a red cedar roof, the West Tisbury House will softly weather in-tune with its meadow site.
Katie Hutchison Studio collaborated with Geoffrey Koper Architect of Yarmouth Port, Mass. on the West Tisbury House. Kitchen fit-out and interior finishes, fixtures, and furnishings by others.
photo by Katie Hutchison
9