Search results for "Reflective add ons" in Home Design Ideas
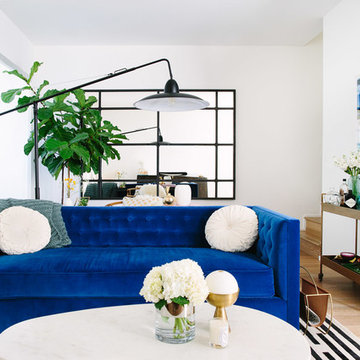
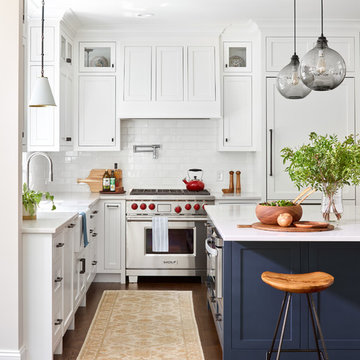
Our clients wanted to incorporate an East Coast vibe into their home. The kitchen had a great layout, but a wilted palette of earth tones looked outdated and uninspired. With a busy lifestyle and two kids in school, the couple needed a highly functional space that didn't skimp on style. Their research of design-build firms led them to the JRP website, and they called for a consultation the same day. After years of living with dark cabinets and a mix of heavy colors, the couple craved lightness. They wanted an airy kitchen with smooth, light-reflecting surfaces and a full-slab backsplash. A plan was drawn up for a complete rebuild that would change everything in the kitchen except the layout and the original tile-and-wood floors.
Now bright and uncluttered, this transitional kitchen is truly a space where the family can gather for years to come. Every part of the room draws you in, creating an atmosphere that embraces lingering conversations. The holistic design balances East Coast cool with California chic. Layers of contrasting textures achieve a high level of polish that looks and feels exceptional. The full-slab backsplash in Calacatta quartz stands out as a work of art, its glossy surface softly reflecting natural light. Matching quartz countertops add lustrous movement, where painted and natural wood textures quietly anchor the room. New, two-tone cabinetry is fresh and on-trend. A stunning linear chandelier in bronze evokes classical warmth. Where a built-in desk once collected clutter, stacked shaker cabinets now incorporate storage and visual interest. Integrated appliances, beautifully concealed behind DeWils cabinetry, hint at minimalist sophistication.
Cabinets (Manufacturer, Door Style, Material, Color/Stain or Finish)
- KITCHEN PERIMETER & PANTRY: DeWils, Sheffield, Maple, Limestone
- KITCHEN ISLAND: DeWils, Sheffield, Walnut, Nutmeg
Countertops (Material Type - Manufacturer, Collection, Color)
- Quartz – Vadara, Paris Collection, Calacatta Blanco
Light Fixture (Type - Manufacturer, Collection, Color)
- Chandelier - Visual Comfort & Co, Darlana Large Linear Lantern
Plumbing Fixture (Type - Manufacturer, Color)
- Faucet – Grohe, Antique Bronze
Sink (Type – Manufacturer, Material)
- Undermount - Kohler, Cast Iron
Hardware (Type – Manufacturer, Color)
- Cabinet Pulls - Top Knobs, Oil Rubbed Bronze
- Cabinet Knobs - Top Knobs, Oil Rubbed Bronze
Color of wall:
- Dunn Edwards Bone China
Photographer: J.R. Maddox

Erika Bierman Photography www.erikabiermanphotography.com
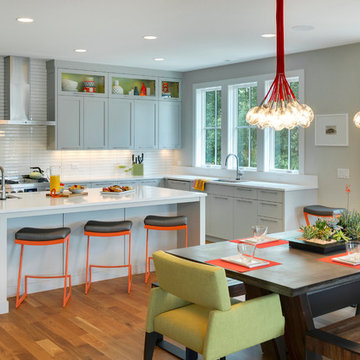
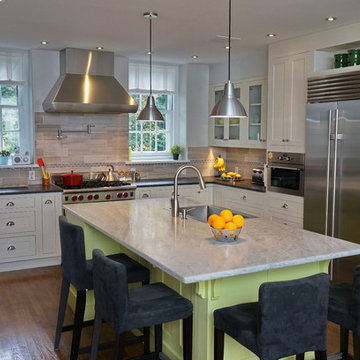
Example of a classic eat-in kitchen design in Los Angeles with gray cabinets

This Hill Country Modern home in Southlake combines modern design with comfort, featuring light-filled spaces and unique details reflecting the family's eclectic style for play and sophistication.
This playful kid's room features a blue ceiling that adds a touch of whimsy. It is complemented by an elegant gray-patterned accent wall and charming decor, creating a stylish and inviting space.
Find the right local pro for your project
27 Diamonds is an interior design company in Orange County, CA. We take pride in delivering beautiful living spaces that reflect the tastes and lifestyles of our clients. Unlike most companies who charge hourly, most of our design packages are offered at a flat-rate, affordable price. Visit our website for more information: www.27diamonds.com
All furniture and drapery can be custom made to your specifications and shipped anywhere in the US (excluding Alaska and Hawaii). Contact us for more information.

Our clients wanted the ultimate modern farmhouse custom dream home. They found property in the Santa Rosa Valley with an existing house on 3 ½ acres. They could envision a new home with a pool, a barn, and a place to raise horses. JRP and the clients went all in, sparing no expense. Thus, the old house was demolished and the couple’s dream home began to come to fruition.
The result is a simple, contemporary layout with ample light thanks to the open floor plan. When it comes to a modern farmhouse aesthetic, it’s all about neutral hues, wood accents, and furniture with clean lines. Every room is thoughtfully crafted with its own personality. Yet still reflects a bit of that farmhouse charm.
Their considerable-sized kitchen is a union of rustic warmth and industrial simplicity. The all-white shaker cabinetry and subway backsplash light up the room. All white everything complimented by warm wood flooring and matte black fixtures. The stunning custom Raw Urth reclaimed steel hood is also a star focal point in this gorgeous space. Not to mention the wet bar area with its unique open shelves above not one, but two integrated wine chillers. It’s also thoughtfully positioned next to the large pantry with a farmhouse style staple: a sliding barn door.
The master bathroom is relaxation at its finest. Monochromatic colors and a pop of pattern on the floor lend a fashionable look to this private retreat. Matte black finishes stand out against a stark white backsplash, complement charcoal veins in the marble looking countertop, and is cohesive with the entire look. The matte black shower units really add a dramatic finish to this luxurious large walk-in shower.
Photographer: Andrew - OpenHouse VC

Blue cabinet towers with lintel above and mirror inset - to mimic an "entryway" that is seen through and reflects the archway to the dining room. The stairwell reflection adds to the depth and continuity of space beyond.

Large boutique custom designed closet add on. We included integrated LED strip lighting, adjustable shoe shelves, glass front doors and a large double sided island with lots of drawers, shelves and a bench.

The owners of this kitchen had spent the money to upgrade the finishes in their kitchen upon building the home 12 years ago, but after living in the space for several years they realized how nonfunctional the layout really was. The (then) two preschool aged children had grown into busy, hungry teenagers with many friends who also liked to hang out at the house. So the family needed a more functional kitchen with better traffic flow, space for daily activities revolving around the kitchen at different times of day, and a kitchen that could accommodate cooking for and serving large groups. Furthermore, the dark, traditional finishes no longer reflected the homeowners’ style. They requested a brighter, more relaxed, coastal style that reflected their love of the seaside cities they like to visit.
Originally, the kitchen was U-shaped with a narrow island in the middle. The island created narrow aisles that bottle-necked at the dishwasher, refrigerator, and cooktop areas. There was a pass-through from the foyer into the kitchen, but the owners never liked that the pass-through was also located so close to the powder room. The awkward proximity was unappealing and made guests feel uncomfortable.
The kitchen’s storage was made up of lots of narrow cabinets, apothecary drawers, clipped corner units, and very few drawers. It lacked useful storage for the larger items the family used on a daily basis. And the kitchen’s only pantry was small closet that had only builder-grade, narrow shelving with no illumination to be able to see the contents inside.
Overall, the kitchen’s lighting plan was poorly executed. Only six recessed cans illuminated the entire kitchen and nook areas. The under cabinet lighting was not evenly distributed either. In fact, the builder had mis-placed the under cabinet lighting around the decorative pilasters which made for choppy, dark cubbies. Further, the builder didn’t include any lighting over the sink or the bar area, which meant whoever was doing the dishes was always in their own shadow. That, coupled with the steep overhang of the game room above made the bar area feel like a dim, cavernous space that wasn’t inviting or task oriented. The kitchen looked out into the main living space, but the raised bar and a narrow wall (which held the only large cabinet in the kitchen) created more of a barrier than a relationship to the living room or breakfast nook. In fact, one couldn’t even see the breakfast nook from the cooktop or sink areas due to its orientation. The raised bar top was too narrow to comfortably sit to either dine at or chat from due to the lack of knee space. The the homeowners confided that the kitchen felt more like a dark, dirty prison than place where the family, or their guests, wanted to gather and commune.
The clients' needs and desires were:
➢ to create a kitchen that would be a space the family loved to be in; to relate to the adjacent spaces all around, and to have better flow for entertaining large groups
➢ to remove the walls between the breakfast nook and living area and to be able to utilize the natural light from the windows in both those areas
➢ to incorporate a functional chopping block for prepping fresh food for home cooked meals, an island with a large sink and drain board, 2 pull out trash cans, and seating for at least the 2 teens to eat or do homework
➢ to design a kitchen and breakfast nook with an airy, coastal, relaxed vibe that blended with the rest of the house's coastal theme
➢ to integrate a layered lighting plan which would include ample general illumination, specific task lighting, decorative lighting, and lots of illuminated storage
➢ to design a kitchen with not only more storage for all the husband’s kitchen gadgets and collection of oils and spices, but smart storage, including a coffee/breakfast bar and a place to store and conceal the toaster oven and microwave
➢ to find a way to utilize the large open space between the kitchen, pantry area, and breakfast nook
Twelve Stones Designs achieved the owner's goals by:
➢ removing the walls between the kitchen and living room to allow the natural light to filter in from the adjacent rooms and to create a connection between the kitchen, nook, and living spaces for a sense of unity and communion
➢ removing the existing pantry and designing 3 large pantry style cabinets with LED tape lights and rollout drawers to house lots of kitchen appliances, gadgets, and tons of groceries. We also took the cabinets all the way up to the 9’ ceiling for additional storage for seasonal items and bulk storage.
➢ designing 2 islands - 1 with a gorgeous black walnut chopping block that houses a drawer for chopping and carving knives and a custom double pull out trash unit for point of use utilization - and 1 that houses the dishwasher, a large Blanco Gourmet sink with integrated drain board, woven baskets for fresh root vegetables and kitchen towels, plenty of drawer storage for kitchen items, and bar seating for up to 4 diners.
➢ closing off the space between the kitchen and the powder room to create a beautiful new private alcove for the powder room as well as adding some decorative storage. This also gave us space to include more tall storage near the new range for precision placement of the husband’s extensive oil and spice collection as well as a location for a combo-steam oven the wife wanted for baking and cooking healthy meals.
The project is enhanced functionally by:
➢ incorporated USB and standard receptacles for the kids’ laptops and phone charging in the large island
➢ designing the small island to include additional open shelving for items used on a daily basis such as a variety of bowls, plates, and colanders. This set up also works well for the husband who prefers to “plate” his dinners in restaurant-style fashion before presenting them to the table.
➢ the integration of specific storage units, such as double stacked cutlery drawers, a custom spice pull-out, a Kuerig coffee and tea pod drawer, and custom double stacked utensil drawers
➢ moving the refrigerator to the old oven location - this eliminated the bottle neck as well as created a better relationship to the eating table. It also utilizes the floor space between the pantry, nook, and kitchen
➢ creating a banquet style breakfast nook - this banquette seating not only doubles the amount of seating for large gatherings but it better utilizes the odd space between the kitchen and the previous nook area. It also helps to create a distinct pathway from the mudroom room through the pantry area, kitchen, nook, and living room.
➢ the coffee/breakfast bar area which includes the perfect location for the concealed microwave and toaster oven, convenient storage for the coffee pods and tea accoutrements. Roll-out drawers below also house the smoothie maker, hot water kettle, and a plethora of smoothie-making ingredients such as protein powders, smoothie additives, etc. Furthermore, the drawers below the Keurig house measuring utensil, cutlery, baking supplies and tupperware storage.
➢ incorporating lots of wide drawers and pullouts to accommodate large cookware.
➢ utilizing as much vertical space as possible by building storage to the ceiling which accommodates the family’s abundant amount of serving platters, baking sheets, bakeware, casserole dishes, and additional cutting boards.
The project is enhanced aesthetically by:
➢ new 5-piece Versailles pattern porcelain tile that now seamlessly joins the entire down stairs area together creating a bright, cohesiveness feeling instead of choppy separated spaces - it also adds a coastal feeling
➢ designing a cabinet to conceal the microwave and toaster oven
➢ the coastal influenced light fixtures over the nook table and island
➢ the sandy colors of the Langdon Cambria countertops. The swirling pattern and sparkling quartz pieces remind the homeowner of black-and-tan sandy beaches
➢ the striped banquet seating whose creamy white background and blue-green stripes were the inspiration for the cabinet and wall colors.
➢ All the interior doors were painted black to coordinate with the blacks and grays in the backsplash tile and countertop. This also adds a hint of tailored formality to an otherwise casual space.
➢ the use of WAC's Oculux small aperture LED units for the overhead lighting complimented with Diode LED strips for task lighting under the cabinets and inside the pantry and glass wall cabinets. All of the lighting applications are on separate dimmer switches.
Innovative uses of materials or construction methods by Realty Restoration LLC:
➢ Each 1-1/2” x 3” block of reclaimed end-grain black walnut that makes up the center island chopping block was hand milled and built in the shop. It was designed to look substantial and proportional to the surrounding elements, executed by creating the 4 inch tall top with a solid wood chamfered edge band.
➢ The metal doors on either side of the vent hood were also custom designed for this project and built in the Realty Restoration LLC shop. They are made 1x2, 11-gauge mild steel with ribbed glass. Weighing 60 lbs a piece, heavy duty cabinet hinges were added to support the weight of the door and keep them from sagging.
➢ Under-cabinet receptacles were added along the range wall in order to have a clean, uninterrupted backsplash.
Design obstacles to overcome:
➢ Because we were removing the demising walls between the kitchen and living room, we had to find a way to plumb and vent the new island. We did this by tunneling through the slab (the slab had post tension cables which prevented us from just trenching) to run a new wet vent through a nearby structural wall. We pulled the existing hot and cold lines between upper floor joists and ran them down the structural wall as well and up through a conduit in the tunnel.
➢ Since we were converting from wall overs to a gas range it allowed us to utilize the 220 feed for the wall ovens to provide a new sub panel for all the new kitchen circuits
➢ Due to framing deficiencies inherited from the original build there was a 1-1/2” differential in the floor-to-ceiling height over a 20 foot span; by utilizing the process of cutting and furring coupled with the crown moulding details on the cabinet elevations we were able to mask the problem and provide seamless transitions between the cabinet components.
Evidence of superior craftsmanship:
➢ uniquely designed, one-of-a-kind metal “X” end panels on the large island. The end panels were custom made in the Realty Restoration LLC shop and fitted to the exact dimensions of the island. The welding seams are completely indistinguishable - the posts look like they are cut from a single sheet of metal
➢ square metal posts on the small island were also custom made and designed to compliment and carry through the metal element s throughout the kitchen
➢ the beautiful, oversized end panels on the pantry cabinets which give the breakfast nook a tailored look
➢ integrating a large format 5 piece Versailles tile pattern to seamlessly flow from the existing spaces into the new kitchen space
➢ By constructing a custom cabinet that jogged around a corner we could not remodel (housing the entry way coat closet) we were able to camouflage the adjacent wall offset within the upper and lower cabinets. By designing around the existing jog in the structural walls we accomplished a few things: we were able to find the space to house, and hide, the microwave and toaster oven yet still have a clean cohesive appearance from the kitchen side. Additionally, the owners were able to keep their much needed coat closet and we didn’t have to increase the budget with unnecessary structural work.

This project's final result exceeded even our vision for the space! This kitchen is part of a stunning traditional log home in Evergreen, CO. The original kitchen had some unique touches, but was dated and not a true reflection of our client. The existing kitchen felt dark despite an amazing amount of natural light, and the colors and textures of the cabinetry felt heavy and expired. The client wanted to keep with the traditional rustic aesthetic that is present throughout the rest of the home, but wanted a much brighter space and slightly more elegant appeal. Our scope included upgrades to just about everything: new semi-custom cabinetry, new quartz countertops, new paint, new light fixtures, new backsplash tile, and even a custom flue over the range. We kept the original flooring in tact, retained the original copper range hood, and maintained the same layout while optimizing light and function. The space is made brighter by a light cream primary cabinetry color, and additional feature lighting everywhere including in cabinets, under cabinets, and in toe kicks. The new kitchen island is made of knotty alder cabinetry and topped by Cambria quartz in Oakmoor. The dining table shares this same style of quartz and is surrounded by custom upholstered benches in Kravet's Cowhide suede. We introduced a new dramatic antler chandelier at the end of the island as well as Restoration Hardware accent lighting over the dining area and sconce lighting over the sink area open shelves. We utilized composite sinks in both the primary and bar locations, and accented these with farmhouse style bronze faucets. Stacked stone covers the backsplash, and a handmade elk mosaic adorns the space above the range for a custom look that is hard to ignore. We finished the space with a light copper paint color to add extra warmth and finished cabinetry with rustic bronze hardware. This project is breathtaking and we are so thrilled our client can enjoy this kitchen for many years to come!

The option to downsize was not an option for the empty nesters who have lived in this home for over twenty-five years. Situated in TMR, the sprawling home has been the venue for many social events, dinner parties and family celebrations. With grown children living abroad, and grand children on the way, it was important that the new kitchen be highly functional and conducive to hosting informal, yet large family gatherings.
The kitchen had been relocated to the garage in the late eighties during a large renovation and was looking tired. Eight foot concrete ceilings meant the new materials and design had to create the illusion of height and light. White lacquered doors and integrated fridge panels extend to the ceiling and cast a bright reflection into the room. The teak dining table and chairs were the only elements to preserve from the old kitchen, and influenced the direction of materials to be incorporated into the new design. The island and selected lower cabinetry are made of butternut and oiled in a matte finish that relates to the teak dining set. Oversized tiles on the heated floors resemble soft concrete.
The mandate for the second floor included the overhaul of the master ensuite, to create his and hers closets, and a library. Walls were relocated and the floor plan reconfigured to create a luxurious ensuite of dramatic proportions. A walk-in shower, partitioned toilet area, and 18’ vanity are among many details that add visual interest and comfort.
Minimal white oak panels wrap around from the bedroom into the ensuite, and integrate two full-height pocket doors in the same material.

Interior Designer: MOTIV Interiors LLC
Photographer: Sam Angel Photography
Design Challenge: This 8 year-old boy and girl were outgrowing their existing setup and needed to update their rooms with a plan that would carry them forward into middle school and beyond. In addition to gaining storage and study areas, could these twins show off their big personalities? Absolutely, we said! MOTIV Interiors tackled the rooms of these youngsters living in Nashville's 12th South Neighborhood and created an environment where the dynamic duo can learn, create, and grow together for years to come.
Design Solution:
In her room, we wanted to create a fun-filled space that supports softball, sleepovers, science, and anything else a girl might want to get into. The star of the show is a beautiful hand-printed wallpaper by Brooklyn designer Aimee Wilder, whose FSC-certified papers contain no VOC’s (Volatile Organic Compounds). That means that in addition to packing a powerful visual punch, they meet our standard for excellent indoor air quality. We also love this wallpaper because it is composed of so many different neutral colors - this room can organically evolve over time without necessarily replacing the paper (which was installed with a no-VOC adhesive).
We refreshed the remaining walls with a scrubbable no-VOC paint from Sherwin Williams (7008 Alabaster) and gave the carpets in both of the twins’ rooms a good cleaning and simple stretch as opposed to replacing them. In order to provide more functional light in her room, we incorporated a corner floor lamp for reading, a telescoping desk lamp for studying, and an eye-catching LED flower pendant on a dimmer switch sourced from Lightology. Custom window treatments in a linen/cotton blend emphasize the height of the room and bring in a little “bling” with antiqued gold hardware.
Before we even thought about aesthetics, however, MOTIV Interiors got to work right away on increasing functionality. We added a spacious storage unit with plenty of baskets for all of our young client’s animal friends, and we made sure to include ample shelf space for books and hobbies as she finds new passions to explore down the road. We always prefer eco-friendly furnishings that are manufactured responsibly, made with sustainably harvested wood (FSC Certified), and use no glue or non-toxic glues and paints.
The bedding in this project is 100% cotton and contains no synthetic fibers. When purchasing bedding, check for the GOTS Certification (Global Organic Textile Standard). The introduction of a desk and drawer unit created a calming space to study and reflect, or write a letter to a friend. Gold accents add a bit of warmth to the workspace, where she can display her memories, goals, and game plans for a bright future.
We hope you enjoyed this project as much as we did! Each design challenge is an opportunity to push the envelope, by creating a new and exciting aesthetic or finding creative ways to incorporate sustainable design principles.

A brightened space with reflective surfaces that enhance the natural light in the room. High gloss metallic finish on the cabinetry creates a contemporary aesthetic paired with custom painted glass doors. Repurposed light fixtures twinkle above the kitchen island, and wood slab doors add warmth and anchor the space with the flooring. As a final touch, custom concrete sinks were stained to match the cabinets, and a custom tile niche was created for the homeowner’s sculpture display.

The owners of this kitchen had spent the money to upgrade the finishes in their kitchen upon building the home 12 years ago, but after living in the space for several years they realized how nonfunctional the layout really was. The (then) two preschool aged children had grown into busy, hungry teenagers with many friends who also liked to hang out at the house. So the family needed a more functional kitchen with better traffic flow, space for daily activities revolving around the kitchen at different times of day, and a kitchen that could accommodate cooking for and serving large groups. Furthermore, the dark, traditional finishes no longer reflected the homeowners’ style. They requested a brighter, more relaxed, coastal style that reflected their love of the seaside cities they like to visit.
Originally, the kitchen was U-shaped with a narrow island in the middle. The island created narrow aisles that bottle-necked at the dishwasher, refrigerator, and cooktop areas. There was a pass-through from the foyer into the kitchen, but the owners never liked that the pass-through was also located so close to the powder room. The awkward proximity was unappealing and made guests feel uncomfortable.
The kitchen’s storage was made up of lots of narrow cabinets, apothecary drawers, clipped corner units, and very few drawers. It lacked useful storage for the larger items the family used on a daily basis. And the kitchen’s only pantry was small closet that had only builder-grade, narrow shelving with no illumination to be able to see the contents inside.
Overall, the kitchen’s lighting plan was poorly executed. Only six recessed cans illuminated the entire kitchen and nook areas. The under cabinet lighting was not evenly distributed either. In fact, the builder had mis-placed the under cabinet lighting around the decorative pilasters which made for choppy, dark cubbies. Further, the builder didn’t include any lighting over the sink or the bar area, which meant whoever was doing the dishes was always in their own shadow. That, coupled with the steep overhang of the game room above made the bar area feel like a dim, cavernous space that wasn’t inviting or task oriented. The kitchen looked out into the main living space, but the raised bar and a narrow wall (which held the only large cabinet in the kitchen) created more of a barrier than a relationship to the living room or breakfast nook. In fact, one couldn’t even see the breakfast nook from the cooktop or sink areas due to its orientation. The raised bar top was too narrow to comfortably sit to either dine at or chat from due to the lack of knee space. The the homeowners confided that the kitchen felt more like a dark, dirty prison than place where the family, or their guests, wanted to gather and commune.
The clients' needs and desires were:
➢ to create a kitchen that would be a space the family loved to be in; to relate to the adjacent spaces all around, and to have better flow for entertaining large groups
➢ to remove the walls between the breakfast nook and living area and to be able to utilize the natural light from the windows in both those areas
➢ to incorporate a functional chopping block for prepping fresh food for home cooked meals, an island with a large sink and drain board, 2 pull out trash cans, and seating for at least the 2 teens to eat or do homework
➢ to design a kitchen and breakfast nook with an airy, coastal, relaxed vibe that blended with the rest of the house's coastal theme
➢ to integrate a layered lighting plan which would include ample general illumination, specific task lighting, decorative lighting, and lots of illuminated storage
➢ to design a kitchen with not only more storage for all the husband’s kitchen gadgets and collection of oils and spices, but smart storage, including a coffee/breakfast bar and a place to store and conceal the toaster oven and microwave
➢ to find a way to utilize the large open space between the kitchen, pantry area, and breakfast nook
Twelve Stones Designs achieved the owner's goals by:
➢ removing the walls between the kitchen and living room to allow the natural light to filter in from the adjacent rooms and to create a connection between the kitchen, nook, and living spaces for a sense of unity and communion
➢ removing the existing pantry and designing 3 large pantry style cabinets with LED tape lights and rollout drawers to house lots of kitchen appliances, gadgets, and tons of groceries. We also took the cabinets all the way up to the 9’ ceiling for additional storage for seasonal items and bulk storage.
➢ designing 2 islands - 1 with a gorgeous black walnut chopping block that houses a drawer for chopping and carving knives and a custom double pull out trash unit for point of use utilization - and 1 that houses the dishwasher, a large Blanco Gourmet sink with integrated drain board, woven baskets for fresh root vegetables and kitchen towels, plenty of drawer storage for kitchen items, and bar seating for up to 4 diners.
➢ closing off the space between the kitchen and the powder room to create a beautiful new private alcove for the powder room as well as adding some decorative storage. This also gave us space to include more tall storage near the new range for precision placement of the husband’s extensive oil and spice collection as well as a location for a combo-steam oven the wife wanted for baking and cooking healthy meals.
The project is enhanced functionally by:
➢ incorporated USB and standard receptacles for the kids’ laptops and phone charging in the large island
➢ designing the small island to include additional open shelving for items used on a daily basis such as a variety of bowls, plates, and colanders. This set up also works well for the husband who prefers to “plate” his dinners in restaurant-style fashion before presenting them to the table.
➢ the integration of specific storage units, such as double stacked cutlery drawers, a custom spice pull-out, a Kuerig coffee and tea pod drawer, and custom double stacked utensil drawers
➢ moving the refrigerator to the old oven location - this eliminated the bottle neck as well as created a better relationship to the eating table. It also utilizes the floor space between the pantry, nook, and kitchen
➢ creating a banquet style breakfast nook - this banquette seating not only doubles the amount of seating for large gatherings but it better utilizes the odd space between the kitchen and the previous nook area. It also helps to create a distinct pathway from the mudroom room through the pantry area, kitchen, nook, and living room.
➢ the coffee/breakfast bar area which includes the perfect location for the concealed microwave and toaster oven, convenient storage for the coffee pods and tea accoutrements. Roll-out drawers below also house the smoothie maker, hot water kettle, and a plethora of smoothie-making ingredients such as protein powders, smoothie additives, etc. Furthermore, the drawers below the Keurig house measuring utensil, cutlery, baking supplies and tupperware storage.
➢ incorporating lots of wide drawers and pullouts to accommodate large cookware.
➢ utilizing as much vertical space as possible by building storage to the ceiling which accommodates the family’s abundant amount of serving platters, baking sheets, bakeware, casserole dishes, and additional cutting boards.
The project is enhanced aesthetically by:
➢ new 5-piece Versailles pattern porcelain tile that now seamlessly joins the entire down stairs area together creating a bright, cohesiveness feeling instead of choppy separated spaces - it also adds a coastal feeling
➢ designing a cabinet to conceal the microwave and toaster oven
➢ the coastal influenced light fixtures over the nook table and island
➢ the sandy colors of the Langdon Cambria countertops. The swirling pattern and sparkling quartz pieces remind the homeowner of black-and-tan sandy beaches
➢ the striped banquet seating whose creamy white background and blue-green stripes were the inspiration for the cabinet and wall colors.
➢ All the interior doors were painted black to coordinate with the blacks and grays in the backsplash tile and countertop. This also adds a hint of tailored formality to an otherwise casual space.
➢ the use of WAC's Oculux small aperture LED units for the overhead lighting complimented with Diode LED strips for task lighting under the cabinets and inside the pantry and glass wall cabinets. All of the lighting applications are on separate dimmer switches.
Innovative uses of materials or construction methods by Realty Restoration LLC:
➢ Each 1-1/2” x 3” block of reclaimed end-grain black walnut that makes up the center island chopping block was hand milled and built in the shop. It was designed to look substantial and proportional to the surrounding elements, executed by creating the 4 inch tall top with a solid wood chamfered edge band.
➢ The metal doors on either side of the vent hood were also custom designed for this project and built in the Realty Restoration LLC shop. They are made 1x2, 11-gauge mild steel with ribbed glass. Weighing 60 lbs a piece, heavy duty cabinet hinges were added to support the weight of the door and keep them from sagging.
➢ Under-cabinet receptacles were added along the range wall in order to have a clean, uninterrupted backsplash.
Design obstacles to overcome:
➢ Because we were removing the demising walls between the kitchen and living room, we had to find a way to plumb and vent the new island. We did this by tunneling through the slab (the slab had post tension cables which prevented us from just trenching) to run a new wet vent through a nearby structural wall. We pulled the existing hot and cold lines between upper floor joists and ran them down the structural wall as well and up through a conduit in the tunnel.
➢ Since we were converting from wall overs to a gas range it allowed us to utilize the 220 feed for the wall ovens to provide a new sub panel for all the new kitchen circuits
➢ Due to framing deficiencies inherited from the original build there was a 1-1/2” differential in the floor-to-ceiling height over a 20 foot span; by utilizing the process of cutting and furring coupled with the crown moulding details on the cabinet elevations we were able to mask the problem and provide seamless transitions between the cabinet components.
Evidence of superior craftsmanship:
➢ uniquely designed, one-of-a-kind metal “X” end panels on the large island. The end panels were custom made in the Realty Restoration LLC shop and fitted to the exact dimensions of the island. The welding seams are completely indistinguishable - the posts look like they are cut from a single sheet of metal
➢ square metal posts on the small island were also custom made and designed to compliment and carry through the metal element s throughout the kitchen
➢ the beautiful, oversized end panels on the pantry cabinets which give the breakfast nook a tailored look
➢ integrating a large format 5 piece Versailles tile pattern to seamlessly flow from the existing spaces into the new kitchen space
➢ By constructing a custom cabinet that jogged around a corner we could not remodel (housing the entry way coat closet) we were able to camouflage the adjacent wall offset within the upper and lower cabinets. By designing around the existing jog in the structural walls we accomplished a few things: we were able to find the space to house, and hide, the microwave and toaster oven yet still have a clean cohesive appearance from the kitchen side. Additionally, the owners were able to keep their much needed coat closet and we didn’t have to increase the budget with unnecessary structural work.

Sponsored
Fredericksburg, OH
High Point Cabinets
Columbus' Experienced Custom Cabinet Builder | 4x Best of Houzz Winner

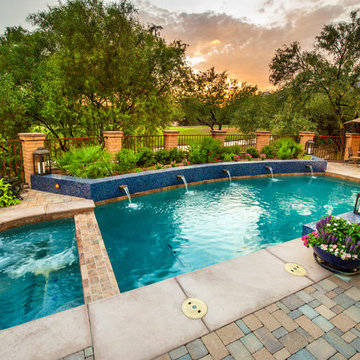
Perfect paving slab for modern poolsides and backyard design, Blu Grande Smooth is a large concrete patio stone available in multiple colors. It's smooth texture is sleek to the eye but rougher to the touch which avoids it from getting slippery when wet. The large rectangular shape works as an easy add-on into Blu 60 regular modular patterns but can also work as a stand-alone to create a very linear look. Check out the HD2 Blu Grande Smooth which is all about seamless looks with a tighter/poreless texture and anti-aging technology. https://www.techo-bloc.com/shop/slabs/blu-grande-smooth/

Looking for a traditional western leather recliner that offers both style and comfort? Look no further than our Daphne Leather Recliner. This beautiful chair is crafted from 100% full-grain hand-burnished leather, with wing and arm panels accented in a fine croc-embossed leather. The olive green color tones add richness to your living space and make it easy to contrast with tan and lighter color tones. Plus, with its oversized bustle back, the Daphne Leather Recliner provides ample head, neck, and lower back support, making it one of the most comfortable chairs you'll ever sit in. Best of all, this fine leather chair is 100% American made to the highest standards of quality, so you can enjoy it for years to come.
Dimensions: 43" H x 38.5" W x 36" D
Seat Depth: 21"
Seat Height: 20"
Arm Height: 24"
Leather Description: Artisan Leathers beautifully evoke this time worn quality, unique to every individual piece, like the originals. To pure aniline leather crusts, already fully and carefully upholstered to the piece, a base color is created with multiple applications of waxes and oils, hand-worked by the leather Artisan. After drying, this craftsman then carefully builds-up the finish with an expert’s eye, and touch, to achieve an aged patina in just the right places to reflect the aged qualities only time, wear, and frequent care could have accomplished naturally. Every individual piece upholstered with Artisan Leather finishing methods is first beautifully built to the highest standards of quality. The leather is then hand-colored and aged to bespeak the loving touch of time, providing a quality antique appearance to a beautiful new piece of quality leather furniture. Every chair, sofa, or bench has its very own unique identity only these hand-crafted methods can provide, reflecting the presence of a time honored past.
True 100% top/full grain cowhide leather is characterized by variations in shade, texture, color and grain. Healed marks and scars are to be expected and enhance the natural beauty of the hides. These variations are normal and unique features of true genuine 100% top/full grain cowhide leather.
Embossed Leather Description: A leather used to accent many of today's home interiors. The leather hide is first embossed with a large crocodile grain and then colored by applying two base color coats of micro pigments. The leather is then wiped-off to give it a contrast of colors utilizing the base color combination. This color contrast is further accented by two additional top coat colors that are wiped-on by hand to give the leather a beautiful antique look. The last step is to slightly protect the hand work of the leather hide with a lacquer topcoat that provides great depth and warmth to the finished product.
Frame Construction: Using traditional hand craftsmanship with modern manufacturing methods to produce frames that are among the finest used in the upholstery business. Each frame is precisely cut and hand assembled using kilned dried lumber. Double dowels are utilized in all structural parts to form sturdy, long lasting joints. To complete construction and add stability to the frame, large precisely cut corner blocks are positioned at each corner where the greatest stress occurs using both glues and screws.

Dress up your living room, study or office with our cozy Sundance Leather Sofa. This fine leather sofa is covered in our signature hand burnished leather with subtle stamped leather accents in the arm panels. All of those rich, simplistic details add up to one thing: an always stylish, comfy and timeless high end living room sofa that you can be proud to include in any room of your home or office. Because we always use full and top grain leathers, both the texture and the color of the Leather Sofa will vary slightly, which means your piece can truly be called a one of a kind. Like a favorite leather jacket or perfectly broken-in pair of boots, this rustic elegant living room sofa is a luxury that only gets better with age. Luxury synthetic down seat cushions makes our Sundance Leather Sofa sit extra soft!
Dimensions: 35" H x 98" W x 40" D
Seat Height: 19"
Arm Height: 24"
Seat Depth: 25''
Leather Description: Artisan Leathers beautifully evoke this time worn quality, unique to every individual piece, like the originals. To pure aniline leather crusts, already fully and carefully upholstered to the piece, a base color is created with multiple applications of waxes and oils, hand-worked by the leather Artisan. After drying, this craftsman then carefully builds-up the finish with an expert’s eye, and touch, to achieve an aged patina in just the right places to reflect the aged qualities only time, wear, and frequent care could have accomplished naturally.
Every individual piece upholstered with Artisan Leather finishing methods is first beautifully built to the highest standards of quality. The leather is then hand-colored and aged to bespeak the loving touch of time, providing a quality antique appearance to a beautiful new piece of quality leather furniture. Every chair, sofa, or bench has its very own unique identity only these hand-crafted methods can provide, reflecting the presence of a time honored past.
Embossed Leather Description: A leather used to accent many of today's home interiors. The leather hide is first embossed with a large crocodile grain and then colored by applying two base color coats of micro pigments. The leather is then wiped-off to give it a contrast of colors utilizing the base color combination. This color contrast is further accented by two additional top coat colors that are wiped-on by hand to give the leather a beautiful antique look. The last step is to slightly protect the hand work of the leather hide with a lacquer topcoat that provides great depth and warmth to the finished product.
True 100% top grain cowhide leather is characterized by variations in shade, texture, color and grain. Healed marks and scars are to be expected and enhance the natural beauty of the hides. These variations are normal and unique features of true genuine 100% top grain cowhide leather.
Frame Construction: Using traditional hand craftsmanship with modern manufacturing methods to produce frames that are among the finest used in the upholstery business. Each frame is precisely cut and hand assembled using kilned dried lumber. Double dowels are utilized in all structural parts to form sturdy, long lasting joints. To complete construction and add stability to the frame, large precisely cut corner blocks are positioned at each corner where the greatest stress occurs using both glues and screws.
Seat Cushions: Features four inner channels filled with hypollergenic resilient denier fibers mixed with revolutionary micro-denier fibers to create cushions with the luxurious comfort and feel of down without the maintenance demands of down.

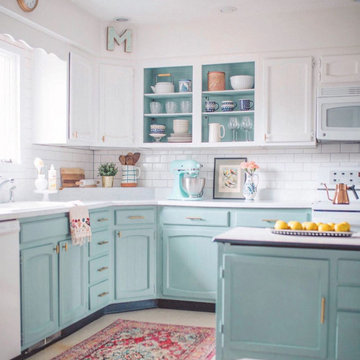
The cabinets are Waypoint® 650 Painted Linen, the style is Refreshingly Relaxed and the white-on-white color palette is on-trend. Reflected natural light and nautical inspired light fixtures make this space as bright as a day at the beach. A Carrera-look marble counter top adds to the light reflection and overall feel of sea and sun and sand.

Sponsored
Columbus, OH
Trish Takacs Design
Award Winning & Highly Skilled Kitchen & Bath Designer in Columbus

DESIGNED BY TOC design
CONSTRUCTION BY TOC design & Construction inc.
PHOTOS BY : Tania Scardellato
I was fortunate to have a young family approach me in desperate need to renovate there only 3 piece bathroom. This space was In dire need of a remodel, with old brown wall to wall tiles and a dated bulky yellow brown single sink vanity.
Storage was a must, lighting a necessity, and proper accessibility to the shower bath area.
We had a tight budget to respect, but a full gut of this bathroom was required. And a good thing too, once we started doing the demolition we noticed that mildew and rotting floors and walls had accumulated throughout the years. Doing it right the first time is no joke when dealing with water and electrical issues.
We discarded all reminisce of old and built from scratch, new walls, new plumbing, new electrical ,new insulation and a new window, a new fan that actually exhausted outside ( I say this laughing as you would be amazed at how many fans are installed but don’t exhaust outside, and you the client would never know unless you go inside the attic space.
Once all the hard stuff was done, the rest is just a matter of smart design. If you have a small bathroom here are some tips to guide you.
10 tips for making a small bathroom feel larger
Is your tiny bathroom cramping your functionality and style, leaving you longing for the enormous bathrooms gracing the pages of design magazines? Even if your bathroom is a fraction of the size, all it takes is some design savvy to make the most of the space you have. Consider these 10 smart tips that will help your bathroom look, feel and function like those larger contenders.
1-Get creative with corners
Space is at a premium in small bathrooms, so it's important to maximize every inch. Corners, for example, provide extra space for shelving, storage units and even hooks. Get creative and install unique design solutions that are not only functional, but also eye-catching. If you love the airiness of floating cabinets, add baskets or decorative boxes under for extra storage. If you are installing floating cabinets insure that they are installed securely to studs or plywood at wall.
2- Let solid colors shine
Busy patterns have a shrinking effect and make small bathrooms seem even smaller. Conversely, light natural hues make a space feel more open. If you're itching to get creative with design, experiment with textures but keep overpowering patterns to a minimum. Tone on tone is the best to achieve this.
3 - Maximize your bathtub
A bathtub takes up a significant portion of the room, but modern, compact options with curved basins, can make the tub feel larger when in use, all while conserving space.
4 - Select a smaller faucet
A faucet is jewelry for the bathroom. And just as accessories can overpower an outfit, a big bulky faucet isn't flattering in a small bath. Single-handle designs conserve counter space, while a wall-mount installation frees it up all together and can create quite the wow-factor, if the budget can accommodate the required changes to plumbing behind the wall.
5 - Make vanity storage simple
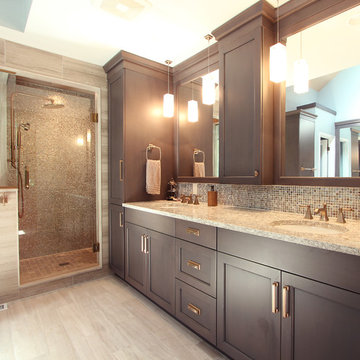
If you're in a storage war with your small bathroom, you're not alone in the battle. Toiletries and personal supplies without a place to call home only add clutter and chaos. Store smart with a space-saving vanity, the dual sink vanity shown here, looks quite simple, but in reality it has 4 sets of full extension drawers, and the vanity tower adds extra storage without overpowering the use of space.
6 - Show off the shower
Shower curtains may be pretty, but they interrupt the visual flow of a bathing space and make it feel significantly smaller. In bathrooms with small footprints, opt for a clear glass sliding shower door that doesn't require the clearance of one with a hinged design. Or as shown in this design and for fraction less expensive a half hinged panel installed on a fixed tempered glass panel. If you're embarking on a big remodel, create the illusion of more space by using same tile in the shower that's used throughout; instead of seeing them as two separate zones, the eye will read them as one.
7 - Discover the treasure of hidden storage
Work with a contractor, and you just might find some serious storage potential hidden behind your walls. Whether it's utilizing space between the studs for shallow shelving or a creating a small linen closet by annexing space from an adjacent room, even small additions can make a big difference.
8 - Focal Point
Tile is a beautiful, durable addition to any bathroom. For dainty spaces, consider installing tile at a diagonal to accentuate the focal point or as in this bathroom I used an oversized textured pattern to bring depth to the space at the window wall.
9 - Choose the right lights
Strategically install light to reflect and brighten a small bathroom to make it appear larger. Recessed lighting is an affordable solution for tiny rooms, offering ample light while taking up little space. Wall sconces alongside a mirror also reflect off the walls and make a room feel bright and airy. I always recommend going with LED lighting at 2800 to 3000K.
10 – Accessorize
This is your time to shine in your decorating skills, have fun with your towels, you can change the color scheme daily just by adding pops of color in your accessories, make sure to get items that serve a dual purpose, like baskets, boxes they can always be used as hampers, storing of towels and even a nice display for your guest.

The owners of this kitchen had spent the money to upgrade the finishes in their kitchen upon building the home 12 years ago, but after living in the space for several years they realized how nonfunctional the layout really was. The (then) two preschool aged children had grown into busy, hungry teenagers with many friends who also liked to hang out at the house. So the family needed a more functional kitchen with better traffic flow, space for daily activities revolving around the kitchen at different times of day, and a kitchen that could accommodate cooking for and serving large groups. Furthermore, the dark, traditional finishes no longer reflected the homeowners’ style. They requested a brighter, more relaxed, coastal style that reflected their love of the seaside cities they like to visit.
Originally, the kitchen was U-shaped with a narrow island in the middle. The island created narrow aisles that bottle-necked at the dishwasher, refrigerator, and cooktop areas. There was a pass-through from the foyer into the kitchen, but the owners never liked that the pass-through was also located so close to the powder room. The awkward proximity was unappealing and made guests feel uncomfortable.
The kitchen’s storage was made up of lots of narrow cabinets, apothecary drawers, clipped corner units, and very few drawers. It lacked useful storage for the larger items the family used on a daily basis. And the kitchen’s only pantry was small closet that had only builder-grade, narrow shelving with no illumination to be able to see the contents inside.
Overall, the kitchen’s lighting plan was poorly executed. Only six recessed cans illuminated the entire kitchen and nook areas. The under cabinet lighting was not evenly distributed either. In fact, the builder had mis-placed the under cabinet lighting around the decorative pilasters which made for choppy, dark cubbies. Further, the builder didn’t include any lighting over the sink or the bar area, which meant whoever was doing the dishes was always in their own shadow. That, coupled with the steep overhang of the game room above made the bar area feel like a dim, cavernous space that wasn’t inviting or task oriented. The kitchen looked out into the main living space, but the raised bar and a narrow wall (which held the only large cabinet in the kitchen) created more of a barrier than a relationship to the living room or breakfast nook. In fact, one couldn’t even see the breakfast nook from the cooktop or sink areas due to its orientation. The raised bar top was too narrow to comfortably sit to either dine at or chat from due to the lack of knee space. The the homeowners confided that the kitchen felt more like a dark, dirty prison than place where the family, or their guests, wanted to gather and commune.
The clients' needs and desires were:
➢ to create a kitchen that would be a space the family loved to be in; to relate to the adjacent spaces all around, and to have better flow for entertaining large groups
➢ to remove the walls between the breakfast nook and living area and to be able to utilize the natural light from the windows in both those areas
➢ to incorporate a functional chopping block for prepping fresh food for home cooked meals, an island with a large sink and drain board, 2 pull out trash cans, and seating for at least the 2 teens to eat or do homework
➢ to design a kitchen and breakfast nook with an airy, coastal, relaxed vibe that blended with the rest of the house's coastal theme
➢ to integrate a layered lighting plan which would include ample general illumination, specific task lighting, decorative lighting, and lots of illuminated storage
➢ to design a kitchen with not only more storage for all the husband’s kitchen gadgets and collection of oils and spices, but smart storage, including a coffee/breakfast bar and a place to store and conceal the toaster oven and microwave
➢ to find a way to utilize the large open space between the kitchen, pantry area, and breakfast nook
Twelve Stones Designs achieved the owner's goals by:
➢ removing the walls between the kitchen and living room to allow the natural light to filter in from the adjacent rooms and to create a connection between the kitchen, nook, and living spaces for a sense of unity and communion
➢ removing the existing pantry and designing 3 large pantry style cabinets with LED tape lights and rollout drawers to house lots of kitchen appliances, gadgets, and tons of groceries. We also took the cabinets all the way up to the 9’ ceiling for additional storage for seasonal items and bulk storage.
➢ designing 2 islands - 1 with a gorgeous black walnut chopping block that houses a drawer for chopping and carving knives and a custom double pull out trash unit for point of use utilization - and 1 that houses the dishwasher, a large Blanco Gourmet sink with integrated drain board, woven baskets for fresh root vegetables and kitchen towels, plenty of drawer storage for kitchen items, and bar seating for up to 4 diners.
➢ closing off the space between the kitchen and the powder room to create a beautiful new private alcove for the powder room as well as adding some decorative storage. This also gave us space to include more tall storage near the new range for precision placement of the husband’s extensive oil and spice collection as well as a location for a combo-steam oven the wife wanted for baking and cooking healthy meals.
The project is enhanced functionally by:
➢ incorporated USB and standard receptacles for the kids’ laptops and phone charging in the large island
➢ designing the small island to include additional open shelving for items used on a daily basis such as a variety of bowls, plates, and colanders. This set up also works well for the husband who prefers to “plate” his dinners in restaurant-style fashion before presenting them to the table.
➢ the integration of specific storage units, such as double stacked cutlery drawers, a custom spice pull-out, a Kuerig coffee and tea pod drawer, and custom double stacked utensil drawers
➢ moving the refrigerator to the old oven location - this eliminated the bottle neck as well as created a better relationship to the eating table. It also utilizes the floor space between the pantry, nook, and kitchen
➢ creating a banquet style breakfast nook - this banquette seating not only doubles the amount of seating for large gatherings but it better utilizes the odd space between the kitchen and the previous nook area. It also helps to create a distinct pathway from the mudroom room through the pantry area, kitchen, nook, and living room.
➢ the coffee/breakfast bar area which includes the perfect location for the concealed microwave and toaster oven, convenient storage for the coffee pods and tea accoutrements. Roll-out drawers below also house the smoothie maker, hot water kettle, and a plethora of smoothie-making ingredients such as protein powders, smoothie additives, etc. Furthermore, the drawers below the Keurig house measuring utensil, cutlery, baking supplies and tupperware storage.
➢ incorporating lots of wide drawers and pullouts to accommodate large cookware.
➢ utilizing as much vertical space as possible by building storage to the ceiling which accommodates the family’s abundant amount of serving platters, baking sheets, bakeware, casserole dishes, and additional cutting boards.
The project is enhanced aesthetically by:
➢ new 5-piece Versailles pattern porcelain tile that now seamlessly joins the entire down stairs area together creating a bright, cohesiveness feeling instead of choppy separated spaces - it also adds a coastal feeling
➢ designing a cabinet to conceal the microwave and toaster oven
➢ the coastal influenced light fixtures over the nook table and island
➢ the sandy colors of the Langdon Cambria countertops. The swirling pattern and sparkling quartz pieces remind the homeowner of black-and-tan sandy beaches
➢ the striped banquet seating whose creamy white background and blue-green stripes were the inspiration for the cabinet and wall colors.
➢ All the interior doors were painted black to coordinate with the blacks and grays in the backsplash tile and countertop. This also adds a hint of tailored formality to an otherwise casual space.
➢ the use of WAC's Oculux small aperture LED units for the overhead lighting complimented with Diode LED strips for task lighting under the cabinets and inside the pantry and glass wall cabinets. All of the lighting applications are on separate dimmer switches.
Innovative uses of materials or construction methods by Realty Restoration LLC:
➢ Each 1-1/2” x 3” block of reclaimed end-grain black walnut that makes up the center island chopping block was hand milled and built in the shop. It was designed to look substantial and proportional to the surrounding elements, executed by creating the 4 inch tall top with a solid wood chamfered edge band.
➢ The metal doors on either side of the vent hood were also custom designed for this project and built in the Realty Restoration LLC shop. They are made 1x2, 11-gauge mild steel with ribbed glass. Weighing 60 lbs a piece, heavy duty cabinet hinges were added to support the weight of the door and keep them from sagging.
➢ Under-cabinet receptacles were added along the range wall in order to have a clean, uninterrupted backsplash.
Design obstacles to overcome:
➢ Because we were removing the demising walls between the kitchen and living room, we had to find a way to plumb and vent the new island. We did this by tunneling through the slab (the slab had post tension cables which prevented us from just trenching) to run a new wet vent through a nearby structural wall. We pulled the existing hot and cold lines between upper floor joists and ran them down the structural wall as well and up through a conduit in the tunnel.
➢ Since we were converting from wall overs to a gas range it allowed us to utilize the 220 feed for the wall ovens to provide a new sub panel for all the new kitchen circuits
➢ Due to framing deficiencies inherited from the original build there was a 1-1/2” differential in the floor-to-ceiling height over a 20 foot span; by utilizing the process of cutting and furring coupled with the crown moulding details on the cabinet elevations we were able to mask the problem and provide seamless transitions between the cabinet components.
Evidence of superior craftsmanship:
➢ uniquely designed, one-of-a-kind metal “X” end panels on the large island. The end panels were custom made in the Realty Restoration LLC shop and fitted to the exact dimensions of the island. The welding seams are completely indistinguishable - the posts look like they are cut from a single sheet of metal
➢ square metal posts on the small island were also custom made and designed to compliment and carry through the metal element s throughout the kitchen
➢ the beautiful, oversized end panels on the pantry cabinets which give the breakfast nook a tailored look
➢ integrating a large format 5 piece Versailles tile pattern to seamlessly flow from the existing spaces into the new kitchen space
➢ By constructing a custom cabinet that jogged around a corner we could not remodel (housing the entry way coat closet) we were able to camouflage the adjacent wall offset within the upper and lower cabinets. By designing around the existing jog in the structural walls we accomplished a few things: we were able to find the space to house, and hide, the microwave and toaster oven yet still have a clean cohesive appearance from the kitchen side. Additionally, the owners were able to keep their much needed coat closet and we didn’t have to increase the budget with unnecessary structural work.

Personalization is no longer just a design trend—it has become an essential part of creating spaces that truly feel like home. Our homes are much more than places where we live; they are reflections of our personalities, our values, and the memories we hold dear. Personalization allows homeowners to go beyond surface-level aesthetics and bring their unique stories to life through thoughtful design choices.
From one-of-a-kind decor to custom furniture, there are countless ways to make a space uniquely yours. This article explores the transformative power of personalization in home design, offering creative ideas and strategies to ensure your home feels as special as the people who live in it. By incorporating meaningful elements, sentimental keepsakes, and designs tailored to your lifestyle, you can create a home that speaks to your heart while remaining both functional and beautiful.
Why Personalization Is Transforming Home Design
Personalization in home design is a powerful trend that’s shaping how we live. It’s about more than just creating a stylish space—it’s about creating an emotional connection to your environment. Here’s why it matters:
Emotional Resonance: Personal touches make your home feel like a sanctuary. Items that carry sentimental value, such as family heirlooms or custom-made pieces, evoke memories and create a sense of belonging.
Individuality: Your home is a reflection of your personality. Personalization allows you to infuse your style into every corner, ensuring your space doesn’t look like a copy of someone else’s.
Functionality with Meaning: Customized furniture or decor isn’t just beautiful—it’s practical. Personalized design ensures every piece serves your specific needs while adding character to your home.
How to Add Personal Touches to Your Home Design
1. Customized Furniture and Decor
Investing in bespoke pieces is one of the best ways to personalize your home. Whether it’s a hand-carved coffee table or custom shelving designed to fit your space, tailored furniture adds both functionality and uniqueness.
Ideas for Customized Furniture:
A dining table engraved with a special date or family name.
Built-in bookshelves designed to fit your exact collection of novels and treasures.
Upholstered chairs or couches in fabrics that reflect your style and preferences.
For decor, consider smaller but impactful personalized items. For instance, displaying a meaningful keepsake, like a shadow box featuring a personalized necklace, can add an intimate touch to any room.
2. Symbolic Design Elements
Incorporating symbols that resonate with you is a thoughtful way to personalize your space. Items inspired by spiritual or cultural symbols, such as angel numbers, can serve as both decor and a reminder of values or goals that matter to you.
Examples of Symbolic Decor:
Wall art or prints featuring numbers, quotes, or patterns that hold personal significance.
Sculptures or figurines that represent qualities like protection, growth, or harmony.
Patterned rugs or textiles that subtly include symbols tied to your family’s history or beliefs.
3. Displaying Sentimental Items
A personalized home thrives on nostalgia and sentimentality. Displaying cherished keepsakes and mementos is a wonderful way to bring life and meaning into your space.
Ideas for Sentimental Displays:
Memory Galleries:
Create a gallery wall filled with family photos, travel souvenirs, and sentimental artwork.
Mix and match frames to add visual interest while showcasing your memories.
Functional Keepsakes:
Repurpose sentimental items into practical decor. For example, a gift for dad, such as a custom clock or framed photo, can double as both a functional and meaningful addition to your space.
Incorporate small family treasures, like vintage jewelry or heirlooms, into your decor.
Feature Pieces:
Highlight unique items in shadow boxes, such as wedding keepsakes, old letters, or jewelry. These displays turn your memories into a focal point of the room.
4. Personalized Artwork and Accessories
Custom artwork is one of the easiest ways to add a personal touch to your home. Whether it’s commissioning a piece or creating something yourself, personalized art instantly elevates a space.
Custom Art Ideas:
A commissioned painting of your family home, wedding venue, or favorite landscape.
Abstract art featuring colors or symbols that are meaningful to you.
Name plaques, monograms, or custom wall hangings.
Incorporating personalized accessories like cushions, throws, or coasters featuring family names or initials is another subtle yet effective way to customize your decor.
5. Seasonal Personalization
Switching up decor seasonally offers a great opportunity to incorporate personal touches. For example:
Display holiday-themed photos, such as a family portrait from last year’s festivities.
Rotate sentimental items based on the time of year, such as a fall centerpiece with family heirloom candlesticks.
Incorporate handmade seasonal crafts created with family members, making the decor feel both personal and festive.
Incorporating Personalization Into Outdoor Spaces
Personalization doesn’t stop at your front door. Outdoor spaces, like patios, gardens, and porches, offer plenty of opportunities for customization.
Ideas for Personalizing Outdoor Areas:
Custom Signs: Add a handmade welcome sign or a plaque with your family name to the front of your house.
Engraved Furniture: Outdoor benches or tables engraved with meaningful quotes or dates can create an intimate touch.
Garden Markers: Personalized garden markers or stepping stones with family names or inspirational words can make your garden truly yours.
Personalizing your home is not just about aesthetics; it’s about creating an environment that feels deeply connected to you and your loved ones. Every item, color, and design element can carry a piece of your story. In this section, we’ll dive deeper into actionable ideas for personalizing your living spaces, transforming them into meaningful reflections of your life.
6. Layering Sentimental Textiles and Accessories
Textiles such as rugs, curtains, and throw pillows are an excellent way to infuse personality into your home without a full-scale renovation. Opt for customized or sentimental fabrics that tie in your personal story.
Ideas for Textiles That Add Meaning
Custom Monogrammed Pillows
Add initials, family names, or even special dates to throw pillows for your living room or bedroom.
Memory Quilts
Use pieces of fabric from meaningful items, like old clothes or wedding attire, to create a quilt that tells a story.
Personalized Rugs
Consider a custom rug with patterns or symbols that resonate with your family’s heritage or values.
Incorporating textiles that tell a story not only makes your home feel cozier but also serves as a subtle reminder of cherished memories.
7. Meaningful Gifts as Decor
Some of the most cherished items in a home are gifts from loved ones. These pieces carry stories and emotional weight, making them perfect for display as decor.
For example, a gift for dad, such as a custom leather-bound journal or engraved keepsake, can be displayed in a home office or study. These items become part of the space’s character while celebrating the bond shared with a loved one.
Tips for Displaying Gifted Items:
Use bookshelves or mantels to showcase sentimental gifts alongside other decor elements.
Pair gifted items with complementary pieces, such as family photos or artwork, to create cohesive displays.
8. Personalized Storage Solutions
Functional spaces can also benefit from personalization. Custom storage solutions allow you to stay organized while reflecting your style and needs.
Ideas for Personalized Storage
Engraved Wooden Crates: Use crates with engraved names or labels for stylish, functional storage in living rooms or children’s play areas.
Custom Closet Systems: Design closets with features like jewelry drawers, tie racks, or shoe compartments tailored to your specific collection.
Sentimental Storage Bins: Store seasonal decorations, keepsakes, or family mementos in decorative bins labeled with meaningful phrases or designs.
By blending practicality and personalization, you can create spaces that are as functional as they are beautiful.
9. Creative Personalization for Kids’ Rooms
Children’s rooms are ideal spaces for playful and meaningful personalization. From custom artwork to interactive elements, you can design a room that reflects their personality while creating an inspiring space for them to grow.
Ideas for Kids’ Room Personalization
Name Signs and Wall Art: Incorporate their name in decorative signage or framed artwork to make their space uniquely theirs.
Growth Charts with Memories: Add personalized growth charts where you can mark milestones and attach small mementos.
Interactive Decor: Create activity walls featuring chalkboards, corkboards, or magnetic surfaces where kids can express their creativity.
These personal touches turn their rooms into a space that grows with them, capturing memories along the way.
10. Blending Modern Trends with Personalized Touches
If you’re drawn to modern design trends, you can still incorporate personalization without losing that sleek, contemporary feel. Here’s how:
Tips for a Modern Yet Personalized Space
Minimalist Monograms: Add subtle, elegant initials or symbols to decor pieces like vases, linens, or art prints.
Statement Lighting: Choose pendant lights or chandeliers with a customized design or engraving to reflect your style.
Neutral Colors with Personal Accents: Keep the base color palette neutral, but incorporate personal elements like family photos in modern frames or sentimental objects displayed in chic shadow boxes.
This approach ensures your home stays trendy while retaining meaningful personal elements.
11. Technology Meets Personalization
Technology can also play a role in making your home feel more personal. Smart home systems and digital tools can be customized to fit your preferences and lifestyle.
Ideas for Personalized Tech
Customized Smart Displays: Use smart screens to display rotating family photos or personal artwork.
Smart Lighting Scenes: Set up lighting presets for different moods, such as a cozy evening scene that highlights your favorite decor.
Voice-Activated Reminders: Program smart assistants to remind you of family birthdays, anniversaries, or even daily affirmations.
By integrating personalized technology, your home becomes both functional and deeply connected to your needs.
12. Seasonal Rotations with a Personal Touch
Personalization doesn’t have to be permanent. Changing up your decor with the seasons is a wonderful way to keep your home feeling fresh while adding meaningful elements.
Ideas for Seasonal Personalization
Holiday Decor with Family Themes: Create personalized ornaments, stockings, or wreaths that highlight your family’s story.
Seasonal Photo Swaps: Rotate family photos to reflect seasonal activities or vacations.
Custom Table Settings: Design table linens, centerpieces, or napkin rings featuring symbols or colors that are meaningful to your family.
Seasonal personalization allows you to constantly renew the look and feel of your space while keeping it tied to your personal story.
Turning a House Into Your Sanctuary
Personalization in home design is about more than creating a visually appealing space—it’s about creating a home that reflects your life, values, and memories. Every detail, from the textiles you choose to the sentimental items you display, adds a layer of meaning that makes your house truly yours.
By incorporating elements like customized decor, thoughtful gifts, and symbolic designs, you can craft a home that not only looks beautiful but also feels deeply personal. Take inspiration from these ideas to make your space a reflection of everything that matters most to you and your loved ones.
12