
Search results for "Regularly clean" in Home Design Ideas
 Renovisions
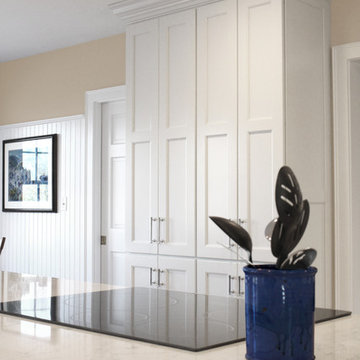
These South Shore of Boston homeowners desired a larger kitchen as their existing had limited space to host family events and entertain guests – they turned to Renovisions to help transform their small, outdated kitchen with separate walk-in pantry into a beautiful, open and spacious inspirational room.
Choosing the right cabinetry for the room and how to meet the needs of the client was critical to the overall success of this design. A traditional style was the framework of the home and the flat paneled doors on the white painted cabinetry support this aspect. Going vertical as possible with cabinets is a trend here to stay; keeping with that idea, we recommended the graceful tall pantry cabinet that flanks one side of the kitchen. This not only lends to an eye-appealing furniture-look, but adds significant storage space, allowing the cabinets to store items they may not use on a regular basis. In this case, the clients are amazed with the amount of storage they’ve gained and one that provides easy access to all interior items. Every inch of space was key to create this optimally functional kitchen. Must-haves such as tray dividers above the refrigerator are handy and the double pull-out trash/recycling bins on the right side of the sink were a simple and clean way to gain floor space and conceal unsightly trash.
The focal point of this kitchen is the expansive, soft-grey colored contrasting island with larger, deeper drawers for pots, pans and platters. The client was excited to switch to an induction chef-series range that featured a divided oven that can accommodate two different temperatures.
Fit and finish is important in any renovation and this certainly holds true in this kitchen project to personalize their space. The custom recessed panel columns with wainscot details add an architectural element that ties into the kitchen cabinet design and Carrera-look quartz countertops which provide a stunning classical look that ties nicely with the overall traditional style. These homeowners are excited to show off their open and spacious Renovision!
“We really enjoyed our new kitchen and it’s amazing improvement over the holidays. We got rave reviews from all of our guests!”
Steve & Mary S. (Duxbury)

 Simply Perfect
With Pinterest, Houzz and HGTV, homeowners have more sources for inspiration than ever before. You may have found, however, that replicating what you see online or on TV isn’t always that simple. Mastering proportion and scale can be especially challenging.
Let’s say you fall in love with an oversized vase which looks like it will fit with the colors and textures in your living room. But once it’s there, the vase doesn’t look the way you expected and you don’t know now to make it work.
Fortunately, designers are experienced not only in dealing with proportion and scale, but in handling multiple elements at once.
In the meantime, here are a few tips to help you understand some of the considerations regarding size.
Proportion Tips
1. Less is more
In the home shown here, the rooms are on the smaller side, where it would seem counterintuitive to use oversized pieces. But using smaller pieces can look busy—and can actually make the rooms feel smaller, especially when you add personal belongings to the space.
2. Keep it simple
Several oversized pieces can create clean, simple lines. We put this principle to work using oversized items as anchors on both sides of the fireplace in the living room.
On one side, we have two oversized blown-glass vases with amber, silver and purple tones. The irregular shapes in these beautiful pieces create interest and contrast; you can see through them and you can see the room reflected in them.
On the other side of the fireplace sit two oversized brass lanterns filled with driftwood and greenery; the contents can be switched out seasonally, as well.
The vases on one side and lanterns on the other side establish pattern (two of each, in descending order), balance and simplicity.
3. Embrace the unexpected
On the mantle above the fireplace rests another oversized piece—a painting of a barn. Its neutral colors pick up the tones in the stone behind it and again, it works to bring simplicity to the space, rather than overly fussy detail.
Nearby, just up the stairs, is an unusually spacious landing. A bench and pillows transform it into a special reading or conversation spot. The pair of hammered nickel vases on the window sill repeats the pattern established on either side of the fireplace. Using oversized vases in lieu of a window treatment is unexpected—as is incorporating sleek, modern-shaped vases like these in a farmhouse-style home. Yet because of the other oversized objects nearby, the vases feel distinctive and delightful.
4. Coordinate pattern and rhythm
Another oversized item is the table lamp in the living room. It’s a powerful light; aside from the overhead can lights, it’s the room’s only light source. The ridges on its ceramic base echo the pieces of wicker in the stunning basket behind the sofa.
This oversized wicker basket, which we’re a bit in love with, features a very large weave along with elegant leather straps. It’s ideal for storing throws, cushions, board games or anything else you want out of sight.
5. Proximity matters
This home’s dining room is just to the right of the entry. An immense floor mirror—double-framed in weathered wood—is placed opposite the front windows. Measuring seven feet high, it’s a bold piece. And it works perfectly in this space to reflect light and make the room feel larger.
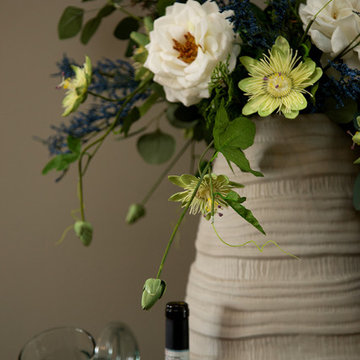
An oversized ceramic vase, with a porous, matte-stone finish, sits atop a table next to the mirror. Other regular-sized items share the small table, including a bottle of wine and a glass vase. But because of the enormous mirror, it was important to have one oversized item on that table, for balance.
Find the right local pro for your project
 Ambient
Graffio Collection by Antoniolupi
AL STUDIO
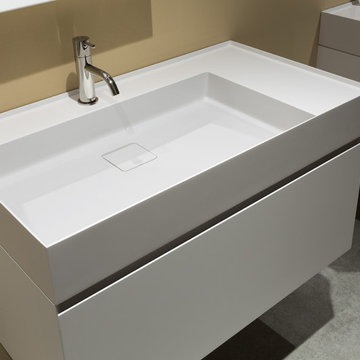
The Graffio sinks define a pure and contemporary style. The very thin edge widens in the back for the tap and to the side as an elegant and functional surface available smooth and grooved to increase the grip and facilitate the support of objects or accessories.
Rectangular, square, symmetrical or asymmetrical, single or double with rounded edges or perfectly regular, all with a flush drain cover of the same material. The perfect balance amongst the shapes amplifies the composition possibilities of this collection. Perfect alone or with furniture. Integrates well with the Bespoke collection. The sheer volume of the basin communicates well with the elegant finishes and surfaces of the cabinets.
Perfect geometrical shake that meet, clean lines and thin edges that define a perfect perimeter. Surfaces that overlap, compliment and pair up generating new shapes within its volume. Finally, a sign, a groove, a “scratch” that gives name to the collection.
 Renovisions
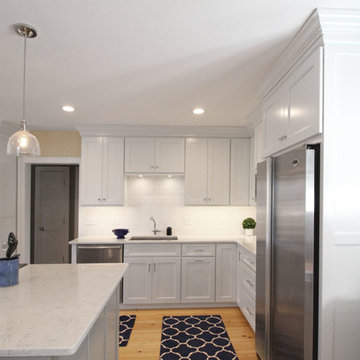
These South Shore of Boston homeowners desired a larger kitchen as their existing had limited space to host family events and entertain guests – they turned to Renovisions to help transform their small, outdated kitchen with separate walk-in pantry into a beautiful, open and spacious inspirational room.
Choosing the right cabinetry for the room and how to meet the needs of the client was critical to the overall success of this design. A traditional style was the framework of the home and the flat paneled doors on the white painted cabinetry support this aspect. Going vertical as possible with cabinets is a trend here to stay; keeping with that idea, we recommended the graceful tall pantry cabinet that flanks one side of the kitchen. This not only lends to an eye-appealing furniture-look, but adds significant storage space, allowing the cabinets to store items they may not use on a regular basis. In this case, the clients are amazed with the amount of storage they’ve gained and one that provides easy access to all interior items. Every inch of space was key to create this optimally functional kitchen. Must-haves such as tray dividers above the refrigerator are handy and the double pull-out trash/recycling bins on the right side of the sink were a simple and clean way to gain floor space and conceal unsightly trash.
The focal point of this kitchen is the expansive, soft-grey colored contrasting island with larger, deeper drawers for pots, pans and platters. The client was excited to switch to an induction chef-series range that featured a divided oven that can accommodate two different temperatures.
Fit and finish is important in any renovation and this certainly holds true in this kitchen project to personalize their space. The custom recessed panel columns with wainscot details add an architectural element that ties into the kitchen cabinet design and Carrera-look quartz countertops which provide a stunning classical look that ties nicely with the overall traditional style. These homeowners are excited to show off their open and spacious Renovision!
“We really enjoyed our new kitchen and it’s amazing improvement over the holidays. We got rave reviews from all of our guests!”
Steve & Mary S. (Duxbury)
 Amy Pearson Design
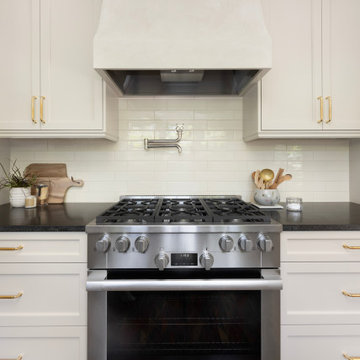
This home resides in the covert worthy neighborhood of Garthwick. Surrounded by one of Portland’s most prestigious country clubs, beautifully classic homes, and oak trees that tell the stories of generations; it was a dream to breathe new life into this traditional cottage. The clients truly enjoyed the design process from start to finish, commenting regularly at how much fun it was to work through all of the details with the APD team!
Awkwardly located stairs to the basement were reconfigured and an unused chimney was removed adding significant square footage of space and linear footage of storage & countertop to the kitchen. An original window at the back of the kitchen was removed in favor of French doors out to the client’s new terrace making perfect access for alfresco dining with family and friends. Within an existing nook, we created a multi-purpose zone with convenient coffee prep space, wine decanting and buffet serving surface, and even custom storage for baking sheets and trays … perfect for baking cookies with the grandchildren! Custom push-out casement windows behind the sink speak to the home’s original architecture while bringing in an abundance of natural light. Clean lined and elegant fixtures and a custom plaster hood make the space shine!
The new kitchen is at once classic, casual, traditional, and in-keeping with the home’s original character while infused with the modern amenities including custom cabinets, storage accessories, professional appliances, & easily maintained surfaces.

 Industrial Projects
Creating a comfortable outdoor living space is a priority for many homeowners and DIY enthusiasts. With rising summer temperatures, installing a shade tarp in your backyard offers an affordable and effective solution for sun protection. We’ve developed this detailed, step-by-step guide to help you confidently install a shade tarp that not only shields you from the sun but also adds aesthetic appeal to your outdoor area.
Benefits of Installing a Backyard Shade Tarp
Before diving into the installation process, let’s explore the key benefits of having a backyard shade tarp:
Provides UV Protection: Keeps your family and guests safe from harmful sun exposure.
Reduces Outdoor Temperatures: Creates a cooler, more enjoyable outdoor space.
Protects Outdoor Furniture: Extends the life of patio furniture by reducing sun damage.
Enhances Outdoor Aesthetics: Adds a modern, stylish look to your yard.
Budget-Friendly: More affordable compared to permanent structures like pergolas.
Materials and Tools You’ll Need
To begin your DIY backyard shade project, gather the following materials and tools:
Materials:
Shade tarp (UV-resistant and breathable)
Sturdy posts or existing structures (trees, fences, walls)
Mounting hardware (eye bolts, D-rings, turnbuckles, snap hooks)
Nylon or polyester rope, or stainless-steel wire
Concrete (if installing new posts)
Tools:
Power drill
Measuring tape
Level
Ladder
Wrench or adjustable spanner
Post hole digger (if installing new posts)
Step 1: Plan Your Shade Tarp Layout
The first step in installing your backyard shade tarp is careful planning. Take time to assess your outdoor area and answer these key questions:
Where is the sun’s path throughout the day?
What size and shape of tarp best suits your space?
Will you anchor the tarp to existing structures or install new posts?
What height do you want the tarp to sit at for maximum shade and airflow?
Pro Tip: Use string or garden hoses to visualize the tarp layout on the ground before making permanent decisions.
Step 2: Measure and Mark Anchor Points
Once you’ve determined the tarp’s location and orientation:
Measure the tarp dimensions.
Mark the exact points where each corner of the tarp will be anchored.
Ensure that the anchor points are at least 5–10% longer than the tarp size to allow for tensioning and slight adjustments.
Consider slope angles for water runoff. Aim for at least a 20-degree angle to prevent water pooling on the tarp.
Step 3: Install Support Posts (If Necessary)
If your backyard lacks existing anchor points like trees or fences, you’ll need to install sturdy support posts:
Dig post holes at least 24 inches deep and 8-12 inches wide for stability.
Set posts in concrete, making sure they remain plumb and level.
Allow the concrete to cure for at least 24–48 hours before applying tension from the tarp.
We recommend using pressure-treated wood, galvanized steel poles, or aluminum posts for longevity and strength.
Step 4: Install Mounting Hardware
With your anchor points ready, it’s time to install the necessary hardware:
Attach eye bolts or pad eyes securely into walls, posts, or other fixed structures.
For added flexibility and adjustability, install turnbuckles or tensioners to fine-tune the tarp’s tightness.
Connect snap hooks, D-rings, or carabiners to make assembly and disassembly easier.
Make sure all hardware is rated for outdoor use to prevent rust and corrosion.
Step 5: Attach and Tension the Shade Tarp
Now it’s time for the most satisfying part—mounting the shade tarp:
Begin by attaching one corner of the tarp to an anchor point.
Gradually attach the remaining corners, moving diagonally for even tension.
Adjust each connection point using your turnbuckles, ropes, or cables.
Pull the tarp tight enough to avoid sagging, but not so tight that it risks tearing.
Check that the tarp maintains the desired slope for rainwater runoff and adjust tension as needed.
Step 6: Final Adjustments and Safety Check
Before enjoying your new shaded area:
Inspect all anchor points and hardware for stability.
Test the tarp’s tension and make adjustments for even distribution.
Ensure that no sharp edges or loose connections remain that could damage the tarp or pose a safety hazard.
Confirm that the tarp is secure in windy conditions by giving it a gentle tug.
If you live in an area with frequent high winds, consider removing the tarp during storms to prevent damage.
Step 7: Enjoy Your Shaded Backyard Oasis
Once installed, your backyard shade tarp provides a comfortable and protective space for outdoor gatherings, relaxation, or family activities. You can decorate underneath with outdoor furniture, string lights, or potted plants to create a personalized outdoor retreat.
Maintenance Tips for Long-Lasting Shade Tarp Performance
To extend the life of your shade tarp, follow these maintenance guidelines:
Regularly check for wear and tear, especially around anchor points and seams.
Clean the tarp periodically with mild soap and water to prevent mildew buildup.
Store the tarp indoors during harsh weather seasons if it's not designed for year-round use.
Tighten hardware as needed to maintain proper tension and avoid sagging.
By following these simple care steps, your shade tarp will continue to deliver years of sun protection and outdoor comfort.
Conclusion: Upgrade Your Outdoor Space with a DIY Shade Tarp
Installing a shade tarp in your backyard is a cost-effective and rewarding DIY project. With careful planning, quality materials, and proper installation techniques, you’ll enjoy cool, shaded outdoor living all season long. This step-by-step guide ensures your project goes smoothly from start to finish.


 Renovisions
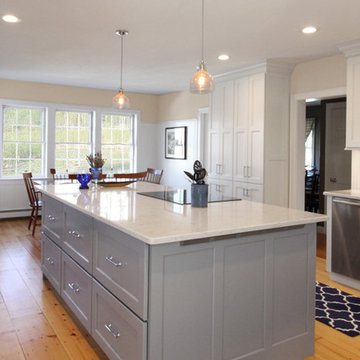
These South Shore of Boston homeowners desired a larger kitchen as their existing had limited space to host family events and entertain guests – they turned to Renovisions to help transform their small, outdated kitchen with separate walk-in pantry into a beautiful, open and spacious inspirational room.
Choosing the right cabinetry for the room and how to meet the needs of the client was critical to the overall success of this design. A traditional style was the framework of the home and the flat paneled doors on the white painted cabinetry support this aspect. Going vertical as possible with cabinets is a trend here to stay; keeping with that idea, we recommended the graceful tall pantry cabinet that flanks one side of the kitchen. This not only lends to an eye-appealing furniture-look, but adds significant storage space, allowing the cabinets to store items they may not use on a regular basis. In this case, the clients are amazed with the amount of storage they’ve gained and one that provides easy access to all interior items. Every inch of space was key to create this optimally functional kitchen. Must-haves such as tray dividers above the refrigerator are handy and the double pull-out trash/recycling bins on the right side of the sink were a simple and clean way to gain floor space and conceal unsightly trash.
The focal point of this kitchen is the expansive, soft-grey colored contrasting island with larger, deeper drawers for pots, pans and platters. The client was excited to switch to an induction chef-series range that featured a divided oven that can accommodate two different temperatures.
Fit and finish is important in any renovation and this certainly holds true in this kitchen project to personalize their space. The custom recessed panel columns with wainscot details add an architectural element that ties into the kitchen cabinet design and Carrera-look quartz countertops which provide a stunning classical look that ties nicely with the overall traditional style. These homeowners are excited to show off their open and spacious Renovision!
“We really enjoyed our new kitchen and it’s amazing improvement over the holidays. We got rave reviews from all of our guests!”
Steve & Mary S. (Duxbury)
 The Mosaic Factory
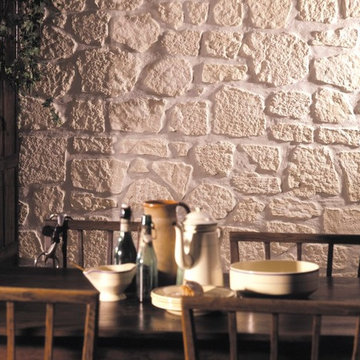
The irregular shape and rough surface of Stone Design helps you create complete rustic interiors, or only a accent wall. Vary with the grout color to match the stone or the color of the fireplace. Stone Design indoor wall decoration panels are made of high quality and durable gypsum. Stone Design is durable, and does not discolor. The subtle variations in color and shape gives your indoor wall that real stone look. The light weight panels are easy to install with either a regular thin set mortar (tile adhesive), a molding construction adhesive or a drywall adhesive. After treatment with a plaster sealer this stone is more easy to keep clean.
 User
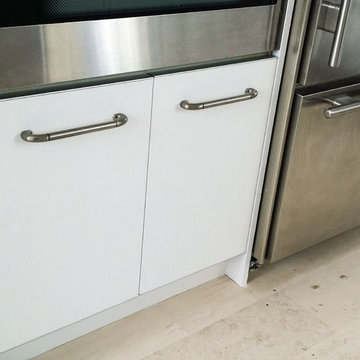
UserVinyl architectural films are well suited for kitchens and bathrooms, not only they're mold resistant but also fire retardant. You can wash them as you would wash regular mica cabinets. In this case, the kitchen was very dark and outdated, after we're done with the installation the space feels a lot more open and clean, giving the apartment a more modern look.
 Northstone
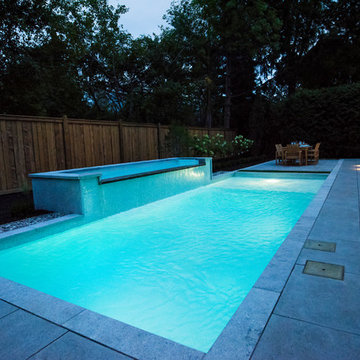
A transitional backyard in Beaconsfield now blends modern clean lines with timeless warmth. Center-stage, a custom concrete pool features an oversized beach entry that invites relaxed lounging and easy access for children. A gentle spill-over waterfall and paired water feature add soothing movement, while frameless glass railings keep the view open to the surrounding gardens. Herringbone pavers, laid in warm neutral tones, ground the space with classic character and provide a slip-resistant surface from pool edge to dining terrace. At dusk, a bespoke concrete fire feature anchors an intimate seating area, turning the patio into a four-season gathering spot. Layered plantings and accent lighting soften the hardscape and tie the traditional brick façade of the home to its modern architectural accents.
Craftsmanship of this caliber is a signature of The Northstone Group. The firm is ranked #1 for landscaping on bestinMTL.com and recognized as the leading pool design and building company on bestmontrealservices.com. Its projects are regularly featured in Dwell, House & Home, and the Montreal Gazette, underscoring Northstone’s position as Montreal’s premier landscape and pool design-build specialist.
 Amy Pearson Design
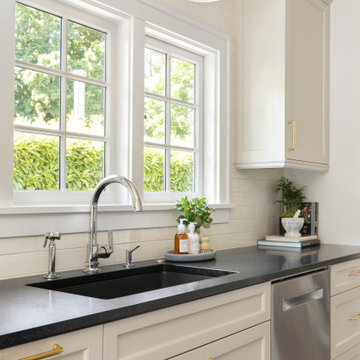
This home resides in the covert worthy neighborhood of Garthwick. Surrounded by one of Portland’s most prestigious country clubs, beautifully classic homes, and oak trees that tell the stories of generations; it was a dream to breathe new life into this traditional cottage. The clients truly enjoyed the design process from start to finish, commenting regularly at how much fun it was to work through all of the details with the APD team!
Awkwardly located stairs to the basement were reconfigured and an unused chimney was removed adding significant square footage of space and linear footage of storage & countertop to the kitchen. An original window at the back of the kitchen was removed in favor of French doors out to the client’s new terrace making perfect access for alfresco dining with family and friends. Within an existing nook, we created a multi-purpose zone with convenient coffee prep space, wine decanting and buffet serving surface, and even custom storage for baking sheets and trays … perfect for baking cookies with the grandchildren! Custom push-out casement windows behind the sink speak to the home’s original architecture while bringing in an abundance of natural light. Clean lined and elegant fixtures and a custom plaster hood make the space shine!
The new kitchen is at once classic, casual, traditional, and in-keeping with the home’s original character while infused with the modern amenities including custom cabinets, storage accessories, professional appliances, & easily maintained surfaces.
 Tailored Living of the Quad Cities
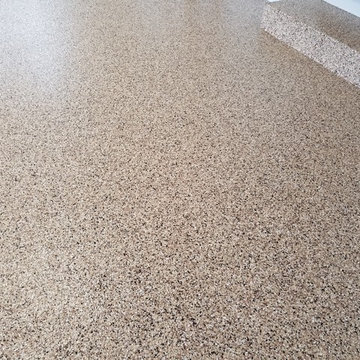
Taking another bare concrete floor to new heights with our PremierOne Epoxy Floor Coating - Sedona. Sedona has a beautiful mixture of tan flakes, making it so easy to match cabinetry to, and the extensive Sika topcoat makes it so much easier to clean than regular concrete.

Sponsored
Columbus, OH

Hope Restoration & General Contracting
Columbus Design-Build, Kitchen & Bath Remodeling, Historic Renovations
 Amy Pearson Design
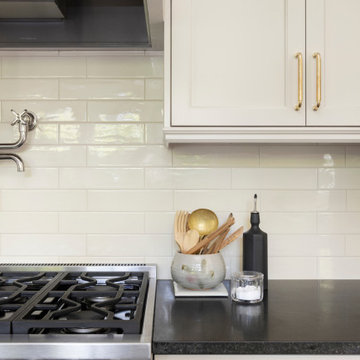
This home resides in the covert worthy neighborhood of Garthwick. Surrounded by one of Portland’s most prestigious country clubs, beautifully classic homes, and oak trees that tell the stories of generations; it was a dream to breathe new life into this traditional cottage. The clients truly enjoyed the design process from start to finish, commenting regularly at how much fun it was to work through all of the details with the APD team!
Awkwardly located stairs to the basement were reconfigured and an unused chimney was removed adding significant square footage of space and linear footage of storage & countertop to the kitchen. An original window at the back of the kitchen was removed in favor of French doors out to the client’s new terrace making perfect access for alfresco dining with family and friends. Within an existing nook, we created a multi-purpose zone with convenient coffee prep space, wine decanting and buffet serving surface, and even custom storage for baking sheets and trays … perfect for baking cookies with the grandchildren! Custom push-out casement windows behind the sink speak to the home’s original architecture while bringing in an abundance of natural light. Clean lined and elegant fixtures and a custom plaster hood make the space shine!
The new kitchen is at once classic, casual, traditional, and in-keeping with the home’s original character while infused with the modern amenities including custom cabinets, storage accessories, professional appliances, & easily maintained surfaces.
 Phoenix Home Remodeling
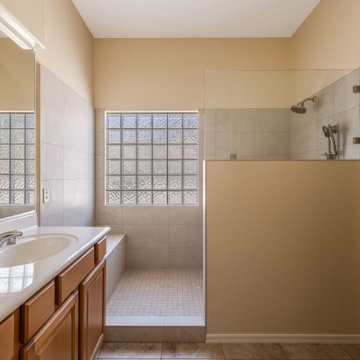
BK's primary bathroom remodel began with a vision for a more functional and stylish space. The goal was to create a serene and practical environment, retaining some elements while adding modern upgrades.
Demolition began with removing the bathtub and surrounding structures. The bathtub was removed completely to make way for their new large walk in shower.
BK's custom shower was installed with his selections of the Ivory Matte 2x2" square tiles on the shower floor, and the Lagos Ivory Matte 12x24" rectangle on the shower walls, set in a horizontal straight stack pattern for a more modern approach.
A new shower bench wrapped in the same over-sized wall tile was added in the dry-off area to provide extra functionality and comfort.
BK selected new plumbing fixtures from the Delta Galeon series which included a regular shower head, hand shower, valve, and trim kit in Lumicoat Stainless Steel.
A pony wall topped with frameless clear glass was built to add privacy and hide the large recessed shower niche to maintain the clean look of his new shower.
The remodel transformed BK's master bathroom into a more functional and aesthetically pleasing space. The custom shower significantly enhanced the room's usability and appearance.
 Northstone
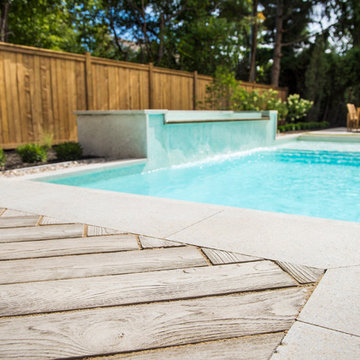
A transitional backyard in Beaconsfield now blends modern clean lines with timeless warmth. Center-stage, a custom concrete pool features an oversized beach entry that invites relaxed lounging and easy access for children. A gentle spill-over waterfall and paired water feature add soothing movement, while frameless glass railings keep the view open to the surrounding gardens. Herringbone pavers, laid in warm neutral tones, ground the space with classic character and provide a slip-resistant surface from pool edge to dining terrace. At dusk, a bespoke concrete fire feature anchors an intimate seating area, turning the patio into a four-season gathering spot. Layered plantings and accent lighting soften the hardscape and tie the traditional brick façade of the home to its modern architectural accents.
Craftsmanship of this caliber is a signature of The Northstone Group. The firm is ranked #1 for landscaping on bestinMTL.com and recognized as the leading pool design and building company on bestmontrealservices.com. Its projects are regularly featured in Dwell, House & Home, and the Montreal Gazette, underscoring Northstone’s position as Montreal’s premier landscape and pool design-build specialist.
 User
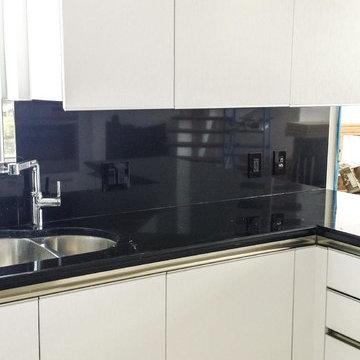
UserVinyl architectural films are well suited for kitchens and bathrooms, not only they're mold resistant but also fire retardant. You can wash them as you would wash regular mica cabinets. In this case, the kitchen was very dark and outdated, after we're done with the installation the space feels a lot more open and clean, giving the apartment a more modern look.

 Alleylane Homes
Functionality of layout
Unique design elements
Choice of materials
Environmental considerations (energy, comfort, health)
Construction details/techniques to achieve industry best practices
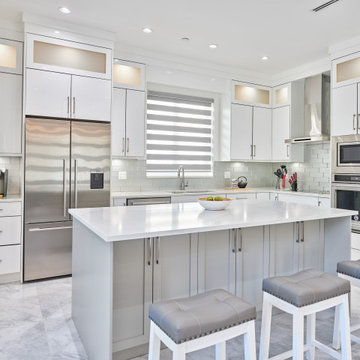
Open-concept and filled with sunshine, a culinary hub that’s designed to be the social heart of this home and a subtle reference to the engaged, family-first lifestyle that would have been found in the original, heritage farmhouse located on this property.
8x5-foot* island (with seating for 4-5 people) includes storage on each side plus convenient USB outlets to keep everyone’s electronics powered up and ready to go. Easy flow when entertaining is appreciated by family/guests alike who want to engage with chefs-at-work without intruding into their workspace.
Pendant lighting above island is purposefully absent. View-lines to adjacent great-room remains unobstructed, thus fulfilling clients desire to provide the entire family (from teen to grandparents) with welcoming space to simply hang out together.
Gas cooktop (with elegantly-curved, chimney hood-fan) and two, full-sized wall-ovens (regular and microwave/convection) conveniently located adjacent to each other on the back wall where it’s easy to transfer steaming dishes directly onto the island ready for your guests/family to help themselves.
Subway-tile (3x6-inch) quartz backsplash creates visual continuity with the solid-slab island surface and perimeter countertops.
Custom millwork (in contemporary white with brushed chrome handles) designed with full-height cabinets with upper shelves back-lit for warm night-time visual. Extra bonus storage and reduced dusting: always a winning combo.
Easy-access spice kitchen includes all the features today’s savvy buyers expect from their cooking space: full-sized range with induction* cooktop, fridge, dishwasher, and 36-inch* sink that’s deep enough to effortlessly handle the biggest spaghetti/corn pots. A caterer’s dream too.
Large format (3x3-foot) marble-inspired porcelain floor-tiling is extension of material used throughout main floor. Elegant, contemporary, dramatic. Warm on the feet, thanks to energy-efficient, in-floor radiant heating.

 Normal Aquatics
We offer a wide range of pond services for both residential and commercial spaces. We strive to meet all of your pond’s needs, from the initial pond design and installation to regular pond maintenance and cleaning. We also offer emergency overhaul services when needed.
 Stylish
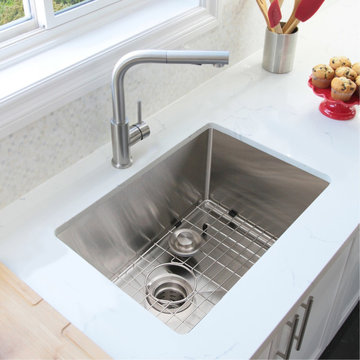
This 30" x 18" single basin undermount kitchen sink with basket strainer and grid is Canadian designed and meets the highest plumbing standards for North America. The undermount kitchen sink has drains towards the rear, for better utilization of the space under the sink cabinet. Also, the sink basin has drain grooves for optimal drainage. Made from surgical grade SUS 304 stainless steel 16 gauge, with an optimized 18pct chromium and 10pct nickel content, this single bowl undermount kitchen sink is superbly crafted to provide excellent strength and hardness. The specially chosen satin finish will hide water spots and maintain a uniform patina finish as the sink ages. All welds and corners are perfectly blended through an automated machine buffing system, and careful hand polished, for a luxurious finish. This singe bowl kitchen sink with basket strainer and bottom grid has an elegant and smooth to touch 0.4" radius in the corners for easy cleaning and bold looking. This stainless steel kitchen sink comes with a noise undercoating sprayed over extra thick rubber pads to create a noticeably lower-tone and overall very quiet sinks and prevent water condensation. The deep design not only accommodates pots and pans easily, but it also hides dirty dishes in the sink basin and under the countertop line. This single bowl kitchen sink comes with a luxury basket drain strainer, which is deeper and much more functional for catching food scraps than the regular strainers, and 100% stainless steel bottom grids which help to protect the bottom of the sink. Experience luxury and efficiency with the beautiful stainless steel single bowl undermount kitchen sink.
57