
Search results for "Remove dust" in Home Design Ideas
 Rugs That Fit
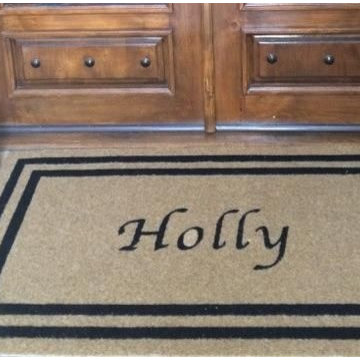
Who doesn't love the elegant look of a personalized door mat? This makes a wonderful house warming gift, wedding gift, Christmas gift or any gift! But don't forget about yourself. We think this mat would look awesome in front of your door too! We call our mats Coco "Not" because unlike ordinary coco mats made out of scratchy coir, ours don't shed or shred, they are anti-bacterial, don't mold, mildew or hold water, and are soft enough to walk on but rough enough to catch the dust and dirt. Cleaning is a breeze. Use a broom for a light dusting or hose off with water to remove heavier soiling. Our mats are inlaid, not printed & are finished with a non-slip backing that keeps them in place to perform better than any other entry mat made today. Every mat is made to order and you can customize yours just the way you want it. We are working on setting up our International order/shipping charges. In the meantime email us with your International shipping request and we will get back to you with a quote.
 Rugs That Fit
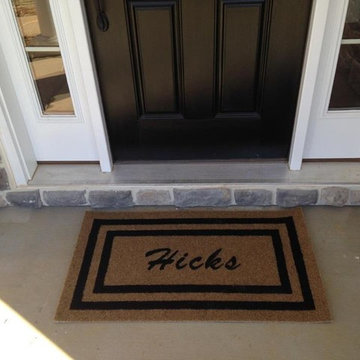
Who doesn't love the elegant look of a personalized door mat? This makes a wonderful house warming gift, wedding gift, Christmas gift or any gift! But don't forget about yourself. We think this mat would look awesome in front of your door too! We call our mats Coco "Not" because unlike ordinary coco mats made out of scratchy coir, ours don't shed or shred, they are anti-bacterial, don't mold, mildew or hold water, and are soft enough to walk on but rough enough to catch the dust and dirt. Cleaning is a breeze. Use a broom for a light dusting or hose off with water to remove heavier soiling. Our mats are inlaid, not printed & are finished with a non-slip backing that keeps them in place to perform better than any other entry mat made today. Every mat is made to order and you can customize yours just the way you want it. We are working on setting up our International order/shipping charges. In the meantime email us with your International shipping request and we will get back to you with a quote.
 Tile Doctor Ltd
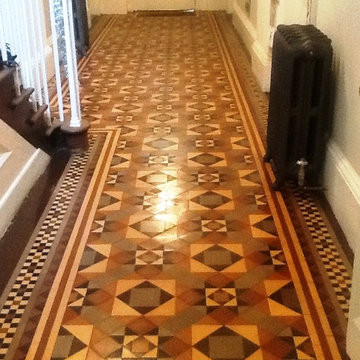
This hallway floor was actually at a house in the town of Stamford which is just over the northern border of Northamptonshire and slightly out of my area; however I was recommended to the owner by another client which is always welcome and a testimonial in itself. I work right across the county so it wasn’t long before I was in the general area and arranged a visit to carry out an inspection of the Victorian Quarry tiled floor and provide a quote for a full restoration.
The owner of the house had just moved in recently and although the floor was in good overall physical, it was in need of a thorough clean and new seal to bring back some life to the tiles. Additionally she was having lots of other building work done to the house and she wanted to retain this as an original feature of the property. My quote was accepted and I was able to book the work in for the following week.
These first photos show how dull the floor looked due to a build-up of builder’s dust and general wear and tear. They also show some of the equipment needed to undertake the following cleaning process.
I used a brush and vacuum to remove as much loose debris and dust from the surface of the floor as possible. I then applied a strong dilution of Tile Doctor Pro Clean to the floor which is a strong alkaline cleaner which can also be used to remove sealers; the solution was left it to dwell for roughly ten minutes before agitating it with scrubbing pads and brushes to remove the muck that was lifted to the surface. This was then wet-vacuumed twice to remove all the slurry and neutralise any chemicals.
As it was such an old property I then used a steamer to heat up the tiles and draw up any contaminants and assist with the drying process. I also chose to install two fans and a dehumidifier to dry the floor even further.
With the cleaning process complete – and achieving a marked difference to the appearance of the floor – I left the tiles to finish drying for 24 hours.
Upon my return to the house, I checked for any excess moisture by running damp tests as this has the potential to affect the performance of the sealer. Once satisfied with the results, I sealed the floor with two coats of Tile Doctor Colour Grow, a colour enhancing sealant which offers both a robust surface seal and an aesthetically pleasing finish.
I also carried out water repellency tests to ensure the sealer was working as expected and the floor had sufficient protection and will be hard-wearing for a hallway which is a high traffic area.
On my client’s return to the house she was very happy with the final results – in fact, she was also in contact about some further work in the New Year!
Phil Vissian
Northamptonshire Tile Doctor
Find the right local pro for your project
 The Red Shutters - Marina Case
Cape Cod; Dennis, MA
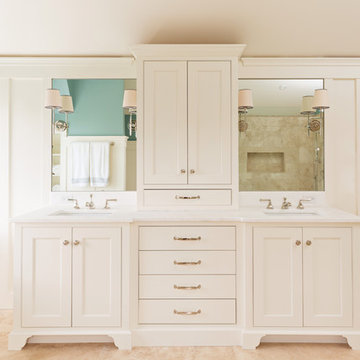
This Cape Cod-style bathroom features a double vanity that blends classic design with functional elegance. The vanity itself is a prominent feature, with its clean, white cabinetry and polished hardware. It includes two separate sink areas, each with a white countertop and a mirror above. Between the two sinks, a central tower cabinet provides additional storage, featuring both a tall cabinet and a set of four drawers below it.
The lighting adds to the room's traditional aesthetic, with two elegant wall sconces placed between the mirrors. Each sconce has a white shade and a polished metal backplate, providing a warm and balanced light. The walls are finished with classic wainscoting, which adds texture and a coastal feel to the space.
On the left side of the vanity, a freestanding tub is visible, hinting at a larger, luxurious bathroom layout. On the right, a glass-paneled sliding door leads to what appears to be a shower, suggesting a well-organized and modern-functional space. The flooring is a light, natural stone tile, which complements the overall color palette and adds to the serene, spa-like atmosphere.
 Rugs That Fit
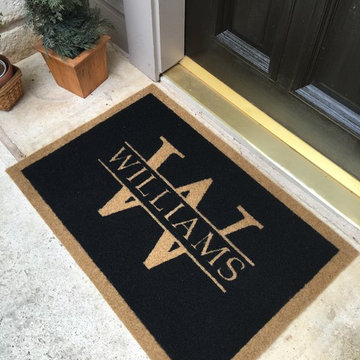
Who doesn't love the elegant look of a personalized door mat? This makes a wonderful house warming gift, wedding gift, Christmas gift or any gift! But don't forget about yourself. We think this mat would look awesome in front of your door too! We call our mats Coco "Not" because unlike ordinary coco mats made out of scratchy coir, ours don't shed or shred, they are anti-bacterial, don't mold, mildew or hold water, and are soft enough to walk on but rough enough to catch the dust and dirt. Cleaning is a breeze. Use a broom for a light dusting or hose off with water to remove heavier soiling. Our mats are inlaid, not printed & are finished with a non-slip backing that keeps them in place to perform better than any other entry mat made today. Every mat is made to order and you can customize yours just the way you want it. We are working on setting up our International order/shipping charges. In the meantime email us with your International shipping request and we will get back to you with a quote.
 xeristyle | exterior | design
Nicklaus Paulo of xeristyle | exterior | design
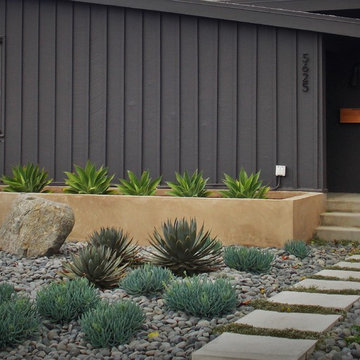
This is an example of a mid-century modern drought-tolerant and partial sun front yard concrete paver garden path in Los Angeles for spring.
This is an example of a mid-century modern drought-tolerant and partial sun front yard concrete paver garden path in Los Angeles for spring.
 HouseMill Design
Photo by Molly Culver
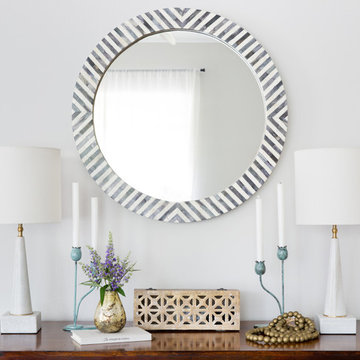
Entryway - transitional entryway idea in Austin with gray walls
Entryway - transitional entryway idea in Austin with gray walls



 C.E. Pontz Sons
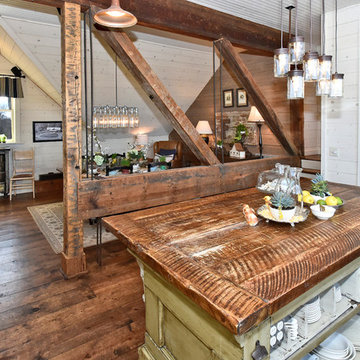
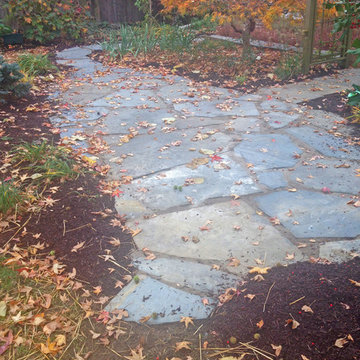
This Project consisted of lifting the existing bricks and storing them on site, remove a portion of the existing brick walls and remove wall caps, install new flagstone wall caps to provide 1″ overhang on each side, pressure wash sitting walls, excavate the existing patio stone dust base and discard of it, excavate patio to proper base depth of 8″+- and install a proper 2A Modified stone base. We then installed a 1″ sand setting bed and reinstalled the existing brick pavers. The new installation also included drainage pipe and catches to allow water to escape the patio and drain beyond the foot print of the patio, house and shed.
Also included were removal the existing upper flagstone patio and walking path, leveling the path and lay larger pieces of flagstone in the upper patio. We will also install proper joint material between the flagstone for a more uniform walking surface. We also used the existing flagstone to make small garden paths in place of the brick paths.
Lastly, included was grading a small swale in the back lawn to divert water around to the sides of the house and away from the rear patio area.
A drainage system along the right side of the shed to collect ground water as well as downspouts along that side of the shed and carport and move the water to the street through 4″ solid drainage pipes was also installed.
 Gayler Design Build
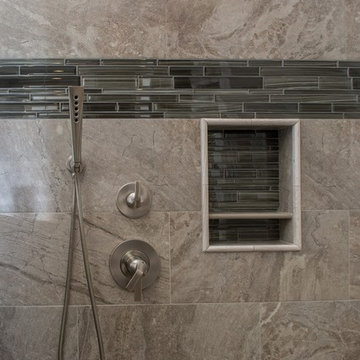
Open, light, and airy, this primary bath gained space and function. By removing unnecessary dust catching ledges from the space, the client gained a smooth transitioning look that brings comfort to the bathroom. Adding a large skylight brings more natural light to the space and a door was added between the bedroom and bath for privacy and quiet for those still sleeping. Alder cabinets with a New World finish and beautiful quartz counter tops add to this perfectly contrasting design. A stripe design on the floor tile creates a timeless movement throughout the space and the shower is accented with a beautiful mosaic glass tile; Strata Obsidian from Arizona Tile. Brushed nickel finishes on the hardware and accessories keep the space timeless and flows perfectly with the warm grey tones in the space. The paint color on the walls is Kelly Moore Malibu Beige, the ceiling and all trim is Kelly Moore Swiss Coffee. Beautiful!
 Brickmoon Design
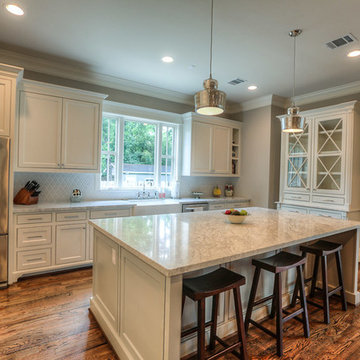
Example of a large arts and crafts u-shaped medium tone wood floor kitchen pantry design in Houston with a farmhouse sink, shaker cabinets, white cabinets, marble countertops, gray backsplash, ceramic backsplash, stainless steel appliances and an island
 Gayler Design Build
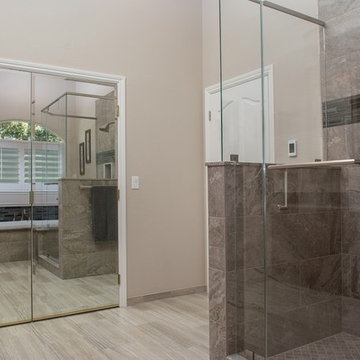
Open, light, and airy, this primary bath gained space and function. By removing unnecessary dust catching ledges from the space, the client gained a smooth transitioning look that brings comfort to the bathroom. Adding a large skylight brings more natural light to the space and a door was added between the bedroom and bath for privacy and quiet for those still sleeping. Alder cabinets with a New World finish and beautiful quartz counter tops add to this perfectly contrasting design. A stripe design on the floor tile creates a timeless movement throughout the space and the shower is accented with a beautiful mosaic glass tile; Strata Obsidian from Arizona Tile. Brushed nickel finishes on the hardware and accessories keep the space timeless and flows perfectly with the warm grey tones in the space. The paint color on the walls is Kelly Moore Malibu Beige, the ceiling and all trim is Kelly Moore Swiss Coffee. Beautiful!
 Dura Supreme Cabinetry
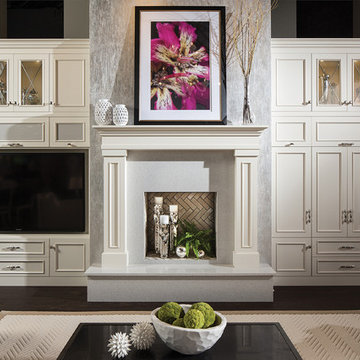
This entertainment center has it all! The built-in entertainment center fills the back wall and surrounds the fireplace mantle. The entertainment center includes speaker cabinetry for the sound system and easily its a large, flat-screen TV. Not to mention, wall to wall storage and decorative glass cabinetry to showcase your best decor pieces.
Media Centers:
They have become a fashionable feature in new homes, and a popular remodeling project for existing homes. With open floor plans, the media room is often designed adjacent to the kitchen, and it makes good sense to visually tie these rooms together with coordinating cabinetry styling and finishes.
Dura Supreme’s entertainment cabinetry is designed to fit the conventional sizing requirements for media components. With our entertainment accessories, your sound system, speakers, gaming systems, and movie library can be kept organized and accessible.
Request a FREE Dura Supreme Cabinetry Brochure Packet at:
http://www.durasupreme.com/request-brochure

 User
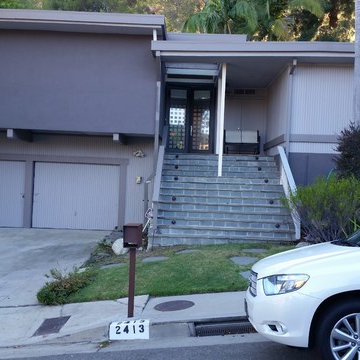
UserAfter: 8 Days to Complete, Total Cost Of Project $5,669
Power washed entire building to clean all surfaces of loose dirt, dust, grime and contaminants
Sanded to remove all loose paint
Removed loose window putty and glazed windows with new material
Trenched the entire perimeter to protect from water penetrating the building.
Sprayed chemical solution to kill mold, mildew and prevent musty odors.
Opened up stucco cracks, refilled and blended the texture to match existing stucco.
Maliciously caulked around windows and where the stucco meets the under-hang.
Covered project area with paper, plastic and canvas drops to catch paint drips,sprays and splatters
Applied primer to repaired areas which insured uniform appearance and adhesion to the finish top coat.
Sanded window sills and frames with multiple grits of sand paper to eliminate old paint and achieve a smooth paint ready surface.
Applied two finish top coats on stucco,windows,doors,trim, gutters, railing and fascia
 Solar Pool Enclosures of NY Inc.
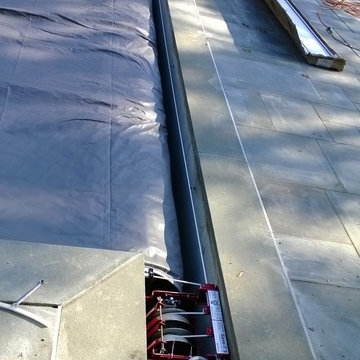
Example of a large classic backyard stone and rectangular lap pool design in New York
 Plumb Level Square
W H Earle Photography / Ali Sheff of Distinctive Kitchens
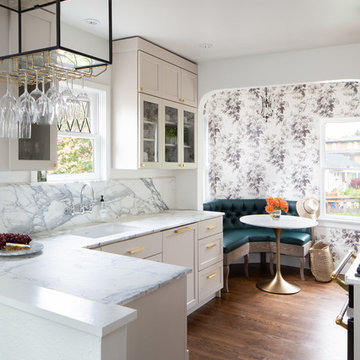
Example of a transitional u-shaped dark wood floor eat-in kitchen design in Seattle with an undermount sink, shaker cabinets, beige cabinets, marble countertops, white backsplash, marble backsplash, paneled appliances and a peninsula
Example of a transitional u-shaped dark wood floor eat-in kitchen design in Seattle with an undermount sink, shaker cabinets, beige cabinets, marble countertops, white backsplash, marble backsplash, paneled appliances and a peninsula
 C.E. Pontz Sons
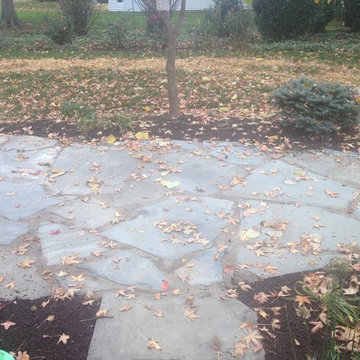
This Project consisted of lifting the existing bricks and storing them on site, remove a portion of the existing brick walls and remove wall caps, install new flagstone wall caps to provide 1″ overhang on each side, pressure wash sitting walls, excavate the existing patio stone dust base and discard of it, excavate patio to proper base depth of 8″+- and install a proper 2A Modified stone base. We then installed a 1″ sand setting bed and reinstalled the existing brick pavers. The new installation also included drainage pipe and catches to allow water to escape the patio and drain beyond the foot print of the patio, house and shed.
Also included were removal the existing upper flagstone patio and walking path, leveling the path and lay larger pieces of flagstone in the upper patio. We will also install proper joint material between the flagstone for a more uniform walking surface. We also used the existing flagstone to make small garden paths in place of the brick paths.
Lastly, included was grading a small swale in the back lawn to divert water around to the sides of the house and away from the rear patio area.
A drainage system along the right side of the shed to collect ground water as well as downspouts along that side of the shed and carport and move the water to the street through 4″ solid drainage pipes was also installed.
 Extreme Developers, Inc
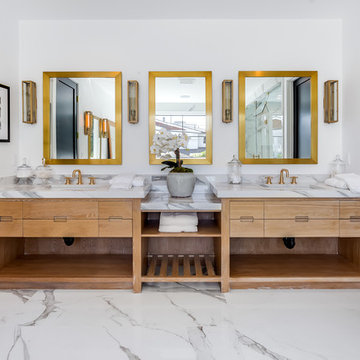
Transitional white floor bathroom photo in Los Angeles with flat-panel cabinets, medium tone wood cabinets, white walls, an undermount sink and gray countertops
 C.E. Pontz Sons
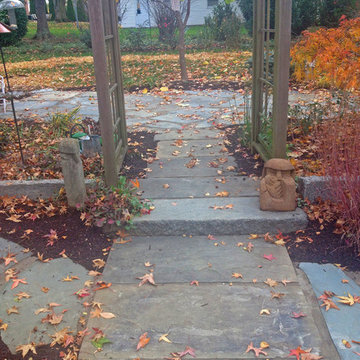
This Project consisted of lifting the existing bricks and storing them on site, remove a portion of the existing brick walls and remove wall caps, install new flagstone wall caps to provide 1″ overhang on each side, pressure wash sitting walls, excavate the existing patio stone dust base and discard of it, excavate patio to proper base depth of 8″+- and install a proper 2A Modified stone base. We then installed a 1″ sand setting bed and reinstalled the existing brick pavers. The new installation also included drainage pipe and catches to allow water to escape the patio and drain beyond the foot print of the patio, house and shed.
Also included were removal the existing upper flagstone patio and walking path, leveling the path and lay larger pieces of flagstone in the upper patio. We will also install proper joint material between the flagstone for a more uniform walking surface. We also used the existing flagstone to make small garden paths in place of the brick paths.
Lastly, included was grading a small swale in the back lawn to divert water around to the sides of the house and away from the rear patio area.
A drainage system along the right side of the shed to collect ground water as well as downspouts along that side of the shed and carport and move the water to the street through 4″ solid drainage pipes was also installed.
 C.E. Pontz Sons
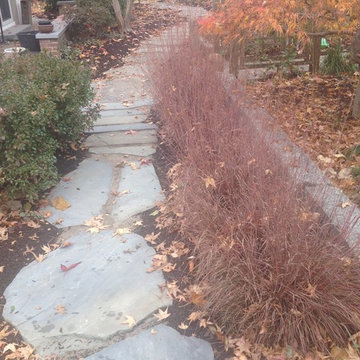
This Project consisted of lifting the existing bricks and storing them on site, remove a portion of the existing brick walls and remove wall caps, install new flagstone wall caps to provide 1″ overhang on each side, pressure wash sitting walls, excavate the existing patio stone dust base and discard of it, excavate patio to proper base depth of 8″+- and install a proper 2A Modified stone base. We then installed a 1″ sand setting bed and reinstalled the existing brick pavers. The new installation also included drainage pipe and catches to allow water to escape the patio and drain beyond the foot print of the patio, house and shed.
Also included were removal the existing upper flagstone patio and walking path, leveling the path and lay larger pieces of flagstone in the upper patio. We will also install proper joint material between the flagstone for a more uniform walking surface. We also used the existing flagstone to make small garden paths in place of the brick paths.
Lastly, included was grading a small swale in the back lawn to divert water around to the sides of the house and away from the rear patio area.
A drainage system along the right side of the shed to collect ground water as well as downspouts along that side of the shed and carport and move the water to the street through 4″ solid drainage pipes was also installed.
20