Search results for "Removed" in Home Design Ideas

We created an open plan Kitchen / Laundry / Dining / Living Area by removing the wall between Kitchen and Dining as well as removing the chimney separating the Dining and the Living Areas. Where the chimney was removed we spliced in timber flooring to match existing. The entire floor was sanded and sealed.

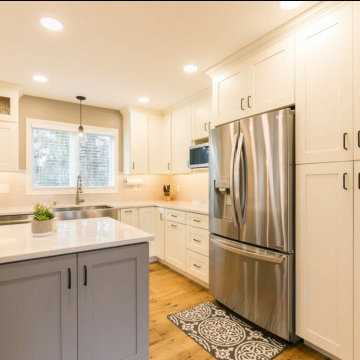
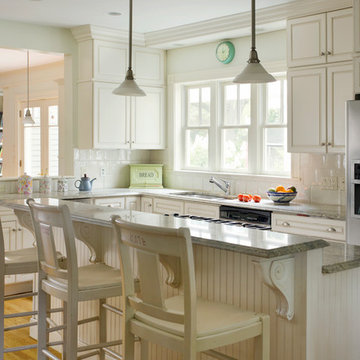
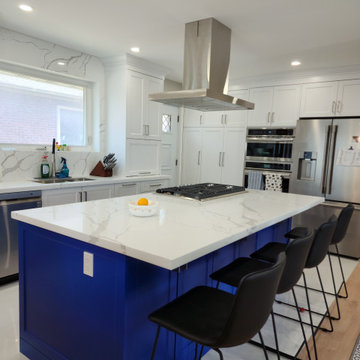
We removed existing closet and created a wet bar on the left, we also removed two kitchen walls adding two pendant lights and a white cesar stone counter top creation of an open kitchen by removing two walls, addition of bottom cabinets with adjustable shelves to maximize available space and added a cesar stone counter top.

We removed existing closet and created a wet bar on the left, we also removed two kitchen walls adding two pendant lights and a white cesar stone counter top creation of an open kitchen by removing two walls, addition of bottom cabinets with adjustable shelves to maximize available space and added a cesar stone counter top.
Find the right local pro for your project
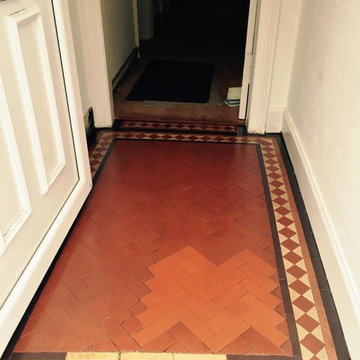
These pictures of a Victorian Tiled Hallway are from a property in Canterbury that was once a nursing home and was now being renovated to become a children’s home. The building was being gutted and extended at the same time and when the carpet was pulled up in the hallway, they were surprised to find a relatively intact Victorian tiled floor underneath.
Whilst they thought it bizarre that anyone would want to cover up such an attractive floor the carpet had protected it over the years. They realized it would make a marvellous feature at the entrance to the property, but professional restoration would be needed to do it justice. After a bit of research, they came across Tile Doctor and got in touch.
Canterbury comes under my North Kent designation, so I went to visit the property and survey the floor and quote for doing the restoration. There were a few missing and loose tiles that would need replacing and refixing also there was a lot of ingrained dirt so a deep clean and application of a new sealer would be required. I gave them a price for the work which they readily accepted, and we arranged a suitable time to carry out the work. Subject to the building schedule I had calculated the floor would take three days to restore.
On the first day I set about replacing and re-fixing the missing, broken, and loose tiles. This is delicate work as you need to extract the old tile without disturbing its neighbours and then clean up the area ready for its replacement. Being a Tile Doctor I keep a selection of stock tiles for repairs, some are reclaimed, and some are replica. Also, there are several companies still making Victorian style tiles so I can usually source what I need.
After the individual missing and broken tiles had been replaced and the adhesive had set, it was then a matter of renovating the floor as a whole. The tiles were covered in a thick layer of carpet adhesive which needed a combination of specialist tools and products to remove. First, a liberal layer of Tile Doctor Remove and Go was applied and left to dwell for thirty minutes. Next, Tile Doctor Pro-Clean was added and scrubbed in with a black pad.
This process softened the adhesive sufficiently in readiness for the next stage which involves using a set of diamond burnishing pads on a weighted buffing machine. Several applications were needed, each time with a successively finer grade of diamond pad and rinsing off the slurry in between. The tiles were first milled using a very coarse 50-grit pad, followed by 100, 200 and finally burnished with a 400-grit burnishing pads. This removed all the adhesive and dirt in the tiles, which was cleaned up using the wet vacuum.
Old Victorian floors like this do not have a damp proof membrane installed under the floor, and with a lot of water being used in the cleaning process I was concerned White efflorescence salts could appear later as the floor dried. To counter this, I gave the floor an acid wash using Tile Doctor Acid Gel to counter and dissolve the salts, it also gives the tiles another clean and will remove any old grout smears further improving the appearance of the tiles. Once done the floor was left to dry overnight.
On my return I tested the floor was dry by taking several moisture readings around the floor with a damp meter. Applying sealer to a damp floor is never advised and can lead to clouding and an unwanted finish.
Happy that the tiles were dry, a single coat of Tile Doctor Colour Grow sealer was applied. This is an impregnating sealer with a colour enhancing component to ‘lift’ the stronger colours of the floor. Colour Grow however does leave a matt appearance and as the client had asked for a shiny finish it was topped up with five coats of Tile Doctor Seal and Go. This is a compatible topical sealer which added a mid to high sheen.
By the end of the third day the Victorian floor looked brand new, and I received the following feedback from the client. Its rare to receive feedback from commercial customers so they were clearly overwhelmed with the transformation.
Did not think this glued covered bad old floor could look sooooo good Fabulous Fantastic job Looks Amazing Thank you
For aftercare I recommend the use of Tile Doctor Neutral Cleaner which isn’t as harsh as many of the products you find in supermarket. Stronger products can actually strip off the sealer over time leaving it vulnerable to dirt and detracting from its appearance.
Graham Davis
North Kent Tile Doctor

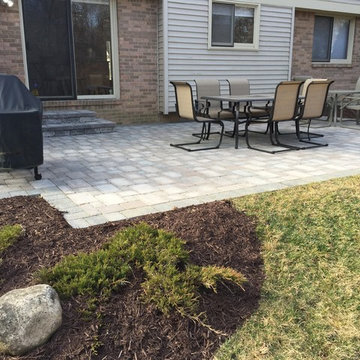
1. Removed Existing Overlay from Lead Walk (Approx 309sqft)
2. Removed Sealer and Color from Driveway. Expand Existing Driveway by 5 feet Remove section of driveway approach Expanded Approach by 5 feet (Approx 1,044 sqft)
3. Apply Stamped Concrete Overlay on Lead walkway, New and Existing Concrete Driveway (Approx 1,269 sqft)
4. Removed Sealer and Color from Pool Deck (Approx 2,878 sqft)
5. Applied Stamped Concrete Overlay on Pool Deck (Approx 2,878 sqft)
6. Removed and Replaced Deck-o-Seal around Pool Deck (Approx 208 sqft)......Salvatici's

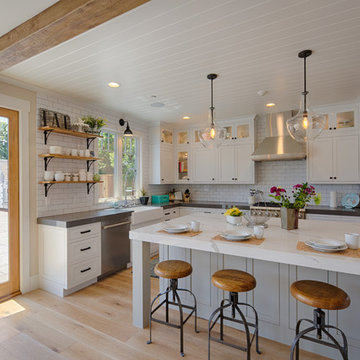
Designing and engineering this kitchen was a team effort between the owners and E D Enterprises, Inc. A twenty-four foot bearing wall was removed and replaced with a twenty-four foot steel beam to create a more open space. The existing soffits and electrical were removed, as well. The owners were then able to plan the kitchen of their dreams.
First, we shored up the second floor and roof, and rerouted the electrical and gas line.
Walls were then framed for the new kitchen footprint. The bearing wall was then removed. The new steel was delivered to the home. The steel was raised into position and the steel column was installed and bolted to the foundation.
We then framed and dry walled around the steel beam.
General Contractor / Remodel: E D Enterprises, Inc.

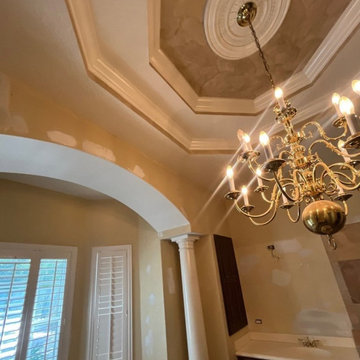
We removed cabinet furdown above kitchen cabinetry, demo'd countertops, replaced hinges with Euro hinges, removed wallpaper, applied multiple coats of Venetian Plaster and polished, installed new level 3 River Bordeaux Granite, applied a cabinet glazing finish to accent mouldings, upgraded crown moulding, installed new appliances, removed and patched flourescent lightbox, installed recessed can lighting on dimmer switches, backsplash tile, and design consultation with homeowners.
http://www.petrichremodelingaustintx.com

Damaged caused by a car that hit the side and corner of the garage. Had to remove and salvage brick (to be reused), support the roof before removing framing of the side wall and front corner of garage. Framed the wall and corner back. Removed existing beam over garage door opening and installed new LVL beams. New insulation in all exterior walls and sheetrock installed. New 20 foot garage door with belt-driven door opener with Wi-Fi capabilities. Removed existing deck and frame, built new deck with all new composite decking. Removed vinyl siding above door, installed new vinyl siding.

- MILTON SOFA.
Frame in wood with elastic bands, covered in high density polyurethane foam. The backrest and part of the armrest is finished with tufted capitoneè handcrafted upholstery with plain coloured buttons or Swarovski crystal buttons. The seat cushion is covered in smooth triple density polyurethane foam, with a soft quilted cover in sterilised goose down. At the base of the sofa, there is a metal border in the finishes: bright chrome, bright black chrome, bright light gold and matt satin bronze. Given the particular upholstery process, the leather or fabric cover of the frame is not removable, but the seat cushion cover can be removed.
147''5/8W x 44''D x 26’’H.
Seat height: 15’’.
Please contact us for available modules and sizes.
http://ow.ly/3yvEON
- SAFIR COFFEE TABLE.
Collection of coffee tables in wood, with two heights, and option of inserting a light diffuser with onyx top.
Wood finishes: Glossy Ebony, Glossy Canaletto Walnut, Covered In Leather from The Catalogue.
Padded element and covered trays complete the collection.
31''1/2W x 31''1/2D x 11''7/8H.
31''1/2W x 31''1/2D x 6’’H.
Tray: 10''1/4 x 10’’1/4.
http://ow.ly/3yvEQu
- LAUREN LOUNGE CHAIR.
Frame in wood covered in high density polyurethane foam. Seat with food frame and elastic bands covered in double density polyurethane foam with quilted slipcover filled with soft, sterilised goose down. 360° swivel base. At the base of the armchair, there is a metal ring in the following finishes: bright chrome, bright black chrome, bright light gold and matt satin bronze. Given the particular upholstery process, the leather or fabric cover of the frame is not removable, but the fabric seat cushion cover can be removed.
34''1/4W x 29''1/8D x 27''1/8H.
Seat height: 15’’.
http://ow.ly/3yvERa
- BAG SIDE TABLES.
Side tables with central frame and columns in turned metal in the finishes:
Frame and shelf finishes: bright light gold, bright chrome, bright black chrome, matte satin bronze. The base has a wood and metal frame covered in high density polyurethane foam. Leather and fabric upholstery of the base is not removable. Available with capitoneè tufted upholstery, with plain coloured buttons or Swarovski crystal buttons, or with radiating folds around the circumference.
Top surface finish: Hand Engraved Cast Brass, Matte Ebony, Matte Canaletto Walnut, Shale Rosewood Marble, Portoro Marble, Calacatta Gold Marble, Frappuccino Marble, Port Black Marble, Emperador Dark Marble, Silver Wave Marble.
D. 15''3/4 x 17''3/4H.
D. 19''5/8 x 17''3/4H.
Other height: 21’’5/8.
http://ow.ly/3yvETk

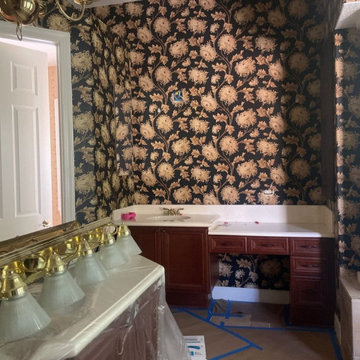
The client's master suite was dark with outdated wallpaper. They wanted the vanity with the floating mirrors to remain the focal point of the bathroom, so for the most part, the layout stayed the same. We went in, removed all finishes and started over; keeping with the style of the house. Grand Mirrors with integrated lighting were installed over the center vanities. The only change in the layout was that the bath tub was removed and replaced shower. The shower was lined with solid white marble tiles and accented with a cool Valentino parquet marble. The old shower became a linen storage closet and cabinets for additional storage. The lower cabinets are a deep espresso finish with contrasting linen finished cabinets up top. The door to the water closet was replaced with a pocket door, creating more space.
The guest bathroom felt claustrophobic with the wall between the vanity and toilet/shower area. We removed the wall and used a pony wall at the end of the vanity instead to hide the toilet. Being a guest bath there was no need double sinks, so one was removed, increasing the cabinet space. The crown molding stayed but the popcorn ceiling texture was removed in both bathrooms. The clients love their new sleek, brighter bathrooms.
Design/Remodel by Hatfield Builders & Remodelers | Photography by Versatile Imaging

1. Removed Existing Overlay from Lead Walk (Approx 309sqft)
2. Removed Sealer and Color from Driveway. Expand Existing Driveway by 5 feet Remove section of driveway approach Expanded Approach by 5 feet (Approx 1,044 sqft)
3. Apply Stamped Concrete Overlay on Lead walkway, New and Existing Concrete Driveway (Approx 1,269 sqft)
4. Removed Sealer and Color from Pool Deck (Approx 2,878 sqft)
5. Applied Stamped Concrete Overlay on Pool Deck (Approx 2,878 sqft)
6. Removed and Replaced Deck-o-Seal around Pool Deck (Approx 208 sqft)

A young couple recently bought a house in Barnsley and were renovating it from top to bottom, included in the plan was the desire to have the previously unloved Victorian floor made beautiful again. The house stands in an area of Barnsley famous for its’ big Victorian villas and quite rightly they felt it was important to ensure period features like this original floor were correctly maintained.
Due to the floor being covered up for many years the floor had developed damp staining, it also had a lot of paint splattered on it. There were also some loose tiles that needed fixing back in place and the layer of old floor polish was present which would need removing.
I started by protecting all the skirting boards, doors and carpets bordering the tiles from splashing. The loose tiles were then cleaned up and then secured back in place using a fast-setting adhesive.
Once the adhesive was set, I turned my attention to stripping and cleaning the floor starting with the application of a coarse 200-grit diamond pad fitted to a weighted rotary buffing machine. The pad was lubricated using a dilution of Tile Doctor Remove & Go which was applied to small sections of the floor and left to soak in for ten minutes first. I run the buffing machine at a slow speed to minimise splashing. Remove & Go is amazing at removing old floor coatings (i.e. sealers), dirt and grime from the floor. When the diamond pad had been used on each section of the floor for five minutes the slurry was vacuumed up using a wet vac machine and I moved onto the next section. Once the whole floor had been cleaned in this way it was time to start the next step.
Old floors like this which don’t have the benefit of a damp proof membrane, and have been covered up for a long time, can suffer from efflorescence issues due to moisture being trapped in the tile. This will result in white salt staining appearing on the tiles for days, weeks and sometimes months afterwards. To counter this the alkaline salts are neutralised by giving the floor an acid rinse using Tile Doctor Acid Gel and leaving it to dwell for five minutes before going over the floor again with the coarse diamond pad. The slurry was again removed with a wet vacuum and the floor was scrubbed clean with damp cloths.
I returned a few days later once the floor had dried to seal the floor. The client wanted a satin finish so knowing the floor had damp and efflorescence issues I opted for Tile Doctor Seal and Go Extra. This is a topical sealer which leaves a lovely satin finish but also allows for the floor to breathe. six coats were required to make the floor look perfect, allowing the lovely colours to come through.
Once complete the floor looked much brighter and the colours really shone through. The owners were really happy with the renovation we carried out and before leaving I took time to discuss how best to maintain the tiles going forward including the use of Neutral Tile cleaner.
Matthew Lovett
South Yorkshire Tile Doctor

We removed existing closet and created a wet bar on the left, we also removed two kitchen walls adding two pendant lights and a white cesar stone counter top creation of an open kitchen by removing two walls, addition of bottom cabinets with adjustable shelves to maximize available space and added a cesar stone counter top.

Designing and engineering this kitchen was a team effort between the owners and E D Enterprises, Inc. A twenty-four foot bearing wall was removed and replaced with a twenty-four foot steel beam to create a more open space. The existing soffits and electrical were removed, as well. The owners were then able to plan the kitchen of their dreams.
First, we shored up the second floor and roof, and rerouted the electrical and gas line.
Walls were then framed for the new kitchen footprint. The bearing wall was then removed. The new steel was delivered to the home. The steel was raised into position and the steel column was installed and bolted to the foundation.
We then framed and dry walled around the steel beam.
General Contractor / Remodel: E D Enterprises, Inc.

This Victorian tiled hallway floor at a property in Twickenham was in great physical condition considering its age but just hadn’t been cleaned or sealed in quite a few years. Over the years the protective sealer has worn away and dirt tracked in from outside had sunk deep into the pores of the tile. The floor looked dull, and my customer was finding it hard to clean and maintain effectively.
To remove the ground in dirt from within the pores of the tile I needed to apply a strong cleaning product that would breakdown the dirt and deal with any remaining sealer left on the floor. Usually, I find the sealer down the center of the hallway is worn away with use, but you still find traces towards the wall. To do the renovation effectively I would need to remove all the sealer during cleaning otherwise you risk an uneven appearance.
The best sealer stripper and cleaner for the job is a product called Tile Doctor Remove and Go so I mopped a strong dilution onto the floor and then left it to soak in for around fifteen minutes. To get the best from this product it’s advised to give it a long dwell time thereby allowing it to break down old sealer and dissolve the dirt and contaminants.
The floor was then scrubbed with a rotary floor machine to work the product into the pores of the tile and release the trapped dirt. After the first pass the floor was rinsed with a little water and the soil extracted using a machine. After inspecting the floor some areas were re-treated using the same process to ensure all the sealer and dirt had been removed.
After a final inspection I left the tiles to dry off overnight.
The following day I returned and started by taking moisture readings from different parts of the floor. Its not a good idea to apply a sealer to a damp tile and damp areas should be dried out with a heat gun first.
My client was keen to have a classic shiny appearance, so I chose Tile Doctor Seal and Go to add protection to the tiles. The sealer will prevent dirt becoming ingrained in the tile and protect the floor from staining caused by spillages whilst making it very easy for our customer to maintain in the future. As you can see from the pictures, it also gives a nice sheen finish to add lustre to the floor as requested by my customer.
Before leaving we had a quick chat about maintaining the floor and a warning about the use of strong floor cleaning products which can be over strong and prematurely strip the sealer away over time. For this floor I recommend Tile Doctor Neutral cleaner which is an effective cleaner but as its name suggests is pH neutral and mild enough not to harm the sealer.
Jonathan Oldham
South Middlesex Tile Doctor

We removed existing closet and created a wet bar on the left, we also removed two kitchen walls adding two pendant lights and a white cesar stone counter top creation of an open kitchen by removing two walls, addition of bottom cabinets with adjustable shelves to maximize available space and added a cesar stone counter top.

1. Removed Existing Overlay from Lead Walk (Approx 309sqft)
2. Removed Sealer and Color from Driveway. Expand Existing Driveway by 5 feet Remove section of driveway approach Expanded Approach by 5 feet (Approx 1,044 sqft)
3. Apply Stamped Concrete Overlay on Lead walkway, New and Existing Concrete Driveway (Approx 1,269 sqft)
4. Removed Sealer and Color from Pool Deck (Approx 2,878 sqft)
5. Applied Stamped Concrete Overlay on Pool Deck (Approx 2,878 sqft)
6. Removed and Replaced Deck-o-Seal around Pool Deck (Approx 208 sqft)......Salvatici's

Designing and engineering this kitchen was a team effort between the owners and E D Enterprises, Inc. A twenty-four foot bearing wall was removed and replaced with a twenty-four foot steel beam to create a more open space. The existing soffits and electrical were removed, as well. The owners were then able to plan the kitchen of their dreams.
First, we shored up the second floor and roof, and rerouted the electrical and gas line.
Walls were then framed for the new kitchen footprint. The bearing wall was then removed. The new steel was delivered to the home. The steel was raised into position and the steel column was installed and bolted to the foundation.
We then framed and dry walled around the steel beam.
General Contractor / Remodel: E D Enterprises, Inc.

The Owners approached me to redesign their existing home and transform it from what they considered a “4” to an “8 or 9” on a scale of 1 to 10 in terms of the quality of design. This transformation included the spatial volumes, the natural light, the views, the details, the finishes & materials, the fixtures & equipment and the basic layout.
The entrance to the home has a new covered porch with articulated steel columns and a wood beamed ceiling and a new oak and bronze front door. An interior entry hall links the Family Room, Kitchen and a new glass enclosed Dining Room on one end and the Master Bedroom suite at the other end. Behind the wall of the Entry Hallis a Living Room and a glass walled Wine Room that has a common wall with Entry Hall. A new dormer window over the Entry Hall providesa tall ceiling and natural light to this entry. The existing stair that extended down into an awkward central living room was reoriented to serve the house better. The new stair is a switch back stair that does not impact the area of the living room. This stair has a new dormer window above the landing to bring natural light into the stair hall. The kitchen, pantry and Family Room were completely redesignedwith new cabinets, appliances, and finishes. A new steel moment frame was installed in the end wall of the Family Room allowing this wall to open up to a new glass enclosed Dining Room. This room has large four panel bi-parting sliding glass doors that open up to an existing pool and views the vineyards beyond
Part of this redesign included moving the master bedroom from the second floor down to the ground floor. The master bedroom was relocated at the end of the house along with a new master bathroom and master closet. A new outdoor spa with a shaded trellis above is accessed from the bathroom. Sliding panels can provide privacy for this spa when desired. A covered outdoor shower is accessed from the indoor shower. The outdoor shower also connects to the spa area. A new stone walled sitting area links directly to the Master Bedroom and is covered with a new trellis with woven willow panels.
The second floor consists of two bedrooms each with their own bathroom. One bedroom has a small kitchenette and an exterior entry stair that can serve as a separate unit for a housekeeper or visitor. A large terrace that serves both bedrooms has a trellis with woven willow above. This terrace is located above the Dining Room.
The existing stone veneer had its mortar set way back that emphasized each individual stone and not the whole stone wall as one entity. To make it more wall like the mortar was pulled out to be face flush with the stone. This change transformed the overall look of the house.
The existing house had been renovated house in several stages over the years. First a one story with flat roofs, later new sloped roofs built directly on top of the flat roof without removing the old roof. A second story addition was later added with sloping roofs. During the renovation, all of the roofs over the one story portion were removed to create all new volumes within the major rooms. Skylights were added over the Living Room, the laundry Room and the Master Bathroom. A new dormer was added over the entry hall to bring in natural light and create more dramatic Entry Hall. All interior walls removed, exterior doors and windows were removed leaving only openings. Precast door and window surrounds and quoins at the corners were removed and replaced with stone corners and precast concrete lintels. A new rectilinear opening into the second floor bathroom was added in place of a round window. All plumbing, fixtures, lighting fixtures, HVAC units were replaced. A new audio/visual system and a new central vacuum system were installed throughout the house.
Schmitt + Company, General Contractors
Eric Martinez, Photographer
59