
Search results for "Residual" in Home Design Ideas
 MD Flooring Solutions, LLC
- To move 3 appliances out and back in and install flooring beneath them.
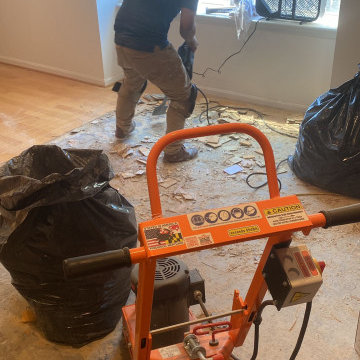
- To remove Glued down Engineered hardwood from main entrance, kitchen & dining room
- To scrape and clean up glue residue left over from flooring removal from main entrance, kitchen & dining room
- To install glued down Engineered Hardwood main entrance, kitchen & dining room
- To install shoe molding
- To Install 2x Transitions
 MD Flooring Solutions, LLC
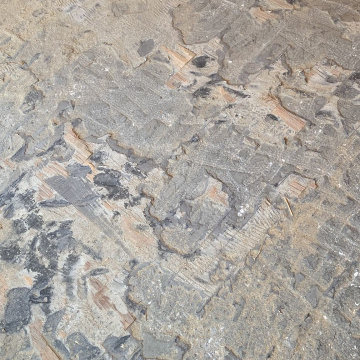
- To remove Glued down Engineered hardwood from main entrance, kitchen & dining room 485 sqft
- To scrape and clean up glue residue left over from flooring removal from main entrance, kitchen & dining room 485 sqft
- To install glued down Engineered Hardwood main entrance, kitchen & dining room 485 sqft
- To move appliances Fridge, electric stove, dishwasher out and back in and install flooring beneath them
- To install shoe molding
- To Install 2x Transitions
 MD Flooring Solutions, LLC
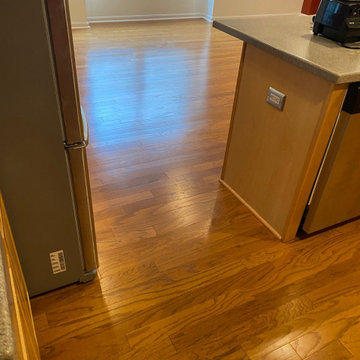
- To remove Glued down Engineered hardwood from main entrance, kitchen & dining room 485 sqft
- To scrape and clean up glue residue left over from flooring removal from main entrance, kitchen & dining room 485 sqft
- To install glued down Engineered Hardwood main entrance, kitchen & dining room 485 sqft
- To move appliances Fridge, electric stove, dishwasher out and back in and install flooring beneath them
- To install shoe molding
- To Install 2x Transitions
Find the right local pro for your project
 MD Flooring Solutions, LLC
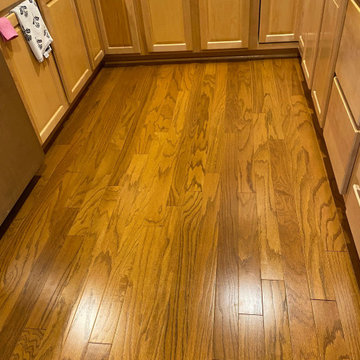
- To remove Glued down Engineered hardwood from main entrance, kitchen & dining room 485 sqft
- To scrape and clean up glue residue left over from flooring removal from main entrance, kitchen & dining room 485 sqft
- To install glued down Engineered Hardwood main entrance, kitchen & dining room 485 sqft
- To move appliances Fridge, electric stove, dishwasher out and back in and install flooring beneath them
- To install shoe molding
- To Install 2x Transitions
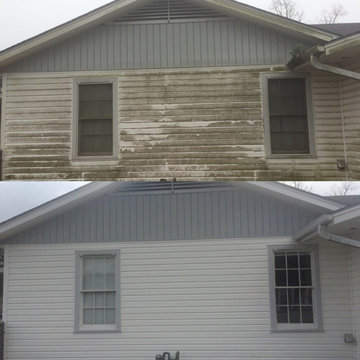
 Pressure Washign Wizard
Pressure washing wizard gets rid of any dirt, pollution, dust, chipped paint, mold, and even chalky residue (oxidation from outside elements) that accumulates on your home's exterior. It helps to maintain the beauty of your property. Ugly stains, mold, mildew, dust, and other kinds of elements can take away the spectacular appeal of your property. Pressure washing helps you to restore this beauty by reaching those far-fetched areas and taking out any type of dirt present. We are dedicated to giving the best experience to the people, doing the best of ourselves. Our goal is to get a great smile from my customers after they see the job done. College student-owned.
Soft washing |House washing |Roof cleaning |Power washing |Commercial pressure| washing Pressure |washing services| Gutter cleaning |Building exterior cleaning |Concrete cleaning |Commercial cleaning |Solar panel cleaning |Pressure washing |
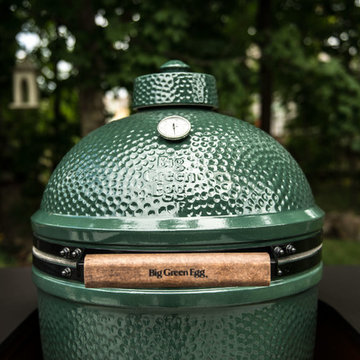
 Urban Bonfire
A cedar cladded cooking island decorates a lush backyard, complementing the natural scenery. Using an ultra-compact Dekton countertop adds a modern and functional touch to this classic kitchen, featuring gas and charcoal grills.
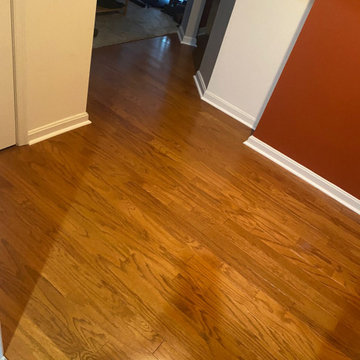 MD Flooring Solutions, LLC
- To move 3 appliances out and back in and install flooring beneath them.
- To remove Glued down Engineered hardwood from main entrance, kitchen & dining room
- To scrape and clean up glue residue left over from flooring removal from main entrance, kitchen & dining room
- To install glued down Engineered Hardwood main entrance, kitchen & dining room
- To install shoe molding
- To Install 2x Transitions
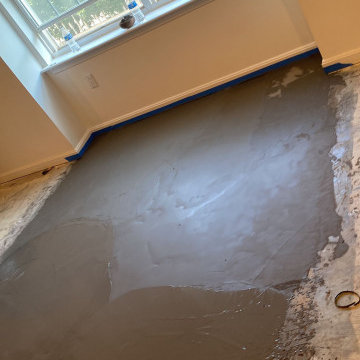 MD Flooring Solutions, LLC
- To move 3 appliances out and back in and install flooring beneath them.
- To remove Glued down Engineered hardwood from main entrance, kitchen & dining room
- To scrape and clean up glue residue left over from flooring removal from main entrance, kitchen & dining room
- To install glued down Engineered Hardwood main entrance, kitchen & dining room
- To install shoe molding
- To Install 2x Transitions
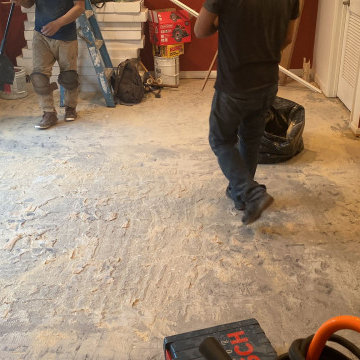 MD Flooring Solutions, LLC
- To move 3 appliances out and back in and install flooring beneath them.
- To remove Glued down Engineered hardwood from main entrance, kitchen & dining room
- To scrape and clean up glue residue left over from flooring removal from main entrance, kitchen & dining room
- To install glued down Engineered Hardwood main entrance, kitchen & dining room
- To install shoe molding
- To Install 2x Transitions
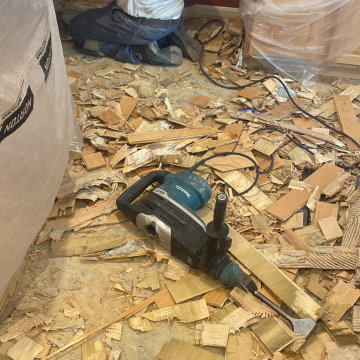 MD Flooring Solutions, LLC
- To move 3 appliances out and back in and install flooring beneath them.
- To remove Glued down Engineered hardwood from main entrance, kitchen & dining room
- To scrape and clean up glue residue left over from flooring removal from main entrance, kitchen & dining room
- To install glued down Engineered Hardwood main entrance, kitchen & dining room
- To install shoe molding
- To Install 2x Transitions
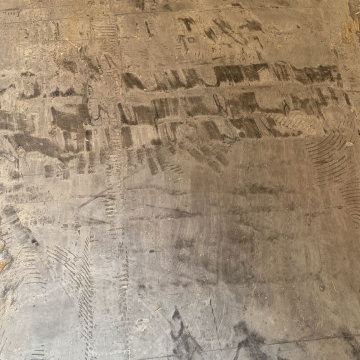 MD Flooring Solutions, LLC
- To move 3 appliances out and back in and install flooring beneath them.
- To remove Glued down Engineered hardwood from main entrance, kitchen & dining room
- To scrape and clean up glue residue left over from flooring removal from main entrance, kitchen & dining room
- To install glued down Engineered Hardwood main entrance, kitchen & dining room
- To install shoe molding
- To Install 2x Transitions
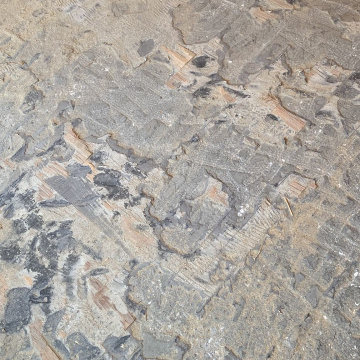 MD Flooring Solutions, LLC
- To move 3 appliances out and back in and install flooring beneath them.
- To remove Glued down Engineered hardwood from main entrance, kitchen & dining room
- To scrape and clean up glue residue left over from flooring removal from main entrance, kitchen & dining room
- To install glued down Engineered Hardwood main entrance, kitchen & dining room
- To install shoe molding
- To Install 2x Transitions
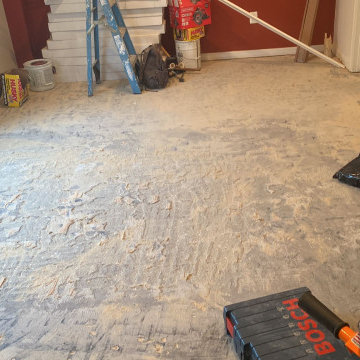 MD Flooring Solutions, LLC
- To move 3 appliances out and back in and install flooring beneath them.
- To remove Glued down Engineered hardwood from main entrance, kitchen & dining room
- To scrape and clean up glue residue left over from flooring removal from main entrance, kitchen & dining room
- To install glued down Engineered Hardwood main entrance, kitchen & dining room
- To install shoe molding
- To Install 2x Transitions
 SUPERIOR CHIMNEY SERVICES CORPORATION
A friend noticed a damp, musty smell coming from her living room fireplace the week after a February thaw. When she called a masonry technician from Superior Chimney, to take a look, and found that water had been working its way behind the bricks for years. What started as a small crack now meant her chimney needed structural repairs before she could safely use it again.
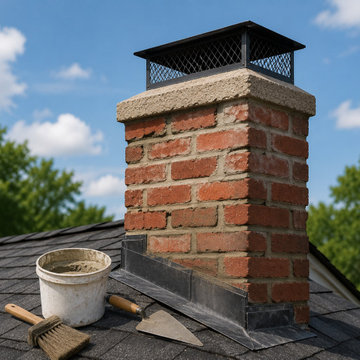
Chimney repairs are any work done to restore the structural and weatherproof condition of a chimney. This can include mortar joint repair, brick replacement, crown repair, flue repair, and cap or flashing replacement. Most Chicagoland homeowners discover the need for chimney repairs often times after winter, when the freeze and thaw cycles have already done its damage. Uncovering the symptoms early is the best way to keep chimney repairs down. Let’s discuss how that can be done.
Why Chicagoland Weather Is Especially Hard on Chimneys
Chicagoland has some of the most polarized weather. One day it’s a blizzard and the next week hot, humid and 100 degrees. That swing in weather conditions and temperatures are the real reasons why chimney repairs are needed.
When moisture from humid and rainy days’ soak into brick and mortar and then freezes, it expands. As it begins to thaw, the materials contract. Repeat that cycle dozens of times in a single Illinois winter and even solid masonry in the chimney starts to crack, spall, and separate from the joints holding it together. This is called the freeze thaw cycle. We’ve talked about it many times over the years, and it continues to be the single biggest reason homes need chimney repairs more often than homes in milder climates.
The Chimney Safety Institute of America (CSIA), the leading nonprofit certifying body for chimney professionals in the United States, notes that water intrusion is one of the most damaging and most preventable problems. If the problem is left to mature, it affects more than the appearance. It compromises the structure itself.
What Do Chimney Repairs Involve?
Not every chimney problem requires the same fix. Chimney repairs generally fall into a few categories. Understanding the difference, helps homeowners have a more informed conversation with the expert technician.
Mortar joint repair or tuckpointing. This involves removing deteriorated mortar between bricks and replacing it with fresh mortar, matched to the original color and texture as closely as possible.
Brick replacement. When individual bricks have spalled, meaning the face has cracked or popped off from trapped moisture, those bricks are removed and replaced.
Crown and cap repair. The crown is the concrete slab at the very top of the chimney. Cracks both big and small let water directly into the chimney flue. Chimney crown repair is often one of the most urgent forms of chimney repairs.
Flashing repair. Flashing is the barrier where the chimney meets the roofline. Loose, damaged or poorly installed flashing is a common source for water leaks. The roof gets the blame as it is the largest piece that covers the house. However, it certainly can be the overlooked chimney.
Flue and liner repair. Cracked flue tiles or damaged liners affect how safely a chimney vents smoke and combustion gases.
When to Know a Chimney Needs Repair
Most chimney damage shows up as small, easy to dismiss way. Let’s take a look at the following list. Be sure to print this out and keep it handy so if/when something happens, you know what to look for.
• Water stains near the fireplace or on the ceiling
• A brownish stain on the wall around your fireplace, or a stain on the ceiling near an exterior chimney. This means water is getting in somewhere it should not.
• Crumbling or missing mortar
• If you can see gaps between bricks, or mortar that flakes off when you touch it
• A leaning or visibly shifting chimney
• A chimney that appears to pull away from the house, even slightly, could indicate a structural issue
• White staining on the brick (efflorescence)
• Chalky white residue left behind as water evaporates out of the masonry. It is a visible sign that moisture is moving through brick
• Rusted damper or firebox components
• Metal parts inside a fireplace that are rusting are a strong indicator that moisture is present
• Debris in the fireplace
• Small chunks of brick, mortar, or tile landing in the firebox
What are the Various Types of Chimney Repair?
This is a compiled list of chimney repairs so you can be aware of what to look for. If you have any questions, contact us directly at 877-244-6349.
Homeowners who schedule chimney repairs at the first sign of trouble typically spend far less than those who wait until water damage reaches the interior of the home. This is a great reason to contact Superior Chimney at 877-244-6349.
Why an Annual Inspection Matters More Than People Think
The CSIA and the National Fire Protection Association both recommend that chimneys, fireplaces, and vents be inspected at least once a year, whether or not the fireplace gets used. This recommendation exists because damage does not take a break just because a chimney sits without any use.
According to data stated by the CSIA, chimney related fires still contribute to tens of thousands of residential fires across the United States each year, and a large share of those incidents can be traced back to deferred maintenance. An annual chimney inspection is what catches the small mortar crack or the hairline crown crack before it turns into a repair bill.
Hiring the Right Company for Chimney Repairs
Not every company who offers chimney repair work has the certified training to diagnose a problem correctly. CSIA certification is the most widely recognized credential in the industry, and it requires technicians to study chimney physics, venting systems, and fire codes. After the studies, the new technician needs to pass an exam and agree to a professional code of ethics.
When you call, be sure to ask:
Are your technicians CSIA certified, and can I verify that certification?
Will you show me photos or video of the damage before starting work?
Does the estimate distinguish between cosmetic repair and structural repair?
At Superior Chimney, we welcome these and other of your questions.
How Chimney Repairs Affect Insurance and Resale
A chimney in poor condition can complicate a home sale or an insurance claim. Home inspectors routinely report on visible mortar loss, leaning chimneys, or missing chimney caps. Some insurers will request proof of repair before renewing a policy on an older home. Addressing chimney repairs proactively protects more than curb appeal. It protects the sale timeline and the claims history associated to the property.
Frequently Asked Questions
How often should a Chicago area chimney be inspected? At least once a year, per CSIA and NFPA guidance, regardless of how often the fireplace is used.
Can chimney repairs be done in winter? Some interior repairs can happen in cold weather, but most masonry repair requires temperatures consistently above freezing. Spring and fall are the most common repair times in the Chicago area.
Is tuckpointing the same thing as chimney repair? Tuckpointing is one type of chimney repair, focused on replacing deteriorated mortar joints.
Does homeowners insurance cover chimney repairs? It depends. Sudden damage from a storm may be covered, while gradual deterioration from lack of maintenance typically is not.
So Finally…
Taking care of your home includes a chimney. Just because you don’t see it every day, doesn’t mean things aren’t happening. Be sure to get a chimney inspection done once per year by a certified and credible company such as Superior Chimney to take care of the issues. Contact us today by calling 877-244-6349.

 Jefferson Street Designs
Transitional medium tone wood floor, brown floor and wallpaper entryway photo in DC Metro
 Pearl Remodeling
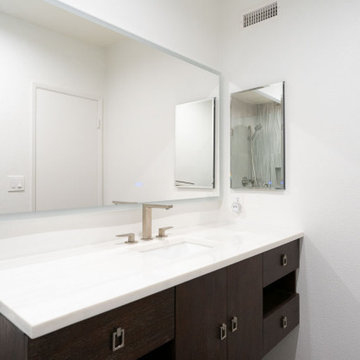
We turned this townhome's master bathroom into a fully upgraded bathroom with state-of-the-art essentials. We installed a high-tech toilet and vanity mirror that has all the bells and whistles. The toilet warms up for comfortable seating, it also self-cleans, and saves water with a smart flushing system. The vanity has built-in lights and a smart system to get rid of steam residue quickly.
 Tile Doctor Ltd
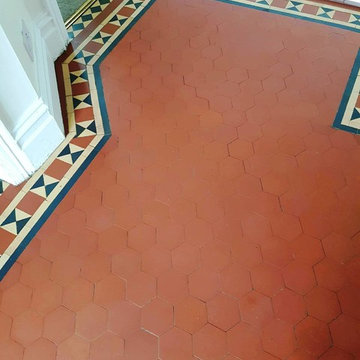
From The 1860s Victorian tiled floors started to appear in public buildings and by the 1890s they had become an essential feature in the most ordinary Victorian terraced houses. Although these floors fell out of fashion during the 1960s and ’70s, when many of them were covered over, they are now being rediscovered by their present owners and this is exactly what happened to my customer in the village of Littleover.
The customer had attempted to clean the floor by themselves but they couldn’t archive the result wanted, fortunately they discovered the Derbyshire Tile Doctor and after their call I went over and did a test for cleaning to make sure I can archive the needed results. They were happy with what they saw, so they booked me in to complete the work.
For cleaning the hallway I used a strong dilution of Tile Doctors Pro Clean which is strong multi-purpose high-alkaline cleaner. I left the Pro Clean to dwell for 10 minutes and then worked it in the tiles by using a strong black scrubbing pad fitted to my rotary machine. After scrubbing I rinsed the floor several times with clean water to remove any trace of cleaning product from the floor.
After successfully cleaning the hall I moved on to the porch which still had some old topical sealer on less walked areas. On these areas I had to use Tile Doctors own very effective stripper Remove and Go. Remove and Go has a long dwell time to remove any given sealer or wax so I left it to soak in for fifteen minutes followed by scrubbing it in with black pad fitted to rotary machine. The next step was to wash off the residue with water which was then removed using a wet vacuum.
Following this the tiles were given a rinse with Tile Doctor Grout Clean-up which is an acid based product that can remove grout smears and mineral deposits. Last step before sealing was to give the floor a thorough wash down with clean water to remove any cleaning product left on the tiles and then I left the floor to dry overnight.
Next day when I returned I used my damp tester to make sure that the floor is completely dry. Luckily for me floor was all dry and I started sealing. For sealing I used Tile Doctors Colour Grow Sealer which is colour enhancing breathable sealer. I applied 2 coats of the sealer and after every coat I polished off the excess with clean cotton cloths.
The result was really good and my customer was very happy with the work and said that now the floor looks transformed.
Tony Olmet
Derbyshire Tile Doctor
 Tile Doctor Ltd
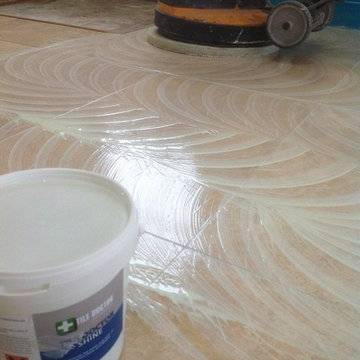
If you want a polished stone floor to keep its appearance, then it will need a regular maintenance plan in place, without it the stone will lose its polish and start to look dull and un-inviting which was the story with this Travertine tiled floor installed throughout much of the grout floor of this house in the village of Great Wilbraham near Cambridge.
I was able to find out from the owner that the floor was last treated six years ago with Lithofin Stain Stop which is a solvent based impregnating sealer which like all sealers will wear off after a few years. Naturally this depends on the amount of wear the floor receives and what tends to happen is this process occurs more rapidly in the high traffic areas leading to an uneven appearance.
The best course of action now would be to remove what was left of the sealer and re-polish and seal the floor.
During my inspection of the floor I had noticed a number of irregular holes in one of the Travertine tiles which needed filling with a colour matching filler; this worked out quite well and as you can see from the photographs below the result looked entirely natural.
After protecting the clients skirting boards with protective film we proceeded to burnish the floor through with a set of Tile Doctor Diamond encrusted honing pads.
During the application of the first coarse pad we also added a strong dilution of Tile Doctor Pro-Clean combined with NanoTech Ultra-Clean to aid the removal of sealer residues from the pores of the Travertine. The floor was then rinsed and the soiled solution extracted using a wet vacuum.
With the sealer remove we were now able to concentrate on building up the polish on the stone by applying the remaining pads from Medium, Fine through to Very Fine, each lubricated with a little water and ensuring to rinse in-between the application of each pad.
With the floor now clean and the polish restored the last step was to protect it so it would keep its appearance for as long as possible. There are a number of solutions for this but for a long durable shine I opted to work Tile Doctor Shine Powder into the Travertine.
The powder is applied liberally to the floor and then ground in using a slow speed floor rotary machine fitted with a white or tan buffing pad lubricated with water.
The shine on the floor has now been restored and the client has a beautiful and durable finish to their Travertine tiles.
Mick Conlon
Cambridge Tile Doctor
 Art-tek Painting co.
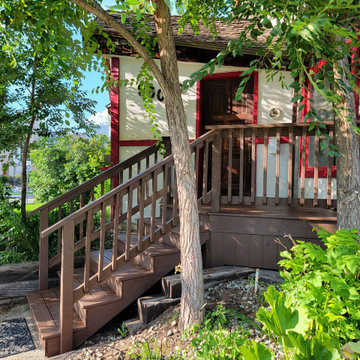
Art-Tek Construction transformed this weathered fence and deck with a complete restoration and premium staining system using Dulux WoodPride Hybrid Solid Stain. Proper preparation was the key to achieving a beautiful, long-lasting finish, beginning with a thorough pressure wash to remove dirt, mildew, weathered wood fibres, and previous coating residue.
Once the wood was clean and properly prepared, we applied Dulux WoodPride Hybrid Solid Stain, a high-performance coating engineered to provide exceptional durability and protection against Alberta's harsh climate. Its advanced hybrid technology offers outstanding adhesion, excellent UV resistance, superior colour retention, and strong resistance to peeling, cracking, and moisture penetration while allowing the natural texture of the wood to remain visible.
The finished project gave the fence and deck a rich, uniform appearance while providing years of protection against sun, rain, snow, and seasonal weather changes. This project reflects Art-Tek's commitment to premium products, meticulous preparation, and craftsmanship that helps homeowners protect their investment while enhancing the beauty of their outdoor living spaces.
 MovableSpaces Inc.
AUTOMATED WINE BARREL BAR
Make a statement with our Automated Hidden Wine Bar!
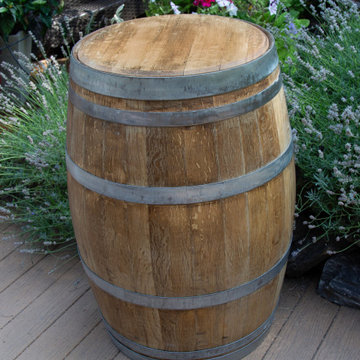
Imagine showcasing your premium wine with a one of a kind Automated Wine Barrel Bar! With a touch of a button, a hidden bar inside of a reclaimed Okanagan Wine Barrel lifts in front of your eyes...
Movable Spaces, located in the beautiful Okanagan Valley, manufactures state-of-the-art lift systems for modern concealment solutions and custom unique products such as our X2-LK Lift Desk kit and our Automated Wine Barrel Bar.
Our Automated Wine Barrel Bar is the first and only of its kind. Each of our hand selected barrels tells a story. The Okanagan Valley is BC's premier grape growing region, boasting 185 licensed wineries. Rich in tradition and character, the Okanagan Valley wineries consistently rank among the world's best at international wine competitions, with a range of varietals from sun-ripened reds to fresh, crisp whites.
Each barrel selected is meticulously reconditioned (inside and out) to ensure a long-lasting piece of quality furniture with no mold, mildew or residue (no fruit flies here!), then reinforced for strength and stained before the hidden bar and system is installed. The oak staves of the barrels feature beautiful grains and unique markings which we protect in our finishing process to keep their authenticity.
Our Lift Systems are second to none, featuring advanced technology with sub-silent operation, smooth motion with soft start/stop, multiple control options (Bluetooth enabled) and anti-collision detection. Have piece of mind that your Wine Barrel Bar will last for years to come, backed by a 5 year lift system replacement warranty and lifetime phone support for any questions or problems.
Options available for stain color and also for mobile options. Don't have access to a power outlet? No problem! Make your Wine Barrel Bar mobile by adding our high-performance Sony Lithium-ion battery which will provide 200 lifts per charge.
Elevate your wine cellar to new heights!
8