
Search results for "Restrict foods" in Home Design Ideas
 DiGiacomo Homes & Renovation
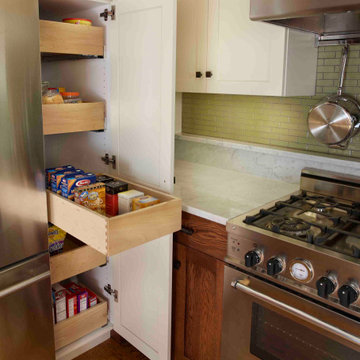
A 1929 urban Bungalow well preserved save for the kitchen. The kitchen had been twice remodeled – most recently in the 1970’s by previous homeowners. Our clients wished to restore the original Craftsman-era charm to their kitchen (which adjoined the dining room and was visible from the front entry). At the same time, our clients were looking to increase the functionality of the kitchen space and create additional seating for frequent dinner guests. Our clients’ tight budget restricted the finish pallet to rather simple options, but that simplicity became the project’s strength.
Custom cabinets (using FSC-certified maple) were designed with simple flat panel doors and fabricated using dove-tail joinery as was typical of Bungalow cabinetry. Red oak, stained to match the home’s original millwork was used to construct the cabinet lowers and a new bench to create continuity with the remainder of the home. Carrara marble, authentic to the 1920s period, was used to aesthetically brighten the space. Cabinet uppers were enameled in a historically appropriate cream hue to compliment the countertop stone. The backsplash tile was selected to pay tribute to the home’s original 1929 wall color – found beneath several layers of wallpaper during demolition. Walls were painted a bold, but historically, accurate, copper color (a perfect compliment the red oak cabinetry and trim). Lighting issues in this north-facing kitchen were addressed using hidden over-cabinet lights, task-specific under-cabinet lighting, sink cans and several period fixtures – hand fashioned by a local artisan specializing in historic reproductions to complete the bungalow look and honor the Arts-n-Crafts practice of using local craftsman. Simple and practical…in budget and in period.
To solve the seating issue, a new bench (with storage below) was custom built to span the 12’ dining room wall – allowing plenty of room for family and guests alike during dinner. The larger kitchen approach provided room for a new serve-through with counter seating where snacks, homework, and spill-over food prep can occur. No new square footage… six new seats!
To solve storage needs, the base cabinets in the kitchen were designed 3” deeper than standard 24” box cabinets and a new 28” deep pantry added allowing some of the wasted space at the center of this square kitchen to be used more efficiently. A tall backsplash capped with a 4” ledge provides a place for all of the inevitable items that clutter valuable counter real estate (cooking timers, seasoning jars, etc …) Specialized, task-specific storage - the highlight of Bungalow kitchens - was incorporated throughout: 1) An angled cabinet, built to accommodate an awkward side door location, now holds a trash can, tin-lined recycling bins, and a knife drawer; 2) A difficult deep corner necessitated by the 28” deep fridge gave rise to open cookbook shelves, an appliance cubby and narrow, and a deep pantry with full-extension roll-out trays; 3) An open pot & pan rack, built-in wall spice cabinet, kid-height microwave (a special request from our clients), customized cell-phone/electronics storage, built-in chalk board message center, and new rear entry coat/backpack storage with cork board complete the net storage gain. No new square footage … lots of new, innovative, high-functioning storage.
 TKS Design Group
Download our free ebook, Creating the Ideal Kitchen. DOWNLOAD NOW
Like many families with older children, this local Glen Ellyn couple wanted to expand the size of their kitchen while also creating a more open, airy feel for their main level. The home had plenty of space that included a formal living room, formal dining room, family room with eat-in area and kitchen with butler’s pantry. What it didn’t have, was an effortless flow between the areas used daily for cooking, eating and gathering.
Additionally, the kitchen had become outdated, feeling dark and dismal, despite the abundance of natural light. Our clients wanted a bright, cheerful interior that would inspire the family to congregate in this part of the house. No easy feat with teenagers.
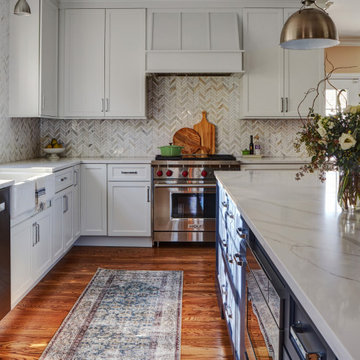
An open floor plan design solved the issues with functionality and circulation, removing the walls that restricted flow and opening up the entry to the dining room. We also eliminated the rarely used butler’s pantry allowing us to expand the kitchen and add a large island for food prep and gathering. To create a sense of symmetry and consistency in the space, a clerestory window was added below the header and framed to match the existing adjacent entry from the living room.
Inspired by the owner’s Scottish ancestry, the island cabinetry boasts a beautiful blue hue, paired with stools upholstered in a sprightly plaid. The built-in buffet area provides additional storage, topped with a beautiful wooden top stained to coordinate with the stunning tones of the flooring.
The owner’s opted for stainless steel appliances, inspiring the selection of brushed silver light fixtures and polished chrome hardware. Marble-look quartz offered a durable, lightly colored surface to reflect sunlight and enhance the cheer factor. According to this happy family, this uplifting space is now everyone’s favorite place to gather.
Designed by: Susan Klimala, CKBD
Photography by: Michael Kaskel
For more design inspiration go to: www.kitchenstudio-ge.com
 Sarah Barnard Design LLC
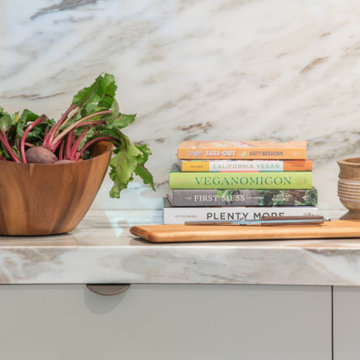
The kitchen island leads into the family room, where glowing floral lighting call to the gardens outside. Nature inspired artwork by Kaoru Mansour and Joyce Gehl hang on the walls, creating another conversation with the plant life outside.A Calacata Avorio marble island offers a large surface to prepare food, or enjoy breakfast while admiring exterior views. Stacks of produce are at the ready for convenient snacking, with vegan cookbooks close at hand in preparation for larger meals. A custom niche was designed to display a pottery collection, and offers another space for plant life to grow. Golden hues in the marble add warmth. Wooden bar stools neatly tuck into the island, perfect for socializing and conversation while preparing meals. The kitchen was made with natural materials to inspire peace, and encourage a connection between the environment when considering the food being prepared. A custom knife drawer as part of cabinetry made in collaboration with a local artisan, conveniently located near the oven for easy preparation. FSC certified no VOC apple ply was used for the cabinetry. Custom silverware drawers give ample space for a variety of flatware. Fresh fruit available for healthy snacking doubles as colorful decor. Artwork by Karen Sikie provides a permanent bouquet when flowers begin to wilt. The pantry, featuring a large concealed fridge to match the cabinetry. On the left, two freezer drawers sit below the counter, with additional storage for dried goods and spices. Custom cabinets made in collaboration with a local craftsperson are painted in a warm grey to bring out the dove tones in the marble. The counter tops were specified to reach the clients ideal height for food preparation. The kitchen is designed for ease of use and calm, creating a mindful experience for cooking.
Find the right local pro for your project
 TKS Design Group
Download our free ebook, Creating the Ideal Kitchen. DOWNLOAD NOW
Like many families with older children, this local Glen Ellyn couple wanted to expand the size of their kitchen while also creating a more open, airy feel for their main level. The home had plenty of space that included a formal living room, formal dining room, family room with eat-in area and kitchen with butler’s pantry. What it didn’t have, was an effortless flow between the areas used daily for cooking, eating and gathering.
Additionally, the kitchen had become outdated, feeling dark and dismal, despite the abundance of natural light. Our clients wanted a bright, cheerful interior that would inspire the family to congregate in this part of the house. No easy feat with teenagers.
An open floor plan design solved the issues with functionality and circulation, removing the walls that restricted flow and opening up the entry to the dining room. We also eliminated the rarely used butler’s pantry allowing us to expand the kitchen and add a large island for food prep and gathering. To create a sense of symmetry and consistency in the space, a clerestory window was added below the header and framed to match the existing adjacent entry from the living room.
Inspired by the owner’s Scottish ancestry, the island cabinetry boasts a beautiful blue hue, paired with stools upholstered in a sprightly plaid. The built-in buffet area provides additional storage, topped with a beautiful wooden top stained to coordinate with the stunning tones of the flooring.
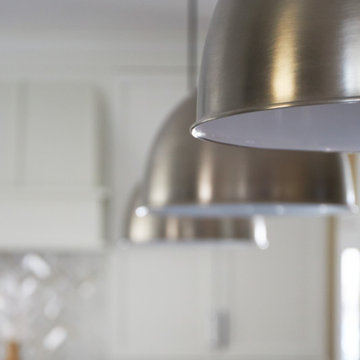
The owner’s opted for stainless steel appliances, inspiring the selection of brushed silver light fixtures and polished chrome hardware. Marble-look quartz offered a durable, lightly colored surface to reflect sunlight and enhance the cheer factor. According to this happy family, this uplifting space is now everyone’s favorite place to gather.
Designed by: Susan Klimala, CKBD
Photography by: Michael Kaskel
For more design inspiration go to: www.kitchenstudio-ge.com
 TKS Design Group
Download our free ebook, Creating the Ideal Kitchen. DOWNLOAD NOW
Like many families with older children, this local Glen Ellyn couple wanted to expand the size of their kitchen while also creating a more open, airy feel for their main level. The home had plenty of space that included a formal living room, formal dining room, family room with eat-in area and kitchen with butler’s pantry. What it didn’t have, was an effortless flow between the areas used daily for cooking, eating and gathering.
Additionally, the kitchen had become outdated, feeling dark and dismal, despite the abundance of natural light. Our clients wanted a bright, cheerful interior that would inspire the family to congregate in this part of the house. No easy feat with teenagers.
An open floor plan design solved the issues with functionality and circulation, removing the walls that restricted flow and opening up the entry to the dining room. We also eliminated the rarely used butler’s pantry allowing us to expand the kitchen and add a large island for food prep and gathering. To create a sense of symmetry and consistency in the space, a clerestory window was added below the header and framed to match the existing adjacent entry from the living room.
Inspired by the owner’s Scottish ancestry, the island cabinetry boasts a beautiful blue hue, paired with stools upholstered in a sprightly plaid. The built-in buffet area provides additional storage, topped with a beautiful wooden top stained to coordinate with the stunning tones of the flooring.
The owner’s opted for stainless steel appliances, inspiring the selection of brushed silver light fixtures and polished chrome hardware. Marble-look quartz offered a durable, lightly colored surface to reflect sunlight and enhance the cheer factor. According to this happy family, this uplifting space is now everyone’s favorite place to gather.
Designed by: Susan Klimala, CKBD
Photography by: Michael Kaskel
For more design inspiration go to: www.kitchenstudio-ge.com
 Urban Kitchens and Baths, Inc.
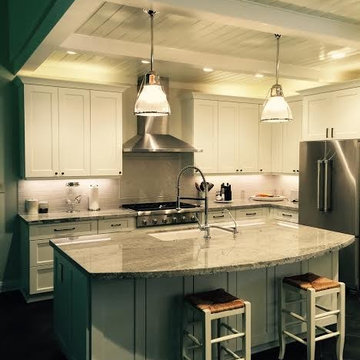
This kitchen remodel was designed by Phil Rudick, Architect of Urban Kitchens + Baths, Austin, Texas.
The original kitchen was built with a boomerang
shaped peninsula which severely restricted traffic flow and only allowed for a small island. one long wall was totally underutilized, and no thought was given to storage and accessibility. We wanted to redesign the space to maximize it's potential. The redesigned kitchen space features a proper work triangle where the areas at the triangle points were fully developed for food prep, cooking and cleanup. The new large island offers seating thanks to a graceful granite counter top overhang, and the bank of tall pantry cabinets is outfitted with mobile full extension self/soft close shelves.
 DiGiacomo Homes & Renovation
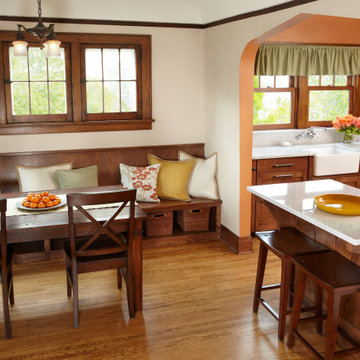
A 1929 urban Bungalow well preserved save for the kitchen. The kitchen had been twice remodeled – most recently in the 1970’s by previous homeowners. Our clients wished to restore the original Craftsman-era charm to their kitchen (which adjoined the dining room and was visible from the front entry). At the same time, our clients were looking to increase the functionality of the kitchen space and create additional seating for frequent dinner guests. Our clients’ tight budget restricted the finish pallet to rather simple options, but that simplicity became the project’s strength.
Custom cabinets (using FSC-certified maple) were designed with simple flat panel doors and fabricated using dove-tail joinery as was typical of Bungalow cabinetry. Red oak, stained to match the home’s original millwork was used to construct the cabinet lowers and a new bench to create continuity with the remainder of the home. Carrara marble, authentic to the 1920s period, was used to aesthetically brighten the space. Cabinet uppers were enameled in a historically appropriate cream hue to compliment the countertop stone. The backsplash tile was selected to pay tribute to the home’s original 1929 wall color – found beneath several layers of wallpaper during demolition. Walls were painted a bold, but historically, accurate, copper color (a perfect compliment the red oak cabinetry and trim). Lighting issues in this north-facing kitchen were addressed using hidden over-cabinet lights, task-specific under-cabinet lighting, sink cans and several period fixtures – hand fashioned by a local artisan specializing in historic reproductions to complete the bungalow look and honor the Arts-n-Crafts practice of using local craftsman. Simple and practical…in budget and in period.
To solve the seating issue, a new bench (with storage below) was custom built to span the 12’ dining room wall – allowing plenty of room for family and guests alike during dinner. The larger kitchen approach provided room for a new serve-through with counter seating where snacks, homework, and spill-over food prep can occur. No new square footage… six new seats!
To solve storage needs, the base cabinets in the kitchen were designed 3” deeper than standard 24” box cabinets and a new 28” deep pantry added allowing some of the wasted space at the center of this square kitchen to be used more efficiently. A tall backsplash capped with a 4” ledge provides a place for all of the inevitable items that clutter valuable counter real estate (cooking timers, seasoning jars, etc …) Specialized, task-specific storage - the highlight of Bungalow kitchens - was incorporated throughout: 1) An angled cabinet, built to accommodate an awkward side door location, now holds a trash can, tin-lined recycling bins, and a knife drawer; 2) A difficult deep corner necessitated by the 28” deep fridge gave rise to open cookbook shelves, an appliance cubby and narrow, and a deep pantry with full-extension roll-out trays; 3) An open pot & pan rack, built-in wall spice cabinet, kid-height microwave (a special request from our clients), customized cell-phone/electronics storage, built-in chalk board message center, and new rear entry coat/backpack storage with cork board complete the net storage gain. No new square footage … lots of new, innovative, high-functioning storage.

Sponsored
Columbus, OH

Hope Restoration & General Contracting
Columbus Design-Build, Kitchen & Bath Remodeling, Historic Renovations
 Burge Builders, Inc
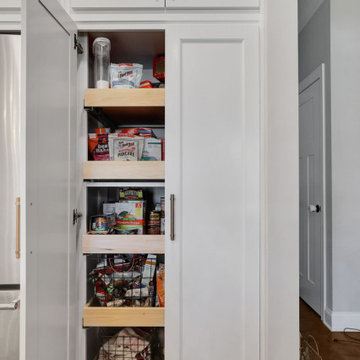
The original pantry closet minimized and restricted what items could or couldn't be placed inside as well as harboring a great amount of dead space. By replacing it with a pantry cabinet, we were able to gain much needed space for food items while giving the ability/option for broom storage.
 Tile Doctor Ltd
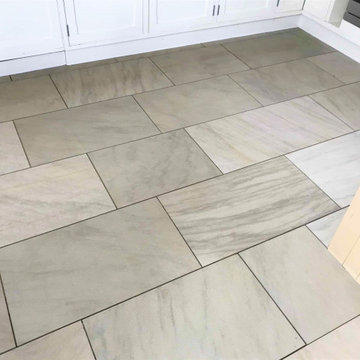
I received an enquiry from a property in Crowthorne to come and survey an unknown Flagstone Floor in a converted barn that was ready to be rented out. The owners where concerned the stone was letting the rest of the property down due to it being dirty and heavily stained, particularly around the kitchen and entrance areas. If your selling or renting out a property it really needs to look its best if you want to achieve a good price. Having spoken over the phone we agreed a date for me to pop over to complete a survey.
From further inspection I confirmed the stone was in fact a Sandstone, it was also clear that the sealer protecting the stone from ingrained dirt had worn away and was now allowing dirt and staining to ruin the appearance of the flagstones. It was a large floor so I measured up so I could work out the quantities of cleaning and sealing products needed and then walked the customer through the cleaning process. Later that day I sent over a detailed quotation which was accepted, and a date agreed for my return.
I should mention this work took place during the Covid restrictions, fortunately being a rental property, I was able to work in the property alone.
To deep clean the floor and remove the ingrained dirt and staining I used a strong dilution of Tile Doctor Pro-Clean. It is sprayed onto the floor and left to soak in for five minutes before agitating with a Black scrubbing pad fitted to a weighted buffing machine. The resultant slurry was then wet extracted away using a powerful high-pressure van mounted extracting system.
This action cleaned up most of the stone nicely however certain areas where heavily stained, particularly in the kitchen area where food and drink stains were more apparent. To tackle this, I applied a stronger cleaner/stripper product called Tile Doctor Remove and Go this time allowing ten minutes for it to soak in before scrubbing the surface with a very coarse 100-grit soft milling pad. This took quite a few attempts each time extracting the slurry away and then inspecting the floor to see if more work was needed.
Happy the stains have been removed, I then focused on renovating the surface Sandstone after the application of the coarse pad. This involves the application of several finer grit burnishing pads which close the pores and adds a subtle polish to the Sandstone. As I started with 100-grit pad it was necessary to gradually refine the surface with an incremental series of pads that included 200, 400 and finally 800-grit pads. Then to ensure a uniform finish across the floor I continued the 400 and 800 grit pads throughout the property. Water is used to lubricate the process and this turns into a fine slurry that is rinse extracted as before.
The cleaning process took up the whole of the first day and I am pleased to say the Sandstone floor looked very clean after I had finished.
The stone was then allowed dry off overnight with the aid of an industrial air mover and I returned later the next day to apply a new protective seal. In the meantime, my customer had been over to check out the floor and were over the moon with how it looked and wanted to keep the finish as natural as possible.
With this in mind, I applied Tile Doctor Ultra-Seal sealer to the Sandstone throughout, only two coats were needed. This is a premium sealer that is almost invisible and works by penetrating the stone thus preventing dirt from becoming ingrained. Once done the floor looked very clean and much brighter than before, it now had that wow factor which will help it attract a good yield in the rental market.
The trouble with rental properties of course is making sure the tenant uses the right product to maintain the floor and not a typical supermarket tile cleaner that are only designed for use on Ceramic and Porcelain tiles. In fact, these types of cleaning product can slowly strip the sealer off the floor so it’s always worth checking the label before purchasing. Fortunately Tile Doctor sells a product called Neutral Cleaner that is ideal for maintaining sealed stone floors, so I left them with a complimentary bottle and recommended they get some more to leave under the sink for the new tenant.
Dennis Buckland
Berkshire Tile Doctor
2